
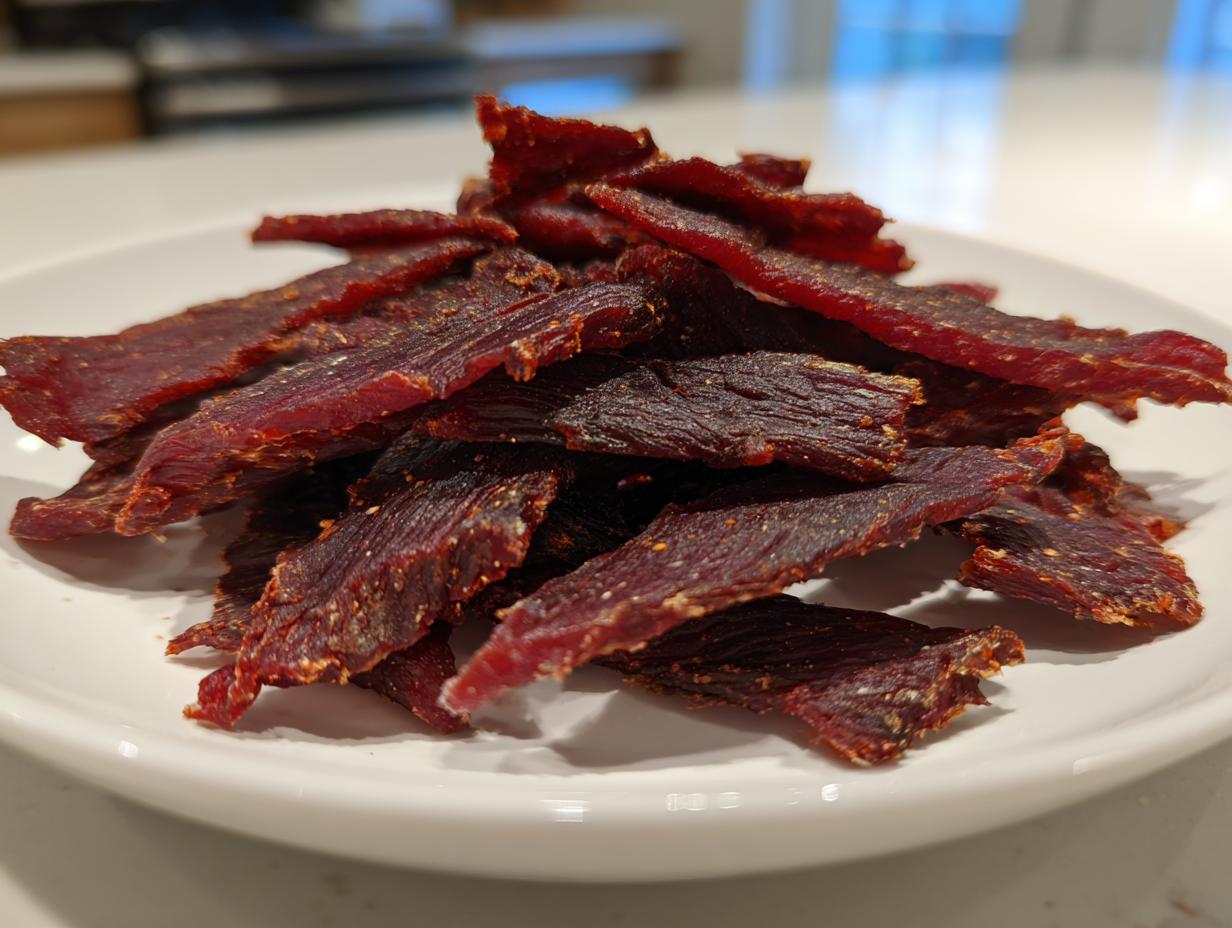
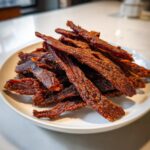
Is there anything better than pulling out a crisp bag of perfect, homemade jerky right when you need it most? Especially when the woods are calling during hunting season, you need snacks that travel well and taste amazing. Forget those dry, sad store-bought versions! I’ve spent years perfecting this sweet and smoky venison jerky recipe. Trust me, this is the batch you’ll want to keep hidden from everyone else. Because I developed this using my simple, foolproof methods, you’re guaranteed chewy, flavorful strips every single time. It’s the perfect make-ahead protein snack!
- Why This Sweet and Smoky Venison Jerky Recipe Works
- Gathering Ingredients for the Best Venison Jerky Marinade
- Preparing the Meat for Perfect Venison Jerky Slicing
- Mixing the Sweet and Smoky Jerky Marinade Ideas
- Marinating Time for Deep Flavor in Your Deer Jerky Recipe
- How to Make Venison Jerky Using the Dehydrator Jerky Method
- Tips for Success When Making Your Venison Jerky
- Storing and Gifting Your Make Ahead Protein Snack
- Common Questions About Making Venison Jerky
Why This Sweet and Smoky Venison Jerky Recipe Works
I’ve tried every trick in the book for making jerky, and this method is the only one that delivers that deep, satisfying flavor without being overly complicated. This isn’t just any dried meat; this is top-tier homemade jerky. When you use the right balance of sweet and savory, you get that perfect snap every time.
- The marinade is balanced. That touch of brown sugar caramelizes just slightly during the drying process, creating that incredible sweet and smoky jerky profile that disappears almost instantly.
- We use a low, slow drying temperature. Keeping things cool prevents the meat from “cooking” and helps it dry evenly, which is key for safety and texture.
- It’s foolproof with either a dehydrator or an oven—I give you clear steps for both! You don’t need fancy gadgets to make fantastic jerky.
- It’s packed with protein and uses super lean venison, making it the perfect, guilt-free snack for those long days out in the field.
Perfect Texture Control for Your Venison Jerky
Here’s a pro tip about slicing that your buddies might not know: how you slice dictates chewiness! If you want jerky that melts in your mouth, slice thinly *across* the grain. If you prefer that classic, toothsome chewiness you have to really work at, then slice *with* the grain. Either way, make sure you aim for uniformity so your venison jerky dries evenly!
Gathering Ingredients for the Best Venison Jerky Marinade
Okay, let’s talk about what goes into this incredible marinade! The most important thing you need to start with is lean meat. I mean *lean*. You have to trim off every speck of visible fat from your venison because fat won’t dry out, and it will spoil your finished venison jerky quickly. Once you have that trimmed meat ready, we layer in the flavor. That liquid smoke combined with the dark brown sugar creates that signature sweet and smoky balance that makes this the best deer jerky recipe out there. Don’t skip whisking the brown sugar in completely!
Here’s what you’ll need for about two pounds of meat:
- 2 lbs venison, trimmed of all fat
- 1/2 cup soy sauce
- 1/4 cup Worcestershire sauce
- 1/4 cup brown sugar
- 2 tablespoons liquid smoke
- 1 tablespoon smoked paprika
- 1 teaspoon black pepper
- 1 teaspoon onion powder
- 1/2 teaspoon garlic powder
- 1/4 teaspoon cayenne pepper (optional)
Ingredient Notes and Substitutions for Venison Jerky
A couple of little secrets here to make sure you nail this! If you open your spice drawer and realize you’re out of liquid smoke—don’t panic! You can absolutely swap it out. Just increase that smoked paprika to a full two tablespoons, and you’ll get a nice smoky depth without needing that liquid ingredient. Also, remember we are dealing with meat here, so when you look at your ingredients list, focus on keeping that venison fat-free. That’s the non-negotiable for great, safe venison jerky!
Preparing the Meat for Perfect Venison Jerky Slicing
This next step is absolutely vital, honestly, it’s where most people mess up their venison jerky before it even hits the marinade. You can’t slice mushy meat, and you definitely can’t slice rock-hard meat! We need it in this perfect in-between stage—firm but not frozen solid.
Take your trimmed venison and pop it into the freezer for just about 30 to 60 minutes. I know, I know, waiting is the hardest part of any good recipe! But this waiting game ensures you get super uniform pieces. If it’s too soft, the knife drags and you get ragged edges. If it’s too hard, you risk damaging a good knife!
When you pull it out, you want that meat to feel super firm when you press it—like a cold stick of butter, not like ice. Now you can slice it super thin, aiming for about 1/8 to 1/4 of an inch thick. I love using my meat slicer if I’m feeling fancy, but a really sharp knife works just fine if you take your time slicing across the grain for tenderness. Remember what I learned back when I was teaching buddies how to cook reliably—consistency is everything. Check out some of my thoughts on consistency and reliability over on my About Page!
Mixing the Sweet and Smoky Jerky Marinade Ideas
Now for the fun part! Once your venison is trimmed and sliced, it’s time to build the flavor base. We’re creating a powerhouse of savory, sweet, and smoky all at once. Grab a medium bowl—you don’t need anything fancy here. Dump in your soy sauce, Worcestershire sauce, and all those dry spices: the smoked paprika, pepper, onion, garlic powders, and that little kick of cayenne if you like things warm. Then, add that brown sugar. This is where those great jerky marinade ideas really come to life!
You absolutely must whisk this mixture vigorously. Seriously, don’t just stir it; whisk it! We need that brown sugar totally dissolved. If you leave little crunchy sugar granules floating around, they won’t stick to the meat properly, and you’ll end up with unmixed sweet spots and dry spots. Keep whisking until everything looks unified and the liquid is smooth. It builds the foundation for that amazing sweet and smoky jerky you’ve been dreaming about!
Marinating Time for Deep Flavor in Your Deer Jerky Recipe
Now that your meat is coated in all that wonderful sweet and smoky goodness, we have to wait. I know, patience is tough, especially when that raw meat smells amazing, but this step is non-negotiable for a really delicious deer jerky recipe. You can, in a pinch, let this go for a minimum of six hours, just get it into the fridge as soon as you mix it up.
But honestly? If you can swing it, let this sit for 12 hours, or even a full 24 hours if you’re planning ahead. That extra time makes such a noticeable difference because it allows the salt and spices to fully penetrate every fiber of the venison. The longer it sits, the deeper that amazing flavor goes. Don’t worry about the meat getting too salty; because the meat is lean and we’re using time rather than just a ton of salt, it just integrates beautifully.
Once it’s done marinating—and I mean *done*—you need to pull the strips out and use paper towels to pat them as dry as you possibly can. Get them really dry! Any excess liquid dripping off will steam the meat instead of drying it properly, and nobody wants soggy jerky. Discard that leftover marinade and start patting those strips happy and dry!
How to Make Venison Jerky Using the Dehydrator Jerky Method
Alright, if you’ve got a dehydrator, this is my favorite way to handle the venison jerky process because it’s so hands-off once you get it set up. After you’ve patted all that beautiful, marinated meat dry, you need to think about a nice, even layer on those racks. You don’t want the strips touching, and definitely no overlapping!
If they overlap, they’ll steam each other instead of drying out, and that’s how you end up with questionable spots. Lay everything out neatly, making sure they aren’t crammed on there. Then, set your dehydrator temperature to exactly 160 degrees Fahrenheit. That heat level is perfect for getting things dry without cooking the meat too fast. Depending on how thick you cut your strips, you’re generally looking at anywhere from 4 to 8 hours. Check on them around the four-hour mark—you’ll be addicted to watching the magic happen!
Mastering the Oven Jerky Method for Homemade Jerky
Now, what if you packed up your dehydrator and forgot it, or maybe you just don’t have one? No worries at all! We can absolutely use the oven jerky method to make fantastic homemade jerky. The trick here is temperature control. Set your oven to the absolute lowest temperature it will go—ideally between 160 and 170 degrees Fahrenheit.
Here’s the make-or-break move for the oven: you have to let the moisture escape! If you close that oven door completely, the steam gets trapped, and you’ll just end up baking a piece of very salty roast. So, find a wooden spoon or turn a small metal spoon sideways and wedge it into the door so it stays propped open a little bit. This lets all that damp air vent out. The timing is generally the same as the dehydrator, maybe 4 to 8 hours of low-and-slow drying. Keep an eye on it, but using the oven for your venison jerky is totally reliable!

Tips for Success When Making Your Venison Jerky
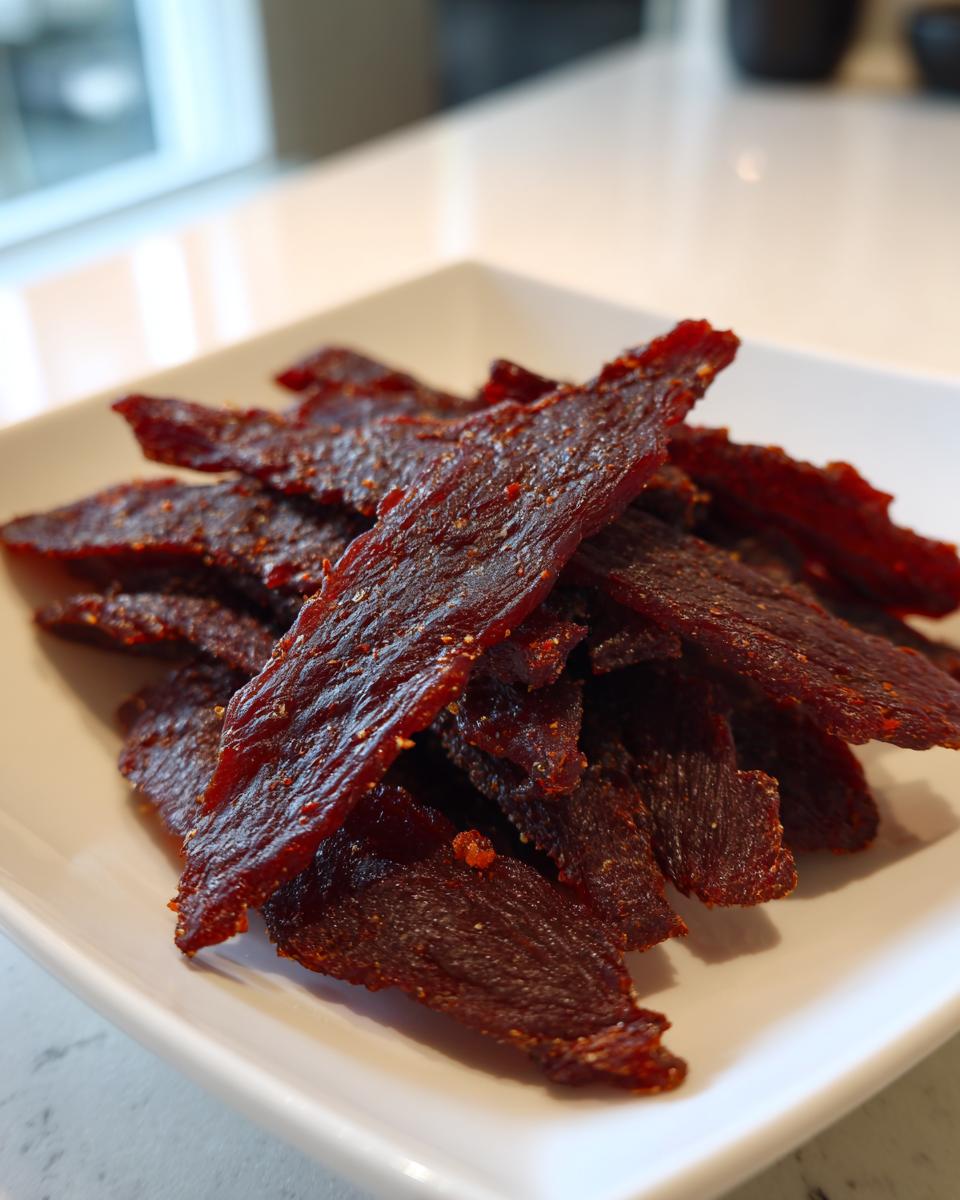
You’ve done all the hard work—the trimming, the marinating, the low-and-slow drying! Now, we need to make sure you pull that venison jerky off the rack at the *exact* perfect moment. If you rush it, it might spoil too fast. If you dry it too long, it tastes like leather! I’ve learned a few checks over the years, and they aren’t complicated at all.
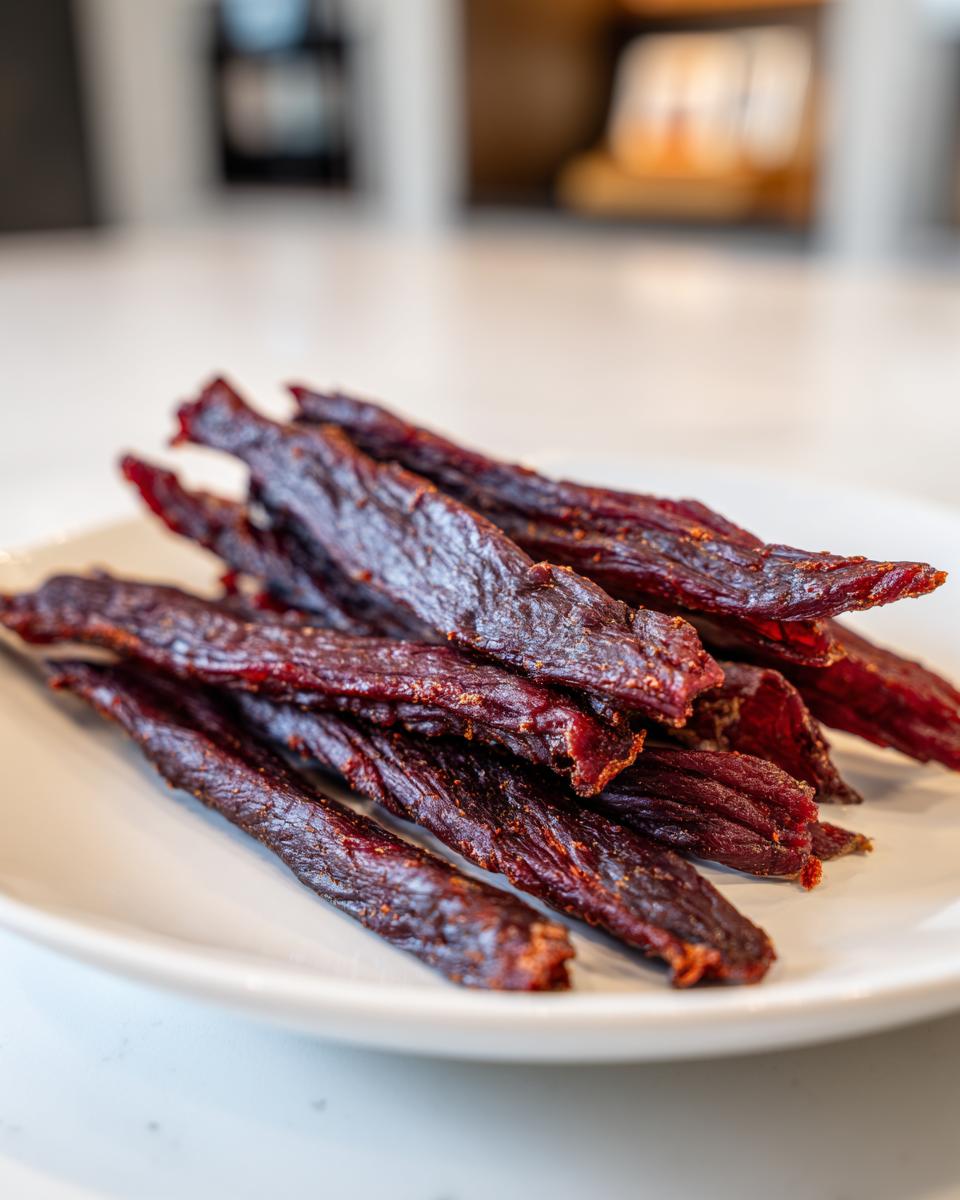
First, let’s talk about thickness again. I feel like I mention this a lot, but it’s the foundation of great jerky: uniform thickness. Whether you used a slicer or a knife, if you have some pieces that are 1/4 inch thick and others barely a sliver, they won’t finish drying at the same time. You could end up with pieces that are perfect and others that are still too wet. Try to keep that slice consistent across the entire batch!
When you think it’s done, don’t just rely on the toothpick test we use for cakes! For jerky, we need something sturdier. Pull a piece out and let it cool for just a minute—it gets firmer as it cools. Now, try the bend test. Take the strip and bend it sharply. If it cracks slightly but doesn’t snap completely in half, you’ve hit the jackpot! That means you have just the right amount of moisture left inside for maximum chewiness.
If the strip bends smoothly without cracking at all—oops!—it’s still too moist. Toss it back in for another hour. If it snaps cleanly in half the second you bend it, you’ve gone too far and might have some crispy jerky on your hands. That’s okay, those are great for snacking while cooking the rest!
Another key expert tip? Make sure everything is completely cooled down before you store it. Storing warm jerky traps moisture against itself, encouraging weird texture changes. Lay it all out on a clean cutting board or a fresh paper towel for about 30 minutes to reach room temperature fully. Once it’s cool, you know it’s ready to be sealed up tight for the best homemade jerky experience!
Storing and Gifting Your Make Ahead Protein Snack
Fantastic! Your kitchen smells incredible, and you’ve got pounds of perfectly chewy venison jerky cooling on the counter. Now we talk about preservation, because you definitely won’t eat all of this in one afternoon! This is exactly why this recipe is my go-to when I’m prepping for hunting season recipes—it’s the ultimate make ahead protein snack that truly lasts.
The main thing to remember about storage is keeping moisture out, since we successfully dried it low and slow. You need an airtight container. I usually grab my big Ziploc bags—the freezer ones are the strongest—or I use sturdy mason jars with tight lids. Make sure your jerky is completely cool before you seal it up; otherwise, that trapped heat creates condensation, and that’s bad news for jerky!
If you plan on using this jerky up within a couple of months, keeping it in an airtight container at a cool room temperature works perfectly fine. If you really want to extend the life, tuck those sealed bags into the refrigerator or even the freezer. We’re talking months of great flavor when refrigerated! It stays ready for impromptu hikes or that unexpected break in the weather.
As for gifting? Oh my gosh, this is the *best* gift for hunters, hikers, or anyone who loves a good chewable snack. I often package smaller batches in cute, labeled muslin bags tied with twine. You can write the date you made it right on the tag, though I doubt it’ll last long enough to need it! Everyone loves getting something homemade, especially something this hearty and delicious.

Common Questions About Making Venison Jerky
It’s totally normal to have questions when you’re working with raw meat to create a shelf-stable snack like homemade jerky! I’ve tried to cover everything above, but let’s tackle the few things that always pop up right before people hit that dehydrator button. Never be afraid to ask questions—that’s how we all get better in the kitchen!
First up: A big concern for anyone making venison jerky is safety. How do I know it’s safe? Because we are drying the meat at a true drying temperature (160°F) and we are using salt/curing agents (soy sauce, etc.), it cures as it dries. The key to safety isn’t just the heat, it’s making sure it gets *dry* enough. If it bends and cracks, you’ve done it right. Never eat jerky that feels soft or wet inside; the low temperature we used is high enough to render modern venison safe *if* it reaches that fully dried, brittle state.
Next question I always get: Can I use other meats? Yes, absolutely! This method is fantastic for almost any lean cut. Turkey breast works beautifully, and oddly enough, I love making this same sweet and smoky jerky marinade with lean beef sirloin. Just remember to trim off *all* the fat, no matter what meat you use, because fat is the enemy of long-term storage for any jerky.
And finally, about that liquid smoke again—what if I just don’t like it? As I mentioned earlier, your best substitution is doubling down on smoked paprika. That gives you a wonderful, deep, woodsy flavor profile that replaces the smokiness beautifully in your brown sugar venison jerky.
Estimated Nutrition for Brown Sugar Venison Jerky
Since this is such a great make ahead protein snack, I know a lot of people track macros, especially if they are taking it on a long hunting trip or just trying to eat clean. Keep in mind that because the final yield depends so much on how dry your meat gets, these numbers are estimates based on a one-ounce serving of the original two pounds of raw meat. It’s definitely lean!
- Calories: About 95 per ounce
- Protein: A whopping 16 grams!
- Fat: Less than 1 gram
- Carbohydrates: Only about 4 grams
Really, for the amount of energy you get packed into such a light snack, it’s phenomenal. I always check my privacy policies when I’m making large batches to ensure I’m tracking my food intake correctly, and you can always review general guidelines here: my privacy policy page.
PrintSweet and Smoky Venison Jerky
A simple recipe for making flavorful venison jerky with a sweet and smoky marinade using a dehydrator or oven.
- Prep Time: 20 min
- Cook Time: 8 hr
- Total Time: 8 hr 20 min
- Yield: About 1 pound 1x
- Category: Snack
- Method: Dehydrating or Oven Drying
- Cuisine: American
- Diet: Low Fat
Ingredients
- 2 lbs venison, trimmed of all fat
- 1/2 cup soy sauce
- 1/4 cup Worcestershire sauce
- 1/4 cup brown sugar
- 2 tablespoons liquid smoke
- 1 tablespoon smoked paprika
- 1 teaspoon black pepper
- 1 teaspoon onion powder
- 1/2 teaspoon garlic powder
- 1/4 teaspoon cayenne pepper (optional)
Instructions
- Trim all visible fat from the venison. Freeze the meat for 30 to 60 minutes until it is firm but not completely frozen.
- Slice the venison thinly, about 1/8 to 1/4 inch thick, cutting across the grain for tender jerky, or with the grain for chewier jerky.
- In a bowl, whisk together the soy sauce, Worcestershire sauce, brown sugar, liquid smoke, smoked paprika, black pepper, onion powder, garlic powder, and cayenne pepper until the sugar dissolves.
- Place the sliced meat into a large, resealable plastic bag or non-reactive container. Pour the marinade over the meat, ensuring all pieces are coated.
- Refrigerate and marinate for at least 6 hours, but preferably 12 to 24 hours for deep flavor penetration.
- Remove the meat from the marinade and pat the pieces dry with paper towels. Discard the remaining marinade.
- Arrange the strips on dehydrator trays or on oven racks placed over baking sheets, ensuring the strips do not overlap.
- For a dehydrator: Set the temperature to 160 degrees Fahrenheit (71 degrees Celsius) and dry for 4 to 8 hours, checking for doneness periodically.
- For an oven: Set your oven to its lowest temperature, ideally 160 to 170 degrees Fahrenheit (71 to 77 degrees Celsius). Prop the oven door open slightly with a wooden spoon to allow moisture to escape. Bake for 4 to 8 hours.
- The jerky is done when it is dry, firm, and bends without breaking, though it may crack slightly.
- Let the jerky cool completely before storing.
Notes
- For best results, use a meat slicer or a very sharp knife to achieve uniform thickness.
- If you do not have liquid smoke, increase the smoked paprika to 2 tablespoons.
- Store finished jerky in an airtight container at room temperature for up to two months, or in the refrigerator for longer freshness.
Nutrition
- Serving Size: 1 ounce
- Calories: 95
- Sugar: 3
- Sodium: 350
- Fat: 1
- Saturated Fat: 0.5
- Unsaturated Fat: 0.5
- Trans Fat: 0
- Carbohydrates: 4
- Fiber: 0
- Protein: 16
- Cholesterol: 45