
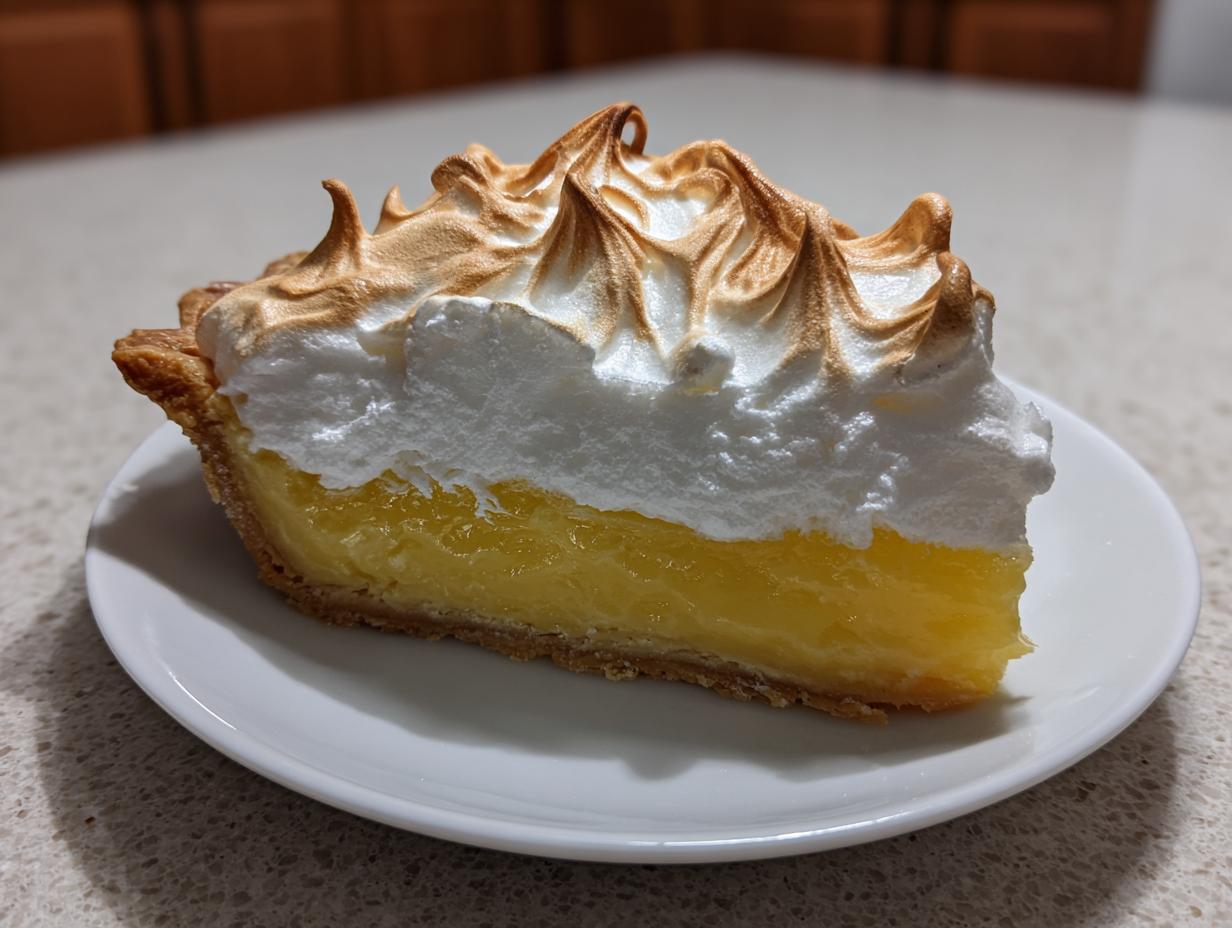
There is just something about lifting a slice of homemade pie that makes any day feel like a holiday, right? If you’re tired of that sad puddle under your pie or a meringue that shrinks the second it touches cool air, then this is the recipe you’ve been searching for. This isn’t some box-mix shortcut; this is the real deal—a truly classic, from-scratch lemon meringue pie that balances that sharp, zesty filling perfectly.
I spent years testing recipes, combining the comfort I learned in my childhood kitchen with the hard science I picked up in a professional test kitchen. Trust me, we figured out exactly what makes that meringue stay tall and proud and keeps your filling thick and luscious! This reliable method guarantees you get that showstopper slice every single time you bake.
- Why This Homemade Lemon Meringue Pie Recipe Succeeds (The EEAT Factor)
- Gathering Ingredients for Your Classic Lemon Meringue
- Step-by-Step Instructions for the Easy Lemon Meringue Recipe
- Expert Tips for No Weep Lemon Meringue Tips
- Transforming Your Lemon Meringue into Other Spring Baking Recipes
- Serving Suggestions for This Showstopper Dessert
- Storage and Reheating Instructions for Lemon Meringue
- Frequently Asked Questions About Making Lemon Meringue Pie
- Estimated Nutritional Data for Your Lemon Meringue
Why This Homemade Lemon Meringue Pie Recipe Succeeds (The EEAT Factor)
You want a pie that’s impressive when it hits the table, and I want to make sure you don’t waste good butter trying to get there. This recipe cuts through all the confusion. Because I understand the science behind baking, my method focuses on two main things: stability and flavor!
- The custard filling is cooked twice—yes, twice!—to ensure that thickening agent (cornstarch) completely activates. That means no soupy lemon filling here.
- We hit that sweet spot between incredibly zesty and perfectly sweet, just how an old-fashioned classic lemon pie should taste.
Achieving a Perfect Tart and Sweet Pie Balance
This pie is all about that beautiful contrast. We use fresh lemon juice and zest for a bright, genuine citrus punch. Then, we balance that intensity with just the right amount of sugar distributed between the filling and the marshmallowy topping. It’s the definition of a tart and sweet pie experience without being overly sugary.
The Secret to Fluffy Meringue Topping
If you’ve ever had your topping weep or shrink, it’s usually because the egg whites weren’t ready or you skipped the acid. We use room temperature egg whites—they whip up bigger, easier!—and a tiny bit of cream of tartar. That little white powder is your insurance policy for a really fluffy meringue topping that stays gorgeous. It’s totally the key to a great lemon meringue.
Gathering Ingredients for Your Classic Lemon Meringue
The beauty of a truly homemade lemon pie from scratch is that you probably have most of this stuff already! We aren’t dealing with specialty baking powder here; we’re using simple pantry staples to make something unforgettable. Remember, quality matters, especially with the lemons, so try to use fresh everything!
Ingredients for the Buttery Pie Crust Tutorial
For the base, you absolutely need a fully cooled 9-inch pie shell. I always use my go-to buttery pie crust tutorial recipe, but honestly, if you already have one you love that bakes up flaky and holds its shape, use that! Just make sure it’s completely cooled before the hot filling goes in, otherwise, goodbye, crust integrity!
Ingredients for the Zesty Lemon Filling Recipe
This is where the zing comes from! You need more than just a splash of lemon; we need impact. You’ll need 1/2 cup of *fresh* lemon juice—that’s usually two or three big Meyer lemons—plus a whole tablespoon of fresh lemon zest. That zest is what makes it a truly zesty lemon dessert. Don’t skimp on the cornstarch here; that’s our secret weapon for a real lemon curd recipe, not soup!
Ingredients for the Stable Lemon Meringue
For the topping, you need 6 large egg whites, and this is crucial: they must be at room temperature. Cold eggs just won’t whip up right! Also, grab that cream of tartar. It stabilizes the air bubbles so you get the best lemon meringue that doesn’t shrink away from the edges.
Step-by-Step Instructions for the Easy Lemon Meringue Recipe
Alright, deep breath! This is where we put all that prep work to good use. Don’t rush through this part, especially the mixing, because that’s where the magic—or the scrambled eggs—happens! Follow these steps exactly, and you’ll have that perfect, bright lemon meringue pie recipe.
Preparing the Crust and Lemon Filling Base
First things first: get that pie crust ready. Bake it according to your recipe and let it cool down completely. I mean it—totally cool. If you pour the hot filling into a warm crust, you’re asking for sogginess, and we don’t want that with this easy lemon meringue recipe!
Now for the filling base in a medium saucepan. Whisk together your sugar, cornstarch, and salt really well before adding water. Cook this over medium heat. Keep stirring until it gets thick and starts bubbling hard—about a minute of hard boiling once it bubbles. Then, pull it off the heat for a second.
This next part is critical for that smooth lemon curd recipe: temper your yolks! Whisk those 3 yolks lightly in a separate bowl. Then, slowly drizzle about a cup of that hot sugar mixture into the yolks *while whisking constantly*. This gently raises the temperature of the eggs so they don’t poach. Once they’re introduced, pour the yolk mixture back into the saucepan with the rest of the hot filling.
Finishing the Hot Lemon Curd and Assembling the Pie
We go back to the stove now, but use medium-low heat. Stir this combined mixture constantly until it bubbles and boils again. You must let it boil for a full minute to cook out any starchy flavor. Remove it from the heat right away—this is instant!
Stir in the butter until it’s all shiny and melted, then pour that hot filling straight into your cooled, empty pie crust. Don’t wait around smoothing the top; you need that filling hot for the next step to seal the meringue properly!

How to Make Perfect Meringue and Baking the Lemon Meringue
Time for the topping! Grab your nice, clean, grease-free bowl and beat those 6 room-temperature egg whites until they get foamy and soft peaks form. Add your cream of tartar and then slowly stream in that remaining 1/2 cup of sugar, mixing until you hit stiff, glossy peaks. You should be able to lift the whisk and the peak stands straight up—that’s what we want!
Quickly spread that meringue all over the hot filling. And here’s a pro move: make sure the meringue touches the crust edge all the way around. This seals it tight and prevents those awful shrink lines! Create some pretty peaks with the back of a spoon. Bake it at 350°F for maybe 12 to 15 minutes until those peaks turn a lovely light gold. Don’t overbake the center!
Expert Tips for No Weep Lemon Meringue Tips
Okay, you’ve done the hard part—the filling is perfect, the meringue is fluffy! But we all know the terror: the weeping. I remember the first time I made this pie for my sister’s birthday; I rushed it into the fridge because I was so proud, and the next morning, there were tiny little beads of sugary sadness all over the topping. Ugh! Don’t let that happen to you.
The number one rule for a great no weep lemon meringue tips situation is temperature management. You need to let that pie cool down slowly on the counter first. If you shock it with the cold fridge right away, the sugar in the meringue contracts too fast, and that moisture has nowhere to go but out!
Cooling Instructions for Your Lemon Meringue
Seriously, let that pie sit out on a wire rack at room temperature until it’s completely cool to the touch—that takes at least four hours in my house. The meringue bonds to the hot filling underneath, creating a stable seal. If you want extra security, sometimes I even skip the baking and just use a kitchen torch to get those golden peaks just right, which also locks everything in!
Transforming Your Lemon Meringue into Other Spring Baking Recipes
Just because we made a full pie doesn’t mean we can’t play around with the leftovers, right? Or maybe you need a smaller summer citrus dessert, but baking a full pie isn’t in the cards. The core flavor profile here is so amazing, we can absolutely turn it into other treats perfect for spring baking recipes.
You can portion out that beautiful lemon filling and bake it into individual crusts to make darling mini lemon meringue tarts. They look so elegant on a dessert tray!
Or, if you prefer something you can eat with your hands, try spreading the filling over a shortbread base. Once that’s set, top it with the meringue (you can bake it briefly or torch it) and cut it into squares. Hello, easy-to-manage lemon meringue bars! Honestly, once you master the curd, you’ve mastered a whole season of desserts.
Serving Suggestions for This Showstopper Dessert
Now that you’ve created this magnificent, sunny showstopper dessert, presentation is everything! We want to make sure this golden-topped beauty gets the attention it deserves. Since the meringue is already providing that light, sweet cloud, I like to keep the accompaniments really simple.
If you’re planning this for a warm evening, it’s a perfect summer citrus dessert. A small scattering of fresh, sharp raspberries or blueberries around the slice elevates the color contrast beautifully. You could also serve a tiny dollop of lightly sweetened whipped cream right next to the pie slice, especially if you want to cut through the intensity of the lemon just a little bit more.
Storage and Reheating Instructions for Lemon Meringue
Okay, you’ve made the most beautiful, perfectly stable lemon meringue pie recipe, and now you have leftovers—which is great, but storing this delicate beauty takes a little know-how. You absolutely want to eat the meringue the day you make it if you can! It’s just heavenly when it’s freshly baked, and frankly, nothing beats that texture when it’s perfectly golden and still slightly warm inside.
If you must store it, forget about tightly wrapping it in plastic wrap. That traps moisture against the meringue peaks, and we all know what happens then: condensation leads to weeping! I take a large cardboard box or an overturned cake dome and gently place that over the pie, leaving an airspace around it. This keeps dust off but lets the pie breathe.
For the best chance of stability, keep the whole pie on the counter at room temperature for up to 8 hours. If you need to keep it longer, the fridge is required, but keep in mind the moisture issue increases the longer it sits there. Seriously, don’t even think about freezing the finished pie. The egg whites in the meringue will turn grainy and watery when thawed, and you’ll lose all that structural lift we worked so hard for!
If you only have filling leftover (without the meringue), that’s freezer-friendly! Cool the lemon curd recipe completely, seal it tight in an airtight container, and it keeps beautifully for about three months. Thaw it in the fridge overnight, and you can whip up a fresh fluffy meringue topping to go on top the next day.
Frequently Asked Questions About Making Lemon Meringue Pie
I get so many questions after people try this pie for the first time, usually about making sure it looks as good as it tastes! That’s fair, right? We want that perfect slice. Here are some of the things I hear most often that might help you get that picture-perfect result for your very classic lemon pie.
Can I use bottled lemon juice instead of fresh for my lemon meringue?
You totally can in a pinch, but please don’t make it your standard practice for this recipe! Bottled juice is usually pasteurized, and honestly, it just tastes duller. It lacks that bright, vibrant punch that fresh juice and zest give your filling. If you swap it for the fresh stuff, you lose a huge amount of what makes this lemon meringue so zesty. If you must use bottled, you might need a little extra lemon zest to try and bring some of that essential oil flavor back.
How do I know when my meringue has reached stiff peaks for the best lemon meringue?
This is the key to a beautiful fluffy meringue topping! Once you’ve added all the sugar, you need to test it. Take your electric mixer whisk out of the bowl when you think it’s done. If the peak that stands up on the whisk flops over immediately, you need more time. If the peak stands straight up, strong and firm, without curling at the tip, you’ve hit stiff peaks! Another test is turning the bowl upside down—if the meringue doesn’t budge, you’ve nailed how to make perfect meringue.
Is this recipe suitable for a vintage pie recipes feel?
Oh, absolutely! If you are aiming for that beautiful, nostalgic vintage pie recipes feel, this scratch method is exactly what you want. My whole philosophy is rooted in that delicious, honest cooking style where everything is made from basic ingredients—no powdered mixes allowed! By making the curd from scratch and whipping the whites yourself, you capture that timeless taste profile perfectly.
Estimated Nutritional Data for Your Lemon Meringue
I always try to look at the facts after I finish a rich, beautiful bake like this lemon meringue pie recipe! Remember, these numbers are just estimates based on standard ingredient amounts, so your actual serving might vary slightly depending on your crust recipe or your lemon size. Treat this as a general guideline for what you’re enjoying!
Here is the breakdown per slice for this gorgeous classic lemon pie:
- Serving Size: 1 slice
- Calories: 380
- Sugar: 45g
- Sodium: 150mg
- Fat: 18g
- Carbohydrates: 52g
- Protein: 5g
A quick note on that sugar content: remember, it’s spread across the crust, the thick lemon curd, *and* the fluffy meringue topping! It’s a special occasion treat, for sure. If you are tracking macros or watching sodium, this gives you a good starting point for planning your other meals that week. Enjoy this slice guilt-free; you definitely earned it!
PrintClassic Homemade Lemon Meringue Pie

Make this classic lemon meringue pie from scratch. It balances tart lemon filling with a buttery crust and a fluffy, stable meringue topping. This recipe focuses on clear steps for a showstopper dessert.
- Prep Time: 30 min
- Cook Time: 30 min
- Total Time: 3 hours 0 minutes
- Yield: 8 servings 1x
- Category: Dessert
- Method: Baking
- Cuisine: American
- Diet: Vegetarian
Ingredients
- 1 recipe for Buttery Pie Crust (for a 9-inch pie plate)
- 1 1/2 cups granulated sugar
- 1/4 cup cornstarch
- 1/8 teaspoon salt
- 1 1/2 cups cold water
- 3 large egg yolks, lightly beaten
- 1/2 cup fresh lemon juice
- 1 tablespoon lemon zest
- 2 tablespoons unsalted butter
- 6 large egg whites, at room temperature
- 1/2 teaspoon cream of tartar
- 1/2 cup granulated sugar (for meringue)
Instructions
- Prepare and partially bake your pie crust according to your preferred recipe. Cool completely.
- For the Lemon Filling: In a medium saucepan, whisk together the 1 1/2 cups sugar, cornstarch, and salt. Gradually whisk in the cold water until smooth.
- Cook the mixture over medium heat, stirring constantly, until it thickens significantly and bubbles. Continue to cook for one minute after boiling. Remove from heat.
- In a separate bowl, whisk the egg yolks. Slowly temper the hot sugar mixture into the yolks, whisking constantly to prevent scrambling.
- Return the entire mixture to the saucepan. Cook over medium-low heat, stirring constantly, until the filling comes to a boil again. Boil for one minute. Remove from heat.
- Stir in the lemon juice, lemon zest, and butter until the butter melts completely. Pour the hot filling into the cooled, pre-baked pie crust.
- For the Meringue: In a clean, grease-free bowl, beat the egg whites with an electric mixer on medium speed until soft peaks form.
- Add the cream of tartar and gradually beat in the remaining 1/2 cup sugar, one tablespoon at a time, beating until stiff, glossy peaks form. This step is key to a stable meringue.
- Spread the meringue evenly over the hot lemon filling, making sure the meringue touches the edges of the crust all around to prevent shrinking. Create decorative swirls with the back of a spoon.
- Bake at 350°F (175°C) for 12 to 15 minutes, or until the meringue peaks are lightly golden brown.
- Cool the pie completely on a wire rack at room temperature for at least 4 hours before slicing. Avoid placing it in the refrigerator immediately to prevent weeping.
Notes
- To prevent weeping meringue, spread the meringue over the hot filling immediately after it comes off the stove.
- For a more stable meringue, ensure your mixing bowl and whisk attachments are completely free of any fat or grease residue.
- If you want a showstopper dessert, use a kitchen torch to brown the meringue peaks instead of baking.
Nutrition
- Serving Size: 1 slice
- Calories: 380
- Sugar: 45g
- Sodium: 150mg
- Fat: 18g
- Saturated Fat: 5g
- Unsaturated Fat: 13g
- Trans Fat: 0g
- Carbohydrates: 52g
- Fiber: 1g
- Protein: 5g
- Cholesterol: 85mg