
Okay, I know what you’re thinking: Yorkshire pudding seems simple, right? Flour, eggs, milk—how hard can it be? But getting that perfect rise, that golden, airy center that soaks up gravy like a sponge, while keeping those edges shatteringly crisp? That’s where most people end up with sad, flat little pancakes instead of magnificent puffed clouds. Well, don’t you worry! I’ve spent years in front of test ovens making sure this Yorkshire pudding recipe isn’t just good, it’s truly foolproof. Jade here—blending my food science background with real-world test kitchen knowledge—to show you exactly how to achieve those impossibly tall, light, and airy puddings every single time. Forget everything you thought you knew; this technique is a game-changer for your Sunday roast!
- Why This Foolproof Yorkshire Pudding Recipe Works
- Ingredients for the Best Batter for Yorkshire Pudding
- How to Prepare Foolproof Yorkshire Pudding
- Serving Suggestions for Yorkshire Pudding
- Ingredient Notes and Substitutions for Yorkshire Pudding
- Tips for Success Making Puffy Yorkshire Puddings
- Storage and Reheating Instructions for Yorkshire Pudding
- Frequently Asked Questions About Yorkshire Pudding
- Estimated Nutrition for This Yorkshire Pudding Recipe
- Share Your Perfect Yorkshire Pudding Results
Why This Foolproof Yorkshire Pudding Recipe Works
Making a truly puffy Yorkshire pudding isn’t luck; it’s chemistry, and that’s where my test kitchen background really shines! I’ve tweaked and tested this batter until I could practically predict the outcome just by looking at the mix. We aren’t aiming for just a side dish here; we are making light and airy puddings that stand proud next to roast beef. The method relies on a few non-negotiable steps during the mixing and baking phases. Trust me, once you nail this science, you’ll never go back to the flat stuff again. This is what sets our Yorkshire pudding recipe apart—it’s reliability built on rigorous baking science. For more reliable results, check out tested methods on sites like this wonderful resource!
The Secret to Light and Airy Puddings: Batter Resting
You absolutely must let the batter rest—no exceptions! This isn’t just a suggestion; it’s fundamental to getting that light and airy pudding texture. When you whisk flour and liquid, you develop gluten strands, which can make baked goods tough and dense. Resting the batter, ideally in the fridge for at least half an hour, lets those gluten structures relax. When the relaxed batter hits the hot oil, it expands rapidly and evenly, giving you those stunning, featherlight interiors we all want.
Achieving Crispy Yorkshire Pudding Edges: Heat Management
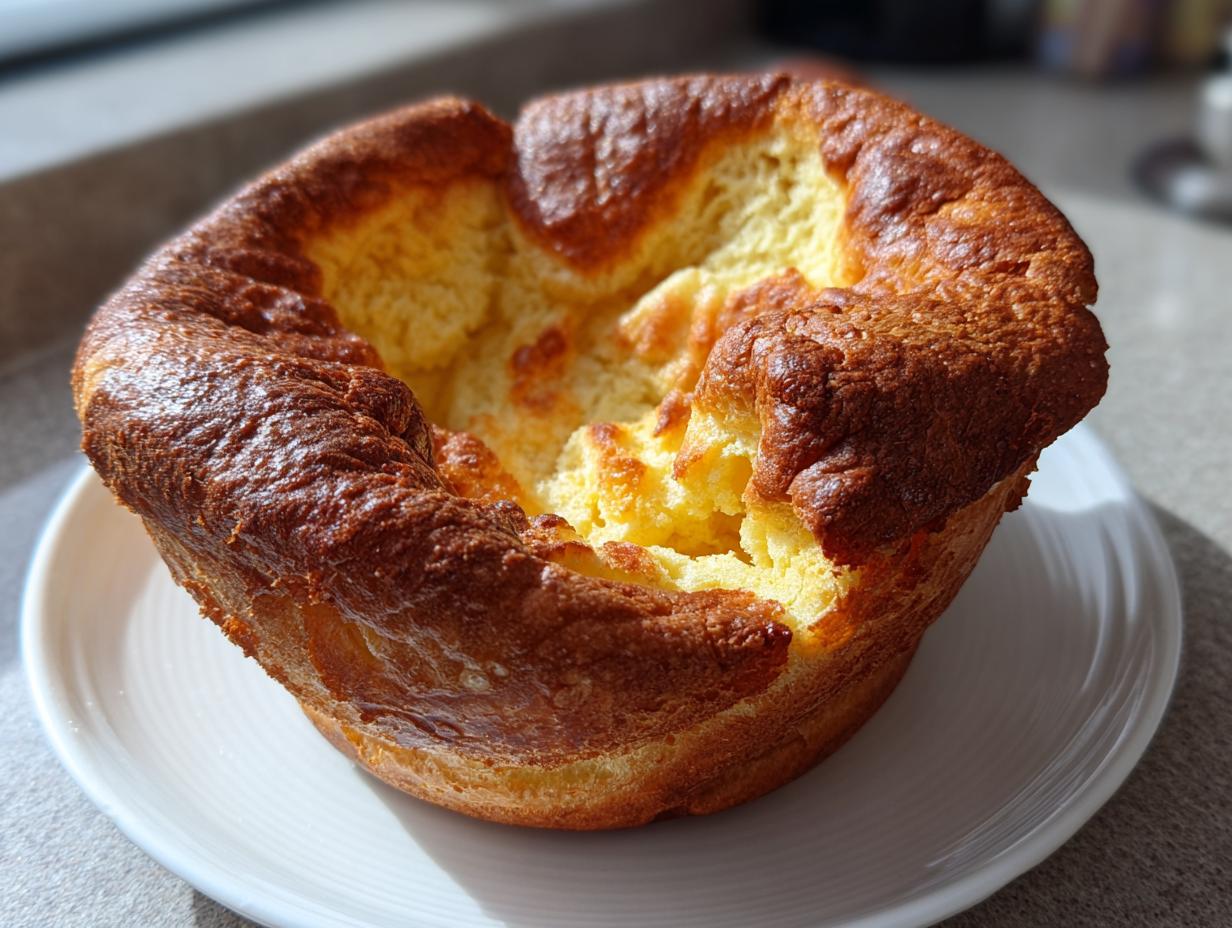
If you want that perfect crispy Yorkshire pudding exterior and a structure that won’t collapse, the oven temperature needs to be screaming hot—we’re talking 450°F (230°C). Even more vital is the fat. That oil or drippings must be smoking hot before the batter even sees the tin. If the fat isn’t sputtering aggressively when the batter hits it, you lose that initial explosive steam needed to launch your pudding upwards. Keep the door shut for the first 15 minutes—I mean it! That initial blast of dry, high heat is what sets the crispy edges.
Ingredients for the Best Batter for Yorkshire Pudding
It warms my heart that this recipe relies on such basic pantry staples. Jade’s philosophy is all about making great food accessible, and you won’t need to hunt down any fancy items here! We are using just five core things to create the magic, but the quality of those ingredients really does matter when you’re aiming for that classic, traditional British baking success we know and love.
Ingredient Specifications and Notes
Okay, here’s the exact list I use when testing:
- 1 cup all-purpose flour (Easy to find and works perfectly!)
- 1 cup whole milk (Don’t skimp here—whole milk gives us the richness we need.)
- 2 large eggs (The binding power is key!)
- 1/2 teaspoon salt
- Vegetable oil or beef drippings (for the tin)
Now, about that fat choice for the tin—this is where you can truly customize the flavor profile. While standard vegetable oil works just fine and keeps things vegetarian, if you are making a beef roast, use the beef drippings. Seriously, nothing beats beef drippings for that depth of flavor!
How to Prepare Foolproof Yorkshire Pudding
Alright, let’s get down to business. This is where the magic happens and where all those sad, flat results from the past get left behind. Making a foolproof Yorkshire pudding is all about respecting the temperature and trusting the process. We’re following the recipe exactly, step-by-step, so you can concentrate on getting your roast ready instead of worrying about your batter! You can find loads of reliable tips for this part over at this great baking site, but I’ll walk you through my tried-and-true method right here.
Mixing the Perfect Yorkshire Pudding Batter
Grab your medium bowl and let’s start simple. First, whisk your flour and salt together. Just get them acquainted! Then, it’s time for the eggs. Beat those in until everything looks shaggy. Now, the milk goes in slowly while you whisk constantly. You are looking for a smooth, thin batter, almost like thin cream. Here’s a tip from the test kitchen: don’t stress if you see a few tiny lumps lingering. Seriously, if you overmix trying to banish every single one, you’ll develop too much gluten, and we want light, remember? A few small lumps are perfectly acceptable!
Resting and Preheating for Tall Puffy Yorkshire Puddings
This next step is often skipped, but it is essential for those tall, puffy Yorkshire puddings! Step four says cover that batter and put it in the fridge. You need at least 30 minutes for the gluten to relax, but honestly? If you can let it rest overnight, even better. While that batter is chilling out, crank your oven up way high—450°F (230°C) is what we need. And here’s the trick: put your muffin tin or pudding tin right in there while it heats up. We need that metal scorching hot.
Baking Instructions for Crispy Yorkshire Pudding
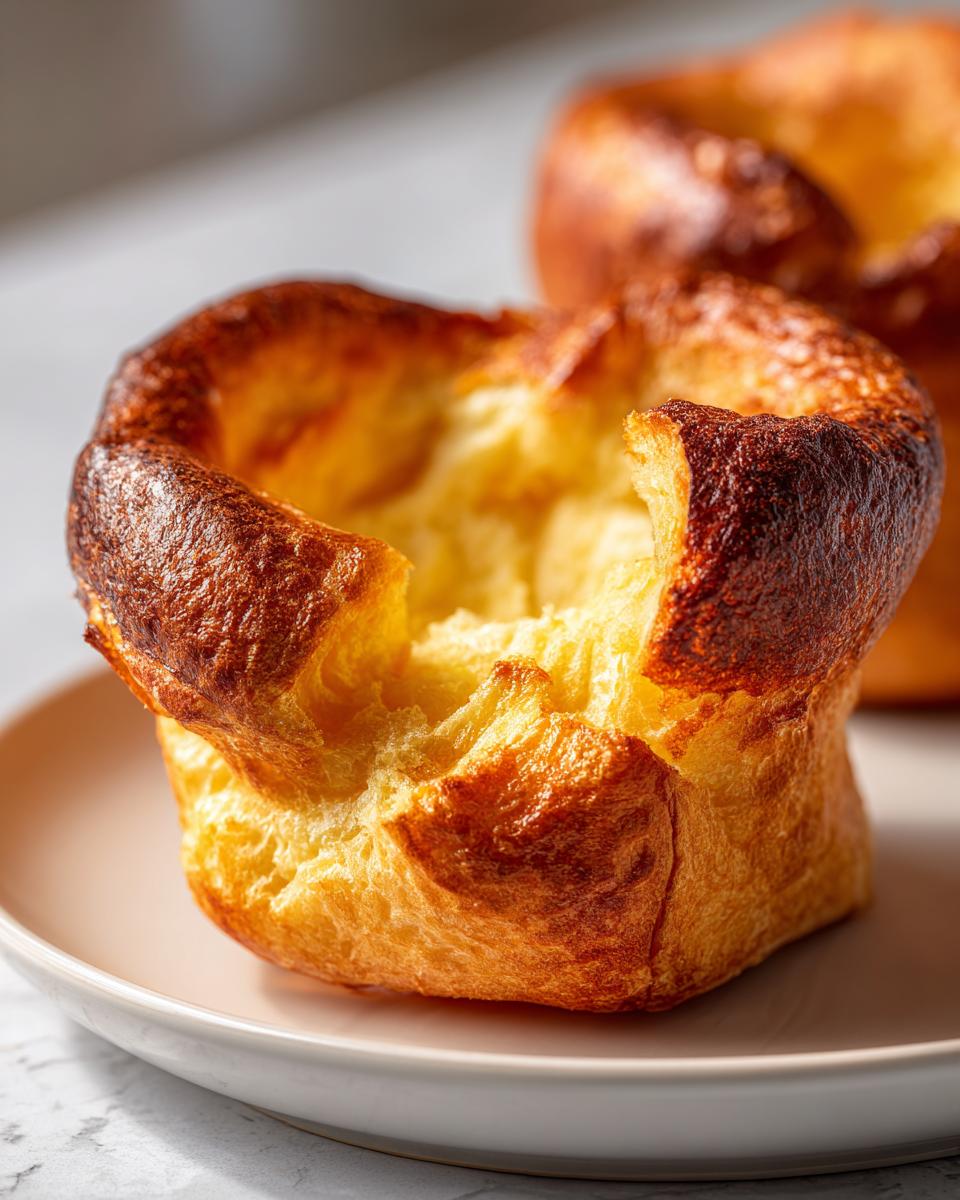
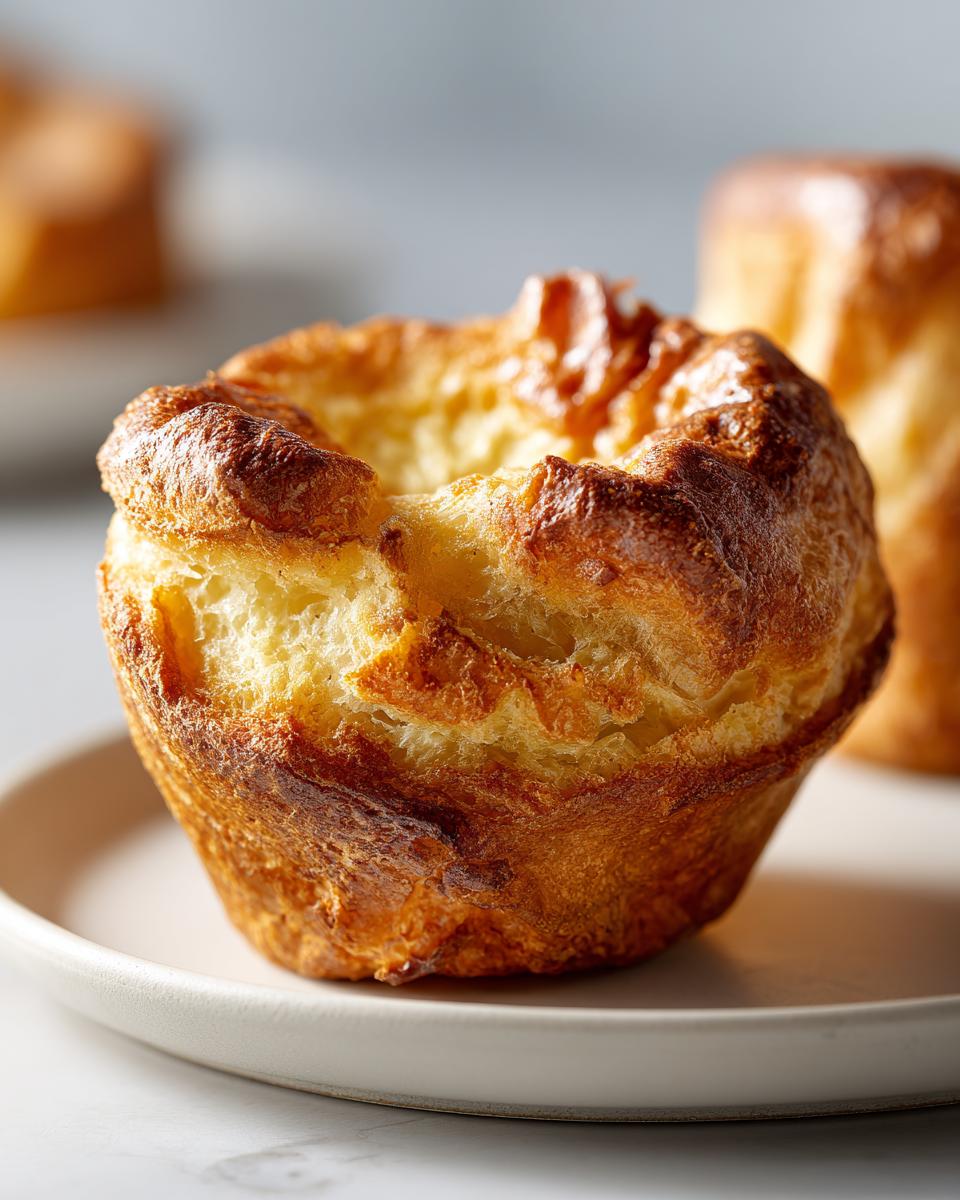
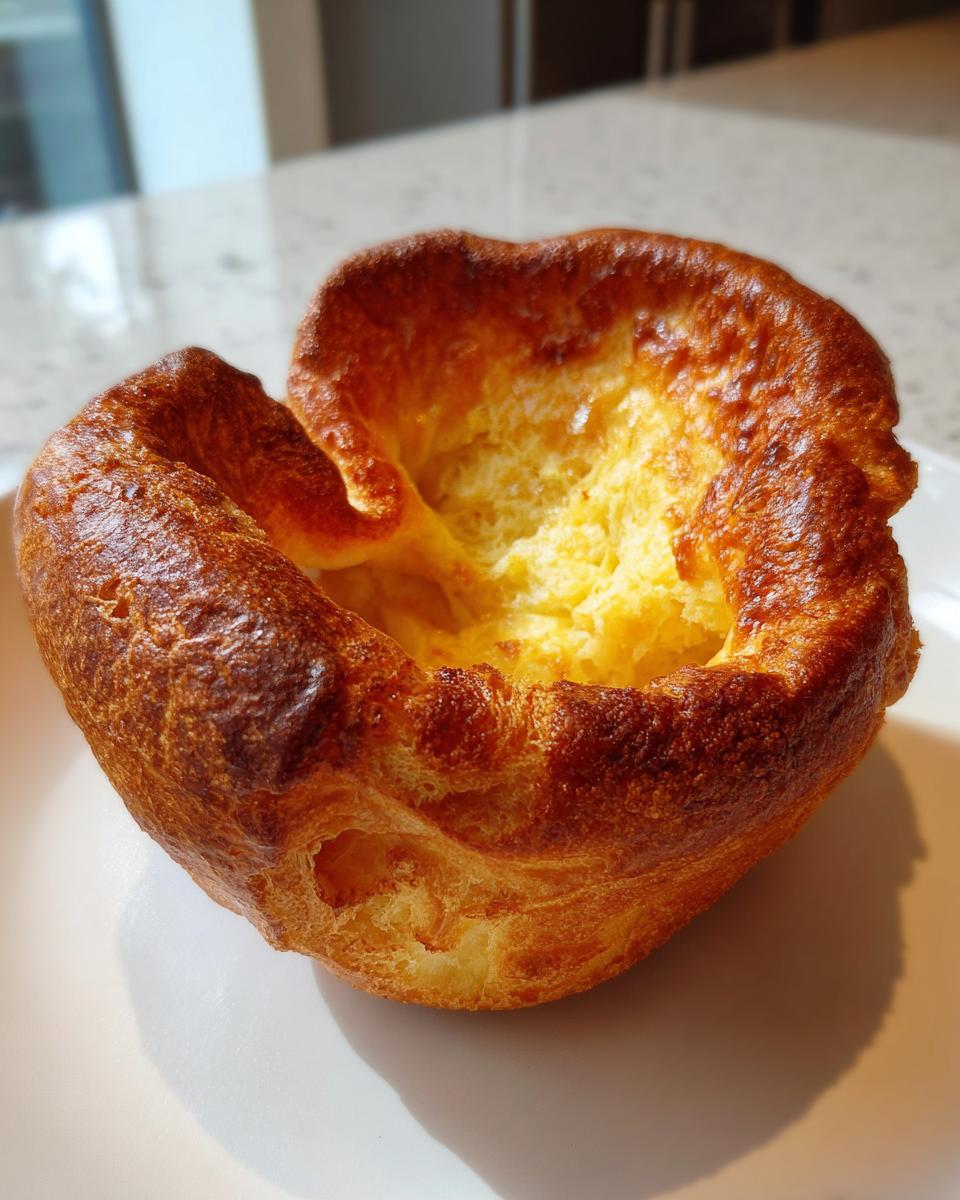
Once the oven is raging hot, carefully pull out that smoking-hot tin. Now, work fast! Add your teaspoon of oil or those wonderful beef drippings into each cup. It should sizzle immediately when it hits the hot metal. Next, quickly pour the batter in, but don’t overfill—one-third full is the sweet spot for maximum rise. Get that tin straight back into the blistering oven. And listen to Aunt Jade: Do not, under any circumstances, open that oven door for the first 15 minutes of baking! If you peek, you let the steam out, and your puddings will deflate right before your eyes. After that crucial 15 minutes, they should look beautifully risen. Give them another 5 to 10 minutes until they are golden brown and wonderfully crispy Yorkshire pudding perfection. Serve them right away!
Serving Suggestions for Yorkshire Pudding
You’ve done the hard work—you made the best puffy Yorkshire puddings ever! But now what? These aren’t just standalone treats; they are key components of a proper meal, especially when we talk about Sunday roast essentials. The absolute golden rule is to serve them immediately. As soon as they come out of the oven, they are at peak fluffiness and crispness. You don’t want them sitting around waiting for the meat to rest; the puddings wait for no one!
Pairing Yorkshire Pudding with Classic Roast Dinner Recipe Components
Yorkshires were born to hang out with a roast, that much is certain! Traditionally, they match perfectly with roast beef, but honestly? They are fantastic with roast chicken, lamb, or even a hearty nut roast if you’re keeping it vegetarian. They serve as the ultimate edible vessel for soaking up those flavorful juices. Speaking of which, you absolutely need a proper gravy. If you’re looking for the best way to finish that meal, I highly recommend checking out my recipe for foolproof homemade turkey gravy. The way these puddings act as homemade gravy accompaniments is just unbeatable. And when it comes to larger gatherings like Christmas or Thanksgiving, make sure these holiday roast sides are baked last so they come out piping hot right when everyone sits down!
Don’t forget, you can find some amazing pairing inspiration, especially for holiday meals, over at Chloe’s Kitchen!
Ingredient Notes and Substitutions for Yorkshire Pudding
Since my whole goal here at Cooking by Jade is to make sure you feel totally confident in the kitchen, I want to talk for a minute about tweaking things. Maybe you’re out of whole milk, or maybe you just want the absolute richest flavor possible. Don’t panic! This Yorkshire pudding recipe is robust, but knowing how small changes affect the final puff is important, especially if you are looking for those cheap ingredient variations that still taste amazing.
Milk Type and Fat Choices for Yorkshire Pudding
Let’s start with the milk. The recipe calls for whole milk, and I stand by that, especially when you’re aiming for puffiness. Whole milk has a better fat content, which contributes to a richer taste and helps create that wonderful crispness on the edges. Can you use skim milk? Sure, you can, but your puddings might be slightly less rich and perhaps a tiny bit less sturdy. You might notice a slight difference in texture, but for an everyday bake, it’ll do!
We already talked about the fat, but it bears repeating because it’s such a flavor game-changer. If you use vegetable oil, you are safe, and it’s easy to get that fat smoking hot. But if you want that undeniable, authentic, savory flavor—the one that screams ‘Sunday Roast’—you absolutely have to use beef drippings. Those little bits left in the bottom of your roasting pan are liquid gold for traditional British baking! They give the puddings a deep, earthy flavor that oil just can’t replicate. It’s the secret ingredient for the most traditional experience!
Tips for Success Making Puffy Yorkshire Puddings
We’ve made the perfect batter, we’ve rested it, and we’ve cranked the oven up to warp speed. Now, let’s talk about the moments right before and during baking where things can still go sideways when you’re trying to achieve that textbook tall popovers recipe structure. Even the best Yorkshire pudding recipe needs a little troubleshooting occasionally. Because I want you to have zero failures—only glorious, plate-sized puffs—here are the main things to watch out for and how to fix them immediately.
Troubleshooting Common Yorkshire Pudding Issues
Don’t panic if your first batch isn’t magazine-perfect! Sometimes, even seasoned bakers have a little drama in the oven. The two big problems, collapsing or not rising at all, almost always point back to temperature. If your puddings look magnificent when you open the door but then sink sadly within seconds, you opened the oven door too early. Remember my firm rule: don’t peek for the first 15 minutes. That initial blast of heat creates steam, and if you interrupt it, the structure gives way instantly. That’s the culprit 90% of the time!
Now, what if they just came out looking stubbornly flat? That tells me your fat wasn’t hot enough. It needs to be shimmering, maybe even lightly smoking, before the cold batter hits it. When the batter hits that super-hot fat, it instantly vaporizes the liquid ingredients, creating the steam explosion that lifts the pudding high. If you look at cheap resources or hear advice about using luke-warm oil, ignore it! For the tallest result, that fat needs serious heat. For more pointers on avoiding those droopy results, you can always check out the tips over at The Skint Chef.
If you ever get stuck, just remember the mantra: Hot Oven + Smoking Hot Fat + Do Not Open Door. Stick to those three things, and you’ll keep getting those beautiful, puffy Yorkshire puddings that make every Sunday roast feel like a celebration. You can also find great, reliable guides on handling common issues on sites like Honey & Juniper!
Storage and Reheating Instructions for Yorkshire Pudding
So, what happens if you’ve made your batch of crispy, airy delights and you actually have some left over? That’s rare in my house, but I totally understand. These are an easy savory bake, but they are definitely best eaten fresh out of the oven. But fear not! They reheated surprisingly well if you follow my simple tip.
First, make sure they are completely cool. You want to avoid trapping any steam if you package them up hot, otherwise, that beautiful crispiness turns soggy immediately. Once cool, just pop them into an airtight container. They’ll stay perfectly fine in the fridge for about two days. Don’t try to freeze them, though; the texture really suffers when thawed!
When you’re ready to serve the leftovers—maybe you’re having another roast later in the week—the key is dry heat. Don’t even think about the microwave; that will instantly turn them into rubbery little hockey pucks. Instead, preheat your oven (or even your toaster oven if you only have a couple) to about 350°F (175°C). Spread the puddings out on a baking sheet—don’t let them touch if you can help it—and bake them for about 8 to 10 minutes. You want to hear them start to crisp up again. They won’t be quite as huge as they were fresh from the tin, but that crisp edge and soft middle will be back. It’s the perfect way to enjoy Yorkshire pudding leftovers!
Frequently Asked Questions About Yorkshire Pudding
I get so many questions about this recipe, which is fantastic because it means you all want perfect results! It shows how keen you are to master this piece of traditional British baking. Here are the things I hear most often from folks trying to figure out how to make Yorkshire puddings that soar.
Can I make Yorkshire pudding batter ahead of time?
This is one of my favorite secrets! Yes, you absolutely can. In fact, I highly encourage it if you’re making a huge roast dinner and need things streamlined. Resting the batter for longer than the required 30 minutes actually helps create an even **lighter and airier pudding**. If you can manage it, letting the batter chill in the fridge for up to 24 hours is heavenly. Just remember, whether you rest it for 30 minutes or overnight, it *must* be cold when it hits that smoking hot fat. If you had to let it sit out on the counter for longer than an hour, just give it a quick re-whisk before baking.
What is the difference between Yorkshire pudding and a popover?
Oh, that’s a great question that comes up all the time, especially since the mechanics of making them are so similar—they are basically cousins!
Structurally, they are nearly identical in terms of the batter ratio (flour, egg, milk). The biggest differences are cultural and flavor-based. Yorkshire pudding is strictly savory. It’s traditionally made with beef fat and served alongside savory meat like roast beef. In the US, the popover tends to be a little sweeter, often baked plain, and served with butter or jam, sometimes even eaten for breakfast!
If you’re serving this alongside your roast, you’re making a Yorkshire pudding, plain and simple. For more classic info, checking out this guide on Yum Dashy can shed some light on the historical context!
Estimated Nutrition for This Yorkshire Pudding Recipe
Just like the ingredients themselves are simple, the nutrition profile for these light, airy creations is pretty straightforward too! Since we’re dealing with a classic bake made from flour, milk, and eggs, you can expect a nice boost of protein from those eggs, but certainly nothing too heavy at all. Remember, these figures are always estimates based on using whole milk and vegetable oil for baking, as is standard.
If you were to use beef drippings instead of the oil, the fat and calorie count would shift slightly higher, but you gain that incredible savory punch, so it’s always worth it, in my opinion! This recipe is fantastic because, for what you get—a huge, fluffy cloud of deliciousness—the numbers stay low, making them perfect British side dishes for any gathering.
- Serving Size: 1 pudding
- Calories: 110
- Sugar: 1g
- Sodium: 150mg
- Fat: 6g
- Saturated Fat: 2g
- Carbohydrates: 10g
- Protein: 4g
See? Super simple and wonderfully light! That’s the beauty of using minimal ingredients and focusing everything on technique. You get great volume without heavy calorie counts, making them ideal for loading up with gravy during your next spectacular classic roast dinner recipe.
Share Your Perfect Yorkshire Pudding Results
Now that you have successfully navigated the high heat and the strict ‘no peeking’ rule, I want to see what you’ve made! Seeing your towering, golden-brown puffy Yorkshire puddings pop up on my social media feed genuinely makes my day. This is why I develop these recipes—to create happy bakers and even happier diners across the Midwest and beyond!

When you get a chance, please come back here and give the recipe a rating. Five stars mean you nailed that crispy edge and airy center, but if you only gave it three, tell me what happened! Was your fat hot enough? Did the batter rest long enough? Your feedback helps me keep this recipe as honest and reliable as possible for the next person who tries those tall popovers recipe steps!
Tag me when you serve them up alongside your roast! I adore seeing them soaking up homemade gravy or piled high on a platter during a huge family meal. Happy baking, everyone! I can’t wait to share in your success.
PrintFoolproof Yorkshire Puddings: Light, Puffy, and Crispy

Follow this simple guide to make classic Yorkshire puddings that rise tall, have crispy edges, and soft, gravy-holding centers. This recipe uses basic ingredients and reliable technique for perfect results every time.
- Prep Time: 10 min
- Cook Time: 25 min
- Total Time: 35 min
- Yield: 12 medium puddings 1x
- Category: Side Dish
- Method: Baking
- Cuisine: British
- Diet: Vegetarian
Ingredients
- 1 cup all-purpose flour
- 1 cup whole milk
- 2 large eggs
- 1/2 teaspoon salt
- Vegetable oil or beef drippings (for the tin)
Instructions
- Combine the flour and salt in a medium bowl.
- Whisk the eggs into the flour mixture until just combined.
- Gradually pour in the milk while whisking constantly until you have a smooth, thin batter. Do not overmix; a few small lumps are acceptable.
- Cover the batter and let it rest in the refrigerator for at least 30 minutes, or up to 24 hours for the best rise.
- Preheat your oven to 450°F (230°C). Place a 12-cup muffin tin or a specific Yorkshire pudding tin into the oven while it preheats.
- Add about 1 teaspoon of vegetable oil or beef drippings into each cup of the hot tin. The fat must be smoking hot.
- Carefully remove the hot tin from the oven. Quickly and evenly divide the batter among the cups, filling each about one-third full.
- Return the tin immediately to the hot oven. Do not open the oven door for the first 15 minutes of baking.
- Bake for 20 to 25 minutes, or until the puddings are well-risen, golden brown, and crispy.
- Serve immediately with your roast dinner and gravy.
Notes
- For the tallest rise, the oven temperature must be high, and the fat must be smoking hot before you add the batter.
- If you use beef drippings instead of oil, you will achieve a richer flavor.
- Resting the batter is key; this allows the gluten to relax, resulting in lighter puddings.
Nutrition
- Serving Size: 1 pudding
- Calories: 110
- Sugar: 1
- Sodium: 150
- Fat: 6
- Saturated Fat: 2
- Unsaturated Fat: 4
- Trans Fat: 0
- Carbohydrates: 10
- Fiber: 0
- Protein: 4
- Cholesterol: 55