
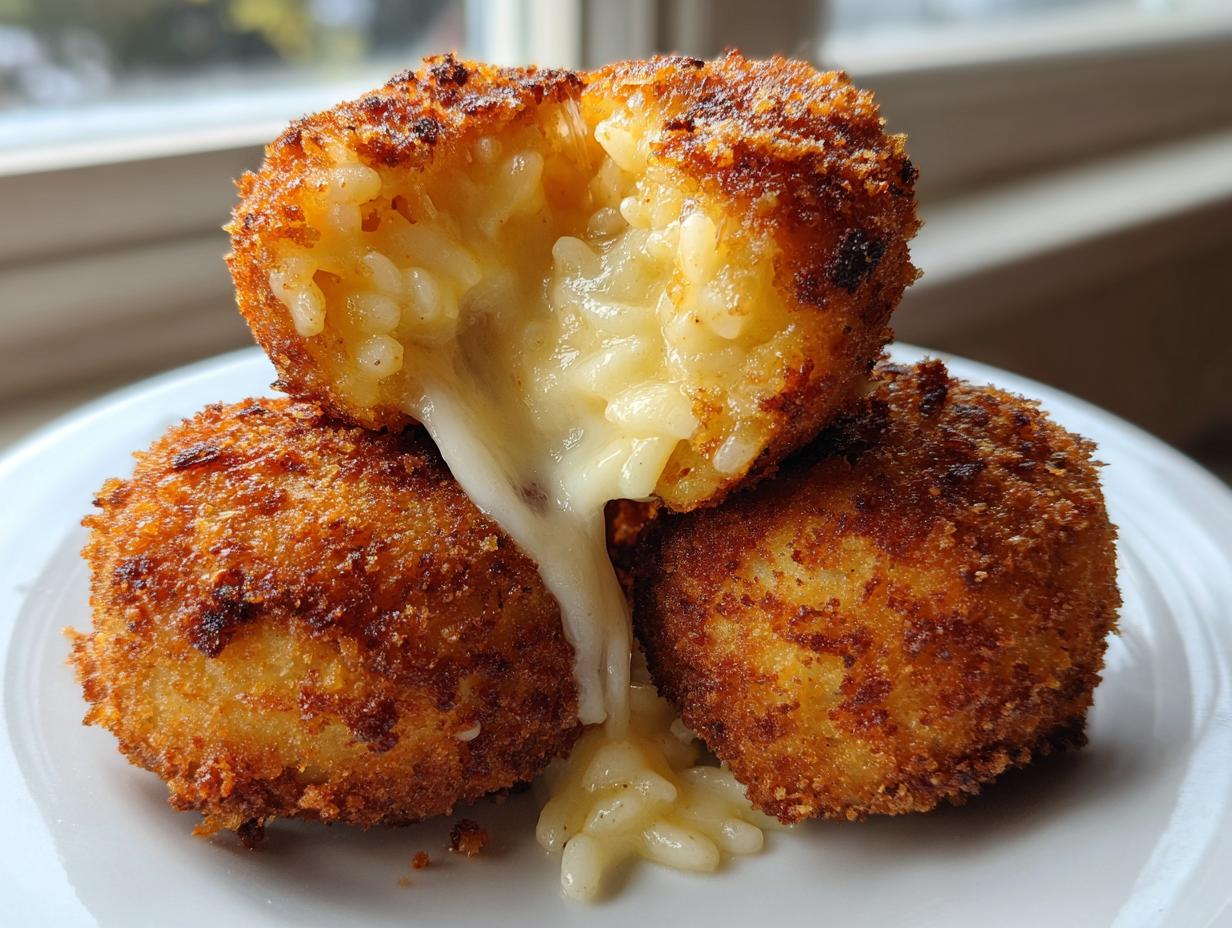
If you’re looking for the ultimate appetizer that screams comfort food but looks fancy enough for a party, stop right here! When I think about the food that genuinely brings people together—the kind of dish you sneak one more of before dinner starts—it’s these rice balls. We are diving deep into the classic Crispy Arancini. My biggest focus when developing this recipe was nailing that perfect contrast: a shatteringly crisp exterior wrapping around a warm, gooey, cheesy center. That’s the magic, right? Building food like this, from humble ingredients into something truly satisfying, reminds me so much of learning to cook in my family kitchen. This Italian staple is foolproof once you nail the texture.
- Why You Will Make These Italian Rice Balls Recipe Again
- Gathering Ingredients for Perfect Homemade Arancini
- Step-by-Step Instructions for Classic Arancini Rice Balls
- Tips for Success When Making Arancini Rice Balls
- Serving Suggestions for These Party Appetizers Rice Based
- Storage and Reheating Instructions for Leftover Rice Balls
- Frequently Asked Questions About Arancini Rice Balls
- Estimated Nutritional Data for Cheesy Rice Balls Appetizer
- Share Your Homemade Rice Balls Creations
Why You Will Make These Italian Rice Balls Recipe Again
Honestly, you’ll be making these over and over because they hit every single mark. I’ve perfected the formula so you get unbelievable crispness without any sogginess creeping in. Here are the real reasons these Cheesy Rice Balls Appetizer favorites will earn a permanent spot on your menu:
- That textural contrast: super crispy coating meets creamy, hot risotto.
- They are pure Comfort Food Rice Spheres—warm, savory, and satisfying.
- They freeze beautifully, making future party prep a breeze.
- The rich Parmesan and mozzarella filling is totally addictive.
Gathering Ingredients for Perfect Homemade Arancini
Okay, you know the secret to amazing rice balls isn’t just the frying—it’s what you put into the risotto itself! Quality matters here because the rice is the star. When you’re gathering your supplies, focus on things like getting good Arborio rice; that starch is exactly what we need for binding. I also stress using low-moisture mozzarella—trust me, the watery kind turns into soup when it melts! We want that perfect, stretchy pull. Before you jump into the steps, just make sure you have everything prepped and ready, especially for that triple dredge. This list keeps things straightforward, so let’s look at exactly what you need for this incredible savory fried snack.
Component Ingredient List for Crispy Fried Rice Balls
- 2 cups Arborio rice
- 6 cups chicken or vegetable broth, warm
- 1/2 cup dry white wine
- 1 small yellow onion, finely chopped
- 2 tablespoons olive oil
- 2 tablespoons unsalted butter
- 1/2 cup grated Parmesan cheese
- 1 large egg yolk
- Salt and black pepper to taste
- 1 cup shredded low-moisture mozzarella cheese
- 1/2 cup finely chopped cooked meat (optional, e.g., ground beef or ham)
- 1 cup all-purpose flour
- 2 large eggs, beaten
- 2 cups plain breadcrumbs (Panko recommended for extra crispiness)
- Vegetable oil, for frying
Step-by-Step Instructions for Classic Arancini Rice Balls
Alright, this is where the dedication pays off! Making your own homemade arancini takes a little time because we simply cannot rush a good risotto, but I promise you, the results are worth the patience. The most important thing I need you to remember is that the risotto has to be completely cold before you even touch it to shape your amazing rice balls. If it’s warm, everything will just squish out. We break this down into three manageable parts: building flavor, chilling and shaping, and then getting that perfect crunch! For more staple rice ideas that are fantastic on their own, check out my recipe for garlic butter rice.
Making the Flavorful Risotto Base for Rice Balls
We start just like any classic Italian preparation. Heat your oil and butter up, then throw in that chopped onion until it smells sweet, about five minutes. Now, this is key: add all the Arborio rice in one go and stir it for about two minutes. We are toasting it slightly! Then, add your white wine and let it just vanish into the rice. From there, add that broth one big ladleful at a time, stirring constantly. Keep going until the rice is creamy and cooked perfectly al dente—that means it still has a tiny bite left in the center. Don’t let it turn to mush!
Chilling and Shaping the Gooey Cheese Center Recipe
Once the risotto is off the heat, stir in your Parmesan cheese, the yolk, salt, and pepper. Spread that luscious mix onto a baking sheet. Seriously, spread it thin so it cools down fast. It needs to be refrigerator-cold—we are talking at least two hours, maybe even overnight. Once it’s firm, you can start assembling your Gooey Cheese Center Recipe masterpieces. Scoop out about two tablespoons of the cold rice, squash it flat in your palm, drop in a chunk of mozzarella, and carefully wrap the rice around it. Make sure you seal it snugly so that cheese stays hidden until frying time!

Achieving the Crispy Fried Rice Balls Exterior
Now for the crunch that everyone talks about! Set up your dredging station: flour first, then your beaten eggs, and finally, those gorgeous, crisp Panko breadcrumbs. You need to coat every single little rice ball thoroughly in all three layers. Don’t be shy with the breadcrumbs; press them on! Heat your vegetable oil in a heavy pot until it hits a steady 350°F (175°C). We carefully lower in only three or four balls at a time; overcrowding drops the oil temperature too fast. Fry for about three to four minutes until they are gorgeously, deeply golden brown. Scoop them out right onto paper towels and hit them with a whisper of salt while they’re hot. If you’re looking for other wonderful crispy textures, you have to check out my thoughts on coconut shrimp!
Tips for Success When Making Arancini Rice Balls
You know, mastering these Italian rice balls comes down to a few little secrets that take them from good to absolutely unforgettable. I’ve seen folks get discouraged, but usually, it’s just a small step they missed in the process. Since we are looking for delicious results that fit busy lives, I always share my best make-ahead and alternative cooking methods. For more recipes where a crisp exterior is key, you absolutely must look at my guide for perfect potato latkes. Also, while frying gives that authentic texture you dream about, I want you to know you have options!
Baked Arancini Alternative for Lighter Rice Balls
If you’re looking to cut down on oil, or maybe you just don’t want to deal with deep-frying for your batch of rice balls, the oven is your best friend. I tested this method extensively in the test kitchen, and it works great! You don’t get quite the same deep, all-over crunch you get from frying, but these baked arancini are still wonderfully golden and satisfyingly crispy on top. Remember to give everything a nice little spray or brush of oil before it goes in, otherwise, the breadcrumbs will turn powdery instead of golden. We want color! You’ll want to preheat your oven to a nice, hot 400°F (200°C). Place your breaded balls on a sheet pan lightly brushed with oil—or check out this great recipe hub for more ideas on ultimate cheesy Italian rice balls. Bake for about 15 to 20 minutes total, flipping them carefully halfway through so they brown evenly on all sides. They taste fantastic this way, just a little lighter!
Another thing I always do, especially if I’m hosting a big game night, is make a double batch just for freezing. Once you’ve breaded and finished shaping all your Arancini, lay them out in a single layer on a tray and pop them straight into the freezer. Once they are solid—about an hour or two later—you can transfer them into a sealed container or heavy zip-top bag. You can then fry them straight from frozen! Just remember to add an extra couple of minutes to the frying time to make sure that center mozzarella gets nice and gooey.
Serving Suggestions for These Party Appetizers Rice Based
Now that you have these gorgeous, crispy, savory rice balls, you have to have the perfect partner for dipping! These are the definition of a crowd-pleasing finger food, and they really shine when served hot alongside something bright and acidic to cut through that fried richness. Forget serving them plain; we need a dipping sauce!
The absolute, non-negotiable pairing for Arancini is a high-quality marinara sauce. It should be warm—not simmering, just nicely warm—so that when you dunk that crispy exterior in, the sauce clings perfectly. I like mine slightly chunky, with good herbs. If you’re planning a big Italian spread and need another showstopper main dish, check out my recipe for amazing tender Nonna-style meatballs; they go hand-in-hand with these rice balls!
If you want to dial up the appetizer presentation for your next party, try serving the rice balls right on a platter streaked with pesto underneath, or offer a side of cool, fresh garlic aioli. The contrast of hot and cold is just divine. Whatever you choose, make sure you have plenty, because these cheesy bites disappear fast!
Storage and Reheating Instructions for Leftover Rice Balls
Now, let’s talk about the unfortunate—but real—moment when you actually have leftover rice balls. Because they are fried, we want to be really respectful of that glorious, crispy shell we worked so hard to achieve! If you followed my freezing tip earlier, great! But if you’re dealing with leftovers sitting in the fridge, here’s my advice.
You can keep fully cooked and cooled Arancini in an airtight container in the refrigerator for about three days max. After that, the texture starts to suffer, even when refrigerated. Don’t even think about bringing soggy, microwaved risotto balls to the table—that’s a culinary crime in my book!
The microwave might be fast, but it turns the crispy coating into something rubbery, and the inside gets tough. We want that golden crust back!
The Best Way to Reheat Your Crispy Rice Balls
For the crispiest results when reheating, you have two champions: your conventional oven or, even better, your air fryer. If you’re doing the oven route, spread the cooled rice balls on a baking sheet and pop them into a preheated 375°F oven for about 8 to 10 minutes. Keep an eye on them; you’re just looking to heat them all the way through and crisp up that crust again.

Honestly, though, the air fryer is my go-to for leftovers—it’s so efficient! Toss them in a single layer, and heat at about 350°F for just 4 to 6 minutes. They come out tasting almost as fresh as they did straight out of the fryer! Because I love talking about air frying fantastic leftovers, you might also want to see how I get my air fryer baked potato skin crispy again!
If you are using frozen, un-fried balls, remember they take longer, usually around 12–15 minutes in the air fryer or 20 minutes in the oven at 400°F, as detailed in the baking section earlier.
Frequently Asked Questions About Arancini Rice Balls
I get so many wonderful questions about this Italian Rice Balls Recipe, and honestly, that’s the hallmark of a genuinely satisfying comfort food—people want to master it! Many of the questions I receive are about substitutions or how to handle the texture, which is totally fair because getting that perfect inside/outside contrast isn’t always easy on the first try. If you’ve been working through this Easy Arancini Tutorial, these quick answers should clear up any last hurdles for you!
Can I use leftover risotto to make these rice balls?
Yes! Using leftover risotto is actually my preferred way to make these! When risotto sits in the fridge overnight, it firms up perfectly, which means it holds its shape so much better when you’re stuffing and rolling. The only major rule here is that it has to be completely chilled and stiff—not just cool, but totally firm. If it’s too soft, the mozzarella will push its way right out while you’re forming the balls, and we definitely don’t want those delicious contents escaping early!
What is the best rice for making authentic rice balls?
For true Italian Arancini that gets that creamy base, you must use Arborio rice. You might see people asking about basmati or short-grain rice for other types of rice balls, but for this recipe, Arborio is necessary. It’s a high-starch medium-grain rice. That starch is what releases during the slow simmering process, creating that thick, almost gluey texture we need, which allows the entire mixture to bind beautifully around the cheese filling. That creamy texture is essential before we even think about the exterior crust!
Can I make Japanese Rice Balls (Onigiri) using this method?
That’s a fun question showing you’re exploring all the wonderful world of global rice balls! While both are delicious spheres of rice, they are quite different. Arancini is fundamentally made from cooked and cooled risotto (which is cooked slow with broth and wine), and we fry them for that signature crunch. Japanese Onigiri typically use steamed short-grain rice, they are shaped cold, and they often have fillings but are usually not deep-fried, often seasoned with salt or wrapped in nori. You can certainly try to adapt the shaping technique for a savory snack, but the base rice texture is totally different. If you want to explore that grilled Japanese approach, check out the information on making Yaki Onigiri Grilled Rice—but for this recipe, stick to the Italian method!
For even more tips on working with rice, I have a great guide on easy chicken fried rice that might give you more insight into starch management! Also, I often refer to professional guides for tricky steps, like checking out the specifics over at Bite My Bun’s guide if you ever need clarification on filling ratios!
Estimated Nutritional Data for Cheesy Rice Balls Appetizer
I always include this section because I know so many of you, like me, balance enjoying incredible comfort food with trying to keep things in check. Remember, these Certified Delicious rice balls come from a recipe that involves frying, so the numbers reflect that richness! This data is based strictly on the recipe yield using the standard ingredients listed, but please remember that every single ingredient you swap out—especially if you choose meat fillings or switch from Arborio to a different rice—will change these figures.
Think of this as a guideline, not a strict daily value mandate! If you are looking for lighter options overall, don’t forget to check out my tips for healthy lunch ideas that require less hands-on time but still deliver incredible flavor.
- Serving Size: 2 balls
- Calories: 350
- Fat: 18g
- Saturated Fat: 7g
- Carbohydrates: 35g
- Protein: 12g
- Sodium: 450mg
Since these are a quintessential cheesy rice balls appetizer, that fat and sodium content usually comes from the Parmesan and the delicious mozzarella core! This estimate assumes optional meat filling is included, and it’s important to treat these numbers as averages. Cooking by Jade is all about deliciousness first, but I always want to be transparent about what’s in the food we make together!
Share Your Homemade Rice Balls Creations
Whew! We made it through the entire process to get these perfect, crispy-on-the-outside, gooey-on-the-inside rice balls!
Now that you’ve mastered the Homemade Arancini, I really, truly want to know how they turned out! Did the mozzarella stretch perfectly? Did your family devour them before you could even finish frying the last batch? I love seeing your kitchen successes! It gets me so excited knowing that my reliable recipe made it onto your table.
Please, head down to the comments and leave a rating for this Italian Rice Balls Recipe—it helps other cooks feel confident trying them out. If you snap a picture of your lovely golden spheres, tag me on social media! I love following along with your cooking adventures. Honestly, sharing these moments—seeing you create something wonderful and satisfying that brings everyone to the table—is why I developed these recipes in the first place. I’m here to guide you, so if you have any lingering questions that weren’t covered in the FAQ, don’t hesitate to reach out via my contact page. Happy cooking, friend!
PrintClassic Crispy Arancini Rice Balls with Mozzarella

Make authentic Italian Arancini rice balls that are crispy on the outside and filled with gooey mozzarella. This recipe guides you through creating perfect, flavorful risotto balls suitable for appetizers or snacks.
- Prep Time: 45 min
- Cook Time: 30 min
- Total Time: 105 min
- Yield: 18 servings 1x
- Category: Appetizer
- Method: Frying
- Cuisine: Italian
- Diet: Vegetarian
Ingredients
- 2 cups Arborio rice
- 6 cups chicken or vegetable broth, warm
- 1/2 cup dry white wine
- 1 small yellow onion, finely chopped
- 2 tablespoons olive oil
- 2 tablespoons unsalted butter
- 1/2 cup grated Parmesan cheese
- 1 large egg yolk
- Salt and black pepper to taste
- 1 cup shredded low-moisture mozzarella cheese
- 1/2 cup finely chopped cooked meat (optional, e.g., ground beef or ham)
- 1 cup all-purpose flour
- 2 large eggs, beaten
- 2 cups plain breadcrumbs (Panko recommended for extra crispiness)
- Vegetable oil, for frying
Instructions
- Make the Risotto: Heat olive oil and butter in a large pot over medium heat. Add onion and cook until soft, about 5 minutes. Add Arborio rice and toast for 2 minutes, stirring constantly. Pour in white wine and cook until absorbed.
- Begin adding warm broth, one ladleful at a time, stirring frequently and waiting until the liquid is almost absorbed before adding the next. Continue until the rice is creamy and cooked al dente (about 20-25 minutes).
- Remove risotto from heat. Stir in Parmesan cheese, egg yolk, salt, and pepper. Spread the risotto onto a baking sheet and let it cool completely in the refrigerator, at least 2 hours or until firm.
- Prepare the Filling: Once the risotto is cold, mix in the optional cooked meat. Place the shredded mozzarella in a small bowl.
- Form the Rice Balls: Scoop about 2 tablespoons of cold risotto into your palm. Flatten it slightly. Place a small piece of mozzarella (and any other filling) in the center. Gently shape the risotto around the filling to form a tight ball, about 1.5 inches in diameter.
- Set up the Breading Station: Place flour, beaten eggs, and breadcrumbs in three separate shallow dishes.
- Dredge each rice ball first in flour, shaking off excess. Dip into the beaten egg, allowing excess to drip off. Finally, roll thoroughly in the breadcrumbs, pressing gently to make sure the coating adheres well.
- Fry the Arancini: Heat about 3 inches of vegetable oil in a deep, heavy-bottomed pot to 350°F (175°C).
- Carefully lower 3-4 rice balls into the hot oil, ensuring you do not overcrowd the pot. Fry for 3-4 minutes, turning occasionally, until they are deep golden brown and crispy.
- Remove the arancini with a slotted spoon and place them on a wire rack lined with paper towels to drain excess oil. Season lightly with salt immediately.
- Serve the crispy rice balls hot.
Notes
- For a baked alternative to frying, place the breaded rice balls on a lightly oiled baking sheet. Spray the tops lightly with cooking spray or brush with oil. Bake at 400°F (200°C) for 15-20 minutes, flipping halfway, until golden brown.
- If you are making these ahead of time, you can freeze the formed, breaded rice balls on a tray before frying. Transfer frozen balls directly to the hot oil, adding 1-2 minutes to the frying time.
- Serve these cheesy rice balls with warm marinara sauce for dipping.
Nutrition
- Serving Size: 2 balls
- Calories: 350
- Sugar: 2
- Sodium: 450
- Fat: 18
- Saturated Fat: 7
- Unsaturated Fat: 11
- Trans Fat: 0
- Carbohydrates: 35
- Fiber: 1
- Protein: 12
- Cholesterol: 65