
If you’re like me, standing in the snack aisle staring at those overly processed, dry crackers masquerading as bars just exhausts you. I used to feel like I had to choose between convenience and quality, but that’s just not true! I’m Jade, and I’m here to show you that making your own homemade granola bars is not only simple—it’s incredibly rewarding. My goal has always been sharing food that tastes amazing without adding stress, and these are the gold standard for that philosophy. We are focusing on a recipe that delivers irresistibly chewy texture and relies purely on natural sweeteners. Once you try these, you’ll realize how much better your own kitchen creations can be. If you are looking for more ways to streamline your mornings, you should definitely check out my guide to quick and easy breakfasts!
- Why These Are the Best Homemade Granola Bars Recipe
- Gathering Your Ingredients for Homemade Granola Bars
- Step-by-Step Instructions for Easy Homemade Granola Bars
- Tips for Perfect Homemade Granola Bars Every Time
- Make Ahead Breakfast Bars and Storage for Homemade Granola Bars
- Serving Suggestions for These Wholesome Granola Bars
- Frequently Asked Questions About Homemade Granola Bars
- Estimated Nutritional Data for Homemade Granola Bars
- Share Your Homemade Granola Bars Creations
Why These Are the Best Homemade Granola Bars Recipe
I put my nutrition background and test kitchen experience into creating this recipe, so trust me when I say these are foolproof. Forget those rock-hard bars you find in the store; these are designed to please the whole family. They’re genuinely the best homemade granola bars recipe you’ll use all year!
- They are incredibly reliable—no surprising crumbly failures here!
- They utilize wholesome ingredients, making them truly healthy homemade snacks.
- It’s a super quick granola bar recipe; you’re done mixing in minutes.
Perfect Texture: Chewy Granola Bars No Bake Results
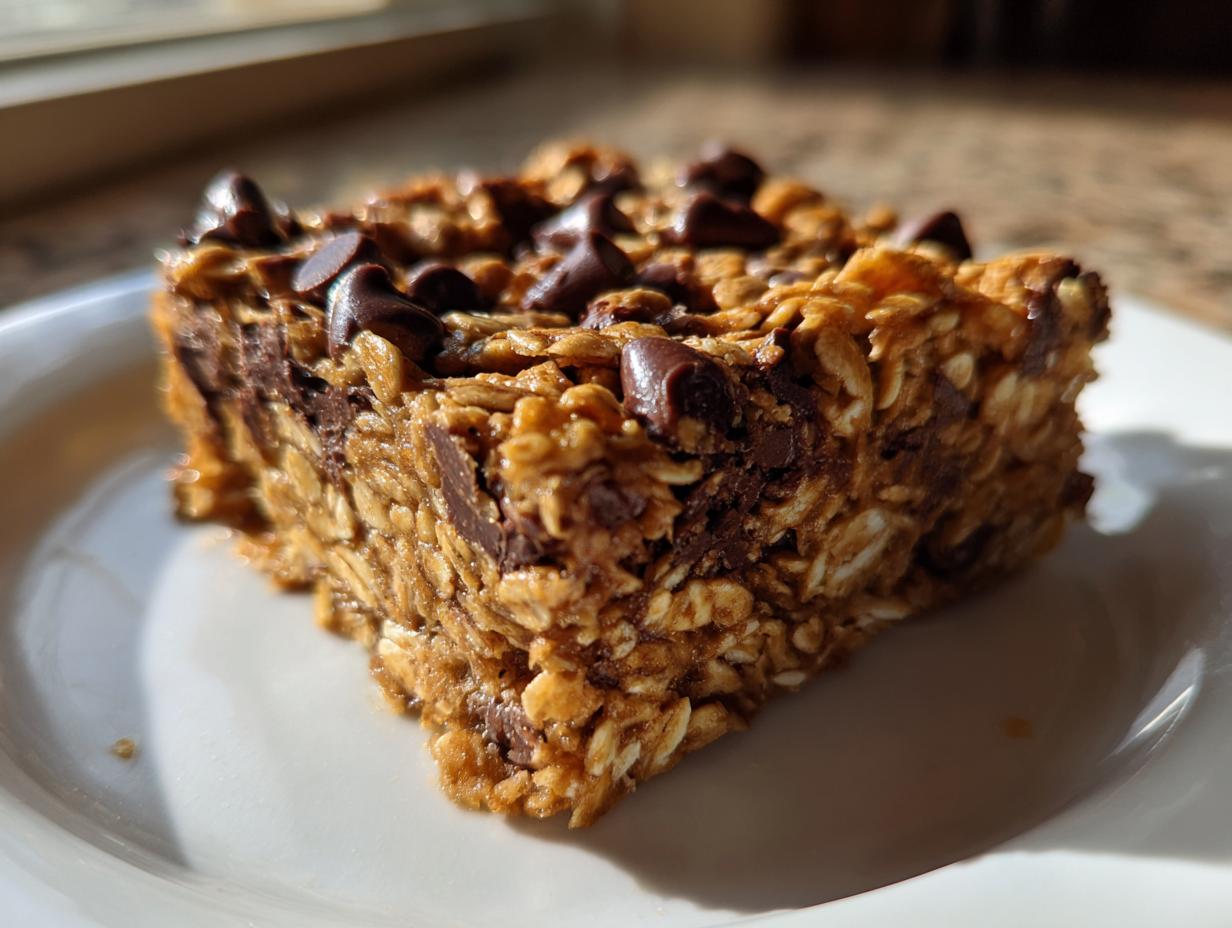
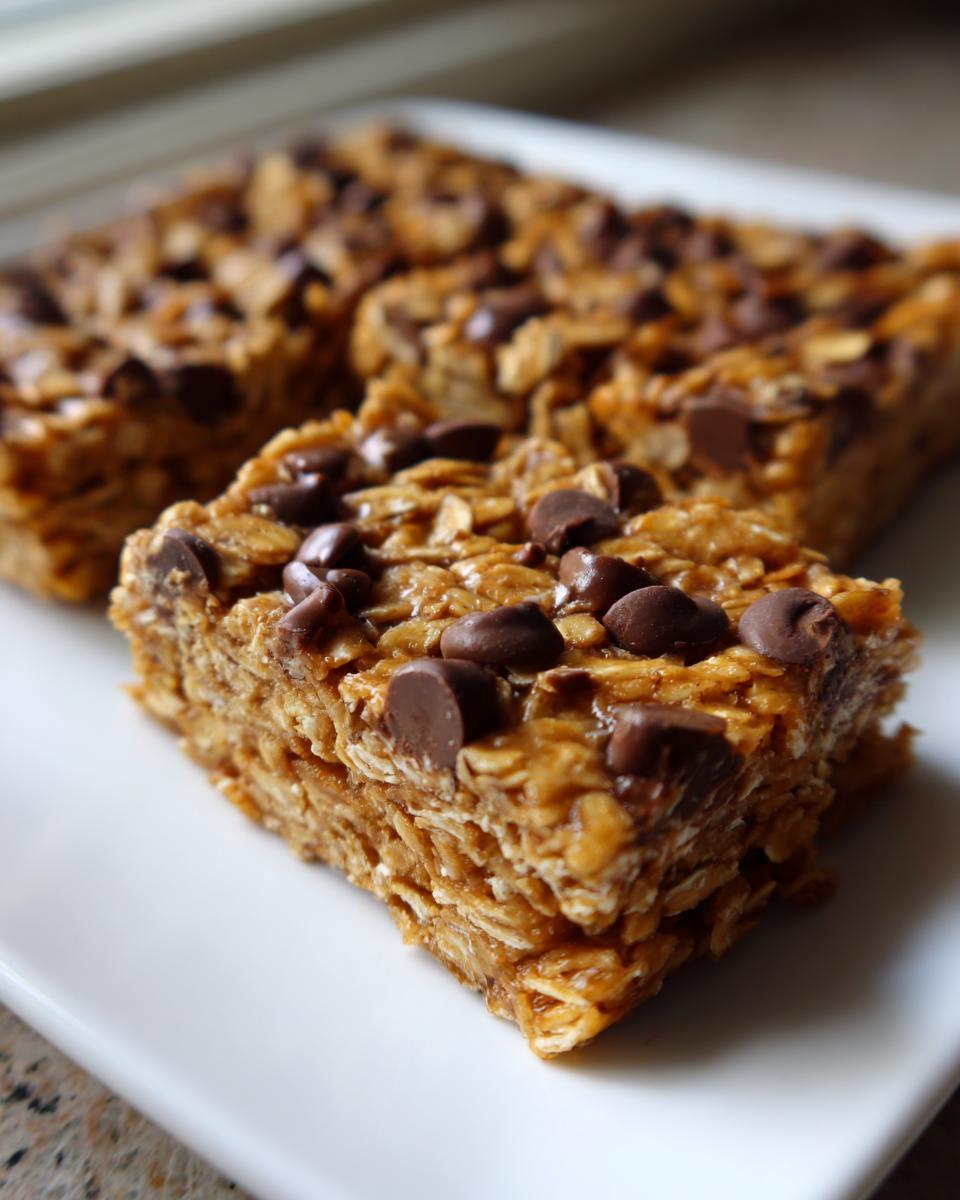
The goal here is chewiness, plain and simple. That dry, crumbly texture? We don’t want that! By using just the right amount of binder and relying on an easy no-bake chill time (though you can briefly bake them if you prefer), we lock in moisture. This method ensures that perfect, satisfying pull when you bite into your bar, making them truly chewy granola bars no bake style success stories.
Simple Ingredients for Natural Sweetener Granola Bars
We aren’t dealing with tricky refined sugars here. I relied on pure maple syrup or honey combined with applesauce or banana to deliver sweetness naturally. This keeps them firmly in the category of natural sweetener granola bars. It’s clean fuel that tastes amazing, giving you confidence in what you’re feeding your family.
Gathering Your Ingredients for Homemade Granola Bars
Okay, gathering your supplies is where the fun really starts, and getting this part right ensures our homemade granola bars stay chewy and perfect. I’ve made sure this recipe doesn’t require a million obscure things—just quality staples you can easily grab. Having everything measured out before you start only takes about 15 minutes of prep time, making this a fantastic option for busy days. For more simple, wholesome meal prep ideas, check out my thoughts on healthy lunch ideas!
The Dry Base for Your Oats Snack Bars Recipe
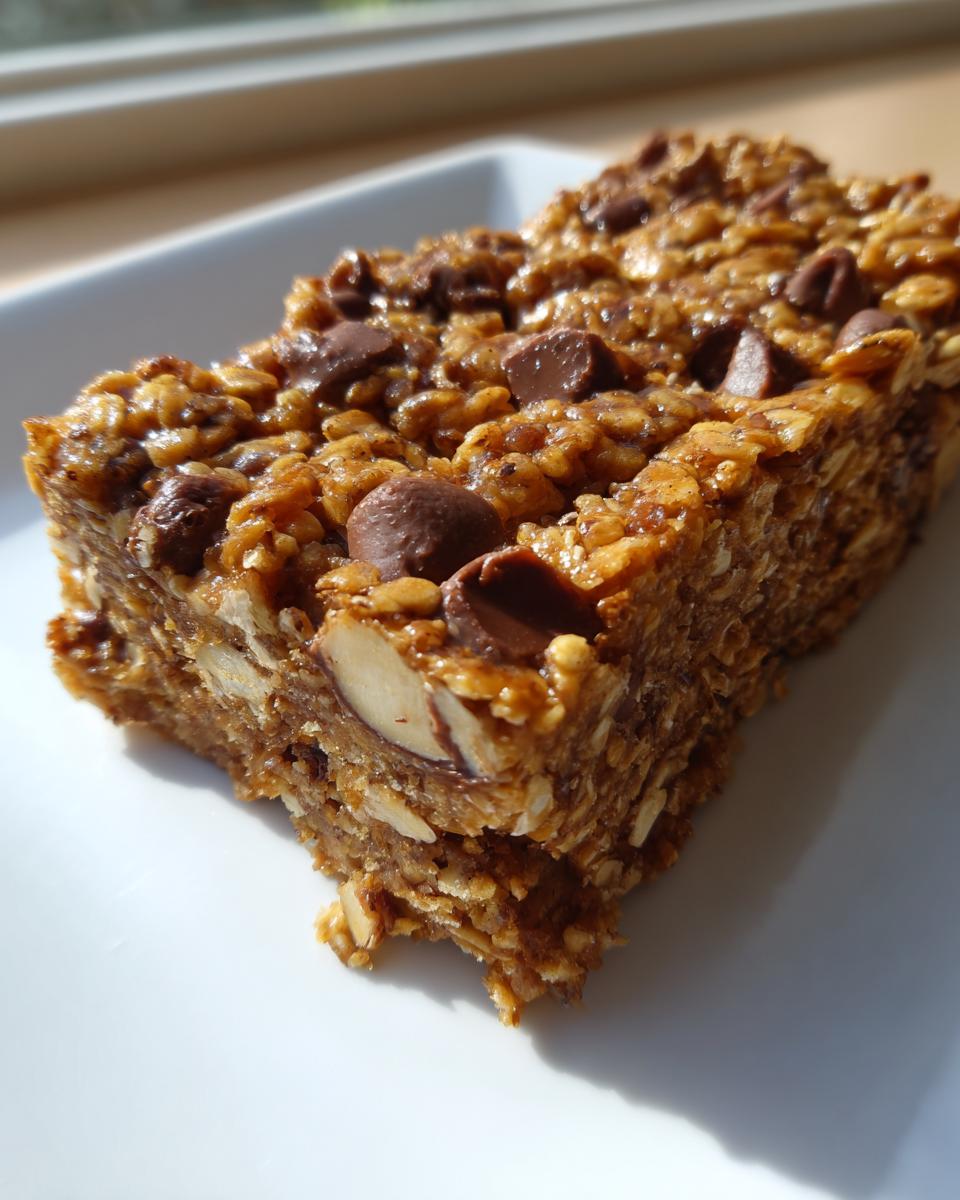
We need the structure first. Use two cups of rolled oats—and I mean rolled oats, not instant! They give the very best texture for our oats snack bars recipe. Then, toss in one cup of your favorite nuts or seeds in there. Walnuts, almonds, pumpkin seeds—whatever you have on hand works great for anchoring the chewiness of these homemade granola bars.
Binding Agents and Flavor for Nut Butter Granola Bars
This is the secret sauce! You’ll need a half cup of your go-to nut butter—peanut or almond work wonders. Then comes the sweetness: we’re using a third cup of pure maple syrup or honey for our natural sweetener granola bars. Don’t skip the vanilla, cinnamon, salt, and that wonderfully moist element, which will be either applesauce or mashed banana.
Customizable Mix-Ins for Kid Friendly Granola Bars
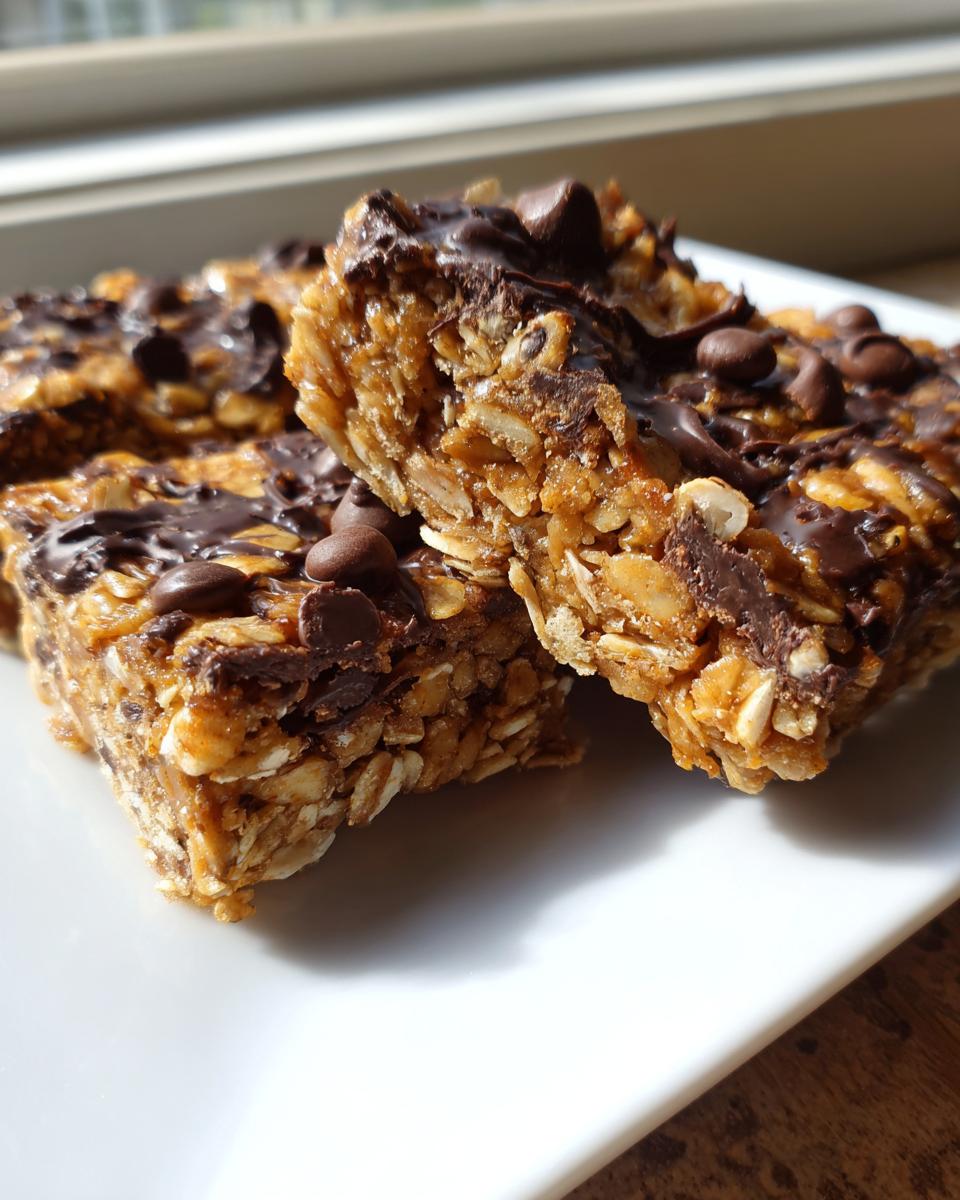
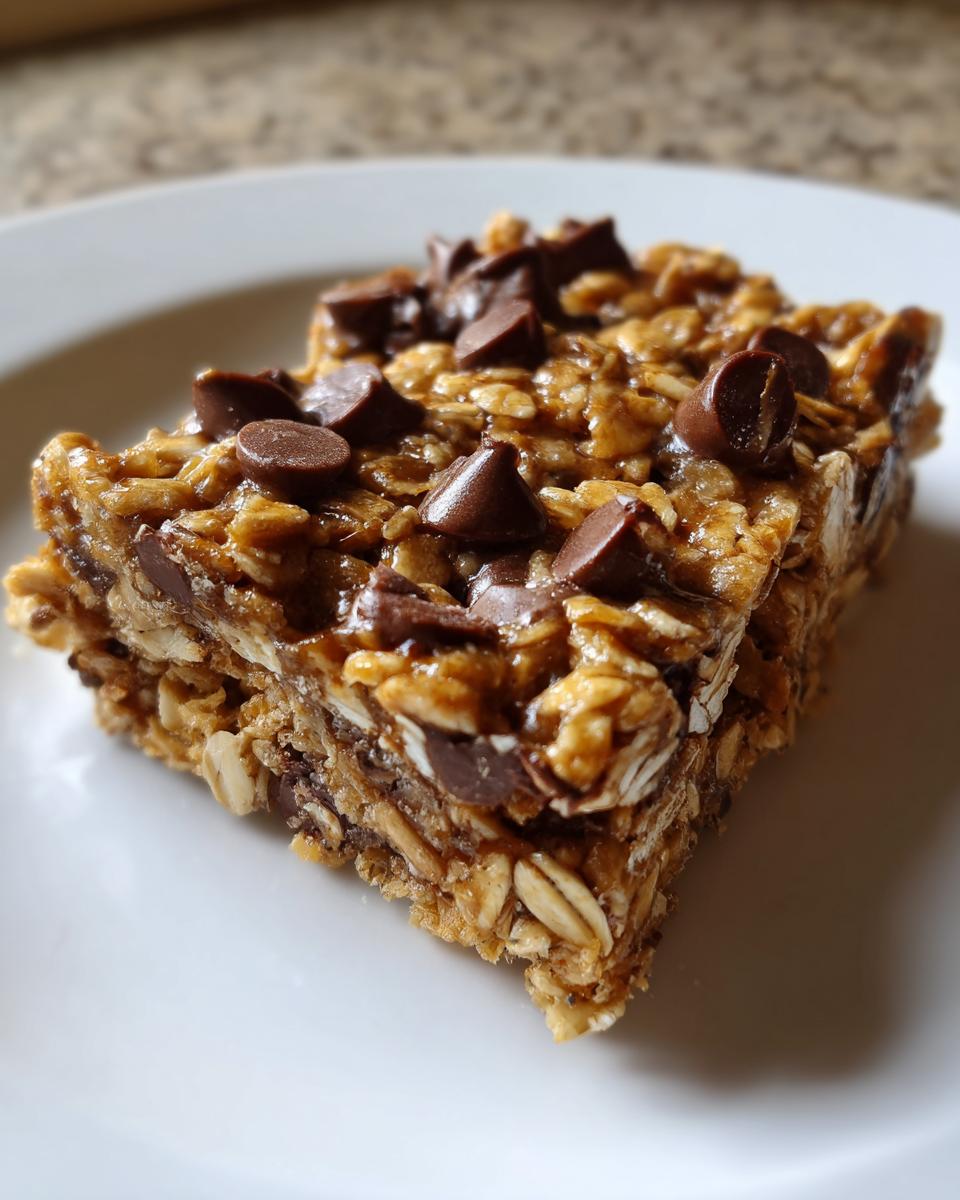
This is where you let your inner chef, or your kids’ preferences, take over! We are adding a half cup of mix-ins. If you want those decadent treats, go for mini chocolate chips—everyone loves the idea of chocolate chip granola bars homemade! Or, lean into healthier vibes with dried cranberries or shredded coconut. These adjustments make them perfect kid friendly granola bars.
Step-by-Step Instructions for Easy Homemade Granola Bars
You asked for simple, and I’m delivering! With only about 15 minutes of prep time before these bars head off to chill, you can have these easy homemade granola bars ready by dinnertime. Remember, clear steps mean reliable results, which is exactly what we want when we’re making make ahead breakfast bars.
Preparing the Pan and Combining Dry Ingredients
First, take an 8×8 inch pan and line it with parchment paper. Make sure you leave an overhang on the sides—this is your handle for removal later, trust me! Then, grab your big bowl and mix the two cups of rolled oats together with the one cup of nuts or seeds. Just a simple toss to get them acquainted.
Creating the Perfect Wet Binder for Homemade Granola Bars
Next, we make the glue! Put your nut butter and your maple syrup or honey into a small saucepan over low heat. Warm it just enough so it becomes super smooth and easy to pour. Pay close attention: you want it warm and runny, but please, whatever you do, do not boil it! Once it’s smooth, take it off the heat and stir in your applesauce (or banana), vanilla, salt, and cinnamon until everything looks happy together.
Mixing, Pressing, and Setting Your Chewy Granola Bars No Bake Style
Now, pour that glorious wet mixture right over your dry ingredients and stir everything until it’s evenly coated. Fold in whatever you decided on for mix-ins, like those little chocolate chips. Transfer this sticky goodness into your prepared pan. Here’s the real trick for those fantastic chewy granola bars no bake results: press that mixture down as hard as you possibly can! Use a spatula or another piece of parchment paper to compact it down. That firm press is what keeps them together. After that heavy pressing, pop the pan into the fridge for at least two hours to set. If you decided to bake them instead, pop them in roughly 350°F (175°C) for about 15-20 minutes, then cool completely.
If you want tips on keeping your weekday cooking simple, I’ve got loads of ideas for easy weeknight dinners that streamline the whole process!
Tips for Perfect Homemade Granola Bars Every Time
Now that you know the basics for making stellar homemade granola bars, let’s talk about kicking them up a notch. The beauty of making things yourself is taking the core recipe and making it completely yours. I developed my recipes to be flexible because I know everyone has different needs or preferences, whether it’s allergies or just wanting a little extra chocolate!
Making Customizable Granola Bars Recipe Variations
If you’re tired of peanut butter, don’t worry—this is where the customizable granola bars recipe truly shines. Swap out the peanut butter for sunflower seed butter if you need to keep things nut-free for school, or try cashew butter for a richer flavor. For added nutrition in your wholesome granola bars, I frequently stir in a tablespoon or two of flaxseed meal with the dry ingredients. It disappears right into the texture!
Achieving the Chewy Texture in Homemade Granola Bars
I can’t stress this enough: the chewiness comes down to two main things. First, make sure your binder (that warm syrup and nut butter mix) coats every oat. You want it evenly distributed, using just enough to make it all stick together, but not so much that it turns mushy. Second, when you press it into the pan, press like you mean it! Seriously compact that mixture. That pressure, especially when you choose the no-bake path, locks in the moisture you worked hard to add.
If you’re looking for other sweets to round out your baking efforts, hop over to my collection of dessert recipes!
Make Ahead Breakfast Bars and Storage for Homemade Granola Bars
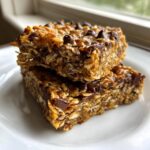
One of the best parts about whipping up a batch of these is that they truly earn the title of make ahead breakfast bars. You can totally batch-prep these on a Sunday afternoon! They hold up beautifully, which makes grabbing something healthy in the morning or packing lunchbox snacks a total breeze during the week. Store them in an airtight container in the refrigerator, and they should stay perfectly chewy for about one week.
If you need them to last longer, don’t stress! These freeze like a dream. Just cut them first, wrap them individually in plastic wrap or parchment paper squares, and tuck them into a freezer-safe bag. They last for months in the freezer, ready whenever you need a quick, wholesome snack. For other recipes that save time on busy days, you might like my ideas for great side dishes that can be prepped ahead too.
Serving Suggestions for These Wholesome Granola Bars
While these wholesome granola bars are absolutely perfect grabbed straight from the fridge for a quick fix, sometimes you want to turn that snack into a real moment! I love having these on hand to turn a simple breakfast into something more substantial. Try breaking one up over a bowl of Greek yogurt—it adds that perfect crunch and texture contrast. Or, serve half a bar alongside some fresh seasonal berries for a balanced, energetic start to the day. They are fantastic fuel for an afternoon slump instead of reaching for something sugary. Honestly, when you make them yourself, you feel good about eating every single bite!
If you need something savory to balance out your menu, check out my recipe for easy creamy garlic aioli!
Frequently Asked Questions About Homemade Granola Bars
It’s only natural to have questions once you start tinkering with a recipe, especially when you want reliable results every single time! I’ve collected the most common things folks ask me about making these bars perfect for their families. Ask away, I’m happy to help you nail this!
Can I make these homemade granola bars completely vegan?
Absolutely! This is one of the great things about using natural sweetener granola bars as a base recipe. The main swap you need to make is using maple syrup instead of honey. Also, just double-check your nut butter to make sure it doesn’t contain any weird additives, and swap out any standard chocolate chips for vegan-friendly ones if you’re adding those!
How do I ensure my homemade granola bars are chewy and not hard?
This is my favorite question! Remember that firm pressing step? That’s half the battle; pack that mixture down in the pan like you mean it! The other half is the binder ratio. If you feel like your bars might be getting too dry later, add just one extra teaspoon of applesauce next time. Keeping the ratio of wet binder to dry oats slightly higher guarantees those dreamy, chewy results. For more inspiration on variations, check out this popular recipe for favorite homemade granola bars!
Are these quick granola bar recipe options suitable for school lunchboxes?
Yes, these are fantastic for lunchbox snacks! They hold together really well after chilling, which makes them easy to pack. If you are dealing with school allergies, just make sure you use a sunflower seed butter alternative instead of peanut butter, and you’ve got a certified winner of kid friendly granola bars that everyone will sneakily enjoy.
For more background on my approach to making reliable food for busy lives, feel free to check out my About Me page!
Estimated Nutritional Data for Homemade Granola Bars
Since we are using natural sweeteners and wholesome ingredients, I always like to give a general idea of what you’re getting with these homemade granola bars. Keep in mind this data is just an estimate based on the base recipe and assumes a 12-bar yield using typical ingredients like peanut butter and maple syrup. They really are designed to be better fuel than anything you find in a wrapper!
- Serving Size: 1 bar
- Calories: ~220
- Fat: ~11g
- Carbohydrates: ~28g
- Protein: ~7g
- Sugar: ~10g
This breakdown shows you exactly why these make such great, satisfying fuel for little ones or a quick boost for adults. It’s all about balance!
Share Your Homemade Granola Bars Creations
I just can’t wait to see what beautiful, customized homemade granola bars you all end up making! Did you go for chocolate chips or dried cherries? Please come back and leave a rating and a comment so I know how it went. If you snap a photo, tag me! I love connecting with you all. For more inspiration, you can always reach out via my contact page, or see what others are loving over at Chelsea’s spot for more ideas!
PrintChewy, Naturally Sweetened Homemade Granola Bars
Make easy, chewy homemade granola bars using natural sweeteners. This recipe is perfect for a healthy snack or make ahead breakfast bars that kids love.
- Prep Time: 15 min
- Cook Time: 0 min
- Total Time: 2 hours 15 min
- Yield: 12 servings 1x
- Category: Snack
- Method: No-Bake
- Cuisine: American
- Diet: Vegetarian
Ingredients
- 2 cups rolled oats
- 1 cup mixed nuts or seeds (like almonds, walnuts, or pumpkin seeds)
- 1/2 cup natural peanut butter or almond butter
- 1/3 cup pure maple syrup or honey
- 1/4 cup unsweetened applesauce or mashed banana
- 1 teaspoon vanilla extract
- 1/2 teaspoon ground cinnamon
- 1/4 teaspoon salt
- 1/2 cup mix-ins (like mini chocolate chips, dried fruit, or shredded coconut)
Instructions
- Line an 8×8 inch baking pan with parchment paper, leaving an overhang on the sides for easy removal.
- In a large bowl, combine the rolled oats and mixed nuts or seeds.
- In a small saucepan over low heat, warm the nut butter and maple syrup (or honey) until smooth and easily pourable. Do not boil.
- Remove the saucepan from the heat. Stir in the applesauce (or banana), vanilla extract, cinnamon, and salt until fully combined.
- Pour the wet mixture over the dry ingredients. Stir well until everything is evenly coated.
- Fold in your chosen mix-ins, such as mini chocolate chips or dried fruit.
- Transfer the mixture to the prepared baking pan. Press the mixture down firmly and evenly into the pan using the back of a spatula or another piece of parchment paper. Pressing firmly is key for chewy granola bars.
- Refrigerate the bars for at least 2 hours, or until completely set.
- Use the parchment paper overhang to lift the block of granola out of the pan. Cut into 12 to 16 bars.
- Store the homemade granola bars in an airtight container in the refrigerator for up to one week, or freeze for longer storage.
Notes
- For a no-bake option, skip baking and proceed directly to chilling after pressing the mixture firmly into the pan.
- If you prefer a crispier bar, bake at 350°F (175°C) for 15 to 20 minutes, then cool completely before cutting.
- Customize your bars by using different nut butters or adding flaxseed meal for extra nutrition.
Nutrition
- Serving Size: 1 bar
- Calories: 220
- Sugar: 10
- Sodium: 85
- Fat: 11
- Saturated Fat: 2
- Unsaturated Fat: 9
- Trans Fat: 0
- Carbohydrates: 28
- Fiber: 3
- Protein: 7
- Cholesterol: 0