
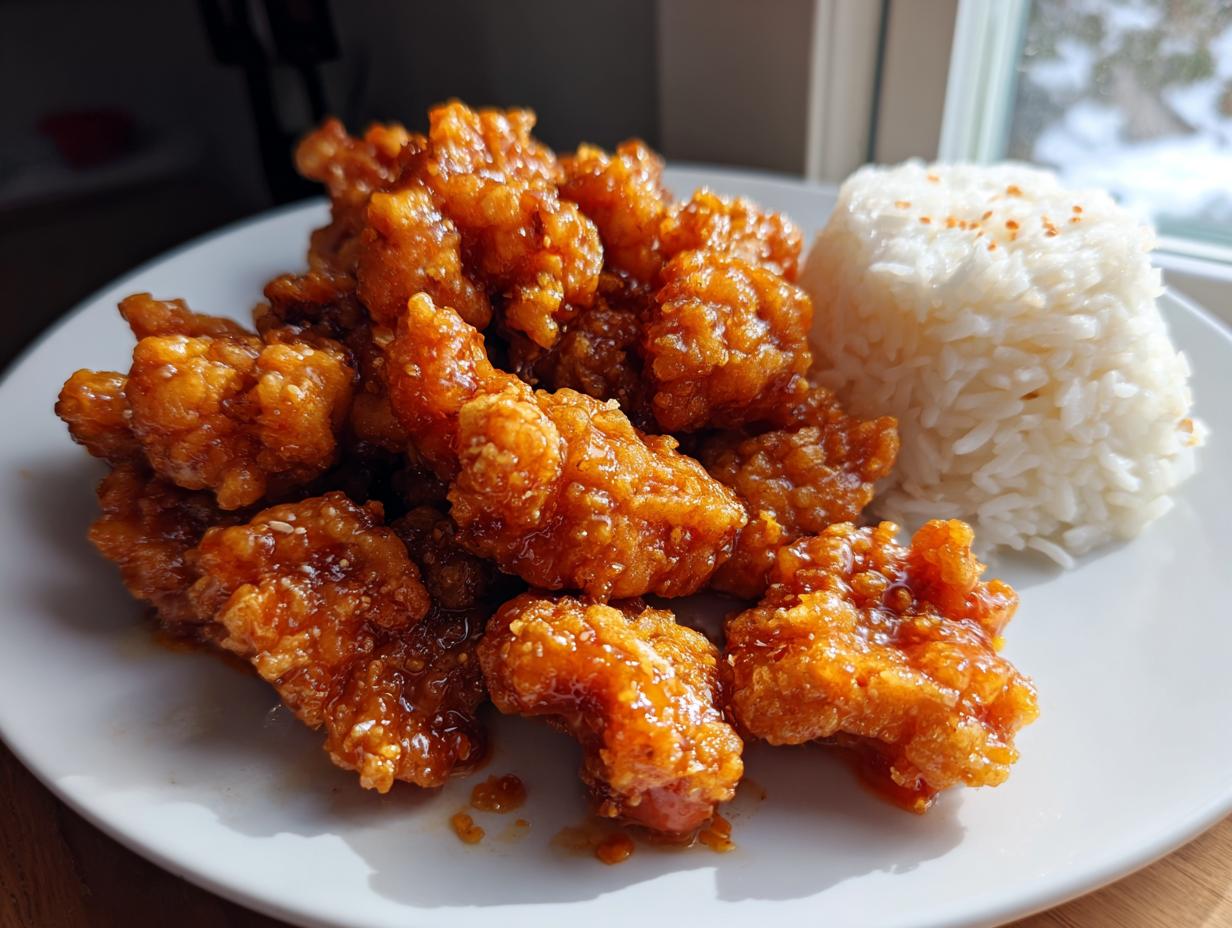
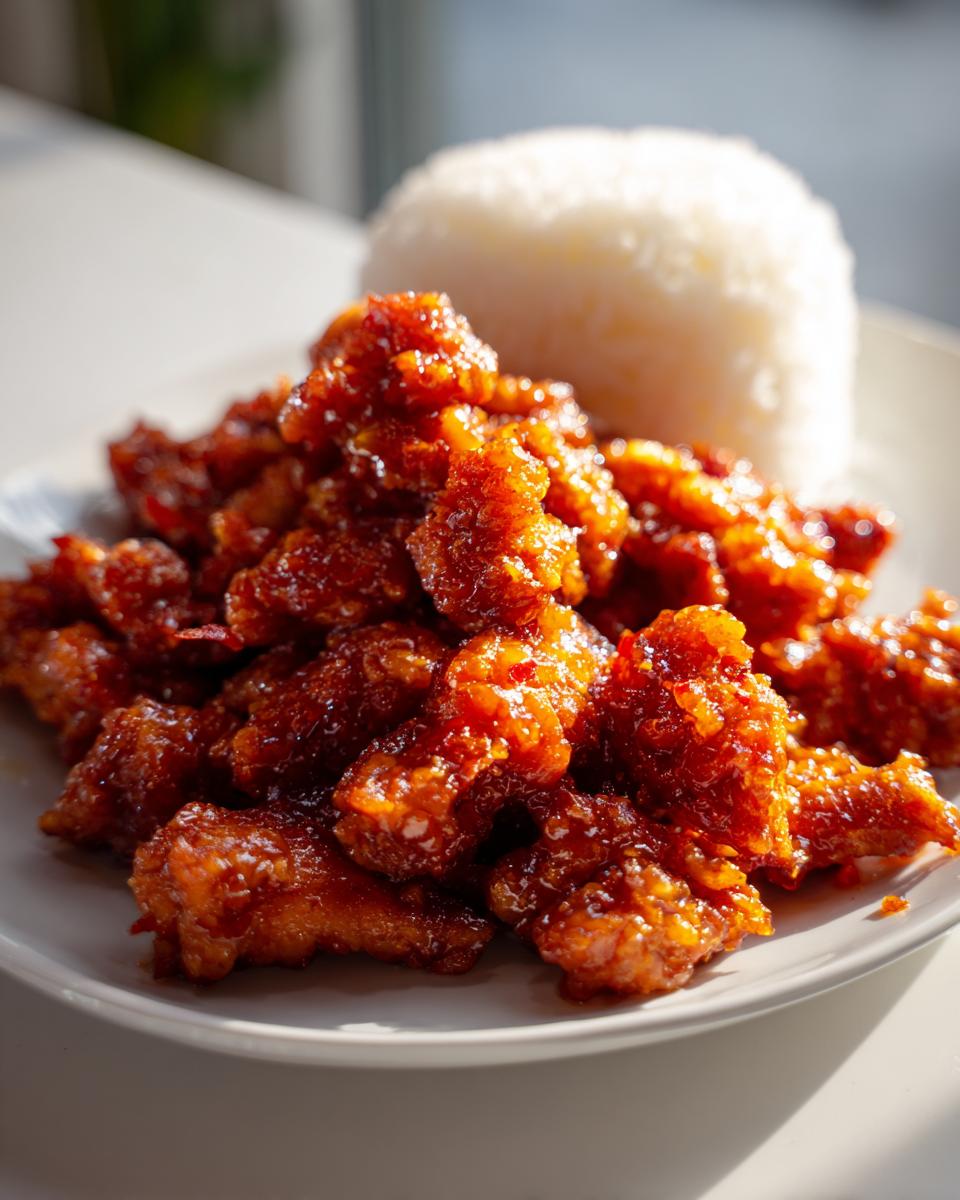
I don’t know about you, but sometimes an intense craving hits for that perfectly sweet, tangy, and slightly spicy takeout flavor that you just can’t shake. For me, that flavor is undeniably orange chicken! When I was first learning to cook, my goal was always to prove that simple ingredients, handled right, could create those amazing meals we normally wait for delivery on. This recipe is my answer to those late-night cravings—it’s the absolute best recipe for crispy takeout-style chicken you’ll find. It’s easy enough to put together for one of our easy weeknight dinners, but the texture is so satisfying, it feels like a celebration. You deserve that amazing, sticky, sweet comfort food tonight!
- Why This Is the Best Crispy Orange Chicken Recipe
- Ingredients for Your Homemade Orange Chicken
- Step-by-Step Instructions for Perfect Orange Chicken
- Ingredient Notes and Substitutions for Orange Chicken
- Make-Ahead and Storage Tips for Leftover Orange Chicken
- Variations: Healthy Orange Chicken and Baked Options
- Frequently Asked Questions About Making Orange Chicken
- Serving Suggestions for Your Asian Chicken Dinner
- Estimated Nutrition for This Orange Chicken
- Share Your Experience Making This Orange Chicken
Why This Is the Best Crispy Orange Chicken Recipe
I know you’ve tried other recipes for this, but honestly, those often end up soggy or just too sweet. My goal with this version was simple: make it truly better than takeout, without needing a giant pot of oil or a complicated marinade. People always ask me what the real secret is, and I always tell them we nailed the texture here. For a similar satisfaction level with different flavors, check out my recipe for Crispy Tender Chicken Fried Steak!
- We get that incredible snap because we use a specific dual-coating method right before frying.
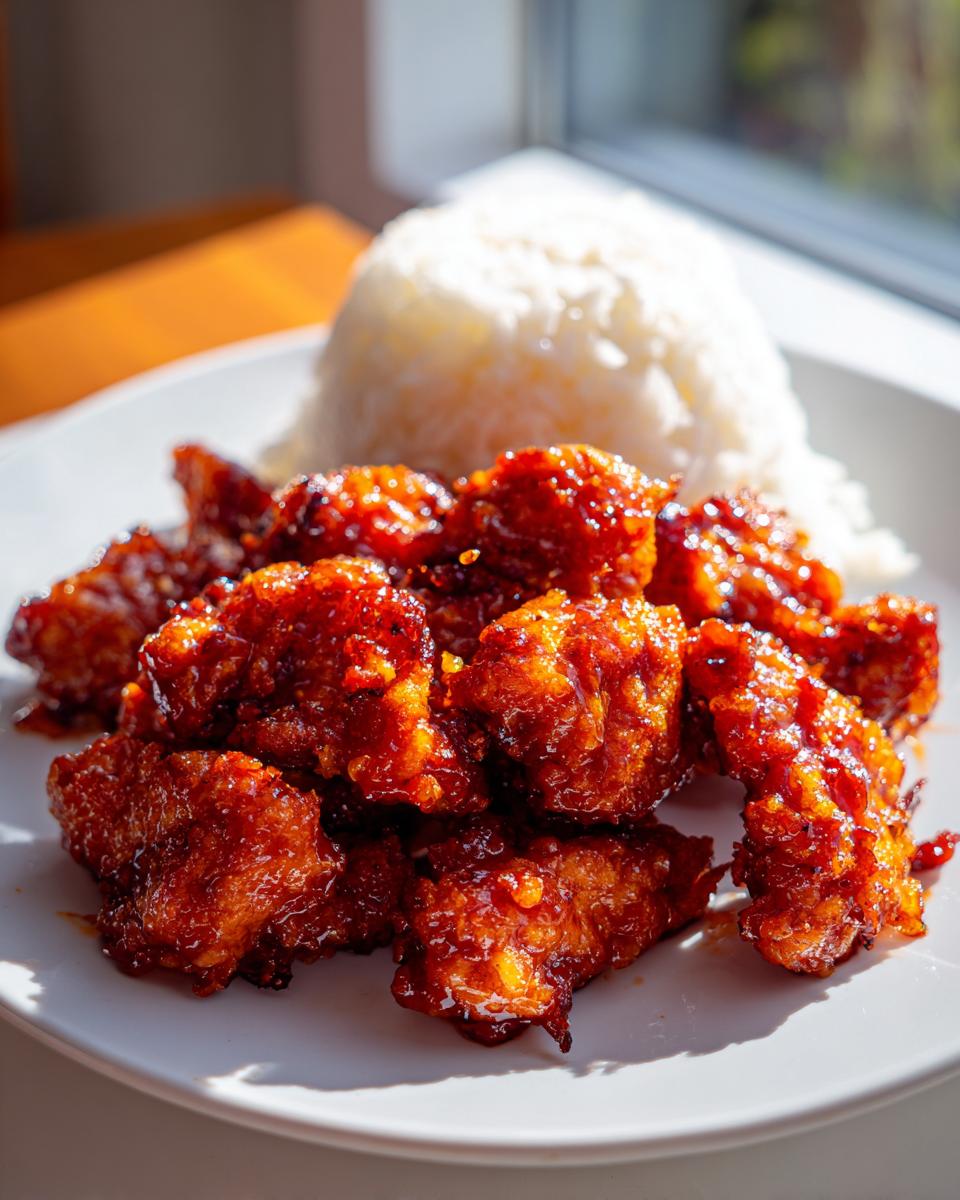
- The sauce is perfectly balanced—it’s that ideal sticky orange sauce, sweet but with a real citrus tang that cuts through the richness. Plus, using fresh zest makes such a difference!
- It comes together so fast. You won’t believe it’s a homemade orange chicken done in under 45 minutes!
Achieving Restaurant-Quality Crispy Orange Chicken
This is where we build expertise, so listen up! The key to that irresistible crunch isn’t just luck; it’s the coating technique. We use a double dredge—dry mix, egg/water dip, and then back into the dry mix. That second layer of flour and cornstarch is what locks in the moisture and creates that thick, shatteringly crisp exterior. If you want that level of crunch you find at your favorite spot, I highly recommend trying the optional double fry I mentioned in the notes—it takes just a minute longer, but those pieces stay crispy even once they hit the sauce. Trust me on this; it’s worth the extra effort!
Ingredients for Your Homemade Orange Chicken
Okay, let’s get down to business. This recipe shines because we don’t use any weird shortcuts. You need good, clear ingredients so we are set up for success later. I’ve broken down the list so it’s easy to shop for, but pay close attention to the prep notes—that’s where the magic starts!
Chicken Coating Ingredients
This is what creates that amazing crust! Make sure you have all these ready to go before you start cutting the chicken, because once the frying starts, things move quickly.
- 2 lbs boneless, skinless chicken breasts or thighs, cut into 1-inch pieces (Thighs stay a bit juicier, but breasts work great too!)
- 1 cup all-purpose flour
- 1/2 cup cornstarch
- 1 teaspoon salt
- 1/2 teaspoon black pepper
- 1 large egg, lightly beaten
- 1/2 cup water
- Vegetable oil, for frying (You’ll need a good 2 inches deep in your pan!)
For the Sweet and Tangy Sauce
This is the flavor bomb! Don’t even think about using powdered orange juice here; we need the real stuff for that vibrant taste. The fresh orange zest is non-negotiable for authentic flavor.
- 1 cup fresh orange juice (Seriously, squeeze one or two oranges—it makes the whole dish!)
- 1/2 cup granulated sugar
- 1/4 cup rice vinegar
- 2 tablespoons soy sauce
- 1 tablespoon sesame oil
- 1 teaspoon grated fresh ginger
- 2 cloves garlic, minced (Use fresh garlic; the jarred stuff just doesn’t cut it here.)
- 1/2 teaspoon red pepper flakes (Totally optional, but if you like a little kick, add them!)
- 2 tablespoons cornstarch mixed with 3 tablespoons cold water (This is your slurry; we need this cold water mix to wake up the cornstarch!)
- Orange zest from 1 orange
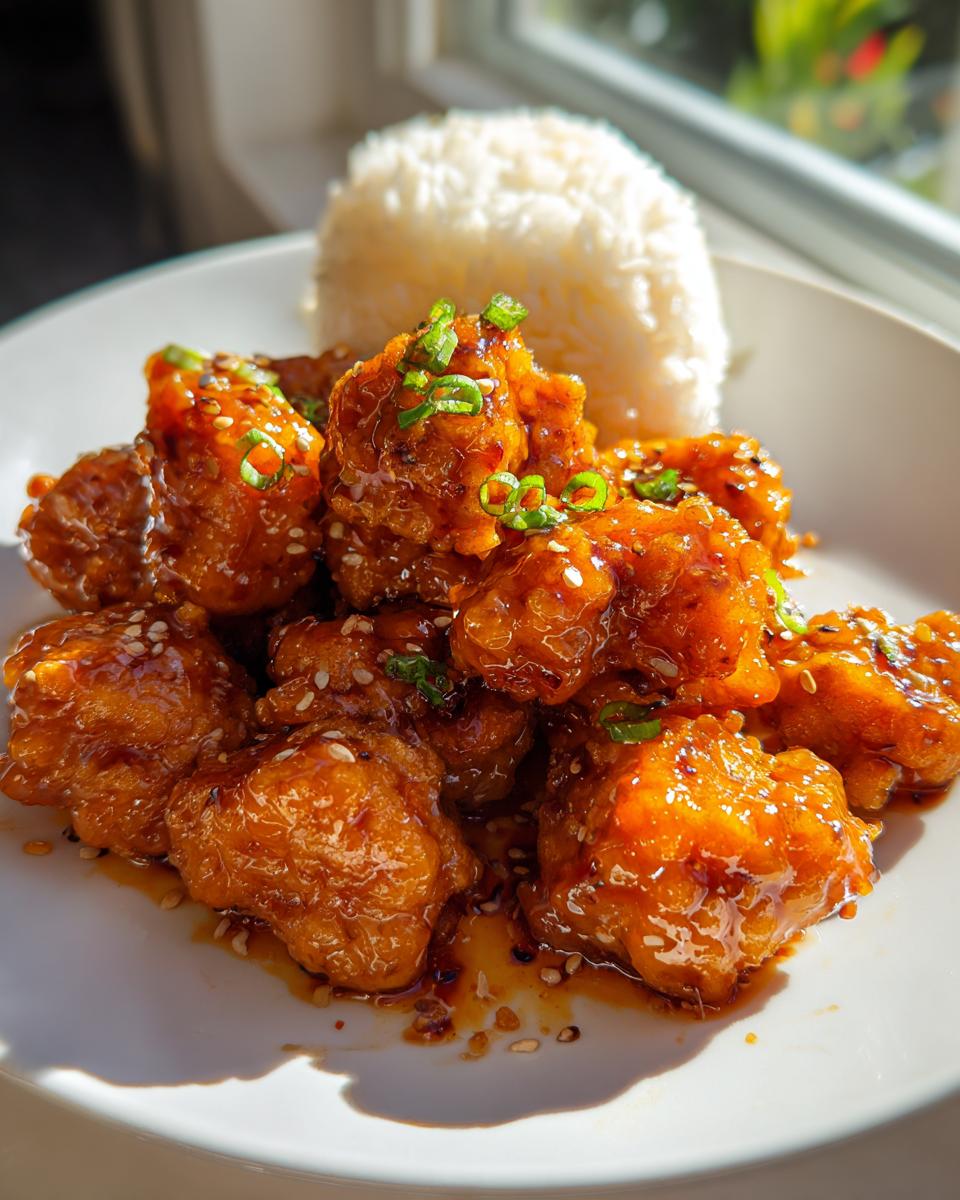
You’ll also need some cooked white rice to serve it over and sliced green onions if you want the pretty garnish restaurants always give you!
Step-by-Step Instructions for Perfect Orange Chicken
I always say the recipe only gets you halfway there; the technique is the other half! Don’t worry if you’ve never deep-fried before—we’re taking this slow and steady. It’s all about patience. Once you get the rhythm down, serving up this amazing, takeout style chicken for dinner feels like such a win. For the perfect side to go with it, you absolutely have to check out my recipe for Easy Chicken Fried Rice!
Preparing and Frying the Chicken for Crispy Orange Chicken
First things first, we need that coating to stick! Follow the dredge steps exactly: dry mix first, dip in the egg wash, and then back into the dry mix again. That double coating is your ticket to the crispiest results ever. Heat your oil to a solid 350°F (175°C). If the oil is too cool, the chicken gets greasy! Fry the pieces in small batches for about five to seven minutes until golden brown. If you are serious about that shatteringly crisp crust, pull them out after the first fry, let them rest for five minutes on the rack, and then drop them back in for just one minute at a higher heat—that seals the deal for ultimate crunch!
Making the Sticky Orange Sauce
While that chicken is busy getting golden, we whip up the sauce. Toss the juice, sugar, vinegar, soy sauce, sesame oil, ginger, garlic, and pepper flakes right into a saucepan. Bring that whole mixture to a gentle simmer until the sugar dissolves beautifully. Now, for the thickness: whisk your cornstarch slurry (that’s the cornstarch and cold water mix) really well, pour it in slowly while stirring constantly. Keep stirring until the sauce gets thick and glossy—it thickens super fast, so watch it so it doesn’t burn!
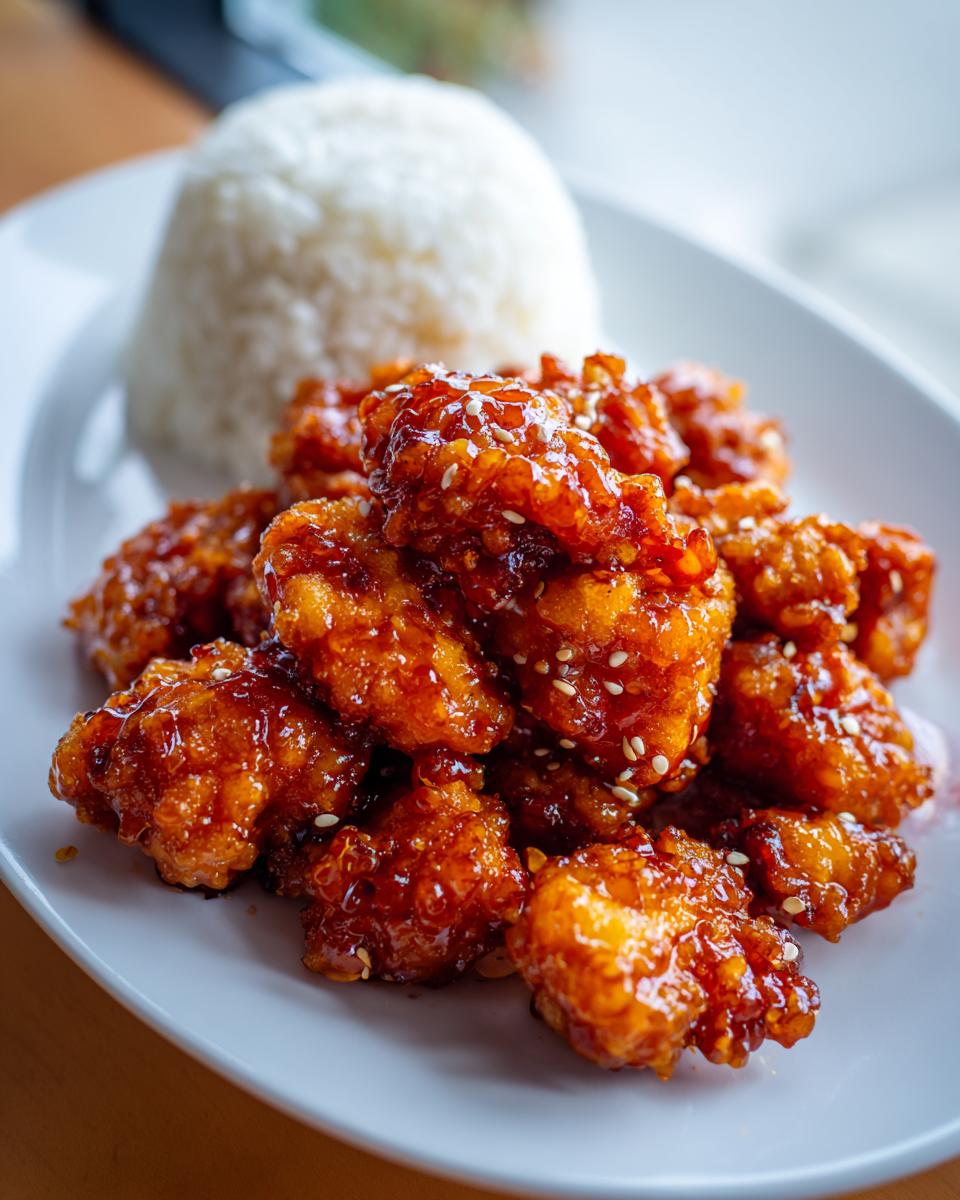
Combining and Serving Your Takeout Style Chicken
This is the grand finale! Once the sauce is off the heat, quickly stir in that fresh orange zest. Take your big bowl of hot, crispy chicken, pour that warm, glorious citrus glaze right over the top. Toss everything gently—and I mean gently! We don’t want to smash that hard-earned crispiness. Serve it right away over warm white rice and sprinkle those green onions on top. That sweet and tangy citrus glaze hitting that crisp coating? Perfection!
Ingredient Notes and Substitutions for Orange Chicken
I get asked all the time about swaps and substitutions, especially when folks are trying to make this recipe work with what they have on hand or if they’re looking for a healthier approach. Since I studied nutrition before I started sharing recipes, I totally get wanting to tweak things! Remember how I insisted on fresh juice for the sauce? That’s one place you really can’t compromise if you want that bright, authentic flavor that sets this orange chicken apart.
When it comes to the chicken itself, breasts or thighs are fine, but I always lean toward thighs for frying because they have a little more fat, which keeps them juicy when they hit that hot oil. Breasts tend to dry out faster, so if you use them, just watch your frying time carefully!
If you find the sauce a little too intense or you’re trying to keep sugar intake down, don’t forget that small adjustment I mentioned in the instructions: you can easily cut back the granulated sugar by two tablespoons. It still yields that perfect sticky orange sauce, but it tones down the sweetness just a touch.
Tips for the Best Citrus Glazed Chicken Flavor
Let’s talk juice and zest, because this is where the real connection to fresh citrus happens. Bottled orange juice is already pasteurized and often has added sugars or concentrates, and honestly, it tastes flat compared to the real thing. When you use fresh juice, you get natural acidity and brightness that complements the savory chicken coating perfectly. It just tastes cleaner, you know?
And the zest! Oh my goodness, don’t skip zesting that orange before you juice it if you can help it. The oils in the zest are where all the intense orange perfume lives. If you just use juice, you miss that top note in the aroma and flavor profile. I just use a microplane grater right over the bowl before I even start squeezing. It takes literally ten seconds, and it guarantees you get that vibrant, wonderful lift in your citrus glazed chicken. If you’re looking for an even healthier spin, I’ve seen some amazing results when people try my healthy orange chicken adaptations, though they usually skip the deep fry!
Make-Ahead and Storage Tips for Leftover Orange Chicken
Listen, sometimes we cook way too much, or maybe you just packed way too much for lunch the next day—it happens! The biggest battle with leftover crispy chicken dishes, especially great orange chicken, is keeping that crunch alive. My biggest tip here, which is also a lifesaver for meal prepping these easy weeknight dinners, is separating the components.
Seriously, do not mix the sauce and the chicken until you are about five minutes from actually eating it. The sauce is delicious and sticky, but its main job is to seep into that beautiful fried coating! If you store them together overnight, you’ll wake up to delicious, saucy chicken, but you’ll have lost that wonderful crispiness we worked so hard for.
So, here is my foolproof system: Store the leftover crispy chicken pieces in a shallow, airtight container. Don’t pack them down too tightly; you want some air circulation if possible. Keep the leftover sweet and tangy sauce in a separate small jar or container. It’s totally fine—in fact, it thickens up nicely—at room temperature or in the fridge for a few days.
When you’re ready to eat the leftovers, the best way to bring back the magic is a very quick reheat. You can toss the cold chicken pieces in a dry, preheated non-stick skillet over medium-high heat for just a minute or two per side until they warm up and firm up again. Then, spoon just enough warm sauce over them to coat lightly and serve immediately. That little blast of heat reactivates the coating. It tastes so close to fresh!
Variations: Healthy Orange Chicken and Baked Options
I totally get it. Sometimes you want that amazing takeout style chicken flavor, but maybe the deep fryer isn’t calling your name today, or you’re trying to keep things a bit lighter for a busy weekday lunch. That’s why I wanted to make sure this recipe could pivot easily into a Healthy Orange Chicken version, too! Just know upfront: when you move away from frying, you change the texture, but we can still get fantastic results.
If you’re looking for something lighter, the biggest change, obviously, is ditching the oil bath. The notes mention baking or air frying, and both work really well. When I test these alternatives in my kitchen for my own healthy lunch ideas, I find the key is getting the chicken coating to dry out enough before the heat hits it.
For baking, preheat your oven to a hot 400°F (200°C). You don’t want to skip the coating process because that flour/cornstarch layer still helps the outside crisp up a bit! Line a baking sheet with parchment paper or use a wire rack set over that paper—this allows air to circulate underneath, which is crucial for crispiness when baking. Toss the coated chicken lightly in a teaspoon of oil just to help it brown, then bake for about 15 to 20 minutes, flipping halfway through. You’re looking for it to be golden and cooked through.
The air fryer is even better for approaching that fried texture! I usually set mine to 380°F (195°C). You can use an oil spray generously on the coated chicken pieces before popping them in. Air fry them in a single layer (you will have to do this in batches, don’t crowd the basket!) usually for about 12 to 15 minutes total. The texture you get from the air fryer is truly the closest you’ll get to fried without submerging it in oil.
Now, here’s the important part about the sauce: If you’re making Baked Orange Chicken, you have two choices! You can toss the baked pieces in the sauce right at the end, just like the fried version, or—if you are really trying to reduce sugar and fat—you can even warm up the sauce gently and pour just a little over the top like a drizzle, rather than a full toss. If you ever want to see a fully dedicated healthy version, I highly recommend checking out the great work by Gimme Delicious for their take on it!
Frequently Asked Questions About Making Orange Chicken
It’s natural to have questions when trying a new version of a classic, especially when you’re aiming for that perfect Panda Express Copycat flavor at home! I’ve fielded so many questions over the years about getting the texture just right, so I put together the most common things I hear. If you have any other burning questions, feel free to reach out through my contact page—I love hearing from you!
Can I make this Easy Orange Chicken Recipe faster than 45 minutes?
Oh, I wish I could promise you 30 minutes flat! While this is certainly a fast recipe, the time adds up when you account for oil heating and that dual coating process. To speed things up without sacrificing too much quality, here’s what you can do: First, if you buy pre-cut chicken strips or cut your own while you’re waiting for the water to boil for rice, you save about ten minutes. Second, you can use the air fryer method mentioned earlier; that cuts down on the final frying/tossing time significantly, making it feel much closer to a 30 Minute Chicken Recipe. But remember, taking time for that double dredge is crucial for the *crispy* texture!
What makes this Homemade Orange Chicken taste ‘Better Than Takeout’?
This is my favorite question! It really comes down to two things: the sauce and the structural integrity of the coating. Most restaurant versions rely on bottled concentrates or mixes that just taste flat after sitting under a heat lamp for a bit. Since we use fresh orange juice and zest for the sauce, the whole dish just *pops* with real citrus flavor. It’s brighter, tangier, and never overly syrupy. Secondly, the deep, double-coating method ensures that when the sweet and tangy sauce hits the chicken, the crunch lasts. That combination of high-quality zest and superior texture is what makes this version truly stand out as Better Than Takeout. If you want to see how another fantastic recipe developer tackles those takeout flavors, check out this Panda Express Copycat Recipe guide!
Serving Suggestions for Your Asian Chicken Dinner
Now that you have this incredible, sticky, crispy orange chicken coating your kitchen in the most delicious aroma, you need the perfect backdrop! This dish is definitely the star of the show, so we want sides that soak up that extra sauce but don’t compete too much with the bold citrus flavor.
Of course, you can never go wrong with a big helping of perfectly steamed white rice. That’s the classic way to anchor any great side dish for an Asian chicken dinner. If you want something a little more fun, a bed of fluffy jasmine rice or even sautéed ramen noodles tossed lightly with a drizzle of sesame oil makes a wonderful base for that sauce to cling to.
If you are serving this for a family dinner and need some green veggies on the table, I love keeping it simple and slightly unexpected. My go-to is quickly steamed broccoli florets tossed with a tiny pinch of salt and maybe a splash of lemon juice—it adds a little freshness. Or, if you want something crunchier, try some simple, lightly seasoned snap peas! They offer a fantastic textural contrast to the soft chicken and the thick glaze. It makes the whole meal feel complete!
Estimated Nutrition for This Orange Chicken
Okay, so a lot of you ask me about the nutrition breakdown, which is totally understandable since I do have that background in nutrition! When you’re making something this delicious—that crispy coating plus that sweet glaze—you know it’s going to be robust. Keep in mind these numbers are estimates based on deep frying the chicken as written in Option A of the recipe details, and they can certainly change based on what cuts of chicken or how much oil you end up using.
But for a standard serving of this incredible orange chicken, here’s what you are generally looking at:
- Calories: Around 550
- Fat: Roughly 22g (That includes the frying oil, of course!)
- Protein: A big boost at 38g, thanks to all that chicken!
- Carbohydrates: About 55g (Mostly from the cornstarch coating and the sugar in the sauce)
- Sugar: You can expect about 35g in that sweet and tangy glaze.
The sodium comes in around 650mg, so if you are watching salt, you might want to go lighter on the soy sauce in the sauce recipe itself. If you decide to try the baked orange chicken modification we talked about, just know that you’ll significantly reduce the fat and calorie count because you’re skipping the deep fry! That’s why I love giving folks options—you can still enjoy that restaurant-quality flavor profile while making it fit what your body needs. Enjoy every bite!
Share Your Experience Making This Orange Chicken
Now that you’ve gone through the process, made the sweet and sticky orange sauce, and hopefully achieved that restaurant-level crispiness we talked about, I truly want to hear all about it! Seeing your versions of this homemade orange chicken is honestly the best part of my day. It helps me know that the guidance I give from my test kitchen days translates perfectly into your home kitchen.
If you loved how easy this was, or maybe you nailed the double-fry technique perfectly, please leave a rating right below this section! Five stars tells me you think this is truly the best way to make this classic dish.
And don’t be shy about the comments section! Tell me everything: What chicken cut did you use? Did you reduce the sugar? Or maybe you added a dash of sriracha to your sauce blend? I read every single comment, and your feedback helps the whole community learn and build confidence in their own cooking journeys. I love seeing photos, too—if you snap a picture of your glistening, saucy pieces ready to be served over rice, tag me!
Connecting with you reminds me exactly why I started Cooking by Jade: to make sure everyone feels like they can create simple, delicious meals that bring people together. If you enjoyed how straightforward this recipe felt, I encourage you to check out the About Me page to learn more about how I develop these recipes just for home cooks like you. Thank you so much for trusting me with your dinner tonight!
PrintThe Best Crispy Takeout-Style Orange Chicken
Make crispy, tangy Orange Chicken at home that tastes better than your favorite takeout. This easy recipe delivers a sweet and sticky citrus glaze perfect for a satisfying weeknight dinner.
- Prep Time: 20 min
- Cook Time: 25 min
- Total Time: 45 min
- Yield: 4 servings 1x
- Category: Dinner
- Method: Frying
- Cuisine: Chinese American
- Diet: Low Fat
Ingredients
- 2 lbs boneless, skinless chicken breasts or thighs, cut into 1-inch pieces
- 1 cup all-purpose flour
- 1/2 cup cornstarch
- 1 teaspoon salt
- 1/2 teaspoon black pepper
- 1 large egg, lightly beaten
- 1/2 cup water
- Vegetable oil, for frying
- 1 cup fresh orange juice
- 1/2 cup granulated sugar
- 1/4 cup rice vinegar
- 2 tablespoons soy sauce
- 1 tablespoon sesame oil
- 1 teaspoon grated fresh ginger
- 2 cloves garlic, minced
- 1/2 teaspoon red pepper flakes (optional)
- 2 tablespoons cornstarch mixed with 3 tablespoons cold water (slurry)
- Orange zest from 1 orange
- Cooked white rice, for serving
- Sliced green onions, for garnish
Instructions
- In a medium bowl, combine the flour, 1/2 cup cornstarch, salt, and pepper.
- In a separate bowl, whisk the egg and water together.
- Dredge the chicken pieces first in the dry mixture, then dip them into the egg wash, and finally coat them again in the dry mixture to ensure a thick coating.
- Heat about 2 inches of vegetable oil in a deep skillet or Dutch oven to 350°F (175°C).
- Fry the chicken in batches, turning occasionally, until golden brown and cooked through, about 5 to 7 minutes. Remove chicken and drain on a wire rack set over paper towels.
- While the chicken fries, prepare the sauce. In a small saucepan, combine the orange juice, sugar, rice vinegar, soy sauce, sesame oil, ginger, garlic, and red pepper flakes.
- Bring the mixture to a simmer over medium heat, stirring until the sugar dissolves.
- Whisk in the cornstarch slurry and cook, stirring constantly, until the sauce thickens and becomes glossy, about 1 to 2 minutes. Remove from heat and stir in the orange zest.
- Place the crispy chicken in a large bowl. Pour the warm sauce over the chicken and toss gently until every piece is evenly coated.
- Serve the sticky orange chicken immediately over cooked rice, garnished with sliced green onions.
Notes
- For extra crispy chicken, fry the pieces twice. After the first fry, let them rest for 5 minutes, then fry them again at a slightly higher temperature (375°F or 190°C) for 1 minute until very crisp.
- If you prefer a less sweet sauce, reduce the granulated sugar by 2 tablespoons.
- You can bake or air fry the chicken instead of deep frying for a healthier option, though the texture will differ slightly.
Nutrition
- Serving Size: 1 serving
- Calories: 550
- Sugar: 35g
- Sodium: 650mg
- Fat: 22g
- Saturated Fat: 4g
- Unsaturated Fat: 18g
- Trans Fat: 0g
- Carbohydrates: 55g
- Fiber: 2g
- Protein: 38g
- Cholesterol: 110mg