
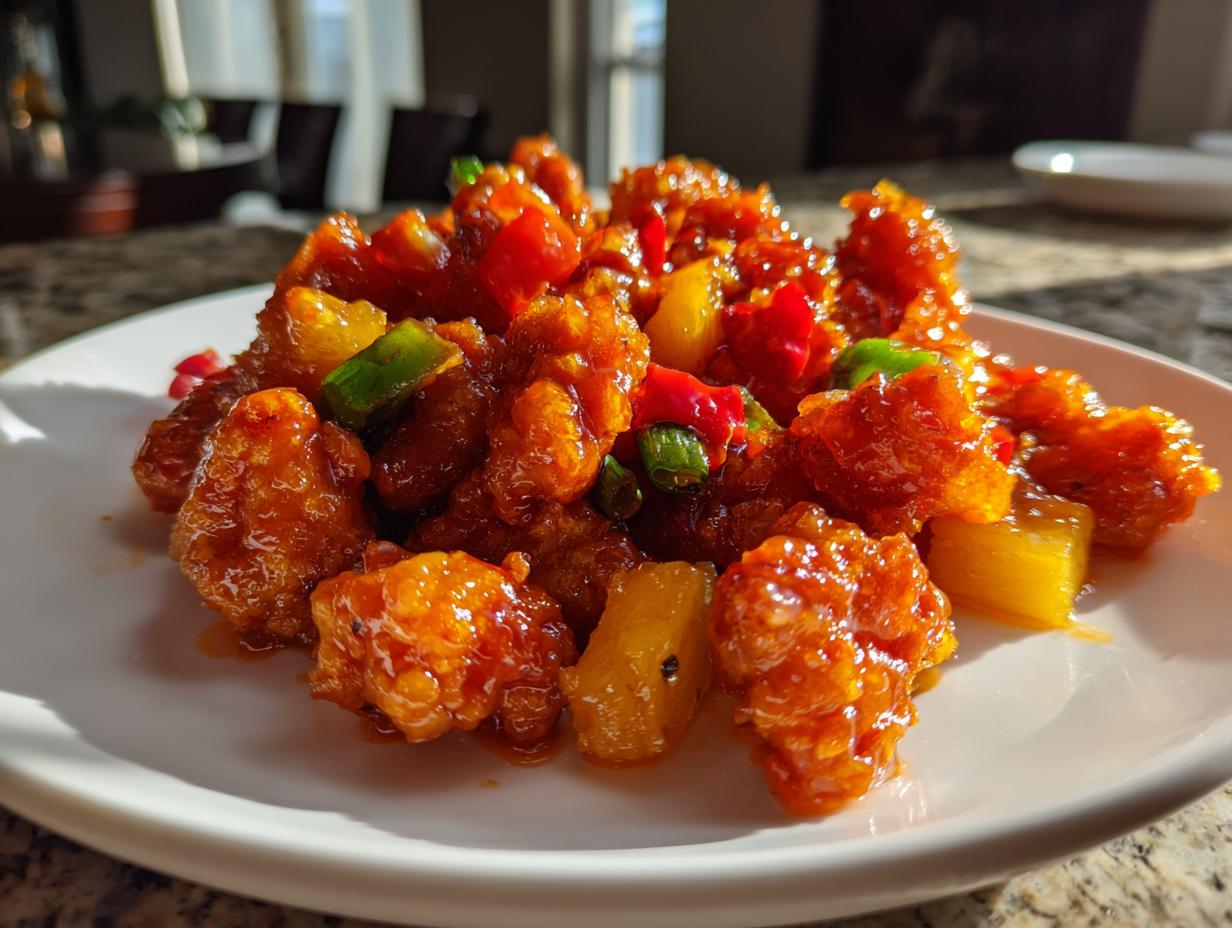
There are nights when only that bright, tangy, perfectly sticky takeout flavor will do, right? I totally get it! The craving for restaurant-style sweet and sour chicken hits hard, but so often the homemade versions end up soggy or way too sweet. I’ve spent years in the kitchen, both professionally and right here at home, working to take those ‘too hard’ recipes and make them completely approachable. Trust me when I say this recipe is the one that finally cracks the code. It gives you that incredible crispy texture and that spot-on balance of zingy vinegar and deep sweetness. Forget feeling intimidated by takeout—we are bringing the best Chinese dinner home tonight! If you’re looking for more simple, reliable weeknight fixes, check out my list of easy weeknight dinners.
- Why This Sweet and Sour Chicken Recipe Delivers Restaurant Results
- Gathering Ingredients for Your Sweet and Sour Chicken Dinner
- Step-by-Step Instructions for Easy Sweet and Sour Chicken Recipe
- Jade Carter's Expert Tips for Perfect Sweet and Sour Chicken
- Ingredient Notes and Substitutions for Your Tangy Sweet Sauce Chicken
- Serving Suggestions for Your Restaurant Style Sweet and Sour Meal
- Storage and Reheating Instructions for Leftover Sweet and Sour Chicken
- Frequently Asked Questions About Making Sweet and Sour Chicken
- Estimated Nutritional Data for This Family Favorite Asian Recipes Dish
- Share Your Homemade Sweet and Sour Chicken Experience
Why This Sweet and Sour Chicken Recipe Delivers Restaurant Results
It all comes down to nailing two things: crispiness and the flavor profile. If those fall flat, you just end up with sticky chicken, not the amazing dish you’re dreaming of. I promise this technique works every single time, giving you that perfect combination of tangy, sweet, and savory that hits all the right notes. It’s all about respecting the process, just like I learned when perfecting other crispy dishes like my famous chicken fried steak.
Achieving Truly Crispy Sweet and Sour Chicken Coating
The secret to that takeout crunch isn’t just one ingredient; it’s how we layer things! We start with an egg wash—that’s our glue—followed immediately by a heavy dredge in the cornstarch and flour mix. Shaking off the excess is crucial, trust me! Then, you absolutely must hit that oil at the right heat, around 350°F. If it’s too low, the coating soaks up oil and gets heavy. For next-level crispiness? Try my double-fry method mentioned in the notes—it’s a game-changer for keeping that coating perfect even after it’s coated in sauce!
Gathering Ingredients for Your Sweet and Sour Chicken Dinner
Okay, let’s look at what we need! Getting the right base ingredients is the first step toward making this the best homemade sweet and sour chicken you’ve ever eaten. Don’t skip the prep work here; cutting everything to the right size really helps everything cook evenly. This recipe works best with breast meat, but if you love things a bit richer, chicken thighs are fantastic too. You can find a full list of my favorite simple weeknight meal ingredients on my general resources page!
Chicken and Coating Components
- 1.5 lbs boneless, skinless chicken breast or thighs, cut into precise 1-inch pieces
- 1 large egg, just lightly beaten so it coats but doesn’t get heavy
- 1/4 cup all-purpose flour
- 1/2 cup cornstarch (This is key for crispiness!)
- 1/2 teaspoon salt and 1/4 teaspoon black pepper
- Vegetable oil, enough for frying (we need about 1.5 inches deep)
Vegetables and Aromatics for Your Sweet and Sour Chicken with Pineapple
These add the crunch and that beautiful color you see at your favorite takeout spots. Make sure your pineapple is drained well!
- 1 medium green and 1 medium red bell pepper, cut into 1-inch chunks
- 1/2 medium yellow onion, cut into 1-inch chunks
- 1 cup canned pineapple chunks, make sure they are canned and drained
- 2 tablespoons fresh ginger, minced—don’t use the jarred stuff, please!
- 2 cloves garlic, minced, for that fantastic aroma
Ingredients for the Tangy Sweet and Sour Sauce Chicken
This sauce has to be perfectly balanced, tangy vinegar cutting through the richness of the sugar. The cornstarch slurry is what makes it glossy and thick!
- 1/2 cup granulated sugar
- 1/3 cup rice vinegar (get the good stuff!)
- 1/4 cup ketchup for color and body
- 2 tablespoons soy sauce
- 1 tablespoon Worcestershire sauce (my little secret for depth)
- 1 teaspoon sesame oil
- For the Slurry: 1 teaspoon cornstarch mixed with 2 tablespoons cold water
Step-by-Step Instructions for Easy Sweet and Sour Chicken Recipe
Here we go! This is where the magic happens, and honestly, it moves pretty fast once you get organized. The key to this whole dish working out is having everything prepped—chicken coated, sauce mixed, veggies chopped—before you even turn on the stove. This is how we get that restaurant-quality speed for your quick weeknight stir fry chicken.
Preparing and Frying the Crispy Sweet and Sour Chicken
First things first: coat that chicken! Dip the pieces first into your lightly beaten egg—it just needs to be tacky enough to hold the coating. Then, you need to really dredge it in your flour and cornstarch mix. Shake off the extra; we want a light, dusty coat, not heavy clumps. Heat your oil up to a solid 350°F. It needs to be hot! Carefully drop the chicken in batches—don’t crowd the pan, or the temperature drops immediately and you lose that crispiness. Fry for about 3 to 4 quick minutes until they look golden brown. Use a slotted spoon to get them out and let them drain on a wire rack. Trust me, the rack is better than paper towels because it keeps air flowing underneath!
Making the How to Make Sweet and Sour Sauce Base
While that first batch is frying (or resting), whisk up your sauce in a small saucepan. Combine the sugar, vinegar, ketchup, soy sauce, Worcestershire, and sesame oil. Heat this over medium heat, stirring until that sugar completely dissolves. You’ll know it’s ready when it looks glossy and uniform. Now, grab that simple cornstarch slurry and whisk it in slowly while you keep simmering. It thickens up unbelievably fast—usually under a minute—to that perfect coating consistency. As soon as it coats the back of your spoon, pull it right off the heat so it doesn’t scorch.
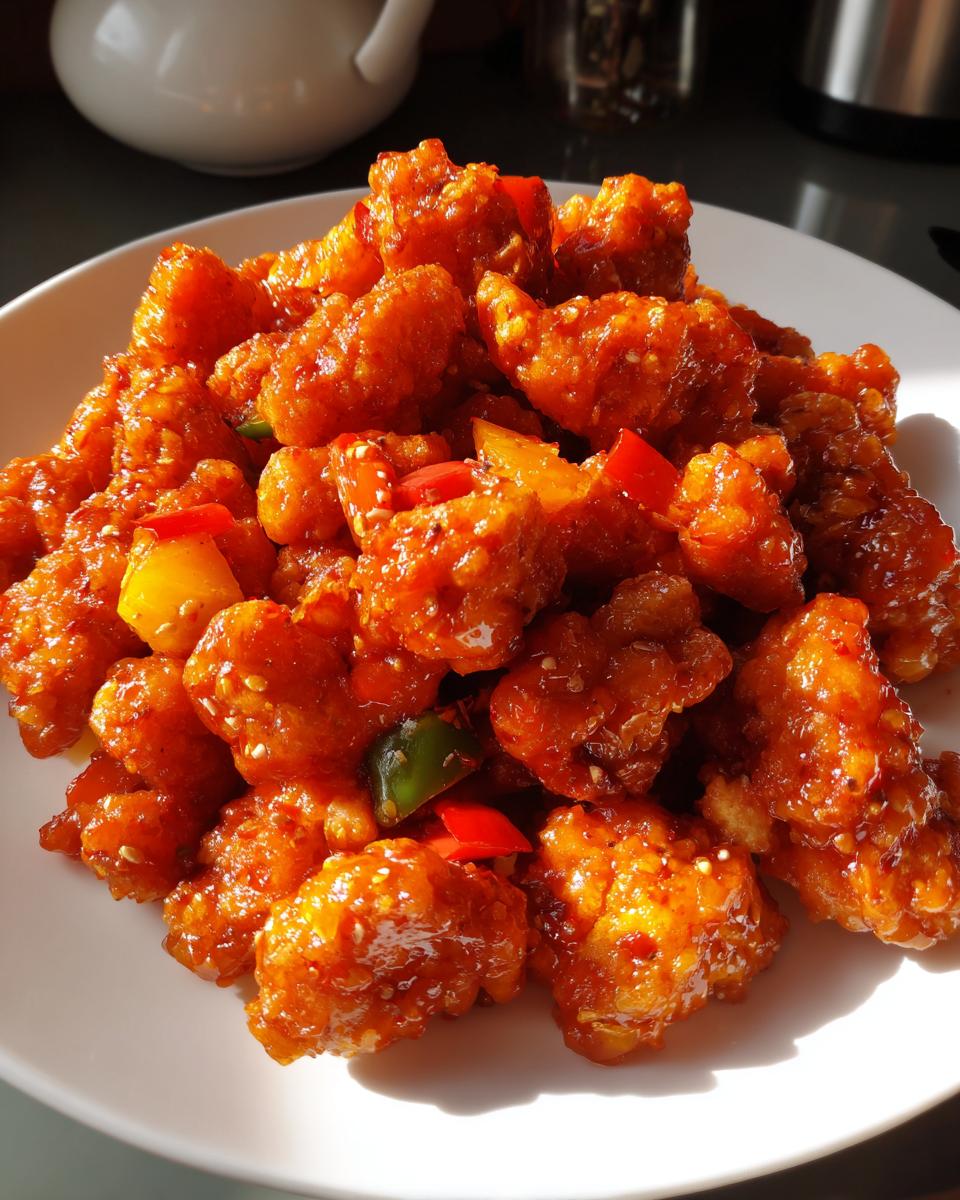
Stir Frying Vegetables and Combining for the Sticky Sweet and Sour Chicken Dinner
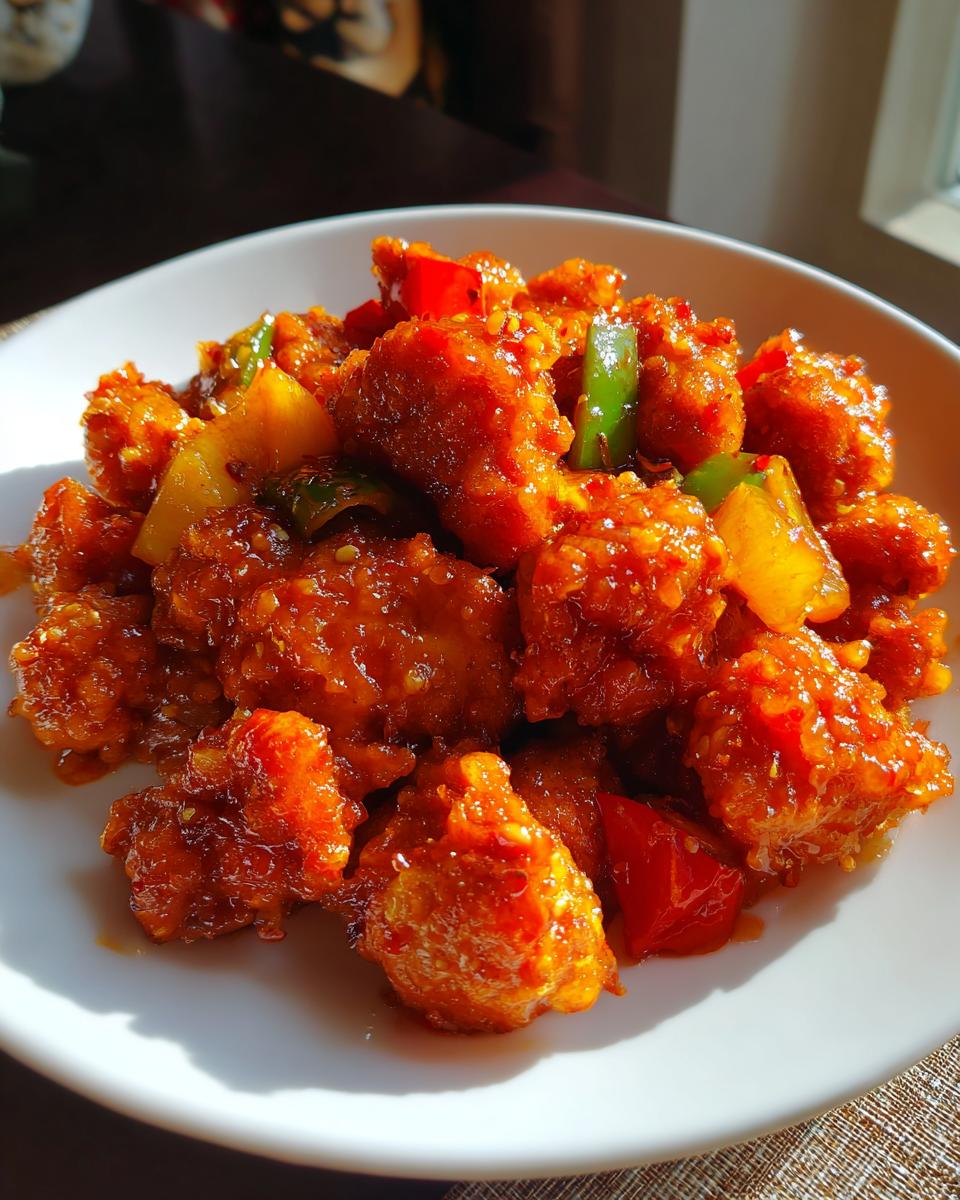
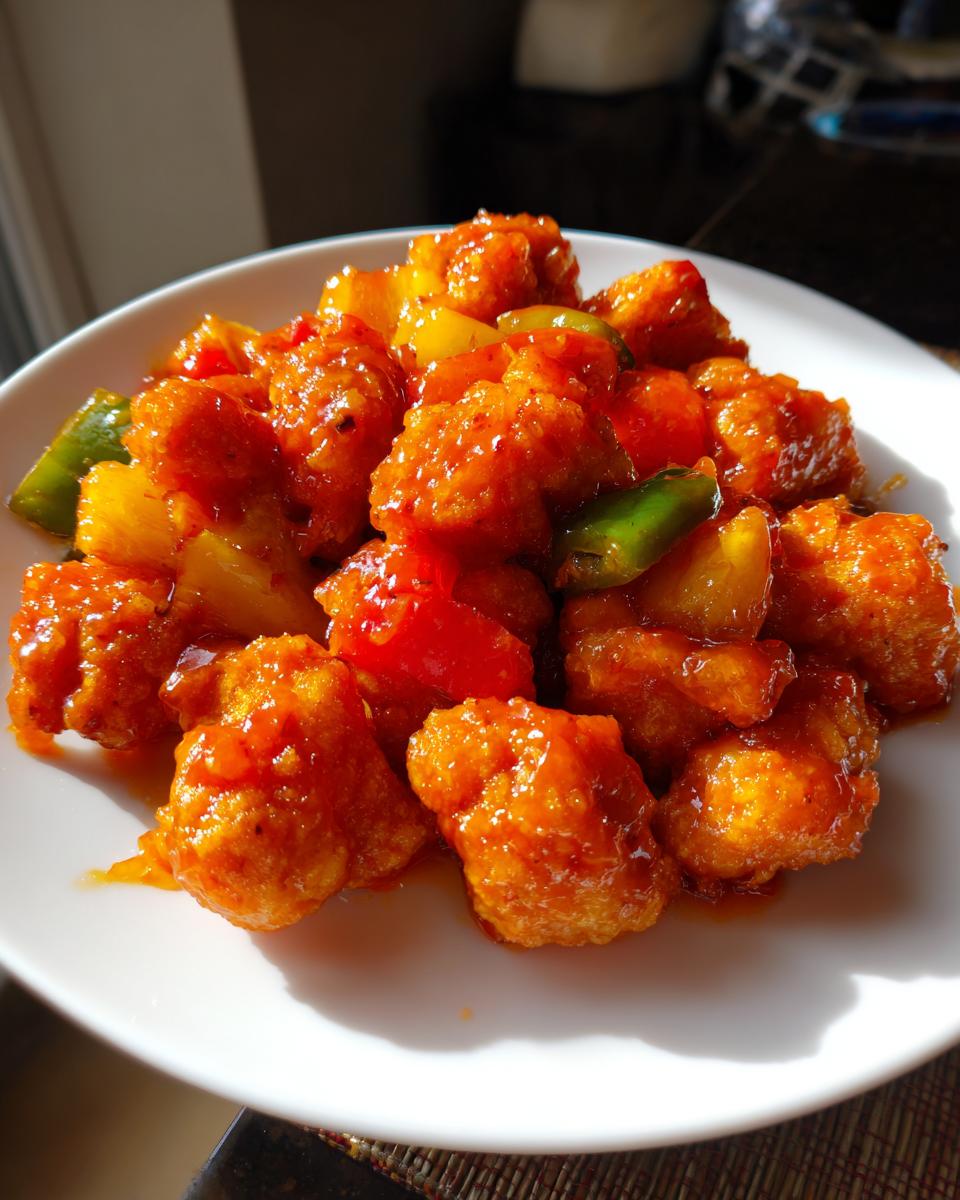
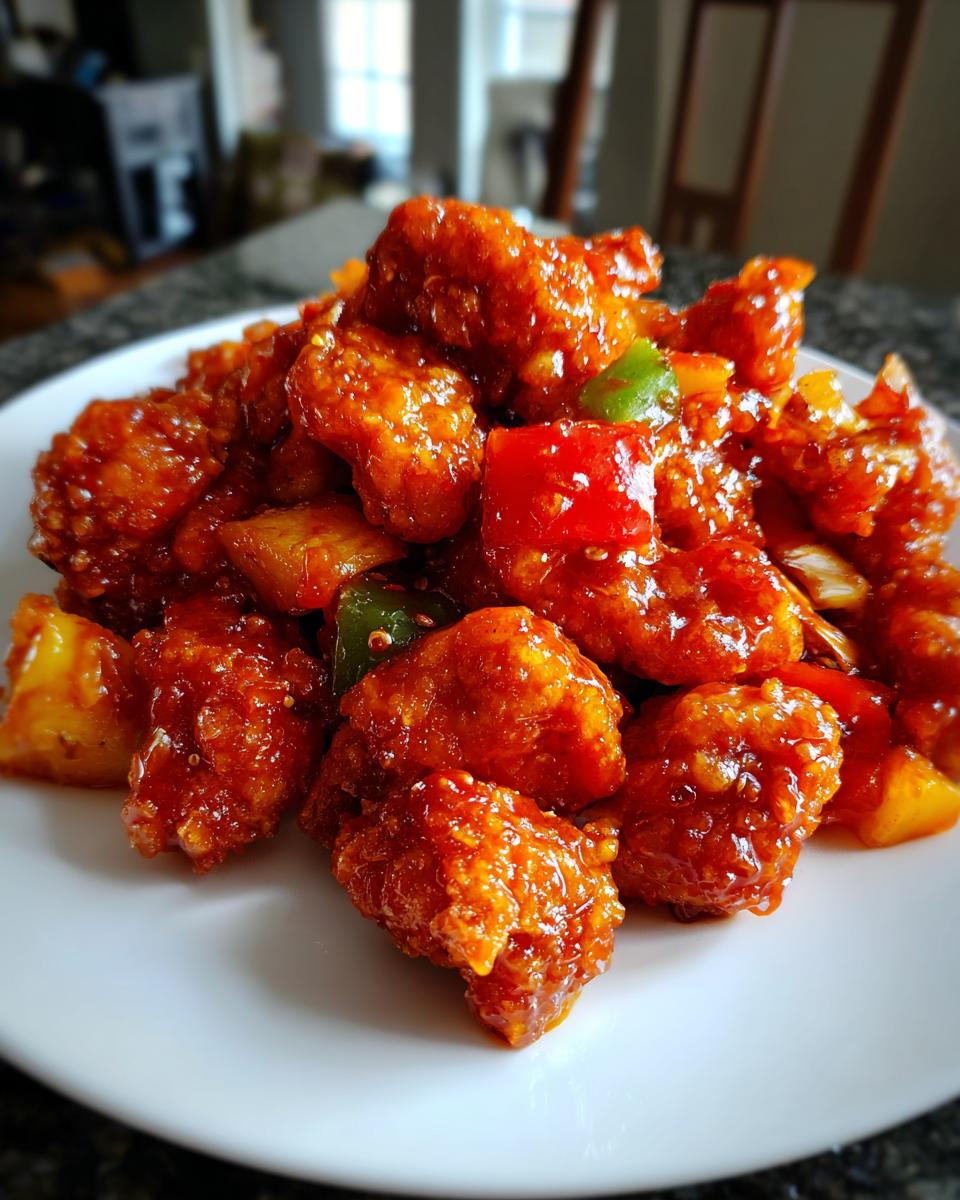
Next, drain most of the oil from your skillet, leaving just a tablespoon behind—we need that little bit of residual oil for flavor. Heat that tablespoon over medium-high. Throw in your minced ginger and garlic and let them sizzle for just 30 seconds until you can smell them—be careful not to burn them! Immediately add your peppers and onions. Stir fry them hard for about 3 minutes; we want them tender-crisp, not mushy! Toss in the drained pineapple for one final minute. Finally, dump that crispy chicken right back into the wok with the veggies. Pour that beautiful, tangy sauce right over everything and toss it *fast* until every piece is coated. Serve this immediately over rice before the sauce has a chance to soften that perfect crunch!
Jade Carter’s Expert Tips for Perfect Sweet and Sour Chicken
When I was working back in the test kitchens, I thought high heat was just a suggestion, not a requirement. I learned quickly that for anything like this, or even a great parmesan-crusted chicken, heat management is everything. If your oil temperature dips even a little when you add the chicken, you’ve already lost the fight against sogginess. That’s why that 350°F starting point is so crucial!
Now for my favorite insider secrets. If you want that truly intense, restaurant-style bright red or orange color—the kind that just screams ‘takeout’—you can sneak in 1/4 teaspoon of red food coloring right into your sauce mixture when you add the other liquids. It doesn’t change the taste one bit, I promise! And if you are making an extra-large batch, you absolutely must double-fry those chicken pieces. Let them rest on the rack for five minutes after the first batch, then throw them back in for 60 seconds when the oil is even hotter (about 375°F). That second blast seals the deal and guarantees that crunch lasts until the very last bite!
Ingredient Notes and Substitutions for Your Tangy Sweet Sauce Chicken
I always want you to feel confident substituting when you’re cooking at home, but for this **sweet and sour chicken**, a few ingredients really make the difference between good and ridiculously good. Chicken choice is the first thing people ask me about. If you use chicken breast, you’ll get a leaner, slightly firmer bite. That’s fine! But if you want that deeply moist, almost falling-apart tender texture you sometimes get in the best Chinese takeout spots, use boneless, skinless chicken thighs instead. They handle the high heat of frying much better without drying out.
Now, about the sauce—I know some of you might skip the Worcestershire sauce because it seems random for an Asian dish, right? Don’t skip it! It’s my little trick to deepen the savory flavor profile, giving you that rich umami base that balances the sharp tang of the vinegar. You won’t taste Worcestershire specifically, just fantastic depth! This depth is useful in so many recipes, even something creamy like my easy creamy garlic aioli.
Lastly, if you don’t have rice vinegar on hand, white vinegar is an acceptable swap in a pinch, but you might need to dial back the quantity slightly, as white vinegar is sharper. Don’t try to substitute the cornstarch; it’s what gives the sauce its signature sheen and viscosity, which is different than flour!
Serving Suggestions for Your Restaurant Style Sweet and Sour Meal
The moment that crispy chicken is coated in that glossy, tangy sauce, you need a perfect base ready to catch every last drop. This incredible flavor demands simple company so it can truly shine! When I serve this **sweet and sour chicken**, my go-to is always plain white rice. It’s the perfect blank canvas to soak up all that extra sauce—don’t let any go to waste!
If you want something a little richer but just as easy, try a batch of fluffy garlic butter rice; you can find my easy recipe for perfect fluffy garlic butter rice, which is surprisingly quick to whip up while the chicken is frying. I often pair this meal with a side of simple steamed broccoli or maybe some quick, lightly pan-fried snow peas if I have an extra five minutes.
The idea is to keep the sides straightforward. You don’t want competing strong flavors taking away from that perfect sweet and sour combination we worked so hard to achieve. You’ve got the crunch, the tang, and the sweetness—now just add your favorite starch and enjoy!
Storage and Reheating Instructions for Leftover Sweet and Sour Chicken
I always hope there are leftovers because this dish is fantastic the next day, but let’s be real—that glorious crispiness we worked so hard for is the first thing to go once it’s mingled with sauce and chilled! It happens to everyone, so don’t stress about it.
When you’re done eating, put any remaining chicken and veggies into an airtight container. You can keep leftovers safely in the fridge for about three days. Make sure the container is sealed tight. If you decide to store the leftover sauce separately, you might get a tiny bit more texture longevity, but honestly, for this recipe, I usually just tuck the sauced chicken right in.
When it’s time to reheat your **sweet and sour chicken**, the microwave is your enemy if you value texture! It gets steamy and soft fast. Instead, grab a baking sheet. Spread the chicken and veggies out in a single layer and pop it into an oven preheated to about 350°F for about 8 to 10 minutes. If you have an air fryer, even better! A quick two-minute blast in the air fryer brings back a surprising amount of that crunchiness we chased earlier. Quick reheating at a moderate temp is the ultimate trick for reviving this leftover goodness, making it almost as good as when it was fresh for dinner. For more reliable weeknight tips, check out my guide to easy weeknight dinners.
Frequently Asked Questions About Making Sweet and Sour Chicken
I know you might have a few lingering questions pop up when diving into a new recipe, especially when you’re chasing that perfect takeout vibe at home. That’s totally normal! I want to make sure your experience creating this **sweet and sour chicken** is flawless. Below, I’ve answered some of the things that come up most often in my comment section. For more simple, reliable weeknight fixes, check out my list of easy weeknight dinners.
How do I keep the chicken crispy when adding the sauce?
This is the biggest worry for everyone, and I get it! For the absolute best texture, you need to toss the chicken with the sauce and vegetables immediately before serving. Seriously, get it onto the plates right away. If you’re making a huge batch and know folks will eat at different times, try this: keep the crispy chicken separate and ready on a platter. Then, just before serving, quickly pour the hot sauce over the pile and toss once or twice. You are coating it, not letting it bathe in the sauce!
Can I make this a Quick Weeknight Stir Fry Chicken using an air fryer?
Yes, absolutely! If you want to avoid deep frying, the air fryer is your friend. For the coating, you might want to slightly increase the cornstarch in your dry mix for extra structure. Instead of frying, arrange the coated chicken in a single layer in your air fryer basket and cook at 380°F, flipping halfway through, until golden brown. It won’t be quite as perfectly craggy as deep-fried, but it’s dramatically healthier and still gives you great crunch for a **simple chicken stir fry dinner**!
What oil should I use for frying? Stick to oils with a high smoke point. I almost always reach for standard vegetable oil or even canola oil. They are neutral tasting and hold up beautifully to that 350°F heat we need for the perfect coating.
Estimated Nutritional Data for This Family Favorite Asian Recipes Dish
Now, let’s talk numbers for this delicious **sweet and sour chicken**. I always want to be super transparent about what goes into a meal, especially one that involves a little frying and a nice sugar-based sauce. Please remember that the data below is just an estimate! It’s based on the ingredients list provided and assumes four equal servings. Ingredient brands, exact amounts of oil absorbed, and whether you use white rice on the side will change these figures, so think of this as a good baseline for your planning.
Honestly, that sweetness adds up, so this is certainly a weekend treat more than an everyday quick meal, but wow, is it worth the calories! Here’s the high-level breakdown for one serving:
- Calories: Around 480
- Protein: About 35g (That gives you great staying power!)
- Total Fat: Near 18g
- Total Carbohydrates: Roughly 45g
It’s important to watch that sodium too, since we are using soy sauce and Worcestershire sauce in the mix—that number is sitting around 650mg. If you are watching your salt intake for this **sticky sweet and sour chicken dinner**, you can easily cut back on the added salt in the chicken dredge and use low-sodium soy sauce to lower that figure significantly without worrying about flavor!
Share Your Homemade Sweet and Sour Chicken Experience
I really poured my heart into making this the most reliable **restaurant style sweet and sour** recipe out there for you! Now it’s your turn to shine. Don’t be shy—tell me how it turned out in the comments below and leave a rating. Seeing your success is exactly why I opened up my kitchen to you all. If you feel a little more confident in your weeknight cooking moves after making this, then I’ve done my job! Head over to my About Page to see more about why kitchen confidence matters so much to me!
PrintCrispy Sweet and Sour Chicken: Restaurant Style Dinner

Make restaurant-quality crispy sweet and sour chicken at home. This recipe balances tangy and sweet flavors perfectly and gives you a reliable method for achieving a crispy coating on the chicken.
- Prep Time: 20 min
- Cook Time: 25 min
- Total Time: 45 min
- Yield: 4 servings 1x
- Category: Dinner
- Method: Stir Fry
- Cuisine: Chinese-American
- Diet: Low Lactose
Ingredients
- 1.5 lbs boneless, skinless chicken breast or thighs, cut into 1-inch pieces
- 1 large egg, lightly beaten
- 1/4 cup all-purpose flour
- 1/2 cup cornstarch
- 1/2 teaspoon salt
- 1/4 teaspoon black pepper
- Vegetable oil, for frying
- 1 medium green bell pepper, cut into 1-inch pieces
- 1 medium red bell pepper, cut into 1-inch pieces
- 1/2 medium yellow onion, cut into 1-inch pieces
- 1 cup canned pineapple chunks, drained
- 2 tablespoons fresh ginger, minced
- 2 cloves garlic, minced
- For the Sauce:
- 1/2 cup granulated sugar
- 1/3 cup rice vinegar
- 1/4 cup ketchup
- 2 tablespoons soy sauce
- 1 tablespoon Worcestershire sauce
- 1 teaspoon sesame oil
- 1 teaspoon cornstarch mixed with 2 tablespoons cold water (slurry)
Instructions
- Prepare the chicken coating: In a medium bowl, combine the flour, cornstarch, salt, and pepper. In a separate small bowl, lightly beat the egg. Dip the chicken pieces first in the egg, then dredge thoroughly in the flour mixture, shaking off excess.
- Heat the oil: Pour about 1.5 inches of vegetable oil into a large skillet or wok. Heat the oil to 350 degrees Fahrenheit (175 degrees Celsius).
- Fry the chicken: Working in batches, carefully add the coated chicken to the hot oil. Fry for 3 to 4 minutes until golden brown and cooked through. Remove the chicken with a slotted spoon and place it on a wire rack set over a paper towel-lined plate to drain excess oil.
- Make the sauce: In a small saucepan, combine the sugar, rice vinegar, ketchup, soy sauce, Worcestershire sauce, and sesame oil. Heat over medium heat, stirring until the sugar dissolves. Bring the mixture to a simmer.
- Thicken the sauce: Whisk the cornstarch slurry into the simmering sauce. Stir constantly until the sauce thickens enough to coat the back of a spoon, about 1 minute. Remove from heat.
- Stir fry vegetables: Drain most of the oil from the wok, leaving about 1 tablespoon. Heat the remaining oil over medium-high heat. Add the ginger and garlic and cook for 30 seconds until fragrant. Add the bell peppers and onion. Stir fry for 3 minutes until slightly tender-crisp. Add the drained pineapple and cook for 1 more minute.
- Combine: Return the crispy chicken to the wok with the vegetables. Pour the sweet and sour sauce over everything. Toss quickly to coat the chicken and vegetables evenly. Serve immediately over rice.
Notes
- For extra crispy chicken, double-fry the pieces. After the first fry, let them rest for 5 minutes, then fry them again for 1 minute in hotter oil (about 375 degrees Fahrenheit).
- Use chicken thighs for a more tender result, or breast for a leaner option.
- If you prefer a brighter red color, add 1/4 teaspoon of red food coloring to the sauce mixture.
Nutrition
- Serving Size: 1 serving
- Calories: 480
- Sugar: 35
- Sodium: 650
- Fat: 18
- Saturated Fat: 4
- Unsaturated Fat: 14
- Trans Fat: 0
- Carbohydrates: 45
- Fiber: 2
- Protein: 35
- Cholesterol: 110