
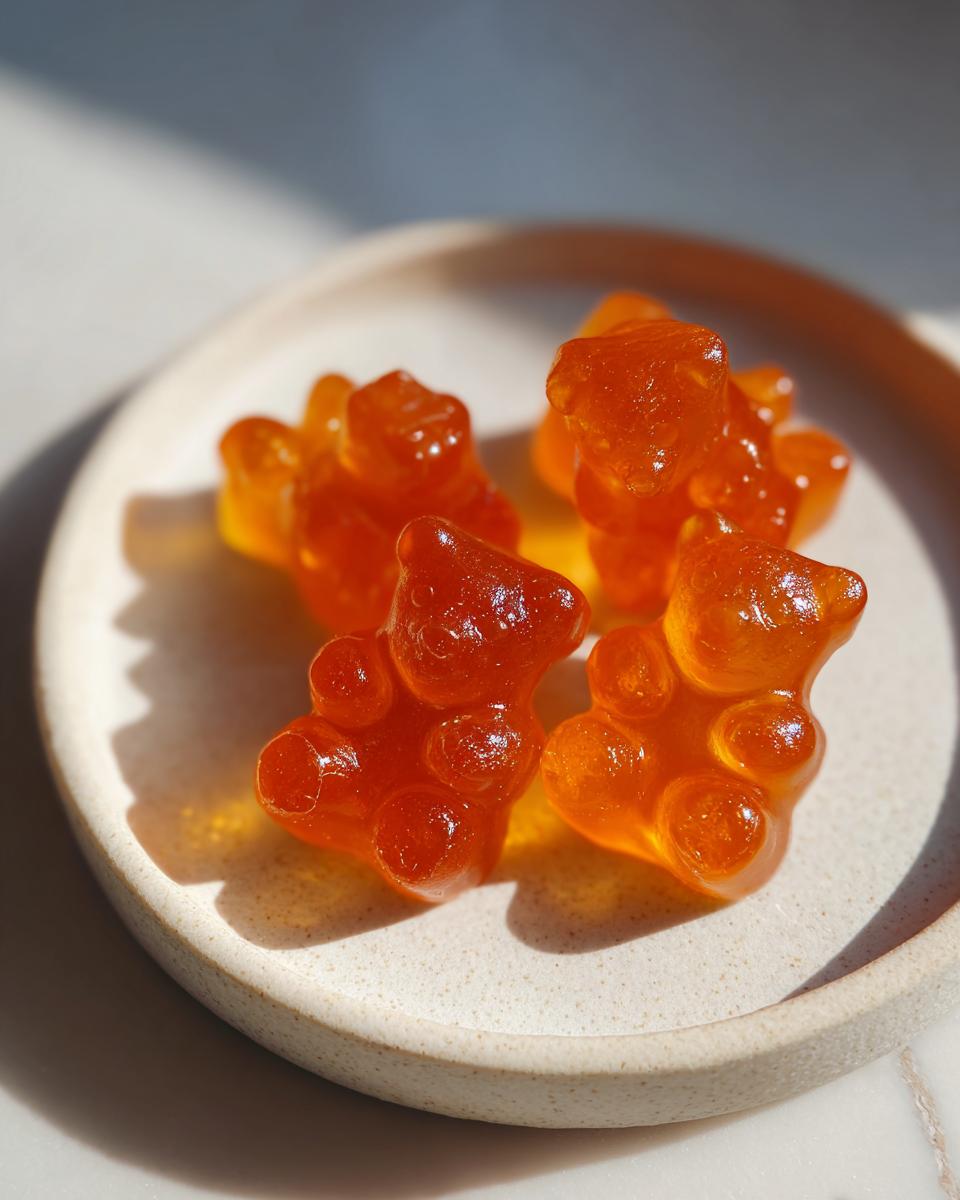
If you’re anything like me, you love a little snack that makes you feel good while you eat it. We’re all chasing that perfect bite—something chewy, something satisfying, maybe even a little ASMR-friendly bounce! So, when I realized you could actually make your own apple cider vinegar gummies right at home, I got obsessed. Forget those overly sweet store-bought versions; these have the most incredible, satisfying ‘spring-back bite’ because we’re ditching gelatin for something a little more magical.
Trust me on this one—I’ve spent years honing recipes, first while studying nutrition and later working in a test kitchen where reliability is everything. That experience means this ACV gummies recipe is absolutely foolproof. We’re taking the tang of the vinegar and wrapping it up in a perfectly textured, functional snack that easily fits into your daily routine. If you’re looking for other simple, feel-good recipes, you should definitely check out some of my favorite healthy lunch ideas! Get ready to ditch the guesswork; these are going to work!
- Why You Need These Homemade Apple Cider Vinegar Gummies
- Gathering Ingredients for Your Apple Cider Vinegar Gummies Recipe
- Essential Equipment for Making Apple Cider Vinegar Gummies
- Step-by-Step Instructions for Perfect Apple Cider Vinegar Gummies
- Tips for Success with Your Gut Health Snacks
- Storage and Shelf Life for Homemade Apple Cider Vinegar Gummies
- Frequently Asked Questions About ACV Gummies Recipe
- Estimated Nutritional Data for Apple Cider Vinegar Gummies
- Share Your Apple Cider Vinegar Gummies Creations
Why You Need These Homemade Apple Cider Vinegar Gummies
Look, you want the benefits of ACV, but you also need a snack that actually tastes good and has that fantastic chew, right? That’s exactly what this recipe delivers. These aren’t just a quick fix; they’re a genuinely delicious daily ritual.
- You get that delightful ‘spring-back bite’ that shop-bought versions rarely nail.
- They are packed with healthy probiotics to support your digestion—real gut health snacks!
- You control the sugar content completely.
- Making your own apple cider vinegar gummies means you know exactly what’s going into your body.
Achieving the Perfect Texture with Agar Agar Gummies
Here’s my little piece of science background coming through! I skip the standard gelatin because it gives you that softer, wobbly texture. We’re using agar agar here. It’s derived from seaweed, and it sets up much firmer, giving you that satisfying, resilient chew that holds its shape beautifully. It’s the key to keeping these functional gummy bears from melting into a sticky mess on you!
Gathering Ingredients for Your Apple Cider Vinegar Gummies Recipe
Okay, let’s talk supplies! Making these ACV gummies recipe treats is almost as simple as just gathering what you need. Since we are aiming for maximum function and flavor, the quality of these few ingredients truly matters. I’ve listed out exactly what you need for about thirty perfect little squares. If you’ve already spotted my favorite healthy lunch ideas, you probably already have a stocked pantry!
- 1/2 cup filtered water
- 1/4 cup apple juice concentrate (it has to be unsweetened, please!)
- 1/4 cup apple cider vinegar (this is important: make sure it has the mother!)
- 3 tablespoons granulated sugar or maple syrup (your choice for sweetness)
- 2 teaspoons agar agar powder (this is our texture secret weapon)
- 1 teaspoon lemon juice
- 1/2 teaspoon probiotic powder (I highly recommend going for a dairy-free option if you can find one!)
Ingredient Notes and Probiotic Substitutions
Paying attention to these details makes all the difference between a good gummy and a fantastic, functional one. First, about the ACV: make sure you are using one with the mother. That cloudy stuff is where all the benefits are hanging out. If you don’t use that, you’re just getting tart water, honey!
For the probiotics—this is where we are adding power to these probiotic recipes—you need a powder. Do not try to crush up capsules directly into this mix; the fillers can sometimes mess with the setting process. Just use a high-quality, shelf-stable powder. If your favorite brand is yogurt-based, try to find one listed as ‘delayed release,’ but usually, any standard multi-strain dairy-free powder works just fine for these quick batches.
Essential Equipment for Making Apple Cider Vinegar Gummies
Getting ready to make your apple cider vinegar gummies means you need a couple of specific items, one of which is key to achieving that super fun, bouncy shape we’re aiming for. You don’t need a ton of fancy gadgets, which is why I love this recipe for busy people!
First, you absolutely need your silicone molds. Honestly, this is how we turn a simple liquid into those satisfying homemade gummy bears. If you want the classic shape, get a silicone bear mold. Silicone is the best because these gummies stick just a *tiny* bit when they set, and silicone lets them pop right out without tearing. If you don’t have molds, don’t panic—I’ll show you a workaround later, but molds make the experience way more fun!
You’ll also need a decent small saucepan for mixing everything on the stove. A whisk is crucial here for getting the sugar dissolved and the agar powder incorporated without clumps. Finally, grab a measuring spoon set—precision really matters with agar agar, so use your correct measuring spoons, not just eyeballing it!
Step-by-Step Instructions for Perfect Apple Cider Vinegar Gummies
This is the part where we turn simple liquids into those bouncy, amazing apple cider vinegar gummies you’ve been dreaming of. Follow these steps closely, especially regarding temperature, and you’ll get gummies that rival anything you buy. Remember, my background from the test kitchen means these steps are designed to work every single time. If you’re looking for more fast recipes, I’ve got some quick guides for quick and easy breakfasts!
- First things first, combine the water, apple juice concentrate, apple cider vinegar, and your chosen sweetener in a small saucepan. Give it a really good whisk just to make sure that sugar dissolves before we even think about turning the heat on.
- Now, sprinkle that agar agar powder right over the top of the liquid. Don’t stir yet! Just let it sit there, getting happy for about 5 minutes to hydrate. This makes sure it dissolves evenly later on.
- Time for heat! Put the pan over medium heat. You need to bring this mixture up to a gentle boil, and you have to whisk constantly while you do this. Once it’s boiling, keep it there for just 1 to 2 minutes. That minute or two is essential for fully activating the agar agar so your gummies actually set up properly.
Activating the Agar Agar and Temperature Control
See that boiling step? Don’t skip it! Agar needs that heat to wake up, or you end up with liquid candy instead of gummies. But here’s the real trick: once you pull the pan off the heat, you need to let it cool down for about 5 minutes. I stir it occasionally while it cools just a bit. Why the wait? Because the mixture has to drop in temperature enough so it won’t kill off the helpful little guys in your probiotic powder when you add them in the next step. It’s a balancing act, but totally doable!
Pouring and Setting Your Homemade Gummy Bears
This is where you need to move fast! As soon as the temperature is down enough (but still totally liquid), whisk in your lemon juice and that probiotic powder until everything looks incorporated. The mixture will try to stiffen up quickly, so don’t dawdle! Pour that liquid immediately into your silicone molds. If you skipped the molds, just pour the whole thing into a shallow dish lined with parchment paper—it works great too!
Tuck those molds right into the refrigerator. They need at least an hour, but honestly, leave them longer if you can, just to ensure they are completely, rock-solid firm. Once they are stiff, carefully pop out your beautiful homemade gummy bears!
Tips for Success with Your Gut Health Snacks
You’ve done the hard part, but I want to make sure your apple cider vinegar gummies come out perfectly chewy every single time—especially since they are meant to be consistent little gut health snacks!
My number one tip comes from the notes section: if your gummies come out a little soft or jiggly instead of having that perfect spring, it’s almost always the agar. Go back and try again, but increase your agar agar powder to 2 1/4 teaspoons next time. That extra bit gives the whole structure a little boost.
The Stickiness Issue (And How to Fix It)
Sometimes, even with silicone, these can be a little sticky when you try to pop them out. This usually happens if they haven’t chilled long enough, so always give them that full hour in the fridge! If they still give you trouble, try popping the mold into the freezer for just five minutes before unmolding. That little blast of cold makes them contract just enough to release cleanly.
Flavor Adjustments
Because we are using different brands of ACV and apple juice concentrate, the tartness can vary. If you taste the mixture before pouring and it’s too fierce, you can whisk in another half teaspoon of maple syrup right before pouring. If you want them punchier, add a tiny extra squeeze of lemon juice. It all comes down to personal taste, which is the beauty of making them yourself. If you’re looking for dinner ideas that are just as flexible, take a peek at my easy weeknight dinners!
And remember, if you skipped the molds and poured them into a dish, don’t fret about cutting them immediately! Let them cool on the counter for about 15 minutes after taking them out of the fridge. This lets the surface dry slightly, which makes cutting them into neat squares much cleaner.
Storage and Shelf Life for Homemade Apple Cider Vinegar Gummies
Listen, nobody wants to waste these perfectly bouncy little treats, especially after all the effort you put into making them the right texture! Because we used agar and we kept the sugar low, these aren’t like hard candy—they need a little refrigeration love.
The hard rule here is: airtight container and the fridge. Always. If you leave your gut health snacks out on the counter, they absolutely will get sticky, absorb moisture from the air, and start to melt a little bit. That’s the agar telling you it needs to chill out!
I store mine in a glass container with a tight-fitting lid. Make sure they aren’t completely packed in there; I like to put a small piece of parchment paper between the layers if my mold made a lot. This stops them from sticking to each other, which is one of the few times parchment truly helps after they’re set.
As for how long they last? The notes mention about two weeks, and I stand by that. You’re dealing with real food and probiotics here, not preservatives. They are at their absolute prime for texture and potency within that first week, but you should easily get a full two weeks out of them if they stay cold and sealed up tight. Don’t stress if they look a little wet when you pull them out of the fridge; just give them a minute to acclimate before you grab your snack!
Frequently Asked Questions About ACV Gummies Recipe
Can I use gelatin instead of agar agar in this ACV gummies recipe?
You absolutely *can* use gelatin to make these, but you need to know you’ll completely change the structure! Gelatin yields a traditional, softer gummy bear texture, which is lovely, but it won’t give you that firm ‘spring-back bite’ we worked so hard to achieve with agar agar. If you swap, use about 4 teaspoons of powdered gelatin instead of the 2 teaspoons of agar. Also, you skip the boiling step entirely—you just dissolve the gelatin into hot liquid, let it sit, and add it in at the end with the probiotics. It’s a different recipe, really, so I always stick to agar for these apple cider vinegar gummies.
Why do my probiotics seem ineffective in these homemade gummy bears?
That’s all about timing and heat! The number one mistake people make with any probiotic recipe is adding the powder when the mixture is still too hot from the stove. If it’s too hot, you sterilize the good bacteria, and boom—no more live cultures working for your gut. That’s why we always let the mixture cool for those crucial five minutes off the heat before whisking in the powder quickly. It keeps them alive long enough to set!
How strong should the apple cider vinegar taste be in these gut health snacks?
When the mixture is liquid on the stove, it will taste quite strong—that’s totally normal! The sweetness from the juice concentrate and the sugar balance it out during the boiling phase, and once it sets, the flavor mellows considerably. You should taste a clear, pleasant tang, but it shouldn’t burn your tongue when you eat it cold from the fridge. If it seems too strong even when set, try decreasing the ACV by a tablespoon next time and adding an extra tablespoon of apple juice concentrate to balance.
I want to make these sugar-free. What’s the best sweetener swap?
This is a great question if you are watching sugar intake! Unlike baking cakes where sugar does important structural work, here it’s mainly for flavor balance against the vinegar. You can use a zero-calorie substitute like monk fruit or erythritol, but be warned: they don’t dissolve quite the same way granulated sugar does. You might need to gently heat the water and sweetener first to make a syrup before adding the ACV. I generally stick to maple syrup because it blends perfectly and is a more natural option, but monk fruit works well if you’re aiming for keto-friendly gut health snacks.
If you want to learn more about the science behind great food and nutrition, feel free to check out my About Page!
Estimated Nutritional Data for Apple Cider Vinegar Gummies
Now, I always believe in knowing what you’re eating, even with something as simple as these little gems. Since we’re making these ourselves, the exact numbers can bounce around a little bit based on the brand of apple juice concentrate you grab or if you choose maple syrup over sugar. So, treat these numbers below as a really great yardstick!
Based on the recipe and typical ingredient measurements, here is what you can generally expect when you serve up three of these agar agar gummies:
- Serving Size: 3 gummies
- Calories: 25
- Sugar: 4g
- Sodium: 1mg
- Fat: 0g
- Carbohydrates: 6g
- Protein: 0g
I want to be clear—these values are estimates, remember! They are based on using the sugar option and standard commercial ingredients. If you swap to maple syrup, the sugar slightly changes, and if you use a different brand of juice concentrate, your carb count might shift by a tiny bit. But the main takeaway is that these are a wonderfully low-fat, low-sodium snack that gives you a little flavor boost without derailing your goals. It’s good to know that you’re getting a delicious, functional snack without unnecessary extras!
Share Your Apple Cider Vinegar Gummies Creations
Okay, now you have the secret to making these bouncy, tangy, absolutely perfect apple cider vinegar gummies! I’ve poured my heart and a little bit of test-kitchen wisdom into making sure this recipe turns out flawlessly for you.
But I truly can’t wait to hear how they turned out! Did you use the bear molds, or did you cut squares? Tell me in the comments below if you found the perfect brand of probiotic powder to use—I’m always curious about what everyone is discovering.
If you loved this easy recipe and found it helped you get your daily tang fix, please consider giving it a rating! Your feedback helps other cooks feel confident trying something new. If you want to send me a picture of your perfect batch of homemade gummies, you can always reach out via my Contact Page. Happy snacking, everyone!
PrintHomemade Apple Cider Vinegar Gummies with Probiotics
Make satisfying, chewy apple cider vinegar gummies at home using agar agar for a perfect spring-back bite. These are a simple, functional snack for gut health.
- Prep Time: 10 min
- Cook Time: 5 min
- Total Time: 75 min
- Yield: About 30 gummies 1x
- Category: Snack
- Method: Stovetop Setting
- Cuisine: American
- Diet: Vegetarian
Ingredients
- 1/2 cup filtered water
- 1/4 cup apple juice concentrate (unsweetened)
- 1/4 cup apple cider vinegar (with the mother)
- 3 tablespoons granulated sugar or maple syrup
- 2 teaspoons agar agar powder
- 1 teaspoon lemon juice
- 1/2 teaspoon probiotic powder (dairy-free preferred)
Instructions
- Combine the water, apple juice concentrate, apple cider vinegar, and sugar in a small saucepan. Whisk well to dissolve the sugar.
- Sprinkle the agar agar powder over the liquid mixture. Let it sit for 5 minutes to hydrate.
- Place the saucepan over medium heat. Bring the mixture to a gentle boil, whisking constantly. Maintain the boil for 1 to 2 minutes to fully activate the agar agar.
- Remove the saucepan from the heat. Let it cool slightly for about 5 minutes, stirring occasionally. The temperature should drop enough so it does not kill the probiotics.
- Whisk in the lemon juice and the probiotic powder until fully incorporated. Work quickly as the mixture will start to set.
- Pour the liquid immediately into silicone gummy molds.
- Place the molds in the refrigerator for at least 1 hour, or until the gummies are completely firm.
- Carefully remove the homemade gummy bears from the molds. Store them in an airtight container in the refrigerator.
Notes
- For a firmer gummy, increase the agar agar to 2 1/4 teaspoons.
- If you do not have molds, you can pour the mixture into a shallow, parchment-lined dish and cut it into squares once set.
- These ACV gummies recipe treats are best consumed within two weeks when stored properly.
Nutrition
- Serving Size: 3 gummies
- Calories: 25
- Sugar: 4g
- Sodium: 1mg
- Fat: 0g
- Saturated Fat: 0g
- Unsaturated Fat: 0g
- Trans Fat: 0g
- Carbohydrates: 6g
- Fiber: 0g
- Protein: 0g
- Cholesterol: 0mg