

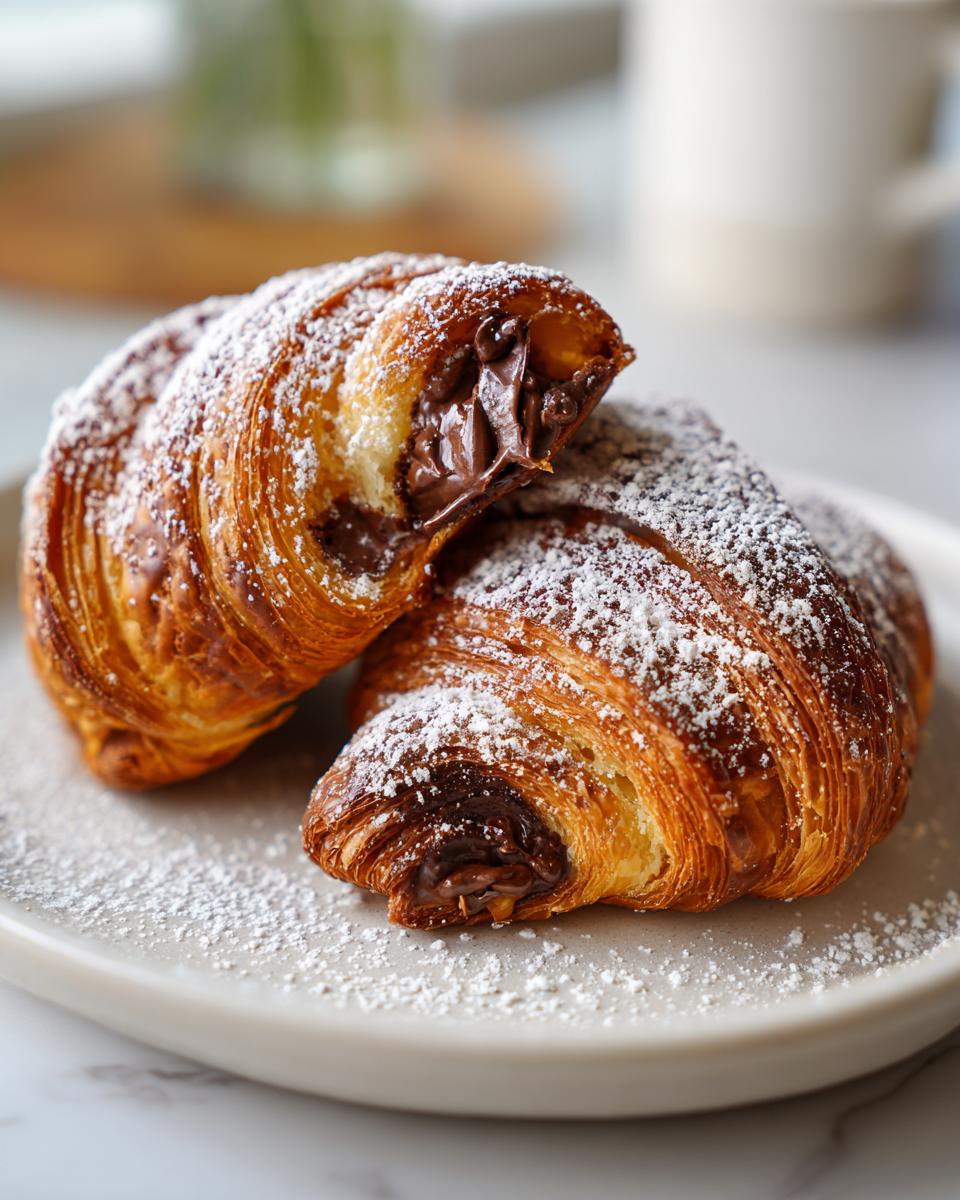
Oh, who doesn’t dream of walking into a French bakery, grabbing a warm, flaky chocolate croissant, and just savoring that first perfect bite? It feels so luxurious, right? The tricky part is, making them the authentic way involves hours of chilling and folding butter—we call that lamination—and honestly, who has that kind of time on a Tuesday morning?
But listen, you don’t have to sacrifice that buttery, flaky magic! Here at Cooking by Jade, my whole mission is taking those intimidating techniques and making them totally doable for you at home. That’s why this shortcut recipe is one of my absolute favorites. We’re using all-butter puff pastry, which is our secret weapon, to give you that bakery-style experience without spending all day in the kitchen. Trust me, the results are divine, and you’ll feel like a pastry genius!
If you are looking for more simple, wonderful ways to start your day, check out my guide to quick and easy breakfasts!
- Why This Shortcut Chocolate Croissant Recipe Works So Well
- Ingredients for Your Chocolate Croissant
- Step-by-Step Instructions to Make Chocolate Croissants
- Tips for Perfect Chocolate Croissant Results
- Variations on the Classic Chocolate Croissant
- Serving Suggestions for Your Homemade Pain au Chocolat
- Storage and Reheating Instructions for Chocolate Croissants
- Frequently Asked Questions About Easy Chocolate Croissants
- Nutritional Estimates for One Chocolate Croissant
Why This Shortcut Chocolate Croissant Recipe Works So Well
You might think cheating with store-bought dough means missing out, but that couldn’t be further from the truth, especially when we’re talking about achieving amazing bakery style pastries at home. The complex folding needed for traditional croissants—called lamination—is where most home cooks throw in the towel. As someone who has spent years simplifying baking, I can tell you: great quality puff pastry does most of that hard work for you!
We’re focusing on technique here, not dough creation. This method lets you nail the texture everyone craves on the first try. It’s about getting those gorgeous, flaky butter croissants without the three-day commitment.

Achieving Buttery Layers Pastry Texture
The key is starting with all-butter puff pastry. When butter puffs hit that searing hot oven, the water inside turns to steam immediately, forcing those paper-thin layers apart. This creates incredible lift and that signature crunch. If you skip the high-quality stuff, you lose that distinct buttery flavor that separates a good pastry from a great one.
The Secret to a Perfect Chocolate Croissant Filling
Nobody wants a pastry where the chocolate either burns or stays hard. That’s why we skip the chips! The magic lies in using actual chocolate batons, sometimes called “pain au chocolat sticks.” These are designed perfectly for baking; they melt evenly without spreading everywhere, giving you that gooey, decadent melted chocolate filling when you bite into your finished chocolate croissant.
Ingredients for Your Chocolate Croissant
- 1 package (14.1 ounces) all-butter puff pastry, thawed according to package directions
- 8 ounces good quality bittersweet or semi-sweet chocolate, cut into batons or thick sticks (about 16 pieces)
- 1 large egg, beaten with 1 teaspoon water (for egg wash)
- Optional: Powdered sugar for dusting
If you want to know more about my background developing these reliable recipes, you can always read about me on the About Jade Carter page!
Step-by-Step Instructions to Make Chocolate Croissants
Okay, now for the fun part! If you think the actual assembly is complicated, you are going to be so surprised at how quickly this comes together. We’re getting ready for that beautiful aroma of french breakfast baking to fill your entire house. We need a couple of baking sheets ready, and line them with parchment paper first—trust me, cleanup is so much nicer that way!
If you are looking for other fantastic meal ideas for when you’re busy, take a look at my easy weeknight dinners collection.
Preparing and Cutting the Puff Pastry for Chocolate Croissants
First up, you need to carefully unfold your thawed puff pastry sheets onto a surface you’ve dusted very lightly with flour. You should have gotten two sheets, right? Take that first rectangle and slice it right down the middle lengthwise. Now, we are cutting crosswise into four equal squares. Since we do this to both halves, you’ll end up with eight squares per sheet, which means sixteen triangles total! That’s a great batch for a weekend breakfast.
Rolling the Pastry Around the Melted Chocolate Filling
Grab your chocolate batons—remember, the good stuff melts best! Lay one small piece near the wide base of one of your triangles. Now, roll that pastry up tight over the chocolate, working your way toward the tip. If you are feeling extra ambitious, go ahead and place a second baton near the center of the triangle before you roll it! That ensures an amazing melted chocolate filling throughout. Once rolled, gently curve the pastry into that classic crescent shape, leaving plenty of space between them on the pan.
Chilling and Baking Your Flaky Butter Croissants
This next step is non-negotiable if you want those perfect, puffy, flaky butter croissants! You MUST chill them. Pop the baking sheets right into the refrigerator for a solid 30 minutes. While they’re chilling, crank your oven up to 400°F (200°C). Once they’re chilled, brush them generously but gently with that egg wash. Bake these little beauties for about 15 to 20 minutes. Pull them out when they look puffed up and deeply golden brown—those are your signs of perfect golden baked croissants!
Tips for Perfect Chocolate Croissant Results
When you are attempting beginner croissant baking, temperature control is honestly everything. It sounds intense, but it’s what separates the good results from the great ones. Once that cold butter hits hot air, science happens! I know it’s tempting to skip the chilling steps when you’re excited to eat these things, but try to fight the urge. A well-chilled pastry is your best chance for flaky success.
Handling Cold Pastry for Maximum Flake
Seriously, don’t let that puff pastry get sloppy warm. The butter layers need to stay solid discs right until they go into the oven. If the butter starts softening on the counter while you’re rolling or shaping, too bad—into the fridge it goes! Those cold, distinct fat layers bump up against each other when they bake, creating all that beautiful air and that stunning flake. You want crisp layers, not a sad pastry blob!
Choosing the Right Chocolate for Your Chocolate Croissant
We talked about batons earlier, and I’ll say it again: use them if you can find them! They make achieving those bakery style pastries so much easier. If you’re chopping up a bar, make sure those pieces aren’t too thin or too finely chopped. We need solid chunks that can melt slowly inside that pastry pocket. If the chocolate is too small, it might liquefy too fast and leak out before the dough has puffed up around it. Good chocolate makes all the difference!
If you run into any snags while you’re baking, don’t hesitate to reach out on the Contact page!
Variations on the Classic Chocolate Croissant
Part of the fun of baking is making a recipe your very own, right? Even though this puff pastry approach is already a fantastic shortcut, you can totally play around with what you stuff inside. It’s so easy to pivot from a classic chocolate croissant to something new for the next weekend brunch!
If you’re looking for fun ways to use up stale croissants or just want to turn this concept into a bigger centerpiece, you might want to search around for chocolate croissant breakfast bake ideas. While this recipe focuses on the individual pastry, those casserole-style bakes are wonderfully comforting!
For a different twist on the filling here, try adding a thin layer of almond paste right next to your chocolate batons—that gives you a gorgeous chocolate-almond combination that tastes straight out of a fancy patisserie. You could also swap the bittersweet chocolate for white chocolate, or even mix in some finely chopped dried cherries for a fruity pop. Don’t feel tied down to just chocolate, though! Try using peanut butter chips or even a teaspoon of jam before rolling them up.
When you’re ready to try another fantastic chocolate treat that’s just as fun to make, check out my recipe for fudgy chocolate crinkle cookies! It’s a completely different kind of chocolate indulgence.
Serving Suggestions for Your Homemade Pain au Chocolat
Okay, you’ve pulled that golden, flaky batch of homemade pain au chocolat out of the oven, and the smell alone is enough to declare victory for the day. But what do you serve alongside this masterpiece? Since these pastries are rich, buttery, and often quite decadent, I like to balance them out with something simple, or sometimes, something that doubles down on the indulgence—it really depends on if it’s a quick Tuesday treat or a full-blown Sunday gathering!
When we talk about french breakfast baking, we’re thinking about comfort and richness. You absolutely need a great beverage nearby. A strong, unsweetened black coffee, like a French press brew, is my go-to pairing. The slight bitterness cuts right through that butter perfectly. A dark roast latte or even just hot brewed Earl Grey tea works wonders, too.
If you’re serving these for brunch and want something a little lighter on the side, keep it fresh! Think simple bowls of mixed berries—raspberries and blueberries are fantastic because their tartness is a nice counterpoint to the sweet chocolate. You could also offer a small side plate of thinly sliced, crisp green apples.
Now, if you’re embracing the decadence—and why wouldn’t you?—you can serve them alongside my recipe for cranberry orange scones for a full pastry spread. Or, for a savory contrast that really anchors a weekend meal, try serving just one pastry per person alongside a small helping of scrambled eggs or maybe a light slice of avocado toast!
Storage and Reheating Instructions for Chocolate Croissants
Okay, this is the hard truth about any perfect, flaky pastry: nothing beats a chocolate croissant fresh out of the oven. That moment when the butter is just warm enough, and that chocolate is perfectly molten? Unbeatable! But sometimes, you either bake too many (never!) or you just want one the next morning.
Here’s the deal: these pastries are generally best eaten the day you bake them. If you have leftovers, you need to handle them gently to keep those buttery, layered textures intact. Don’t just seal them up in plastic wrap right away, or they’ll steam and go soft. Let them cool completely on the wire rack first. Once totally cooled, store them loosely covered in a paper bag or an airtight container at room temperature. They should be fine for about two days like this.
If you’re storing them for longer than two days, you really should freeze them. Cool them completely, place them on a baking sheet separated by wax paper, and freeze until solid. Then, transfer them to a freezer-safe bag. I avoid freezing them once they’re already baked if I can, because reheating pastry is always better than microwaving it!
Waking Up Those Layers: Reheating Advice
If you’re reheating a day-old croissant, skip the microwave entirely—it turns that beautiful flakiness into chewiness, and we can’t have that! The best method is a quick warm-up in the oven. Preheat your oven to a low temperature, maybe 300°F (150°C). Wrap the croissant loosely in foil first, just to bring it back to life gently, and warm it up for about 5 to 8 minutes. You’ll get wonderful warmth in the chocolate and a nice crispness return to the outer layers.
If you’re reheating one you froze, you can often skip the foil. Place it straight on a baking sheet in a 325°F (160°C) oven for about 10 to 12 minutes. You’ll be amazed how close to fresh they taste!
For more about how I handle site information, check out my Privacy Policy.
Frequently Asked Questions About Easy Chocolate Croissants
Can I use crescent roll dough instead of puff pastry for chocolate croissants?
That’s a question I get all the time! Look, you absolutely *can* use those refrigerated crescent rolls if you’re in a real pinch and need some quick chocolate-filled pastry action. It’s the ultimate shortcut croissant move. However, I have to be honest with you: crescent roll dough has a lot of stabilizers and less butter incorporated in the way it’s designed. You are going to get a good pastry, sure, but it won’t have those distinct, shattering, paper-thin layers you get from real all-butter puff pastry. For the true flaky butter croissants experience, stick with the puff pastry!
How do I get that shiny, golden finish on my Flaky Butter Croissants?
That gorgeous, deep golden color and the beautiful sheen? That is all thanks to the egg wash! It’s super simple, but make sure you do it right. You mix one large egg—just one!—with about one teaspoon of water. You whisk it up really well until it’s kind of frothy. Then, use a clean pastry brush and gently paint the tops and sides of your shaped croissants before they go into the oven. You want a nice, even coat, but be careful not to let any drip down into the seams of the pastry, or it can sometimes seal the edges shut and stop them from puffing up nicely. That little bit of egg makes all the difference between a pale, matte finish and a truly golden baked croissant!
Can I make these Chocolate Filled Pastry items ahead of time?
Yes, and I often recommend it, especially if you’re planning a big weekend brunch! You can totally assemble the entire thing—cut the pastry, wrap the chocolate, and shape the crescents—and then put them in a pan, cover them loosely, and pop them in the fridge overnight. Chilling them longer than the recommended 30 minutes actually helps the butter firm up even more, which can lead to better lamination later. Just make sure when you wake up in the morning that they are completely cold before you brush the egg wash and bake them. If you want to freeze them unbaked, just make sure they are fully shaped, placed on a parchment-lined tray, and frozen solid before bagging them up. When you bake from frozen, you usually just add about 10 extra minutes to the baking time!

If you want to learn more about my baking philosophy and why I love reliable recipes, head over to my About Page!
Nutritional Estimates for One Chocolate Croissant
You know, as much as I love sharing decadent recipes like these, I always have to put a little disclaimer next to the numbers. Because we are using all-butter puff pastry and depending on the exact brand of chocolate you choose, these values are just estimates! But hey, at least you have a ballpark idea of what you’re indulging in for that perfect chocolate croissant moment.
When I put this quick recipe through the standard estimators based on the ingredients listed above, here’s what we get for a single pastry. Remember, this is for one of those wonderfully flaky treats!
- Serving Size: 1 croissant
- Calories: 280
- Fat: 18g (with 10g being saturated fat—that’s where all the buttery goodness comes from!)
- Carbohydrates: 25g
- Sugar: 10g
- Protein: 4g
- Cholesterol: 45mg
These aren’t exactly low-cal, but wow, they are worth every single bite! If you are tracking things closely, you might want to weigh out your chocolate and pastry sections, but for us regular home bakers, this gives us a good guide. If you are looking for leaner options for later in the day, you should check out my ideas for healthy lunch ideas!
PrintEasy Homemade Chocolate Croissants (Pain au Chocolat Shortcut)

Make bakery-style chocolate croissants at home using store-bought puff pastry for flaky, buttery layers and a rich melted chocolate center. This recipe simplifies the classic French pastry for quick weekend baking.
- Prep Time: 20 min
- Cook Time: 20 min
- Total Time: 1 hour
- Yield: 16 servings 1x
- Category: Breakfast
- Method: Baking
- Cuisine: French
- Diet: Vegetarian
Ingredients
- 1 package (14.1 ounces) all-butter puff pastry, thawed according to package directions
- 8 ounces good quality bittersweet or semi-sweet chocolate, cut into batons or thick sticks (about 16 pieces)
- 1 large egg, beaten with 1 teaspoon water (for egg wash)
- Optional: Powdered sugar for dusting
Instructions
- Prepare the puff pastry: Unfold the thawed puff pastry sheets onto a lightly floured surface. If using one large sheet, cut it in half lengthwise to create two rectangles.
- Cut the pastry into triangles: Cut each rectangle crosswise into 4 equal squares, then cut each square diagonally to form 8 triangles per sheet (16 total triangles).
- Place the chocolate: Lay one chocolate baton near the wide base of a triangle. Roll the pastry tightly over the chocolate toward the tip, ensuring the chocolate is fully enclosed. You can place a second baton near the middle of the triangle before rolling for extra filling.
- Shape the croissants: Gently curve each rolled triangle into a crescent shape. Place the shaped croissants on baking sheets lined with parchment paper, leaving space between them.
- Chill the croissants: Place the baking sheets in the refrigerator for 30 minutes. This step helps the pastry hold its shape during baking.
- Preheat the oven: Preheat your oven to 400°F (200°C).
- Apply egg wash: Brush the tops and sides of the chilled croissants lightly with the egg wash.
- Bake: Bake for 15 to 20 minutes, or until the croissants are puffed, deeply golden brown, and flaky.
- Cool and serve: Let the chocolate croissants cool slightly on the baking sheet before transferring them to a wire rack. Dust with powdered sugar before serving warm.
Notes
- For the flakiest texture, ensure your puff pastry stays cold until it enters the hot oven.
- If you want a true bakery-style look, use chocolate batons specifically made for croissants, often called ‘pain au chocolat sticks.’
- If you skip the chilling step, the butter in the pastry may melt too soon, resulting in less defined layers.
- These are best eaten the day they are baked for maximum flakiness.
Nutrition
- Serving Size: 1 croissant
- Calories: 280
- Sugar: 10g
- Sodium: 250mg
- Fat: 18g
- Saturated Fat: 10g
- Unsaturated Fat: 8g
- Trans Fat: 0.5g
- Carbohydrates: 25g
- Fiber: 1g
- Protein: 4g
- Cholesterol: 45mg