
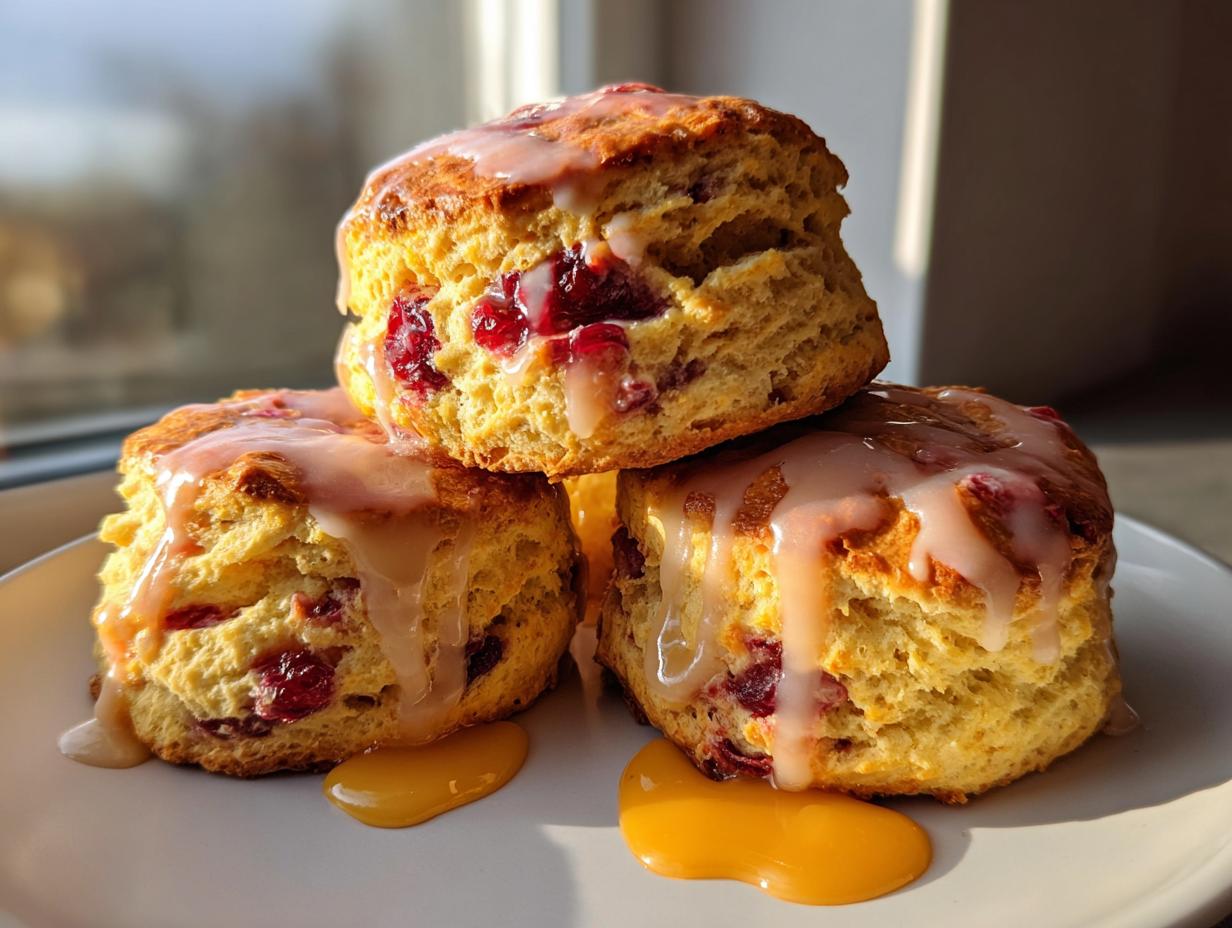
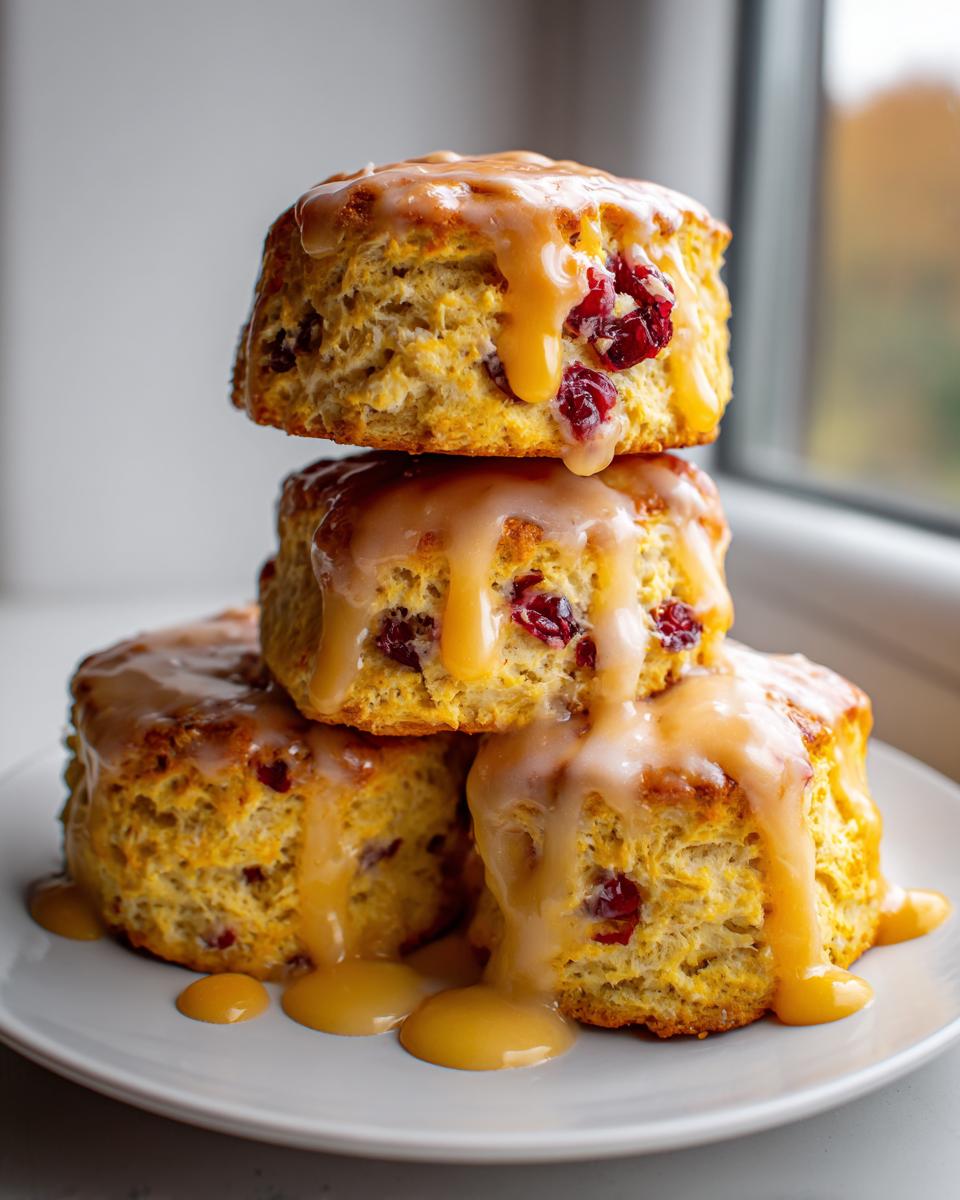
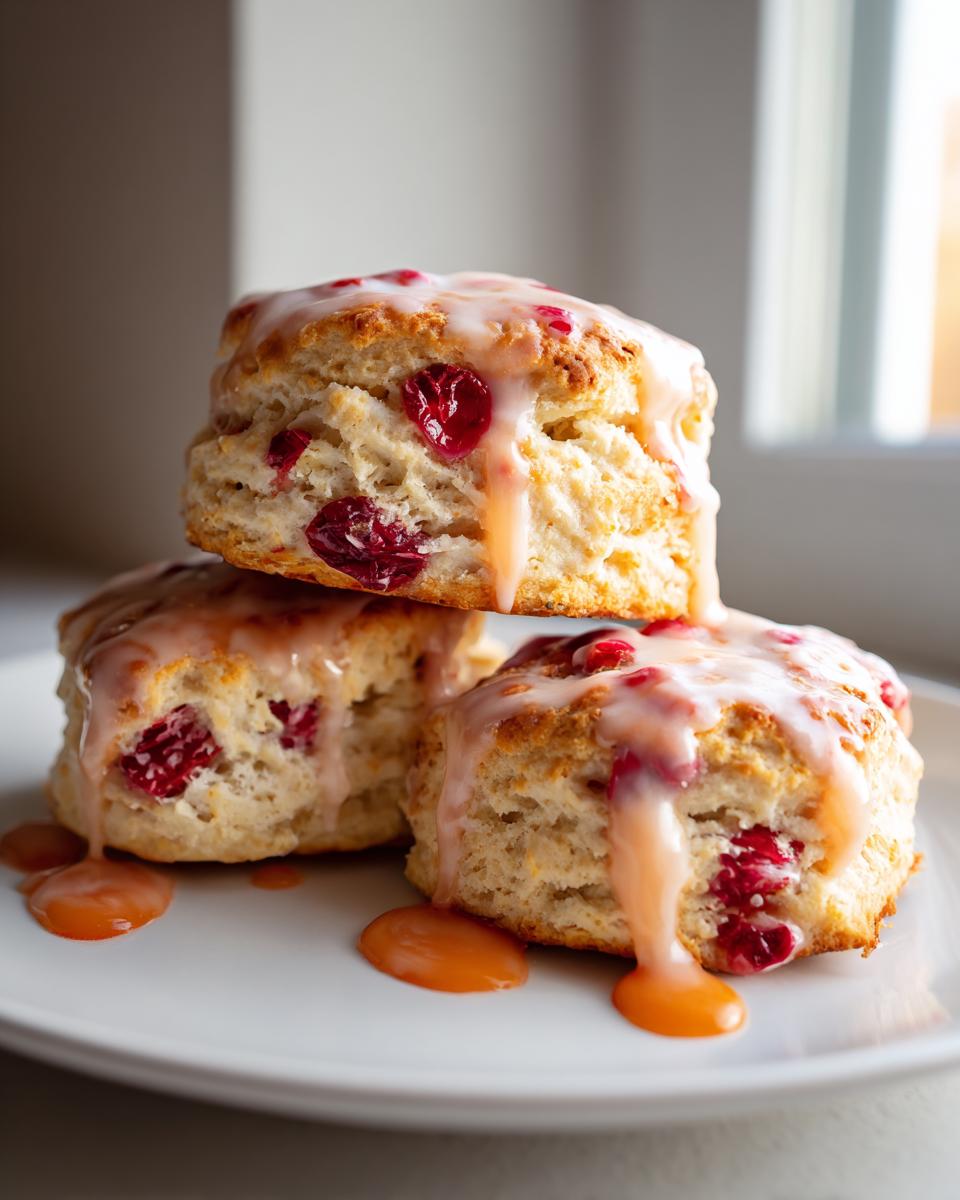
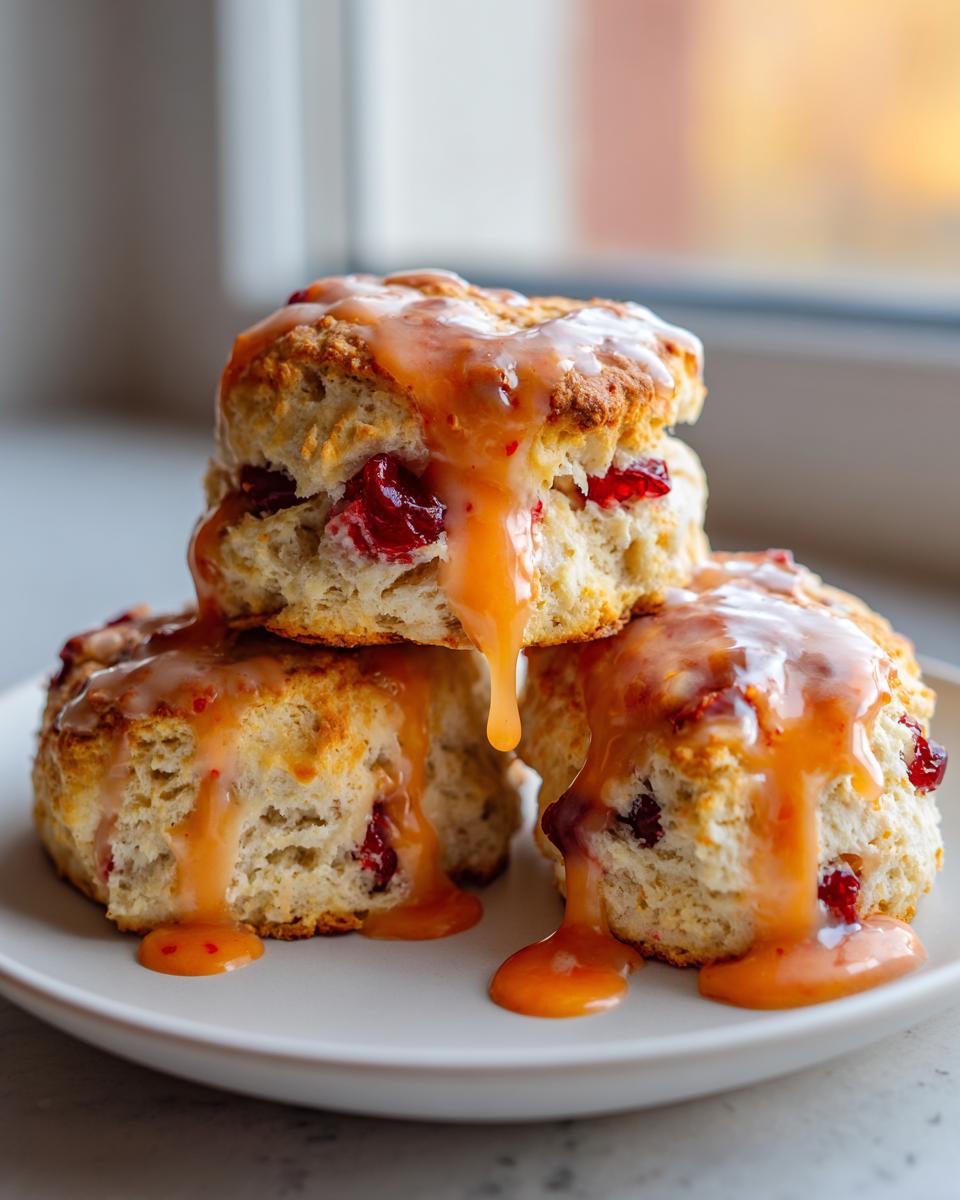
There is just something about the smell of a bright, citrusy bake on a chilly morning. If you’re planning a cozy weekend breakfast or maybe getting ready for a big holiday brunch, you absolutely need these cranberry orange scones in your life. In my kitchen, baking isn’t about being fancy; it’s purely about comfort, and nothing says comfort like a perfectly flaky scone bursting with sweet-tart flavor. Trust me when I say this easy scone recipe delivers the absolute best—flaky pastry on the outside, a wonderfully tender crumb inside, and finished with the zesty orange glaze of your dreams. We’re making bakery style scones today, and you won’t believe how little time it takes!
It only takes about 15 minutes of prep time to get these into the oven, and you can jump right over to see some other quick and easy breakfasts while they bake. That level of speed is essential for making great food accessible!
- Why These Are the Best Cranberry Orange Scones You Will Ever Make
- Gathering Ingredients for Perfect Cranberry Orange Scones
- Step-by-Step: How to Prepare Your Cranberry Orange Scones
- Tips for Making Bakery Style Scones from Scratch
- Make Ahead Breakfast and Storage for Cranberry Orange Scones
- Serving Suggestions for Holiday Brunch Recipes
- Frequently Asked Questions About Citrus Scones
- Estimated Nutritional Data for Cranberry Orange Scones
- Share Your Perfect Cranberry Orange Scones Experience
Why These Are the Best Cranberry Orange Scones You Will Ever Make
I spent ages testing recipes to make sure this version of cranberry orange scones really stands above the rest. What sets them apart is the balance—they hit that perfect sweet and tangy scones spot without tasting like dessert for breakfast. Honestly, they taste just like the ones you’d pay too much for at a fancy coffee shop! They’re the absolute best homemade scones because they give you that amazing, tender crumb scones texture without needing a pastry chef on staff. If you want to dive deeper into my philosophy on simple, reliable baking, you can always check out my About Page!
- You get that gorgeous bakery style quality every time.
- Total prep time is under 15 minutes—seriously fast for something this good!
- They always come out golden and fragrant, perfect for festive breakfast bakes.
Achieving a Flaky Pastry Recipe Texture
The secret to that phenomenal crumbly, flaky pastry recipe texture is all about temperature and timing, my friends. You must use ice-cold butter that you haven’t touched too much. When you cut it into the flour, you’re creating tiny little pockets. When those pockets hit the hot oven, the butter melts, creating steam, and *poof*—you get layers. If you overwork the dough, that butter melts before it should, and you end up with dense hockey pucks instead of light scones. Don’t worry, I show you exactly how little you need to mix them in the next section!
Gathering Ingredients for Perfect Cranberry Orange Scones
Okay, you’re convinced these are going to be the best, so let’s get our supplies ready! When developing this recipe in the test kitchen, I learned quickly that the quality of what you put in directly impacts the final beautiful look of your cranberry orange scones. Seriously, cutting corners here is a recipe for disappointment. We need that super cold butter for layering, and fresh orange zest—not the bottled stuff—to get that bright punch that balances the tartness of the berries. Everything needs to be on the counter, ready to go before we even think about mixing!
Dry Ingredients and Flavorings
This is where we build the structure and the base flavor. Make sure your butter is truly chilled. I mean, *straight from the fridge* cold. Here’s what you’ll need for the base:
- 2 1/2 cups all-purpose flour
- 1/3 cup granulated sugar
- 1 tablespoon baking powder—this gives us our lift!
- 1/2 teaspoon salt
- 1/2 cup (1 stick) cold unsalted butter, cut into small pieces. This is non-negotiable for flakiness!
- 1 cup dried or frozen cranberries
- The Zest of 1 large orange. Get right down to the orange part; that white pith underneath is where all the bitterness hides, and we want pure, zesty sunshine here.
Wet Ingredients and the Orange Glaze Scones Topping
Next up are the liquids that bring that dough together, plus the finishing touch that makes these famous—that beautiful orange glaze scones coating. Don’t mix these wet ingredients until the butter is already cut into the flour, okay? We protect those butter pockets!
For the dough, grab:
- 1 large egg
- 1/2 cup heavy cream, plus a little extra for brushing the tops later
- 1 teaspoon vanilla extract
And for that sweet, shiny finish, the glaze is super fast. We whisk this while the scones are cooling, and it locks in all that wonderful citrus aroma:
- For the Glaze: 1 cup powdered sugar
- 2 tablespoons fresh orange juice (plus maybe a tiny bit more if needed)
Step-by-Step: How to Prepare Your Cranberry Orange Scones
I know looking at a recipe can feel daunting sometimes, but I promise you, these cranberry orange scones are my go-to when I need something amazing fast. That 15-minute prep time is real, folks! Once you get the hang of cutting in the cold butter, the whole process flies by. We’re moving from mixing bowls to baking sheet so quickly, you barely have time to clean up!
Mixing the Dough for Tender Crumb Scones
This is the make-or-break moment for that soft, tender crumb scones texture we’re after. Once your wet ingredients are mixed up in their little bowl, pour them right over the flour and butter mixture. Grab a fork—no electric mixer needed here! Gently fold everything together. Stop exactly when you can’t see any dry white flour streaks anymore. The dough will look messy; it’ll look shaggy and barely held together. That’s perfect! If you keep mixing until it’s smooth, you are developing gluten, and that immediately switches your scone into tough biscuit territory instead of light, fluffy goodness.
Shaping and Baking Your Citrus Scones
Now, turn that shaggy mess out onto a lightly floured counter. Don’t panic about adding too much flour, either! Just gently press it together maybe three or four times—that’s all the kneading these need. Pat it down gently into a thick circle, aiming for about a 3/4-inch thickness. Then, take your knife or bench scraper and cut that circle into 8 perfect pie wedges, just like you are cutting a pizza. Give them a little space on your parchment-lined baking sheet and brush the tops lightly with a bit of extra cream. Pop them into a hot oven, preheated to 400 degrees F, and let them bake for 15 to 18 minutes. You are looking for beautiful golden brown tops!
Need more fast ideas for the morning? I have a whole section of easy weeknight dinners, but trust me, these scones are worth slowing down for on a weekend!
Creating the Perfect Orange Glaze Scones Finish
While those beauties are cooling off—and just try not to eat them warm right away!—we whip up the glaze. This is pure simplicity. Whisk that cup of powdered sugar with your fresh orange juice. The trick here is to add the juice slowly. You want this orange glaze scones topping to be thick, slightly opaque, and drizzly, not thin and watery. If you use too much juice, you’ll need a whole extra cup of sugar to fix it later. Once the scones are just barely warm, drizzle that sweet citrus topping all over. It sets up beautifully and makes them look professionally done!
Tips for Making Bakery Style Scones from Scratch
Achieving that perfect bakery style scones look and feel at home is totally doable, I promise! When I was developing this recipe, I tested everything to find those little shortcuts that make all the difference between an okay scone and one of the best homemade scones you’ve ever eaten. If you’re aiming for those gorgeous, slightly rustic, tall shapes, it all comes down to respecting your ingredients and being quick when you handle the dough.
Ingredient Temperature and Handling
I have to harp on this one more time because it’s the most crucial step for these cranberry orange scones: your butter has to be rock solid cold. If your kitchen runs warm, chill your bowl and your flour mixture for about 15 minutes before you start cutting in the butter. If the butter melts even a little, those flaky layers described in the recipe notes disappear! Also, regarding the fruit, if you decide to use frozen cranberries instead of dried, don’t thaw them first. Toss them in straight from the freezer. They behave more like the dried ones and won’t bleed all their color into your gorgeous pale dough.
Variations for Festive Breakfast Bakes
If you want to mix things up for your next round of festive breakfast bakes, this base recipe is so reliable you can play with it a little! For example, if you suddenly realize you’re out of cranberries, dried cherries are a fantastic substitute; they bring that same tart pop. Or, if you want to lean harder into the spice cabinet, try adding just a tiny pinch of ground cardamom when you mix the dry ingredients. It pairs unbelievably well with the orange zest and makes these feel extra special for Christmas morning!
If you’re looking for other fantastic, no-fuss holiday favorites, check out my recipe for easy pub-style beer cheese dip—it’s always the first thing gone at a party!
Make Ahead Breakfast and Storage for Cranberry Orange Scones
I know life gets busy, especially when you’re hosting or need something special ready before the sun is even up. One of my favorite things about this recipe being categorized as a make ahead breakfast favorite is how easy the storage is! You absolutely can prep these cranberry orange scones ahead of time, which means less scrambling when guests arrive for your holiday brunch recipes.
Freezing Unbaked Scones
This is my number one trick for stress-free weekend mornings! Once you have cut your scones into wedges (Step 6), lay them out on that parchment-lined baking sheet, making sure they aren’t touching. Pop the whole sheet into the freezer for about an hour until those wedges are completely frozen solid. Then, transfer the frozen rounds into an airtight zip-top bag or heavy-duty freezer container. They keep beautifully in the freezer for up to three months! When you’re ready to bake, just put them directly onto the baking sheet from frozen. You’ll need to add about 3 to 5 extra minutes to the bake time since you aren’t starting with room temperature dough, but the flaky texture stays perfect!
If you are looking for other great ideas for making mornings easier, you have to check out my recipe for easy egg bites—they are lifesavers!
Storing Baked Scones
If you bake them fresh but don’t eat them all right away, storage is simple. Once the orange glaze scones have set completely, store them in an airtight container at room temperature. Since they are denser than a soft roll, they hold up well! They should stay wonderfully fresh for a good two days. If you want to reheat them later, just wrap a scone in a paper towel and microwave it for about 15 to 20 seconds. It warms up the butter slightly and brings back that ‘fresh from the oven’ feel. You really can’t go wrong with these year-round winter morning treats!
Serving Suggestions for Holiday Brunch Recipes
These cranberry orange scones are fantastic all on their own, especially when they’re still slightly warm from the oven with that glaze glistening under the lights. But when you are putting together a full spread for your holiday brunch recipes, you need a few simple accompaniments to take them over the top. I like to keep things bright and easy so I’m not spending all morning fussing around while everyone else is enjoying themselves!
First off, you absolutely need great coffee or hot tea nearby. The slight bitterness of a strong black coffee cuts through the sweetness of the glaze perfectly. If you’re serving a crowd for a December breakfast, a nice hot spiced cider is also wonderful—it complements the spice notes in the scone dough beautifully.
If you want to serve something alongside them, skip anything too heavy since scones are pretty substantial! A simple homemade citrus curd is divine—just a small bowl of tart lemon or orange curd for spreading is better than any heavy jam. If you need a showstopper main dish for that same brunch, you have to try my recipe for Christmas breakfast casserole; it’s hearty, feeds a crowd, and tastes incredible alongside these citrus scones!
Frequently Asked Questions About Citrus Scones
I totally get it—when you find a recipe that promises the best results, you have quick questions before you even start mixing! I developed this recipe from scratch, meaning I tried every mistake so you don’t have to! Here are some of the things people ask most often about making these perfect cranberry orange scones.
Can I use fresh cranberries instead of dried in this easy scone recipe?
That is such a good question, as fresh cranberries are sometimes easier to find depending on the season! Yes, you absolutely can use fresh ones in this easy scone recipe. The main thing to watch out for is moisture. If you grab the ones straight out of the fridge, they act almost identical to dried ones. If you grab them already frozen (which I love to do!), do not thaw them first—toss them right in with the dry mixture so they don’t bleed color. If you use very plump, thawed fresh cranberries, you might notice the dough gets a little wetter. If that happens, just add a tiny sprinkle more flour when you are gently turning the dough out.
How do I prevent my scones from becoming hard instead of having a tender crumb?
This is the absolute number one way people accidentally ruin a great scone! The whole key to those wonderful tender crumb scones is *minimal handling*. Think of it like handling a puppy—you love it, but you don’t want to squeeze it until all the air is gone! When you combine the wet and dry ingredients, stop mixing the second you can’t see any dry streaks of flour. The dough should look messy, almost like it’s falling apart. If you knead it more than three or four times on the countertop, you are developing gluten, and that’s what makes things tough and hard instead of light and flaky. Low and slow mixing during that wet-to-dry stage is your secret weapon!
What is the secret to a thick, opaque orange glaze scones topping?
Oh, that sweet, bright orange glaze scones topping is my favorite part to drizzle on! The secret to getting it thick and opaque rather than thin and transparent is using *only* powdered sugar and keeping the liquid additions extremely minimal. I list two tablespoons of fresh orange juice because that’s usually plenty to get it moving. If you add too much juice at once, you’ll need to add a whole extra cup of powdered sugar to correct it later, and trust me, it gets messy! Add the juice a half-teaspoon at a time until you reach that beautiful, thick, pourable consistency. We want it to sit up on top of the scone, not sink right into the crumb!
Estimated Nutritional Data for Cranberry Orange Scones
Because I have a background in nutrition, I always run the numbers on my favorite recipes, even for something as fun and simple as these cranberry orange scones. It’s helpful to know what we’re working with, especially when these festive breakfast bakes show up on the table!
Here are the estimated values based on the ingredients listed above for one single scone. Remember, these are what I estimate from my testing in the professional kitchen, so results can vary slightly based on how much butter you leave in the flour or the exact size of your fruit!
- Calories: 320
- Total Fat: 16g
- Carbohydrates: 40g
- Protein: 5g
Just a quick note, because I want you to enjoy these worry-free: these are estimates! If you use low-fat cream instead of heavy cream, or if you skip the orange glaze scones topping, your numbers will change. You can rest assured that these values are calculated for the full recipe as written. Cook with confidence!
Share Your Perfect Cranberry Orange Scones Experience
Whew! We did it! You now have the blueprint for making the most unbelievably flaky, zest-filled cranberry orange scones right in your own kitchen. Honestly, seeing these come out golden brown, glistening under that sweet orange glaze, is one of my biggest joys when I share these recipes.
I truly hope you love making these as much as I love sharing them with you. They are perfect for cozy winter morning treats, and I love hearing how you serve them up!
Now comes my favorite part: I want to hear all about it! Head down to the comments below and let me know:
- How did your scones turn out? Did you get that perfect flaky pastry texture we talked about?
- Rate this recipe for me! Give it a star rating—out of 5 stars—so other cooks know this is a winner!
- What was your favorite way to enjoy these citrus scones? With a cup of coffee, maybe alongside some other holiday brunch recipes?
Your feedback helps me continue developing reliable recipes that bring joy to busy home cooks, just like you. Happy baking, and I can’t wait to read your results!
PrintEasy Flaky Cranberry Orange Scones with Zesty Glaze

Make bakery-style cranberry orange scones from scratch. This easy recipe delivers flaky pastry, a tender crumb, and a perfect balance of sweet and tangy flavor, topped with a simple orange glaze.
- Prep Time: 15 min
- Cook Time: 18 min
- Total Time: 33 min
- Yield: 8 servings 1x
- Category: Breakfast
- Method: Baking
- Cuisine: American
- Diet: Vegetarian
Ingredients
- 2 1/2 cups all-purpose flour
- 1/3 cup granulated sugar
- 1 tablespoon baking powder
- 1/2 teaspoon salt
- 1/2 cup (1 stick) cold unsalted butter, cut into small pieces
- 1 cup dried or frozen cranberries
- Zest of 1 large orange
- 1 large egg
- 1/2 cup heavy cream, plus more for brushing
- 1 teaspoon vanilla extract
- For the Glaze: 1 cup powdered sugar
- 2 tablespoons fresh orange juice
Instructions
- Combine the flour, granulated sugar, baking powder, and salt in a large bowl. Whisk these dry ingredients together.
- Add the cold butter pieces to the flour mixture. Use a pastry blender or your fingertips to cut the butter into the flour until the mixture resembles coarse crumbs with some pea-sized pieces of butter remaining.
- Stir in the cranberries and orange zest until they are evenly distributed throughout the flour mixture.
- In a separate small bowl, whisk together the egg, heavy cream, and vanilla extract.
- Pour the wet ingredients into the dry ingredients. Use a fork to mix until just combined. Do not overmix; the dough will be shaggy.
- Turn the dough out onto a lightly floured surface. Gently knead it 3 or 4 times until it comes together. Pat the dough into a 3/4-inch thick circle.
- Cut the circle into 8 equal wedges, like cutting a pizza.
- Place the wedges on a baking sheet lined with parchment paper, leaving about 1 inch between them. Brush the tops lightly with a little extra heavy cream.
- Bake in a preheated oven at 400 degrees F (200 degrees C) for 15 to 18 minutes, or until the tops are golden brown.
- While the scones cool slightly, prepare the glaze. Whisk the powdered sugar and orange juice together until smooth. Add more juice, a drop at a time, if the glaze is too thick.
- Drizzle the orange glaze over the warm scones. Let the glaze set before serving.
Notes
- For the flakiest scones, make sure your butter is very cold before you start mixing.
- If you use frozen cranberries, do not thaw them before adding them to the dough.
- You can make these scones ahead of time; freeze the unbaked wedges on the sheet pan, then bake them directly from frozen, adding a few extra minutes to the baking time.
Nutrition
- Serving Size: 1 scone
- Calories: 320
- Sugar: 18
- Sodium: 210
- Fat: 16
- Saturated Fat: 10
- Unsaturated Fat: 6
- Trans Fat: 0
- Carbohydrates: 40
- Fiber: 1
- Protein: 5
- Cholesterol: 55