
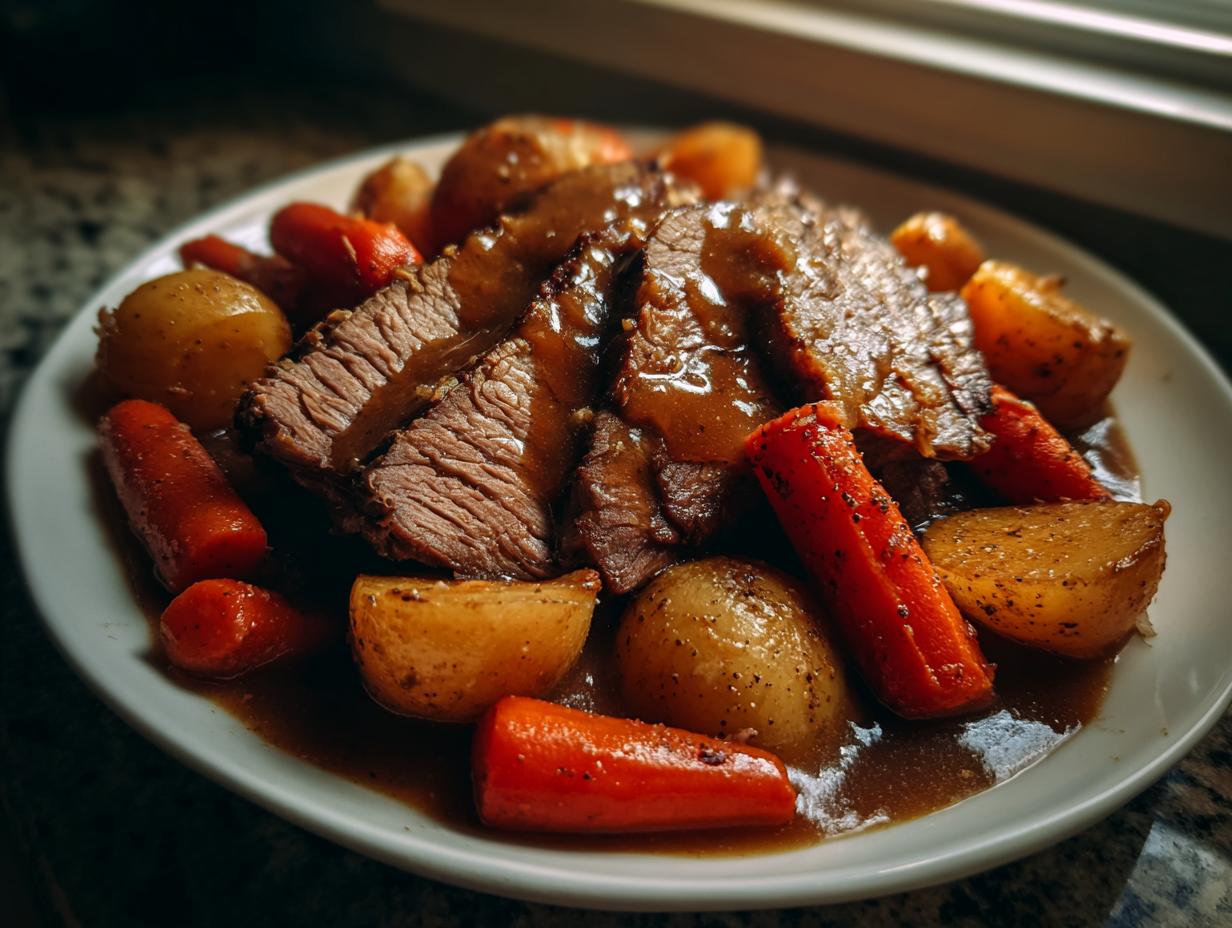
When the world just feels like too much, there is nothing, absolutely nothing, that can fix it quite like a truly tender, melt-in-your-mouth pot roast. Seriously, it’s the kind of meal that sinks into your soul and tells you everything is going to be okay. Here at Cooking by Jade, we focus on making those deeply comforting meals achievable, even when your schedule is packed. That’s why I developed this Classic Slow Cooker Pot Roast recipe. It follows my core philosophy: simple, reliable ingredients handled with care result in the most delicious outcomes. Forget dry, stringy meat; this method guarantees fork-tender results, turning tough chuck roast into the star of your table with almost zero effort on your part.
We want you to ditch the stress and embrace the aroma of a traditional, hearty beef dinner bubbling away all day. If you’re ready to unlock the secret to foolproof slow-cooked perfection, you can start right here. For other quick weekday meals that offer similar comfort, check out my guide to easy low-effort dinners.
- Why This Is the Best Pot Roast Recipe for Weeknights
- Ingredients for a Classic Slow Cooker Pot Roast
- How to Prepare Your Tender Pot Roast Instructions
- Making Homemade Beef Gravy from Pot Roast Drippings
- Tips for How to Make Pot Roast Perfect Every Time
- Ingredient Notes and Substitutions for Your Pot Roast
- Serving Suggestions for This Hearty Beef Recipe
- Storage and Make Ahead Tips for Pot Roast
- Frequently Asked Questions About Slow Cooked Beef Dinner
- Share Your Perfect Pot Roast Experience
Why This Is the Best Pot Roast Recipe for Weeknights
If you’re looking for the absolute best pot roast recipe that doesn’t require you hovering over a stove or babysitting a hot oven, this slow cooker version is your weeknight savior. I designed this specifically for busy folks who deserve a comforting meal after a long day. You get that deep, slow-cooked flavor profile without sacrificing your entire evening. Honestly, once it’s in, you can forget about it until dinner time!
- It’s truly set-it-and-forget-it cooking.
- The low-and-slow method guarantees unbelievably tender meat.
- Minimal cleanup since everything cooks in one pot.
Quick Prep for Your Pot Roast
I know what you’re thinking: tender roast takes hours, so the prep must be complicated. Nope! That’s the beauty here. You’re only looking at about 15 minutes of actual hands-on time. That’s seasoning the meat and chopping the vegetables. After that initial quick flurry, this pot roast handles itself beautifully for 8 hours. It’s pure magic, I tell you!
Ingredients for a Classic Slow Cooker Pot Roast
Okay, let’s talk ingredients. Because even in a slow cooker, the quality of what you toss in matters! This recipe shines because we rely on robust, simple flavors. For that unbelievably tender texture we’re aiming for, you absolutely must use a chuck roast. It has the right amount of marbling and connective tissue that breaks down perfectly over those long, slow hours, transforming into buttery beef. Don’t try to cheat with a leaner cut here; the chuck is the secret weapon for a real, classic American roast.
Here is everything you need on hand before you plug in that crockpot:
- 3 lb chuck roast (The star!)
- 1 tablespoon olive oil
- 1 teaspoon salt
- 1 teaspoon black pepper
- 1 teaspoon garlic powder
- 1 teaspoon dried thyme
- 1 large onion, quartered
- 4 carrots, cut into 2-inch pieces
- 4 celery stalks, cut into 2-inch pieces
- 1 lb small potatoes, halved
- 3 cups beef broth
- 2 tablespoons Worcestershire sauce
See? Accessible stuff! Things you probably already have, which is why this ends up on my table so often. Now, don’t forget, if you’re looking for other easy beef recipes that use pantry staples, you might love my old-fashioned hamburger soup recipe next week!
We’ll cover the liquids needed specifically for the gravy later, but these are the essentials that build the base flavor for the meat and vegetables in the crockpot.
How to Prepare Your Tender Pot Roast Instructions
Okay, here’s where the magic happens, and I promise you, it’s so straightforward it feels almost criminal how good the result is. The key to the best flavor, especially when using a chuck roast recipe like this, is building the aromatics right in the pot. We want maximum flavor infusion without all the scrubbing later!
Here is the step-by-step method for your slow cooker.
Seasoning and Layering the Slow Cooker Pot Roast
First, grab a paper towel—we need that beef totally dry before seasoning. Patting it gives the spices a place to cling! Rub the entire roast with the olive oil, then generously massage in the salt, pepper, garlic powder, and thyme. Don’t be shy! Next, toss all of your veggies—the onion quarters, the chunky carrots, the celery, and those lovely potatoes—right into the bottom of the slow cooker insert. This creates a natural little rack for your meat and flavors the vegetables as the juices drip down.
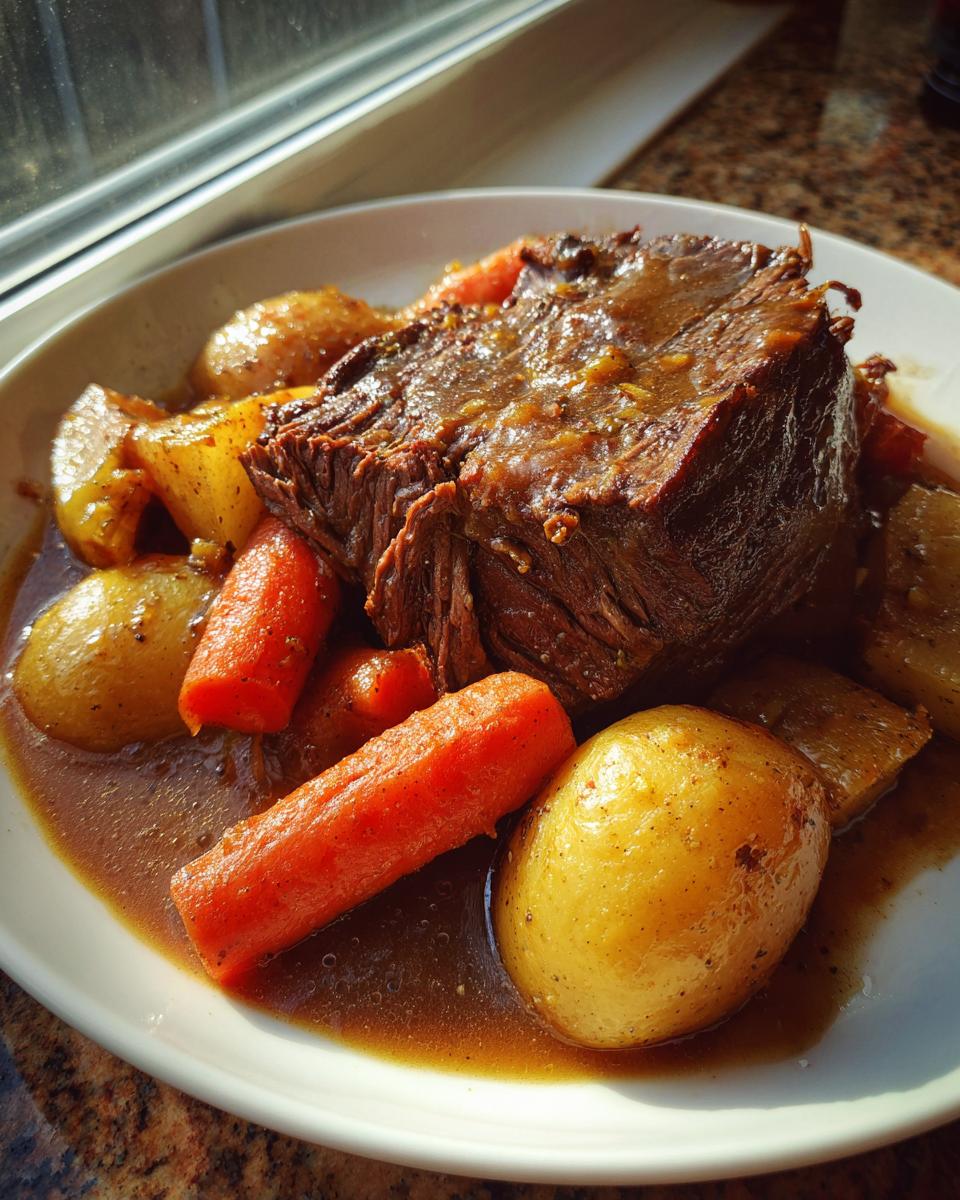
Now, set that beautifully seasoned roast directly on top of the bed of vegetables. It protects the meat from scorching on the bottom.
Cooking Times for the Perfect Pot Roast
Pour in your beef broth and Worcestershire sauce, making sure the liquid goes around the edges and not directly over the top of the roast. Then, here’s the hardest part: cover it and wait! For maximum tenderness, I always recommend setting it to low for 8 to 10 hours. If you’re short on time, you can do high for 4 to 5 hours. Either way, you’re looking for that beautiful moment when the meat shreds easily with just a fork. That tenderness is when you know your pot roast is done!
Pro Tip: If you have a spare 10 minutes in the morning, you can absolutely sear that seasoned roast in a hot skillet with a bit of oil until it’s beautifully browned on every side before it goes into the cooker. It adds an extra layer of depth—a great trick I learned in the test kitchen!
Once it’s ready, scoop out the roast and veggies onto a platter. Don’t wipe out that liquid! That’s the goldmine for our next step, making rich gravy. If you want to see a fantastic recipe where a beautiful sear is mandatory, check out my chicken fried steak guide!
Making Homemade Beef Gravy from Pot Roast Drippings
If I hear one more person reaching for a jar of instant gravy mix when they’ve made a gorgeous, slow-cooked meal, I might cry! Seriously, you just created flavor concentrate in that slow cooker, and we are going to use every drop of it. Making the homemade beef gravy from roast drippings is the final, critical step to elevate this from a nice dinner to legendary pot roast comfort food.
Don’t worry if you’ve never made gravy before; this is the easiest method out there because the seasoned liquid is already perfect. The only things we need to add are a little thickening agent and five minutes of your attention.
First things first: skim off any major pools of fat floating on top of the liquid left in the slow cooker. You want that rich, dark broth, but not too much greasy slick on top. Just lift the fat off with a spoon.
Now for the thickening part. This is where people go wrong, so listen closely! We are making a cornstarch slurry. You absolutely cannot dump dry cornstarch directly into the hot liquid—it will go straight into clumps the size of marbles, and your gravy will be lumpy. Yuck!
Take 4 tablespoons of cold water and whisk in 2 tablespoons of cornstarch until it is totally smooth and milky. That’s your slurry. Whisk that mixture into the hot drippings still in the slow cooker. Seriously, keep whisking gently as you pour it in!
Put the slow cooker back on high (or switch it to the sauté/simmer function if your model has one). Let it bubble gently for about 10 to 15 minutes, stirring every few minutes. You’ll watch it go from thin broth to thick, glossy gravy right before your eyes. That’s it—you made gravy from scratch! If you need more help with gravy basics, my guide to foolproof homemade gravy walks through the science even deeper.
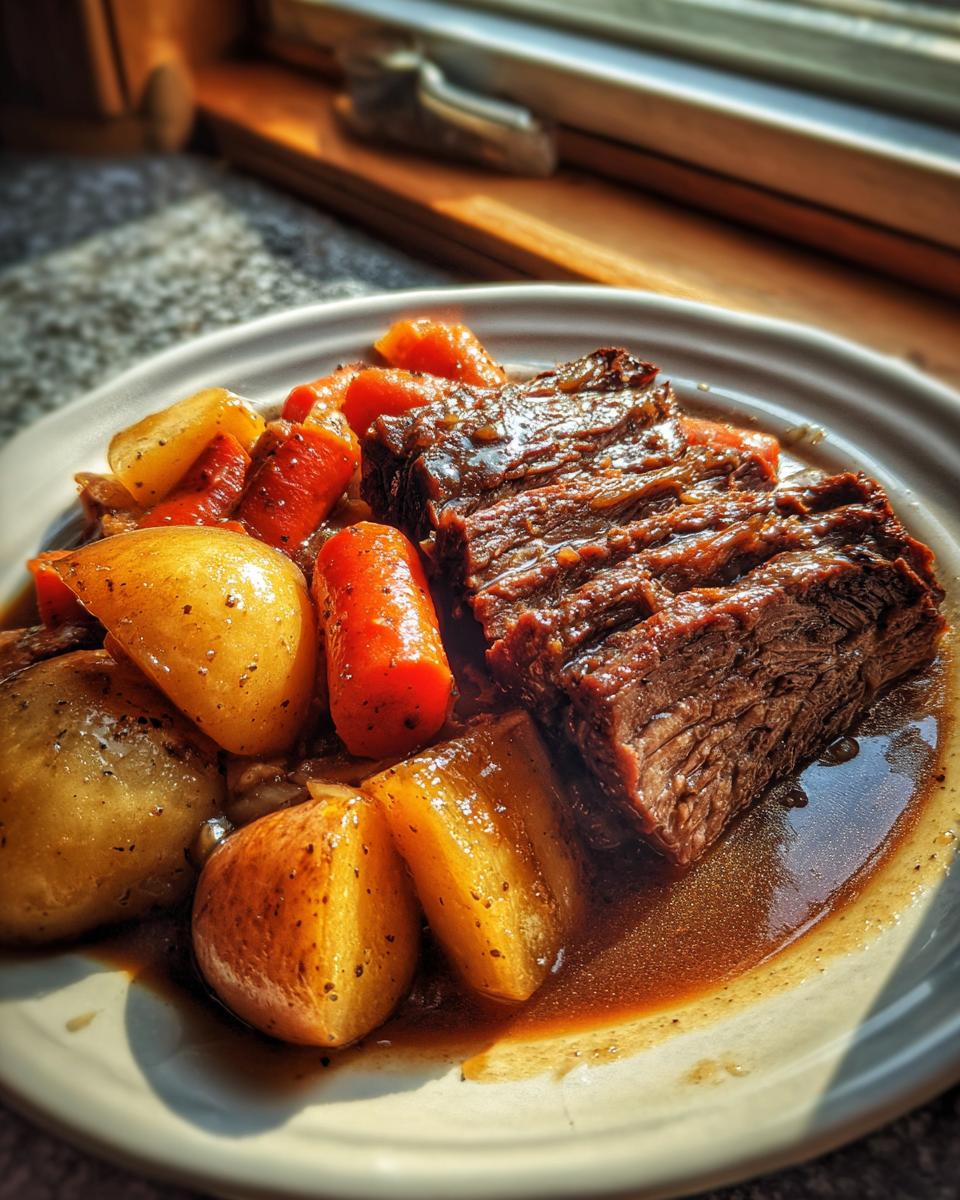
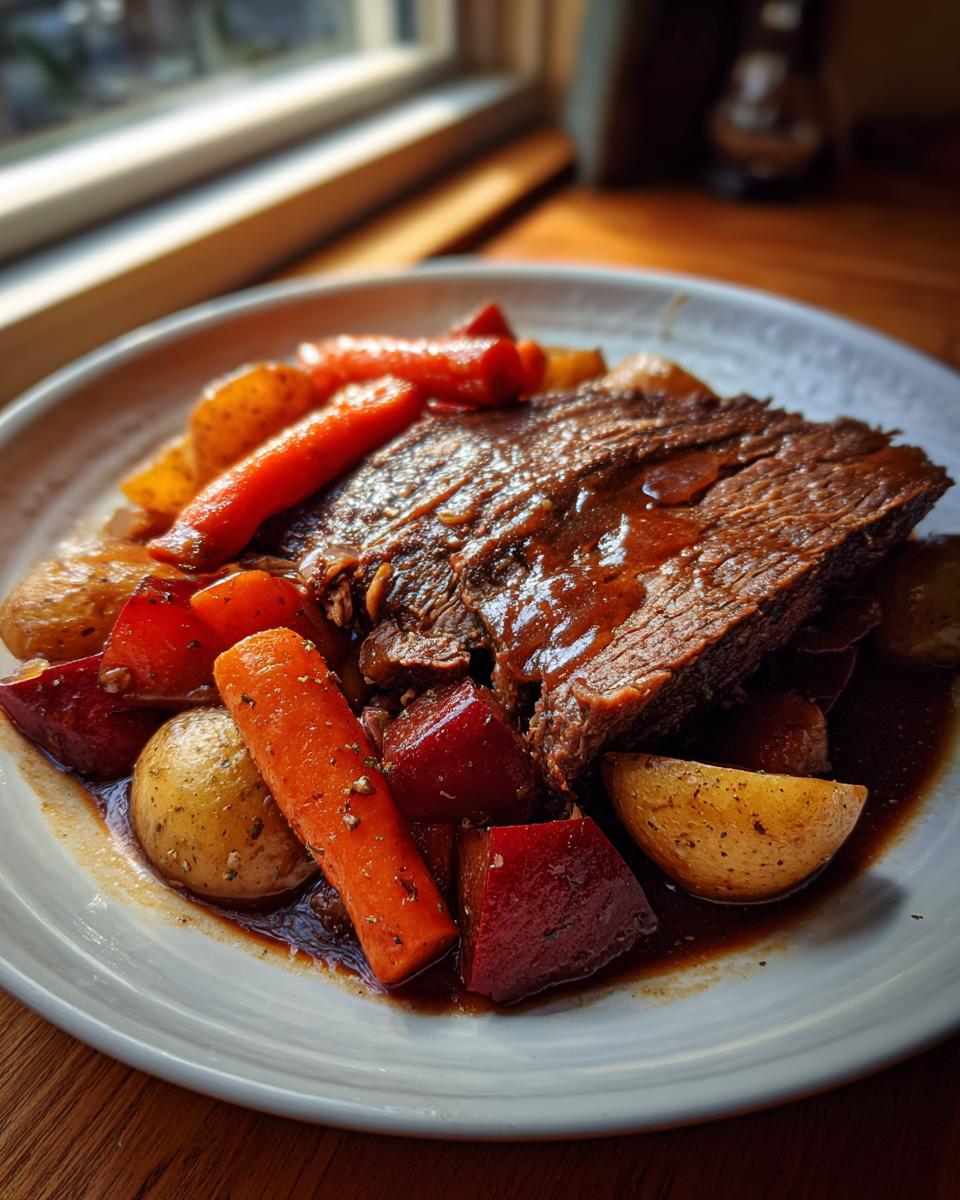
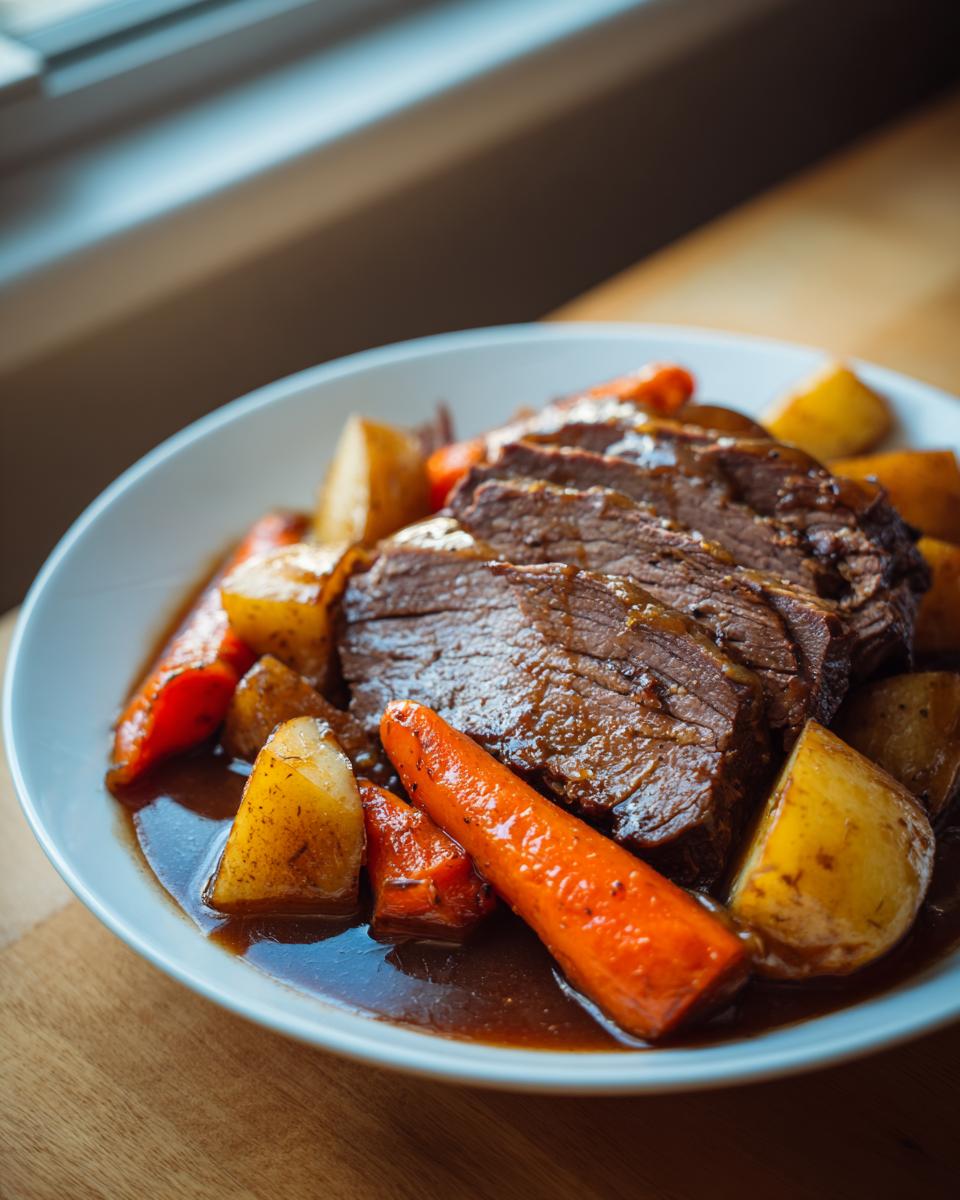
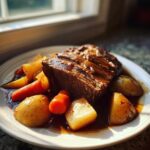
Once it’s thick enough to coat the back of a spoon, ladle that rich gravy generously over your sliced beef and those tender carrots and potatoes. You did that!
Tips for How to Make Pot Roast Perfect Every Time
Even though I champion the slow cooker because it’s so nearly impossible to mess up, a truly perfect pot roast comes down to two things: using the right cut of meat and slicing it correctly at the very end. These little details are what separate a good meal from a life-changing one, and they are definitely part of my commitment that you get foolproof results when you use my recipes.
We already talked about the superiority of the chuck roast—it’s got the intramuscular fat that melts into silkiness, unlike leaner cuts that just dry out. But once you pull that gorgeous piece of meat out, you can’t just hack into it like a barbarian! The structure of the muscle fibers matters immensely.
My biggest expert tip, which I stress in my guide for every beginner beef roast recipe, is to always slice the meat against the grain. Look closely at the cooked roast; you’ll see long lines of muscle fibers running in a certain direction. You need to slice perpendicular (across) those lines. This shortens the fibers, making every single bite incredibly tender. If you slice with the grain, you end up with long, chewy strands, no matter how long you cooked it!
Achieving Tender Oven Pot Roast Results
While the slow cooker is my go-to for hands-off cooking, sometimes you need the oven, especially if you’re cooking a bigger version or just don’t want to wait 8 hours. Good news: this recipe translates beautifully to a traditional Dutch oven or heavy-bottomed pot with a tight lid! This lets you achieve that tender oven pot roast finish.
The steps are similar but the timing shifts. You still need to season and sear that chuck roast until it’s beautifully browned on all sides—don’t skip the sear! Then, layer your veggies and meat just like we did in the slow cooker, using about the same amount of liquid (broth and Worcestershire). Pop that Dutch oven, covered tightly, into a preheated oven at 325°F. You’ll need about 3 to 4 hours. Check it after 3 hours; you’re looking for that fork-tender magic again. It’s slightly faster than the slow cooker, but still a very hands-off cooking process!
If you were keen on using an Instant Pot, you’d typically sear it, add the liquid, and cook on High Pressure for about 60–75 minutes, followed by a natural pressure release. Either way you choose, the payoff is comfort food perfection!
Ingredient Notes and Substitutions for Your Pot Roast
I get so many questions about substitutions, and that’s fair—we all have different things kicking around the fridge! When we’re talking about deep, comforting flavors for a pot roast, remember that this recipe is built around the strengths of the chuck roast. If you try to use something like a nice sirloin or round roast, you’re going to end up disappointed because those cuts don’t have the connective tissue needed to break down into that amazing, buttery texture we’ve worked so hard to achieve.
Chuck roast is the hero here because it’s designed for low and slow cooking. It’s affordable, readily available, and it performs perfectly. If you absolutely can’t find chuck, the next best thing would be a nice, well-marbled shoulder roast, but I wouldn’t stray too far from those tougher, hardworking cuts for this style of cooking.
As for the vegetables, this is where you can really have some fun customizing your meal! The carrots, onions, celery, and potatoes are the standard crew, but don’t be afraid to mix around the supporting cast. For instance, if you’re planning ahead, you can totally swap out some of the carrots for parsnips. Parsnips have a slightly sweeter, earthier spice note that marries beautifully with the thyme and the rich beef broth. Honestly, it takes this recipe up a notch!
Another fantastic addition are mushrooms—cremini or white button mushrooms work like a charm. Toss a pound of sliced mushrooms in along with the other veggies right before you close the lid. They absorb all those amazing drippings and add a wonderful, savory depth. If you enjoy these kinds of earthy flavors alongside your beef, you definitely need to check out my recipe for some creamy potatoes to sop up that extra leftover gravy; you can find the recipe for creamy garlic mashed potatoes right here on the site!
Essentially, stick to the beef cut and the cooking method, and feel free to treat the vegetables as your flavor playground. It all simmers down into deliciousness anyway!
Serving Suggestions for This Hearty Beef Recipe
You’ve done the hard work, and now you have this incredibly rich, tender beef bathed in flavorful drippings. The meal isn’t complete without the right companions, right? This is serious comfort food dinner territory, so we need sides that can stand up to that spectacular gravy you just made. Forget light salads; we want sides that are ready to soak up every last drop!
The obvious champion here is something starchy. My absolute go-to recommendation, which I talk about constantly because it’s just that good, is a big, fluffy pile of creamy mashed potatoes. They are the perfect vehicle for transferring that homemade beef gravy from your plate to your mouth. You simply cannot beat that combination. If you need the best recipe for that, my specific guide to creamy mashed potatoes will give you foolproof results every time.
If you’re not feeling potatoes, don’t worry, we have options! Since our recipe already includes carrots and celery cooked right in the pot, you don’t need a separate vegetable dish unless you want one. But if you want more green on the plate, try some simple buttered egg noodles. They are fantastic mixed right into the gravy, giving the whole dish a wonderful texture, almost like a lighter stew.
Another favorite in my family for a weekend dinner is some sort of simple, crusty bread. A good French baguette or even a soft, buttery roll is perfect for wiping the plate clean after the meat and veggies are gone. Trust me, you will want to save that gravy, and a sturdy bread ensures none of it goes to waste!
Keep it simple, keep it hearty, and focus on sides that complement the richness of the slow-cooked beef. That’s the key to a truly satisfying meal.
Storage and Make Ahead Tips for Pot Roast
One of the absolute best parts about making a big, beautiful batch of pot roast is knowing you have amazing leftovers waiting for you. This is a fantastic make ahead roast beef option because the flavor actually deepens overnight! Whether you’re planning seconds or freezing portions for future busy nights, there are a couple of tricks I use in my kitchen to keep everything tasting fresh.
First, let’s talk about storing the meat and vegetables. Once cooled slightly, store the sliced beef and the cooked vegetables together in an airtight container in the fridge. They should hold up well for about three to four days. Make sure you’re using a container big enough so the meat isn’t completely swimming, which can turn it mushy over several days.
Separating the Gravy is Key
Now, this is the most important storage secret for your pot roast gravy, so listen up! Gravy and meat should never be stored together if you plan on keeping them more than a day. Gravy, which is mostly liquid and starch, has a very different shelf life than the solid meat components, and freezing them together just creates a watery mess when reheated.
When you’re ready to put the leftovers away, let that magnificent gravy cool slightly on the counter. Then, transfer it to its own separate small, airtight container. Keep the gravy in the fridge for up to three days. If you want to freeze it, that’s easy too! Just pop the gravy container in the freezer. When it’s time to eat again, you’ll simply reheat your meat and veggies, and then reheat your gravy separately on the stove, whisking in a tiny bit of water or broth if it looks too thick after thawing.
For more ideas on planning your meals ahead of time so you can enjoy more Sunday-style dinners during the hectic week, you should take a look at my dedicated make ahead roast beef strategies. It covers everything from freezing cuts to prepping spice rubs in bulk!
Freezing Your Slow Cooked Beef Dinner
If you’re making this large batch specifically for future meals—and honestly, who isn’t?—freezing is your best friend. You can freeze the meat and vegetables together, or you can shred the beef right now and freeze it with just a splash of broth instead of a lot of gravy, which helps maintain texture.
Always use freezer-safe containers or heavy-duty freezer bags, making sure to press out as much air as possible before sealing them up. If you’re patient, this slow cooked beef dinner will keep perfectly well in the freezer for up to three months. When you thaw it overnight in the fridge, remember to reheat the components gently—slow and low is the way to go, just like when you first cooked it!
Frequently Asked Questions About Slow Cooked Beef Dinner
I know sometimes after reading all those details, you might still have a little question buzzing around in your head. That’s totally normal! When you’re making a classic comfort food dinner like this, you want to make absolutely sure you get that melt-in-your-mouth texture we talked about. Here are some of the most common things people ask me about transforming their beef into the best roast they’ve ever had.
Can I use frozen beef for this pot roast?
Oh, that’s a tough one, and honestly, I always advise against it if you can help it. For the best texture and to ensure those seasonings really stick, raw, thawed meat is always the way to go. If you *must* start with a frozen 3 lb chuck roast, you’ll need to add a significant chunk of time to your cook. I’d suggest adding at least 2 to 3 hours on the low setting, maybe even more. Be patient, and don’t rush the final check—you still need that beautiful fork-tender result!
What is the best cut of beef for pot roast?
If you take one thing away from this recipe, let it be this: use the chuck roast! It’s the absolute champion for this kind of slow-cooked magic. We lean heavily on chuck because it’s beautifully marbled with fat and connective tissue—which sounds less glamorous than, say, a tenderloin, but trust me here! Those tough bits break down slowly over 8 hours in the liquid, basting the meat from the inside and turning into that incredible, silky texture. Leaner cuts just don’t have the magic to break down like that; they end up stringy instead of succulent.
What if my gravy is too thin after cooking?
This is so easy to fix, and it’s just a matter of timing, not a major mistake! Remember that cornstarch slurry we made earlier? If your gravy in the slow cooker pot is still too runny after the 15 minutes of simmering, just make a second, tiny slurry. Take about one tablespoon of cold water and whisk in one teaspoon of cornstarch until smooth.
Carefully ladle out about a half-cup of the *hot* liquid from the slow cooker into a separate mug, and whisk your second slurry into that hot liquid first. Then, pour that mixture back into the slow cooker. Stir gently and let it simmer on high for another 5 to 10 minutes. It will thicken up beautifully! This trick works perfectly for adjusting the consistency of your homemade beef gravy every time.
If you made this recipe and loved how easy it was, swing by my guide on easy weeknight dinners for more inspiration on getting a comforting meal on the table fast!
Share Your Perfect Pot Roast Experience
Now it’s your turn! I pour my heart into making sure every recipe Jade Carter puts out is reliable, comforting, and downright delicious, especially something as classic as a good pot roast. But the story isn’t finished until you’ve tried it and made it your own at your own table.
Seriously, I want to hear all about it! Did it turn out perfectly fork-tender? Did your family devour the gravy? Please hop down to the comments section below and leave a rating—five stars if it brought happiness to your kitchen! Telling me how it went helps me verify these recipes and ensures every cook who visits Cooking by Jade gets the best, most trustworthy instructions possible.
And if you’ve snapped a picture of your beautiful, hearty beef dinner, tag us on social media! Seeing your successes—whether you used the slow cooker magic or adapted it for your Dutch oven—is the reason I do this. I love seeing my tried-and-true recipes become part of your family’s favorites. If you’re curious about the passion behind the recipes, you can read more about my journey over on the About Page. Happy cooking!
PrintClassic Slow Cooker Pot Roast with Root Vegetables
This recipe shows you how to make a tender, flavorful pot roast using a slow cooker. It includes simple steps for achieving rich gravy from the roast drippings.
- Prep Time: 15 min
- Cook Time: 8 hours
- Total Time: 8 hours 15 min
- Yield: 6 servings 1x
- Category: Dinner
- Method: Slow Cooking
- Cuisine: American
- Diet: Low Fat
Ingredients
- 3 lb chuck roast
- 1 tablespoon olive oil
- 1 teaspoon salt
- 1 teaspoon black pepper
- 1 teaspoon garlic powder
- 1 teaspoon dried thyme
- 1 large onion, quartered
- 4 carrots, cut into 2-inch pieces
- 4 celery stalks, cut into 2-inch pieces
- 1 lb small potatoes, halved
- 3 cups beef broth
- 2 tablespoons Worcestershire sauce
- 2 tablespoons cornstarch
- 4 tablespoons cold water
Instructions
- Pat the chuck roast dry with paper towels. Rub the roast all over with olive oil, salt, pepper, garlic powder, and thyme.
- Place the onion, carrots, celery, and potatoes in the bottom of your slow cooker.
- Place the seasoned roast on top of the vegetables.
- Pour the beef broth and Worcestershire sauce around the roast.
- Cover the slow cooker and cook on low for 8 to 10 hours, or on high for 4 to 5 hours, until the meat is fork-tender.
- Carefully remove the roast and vegetables from the slow cooker and keep them warm.
- For the gravy, skim any excess fat from the liquid remaining in the slow cooker.
- In a small bowl, whisk together the cornstarch and cold water to create a slurry.
- Pour the slurry into the hot liquid in the slow cooker. Stir well.
- Cook on high for 10 to 15 minutes, stirring occasionally, until the gravy thickens.
- Slice the pot roast against the grain and serve immediately with the cooked vegetables and homemade beef gravy.
Notes
- For a deeper sear, brown the roast in a skillet on all sides before placing it in the slow cooker.
- You can substitute mushrooms or parsnips for some of the other root vegetables.
- This roast beef recipe freezes well; store leftover gravy separately.
Nutrition
- Serving Size: 1 serving
- Calories: 450
- Sugar: 5
- Sodium: 550
- Fat: 22
- Saturated Fat: 8
- Unsaturated Fat: 14
- Trans Fat: 0
- Carbohydrates: 25
- Fiber: 4
- Protein: 40
- Cholesterol: 110