
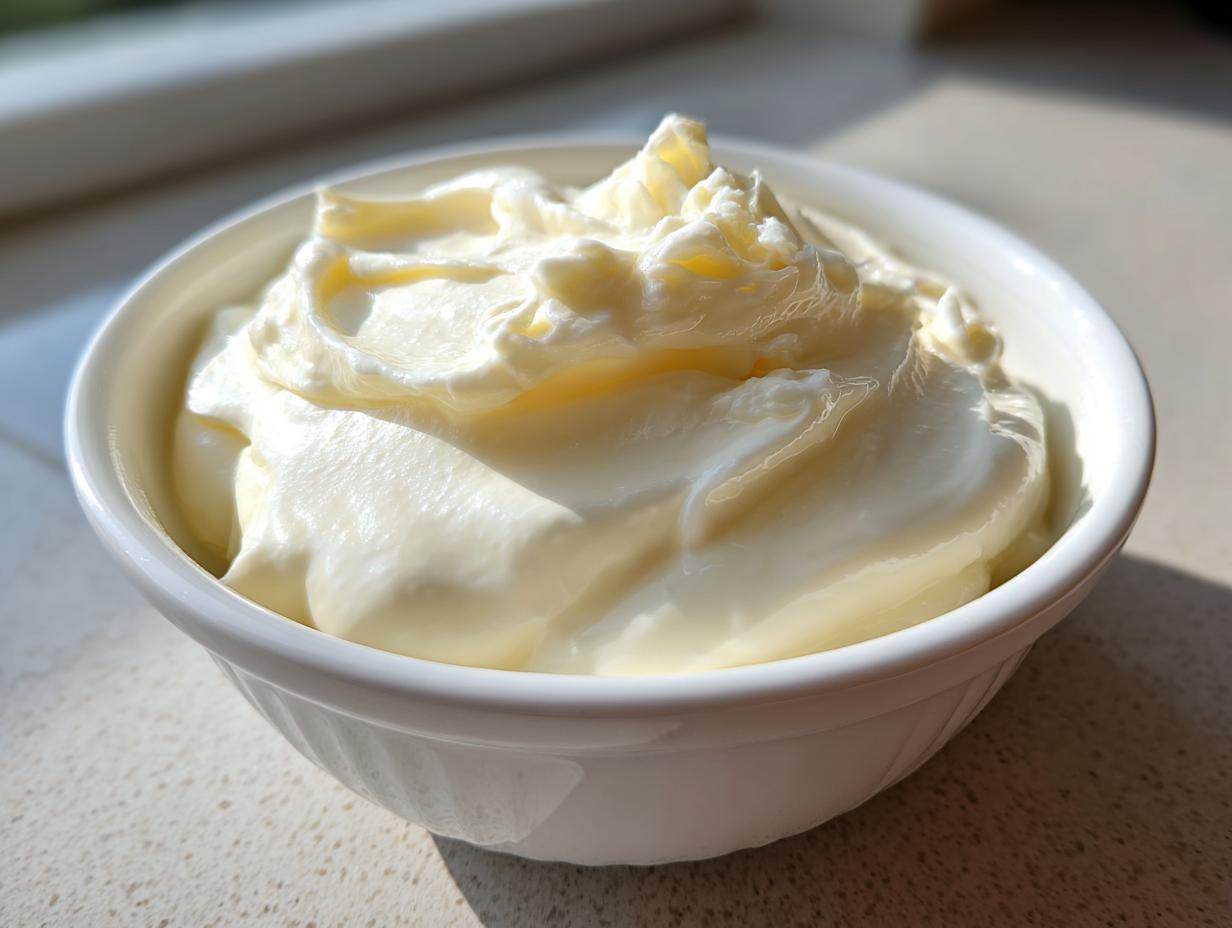
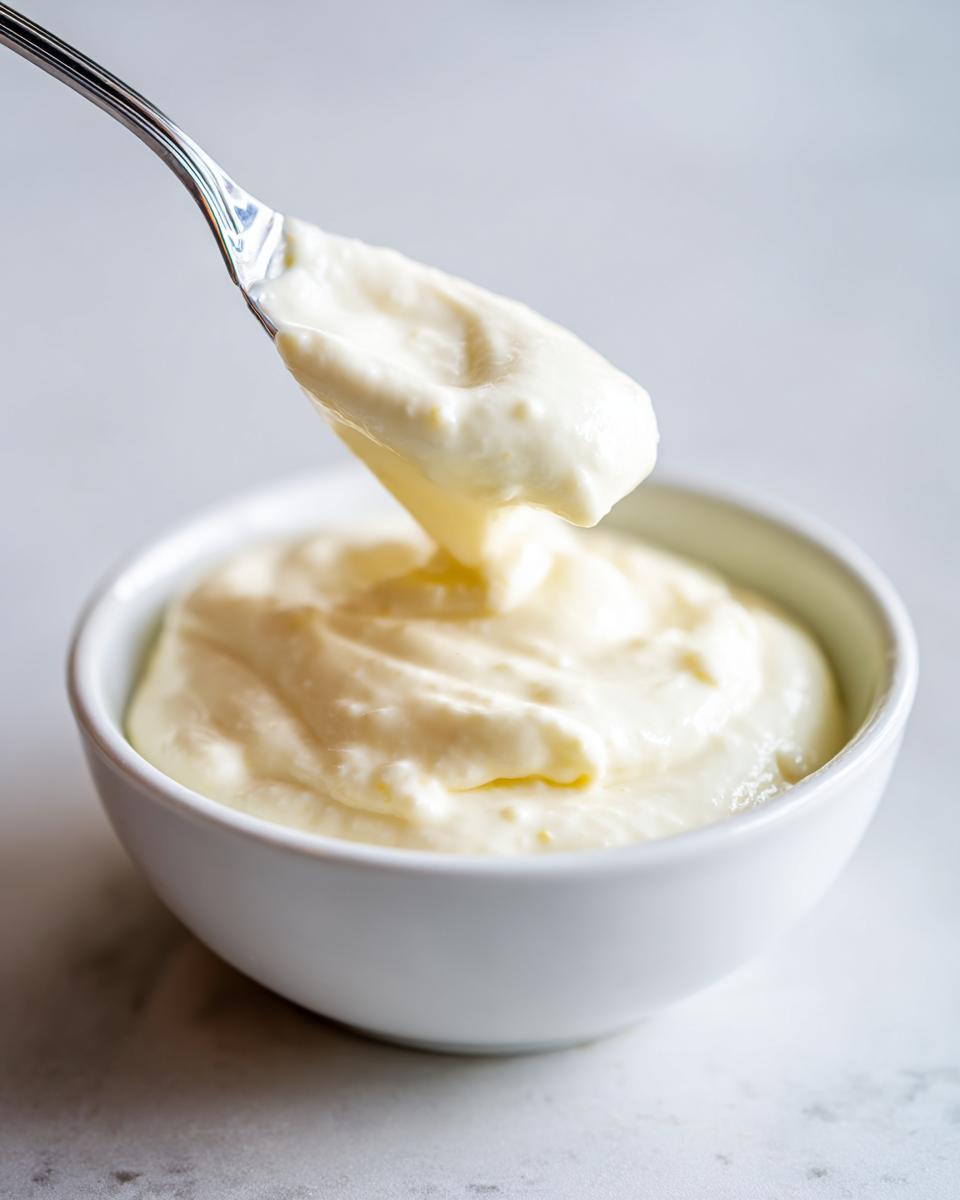
You know those moments when a plain plate of fries or a boring sandwich just needs a serious glow-up? That’s exactly where our garlic aioli steps in! Seriously, stop reaching for that jarred stuff. I developed this recipe combining my background in nutrition with everything I learned in professional test kitchens to make sure you get the most intensely flavorful, perfectly creamy result every time. Trust me when I say this is the best 5-minute creamy garlic aioli recipe you will ever make; it delivers that authentic, restaurant-quality magic right on your countertop. You’re going to be amazed how easy it is to whip up this amazing homemade sauce recipe.
- Why This Creamy Dipping Sauce is Your New Go-To Garlic Aioli
- Ingredients for the Ultimate Garlic Aioli Recipe
- How to Prepare Your 5 Minute Sauce Garlic Aioli
- Tips for Success with Your Homemade Sauce Recipe
- Serving Suggestions for This Versatile Homemade Sauce
- Storage and Keeping Your Fresh Garlic Dip
- Frequently Asked Questions About Making Garlic Aioli
- Estimated Nutrition for This Easy Aioli Recipe
- Share Your Ultimate Garlic Sauce Creations
Why This Creamy Dipping Sauce is Your New Go-To Garlic Aioli
I know, I know, you’ve heard that before. But this garlic aioli is different because it actually *works*, every single time, and it takes less time than boiling water for pasta! Forget spending ages trying to get the texture right; we’re talking a thick, luxurious result in about five minutes flat. That’s the hallmark of a truly excellent creamy dipping sauce.
- It’s lightning fast: Ready in just 5 minutes, making it the perfect quick homemade condiment for last-minute appetizers.
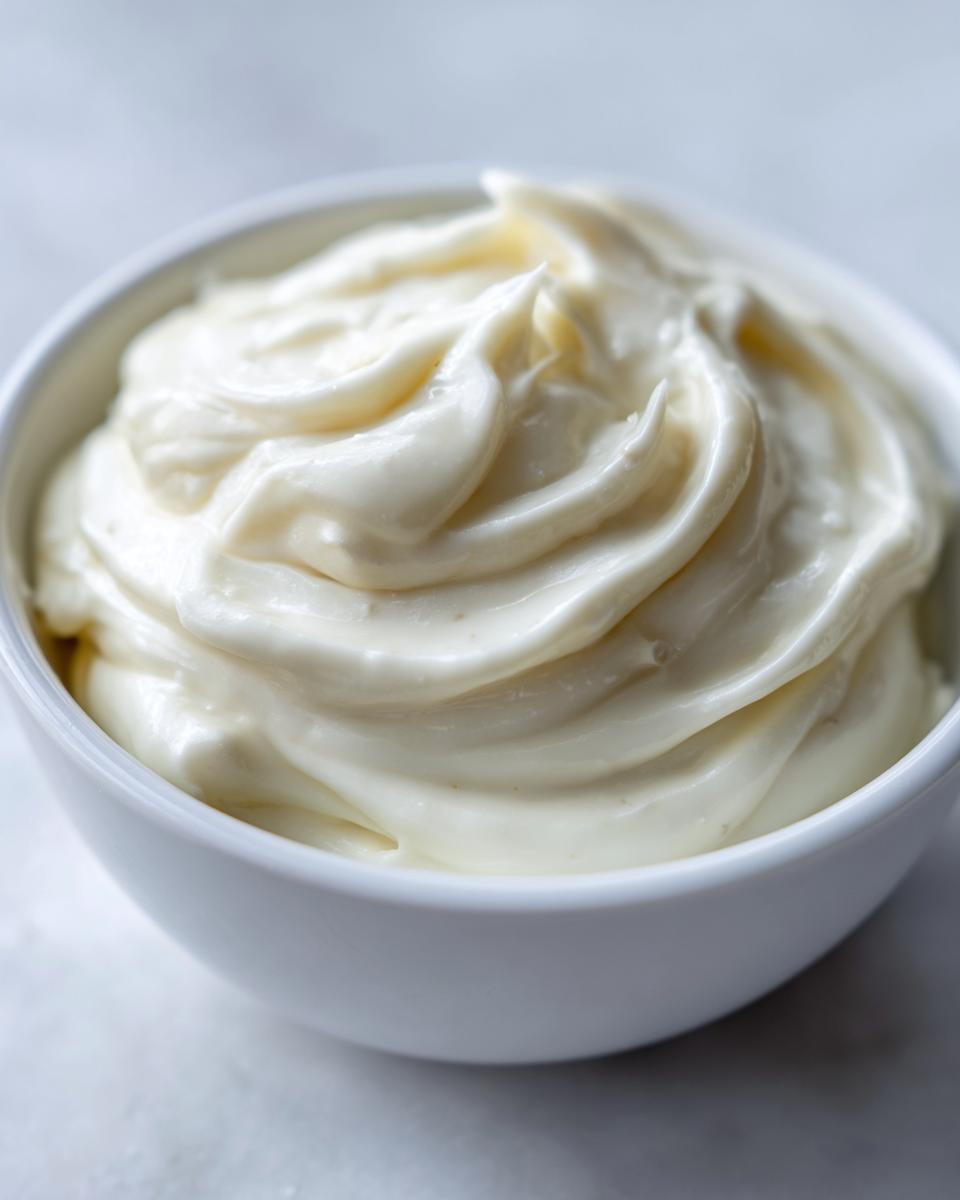
- The texture is unbeatable—silky smooth and rich, just like you get at those fancy seafood places.
- Maximum flavor payoff without a giant ingredient list. This is truly a restaurant style condiment you can master today.
Achieving Restaurant Quality Garlic Aioli in Minutes
The secret isn’t fancy ingredients; it’s simple technique! When you whisk that oil in slowly—I mean *painstakingly* slowly at the start—you’re creating a stable emulsion. That whisking action traps the oil and stops it from separating. Pairing that perfect emulsion with two cloves of freshly minced garlic gives you that bold, bright hit of flavor that separates homemade from store-bought every time. It creates a reliable, foolproof base, I promise!
Ingredients for the Ultimate Garlic Aioli Recipe
Okay, let’s talk about what you need for this real deal, emulsified garlic aioli. Keep these measurements exact, especially the oil—that’s where the magic happens! I insist on using a completely neutral oil, like grapeseed or canola, because we want the garlic and lemon to sing, not the oil flavor. Make sure your garlic is just pulverized; you want it almost a paste!
- 1 large egg yolk (must be room temp!)
- 2 cloves fresh garlic, minced very fine or grated (seriously, grate it!)
- 1 teaspoon Dijon mustard (don’t skip the mustard, it helps glue things together)
- 1 teaspoon fresh lemon juice
- 1/4 teaspoon salt and a small pinch of black pepper
- 1 cup neutral oil (canola or grapeseed is my pick)
Don’t forget we have an easier route if you’re short on time or worried about cracking eggs.
The Quick Homemade Condiment Alternative (Egg-Free Garlic Aioli)
If you need an even faster fix, or just don’t want to deal with raw egg, here’s my little secret: grab one cup of really good, quality mayonnaise. That’s your shortcut! You just whisk that mayo together with the minced garlic, Dijon, and lemon juice. Suddenly, you have an incredibly tasty, thick, garlicky condiment that makes an amazing garlic mayonnaise spread. This egg-free garlic aioli is nearly instant!
How to Prepare Your 5 Minute Sauce Garlic Aioli
This is it—the action part! Since this whole process is designed to take about 5 minutes total, you need to be ready to move quickly but methodically. If you’re using a food processor, just throw the first set of ingredients in there. But if you’re doing it by hand, grab the sturdiest whisk you own!
- First, get your egg yolk, that super-fine garlic, Dijon, lemon juice, salt, and pepper into your bowl. Give these a good whisk until they look happy and really blended together. They should look a little lighter in color than when you started.
- Now, here’s the make-or-break moment. You have to introduce the oil incredibly slowly. I mean it—think one drop at a time for the first minute or so. If you dump the stream in too fast here, your gorgeous sauce will separate, and you’ll have a mess instead of a classic garlic aioli.
- Once you see it start to noticeably thicken—it will look opaque and creamy—you can speed up. Switch from drops to a very thin, steady drizzle. Keep whisking hard the whole time!
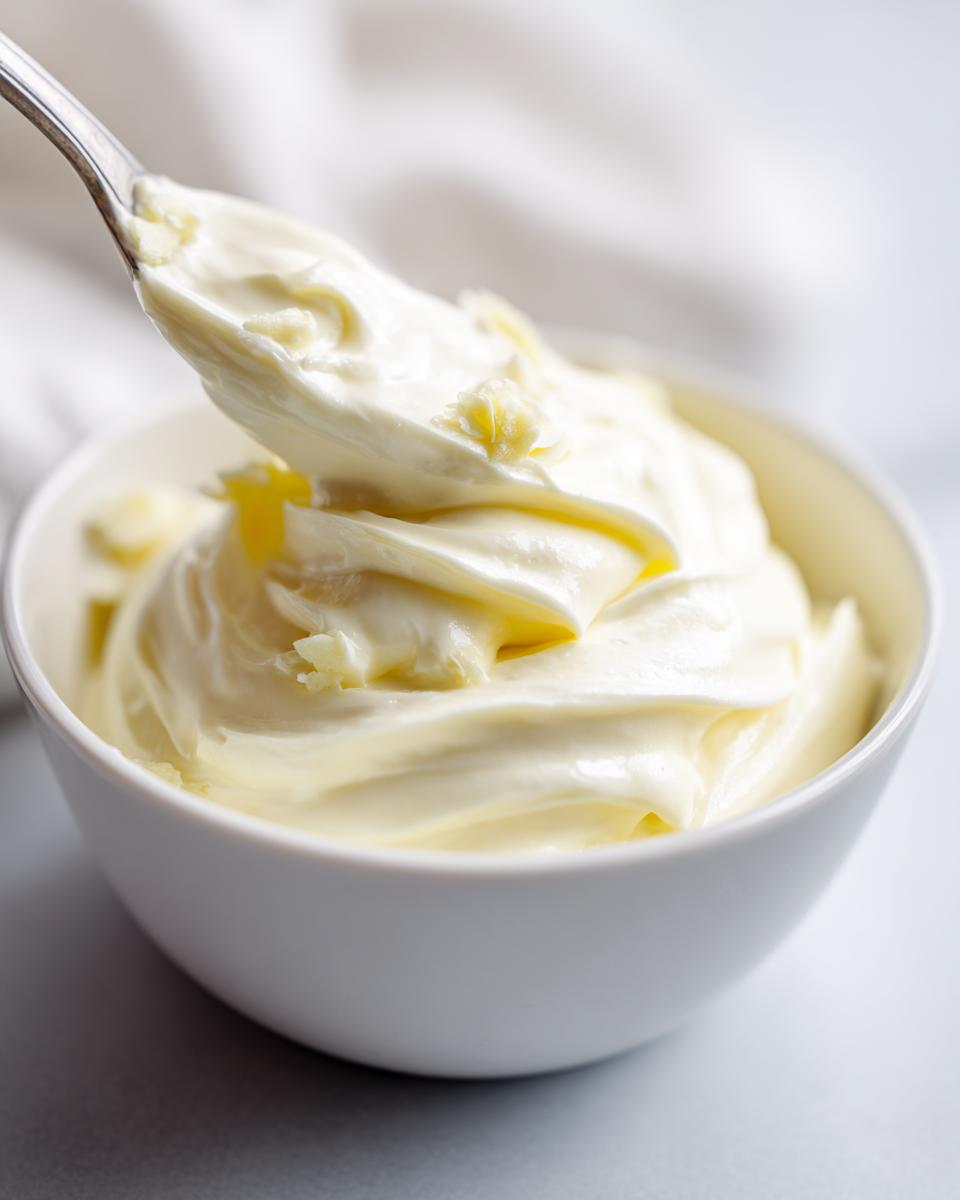
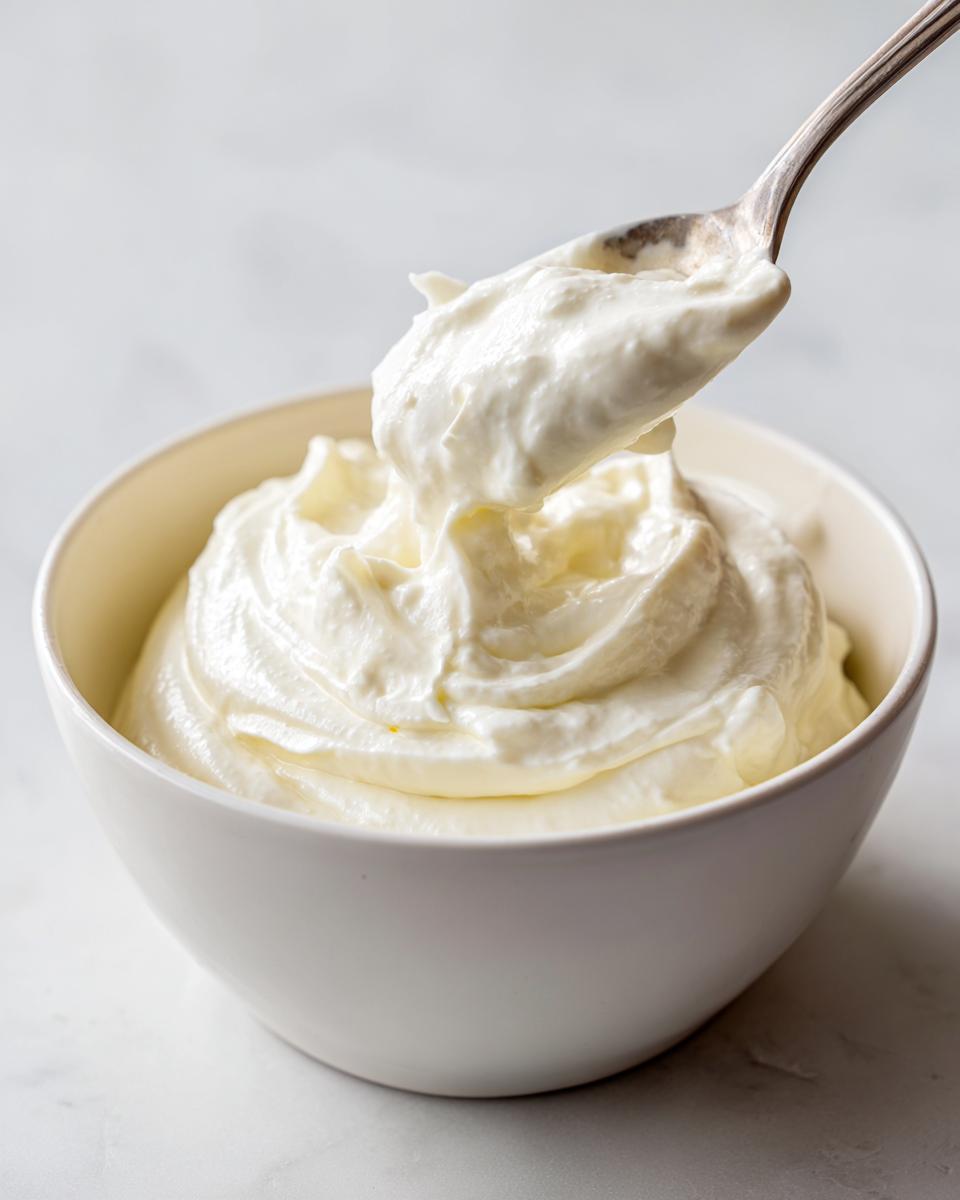
- Keep going until all that oil is gone and you’re left with this beautiful, thick, homemade spread.
- Taste it! Does it need a little more salt? A tiny sharp burst of lemon? Adjust it now before you serve this ultimate sauce.
Mastering the Emulsification for Perfect Garlic Aioli
The single most important part of making any true, traditional aioli is getting that oil whipped in correctly. You absolutely must whisk constantly and vigorously, especially when you first introduce that oil. If you add the oil too fast in the beginning stages, the tiny fat droplets don’t have time to bond with the egg yolk and the mustard. What happens? The mixture won’t thicken; it’ll just separate into oily liquid and watery bits. Don’t panic if this happens—we cover how to fix it later! But for the first 1/4 cup incorporation, treat that oil like it’s liquid gold and go slow!
If you want to see how others handle this delicate dance, check out how this recipe does it for inspiration: How to make the best garlic aioli.
Tips for Success with Your Homemade Sauce Recipe
Even when following instructions perfectly, sometimes emulsions just decide they don’t want to cooperate. It happens to me, even after all these years in the kitchen! I vividly remember one batch where I was rushing to finish this incredible homemade sauce recipe for a catering event, and I poured the oil in too quickly. It looked like cloudy scrambled eggs—totally broken. I almost tossed the whole thing!
But don’t worry, because this is where that test kitchen knowledge comes in handy! If your garlic aioli decides to split on you, don’t throw it away! Grab a fresh, clean bowl and put just one extra teaspoon of warm water or fresh lemon juice in it. Then, start whisking that teaspoon vigorously and slowly drizzle the *broken* mixture into it, drop by drop. It almost always re-emulsifies right back into that perfect, creamy state we want. It’s basically magic!
Flavor adjustment is the final, crucial step. Since every batch of lemons sings a different tune, you need to taste before you serve. After all the oil is incorporated, give it a small dip. Does it taste a little flat? Add another tiny squeeze of lemon. Do you want that sharp garlic punch to really stand out? Add a tiny pinch more salt. This step turns a good homemade sauce into a great one!
If you want to read about another successful cheater version, check out what The Food Charlatan does. Sometimes shortcuts are exactly what we need! Check out their tips here.
Serving Suggestions for This Versatile Homemade Sauce
Now that you have this glorious, thick batch of garlic aioli, the fun really begins! Honestly, you can put a dollop of this on almost anything and instantly elevate the dish from basic to brilliant. This isn’t just a dip; it’s a true flavor booster for your whole routine. I use it weekly because it makes leftovers feel brand new.
For example, if you’re making potatoes, forget ketchup! This is the ultimate condiment for fries (or roasted potatoes, or baked potatoes—you get the idea). It adds a creamy richness that satisfies immediately. It’s so much better than anything store-bought.
But don’t stop at fries! Think bigger:
- Sandwich Upgrade: Replace plain mayo with our aioli on any lunch item. It makes the best sandwich spread ideas for turkey clubs, roast beef, or even grilled cheese. The sharp garlic cuts through fatty meats perfectly.
- Seafood and Grills: I love drizzling this over simple grilled fish—think flaky cod or salmon. It’s fantastic with shrimp cocktail too! If you’re looking for an elevated side dish sauce for any grilled chicken, this is it. Check out how delicious it is with tuna too! See ideas for main courses here.
- Vegetable Booster: Got some sad-looking roasted broccoli or asparagus? A quick drizzle of this spreads the richness around and makes those veggies disappear off the plate. It transforms them into an appetizer contender!
No matter how you use it, this simple garlic aioli will make you proud of the amazing, versatile homemade sauce you whipped up in five minutes.
Storage and Keeping Your Fresh Garlic Dip
Once you’ve managed to make this gorgeous, thick batch of garlic aioli, you want to make sure it stays perfect! Since one version uses a raw egg yolk and the other uses pre-made mayo, we have slightly different rules for keeping them fresh. You don’t want waste, and you definitely don’t want to mess with food safety—that’s rule number one in my kitchen, even for a creamy make-ahead tuna dip! I always make sure to store my homemade creations in airtight glass jars rather than plastic, just because I feel like the flavor stays cleaner that way.
Shelf Life Expectations for This Quick Homemade Condiment
If you made the traditional, emulsified version using that fresh egg yolk, you need to treat it like any homemade mayonnaise. It’s best to enjoy that batch within about 3 to 4 days, maximum. Because we aren’t baking or cooking it, we rely on the acidic ingredients like lemon and mustard to help preserve it, but fresh eggs have a short life span on the counter. Make sure it’s kept tightly sealed in the fridge the whole time.
Now, if you went for the sneaky, egg-free option using store-bought mayonnaise? You get a little more breathing room! Since the base is already Pasteurized, that version usually lasts quite a bit longer—sometimes up to a week or maybe even ten days in the fridge. Check the expiry date on the mayo you started with. Either way, if it starts smelling funky or the texture gets really loose and watery, toss it. Better safe than sorry!
Frequently Asked Questions About Making Garlic Aioli
When I first started whipping up batches of this sauce, I had a million questions swirling around in my head. It’s always good to anticipate what might pop up while you’re in the zone! Here are some of the things I get asked most often about making the best garlic aioli at home.
Can I use olive oil instead of a neutral oil?
Oh, that’s a very common question! Technically, yes, you *can* use olive oil, but I really don’t recommend the standard extra virgin stuff for your main oil. Why? Because EVOO has a really strong, sometimes bitter flavor that will totally overpower your delicate garlic and lemon, and it can make the final product taste harsh. If you must use it, go for a very light, mild olive oil blend, but for that perfect, clean flavor profile of a true homemade sauce recipe, stick to canola or grapeseed oil.
My mixture separated! What went wrong with my creamy dipping sauce?
Don’t panic! This is the curse of emulsification, right? It almost always means you added the oil too quickly at the very beginning. Remember: drop by drop! If it breaks, don’t just stir it; you have to save it. This is part of learning to make a brilliant creamy dipping sauce. Grab a clean bowl, add one teaspoon of warm water or lemon juice, and start whisking that in slowly. Then, stream your separated goo into that fresh liquid while you whisk like crazy. It should magically come back together!
What if I want a really garlicky spread recipe? How do I boost that flavor?
That’s easy, and I love extra garlic too! If you want that intense pop for your garlicky spread recipe, you have a couple of choices. First, you can simply add an extra half-clove of fresh garlic and mince it super fine. Second, for a deeper, mellow garlic flavor without the raw bite, gently smash your garlic cloves and let them sit in the lemon juice for about 10 minutes *before* mixing them into the yolk. This slightly mellows the raw edge, letting the flavor deepen. That way, you get a more robust flavor that works perfectly as a sandwich spread idea.
Does the egg yolk need to be pasteurized if I’m not cooking this easy aioli recipe?
That’s a really responsible question, and I’m glad you asked! Since my primary goal is making delicious food that’s also safe for everyone, if you are pregnant, serving this to very young children, or serving someone with a compromised immune system, you absolute MUST use pasteurized shell eggs or a liquid pasteurized egg product to make this easy aioli recipe. For everyone else, standard good quality, fresh eggs are fine when used quickly, but pasteurized is always the safest route for raw egg preparations.
Estimated Nutrition for This Easy Aioli Recipe
Now, if you’re tracking macros or just curious about how much indulgence is really in that tiny dollop, here’s the breakdown. Remember, this is just an estimate since the exact fat content of your oil and the size of your egg yolk can change things slightly. But this gives you a really good ballpark idea of what you’re working with when you use the classic egg-and-oil method.
I like to look at this and see that while it is definitely a fat-heavy sauce—which is what makes it so satisfyingly creamy—it’s got zero sugar! That’s a win in my book, especially when it’s accompanying something simple like plain roasted carrots or vegetables.
Here’s the general estimate for just two tablespoons of the full-fat, homemade sauce:
- Calories: Around 180
- Total Fat: Roughly 20 grams (The good, unsaturated kind dominates here!)
- Saturated Fat: Only about 2 grams
- Carbohydrates & Fiber: Zero! It’s ultra-low carb.
- Protein: Just about 1 gram
- Sodium: Approximately 110mg
If you decided to go the ‘cheater’ route using prepared mayonnaise, these numbers will shift a bit depending on what brand you used, but the overall profile—high fat, zero sugar—stays pretty consistent.
Share Your Ultimate Garlic Sauce Creations
Whew! We did it! You’ve officially mastered the science behind a perfect emulsion and now you have a jar of the most incredible, vibrant, garlic aioli sitting in your fridge. I always feel this huge sense of accomplishment when I make something this bright and flavorful from true scratch!
Now, this is where I need your help as a fellow cook. I want to hear how you used this amazing versatile homemade sauce! Did you drizzle it over roasted fish? Did you use it on your lunchtime sandwich? Maybe you just kept it all to yourself and dipped every single vegetable in your crisper drawer into it—I won’t judge, promise!
Please take a second and stop by the comments section below. I’d love for you to leave a quick rating on this recipe, especially if you tried the classic emulsion method. It really helps others who are nervous about whipping up their first garlic aioli feel confident enough to try it.
If you snapped a photo of your creation—maybe it’s dipping perfectly crispy fries or looking gorgeous next to a burger—I’d be thrilled if you tagged me on social media! Seeing exactly how you incorporate these easy, flavorful recipes into your regular cooking routine is genuinely my favorite part of running this whole site. Keep cooking wonderfully, friends!
PrintThe Best 5-Minute Creamy Garlic Aioli
Make this quick and creamy garlic aioli at home in under five minutes. This recipe delivers a restaurant-style condiment, perfect as a versatile homemade sauce for fries, sandwiches, or grilled meats.
- Prep Time: 5 min
- Cook Time: 0 min
- Total Time: 5 min
- Yield: About 1 cup 1x
- Category: Condiment
- Method: Emulsification
- Cuisine: Mediterranean Inspired
- Diet: Low Calorie
Ingredients
- 1 large egg yolk
- 2 cloves fresh garlic, minced very fine or grated
- 1 teaspoon Dijon mustard
- 1 teaspoon fresh lemon juice
- 1/4 teaspoon salt
- Pinch of black pepper
- 1 cup neutral oil (like canola or grapeseed)
Instructions
- Place the egg yolk, minced garlic, Dijon mustard, lemon juice, salt, and pepper into a medium bowl or the bottom of a food processor.
- Whisk these ingredients together until they are well combined and slightly pale.
- Begin adding the neutral oil very slowly, drop by drop, while whisking constantly and vigorously. This slow addition is key to emulsification.
- Once about 1/4 cup of oil is incorporated and the mixture thickens slightly, you can increase the oil stream to a thin, steady drizzle, continuing to whisk without stopping.
- Continue adding the oil until all of it is incorporated and the aioli is thick and creamy.
- Taste the garlic aioli and adjust salt or lemon juice as needed. Serve immediately or chill.
Notes
- For a quicker, egg-free ‘cheater’ version, substitute 1 cup of good quality mayonnaise for the egg yolk and oil. Whisk the mayonnaise with the garlic, mustard, and lemon juice until smooth.
- If your aioli breaks (separates), whisk one teaspoon of warm water or lemon juice into the mixture, then slowly drizzle in a teaspoon of oil while whisking rapidly to re-emulsify.
- This versatile homemade sauce works well as a condiment for fries or as a sandwich spread idea.
Nutrition
- Serving Size: 2 Tablespoons
- Calories: 180
- Sugar: 0
- Sodium: 110
- Fat: 20
- Saturated Fat: 2
- Unsaturated Fat: 18
- Trans Fat: 0
- Carbohydrates: 0
- Fiber: 0
- Protein: 1
- Cholesterol: 45