
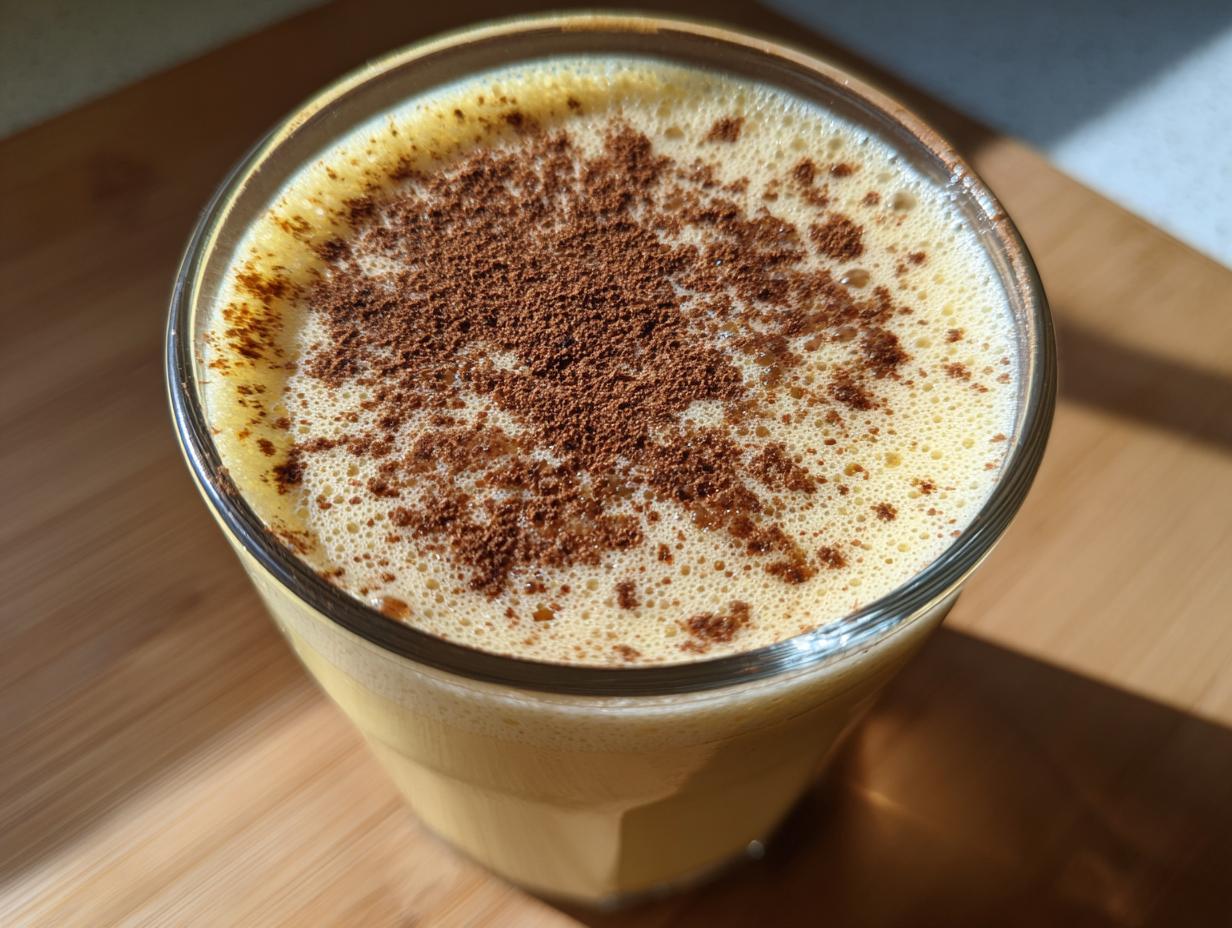
When the cold finally hits and the lights start going up, you know it’s officially time to get cozy! For me, nothing signals the holidays like a tall, frosty glass of rich, creamy homemade eggnog. Forget those thin, overly sweet tubs from the grocery store; we’re doing this the right way—the way I learned back when I was standing on a stool, getting inspired in the kitchen. This classic eggnog recipe is superior because we control the richness. It’s smooth, perfectly spiced, and honestly, it tastes like pure, distilled holiday magic in a glass!
- Why This Homemade Eggnog Recipe Beats Store-Bought
- Ingredients for Classic Creamy Eggnog
- Step-by-Step Instructions for Easy Eggnog
- Tips for the Best Eggnog Success
- Serving Suggestions for Your Festive Eggnog
- Storage and Make-Ahead Tips for Eggnog
- Frequently Asked Questions About This Eggnog Recipe
- Nutritional Estimates for Your Creamy Eggnog
- Share Your Perfect Eggnog Experience
Why This Homemade Eggnog Recipe Beats Store-Bought
Trust me on this: once you make this eggnog from scratch, you will never go back to the carton. Store-bought stuff is just too simple, right? It’s missing that deep, custardy body we all crave. My goal here is to give you that best eggnog recipe that feels luxurious without being overly fussy.
- Freshness Factor: You can’t beat the flavor of fresh spices that haven’t been sitting on a shelf for months!
- Flavor Control: You decide exactly how much nutmeg sings and exactly how sweet it needs to be.
- Richness Guarantee: We use quality whole milk and heavy cream—no weird stabilizers here!
Achieving That Perfect Creamy Eggnog Texture
This is where science meets holiday cheer! The reason this is such a creamy eggnog is because those egg yolks and sugar get whisked first, and then we gently cook the mixture on the stove. We are essentially making a custard base, which is a technique you never see in those super quick blender versions. That slow cooking builds incredible body and richness when you add the heavy cream. It’s thick enough to coat the back of your spoon—that’s how you know you’ve nailed it!

Ingredients for Classic Creamy Eggnog
Okay, let’s talk supplies! Since we aren’t whipping up a thin, watery drink here, we need the good stuff. Don’t try to sneak in low-fat dairy—this is the holidays, treat yourself! You’ll need six beautiful large egg yolks; yes, just the yolks are key for that perfect golden color and unbelievable creaminess.
We mix those yolks up with 3/4 cup of good granulated sugar and just a tiny pinch of salt to balance everything out. For the liquids, grab a whole quart of whole milk and a full pint of heavy cream. That heavy cream is doing most of the heavy lifting for the texture, so don’t skimp on it!
For the spice blend that makes this a true classic eggnog, grab a teaspoon of vanilla extract and about a half teaspoon of ground nutmeg—and always get extra nutmeg because we will be grating it fresh later! A quarter teaspoon of cinnamon finishes the spice profile perfectly right now.
Alcohol Options for Spiced Eggnog
Now, if you’re making this for the grown-up celebration—and wow, the flavor boost is incredible—you can add about one cup of spirits. My personal favorite for this recipe is a good quality spiced rum, or if you want that deeper, richer note, Bourbon is amazing. Brandy works beautifully too! Remember, this part is totally optional, so if you need a family-friendly batch, just skip this step!
Step-by-Step Instructions for Easy Eggnog
I know reading the steps for cooking raw eggs can look intimidating, but honestly, this stovetop process is smoother than you think! It only takes about ten minutes of active cooking time before we get to the best part—the waiting! First, whisk those yolks, sugar, and salt until they are pale yellow and look totally smooth. You can check out my general kitchen philosophy over on the privacy policy page if you need a refresher on why I love simple, foolproof cooking!
Next, heat your milk and heavy cream in a saucepan until you see steam rising and just a few tiny bubbles forming around the edge. Pay close attention—we absolutely do not want this mixture to boil! If it boils, you’ll end up with sweet scrambled eggs, and trust me, we want rich custard here.
Tempering the Eggs: The Key to Smooth Eggnog
This is the step that makes or breaks your texture, so listen up! We have to slowly warm those yolks up—we call this tempering. Take about one cup of that hot milk mixture and drizzle it *very* slowly into your eggs while you are whisking them like crazy. If you dump the hot milk in fast, the eggs seize up instantly! We’re trying to gently raise the temperature of the yolks with the hot liquid, so keep your whisk moving constantly until it’s all mixed in nicely.
Once that’s done, pour that warmed-up egg mixture right back into the saucepan with the rest of the milk and cream. Now, turn the heat down to medium-low. You have to stir this constantly with a wooden spoon until it thickens enough to coat the back of that spoon. That’s your goal—don’t let it get hotter than 160 degrees! If you have a thermometer, use it, but watching the spoon works too.
Chilling Your Homemade Eggnog
Once everything comes off the heat, stir in your vanilla, nutmeg, and cinnamon. If you’re adding alcohol, now is the time to drop in that Bourbon or Rum! Pour the whole batch into a clean pitcher or container. This is the hardest part, I won’t lie to you. You *must* chill this for at least four hours, but if you can manage it, let it sit overnight in the fridge. That chilling time is when the flavors actually marry together, and the creamy eggnog base thickens up perfectly into that luxurious holiday drink consistency you’re hoping for!
Tips for the Best Eggnog Success
We’ve made the custard base, and now it’s all about dialing in the final product! The absolute number one trick, in my opinion, is utilizing those high-quality dairy products. Using full-fat milk and heavy cream isn’t just a suggestion; it’s the secret to that rich, velvety mouthfeel, which is what makes this homemade eggnog recipe shine. Also, remember that chilling time I mentioned? It’s crucial! You can check out how quickly others make theirs here, but I promise you, a little patience pays off!
Don’t rush it, or you’ll end up with a thinner drink. If yours ends up slightly too thin after chilling, don’t panic! One little trick I learned is to whisk in just a splash more heavy cream once it’s cold. Sometimes the ratios shift slightly depending on the cream, and this quick fix restores the perfect thickness. For an extra festive touch, try rimming your serving glasses with cinnamon sugar before you pour—it tastes amazing!
Variations: Making Eggnog Recipe No Alcohol (Amish Style)
If you’re making this for everyone, including the kids or anyone abstaining from spirits, don’t worry one bit! Simply leaving out the Bourbon or rum results in a completely delicious, totally family-friendly beverage. This is often what folks refer to as an old fashioned eggnog, sometimes even called Amish style because it relies purely on that cooked custard base and spices. It’s just as comforting and full of flavor, proving you don’t need booze to have a fantastic holiday drinks treat. The spices really carry the flavor beautifully!
Serving Suggestions for Your Festive Eggnog
Now that you have this gorgeous, chilled, creamy eggnog base, it’s time for the fun part: serving and showing off! This is the star of your christmas cocktails spread, so presentation really matters. The absolute must-do, the thing that makes people stop and ask what you made, is the garnish.
You simply cannot serve classic eggnog without freshly grated nutmeg right on top. Seriously, skip the dusty jar stuff! Grating a whole nutmeg over the top releases these incredible, sharp, aromatic oils that smell like pure winter bliss. It elevates the entire drink immediately.
If you want to go the extra mile for your holiday drinks party, try rimming your glasses first! Take a small saucer with a little corn syrup or honey, dip the rim of your glass lightly—don’t soak it—and then lightly press that moistened rim into a mixture of cinnamon and sugar. It adds a wonderful sweetness and texture break before you even take a sip.
When it comes to pairings, keep it simple so the eggnog remains the focus. Think heavy, rich holiday desserts! A slice of gingerbread or a dense pecan pie pairs fantastically with the creaminess. If you’re doing an appetizer spread, something salty or savory, like smoked almonds or tiny cheese skewers, cuts through the richness perfectly. You can check out some other great festive ideas over here, but trust me, a simple glass with a grate of nutmeg is magic!
Storage and Make-Ahead Tips for Eggnog
One of the best things about this whole process is knowing you can totally plan ahead for your holiday drinks! Since this homemade eggnog recipe uses cooked eggs, it lasts much longer than those raw-egg versions people make—and honestly, I think it tastes better the longer it sits! I always make a huge batch two days before Christmas.
You can safely keep this eggnog refrigerated for up to a week in a tightly sealed pitcher. Just give it a good shake or stir before serving each time, because things can settle a little bit once it sits for a few days.
We talked about chilling it for at least four hours, but if you’re hosting a big party, making it the day before is my secret weapon. Letting it chill overnight in the fridge lets those spices really bloom and deepens that nutmeg flavor. Plus, the texture firms up just perfectly as it cools down completely. It goes from delicious to absolutely show-stopping overnight!
If you happen to look at your leftover eggnog later in the week and think it looks a touch thin, remember that quick fix! Just whisk in a little extra heavy cream until you get that perfect velvety texture back. It’s so nice knowing I have a spectacular dessert drink ready to go for last-minute guests. And if you ever want to try adapting this base for a lighter version, make sure to check out the tips for dairy free eggnog recipes; the chilling principle works there too!
Frequently Asked Questions About This Eggnog Recipe
It’s totally normal to have a few little doubts when dealing with custards and holiday drinks! I promise this recipe is rock-solid, but here are the answers to the questions I get most often when folks give this homemade eggnog recipe a try for the first time.
Can I use raw eggs and skip the cooking?
Oh, I know the real old fashioned eggnog sometimes skips the cooking, but for safety and consistency, I firmly suggest baking this base instead! Since this recipe cooks those egg yolks to 160 degrees Fahrenheit, you don’t have to worry about tempering technique going sideways, and it makes the final product so beautifully thick. If you skip heat, you’re moving into a totally different recipe territory!
How thick should this creamy eggnog be?
The thickness really builds during that long chill time, but when you take it off the stove, it should just perfectly coat the back of a spoon. If you can draw a clean line through the coating with your finger, you’re there! If it comes out too thin later, don’t fret—just whisk in a half-cup of extra heavy cream while it’s cold.
Can I make a sugar free eggnog version?
Yes, you absolutely can tweak this! Since this recipe relies on sugar to help stabilize the egg yolks during cooking, you’ll need to use your favorite 1:1 granular sweetener (like Erythritol or Monk Fruit blends). You won’t get the exact same final texture as you would with real sugar, but it works wonderfully for a sugar free eggnog that still rings in that perfect spice note.
Can I make a Dairy-Free Eggnog using this base?
That is a great question, especially with so many folks looking for dairy free eggnog options that still taste rich! You can definitely adapt this cooked base. Instead of whole milk, try using unsweetened cashew milk or oat milk. For the heavy cream, I highly recommend using an equal amount of full-fat coconut cream (the thick part from the top of the can). It gives you that necessary richness and fat content required for a truly creamy eggnog!
If you have other questions about spices or using brandy, feel free to send me a note over on my contact page! Happy sipping!
Nutritional Estimates for Your Creamy Eggnog
I always check these numbers, even though I know this is a holiday indulgence and not an everyday staple! Since we are using heavy cream and egg yolks, this really is the indulgent, full-flavor version of eggnog. Now, remember, these numbers are just estimates based on the recipe itself, so they can definitely swing a bit based on what brand of dairy you buy or, more importantly, if you decide to spike your batch with a cup of that wonderful bourbon or spiced rum!
This estimate is based on six servings of the recipe *without* any added alcohol, so if you add spirits, you are obviously adding extra calories and sugar depending on the liquor type. But wow, look at that flavor profile for nearly 500 calories—it’s worth every sip for a truly classic eggnog experience!
- Serving Size: About 1 cup
- Calories: Roughly 450 per serving
- Fat: About 28 grams (remember, this is where the creamy texture comes from!)
- Protein: Around 11 grams
- Carbohydrates: Approximately 38 grams
- Sugar: Close to 35 grams
If you are aiming for a sugar free eggnog or a lighter version, you’ll need to look at substitutes that drastically alter this profile, but for this beautiful, rich, homemade eggnog recipe, those numbers reflect the pure holiday goodness packed into every glass. Enjoy it, guilt-free!
Share Your Perfect Eggnog Experience
That’s it! You have now officially made the absolute best homemade eggnog recipe that your family will be talking about for years. Seriously, I’m so excited for you to take that first sip once it’s perfectly chilled and seasoned with that fresh nutmeg!
Now that you’ve done the hard work, I would absolutely love to hear all about it! Did you opt for the Bourbon, or did you stick to the non-alcoholic version for the little ones? Did your **creamy eggnog** turn out just like mine?
Please take a moment and drop a rating down below—five stars if it knocked your socks off! And if you snap a picture of your festive glasses, tag me on social media! Seeing your mugs full of my recipe makes my whole holiday season. It truly helps me know that these recipes are bringing that same kitchen warmth to your home that Jade always aimed for. Happy sipping, friends!
PrintCreamy Homemade Eggnog Recipe

Make this rich, creamy, and perfectly spiced homemade eggnog. This classic recipe is easy to prepare and delivers superior flavor compared to store-bought versions.
- Prep Time: 15 min
- Cook Time: 10 min
- Total Time: 4 hr 25 min
- Yield: 6 servings 1x
- Category: Dessert Drink
- Method: Stovetop Cooking
- Cuisine: American
- Diet: Vegetarian
Ingredients
- 6 large egg yolks
- 3/4 cup granulated sugar
- 1/4 teaspoon salt
- 1 quart whole milk
- 1 pint heavy cream
- 1 teaspoon vanilla extract
- 1/2 teaspoon ground nutmeg, plus more for garnish
- 1/4 teaspoon ground cinnamon
- Optional: 1 cup bourbon, spiced rum, or brandy
Instructions
- In a medium bowl, whisk the egg yolks, sugar, and salt together until the mixture is pale yellow and smooth.
- In a large saucepan, combine the whole milk and heavy cream. Heat over medium heat until steam rises and small bubbles form around the edges. Do not boil.
- Slowly temper the eggs by pouring about one cup of the hot milk mixture into the egg mixture while whisking constantly.
- Pour the tempered egg mixture back into the saucepan with the remaining milk and cream.
- Cook over medium-low heat, stirring constantly with a wooden spoon or heatproof spatula, until the mixture thickens enough to coat the back of the spoon (reaching 160 degrees Fahrenheit). Do not let it boil.
- Remove the saucepan from the heat immediately. Stir in the vanilla extract, nutmeg, and cinnamon.
- If using alcohol, stir in the bourbon, rum, or brandy now.
- Pour the eggnog into a pitcher or airtight container. Chill in the refrigerator for at least 4 hours, or preferably overnight, to allow the flavors to meld and the texture to thicken.
- Serve cold, garnished with freshly grated nutmeg.
Notes
- For a non-alcoholic version, simply omit the spirits. This creates a delicious Amish style eggnog.
- To achieve the creamiest texture, use high-quality, full-fat dairy products.
- If you prefer a thinner consistency, reduce the heavy cream slightly or add a splash more milk after chilling.
- For an extra festive touch, rim your glasses with cinnamon sugar before serving.
Nutrition
- Serving Size: 1 cup
- Calories: 450
- Sugar: 35
- Sodium: 90
- Fat: 28
- Saturated Fat: 17
- Unsaturated Fat: 11
- Trans Fat: 1
- Carbohydrates: 38
- Fiber: 0
- Protein: 11
- Cholesterol: 350