
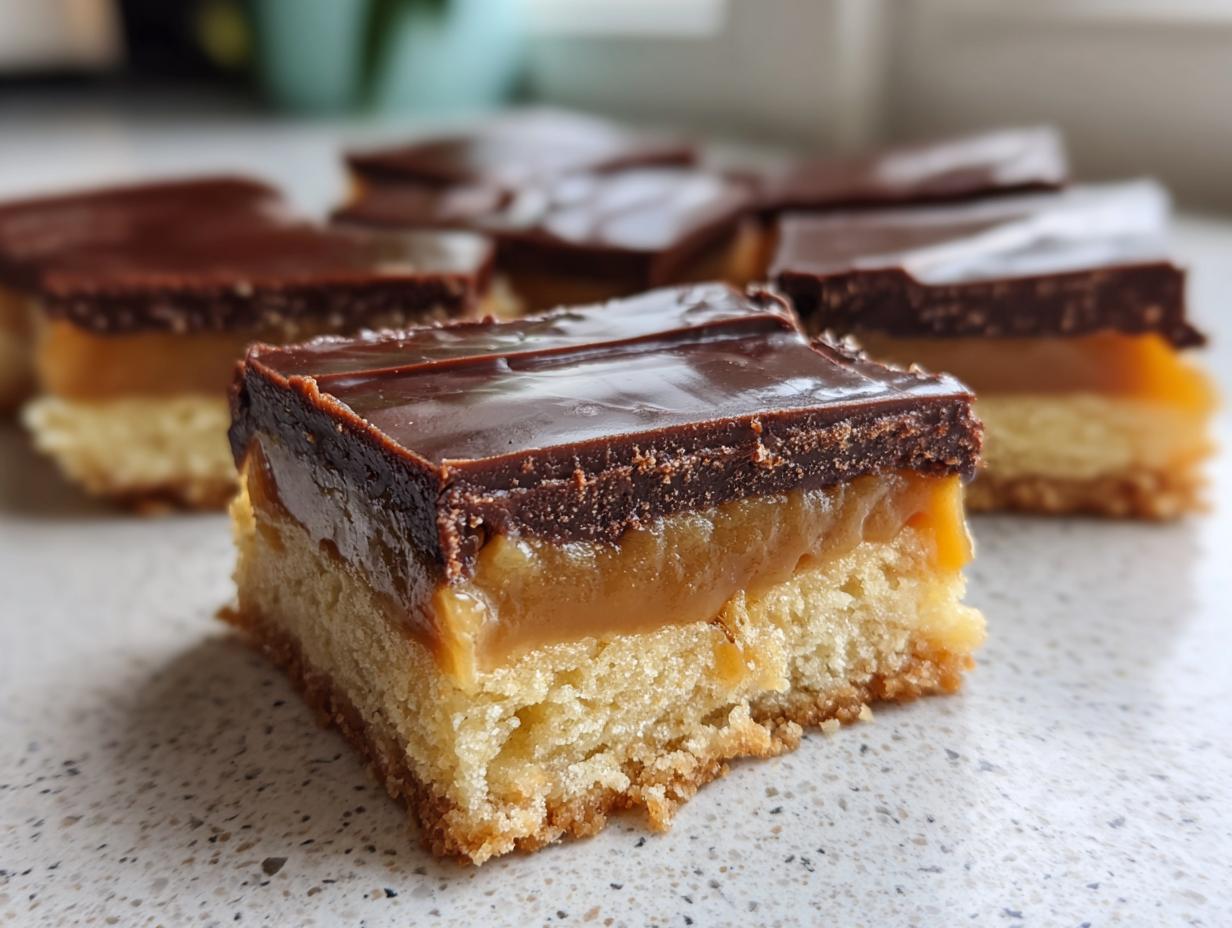
Oh my gosh, I have to tell you: that snap of chocolate, that thick, gooey layer of salty-sweet caramel, and that perfectly crumbly, buttery shortbread underneath? I’m talking about the legendary candy bar that lives rent-free in every single one of our childhood memories! We all adored those things, but honestly, sometimes the factory-made ones are just a little too thin on the good stuff, right? Well, say goodbye to the wrapper because we are making the ultimate **Twix** bars from scratch! This recipe is seriously foolproof, and I promise you, the homemade version with those distinct, thick layers is way better than anything you grab at the checkout line. Baking these fills my kitchen with the best smell and instantly transports me back to sneaking candy from my lunchbox.
- Why You Will Love These Homemade Twix Cookie Bars
- Gathering Ingredients for Your Twix Copycat Recipe
- Step-by-Step Instructions for Perfect Twix Bars
- Tips for Success Making Homemade Twix
- Variations on the Classic Twix Recipe
- Storage and Serving Suggestions for Your Layered Dessert Bars
- Frequently Asked Questions About Making Twix at Home
- Estimated Nutritional Information for Twix Cookie Bars
- Share Your Homemade Twix Creations
Why You Will Love These Homemade Twix Cookie Bars
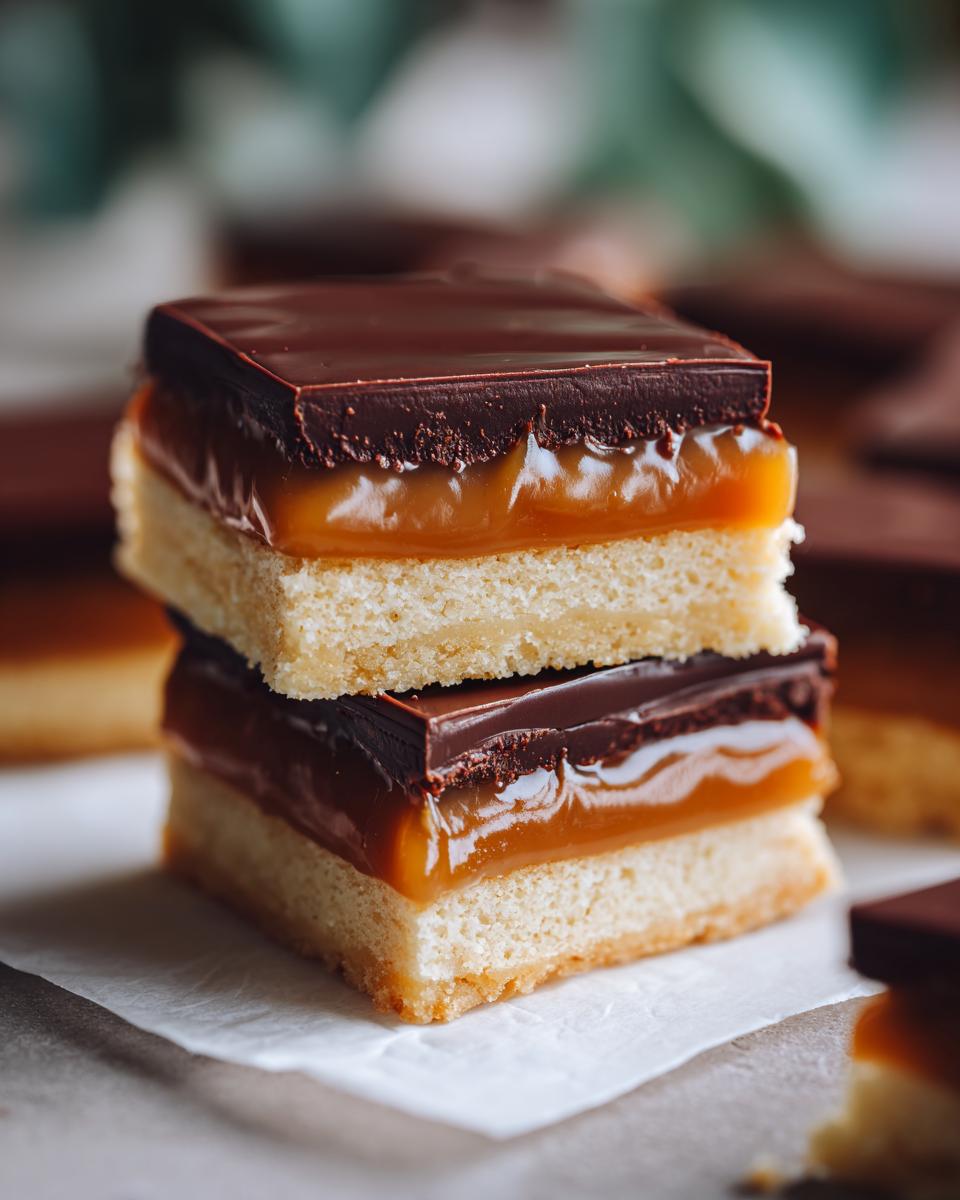
Seriously, I get why this recipe has been saved hundreds of times online—it’s everything a candy bar should be, only bigger and made with real butter! When you make them at home, you control the ratios, and trust me, we go heavy on the good stuff.
- The shortbread base is perfectly **buttery** and sturdy enough to hold everything up—no sad, crumbly bottoms here!
- That caramel layer? It sets up perfectly chewy, not rock-hard like some copycat recipes turn out.
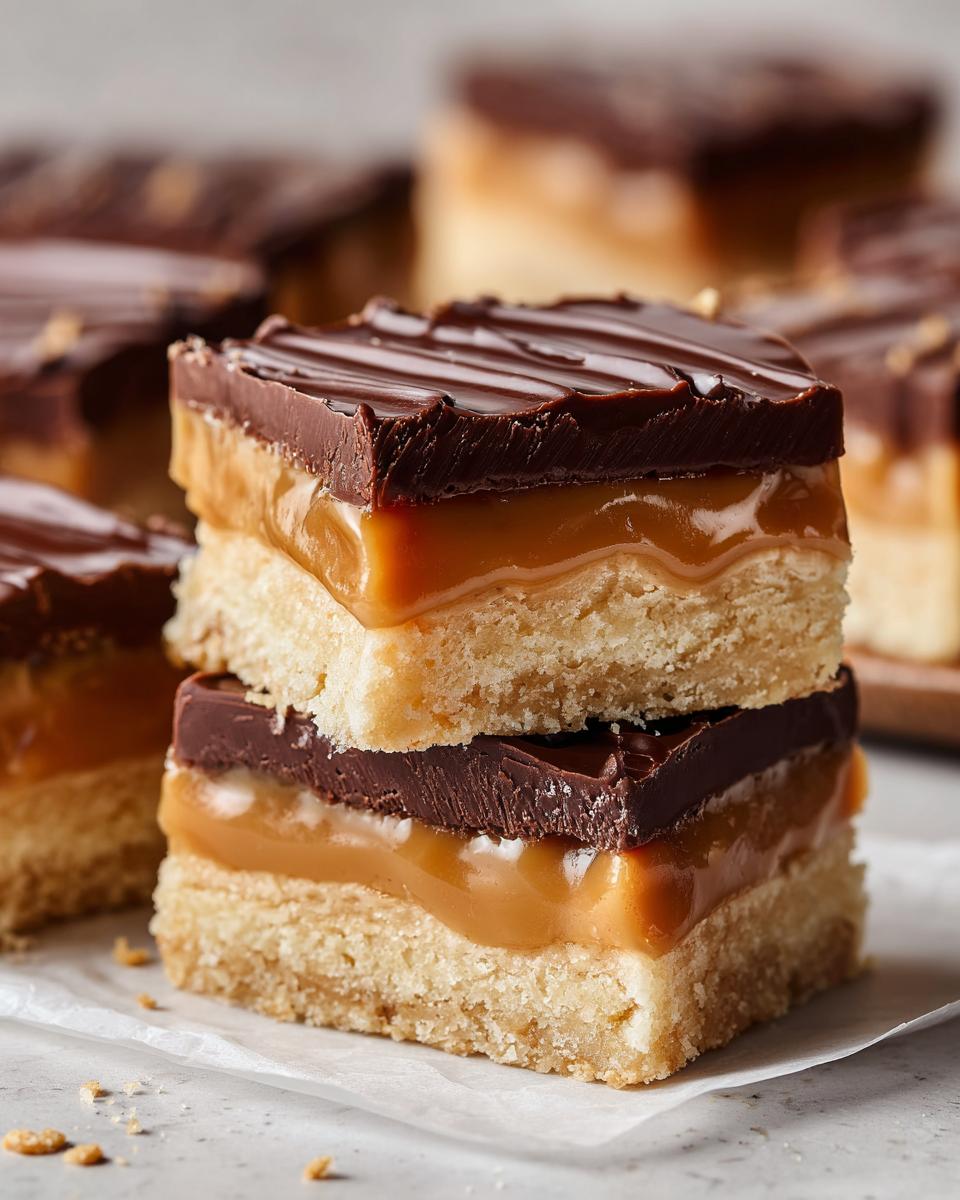
- It genuinely tastes exactly like the real thing, but better because you made it yourself. Totally makes you skip those boxed versions!
- These are amazing for batch baking. You can whip up a 9×13 pan and have treats ready for the whole week. (Need quick dinner ideas to go with your dessert? Check out my guide to easy weeknight dinners!)
- The recipe is straightforward—three distinct layers, but none of them are fussy or require special equipment.
- We coat these generously in rich chocolate so you get maximum decadent satisfaction in every single bar.
Gathering Ingredients for Your Twix Copycat Recipe
Okay, before we start layering up this absolute dream, we need our supporting cast! Remember what I always say: for that unbelievable shortbread base, you absolutely must use real, good-quality butter. It makes all the difference, trust me. Don’t shy away from those measurements—each ingredient is here for a precise reason to give us that perfect *crunch* and *chew*.
For the Buttery Shortbread Base
- 1 cup unsalted butter, softened
- 1/2 cup granulated sugar
- 1 teaspoon vanilla extract
- 2 cups all-purpose flour
- 1/4 teaspoon salt
For the Gooey Caramel Layer
This is where the magic happens! Quick tip: when we get to cooking this part, you’ll need to stir constantly. If you let it sit for even a second, you risk burning or making it too stiff. We want gooey, not granite!
- 1 (14 ounce) can sweetened condensed milk
- 1 cup packed light brown sugar
- 1/2 cup unsalted butter
- 1 teaspoon vanilla extract
- 1/4 teaspoon salt
For the Rich Chocolate Coating
For the final layer, I almost always throw in a tiny bit of coconut oil. It’s optional, but it really helps the chocolate set up beautifully smooth and shiny, which makes cutting so much nicer!
- 1 1/2 cups semi-sweet chocolate chips
- 1 tablespoon coconut oil (optional, for smoother coating)
Step-by-Step Instructions for Perfect Twix Bars
Alright, this is the fun part where we build our three beautiful layers! Don’t feel intimidated; just take it one step at a time, and you’ll have the best homemade candy bars ever. Trust me, the effort is so worth that first bite. We’re aiming for high flavor impact here, just like our favorite recipes for simple baking treats like butter cookies!
Baking the Buttery Shortbread Caramel Layer Base
First things first, get that oven warming up to 350°F (175°C). Now, grab your 9×13 pan. This next part is super important for easy cleanup: line it with parchment paper, making sure you leave an overhang on the sides. You’ll use those flaps later to lift the whole thing out—it’s the best trick for bar recipes!
In your mixing bowl, we need to cream together that 1 cup of softened butter and the granulated sugar until it gets nice and fluffy. Mix in your vanilla. Then, gradually add your flour and salt mixture until *just* combined—we aren’t whipping bread here, we just want it to come together into a dough. Press this down evenly into your prepared pan. Pop it into the oven for about 15 to 18 minutes, or until those edges look just barely golden. Let it cool a little while we work on that amazing caramel!
Making the Chewy Caramel Filling for Your Twix Style Cookies
Time to make the glue that holds this whole operation together! Grab a medium saucepan and put in your condensed milk, brown sugar, the second half-cup of butter, vanilla, and salt. Heat this over medium heat and stir, stir, stir! You have to keep it moving so that sugary mix doesn’t scorch. If you are trying to achieve that perfect sweet shop look, check out this great recipe for inspiration on making Homemade Twix Bars.
Once that butter melts and it starts to bubble gently, reduce the heat to low. Keep stirring consistently for about 5 to 7 minutes. You’ll notice it starts to thicken up and pull slightly away from the sides of the pan—that’s when you stop! If you cook it too long, you’ll end up with hard caramel, and we want that satisfying chew, not a jaw workout. Pour that gorgeous caramel right over your warm shortbread base. Stick the whole pan back into the oven for just 10 more minutes—this helps it set up just right. Now comes the hard part: you have to let it cool completely—we’re talking at least an hour or two—until that caramel is firm to the touch.
Applying the Final Rich Chocolate Coated Bars Topping
Once that caramel is totally firm (seriously, don’t rush this, or it will bleed into your chocolate!), it’s time for the chocolate hug! Put your chocolate chips and that optional teaspoon of coconut oil into a microwave-safe bowl. Zap it in 30-second bursts, stirring well after each one, until it’s completely smooth. You want it glossy and pourable, kind of like a really thick ganache. If you’re looking for inspiration on other creamy toppings, my fudge recipe shows a similar melting technique!
Pour that melted chocolate over the cooled caramel layer. Use an offset spatula to spread it out gently so you get an even, thick coating across the top. Now, back into the fridge it goes! Let it chill for at least an hour until that chocolate is totally set. Once it’s firm, use those parchment paper overhangs to lift the whole slab out, and slice it into classic rectangular bars. So easy!
Tips for Success Making Homemade Twix
You’ve made the layers, which is the hard part! Now, let’s talk about making sure these **Chocolate Caramel Cookie Bars** come out looking professional, not messy. Getting that ooey-gooey texture just right in the caramel and ensuring clean slices are my two biggest secrets for keeping this recipe reliable every single time.
Achieving the Ideal Caramel Texture
When you’re making the caramel, remember I said *don’t overcook it*? That is the number one reason people end up with hard, brittle candy instead of that perfect chewiness. If you’re feeling nervous about timing it on the stove, especially if you’re new to making caramel, you can absolutely bring in some science! A candy thermometer is your best friend here.
For a really chewy caramel layer that mimics that satisfying pull of a real **Twix**, you want to pull it off the heat right when it hits about 240°F (115°C). If you like it a little softer, pull it down around 235°F. Cooking longer pushes it toward the hard-crack stage, so keep that temperature monitored. If you don’t have a thermometer, just stick to my stove timing—stop stirring when it’s thick and starts bubbling sluggishly and pulls away from the bottom of the pan.
Cutting Clean Twix Bars
I see so many gorgeous bars ruined by messy slices! If you try to cut these bars when they are room temperature or even slightly warm, you’ll just smear chocolate everywhere and pull up chunks of caramel. It’s a disaster unless you want a messy pile of goodness, which is fine too, of course!
The trick to clean bars is patience and temperature control. You must let them chill in the refrigerator for at least one hour after the chocolate is set—I actually leave mine in overnight sometimes. Once they are thoroughly cold, use a very sharp, long knife. If the knife starts sticking, dip the blade into a tall glass of hot water between slices. Wipe the blade completely dry, and then slice again. That hot knife glides right through the set chocolate and firm caramel for beautiful, neat squares. If you’re ever looking at recipes with tricky toppings, like a fussy frosting, seeing how I handle the structure in my cream cheese frosting guide might show you similar cutting principles!
Variations on the Classic Twix Recipe
We’ve nailed the traditional rectangular bar, but one of the best things about making **Homemade Twix Bars** is that you can totally customize them! Don’t feel locked into the 9×13 pan setup if you don’t want to. I love experimenting, especially when holidays roll around or when I need something portion-controlled for snack time. Think of this recipe as a fantastic base structure for all sorts of **Twix Inspired Desserts**. If you love layered treats that mix chocolate and caramel, you might also wanna look at my tips for my turtle brownies—they scratch that same rich itch!
Making Twix Bites Recipe
If you’re bringing these to a party or if you just have a seriously sweet tooth and want built-in portion control, turning them into **Twix Bites Recipe** is genius. You have two easy ways to do this. The first is super simple: just cut the fully chilled 9×13 slab into tiny squares—think 1-inch by 1-inch little gems!

The second way, which is a bit more fun, involves using a mini muffin tin. Prepare the tin with liners, and instead of pressing the shortbread dough into a giant pan, you press small amounts into the bottom of each cup. You then bake that base, cool it, pour the caramel over, cool again, and top with chocolate. They come out looking perfectly uniform. Everyone grabs two or three because they are so cute!
Dietary Swaps for Twix Inspired Desserts
Look, I’m all about that rich, buttery shortbread, but sometimes we need to cater to different needs without sacrificing that signature texture we worked so hard for. If you have friends who need gluten-free options, you can absolutely swap out the all-purpose flour for a good quality 1-to-1 GF blend. The key is making sure the blend you use already contains xanthan gum so the shortbread holds together well.
For the chocolate topping, switching to dairy-free chocolate chips is easy; they melt the exact same way. If you are really trying to kick this up a notch for dietary needs, I’ve seen some amazing versions online using things like maple syrup instead of refined sugar in the caramel, though that changes the texture slightly. If healthier adaptations are your jam, you should absolutely check out the work over at Rachael’s Good Eats for some wonderful takes on Healthy Twix Bars that skip the refined stuff entirely!
Storage and Serving Suggestions for Your Layered Dessert Bars
Now that you have these incredible, thick, homemade **Twix** masterpieces, you need to know how to keep them perfect! These bars are so delightful that they might not last long, but if you do have leftovers—or if you want to bake ahead for **Holiday Baking Cookie Bars**—proper storage is key.
Because we have that beautiful, rich chocolate shell and a slightly soft caramel center, you absolutely want to keep these bars chilled. Store them in an airtight container in the refrigerator. They will stay amazingly fresh tasting for up to a week this way. Keeping them cold ensures that the chocolate stays nice and firm so you don’t end up with melted fingers when you grab one!
If you freeze them? Wow, they become like decadent little frozen caramel candies! I usually wrap individual bars tightly in plastic wrap and then place them all into a freezer bag. They can hang out in the freezer for up to two months. Honestly, peeling off the wrapper and letting a frozen bar thaw for just 10 minutes on the counter is almost as good as eating them immediately—it gives you that amazing hard chocolate snap!
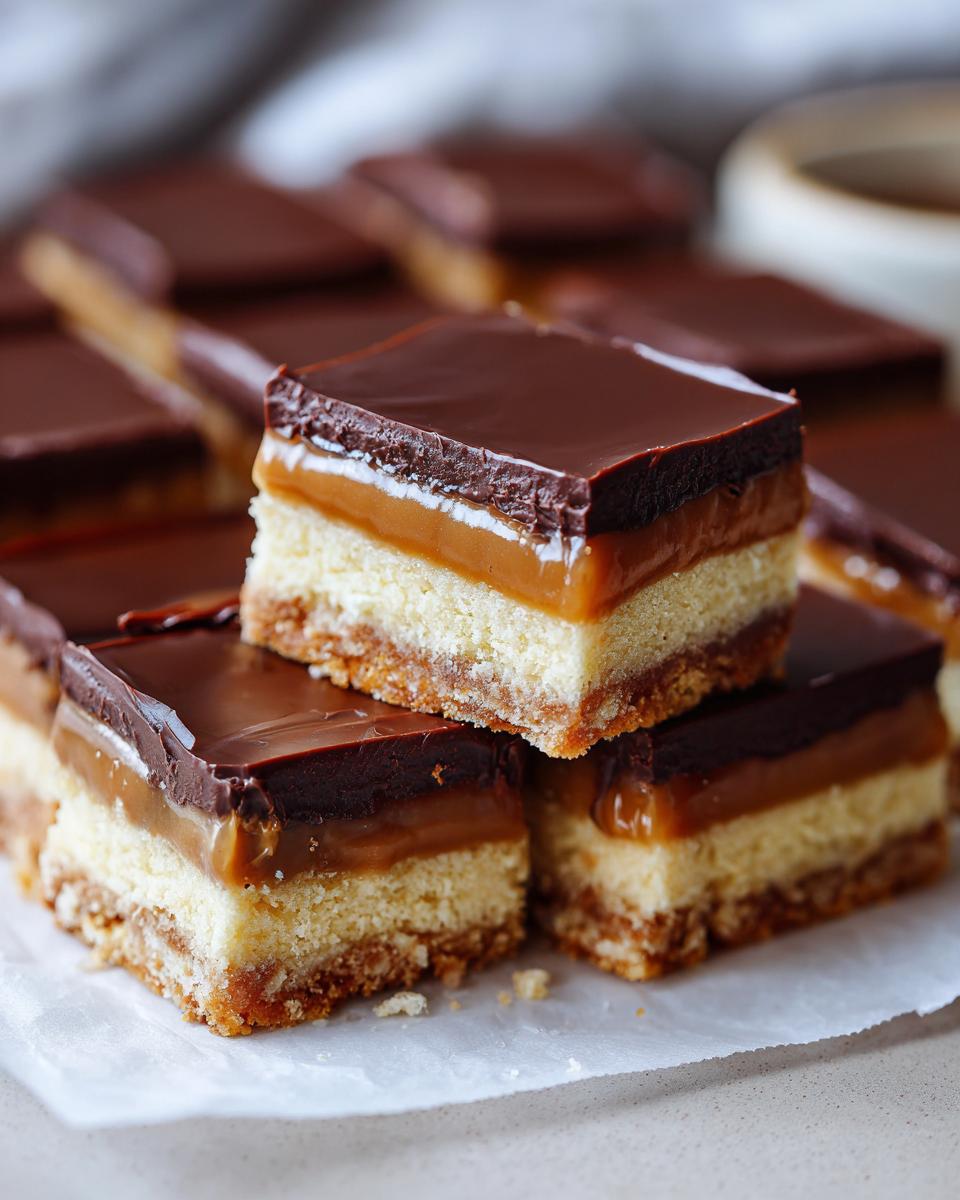
So, how should you serve these **Quick Homemade Candy** treats? They are fantastic all on their own, naturally. But if you ask me, nothing pairs better with the salty-sweet profile of the caramel and chocolate than a steaming hot cup of coffee or a tall, ice-cold glass of milk, just like when we were kids. Honestly, they are so rich that if you’re serving them after a big meal, maybe a smaller slice is all you need! If you’re looking for other recipes that stay moist for days, check out my tips for an easy, super moist fruit cake; the storage principles are similar!
Frequently Asked Questions About Making Twix at Home
I know when you’re making something this iconic, you sometimes have questions about those tricky spots! Don’t worry one bit. I’ve answered the ones I get asked most often about creating the perfect **Copycat Twix Recipe** right here. If you have another burning question after trying these incredible **Layered Dessert Bars**, please always feel free to reach out to me on my contact page!
Can I skip baking the shortbread base of the **Twix**?
Oh, please don’t skip this step! The shortbread base is the foundation of our whole structure. If you just press raw dough into the pan and pour hot caramel over it, you end up with raw, doughy pockets underneath the caramel later on. You absolutely have to bake that base until it’s lightly golden; that baking process sets the butter and flour so it becomes that crisp, **buttery shortbread caramel layer** structure we love. Trust me, just 15 minutes in the oven is worth it!
What is the best way to get a **No Box Twix Recipe** taste?
The secret to that genuine, addictive taste that makes you forget store-bought candy is twofold: ingredients and temperature control! First, like I mentioned way back in the ingredient chat, you have to use real, good-quality butter—no substitutes here for authentic flavor in the shortbread! Second, when cooking the caramel, you are aiming for that sweet spot where it’s fully cooked but not hardened. You need to cook it just until it reaches the soft-ball stage, or right before. That slight richness from the cooked brown sugar plus the simple butter base is what screams authentic, **gooey caramel treats**!
How long does it take for the caramel to set properly in these **Chocolate Caramel Cookie Bars**?
Patience is your only tool here when it comes to setting the caramel! After you pour that warm caramel over the slightly warm shortbread and bake it for those extra 10 minutes, the cooling process starts. You need a good hour to two hours sitting at room temperature for the caramel to firm up just enough so it won’t melt when the chocolate goes on top. After the chocolate is applied, they need another solid hour in the fridge. If you want the absolute cleanest slices, chill them until they are totally firm—I often let mine sit overnight, which guarantees perfect portions for cutting your **bite sized candy bar treats**!
Estimated Nutritional Information for Twix Cookie Bars
Okay, I know when we are baking treats this decadent, the nutrition label isn’t exactly the star of the show, right? But since I love giving you all the full picture—and being totally transparent about what goes into these amazing **Homemade Twix Bars**—here is the rundown on what you can expect per serving.
Remember, this is just an estimate based on the ingredients listed and how perfectly we divide the 9×13 pan into 24 treats. If you cut smaller **Bite Sized Candy Bar Treats**, the numbers shift down! Always treat these numbers as a guideline for your planning.
- Serving Size: 1 bar
- Calories: 280
- Sugar: 28g (Yep, that’s the caramel and chocolate doing their work!)
- Sodium: 85mg
- Fat: 16g
- Saturated Fat: 9g
- Carbohydrates: 33g
- Protein: 3g
Don’t worry about those sugar counts too much; these are treats meant to be savored! They come out so rich that one perfectly cut slice of this **Layered Dessert Bar** is unbelievably satisfying. Enjoy every single buttery, chewy, crunchy bite of this fantastic **From Scratch Twix** recipe!
Share Your Homemade Twix Creations
Now that you’ve mastered the best **Copycat Twix Recipe**, I need to see them! Please, please leave a rating below—give these bars five stars if they blew your mind. Snap a picture and tag me on social media so I can swoon over your beautiful layers. I always love hearing which part you love most: the buttery shortbread, the gooey caramel, or that thick chocolate top!
If you ever need to circle back on ingredient sourcing or privacy details, you can always review my privacy policy, but for now, go enjoy those treats!
PrintHomemade Twix Cookie Bars
Make rich, layered cookie bars that copy the taste of a Twix candy bar, featuring buttery shortbread, gooey caramel, and a chocolate coating.
- Prep Time: 25 min
- Cook Time: 35 min
- Total Time: 1 hour 40 min
- Yield: 24 bars 1x
- Category: Dessert
- Method: Baking
- Cuisine: American
- Diet: Vegetarian
Ingredients
- 1 cup unsalted butter, softened
- 1/2 cup granulated sugar
- 1 teaspoon vanilla extract
- 2 cups all-purpose flour
- 1/4 teaspoon salt
- 1 (14 ounce) can sweetened condensed milk
- 1 cup packed light brown sugar
- 1/2 cup unsalted butter
- 1 teaspoon vanilla extract
- 1/4 teaspoon salt
- 1 1/2 cups semi-sweet chocolate chips
- 1 tablespoon coconut oil (optional, for smoother coating)
Instructions
- Preheat your oven to 350°F (175°C). Line a 9×13 inch baking pan with parchment paper, leaving an overhang on the sides for easy removal.
- Prepare the shortbread base: In a large bowl, cream together the 1 cup softened butter and 1/2 cup granulated sugar until light and fluffy. Mix in 1 teaspoon vanilla extract.
- In a separate bowl, whisk together the flour and 1/4 teaspoon salt. Gradually add the dry ingredients to the wet ingredients, mixing until just combined to form a dough.
- Press the shortbread dough evenly into the bottom of the prepared baking pan. Bake for 15 to 18 minutes, or until the edges are lightly golden. Let cool slightly while you prepare the caramel.
- Prepare the caramel layer: In a medium saucepan over medium heat, combine the sweetened condensed milk, brown sugar, 1/2 cup butter, 1 teaspoon vanilla extract, and 1/4 teaspoon salt.
- Stir constantly until the butter melts and the mixture comes to a gentle boil. Reduce the heat to low and continue stirring for about 5 to 7 minutes, until the mixture thickens slightly and pulls away from the sides of the pan. Do not overcook, or the caramel will become hard.
- Pour the warm caramel evenly over the warm shortbread base. Return the pan to the oven and bake for an additional 10 minutes. This helps the caramel set. Remove from the oven and let cool completely, about 1 to 2 hours, until the caramel is firm.
- Prepare the chocolate topping: Place the chocolate chips and coconut oil (if using) in a microwave-safe bowl. Microwave in 30-second intervals, stirring in between, until smooth and fully melted.
- Pour the melted chocolate over the cooled caramel layer, spreading it evenly to cover the entire surface.
- Refrigerate the bars for at least 1 hour, or until the chocolate is completely set.
- Use the parchment paper overhang to lift the chilled bars from the pan. Cut into rectangular bar shapes.
Notes
- For a cleaner cut, chill the bars for at least 2 hours before slicing.
- If you prefer a softer caramel, reduce the cooking time for the caramel layer by 1-2 minutes.
- You can use milk chocolate or dark chocolate for the topping based on your preference.
Nutrition
- Serving Size: 1 bar
- Calories: 280
- Sugar: 28g
- Sodium: 85mg
- Fat: 16g
- Saturated Fat: 9g
- Unsaturated Fat: 7g
- Trans Fat: 0.1g
- Carbohydrates: 33g
- Fiber: 1g
- Protein: 3g
- Cholesterol: 30mg