
There is just something so satisfying about the *snap* of a perfectly crunchy pickle. Seriously, that sound alone is worth making them at home! If you’ve ever wanted to dive into quick pickling but were scared off by the idea of boiling water baths and serious preserving techniques, I have fantastic news for your busy week. Forget the canning—we are making what I call the Ultimate Crispy 24-Hour Dill and Garlic Refrigerator Pickles. This is my tried-and-true, no-fuss method for getting the best refrigerator pickles ready fast. It speaks right to my philosophy: simple ingredients, reliable results, and absolute connection to what you’re eating. You won’t believe how easy these tangy beauties are to pull together for your weeknight meals!
- Why These are the Best Refrigerator Pickles You Will Make (E-E-A-T Focus)
- Ingredients for Ultimate Garlic Dill Refrigerator Pickles
- Step-by-Step Instructions for Your Easy Homemade Pickles
- Tips for Success with Crispy Refrigerator Pickles
- Flavor Variations for Your Refrigerator Dill Pickles
- How to Store and Keep Your Refrigerator Pickles Fresh
- Serving Suggestions for Tangy Refrigerator Pickles
- Frequently Asked Questions About Making Refrigerator Pickles
- Understanding the Nutrition in Your Homemade Pickles
- Share Your Favorite Refrigerator Dill Pickles Experience
Why These are the Best Refrigerator Pickles You Will Make (E-E-A-T Focus)
I developed this recipe after testing batches endlessly, trying to solve the ultimate pickle problem: how to get that perfect store-bought crunch without the hassle. Trust me, these aren’t your grandma’s soft, fermented cukes—unless your grandma was a mad scientist of quick flavor! We focused hard on making this a truly foolproof No Canning Pickle Recipe. If you’re looking for the best flavor bomb with zero stress, you’ve found it. I poured all my test kitchen know-how into making sure these work perfectly for you the first time. If you’re curious about my background, you can peek more at my philosophy here!
Achieving Maximum Crunch in Your Refrigerator Pickles
The secret to incredible crunch comes down to two things we focus on early: using fresh Kirby cucumbers—they just hold up better—and drenching them in a hot brine immediately. That blast of heat sets the structure, locking in that desirable texture. It’s key to getting those genuinely Crispy Refrigerator Pickles.
Ready in 24 Hours: The Speed of Quick Refrigerator Pickles
Who has time to wait weeks for flavor? Not me! That’s why I love that we can have these incredible Garlic Dill pickles ready to go the very next day. These are true 24 Hour Pickles. You prep them in the evening, and they are perfect for loading onto burgers or snacking straight from the jar the following afternoon. It’s fast food, but healthy fast food!
Ingredients for Ultimate Garlic Dill Refrigerator Pickles
Okay, let’s talk about what you need to make these happen. Great refrigerator pickles start with quality, simple ingredients, and that’s all this recipe asks for. We aren’t messing around with complicated stuff here, just the basics that deliver HUGE flavor. You’ll need about four cups of water and two cups of vinegar—I usually grab standard white vinegar, but apple cider vinegar works too if you want a slightly fruitier tang! For saltiness, we use precisely two tablespoons of pickling salt, or kosher salt if that’s all you have on hand. Don’t forget one full tablespoon of regular sugar to balance the brine. That’s the base!
Now for the good stuff that makes these Garlic Dill Pickles Recipe staples. You absolutely need about four cloves of garlic, and they must be smashed—not sliced, smashed! This helps release all that pungent flavor into the brine. We want one full tablespoon of fresh dill sprigs for that classic taste, or if you’re using dried, use one teaspoon of dill seed instead. Finish it off with one teaspoon of whole black peppercorns tucked in there for just a little warmth. See? Nothing scary, just straightforward flavor builders!
Selecting Cucumbers for Perfect Refrigerator Pickles
You cannot use those giant, watery slicing cucumbers from your regular grocery haul for crispy results, trust me on this. You need pickling cucumbers. Kirby cucumbers are my absolute favorite for this Simple Pickling Recipe because they have thinner skins and are dense, which helps them stay crunchy when submerged. You’ll want about two pounds of them. Before they even touch the brine, give them a good wash—always! And make sure you trim off both the blossom end and the stem end. That little bit of blossom end residue can sometimes soften your pickles, and we are aiming for maximum snap here!
Step-by-Step Instructions for Your Easy Homemade Pickles
Alright, now that we have our ingredients sorted and our cucumbers trim-ready, we jump right into the physical part of making these refrigerator pickles. Don’t let the word “boil” scare you—this process is incredibly fast, like maybe 15 minutes total, and that’s what makes this such a great Simple Pickling Recipe for weeknights! We are getting flavor packed in fast, and you can find more easy methods on my other recipes pages too!
Preparing Cucumbers and Jars for Refrigerator Pickles
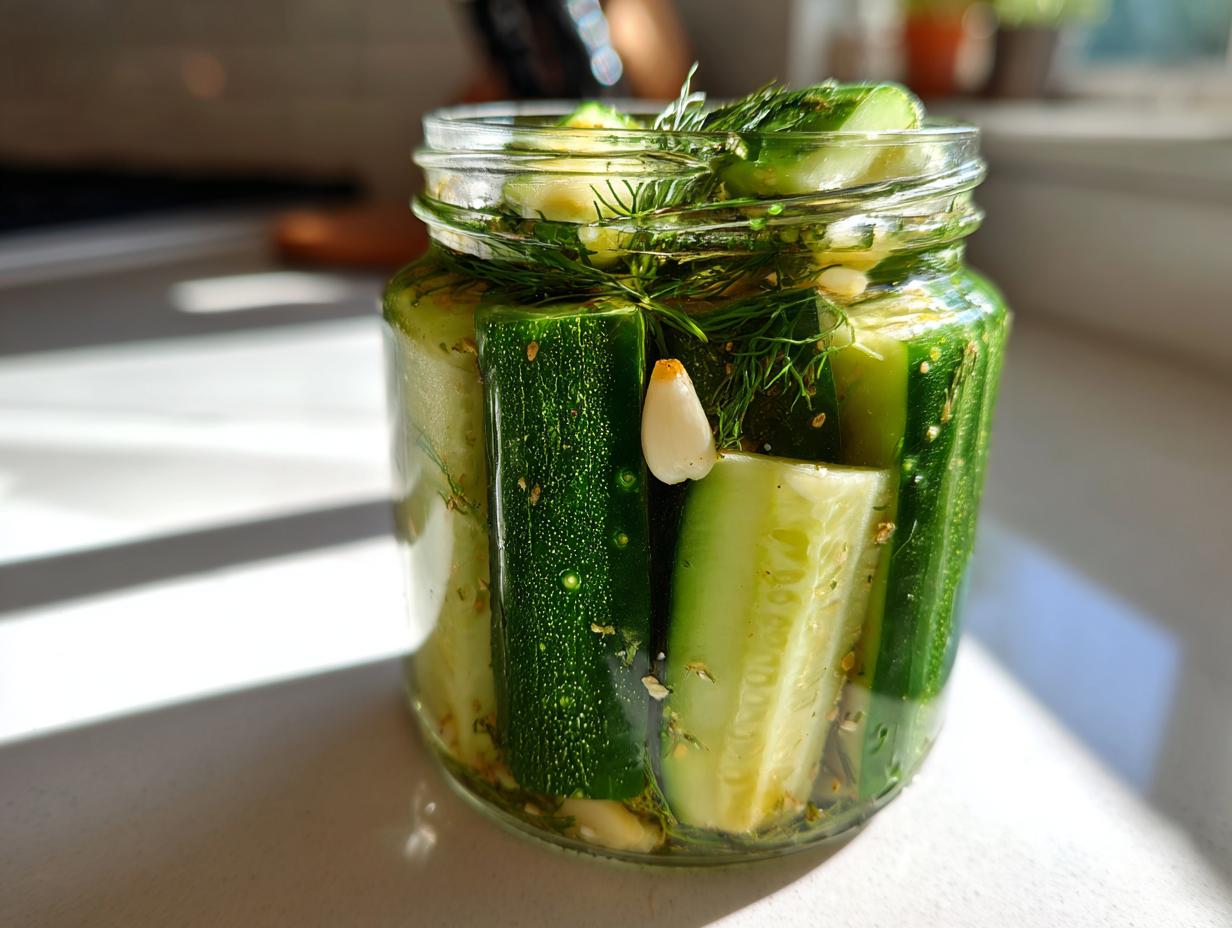
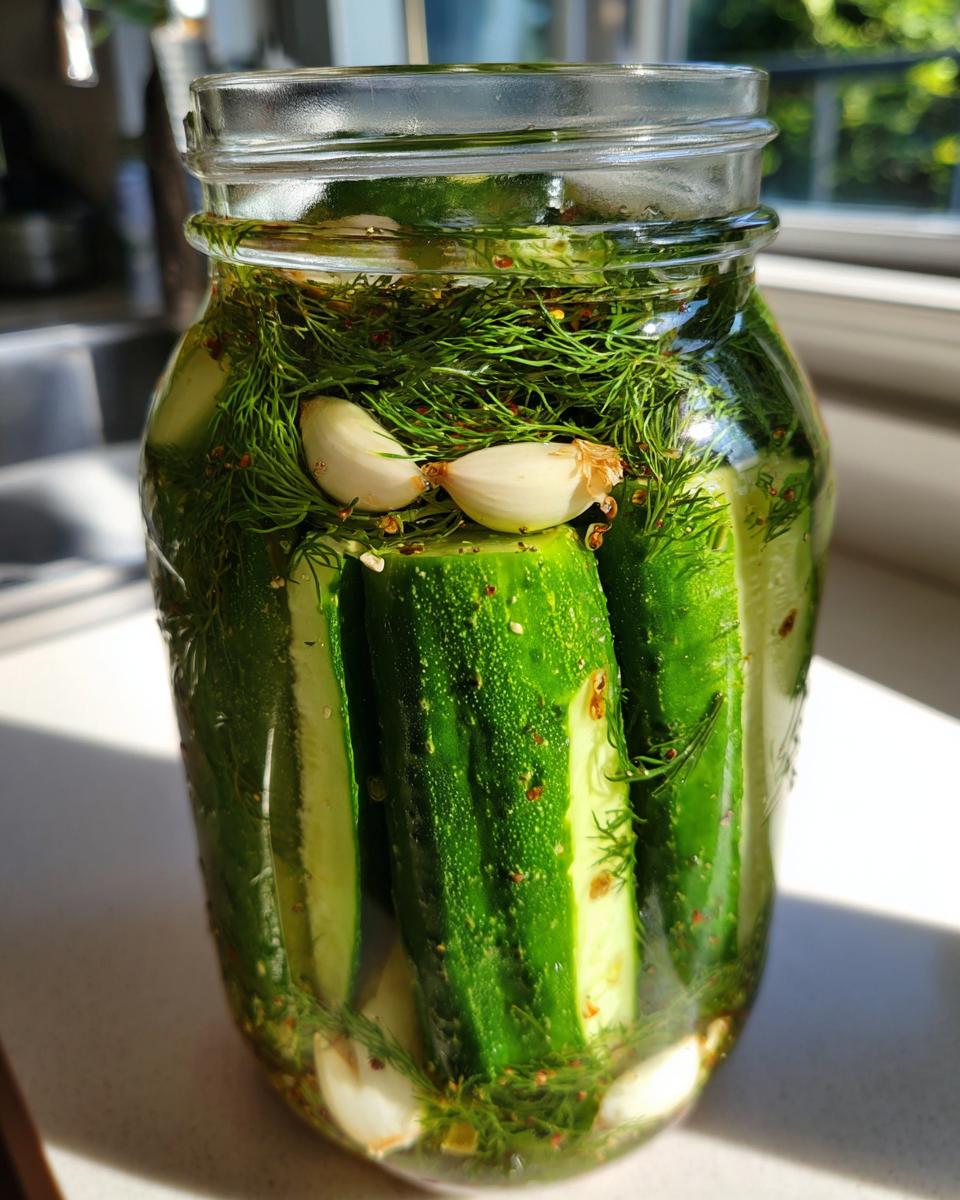
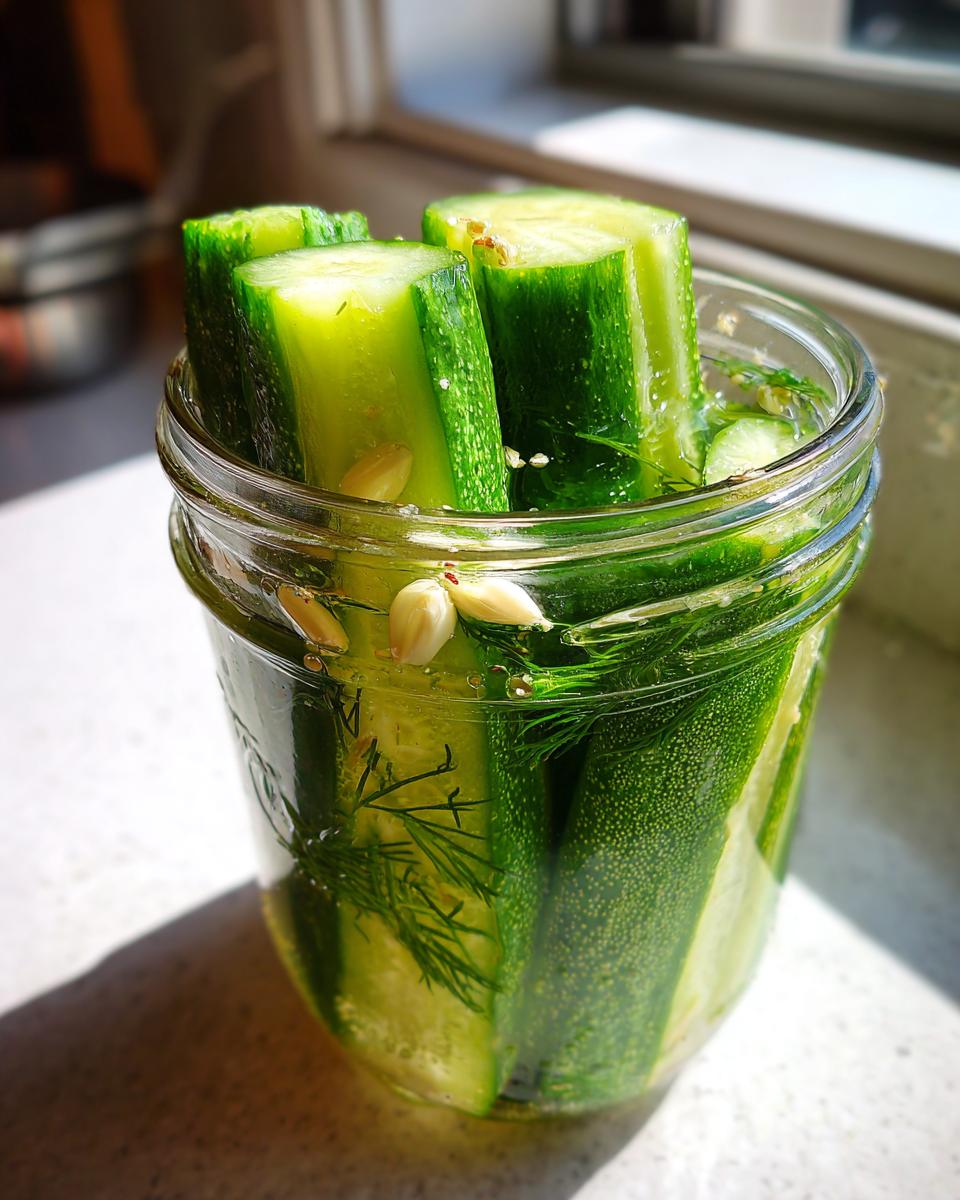
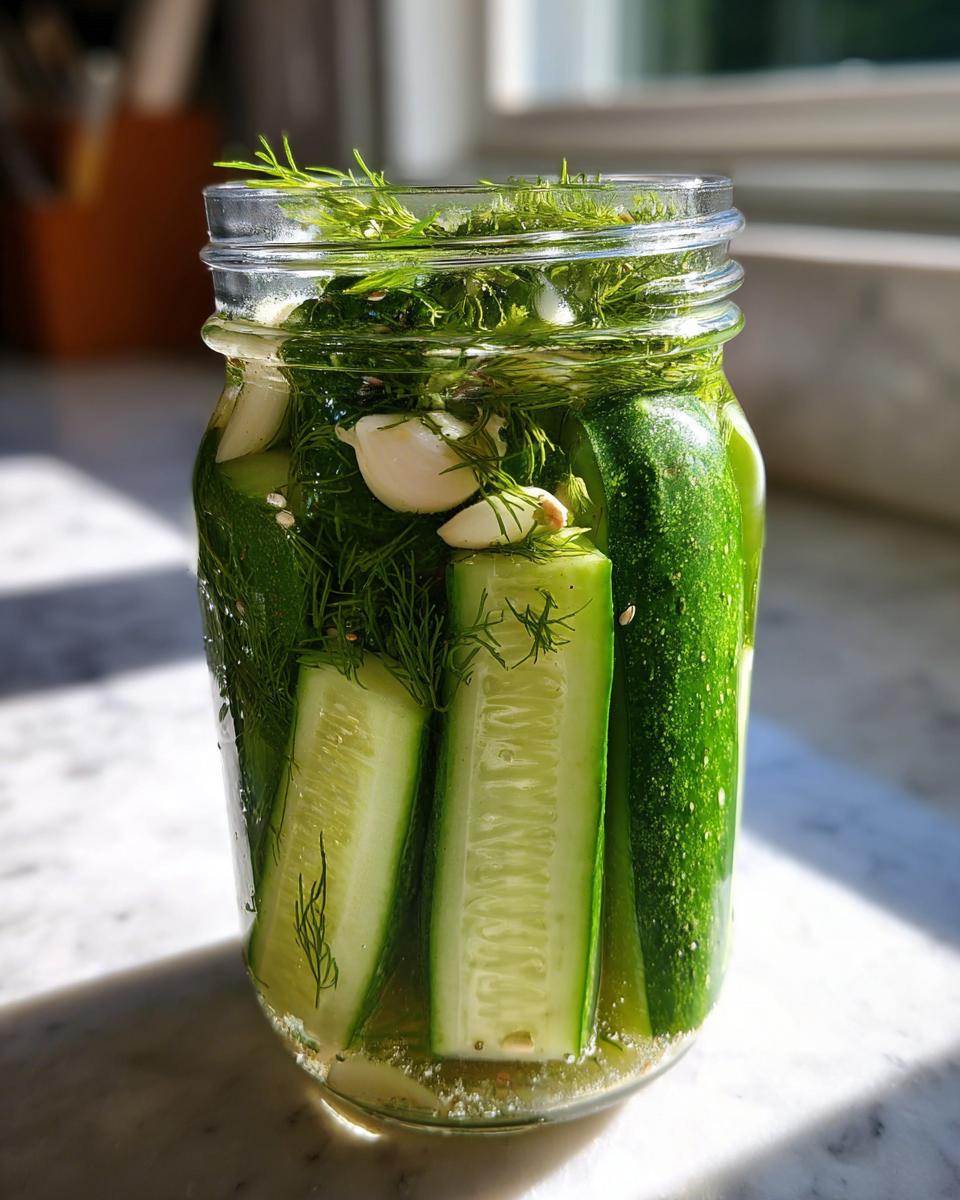
First things first, grab those perfectly trimmed cucumbers and slice them up. I aim for spears or rounds that are about a quarter-inch thick. If they are too thin, they get mushy; too thick, and the brine doesn’t get in deep enough for that sharp flavor. Once sliced, you need to pack them tightly into two clean, pint-sized glass jars. You really want to squish them in there, making sure there are no huge air pockets. Leave about half an inch of space at the very top of the jar—that’s called headspace, and we need it so the hot brine doesn’t overflow when we pour it in.
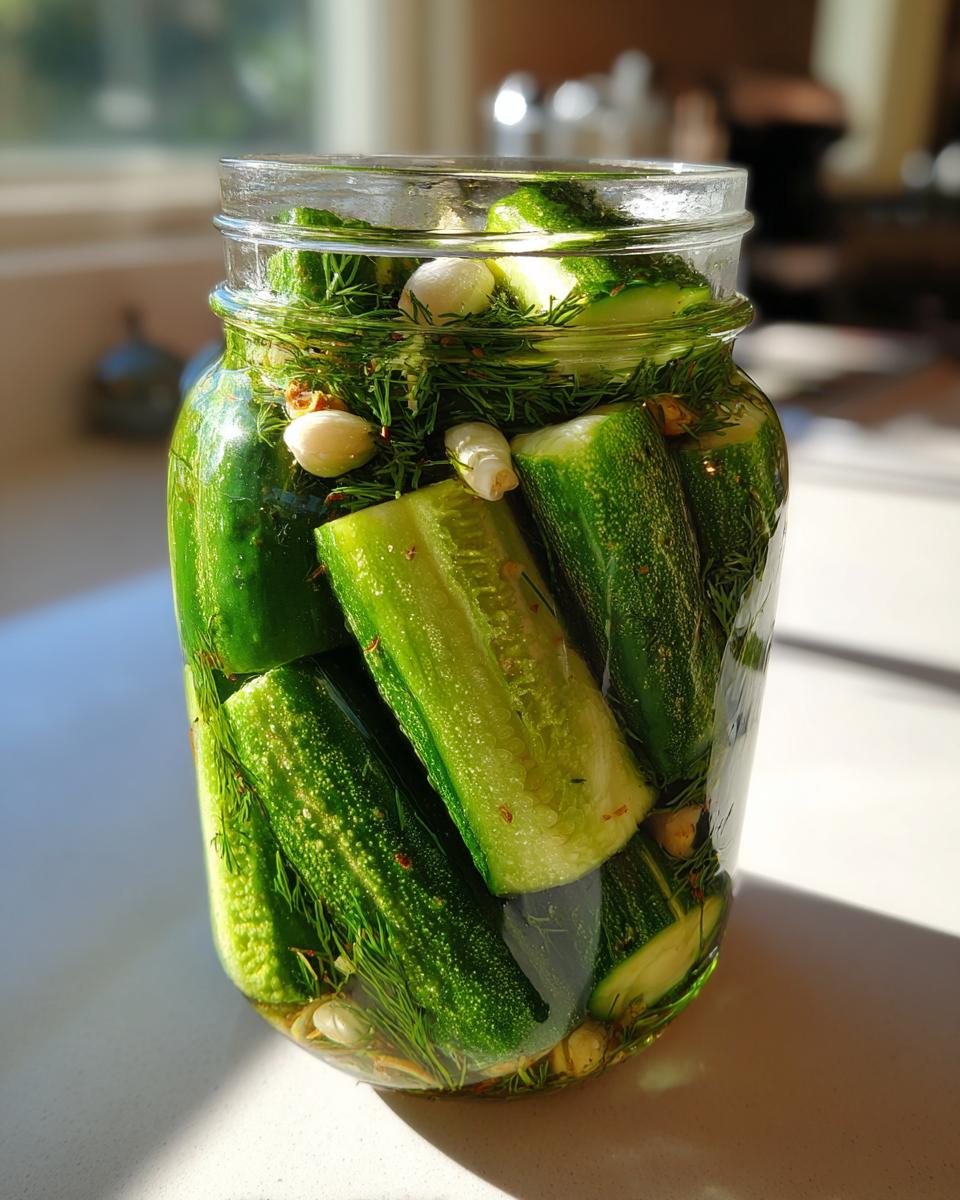
After you’ve packed the cucumbers, divide up all your flavor builders. Make sure you drop the smashed garlic, the fresh dill sprigs, the peppercorns, and that little bit of sugar evenly between the two jars. Just sprinkle them right in on top of the cucumbers. They nestle down in there while we make the magic liquid!
Creating the Flavorful Brine for Tangy Refrigerator Pickles
Time for the brine! Grab a medium saucepan—nothing fancy needed here. You’re going to pour in your four cups of water, your two cups of vinegar (I used plain white, remember!), and your salt and sugar. Put this mix over medium-high heat. You need to stir it pretty consistently until you see everything dissolve completely. We aren’t looking for a rolling hard boil, just enough heat to make sure that salt and sugar vanish into the liquid. Once it’s clear and sparkling, pull the pan right off the heat. That’s it for our brine work!
The Final Steps to Seal and Chill Your Simple Pickling Recipe
This is where we assemble everything. Carefully pour that hot brine mixture right over the cucumbers and flavorings in your jars. Be slow and steady so you don’t splash! Remember that headspace? Make sure you leave about that half-inch clear at the top. Then, take a clean paper towel and wipe the rims of the jars super well. Any salt residue left on the rim can stop the lid from sealing properly, even for fridge pickles! Pop on those tight-fitting lids.
Now, this next part is crucial for setting the crunch. Don’t rush them into the fridge! Let the sealed jars sit right out on the counter at room temperature for about 30 minutes to cool down slightly. After that half-hour rest, transfer them straight to the refrigerator. Seriously, try not to sneak one for at least 24 hours. If you can hold out for 48 hours, the flavor penetration is even better, but the first taste of these tangy refrigerator pickles the next day is heaven.
Tips for Success with Crispy Refrigerator Pickles
I’ve made enough batches of these refrigerator pickles to know what makes them *great* versus just *okay*. Remember my background taught me the science behind the crunch, so I can tell you what really matters! If you want absolutely unbeatable texture—I mean, an audible snap every time—we have one little optional trick up our sleeves. You can add about half a teaspoon of a pickling crisping agent, like calcium chloride, right into that brine when you’re heating it up. It sounds technical, but it really firms things up! I’ve tested it, and wow, it makes a difference in keeping those Homemade Crunchy Cucumbers perfect for longer.
Now, if you’re someone who likes a little heat with your tang, don’t be shy! I found that adding just half a teaspoon of red pepper flakes into each jar before pouring the hot liquid over makes these easy homemade pickles just sing. It gives them a lovely background warmth without overpowering that fresh garlic and dill. You can check out how I manage my crispy side dishes later, but for now, focus on getting this pickle crunch locked down!
Flavor Variations for Your Refrigerator Dill Pickles
One of the best things about using this simple hot brine method for refrigerator pickles is how flexible it is! You don’t have to stick just to dill and garlic, even though that combination is honestly my favorite way to eat them. This basic framework allows you to get super creative with your flavors while still achieving that wonderful, quick crunch. Think of the brine as your canvas!
If you want to try a completely different profile, switching out the herbs is super easy. Instead of dill, try using a sprig of fresh thyme and a few thin slices of lemon right in the jar. It gives you a brighter, almost Mediterranean-style pickle that’s amazing alongside grilled chicken or fish. I have a fantastic tuna steak recipe that would be perfectly zesty with those lemon dill pickles!
And remember how I mentioned red pepper flakes earlier? That’s the easiest way to dial up the excitement if you like a little heat alongside your tang. If you want something sweeter but still tangy, you can keep the dill and garlic but swap out the one tablespoon of sugar for two tablespoons of brown sugar or even a teaspoon of pickling spice blend. It gives the overall profile a slightly warmer, deeper flavor without resorting to full-on sweet pickles. See? You can keep making these fun refrigerator pickles week after week and never make the exact same batch twice!
How to Store and Keep Your Refrigerator Pickles Fresh
Now we come to the part where we talk about keeping the crunch! Since this is a No Canning Pickle Recipe, this storage step is non-negotiable and super important. You cannot leave these jars sitting on your pantry shelf or counter once they’ve been cooled down. These refrigerator pickles absolutely must stay in the fridge the whole time. They rely on that cold temperature to keep everything stabilized and crisp, which is exactly why they taste so fresh!
Because we skipped the professional sterilization and sealing steps of traditional canning, these pickles have a shorter shelf life than the ones you find preserved on grocery store shelves. I’ve found that if you keep them submerged and cold, they are at their absolute peak—meaning that signature crunch is still there—for about three weeks. After that, they’re still perfectly edible and tasty, but you might notice they soften up a little bit. That’s totally normal for quick refrigerator pickles!
Think of it this way: you’re getting incredible flavor in just 24 hours because you skipped the canning process. The trade-off is that you have to eat them within the next few weeks. If you’re making these for meal prep or for a party, calculate how many jars you’ll realistically eat in that timeframe. I usually make one batch every two weeks just to keep my supply stocked. Keep the cucumbers fully covered by the brine at all times, and you’ll enjoy beautiful, tangy cucumbers right up until the very end of their crisp life!
Serving Suggestions for Tangy Refrigerator Pickles
Here’s the fun part: eating them! Once your tangy refrigerator pickles have chilled for that crucial 24 hours, it’s time to put that crunch to work. Honestly, I eat them straight out of the jar while standing in front of the fridge because I can never wait. They are the perfect, low-calorie, high-flavor companion for when you just need a little something savory. Think of this as your go-to Snack Pickles Recipe!
But they shine brightest when they are playing off something rich, you know? That bright acidity cuts right through fats and salty flavors like a little flavor knife. Are you making burgers? You absolutely need a few slices of these garlic dill pickles nestled right under that melted cheddar cheese. They are miles better than anything you can buy off the shelf for that job.
They are also incredible at breaking up the richness of something heavy, like a big, creamy side dish. I swear, a few of these on top of my creamy mashed potatoes makes the whole meal feel brighter! Or, chop them up small and mix them into tuna salad or chicken salad—it adds that perfect salty ‘zing’ we all look for. Trust me, once you start making these small batches of refrigerator pickles, you’ll find yourself putting them on everything!
Frequently Asked Questions About Making Refrigerator Pickles
I totally get it—the first time you make something like this, you have a million little doubts running through your head. That’s why I wanted to put together some quick answers for the things I hear most often when people try my refrigerator dill pickles recipe for the first time. We want you to feel totally confident making this easy homemade pickles batch!
Can I use regular cucumbers instead of pickling cucumbers for my refrigerator pickles?
That’s a great question, especially if you’re grabbing produce at the market and can’t find those specific Kirby cucumbers. Yes, you absolutely can use the regular slicing cucumbers! However, I have to be honest: for the crispiest results, the pickling varieties are always better. The regular ones have higher water content, so while they will taste fantastic and will still be good, they might turn out a bit softer. Don’t let that stop you, but if crunch is your top priority, stick to the picking cukes.
How long do I really need to wait before eating these Quick Refrigerator Pickles?
This is the hardest part! You’ve got the jars cooling on the counter, and you want to dive in right away, I know the feeling. The recipe calls for a minimum of 24 hours because that’s when the brine has penetrated enough to make them taste like a proper pickle rather than just a cucumber sitting in vinegar. But just between you and me? If you can hold out another full day, waiting 48 hours makes a huge difference. Those extra 24 hours let that garlic and dill really seep in, giving you deep, complex flavor. Think of it as hitting the flavor sweet spot for these Quick Refrigerator Pickles!
If you want to see how another amazing source breaks down some of these challenges, check out this guide at The Kitchn. If you still have questions after trying this simple pickling recipe, please reach out to me on my contact page—I love troubleshooting with you!
Understanding the Nutrition in Your Homemade Pickles
As someone who studied nutrition, I know we all care about what we’re eating, even when it’s something totally fun like refrigerator pickles! Since these use such simple ingredients—mostly cucumbers, water, vinegar, and salt—they keep things refreshingly light compared to many store-bought varieties. I figured out the rough estimates for you based on the ingredients we used in the brine, but keep in mind, this is my best guess!
When you look at the breakdown, you’ll see low numbers across the board, which is great for snacking. Each serving size (which I based on about four slices of a spear) comes in around 15 calories. That is a fantastic number for a flavor boost! The sugar is minimal too, only about 1 gram per serving, because we aren’t making sweet pickles here; we are sticking to tangy and salty.
Now, the sodium is where we need to pay a little attention, which is true for any pickle, right? We use two tablespoons of salt for the whole batch, so you’re looking at roughly 290mg of sodium per serving. That’s totally normal for something preserved, but it’s good to be aware!
I always want to be super clear: since this is a small-batch, easy homemade pickles recipe, the exact nutritional content can jump around depending on the brand of vinegar you buy or how much salt you personally dissolved. These numbers are just a guide to show you that these tangy refrigerator pickles are generally a fantastic, low-calorie way to get more vegetables into your day. Enjoy that crunch without the guilt!
Share Your Favorite Refrigerator Dill Pickles Experience
Whew! We made it through making the best refrigerator dill pickles you’ll ever need. Now, it’s your turn to jump in and tell me all about it! I put so much care into testing this simple pickling recipe to ensure you got that perfect 24-hour crunch, and knowing that it worked for you makes all the chopping and brining worth it! You can rate this recipe right down below—I give it five stars, obviously!—and I genuinely want to hear what you thought.
Did you stick with the classic garlic and dill combo? Or did you get brave and try swapping out the herbs for that lemon variation I mentioned? I really, really want to see your jars! If you snap a picture of your beautiful, crisp homemade crunchy cucumbers, please tag me on social media. Seeing that snap and hearing about your experience is the absolute best part of sharing these recipes with you.
And hey, just so you know the rules of the road when you’re hanging out on the site, you can always check out my Terms of Use whenever you need to. But seriously, drop me a five-star rating and a comment when you get a chance. Happy pickling, friends!
PrintUltimate Crispy 24-Hour Dill and Garlic Refrigerator Pickles (No Canning Required)
Make crisp, tangy refrigerator pickles at home without any canning steps. This easy recipe uses simple ingredients and yields flavorful garlic dill pickles ready to eat in 24 hours. They are perfect for snacks, sandwiches, or burgers.
- Prep Time: 15 min
- Cook Time: 5 min
- Total Time: 15 hr 5 min
- Yield: 2 pints 1x
- Category: Side Dish
- Method: No Canning
- Cuisine: American
- Diet: Vegetarian
Ingredients
- 2 pounds pickling cucumbers (Kirby or similar), washed and ends trimmed
- 4 cups water
- 2 cups white vinegar or apple cider vinegar
- 2 tablespoons pickling salt (or kosher salt)
- 1 tablespoon granulated sugar
- 4 cloves garlic, smashed
- 1 tablespoon fresh dill sprigs (or 1 teaspoon dried dill seed)
- 1 teaspoon black peppercorns
Instructions
- Prepare the cucumbers: Slice the cucumbers into spears or rounds, about 1/4 inch thick. Pack the cucumber pieces tightly into two clean, pint-sized glass jars, leaving about 1/2 inch of headspace at the top.
- Add flavorings: Divide the smashed garlic cloves, dill sprigs, peppercorns, and sugar evenly between the two jars, placing them among the cucumbers.
- Make the brine: In a medium saucepan, combine the water, vinegar, and salt. Bring the mixture to a boil over medium-high heat, stirring until the salt and sugar dissolve completely. Remove the brine from the heat.
- Pour the brine: Carefully pour the hot brine over the cucumbers in the jars, making sure the cucumbers are fully submerged. Leave about 1/2 inch of space at the top of the jar.
- Seal and cool: Wipe the rims of the jars clean. Seal the jars with tight-fitting lids. Let the jars cool on the counter for about 30 minutes.
- Refrigerate: Transfer the jars to the refrigerator. For the best flavor and crunch, wait at least 24 hours before eating. These refrigerator dill pickles are best eaten within three weeks.
Notes
- For extra crisp refrigerator pickles, you can add 1/2 teaspoon of pickling crisping agent (like calcium chloride) to the brine, though it is optional.
- If you prefer a spicier flavor, add 1/2 teaspoon of red pepper flakes to each jar.
- These are quick pickles; they must stay refrigerated and will not last as long as shelf-stable canned pickles.
Nutrition
- Serving Size: 4 slices
- Calories: 15
- Sugar: 1
- Sodium: 290
- Fat: 0
- Saturated Fat: 0
- Unsaturated Fat: 0
- Trans Fat: 0
- Carbohydrates: 3
- Fiber: 0
- Protein: 0
- Cholesterol: 0