

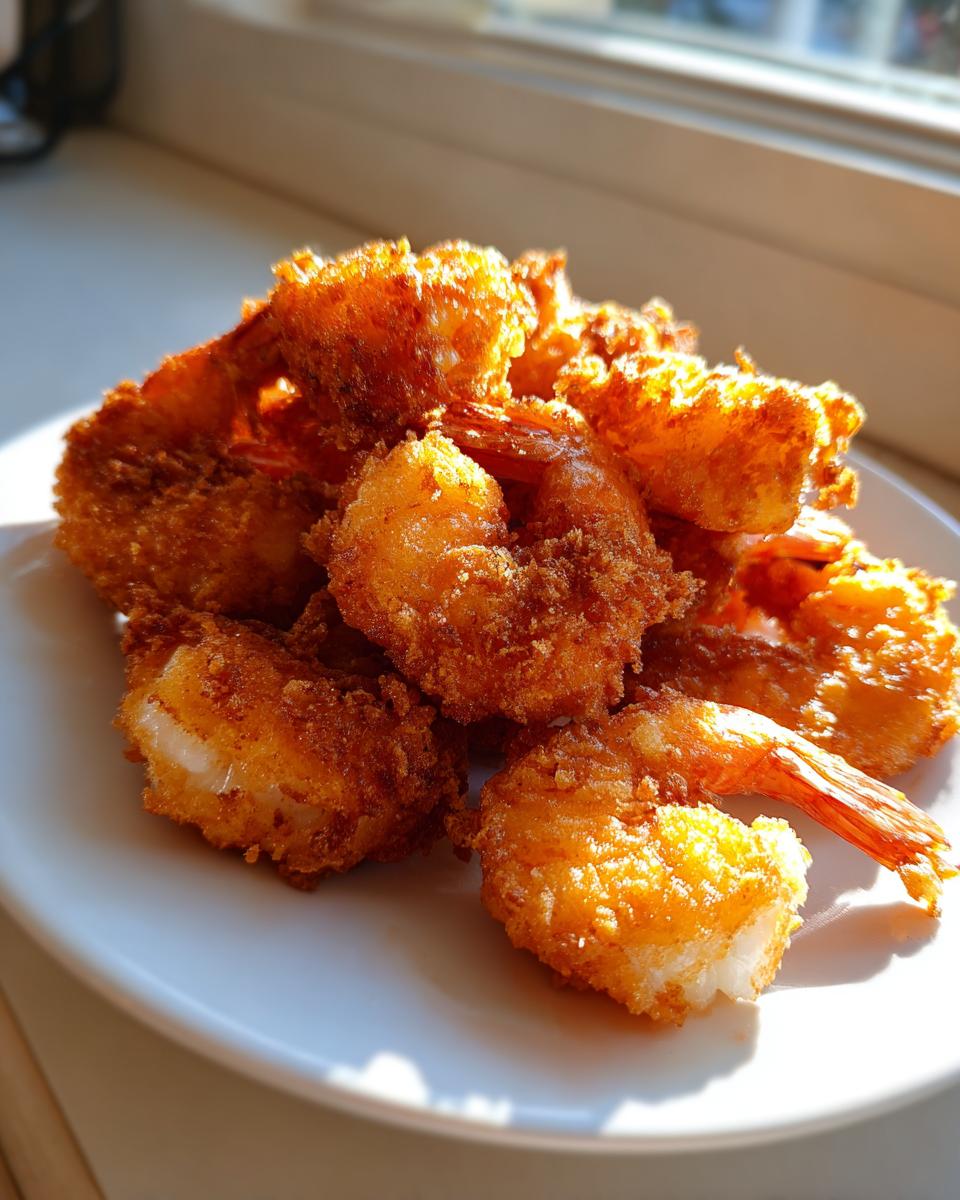
There is just nothing in this world quite like biting into perfectly cooked seafood. I mean, really perfect—juicy on the inside, shattering-crisp on the outside, and golden brown all over. That’s the dream, right? Forget flimsy coatings or greasy messes; I’m here to give you the absolute best recipe for homemade fried shrimp you’ll ever need. This isn’t just another recipe floating around; this is my go-to method for achieving that signature, maximum-crunch Southern fried shrimp experience every single time.
When I was developing recipes back in the professional test kitchen, shrimp was tricky. It goes from perfect to overcooked in about three seconds flat! But I finally locked down the technique that guarantees fantastic results without all the worry. After countless tests achieving the absolute best texture, I can confidently say this foolproof method, using a buttermilk soak and a double dredge, gives you the most unbelievably good fried shrimp.
- Why This is the Best Crispy Fried Shrimp Recipe
- Gathering Ingredients for Perfect Fried Shrimp
- How to Make Fried Shrimp Crispy: Step-by-Step Instructions
- Expert Tips for Perfect Southern Fried Shrimp
- Serving Suggestions for Your Homemade Fried Shrimp
- Storage and Reheating Instructions for Fried Shrimp
- Frequently Asked Questions About Deep Fried Shrimp
- Estimated Nutritional Data for Fried Shrimp
- Share Your Experience Making This Fried Shrimp
Why This is the Best Crispy Fried Shrimp Recipe
You’ve probably tried recipes where the coating falls off or it just ends up soggy, right? Ugh, I hate that! That’s why I put so much work into perfecting this recipe. We are delivering on that coastal comfort food dream. If you also love things crispy, you should totally check out my recipe for crispy coconut shrimp too!
Here’s what makes this the keeper in my cookbook:
- It delivers that unbelievably satisfying crispy fried shrimp sound when you bite into it.
- It’s genuinely quick. You can have these on the table in about 30 minutes total, making it perfect for easy seafood meals.
- The flavor profile is truly authentic Southern fried shrimp, seasoned just right in the flour every time.
Achieving Maximum Crunch with a Double Dredge
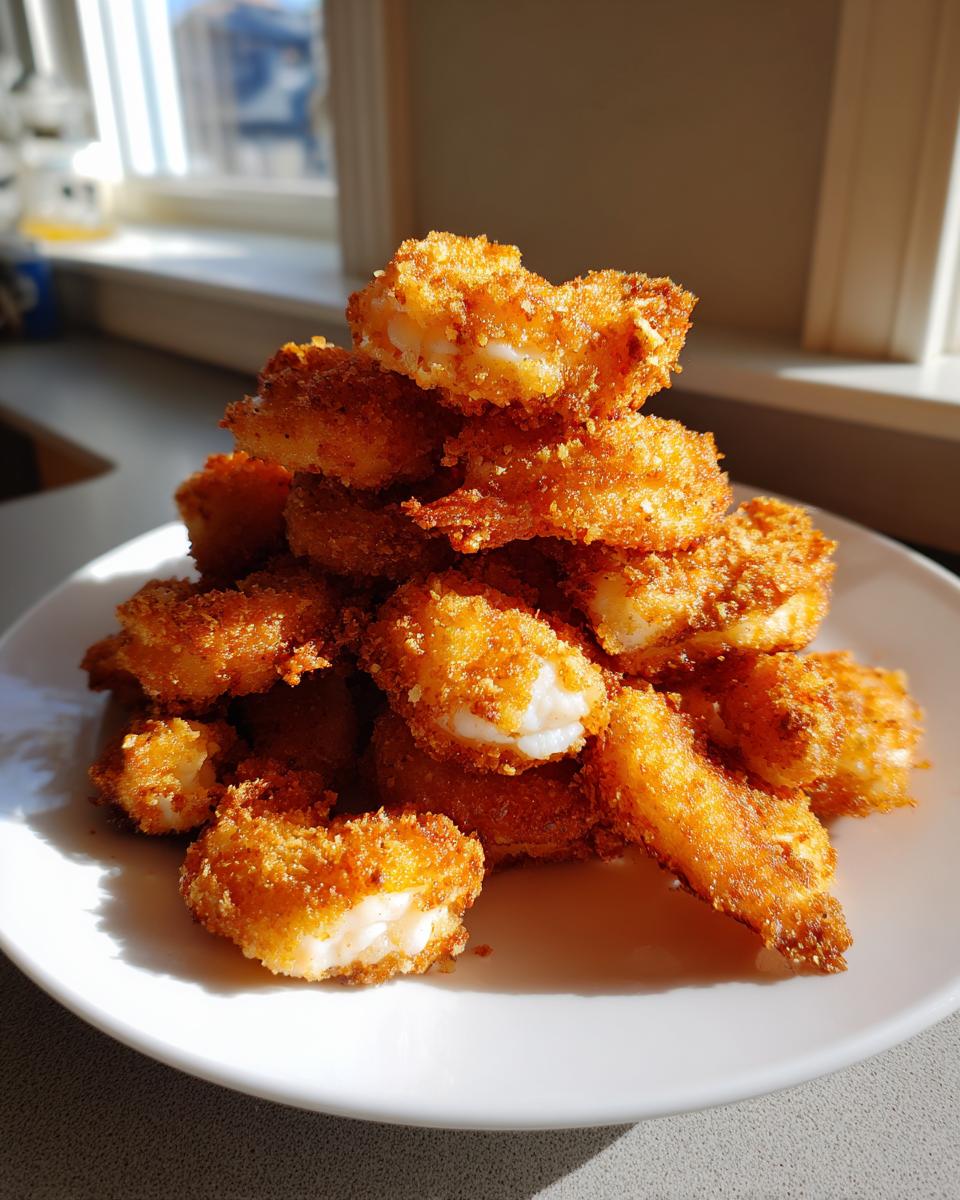
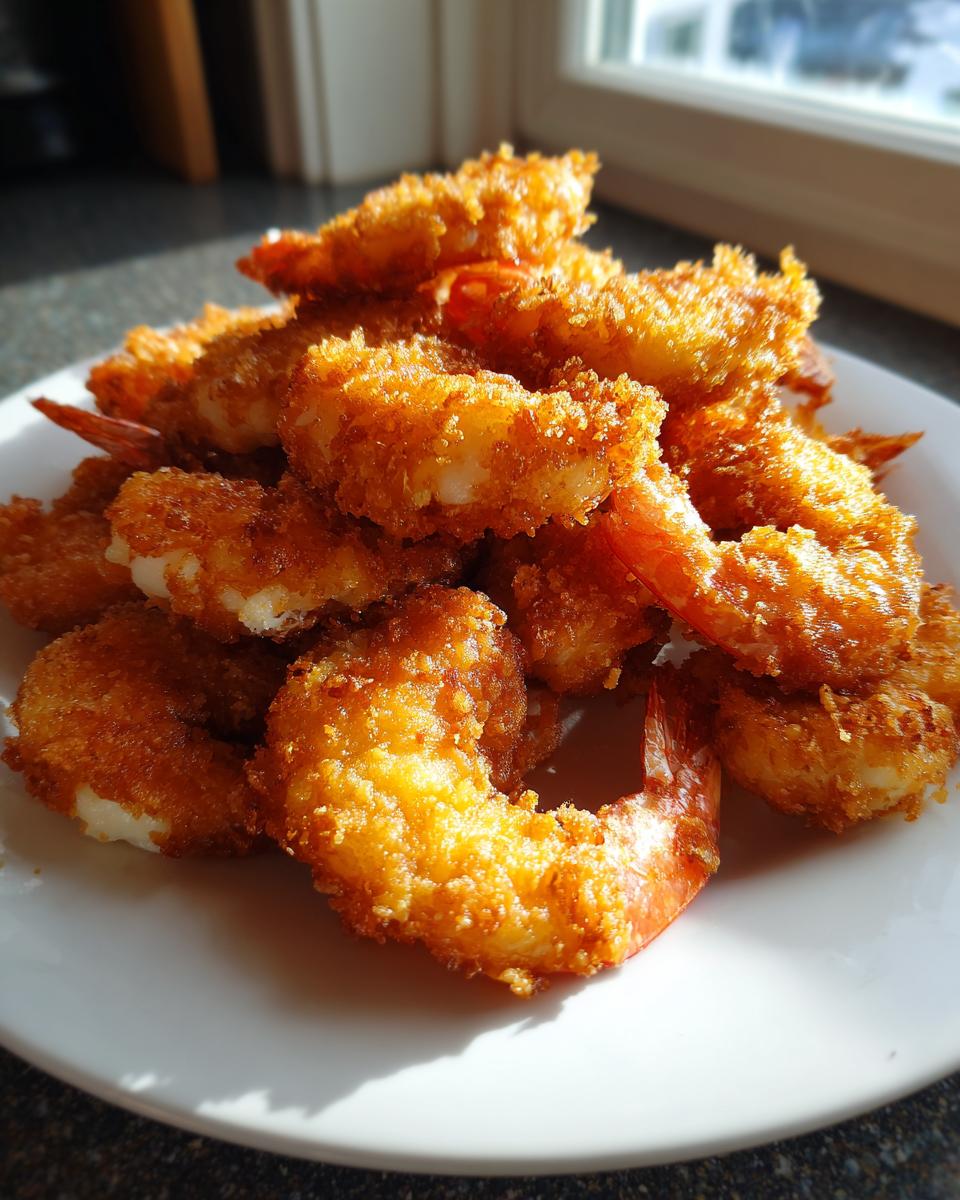
This is our secret weapon, honestly. When I was testing coatings back in the kitchen, I found that a single dip in flour just wasn’t enough to withstand the hot oil. The buttermilk soak first tenderizes the shrimp beautifully, but the magic happens when you double dredge. You dip it in the wet, then the flour, then dip it *back* into the wet mix for just a second, and then hit it with the seasoned flour one last time. That creates a thick, craggy shell that locks in all the juices and gives you that incredible crunch.
Quick Shrimp Appetizers or Easy Seafood Meals
Don’t let the quality fool you—this whole dish comes together fast. Prep time is only about 20 minutes, and the actual frying takes less than 10 minutes because these shrimp cook super quickly. This speed means you can whip up a batch of quick shrimp appetizers on a weeknight if folks drop by, or easily scale it up for a fantastic family dinner. You don’t need to reserve this just for big summer parties!
Gathering Ingredients for Perfect Fried Shrimp
Okay, let’s talk supplies! Having the right ingredients lined up makes the entire process so much less stressful. When you’re making something like this that cooks so fast, you need everything ready to go before that oil even gets hot. You’ll see we use some pretty standard pantry staples, but the quality of the shrimp really matters here, since they are the star of the show. If you need some inspiration for making this into a more complete meal, check out my guide on easy seafood meals!
For this recipe, we need 2 pounds of extra large shrimp—make sure they are peeled and deveined, but I always tell people to leave the tail on. It gives you a perfect little handle to grab onto while you’re dipping and eating later! Also, plan on needing about 2 inches of oil in your pot for deep frying.
Ingredient Notes and Substitutions for Your Fried Shrimp
We need a high heat oil, so please don’t reach for olive oil! I love using either vegetable or peanut oil because they have a high smoke point and won’t burn before the shrimp cooks. If you skip the hot sauce—no sweat, but it adds a nice little subtle background kick that I love.
When it comes to seasoning, the Creole seasoning I listed is fantastic because it’s already balanced. If you don’t have any on hand or just prefer mixing your own blend, feel free! Just make sure you’re using garlic powder and onion powder, and don’t skimp on the smoked paprika—it gives our coating that beautiful, deep golden color we are looking for. Remember, using extra large shrimp means they stay juicy inside even when the outside gets super crispy.
How to Make Fried Shrimp Crispy: Step-by-Step Instructions
Alright, this is where the magic truly happens! Don’t be intimidated by the idea of deep-frying; I’ve broken this down so carefully that you’ll feel completely confident making the best fried shrimp batter you’ve ever encountered. The key to success here is organization and temperature control. If your oil isn’t hot enough, you end up with greasy, soggy messes. We want golden and crisp, remember?
Preparation: Drying and Seasoned Flour Mix
Step one is non-negotiable if you want to know how to make fried shrimp crispy: you have to pat them dry. Take those shrimp out of your prep bowl—even if they look dry already—and use paper towels to make them completely dry. Why? Because moisture hates oil, and any lingering water will actually cause the oil to splatter aggressively, plus it prevents the flour coating from sticking properly. That’s why we pat, pat, pat!
Once the shrimp are dry, move right over to your dry station. In a wide, shallow dish—I prefer a pie plate for easy dipping—whisk together your flour, garlic powder, onion powder, paprika, Creole seasoning, and pepper. Whisk it really well! You need those seasonings evenly distributed so every shrimp gets the same punch of flavor when it gets coated.
The Buttermilk Soak and Double Dredge Technique
Now that we have our dry ingredients ready, let’s prep the wet. Whisk those two eggs right into the buttermilk and the optional hot sauce. Just combine it until it looks uniform. Now, take your dried shrimp and dip them right into that buttermilk mixture. Let the excess drip off for a second—we want it damp, not swimming.
Next, dredge it thoroughly in the seasoned flour. Press that flour onto the shrimp gently so it really adheres. Here’s the double dredge trick: dip it back into that buttermilk mixture for just a quick second—don’t let it sit!—then immediately back into the flour mixture for its final coat. That second coating is what builds the texture needed for truly crispy fried shrimp. Once they’re fully coated, set them on a wire rack over a sheet pan. Don’t let them sit too long before frying, or the coating can get soggy!
Frying the Shrimp to Golden Perfection
Time to get the oil hot! Pour enough oil into your heavy pot—about 2 inches deep is perfect—and clip on a good thermometer. You absolutely must keep that oil steady at 350°F (175°C). This temperature is the secret to getting that wonderful, golden-brown finish without cooking the shrimp too fast or soaking up too much oil.
When the oil is ready, carefully lower in your shrimp in small batches. I can’t stress this enough: do not overcrowd the pot! If you dump too many in at once, the oil temperature plummets, and you’ll end up with the opposite of what we want—soggy shrimp. Fry them for only 2 to 3 minutes per side, turning once halfway through. They’ll turn this glorious golden color when they are done. Use a slotted spoon to lift them out and set them immediately on a clean wire rack to drain off any extra oil. This resting time on the rack also helps keep the bottom crisp! Check out these tips on making creamy shrimp and grits while you wait for your oil to heat up!
Expert Tips for Perfect Southern Fried Shrimp
You know, even after developing this recipe in a professional controlled setting, I still make little tweaks based on what I learn from frying at home. Trying to nail how to make fried shrimp crispy perfectly every time is a journey! One thing I had to learn the hard way was about re-using oil. I thought I was being thrifty one time when frying up a big batch for a neighborhood potluck—it was a real scene, everyone wanted my southern fried shrimp!
I skimmed the bits out, thought the oil looked fine, and tried to fry the next batch an hour later. Total disaster! The coating absorbed the oil instantly, and the shrimp tasted heavy and almost burnt, even though the temperature seemed okay. I learned then and there: once you’re done frying shrimp, unless you’re doing it within 10 minutes for another batch, let that oil cool completely, strain it well, and just start fresh next time. It’s worth the extra bit of oil to get that heavenly, clean crunch.
If you’re looking to make other classic Southern sides while you wait, you absolutely have to get my recipe for tall, flaky buttermilk biscuits. They go perfectly alongside these shrimp!
Here are a couple of non-negotiable tips to ensure your crust holds up:
- Keep the Shrimp Cold: Seriously, if you notice your shrimp sitting out while you coat them, pop the whole batch of coated shrimp into the fridge for 10 minutes before frying. That temperature difference between the cold coating and the hot oil helps set that crust instantly, which keeps them wonderfully crispy.
- Don’t Skip the Drain Rack: I know it seems easier to just place them on paper towels, but paper towels trap steam right under the shrimp, making the bottom soggy. A wire cooling rack allows air to circulate around the entire piece, keeping the bottom just as crunchy as the top.
For more amazing regional takes on this classic, you might want to sneak a peek at what my pal, Sarah, over at Miss in the Kitchen does with her version (check out her thoughts on Southern Fried Shrimp). Hearing how other cooks tackle regional favorites always inspires me!
Serving Suggestions for Your Homemade Fried Shrimp
Okay, now that you have this incredible batch of golden fried shrimp sizzling hot, the most important question is: what are you dipping them in? Serving these beauties is almost as fun as making them! They are so versatile, fitting perfectly as a main course for seafood dinner ideas or just as a killer appetizer when you’ve got friends over.
Honestly, you can’t go wrong just serving them straight up with a pile of fresh lemon wedges. A little squeeze of bright citrus cuts right through the richness of the fried coating, and it tastes like summer. But if you’re like me, you need a good sauce for dipping. Forget those watery, store-bought versions; making your own is ridiculously easy and tastes a million times better.
If you want something rich and tangy to complement that Creole seasoning, you seriously need to try making my homemade tartar sauce. It’s creamy, loaded with pickles, and takes less than five minutes to pull together. It’s my personal favorite choice for dipping anything fried!
However, if you’re looking for something a little spicier and garlicky, have you thought about an aioli? My recipe for creamy garlic aioli is fantastic with these. It’s so fast, and that garlic punch works wonders with the sweet shrimp meat.
When thinking about a full plate of fried shrimp, I usually serve this with something cold and crunchy to balance the hot fat. Think creamy coleslaw, maybe some crisp hushpuppies, or even just a simple tossed green salad. Whatever you decide, make sure you have plenty of napkins ready!
Storage and Reheating Instructions for Fried Shrimp
Finding good leftovers of anything fried can feel like a losing battle, can’t it? We worked so hard to get that perfect, shattering crunch on our fried shrimp, and nobody wants to ruin that by reheating them incorrectly. So, here are my firm rules for handling leftovers so they taste almost as good as the first batch.
First thing’s first: If you have leftovers, you need to store them properly right away. Don’t let them sit at room temperature for too long, especially since this is seafood. Get them into an airtight container once they’ve cooled down slightly. But here’s the absolute deal breaker—never, ever put these in the microwave!
Microwaves use water molecules to heat food, and that steam will turn your beautiful, crisp shell into sad, rubbery dampness in about 15 seconds flat. Throwing them in the microwave is the fastest way to destroy the texture we worked so hard to build with that double dredge!
The Oven Method for Reheating
If you’re only reheating a handful, the traditional oven is your best friend. Set your oven to about 400°F (200°C). Lay the shrimp out in a single layer on a wire rack set over a baking sheet. Yes, we are using that rack again! It lets the heat circulate all around the shrimp, crisping up the bottom as well as the top. Bake them for about 8 to 10 minutes, or until they are hot all the way through and you hear that little crunch again.
Bringing Back the Crunch with an Air Fryer
Now, if you happen to have an air fryer—and if you don’t, you should totally look into one!—that is the ultimate tool for reheating fried foods. You can find my review on a couple of models over on my air fryer gnocchi recipe post. For the shrimp, set your air fryer to about 375°F (190°C).
Lay the shrimp in a single layer in the basket. Don’t overlap them, or they’ll steam instead of crisp! Pop them in for just 5 to 7 minutes. You’ll be amazed at how that blast of hot, circulating air completely restores that amazing crunchy crust. It honestly dries the entire surface out beautifully. This method is way faster than the oven and gives you results that are nearly identical to fresh-off-the-fryer shrimp!

Frequently Asked Questions About Deep Fried Shrimp
I get so many questions after people try this on the blog! It just shows how many of you are craving that perfect, homemade fried shrimp experience. Because I spent so much time testing the science behind getting that crust just right, I try to answer everyone’s concerns with confidence. If you’re still dreaming about making this but need a little reassurance, hopefully these answers help you get started!
Can I use this batter for other seafood?
Oh, absolutely! That’s the beauty of a good, sturdy coating like this one. If you’re looking for easy seafood meals beyond just shrimp, this batter works wonderfully on smaller fish fillets—think cod or tilapia—cut into strips. It’s fantastic for things like clam strips or even fresh oysters if you can find them! Just watch your cooking time closely, because thinner fillets might cook slightly faster than the extra-large shrimp.
What is the secret to golden fried shrimp?
If I had to narrow down the secret to that perfect, non-pale, non-burnt golden hue, it comes down to two things we really hammered home in the instructions. First, maintaining that oil temperature at a solid 350°F (175°C) is key. If it’s too low, the food soaks up oil before it crisps. Second? The seasoning in your flour mix! That little bit of smoked paprika we added isn’t just for flavor; it really helps drive that beautiful, rich color onto the crust as it fries up. Don’t skip it for truly beautiful, golden fried shrimp.
Is this recipe suitable for family friendly fried food?
That is a great question, especially when cooking for little ones. This recipe leans toward a mild Southern flavor profile, but that dash of hot sauce in the buttermilk might cause some sensitivity. So, yes, it is completely suitable for family friendly fried food!
To easily adjust the spice for picky eaters, just omit the hot sauce in the wet mix. You can also simply halve the amount of Creole seasoning and black pepper in your dry dredge. You still get fantastic savory flavor from the garlic and onion powder without the heat. Then, when you serve it, you can offer a small side bowl of the sauce mixed with a dash of hot sauce just for the adults!
If you’re looking for more reliable kitchen guides, you can always check out my tips on making a beautiful, easy-to-manage bake, like this creamy sushi bake.
Estimated Nutritional Data for Fried Shrimp
Now, I know some of you are tracking macros or counting calories, and while cooking at home gives us the best control, you still need a ballpark idea of what you’re eating! Remember, based on my background studying nutrition, I can tell you that frying always adds significant fat content, even when trying to mitigate it. I’ve put together the best estimate of the nutritional breakdown for this recipe.
Please treat these numbers as approximations only, based on the ingredients listed and a standard serving size of five large shrimp. If you use different oil, larger shrimp, or drench them thicker in that gorgeous batter, these values will shift!
- Serving Size: 5 large shrimp
- Calories: 350
- Fat: 18g
- Saturated Fat: 3g
- Carbohydrates: 25g
- Protein: 24g
- Sodium: 450mg (This can vary a lot depending on your Creole seasoning!)
See? Still a great source of protein, especially since we’re using large, meaty shrimp! It’s all about balance, folks. If you’re looking for ways to make other meals lighter, I have some truly wonderful low-fat options available on my seafood recipes page.
Share Your Experience Making This Fried Shrimp
Well, that’s it! You now have the blueprint for the crispiest, juiciest, most satisfying fried shrimp you’ve ever made right in your own kitchen. I truly hope you feel ready to tackle the deep fryer because these results are just worth the effort.
Now, I absolutely love hearing from you all! Did those double-dredged shrimp turn out crunchy? Were they golden brown? Did your family dive right in before you could even set out the dipping sauces? When you make this, please come back down here and leave a rating for the recipe. A five-star rating tells me that this method worked perfectly for you too!
And I want to see the results! If you snap a picture of your platter of golden fried shrimp, tag me on social media or drop the photo in the comments below. Seeing your successes and hearing about the little tweaks you made is genuinely the best part of what I do here, connecting all of us cooks together. If you are curious about my journey and why I focus so much on foolproof recipes, you can read a little more about me and my mission here.
Happy frying, everyone. I can’t wait to read all about your perfectly crunchy seafood!
PrintCrispy Southern Fried Shrimp Recipe
Follow this easy tutorial to make perfectly juicy, golden fried shrimp with a crispy crust. This recipe uses a buttermilk soak and double dredge for maximum crunch.
- Prep Time: 20 min
- Cook Time: 10 min
- Total Time: 30 min
- Yield: 4 servings 1x
- Category: Dinner
- Method: Deep Frying
- Cuisine: American
- Diet: Low Fat
Ingredients
- 2 pounds extra large shrimp, peeled and deveined, tail on
- 2 large eggs
- 1/2 cup buttermilk
- 1 tablespoon hot sauce (optional)
- 1 1/2 cups all-purpose flour
- 1/2 teaspoon garlic powder
- 1/2 teaspoon onion powder
- 1/2 teaspoon smoked paprika
- 1/2 teaspoon Creole seasoning
- 1/4 teaspoon black pepper
- Vegetable oil or peanut oil, for frying
Instructions
- Pat the shrimp very dry using paper towels. This step helps the coating stick.
- In a medium bowl, whisk together the eggs, buttermilk, and hot sauce until combined. Set aside.
- In a shallow dish, whisk together the flour, garlic powder, onion powder, paprika, Creole seasoning, and black pepper. This is your seasoned flour mixture.
- Dip the dried shrimp into the buttermilk mixture, allowing excess to drip off.
- Dredge the shrimp thoroughly in the seasoned flour, pressing lightly to coat all sides. For extra crispiness, dip the coated shrimp back into the buttermilk mixture briefly, then dredge again in the flour mixture (double dredge). Place coated shrimp on a wire rack.
- Pour enough oil into a heavy-bottomed pot or deep fryer to reach a depth of about 2 inches. Heat the oil to 350°F (175°C). Use a thermometer to monitor the temperature.
- Working in batches, carefully lower the shrimp into the hot oil. Do not overcrowd the pot, as this lowers the oil temperature.
- Fry the shrimp for 2 to 3 minutes per side, turning once, until they are golden brown and cooked through.
- Remove the fried shrimp with a slotted spoon and place them on a clean wire rack set over a baking sheet to drain excess oil.
- Serve immediately with lemon wedges or your favorite dipping sauce, like cocktail or tartar sauce.
Notes
- For the best results and a truly crispy fried shrimp coating, make sure your oil temperature stays steady around 350°F.
- If you prefer a less spicy flavor, omit the hot sauce from the buttermilk soak.
- This recipe works well for making quick shrimp appetizers or a full seafood dinner.
Nutrition
- Serving Size: 5 large shrimp
- Calories: 350
- Sugar: 1
- Sodium: 450
- Fat: 18
- Saturated Fat: 3
- Unsaturated Fat: 15
- Trans Fat: 0
- Carbohydrates: 25
- Fiber: 1
- Protein: 24
- Cholesterol: 180