

If you ever need a dessert that requires zero oven time but still manages to blow people away at parties, stop right here! I live by the philosophy that cooking should bring joy, not stress, and that’s exactly what these classic 3-ingredient, no-bake oreo balls do. They are the definition of accessible indulgence. Seriously, they are so simple—we’re talking crushed cookies, cream cheese, and chocolate—that even if you’re nervous in the kitchen, you’ve found your absolute winner here. If you love simple sweets, you will absolutely adore how fast this comes together, much like this no-bake eclair cake suggestion. Forget the complicated steps; we are making magic happen today!
- Why These Classic 3-Ingredient Oreo Balls Are the Ultimate Easy Dessert
- Essential Ingredients for Perfect Oreo Balls
- Step-by-Step Guide to Making No Bake Chocolate Truffles
- Tips for Success with Your Simple Cookie Truffles
- Creative Variations for Holiday No Bake Treats
- Storage and Serving Suggestions for Homemade Oreo Candy
- Frequently Asked Questions About Oreo Balls
- Estimated Nutritional Data for This Easy Oreo Dessert
- Share Your Homemade Oreo Candy Creations
Why These Classic 3-Ingredient Oreo Balls Are the Ultimate Easy Dessert
What is it I love most about these little chocolate gems? They are practically foolproof! Since we aren’t introducing any heat, we eliminate the scariest part of baking for beginners: timing the oven. Trust me, as someone who has tested hundreds of recipes, recipes built around such a small ingredient list—a true minimal ingredient dessert—always succeed. These are the ultimate no bake chocolate truffles because the ratio of cookie to cream cheese is just magical.
Quick Party Sweets Ready in Under an Hour
If you suddenly realize you need a showstopper treat for tonight, these are your answer. Because there’s no baking time, the longest part of this process is just chilling them so they hold their shape! Our total time ends up being around 50 minutes if you move quickly. That makes them perfect quick party sweets that look like you slaved away for hours.
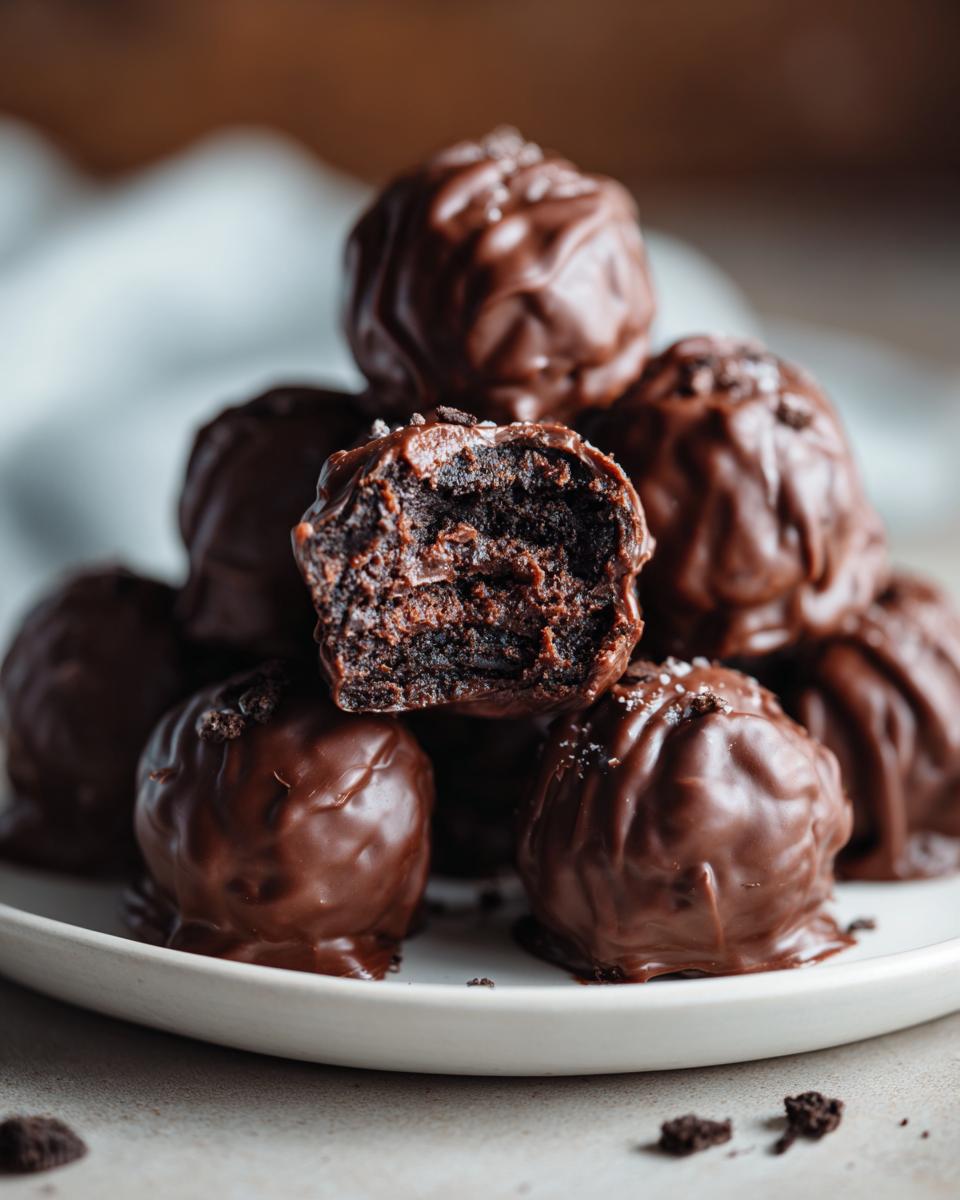
The Perfect Cream Cheese Oreo Balls Texture
The structural integrity of these bites absolutely hinges on the cream cheese. When combined with the fine crumbs, it creates a texture that’s dense, fudgy, but somehow still light. These cream cheese Oreo balls mimic a cheesecake center that melts beautifully in your mouth. That richness is what makes people always ask for the recipe!
Essential Ingredients for Perfect Oreo Balls
Look, when you only use three things, quality matters, right? I insist on using the regular, original Oreo cookies—filling and all! Don’t worry about scraping out that white center; it holds the magic together with the cream cheese. You need one full block of cream cheese, and I can’t stress this enough: it must be truly softened. If you try to mix in cold cream cheese, you’ll end up with lumpy, sad balls instead of the smooth dough we want. Finally, grab a big bag of semi-sweet chocolate chips. This is what provides that beautiful, crack-free shell.
Ingredient Notes and Substitutions for Your Oreo Balls
If you’re tempted to use Double Stuf Oreos, be careful! They have more filling, which means you might need an extra tablespoon or two of crumbs to help the dough firm up again. Also, if your chocolate melts too thick after you remove it from the microwave, just stir in about one teaspoon of vegetable oil or a teaspoon of shortening. It sounds weird, but it thins out that coating just enough so you get those gorgeous, thin layers on your chocolate covered Oreo bites—no thick chocolate armor needed!
Step-by-Step Guide to Making No Bake Chocolate Truffles
Okay, let’s get down to business! Making these no bake chocolate truffles is honestly just three main mixing stages followed by a quick dip. The key to success really lies in how you handle the dough before it hits the chocolate. Follow these steps exactly, and you’ll have perfect, bite-sized treats ready for the fridge in no time. Remember, patience during the chilling process saves you so much grief later on! I always think of this stage like making a super easy dip, similar to my creamy garlic aioli—it all comes down to smooth combining!
Crushing Cookies and Forming the Oreo Balls Dough
First up, we need crumbs, nice and fine. If you have a food processor, throw the whole cookies in there and pulse until everything looks like damp sand. If you’re doing this the old-school way—which I totally respect—toss them in a sturdy zip-top bag and go at it with a rolling pin! Once you have your crumbs, mix them with that softened cream cheese. Use your hands or a mixer, but stop mixing as soon as everything comes together into a cohesive dough. Overmixing releases too much oil, and that’s how things get greasy!
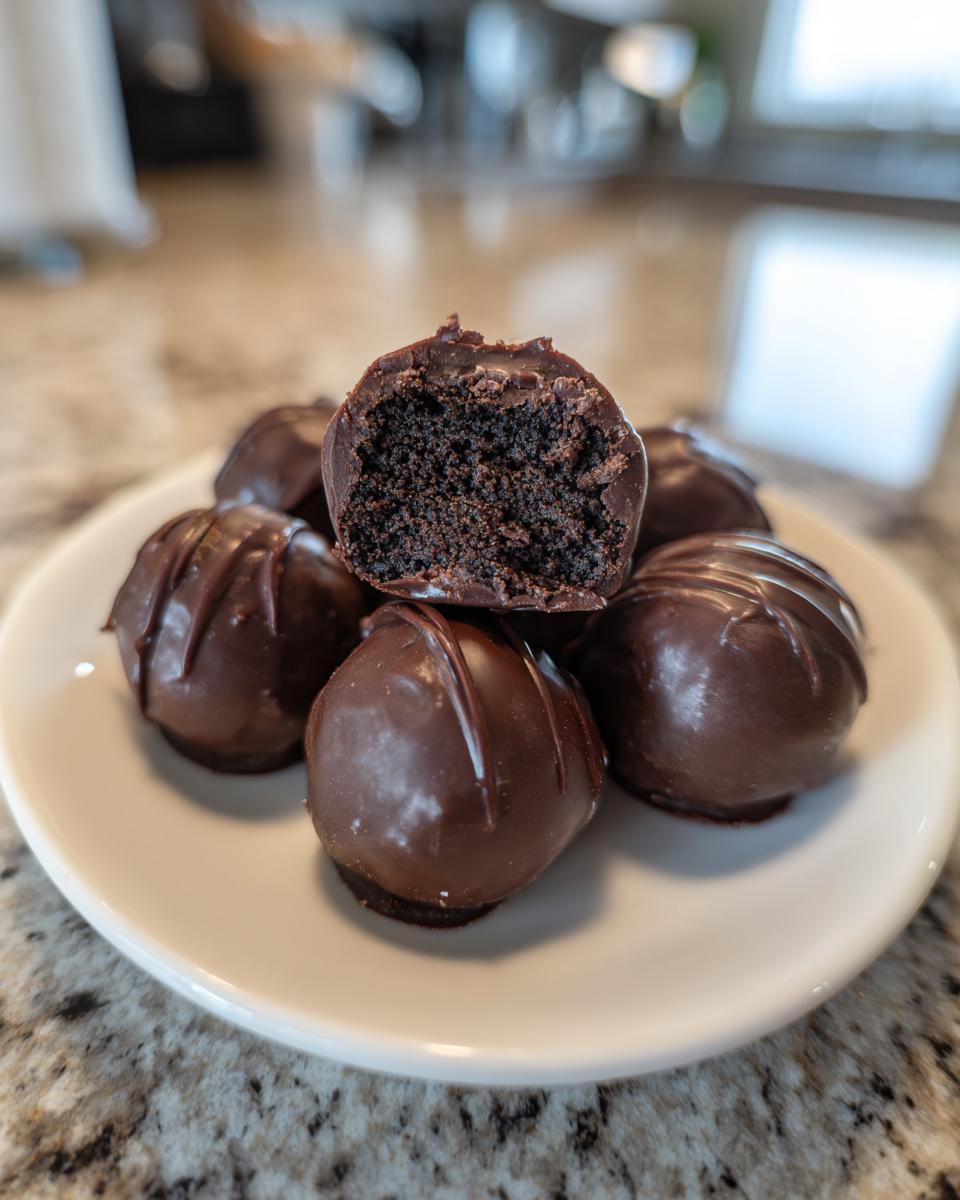
Mastering the Chocolate Coating for Your Chocolate Covered Oreo Bites
Now for the shell! Melt your chocolate slowly. I mean it—use the microwave in 30-second bursts, stirring well after every single one. If you blast it for a full minute, you risk scorching and seizing it, and nobody wants clumpy chocolate on their gorgeous chocolate covered Oreo bites. Once smooth, take your chilled dough balls and carefully drop them in. Use a fork to gently roll it around until it’s fully submerged. Lift it out, let that excess drip back into the bowl, and plop it onto your parchment paper. That chilling step truly is what makes this work seamlessly.
Tips for Success with Your Simple Cookie Truffles
Even though these are truly easy, mastering the execution separates the good batch from the *amazing* batch of simple cookie truffles. My biggest tip involves chilling the dough longer than you think you need to. If the dough is warm or soft when you try to roll it, you’re going to have a sticky mess, and you’ll end up adding too much extra cookie, which dries out the center.
When rolling, try to use a small cookie scoop. This ensures every single truffle is the exact same size, which is great for presentation and guarantees they all chill and dip evenly. Aim for about one inch across. Also, when you dip them, work quickly. If the ball starts warming up in your hand, set it down for 30 seconds to firm up again before dipping. This friction is what causes those tiny cracks in the chocolate shell later on, and nobody wants a cracked truffle!
If you want that perfectly smooth chocolate finish, leave the dipped balls on the parchment paper untouched until the chocolate is fully set. Don’t try to nudge them or fix them! For extra confidence in your decorating skills, you can always practice applying a pretty topping, like quick sprinkles, right away. If you need a fantastic frosting recipe for a different project, check out my guide on making fluffy vanilla buttercream!
Creative Variations for Holiday No Bake Treats
As fun as the classic chocolate shell is—and trust me, it’s a classic for a reason—these little bites are practically begging to be customized, especially when you’re making holiday no bake treats! This is where you can really show off without much extra effort. If you’re tired of dark chocolate, try melting down white chocolate or even bright green candy melts for a very festive look.
Thinking about the holidays? You could easily make these into something like the famous Grinch version by coating them in green melts and adding a tiny heart sprinkle or a small red candy on top. For a winter vibe, skip the sprinkles and dip half in dark chocolate and the other half in white chocolate; you can even swirl them together with a toothpick for a marbled effect. We often dip ours in crushed peppermint right after coating them, which pairs beautifully with the cookie.
If you want to change the base flavor *before* you roll them? Just swap out the filling in the Oreos! If you use Golden Oreos, you get a much lighter center, almost like a vanilla truffle. If you’re making something like my candy cane brownies later, you could incorporate a bit of peppermint extract into the dough before chilling. For more inspiration on fun Christmas flavors, check out this pin on Christmas Oreo Balls!
Storage and Serving Suggestions for Homemade Oreo Candy
Once you’ve dipped these beauties, the final hurdle is waiting for that chocolate shell to set! Make sure they chill in the fridge for at least 15 minutes after dipping—this locks everything in place. Properly stored, these homemade Oreo candy treats are fantastic because they keep well! You can store them in an airtight container in the refrigerator for up to two weeks.
If you’re planning ahead, they do amazing in the freezer, too! I often pop them away for about a month. When you want to serve them, just pull them out about 15 minutes before guests arrive. They are generally best served slightly cool, not rock-hard straight from the fridge, as that lets the cream cheese center get perfectly soft again. They are just as satisfying as my recipe for crispy refrigerator pickles—great to have on hand!
Frequently Asked Questions About Oreo Balls
I know whenever I look at a new recipe, my brain immediately starts wondering about substitutions or how far ahead I can prep. You’ve got questions, and I’ve got answers based on testing these easy weeknight dinners and countless batches of these truffles. You absolutely want to nail the texture, especially if you’re trying to impress at a gathering where everyone brings their best easy Oreo dessert.
Can I make Oreo Balls without cream cheese?
Oh, I really wouldn’t advise that if you’re aiming for the classic result. The cream cheese isn’t just for flavor; it acts as the primary binder that holds all those cookie crumbs together. If you try to substitute it with something like butter or frosting, you risk the dough becoming too greasy or too sweet, and more importantly, the balls won’t firm up enough in the fridge to hold their shape when you dip them. They’ll just turn back into messy, delicious crumbs!
Are these Oreo Truffle Recipe bites suitable for freezing?
Yes, they are fantastic for freezing, which is why they are my go-to for holiday baking! These Oreo truffle recipe bites freeze beautifully, chocolate shell and all. For the best results, make sure the chocolate shell is completely set first—this is crucial to prevent sticking. Pop them into a large zip-top bag or an airtight container, separating layers with wax paper, and they will be great for up to six weeks. Thaw them in the refrigerator for a couple of hours before serving, and they taste just as fresh!
Estimated Nutritional Data for This Easy Oreo Dessert
Since these are such a rich treat, I always like to give a little heads-up about what’s packed inside. Remember, since this recipe focuses on just three core ingredients—Oreos, cream cheese, and chocolate—these numbers are pretty accurate approximations for one standard ball. If you start adding extra coatings, drizzles, or mix-ins, the totals will absolutely shift, so keep that in mind!
It’s important to know that these oreo balls are definitely a treat, not an everyday snack, because of that decadent chocolate coating and cream cheese center. But hey, sharing a delicious, homemade treat is why we bake, right? If you are looking for lighter options for your midday meals, you might want to check out my ideas for healthy lunch ideas to balance things out!
Here’s the breakdown per serving, based on making about 28 of these easy Oreo dessert bites:
- Calories: 180
- Sugar: 18g
- Fat: 11g (with 6g being Saturated Fat)
- Carbohydrates: 19g
- Protein: 2g
- Cholesterol: 15mg
See? Simple, delicious, and easy to track if you’re watching your intake. That small amount of protein is thanks to that little bit of cream cheese!
Share Your Homemade Oreo Candy Creations
I truly hope you’ve had as much fun making these oreo balls as I do every single time I whip up a batch! Now that you’ve mastered this incredibly simple, no-bake foundation, I’d absolutely love to hear all about it. Did you stick to the classic dark chocolate shell, or did you try dipping yours in white chocolate?
Please head down to the comments section below and let me know what score you give this recipe—I’m aiming for a solid 5 stars from you! If you ended up trying out any fun sprinkle combinations or maybe used a different cookie entirely, snap a picture and share your gorgeous, finished homemade Oreo candy! It always inspires me to see how you all put your own spin on the classics.
And listen, if you have friends or family members who always panic when they need a last-minute sweet for a cookie swap or party, do them a huge favor and send them the link to this page. These are truly the best easy dessert exchange recipes out there because they take minutes to prep. If you have any questions after trying this out, feel free to reach out via my contact page! Happy baking—well, happy *no-baking*!
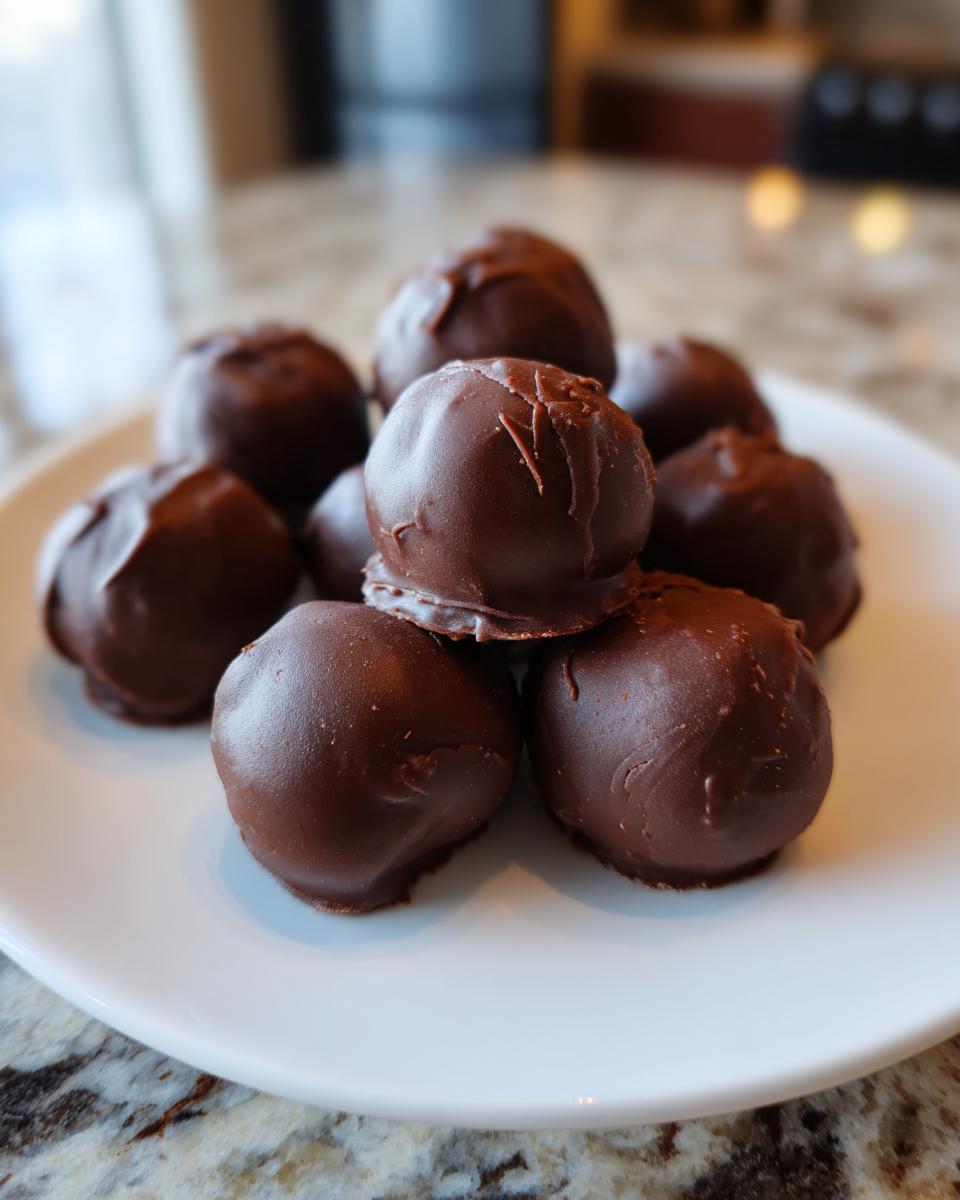
PrintEasy 3-Ingredient No-Bake Oreo Balls

Make these simple, no-bake Oreo truffles using only three ingredients. They are rich, chocolate-covered bites perfect for parties or holiday cookie exchanges.
- Prep Time: 20 min
- Cook Time: 5 min
- Total Time: 50 min
- Yield: 28 servings 1x
- Category: Dessert
- Method: No-Bake
- Cuisine: American
- Diet: Vegetarian
Ingredients
- 1 package (14.3 oz) Oreo cookies
- 8 oz cream cheese, softened
- 16 oz semi-sweet chocolate, melted for coating
Instructions
- Place all Oreo cookies, filling included, into a food processor. Pulse until you have fine crumbs.
- Transfer the crumbs to a mixing bowl. Add the softened cream cheese. Mix with a hand mixer or by hand until the mixture is completely combined and forms a dough.
- Roll the mixture into small balls, about 1 inch in diameter. You should get about 24 to 30 balls. Place them on a baking sheet lined with parchment paper.
- Chill the Oreo balls in the refrigerator for at least 30 minutes until firm. This step is important for easy dipping.
- Melt the semi-sweet chocolate in a microwave-safe bowl in 30-second intervals, stirring between each interval until smooth.
- Dip each chilled Oreo ball into the melted chocolate, ensuring it is fully coated. Use a fork to lift the ball out, allowing excess chocolate to drip off.
- Place the coated balls back onto the parchment-lined baking sheet.
- Refrigerate the finished Oreo balls for about 15 minutes, or until the chocolate coating is set.
Notes
- For a festive look, add sprinkles to the chocolate coating immediately after dipping before the chocolate sets.
- If you prefer a thinner chocolate coating, add 1 teaspoon of vegetable oil or shortening to the melted chocolate.
- If you do not have a food processor, place the cookies in a large zip-top bag and crush them thoroughly with a rolling pin.
Nutrition
- Serving Size: 1 ball
- Calories: 180
- Sugar: 18
- Sodium: 85
- Fat: 11
- Saturated Fat: 6
- Unsaturated Fat: 5
- Trans Fat: 0
- Carbohydrates: 19
- Fiber: 0
- Protein: 2
- Cholesterol: 15