
If you’ve ever tossed zucchini spears onto a baking sheet only to pull out sad, floppy, steaming water logs, you are definitely not alone! It’s the biggest frustration when trying to make healthy, oven-baked vegetables. But trust me, that era of soggy sides is over. My ultimate baked parmesan zucchini recipe is here to solve that for good. Developed through my years studying nutrition and testing recipes in a professional kitchen, this method guarantees incredible flavor and the maximum crunch you are absolutely looking for.
- Why This Baked Parmesan Zucchini Recipe Works Every Time
- Essential Ingredients for Flavorful Baked Parmesan Zucchini
- Step-by-Step Instructions for Crispy Baked Parmesan Zucchini
- Tips for Success with Your Oven Baked Zucchini
- Making Baked Parmesan Zucchini a Family Friendly Zucchini Recipe
- Ingredient Notes and Substitutions for Baked Parmesan Zucchini
- Serving Suggestions for Your Quick Zucchini Appetizer
- Storage and Reheating Instructions for Cheesy Baked Zucchini
- Frequently Asked Questions About Baked Parmesan Zucchini
- Share Your Perfect Baked Parmesan Zucchini Results
Why This Baked Parmesan Zucchini Recipe Works Every Time
I’m going to give you the secret right up front: the magic to amazing crispy baked vegetables like this isn’t about deep frying! It’s all about technique before they even hit the oven. That’s why you see me stressing the prep work. When you are looking for an easy zucchini side dish that doesn’t disappoint, you have to respect the water content in zucchini.
Here’s the science bite from my nutrition background: Zucchini is basically a water balloon wrapped in skin! If you don’t pull that water out, the steam gets trapped under the coating, and boom—soggy mess. That 10 minutes of salting we do pulls out that excess moisture right onto the paper towels. When that water is gone, the coating can actually adhere, bake hard, and give you that gorgeous, golden texture you crave.
Achieving Perfect Parmesan Crusted Zucchini Texture
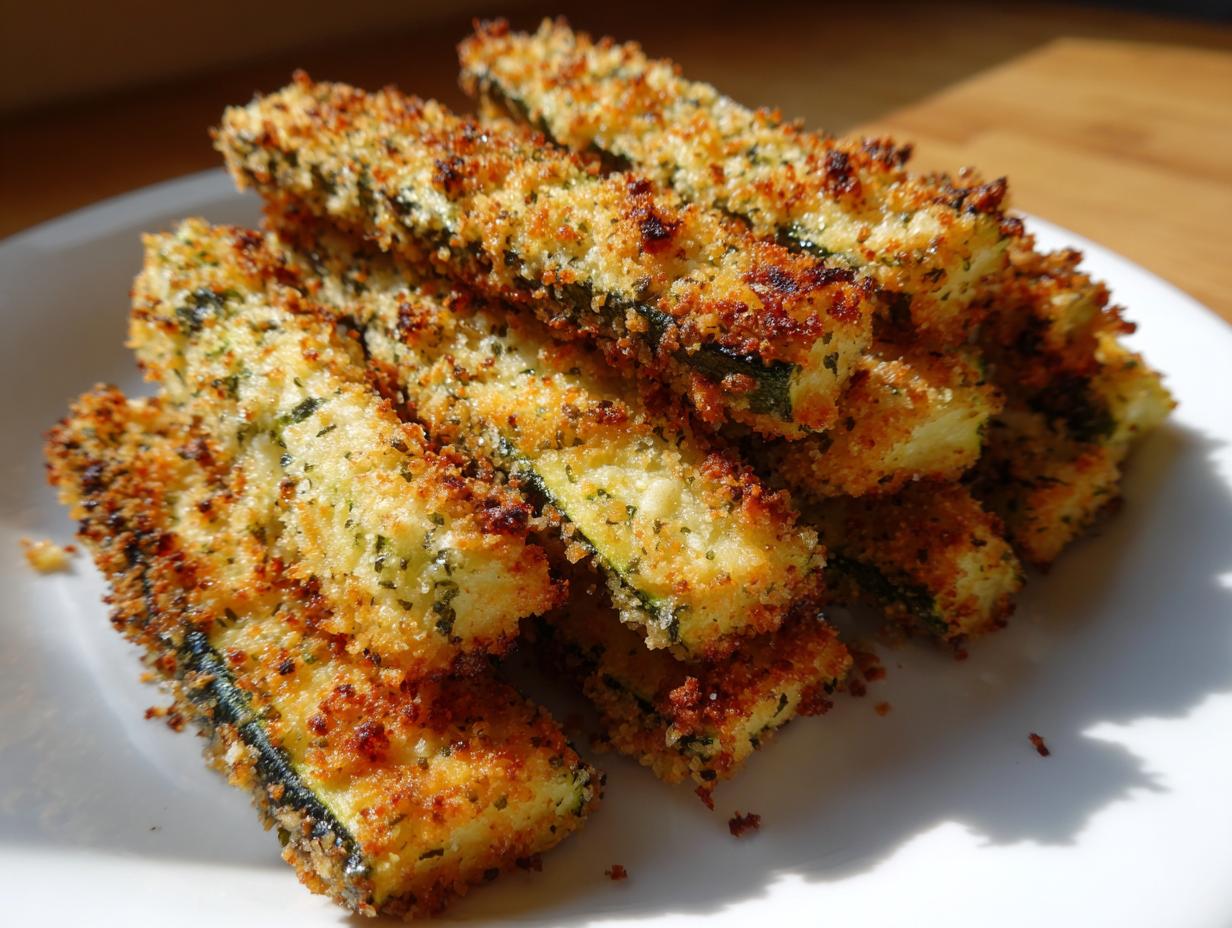
When you follow that drying step, you give yourself permission to dream big when it comes to texture. We are aiming for crunchy, cheesy, and golden all over the outside, but the inside should still be perfectly tender—not raw, but cooked through. It’s a lovely counterpoint. Don’t worry, if you stick to the dry zucchini trick, this becomes a fantastic, satisfying low carb zucchini recipe that feels like a treat!
Essential Ingredients for Flavorful Baked Parmesan Zucchini
Let’s talk turkey about what we need to make this happen. This Parmesan Zucchini Recipe is so simple because the ingredients are incredibly approachable, but trust me, the quality matters, especially with the cheese!
You want to measure everything out before you start dipping, because once the zucchini gets coated, things move fast. Everything listed below is what gets you that perfect balance of savory crust and tender vegetable.
- 2 medium zucchini: Medium size is best for sticks—not too watery, not too dense.
- 1 large egg: This is our glue. It needs to be lightly beaten.
- 1 tablespoon water: Just a splash to thin the egg slightly so it coats better.
- 1/2 cup all-purpose flour: Used in the first dredging phase.
- 1/2 teaspoon salt and 1/4 teaspoon black pepper: For seasoning the flour mix.
- 1/2 cup grated Parmesan cheese: Please, please use freshly grated Parmigiano-Reggiano if you can! That pre-shredded stuff just doesn’t melt and brown the same way. It’s worth the extra minute of grating, I promise.
- 1/4 cup panko breadcrumbs: This is the crunch secret sauce! Regular breadcrumbs get a bit soft; panko keeps things light and crispy.
Gathering these items first is half the battle won. Remember, those zucchini pieces must be super dry before they ever meet this beautiful coating mixture!
Step-by-Step Instructions for Crispy Baked Parmesan Zucchini
Okay, now that we have our gorgeous ingredients ready to go, we need to get organized. I always set up my station, kind of like a little assembly line. When you’re making this baked parmesan zucchini, speed is your friend once you start coating, which is why preparation is everything. First things first: make sure that oven is roaring hot at 425°F (220°C) and your baking sheet is lined with parchment paper. A hot oven shocks the coating, which helps lock in texture!
We’re aiming for incredible results, so don’t skip any steps here. If you want these crispy and amazing, follow the order exactly. This whole process, from prep to plate, is usually under 30 minutes, making it a fantastic side dish recipe for any busy night.
Prepping the Zucchini to Prevent Soggy Baked Parmesan Zucchini
This is the moment of truth for avoiding disappointment. After you’ve cut your zucchini into sticks—about 1/4 inch thick is perfect—lay them out on a plate lined with paper towels. Now, sprinkle them lightly with salt. Don’t drown them, just a light dusting! Let them sit there for ten minutes. Seriously, ten minutes! You will see beads of water forming on top. Once those ten minutes are up, grab fresh, dry paper towels and blot them until they feel almost dry to the touch. This is the #1 secret to achieving those coveted crispy baked vegetables. Water is the enemy of crunch!
Coating Technique for Maximum Adhesion
Now we build the crust! Get three SHALLOW bowls—I stress shallow, because you don’t want to waste that beautiful coating mixture. In Bowl 1, whisk your egg and water. In Bowl 2, mix your flour, salt, and pepper. In Bowl 3, combine the Parmesan and panko breadcrumbs.
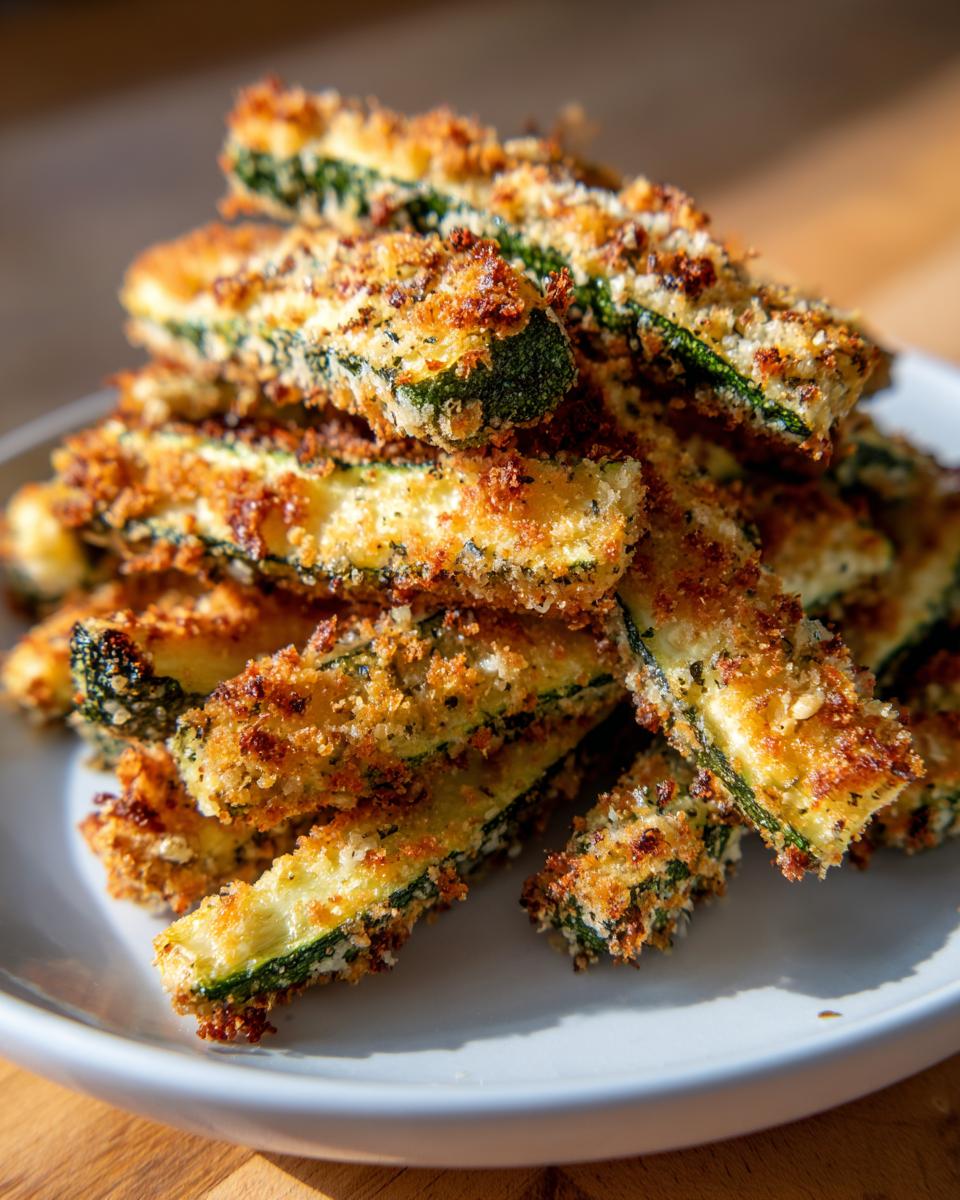
Take one perfectly dry zucchini stick and dip it fully into the flour mix first. Shake off the excess—we only want a very thin layer. Next, dip it into the egg wash—let that extra drip off for just a second. Finally, press that stick firmly into the Parmesan and panko bowl, making sure every single side is completely encased in that golden mixture. Place it on your baking sheet, ensuring none of the pieces are touching. Crowding the pan traps steam and you’re back to square one, so use two pans if you need to!
Tips for Success with Your Oven Baked Zucchini
I’ve walked you through the prep and the assembly, but I want to give you a few extra little tricks I learned back in the test kitchen. These aren’t just suggestions; these are the tweaks that take your oven baked zucchini from “pretty good” to “can I have another helping?” These tips ensure you get reliable results when making these simple baked veggies, especially on a hectic weeknight.
First, let’s talk heat. We preheated to 425°F (220°C) for a reason! Don’t try to bake these at 375°F thinking it might be gentler; it won’t. Lower heat just gives the zucchini more time to release steam before the coating sets. You need that high heat right away to crisp up that Parmesan crust before the inside gets mushy. Keep that oven door shut tight once they’re in, too!
My second non-negotiable tip is pan space. I know it’s tempting to try and squeeze every last stick onto one sheet to save on dishes, but please don’t overcrowd! Imagine them trying to bake versus steaming. If the pieces are touching, they are going to steam each other. I always prefer using two pans, ensuring there is at least an inch of space between every single stick. It results in a slightly faster bake time, too, which is a nice bonus.
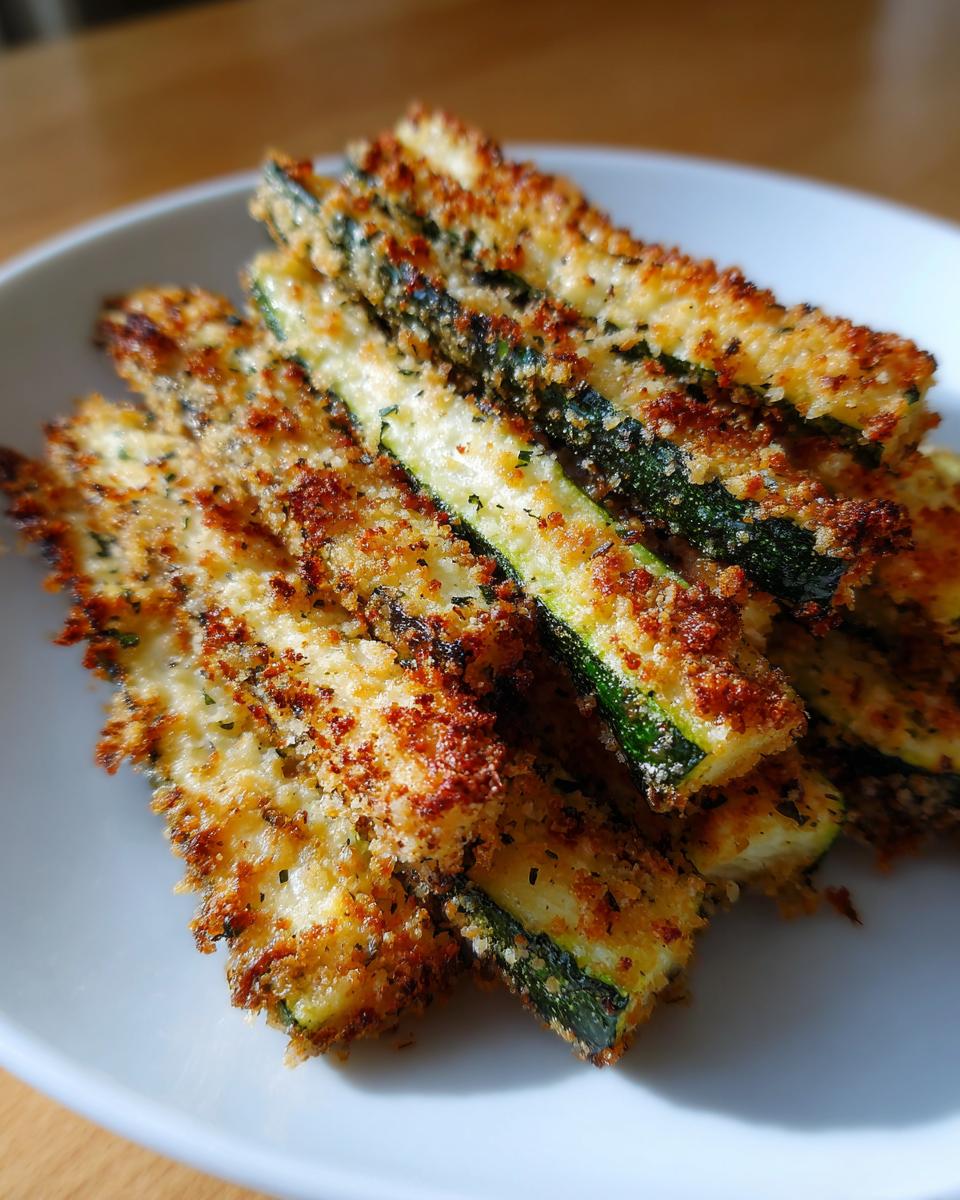
Finally, watch that flip time! The recipe says 12 to 15 minutes total, flipping halfway. If you have very thin zucchini, they might be done closer to 10 minutes. When you flip them, check the bottom—it should already look golden brown and firm. That’s your cue that the top side is going to crisp up beautifully when you put them back in the oven. You’re looking for that beautiful Parmesan crust to form.
Making Baked Parmesan Zucchini a Family Friendly Zucchini Recipe
When I first started sharing recipes, especially healthier ones, I always heard, “My kids will *never* eat that.” Believe me, I get it! Getting kids to eat their vegetables without a fight can feel like winning the lottery. But this is where the cheesy baked zucchini really shines because the flavor profile is so familiar and comforting. It’s savory, salty, and has that *crunch* factor that kids crave, making it easy to slip in those sneaky vegetables!
When I was developing this for my own family—and yes, even I had to deal with skeptical younger relatives—I learned that presentation is half the battle. If you have picky eaters, ditching the standard rounds for sticks (like little French fries) can make all the difference. They are easier for little hands to hold and dip, and they feel more like a snack than a side dish. You can also try cutting them into small rounds if sticks are too fiddly for your crew; just make sure those rounds are thick enough not to crumble when you flip them.
I remember my nephew, bless his heart, refusing anything green for years. I made these baked parmesan zucchini sticks, served them next to some plain pasta, and didn’t even mention they were zucchini. He just saw the crispy golden coating. He picked one up, dipped it in some marinara sauce, and—guess what? Gone! When he asked what it was, I told him it was his new favorite crunchy snack. That’s the power of a great coating! You can read more about my philosophy on practical, flavor-first cooking over on my About Page.
Another trick I use to encourage everyone at the table is offering two dips—maybe a simple marinara and something creamy. Sometimes a little ranch or light aioli provides the perfect counterpart to the salty Parmesan crust. It turns the act of eating vegetables into a fun experiment rather than a chore. This recipe just proves that you don’t have to sacrifice incredible flavor just to keep things simple and healthy.
Ingredient Notes and Substitutions for Baked Parmesan Zucchini
When I develop a recipe, I always think about what you might have on hand or what you might need to swap out due to allergies or preference. This baked parmesan zucchini recipe is pretty flexible, but a couple of components really impact the final texture, so we need to talk about them seriously.
First off, that Parmesan cheese! If you absolutely have to use the pre-grated kind in the green can, it will work in a pinch, but know that it has anti-caking agents that prevent it from melting into that beautiful, cohesive, crispy sheet we love. For the best possible result, my recommendation remains freshly grated Parmesan. If you can’t do dairy, you can certainly swap that half cup of Parmesan for a good quality vegan parmesan alternative, or even some nutritional yeast mixed in with the panko for a nutty flavor boost.
Now let’s talk about the flour and breadcrumbs, because this is where we can easily turn this into the perfect gluten free zucchini snack.
Gluten Free Zucchini Snack Swaps
If you or a family member can’t have gluten, don’t worry one bit! You can make a fantastic version of this dish. For the all-purpose flour in the second bowl of our dredging station, swap it out for almond flour. Almond flour adds a lovely subtle richness and works perfectly as a binder.
For the breadcrumbs, you need to use certified gluten-free panko style crumbs. The panko structure—those rough shards—is what gives us that necessary light, airy crunch, so try to keep that texture in mind when you’re shopping for substitutes. This simple switch means you get all the cheesy, crunchy goodness without any of the wheat. It’s so satisfying to know you can customize these healthy vegetable sides so easily!
Using Different Types of Zucchini
Sometimes you don’t have the standard green zucchini—maybe you have yellow squash or even those cute little round ones. Yellow summer squash works almost exactly the same way, but sometimes it’s a touch softer, so make sure you salt and dry it really well! If you use the round zucchini, just cut them into eighths instead of sticks. The biggest caution here is baking time; rounder, thicker pieces take a couple of minutes longer to ensure the interior is cooked through, so keep an eye on them.
Serving Suggestions for Your Quick Zucchini Appetizer
So, you pulled those beautiful, golden, perfectly crispy sticks out of the oven—what now? Part of the joy of mastering a truly baked parmesan zucchini recipe is showing it off! Because these are so perfectly balanced—savory, a little salty, and wonderfully crunchy—they don’t really *need* anything else. But hey, we love options, right?
If you’re serving these as a fun, low-effort appetizer, I always suggest having a couple of dipping sauces ready to go. My favorite, hands-down, is a tangy, bright dip to cut through that rich Parmesan. I’ve got a super quick creamy garlic aioli recipe that takes literally five minutes, and it’s heavenly with these sticks. If you have kids (or just love Italian flavors), a good quality, slightly warm marinara sauce is always a winner. They turn into savory little zucchini fries!
But let’s say you’re bringing these to the dinner table as your featured healthy side dish. These guys pair amazingly well with almost any simple protein. Think about tossing them on the platter next to some baked chicken breast or grilled salmon. They offer that necessary texture contrast to softer mains. They are also phenomenal simply scattered over a bowl of weeknight pasta, acting like little savory veggie croutons!
Honestly, once you nail the technique to get them genuinely crispy, you’ll find yourself making them constantly because they fit into so many meal plans. They don’t compete with the main course; they just elevate the whole plate. Enjoy showing off your successful crunchy batch!
Storage and Reheating Instructions for Cheesy Baked Zucchini
Okay, you made too much! (It happens, even with the best recipes, because they are just that good). That leftover cheesy baked zucchini needs a little TLC if you want that crispiness to come back when you reheat it. I really need to stress this first rule: please do not put your leftovers into an airtight container straight away.
If you try to store them while they still have any residual heat, that moisture will condense inside the container, and you’re going to soften that beautiful Parmesan crust we worked so hard to achieve. If you have extras, let them cool completely on a wire rack—this allows any latent steam to escape into the air. Once they are totally cool, you can transfer them to a container.
For storage, stick them in the fridge for up to three days. I usually use a container lined with a paper towel just to absorb anything extra, just being extra cautious. But the real game-changer is how you reheat them. The microwave is the absolute death of crispiness—it heats the water molecules inside, making everything soft and sad. Please, avoid that route entirely if you can!
The best way, honestly, is to go back to the high heat approach you used initially. Pop those sticks onto a dedicated baking sheet and put them back into a 400°F (200°C) oven for about 5 to 7 minutes. You just need to heat them through and crisp up that coating again. If you have an air fryer, that’s even faster! Toss them in the air fryer basket at 375°F (190°C) for just 3 or 4 minutes. They come out tasting almost freshly made. It takes just a couple of minutes longer than microwaving, but the textural reward is totally worth taking that extra time!
Frequently Asked Questions About Baked Parmesan Zucchini
I know that even with the clearest steps, sometimes you just have one last little question lingering before you head to the kitchen. That’s totally normal! That’s why I took a peek at what everyone asks about making perfect baked parmesan zucchini so we can clear up any last bits of confusion. Getting your technique right here means you’ll never settle for soggy veggies again!
Can I use shredded zucchini instead of sticks for this recipe?
Oh, that’s a common question! If you shred your zucchini, you are actually making this recipe much harder on yourself. Shredded zucchini has exponentially more surface area to release water from. If you use shredded, you’d need to salt it for about 30 minutes and press it really hard through a cheesecloth or fine-mesh sieve to get the moisture out. Honestly, it’s much easier and guarantees a better final texture if you stick to cutting them into sticks, coins, or even small wedges. We want those wonderful, crunchy pieces, and sticks are the easiest shape for that!
What temperature should I bake my zucchini at for the best results?
I cannot stress this enough: high heat is mandatory for crispy coatings! You absolutely must preheat your oven to 425°F (220°C). If you bake these healthy vegetable sides at a lower temperature, like 375°F, the moisture from the zucchini has too much time to escape as steam before the crust hardens. That high blast of heat sets the coating immediately. You only need 12 to 15 minutes total, flipped halfway through, to get that perfect golden color.
Can I use a different cheese instead of Parmesan?
You certainly can experiment, but you have to be mindful of how the cheese melts! Parmesan is salty, dry (pre-grated notwithstanding!), and browns beautifully. If you want to substitute, Pecorino Romano is a fantastic, sharper swap that functions almost identically. If you use something like Mozzarella, it will melt wonderfully but it tends to become very stringy and chewy rather than forming a crispy ‘crust.’ If you need a non-dairy option, check out the substitution advice above, but for that classic savory kick, Parmesan is really the best player in this line-up!
How long do these take to prep exactly?
If you include the crucial 10 minutes where the zucchini is just sitting there salting, the total prep time is right around 25 minutes. Once you’ve mastered the salting and drying—which takes maybe 2 minutes of active work—the assembly line portion (flour, egg, Parm/panko) moves quickly! It’s what makes this such a great quick and easy addition to your weeknight menu when you need something flavorful but fast.
Is this recipe suitable for meal prep?
Yes and no! I love making extra just like anyone else, but *texture* is everything here. They are absolutely best eaten the moment they come out of the oven. If you are planning ahead, you should definitely follow the cooling and storage advice I laid out previously. The key is to cool them completely on a rack before storing. They will lose about 25% of their crispness in the fridge, but they reheat beautifully in the oven or air fryer! Think of them as a ‘prepare-the-coating-ahead’ item rather than a final dish that keeps perfectly.
Share Your Perfect Baked Parmesan Zucchini Results
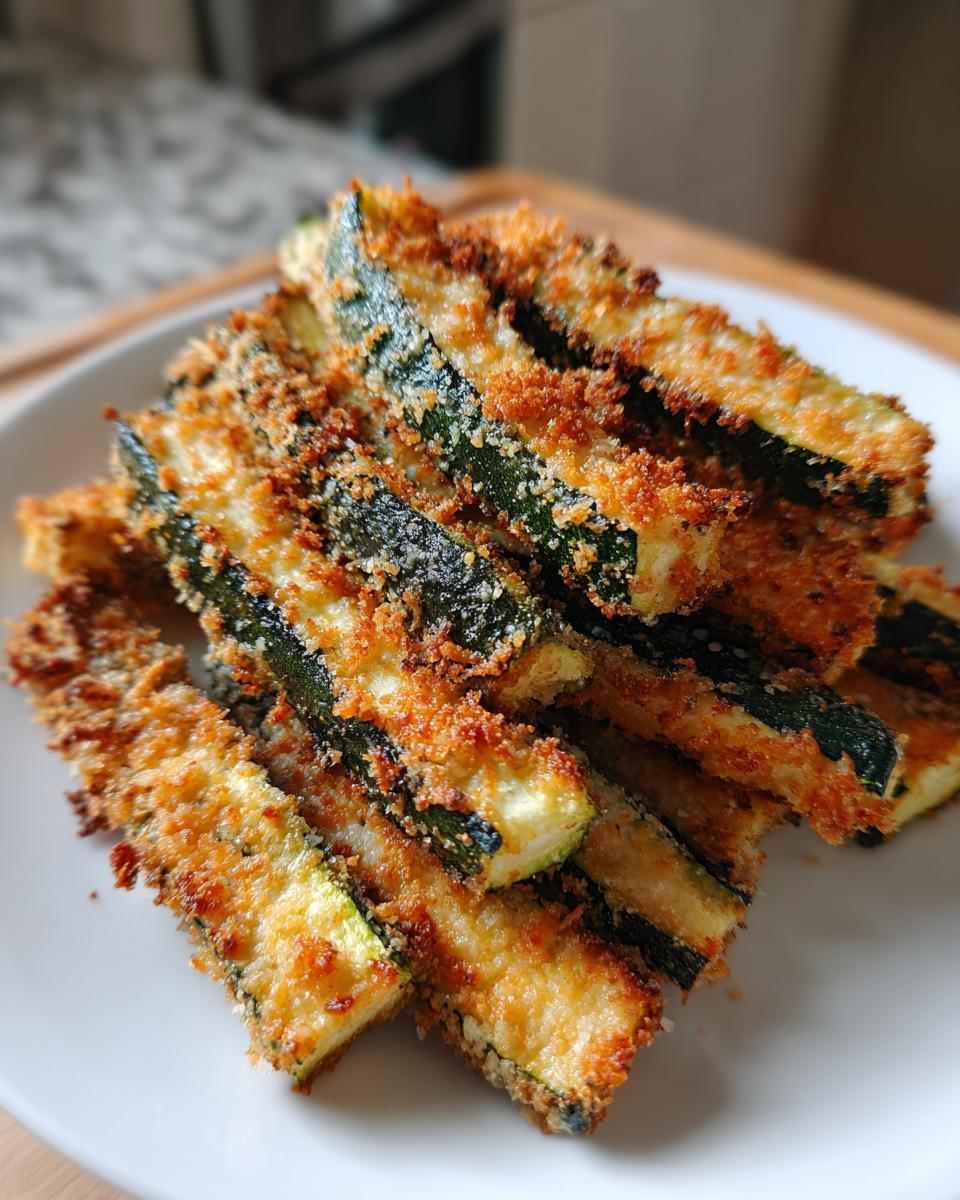
Now comes the best part for me—seeing what you’ve created! You’ve followed the steps, you’ve respected the zucchini’s water content, and now you have a big platter of beautifully golden, baked parmesan zucchini sticks. Did they stay crispy? I truly hope so!
I want to hear all about it! Head down to the comments section below and let me know how yours turned out. Did the high heat work its magic? Did you try the almond flour swap? Your feedback helps me know I’m guiding you right from my kitchen to yours. Tell me what you served them with, too!
If you snapped a photo of your crunchy, savory zucchini—maybe you’re dipping them in that creamy aioli I mentioned—please tag me on social media! I absolutely love seeing my recipes come to life on your tables. Sharing food is how we connect, and I read every single comment and message. If you have suggestions for future healthy vegetable sides or need any last-minute help, don’t hesitate to reach out via my Contact Page. Happy cooking, and enjoy every last crunchy bite!
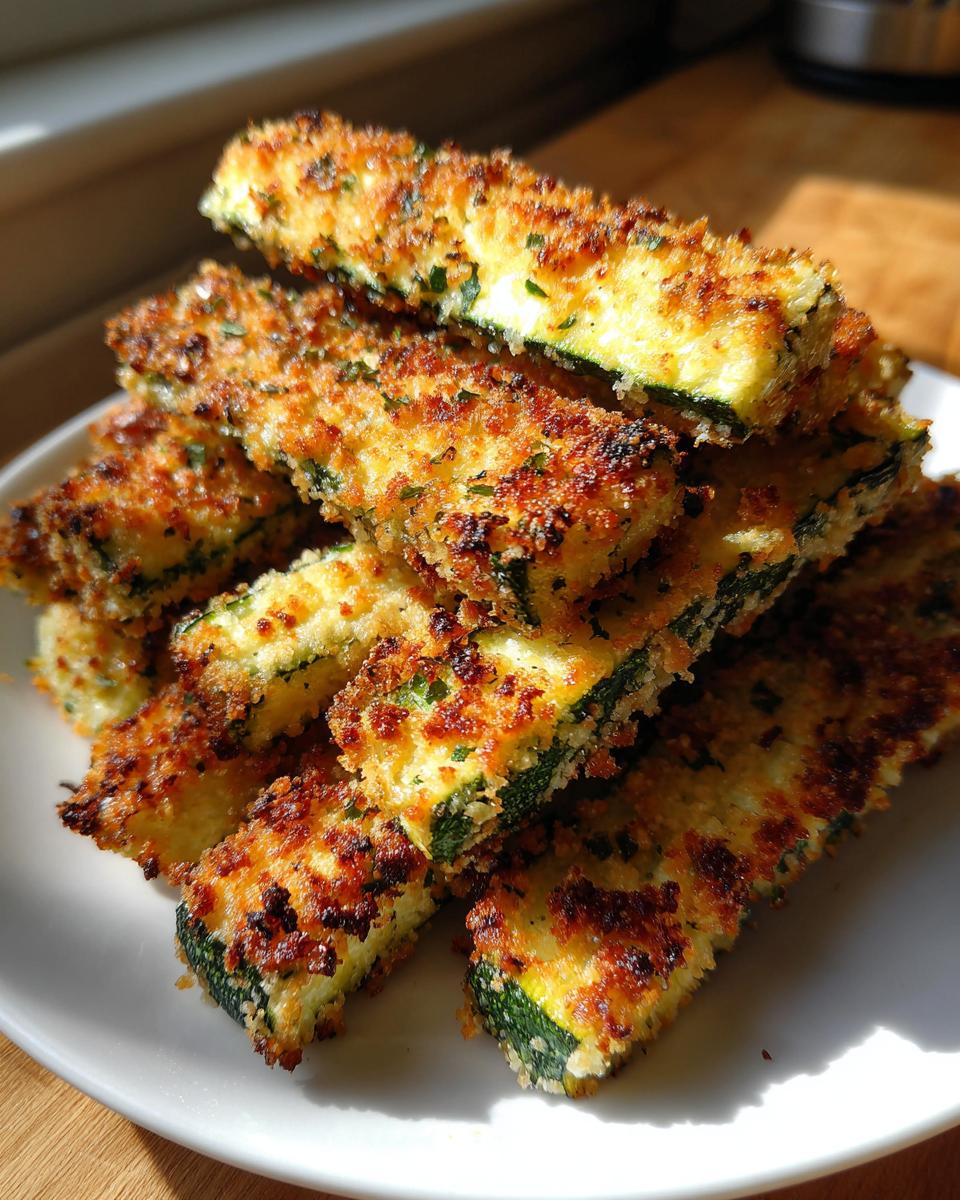
PrintUltimate Crispy Baked Parmesan Zucchini Sticks
Make this easy zucchini side dish that stays crispy. You get flavorful, cheesy zucchini baked to perfection without any frying. This recipe is quick, healthy, and perfect for weeknight dinners or as a simple appetizer.
- Prep Time: 15 min
- Cook Time: 15 min
- Total Time: 30 min
- Yield: 4 servings 1x
- Category: Side Dish
- Method: Baking
- Cuisine: American
- Diet: Low Fat
Ingredients
- 2 medium zucchini
- 1 large egg
- 1 tablespoon water
- 1/2 cup all-purpose flour
- 1/2 teaspoon salt
- 1/4 teaspoon black pepper
- 1/2 cup grated Parmesan cheese
- 1/4 cup panko breadcrumbs (for extra crisp)
Instructions
- Preheat your oven to 425°F (220°C). Line a baking sheet with parchment paper.
- Wash the zucchini and trim the ends. Cut the zucchini into sticks about 1/4 inch thick.
- Place the zucchini sticks on a paper towel-lined plate. Sprinkle lightly with salt and let them sit for 10 minutes to draw out excess moisture. Pat them completely dry with more paper towels. This step is key for crispiness.
- Set up a dredging station with three shallow bowls. In the first bowl, whisk the egg and water. In the second bowl, mix the flour, salt, and pepper. In the third bowl, combine the Parmesan cheese and panko breadcrumbs.
- Dip each dry zucchini stick first into the flour mixture, shaking off any excess.
- Next, dip the floured stick into the egg wash, letting the extra drip off.
- Finally, press the stick firmly into the Parmesan and breadcrumb mixture until fully coated.
- Arrange the coated zucchini sticks in a single layer on the prepared baking sheet. Do not overcrowd the pan.
- Bake for 12 to 15 minutes, flipping halfway through, until the coating is golden brown and crispy.
- Serve immediately as a healthy vegetable side dish or quick zucchini appetizer.
Notes
- For the crispiest results, ensure your zucchini is very dry before coating.
- If you prefer a gluten free zucchini snack, substitute the flour with almond flour and use gluten free breadcrumbs.
- Baking time may vary; watch closely after 10 minutes to prevent burning the cheese.
Nutrition
- Serving Size: 1 serving (about 1/4 of recipe)
- Calories: 150
- Sugar: 3
- Sodium: 350
- Fat: 8
- Saturated Fat: 4
- Unsaturated Fat: 4
- Trans Fat: 0
- Carbohydrates: 12
- Fiber: 2
- Protein: 9
- Cholesterol: 30