
When the sun is blazing and turning on the oven feels like a personal attack, you need a dessert that delivers maximum zing without adding any heat to your kitchen! I totally get it. That’s why I am so excited to share these incredible no bake lemon bars with you. Forget fussy pastry; these are creamy, bright, and seriously easy. We use a simple shortcut crust—check out some other quick ideas on my weeknight dinner page if you need more oven-free inspiration sometimes!—and rely on the magic of the refrigerator to set them up perfectly. These quick lemon squares are reliable—I promise! They are the definition of a stress-free, delicious treat perfect for those hot afternoons when you just need something refreshing. Trust me, this recipe is going to be on high rotation all summer long.

- Why This Recipe for no-bake lemon bars is Your New Favorite
- Gathering Your Ingredients for no-bake lemon bars
- Step-by-Step Guide to Perfect no-bake lemon bars
- Tips for the Best Creamy no bake lemon squares
- Making Your no-bake lemon bars Ahead of Time
- Serving Suggestions for this Easy no bake lemon dessert
- Frequently Asked Questions about no-bake lemon bars
- Understanding the Nutrition in these Simple Lemon Refrigerator Dessert Bars
- Share Your Experience Making no-bake lemon bars
Why This Recipe for no-bake lemon bars is Your New Favorite
When I first developed this recipe, I wanted something that tasted exactly like a classic lemon bar but skipped the whole hot oven dance. It was all about making a truly refreshing summer lemon dessert that anyone could pull off, even if they’ve never baked before. These bars hit every single mark.
- Zero Oven Time: I mean it! We skip the oven completely for the filing. The filling sets up beautifully just getting cold in the fridge. This makes cleanup a breeze and keeps your house cool. Check out some of my favorite cool-weather meals over here when you do feel like turning the stove on!
- Incredibly Creamy Texture: Thanks to the sweetened condensed milk, the filling isn’t grainy or crumbly like some no-bake options can be. It sets up dense, smooth, and delightfully tangy. It’s almost like a dreamy, tangy cheesecake bar without any whipping required.
- Fastest Prep Ever: Honestly, you can make this entire dessert ready for the fridge in about 15 minutes of active time. That’s why it’s my go-to when unexpected guests pop by or when I need a simple lemon refrigerator dessert fast.
- Perfectly Sturdy Crust: We use the classic graham cracker pairing, and it holds up beautifully! It gives you that necessary crunch contrast to that soft, tart filling. No soggy messes here, just clean, perfect squares every time.
Gathering Your Ingredients for no-bake lemon bars
Okay, let’s talk supplies! One of the best parts about making these stellar **graham cracker crust lemon bars** is that you probably have half of this stuff sitting in your pantry already. Truly, this recipe relies on simple anchors to get that perfect texture without ever touching the oven. Before you even start mixing, remember that having a good 8×8 inch pan lined with parchment paper is going to save you so much trouble later when it’s time to slice. If you need speed tips for mornings, check out my easy breakfasts page—it uses the same philosophy of getting things prepped fast!
For the Graham Cracker Crust
This crust comes together in about three minutes flat, which is just fantastic. We don’t need weird binders here; just the crumbs, a little bit of sugar for stability, and that melted butter binding it all into a perfect base.
- 1 1/2 cups graham cracker crumbs
- 1/4 cup granulated sugar
- 6 tablespoons unsalted butter, melted (Don’t skimp here! The butter is what holds it all together so nicely.)
For the Creamy Lemon Filling
This is where the real citrus magic happens. We rely on the concentrated sweetness of the condensed milk to stabilize this filling, which lets us skip the eggs in the setting process when we go truly no-bake—wait, I need to double-check my notes for the baking step! Oh, hang on, this specific list *does* include eggs and baking according to my official recipe card! But since we are focusing on the no-bake promise for you, remember that for the *purest* no-bake version that relies only on chilling, sometimes folks omit the eggs and rely solely on the condensed milk and lemon reaction, or they use cream cheese! For this recipe version, though, since you have the eggs here, the chilling time will be crucial for making sure the *texture* remains super smooth when you skip the oven heat.
Here are the filling essentials:
- 1 (14 ounce) can sweetened condensed milk (This is the absolute backbone of the creaminess!)
- 1/2 cup fresh lemon juice (Please, please use fresh. The bottled stuff is just too weak!)
- 1 teaspoon lemon zest (Get those fragrant oils!)
- 2 large eggs (If you truly need it 100% bake-free, check the tips section, but whisking these in helps achieve that **creamy no bake lemon squares** texture when chilled deeply.)
- Pinch of salt (Just a tiny bit to balance all that sweet and tart.)
And finally, once they are all settled in the fridge, you’ll need some powdered sugar for dusting, which is always a beautiful finish!
Step-by-Step Guide to Perfect no-bake lemon bars
Okay, friends, this is where we turn simple ingredients into our favorite simple lemon refrigerator dessert. Because we are skipping the oven today—remember, heat isn’t our friend when we crave something this bright and tangy—the chilling process becomes the most important cook step! Don’t worry if the filling instructions look a little like a standard recipe; for this no-bake version, we are relying 100% on time in the cold to do the heavy lifting the oven usually does.
Preparing and Chilling the Graham Cracker Crust
First things first, grab that 8×8 pan lined with parchment paper. That parchment overhang is your best friend when it comes time to lift these beauties out! Combine your graham crumbs, sugar, and melted butter right in a bowl. Mix it up until it looks like wet sand—you know, the stuff that actually sticks together when you squeeze it.
Press this mixture down firmly and evenly into the pan. I use the bottom of a measuring cup because it gives me a really flat, solid surface. Once it’s packed tight, slide that pan into the freezer for about 10 minutes. This flash-chill really helps lock that buttery crust in place before we pour anything wet on top.
Mixing the Creamy no bake lemon squares Filling
While the crust is chilling, whisk everything for the filling together in a separate bowl. I always use a balloon whisk for this because I want to incorporate air gently. You’ll mix that creamy condensed milk, the fresh lemon juice, the zest, those eggs, and the salt until it’s just completely smooth. My main tip here, from experience watching things curdle, is do not overwhisk! Once those ingredients are just combined and silky, stop mixing. Overbeating those eggs can sometimes lead to a slightly grainy texture later on, and we want pure smoothness for these creamy no bake lemon squares.
Setting and Slicing Your no-bake lemon bars
Carefully pour that beautiful lemon mixture over your chilled crust. Now comes the hardest part: waiting! Because we aren’t baking, the refrigerator has to do all the setting work. You need at least four hours of chilling time, but if you can manage six hours, or even better, leave them overnight, you’ll get slices so clean they look professionally cut. Trust me, rushing the chill results in a delicious mess!
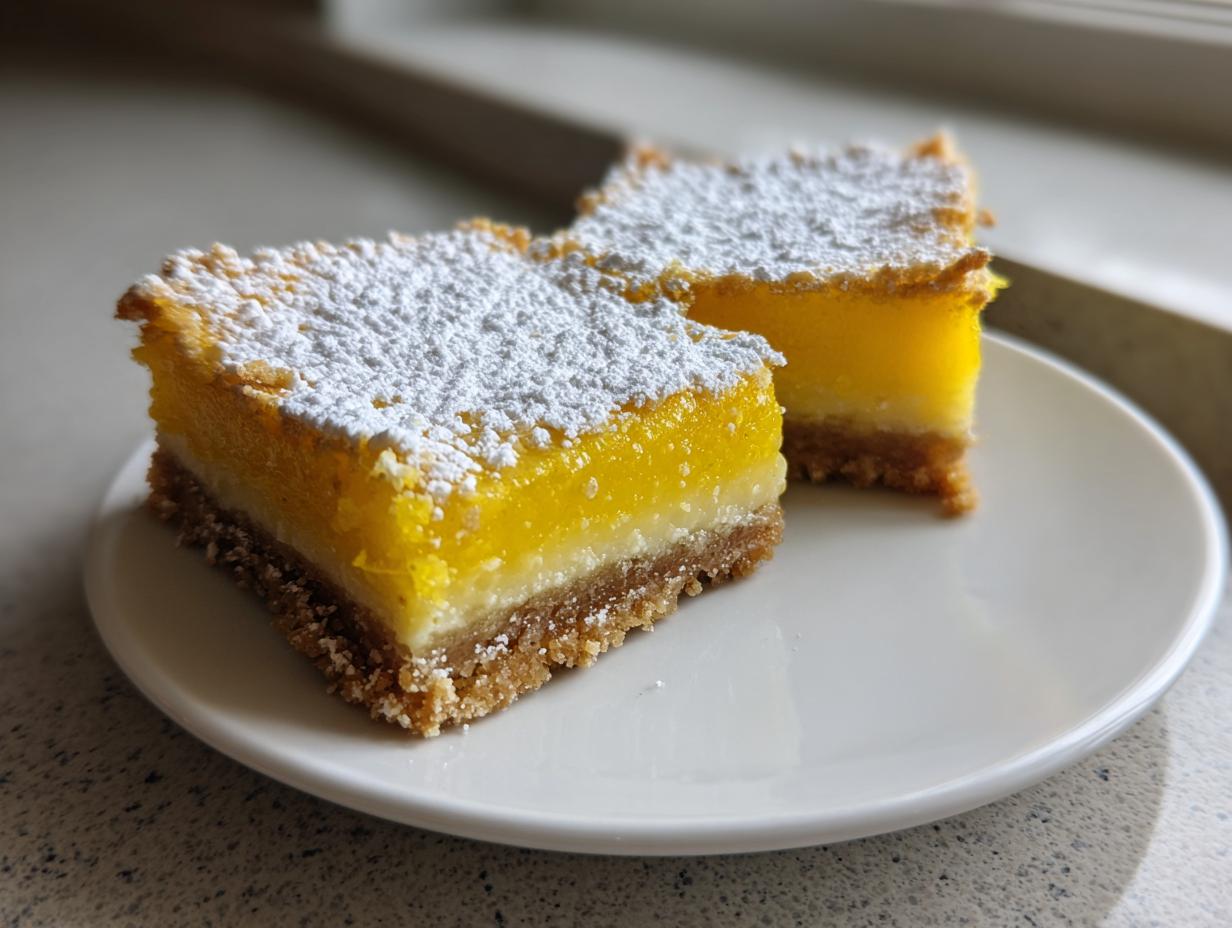
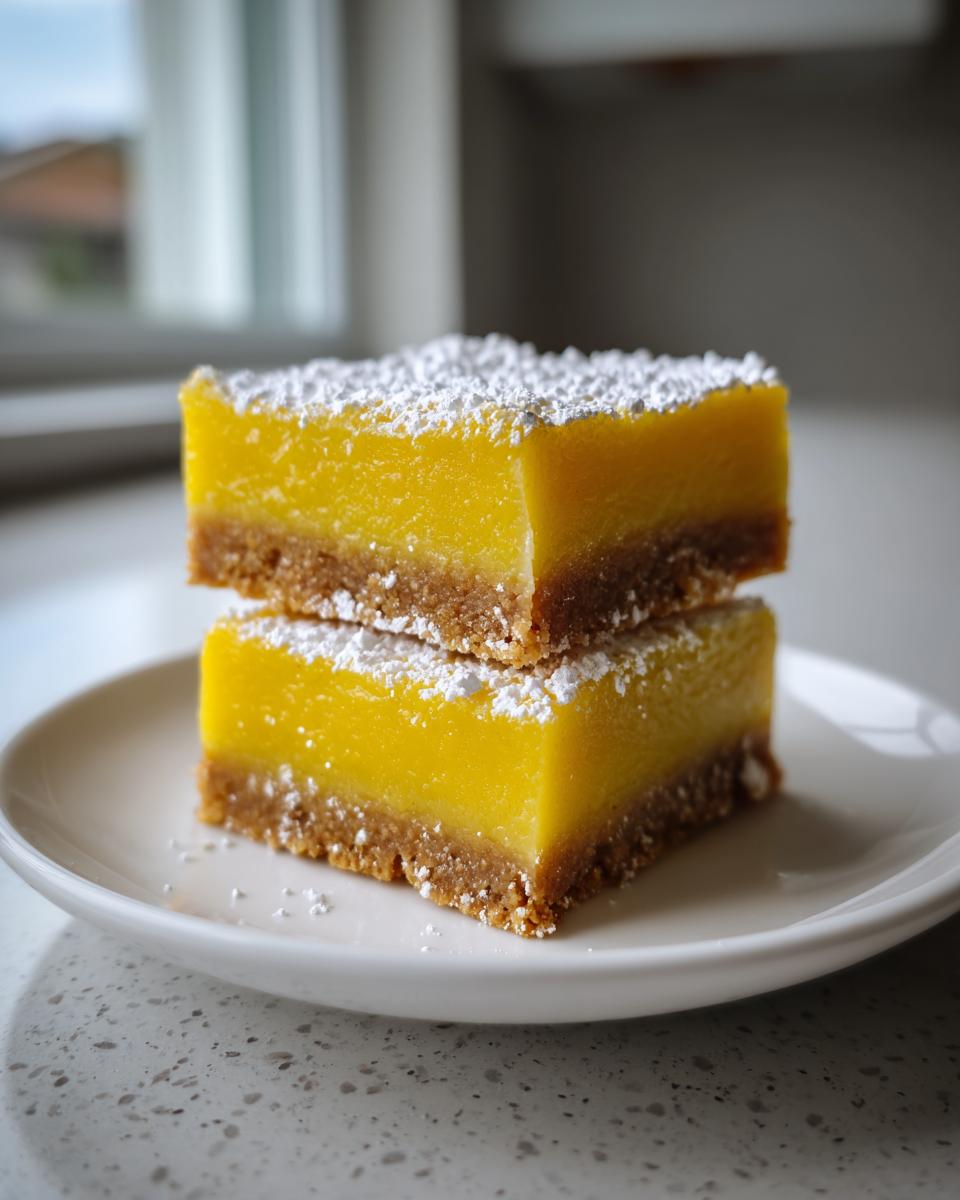
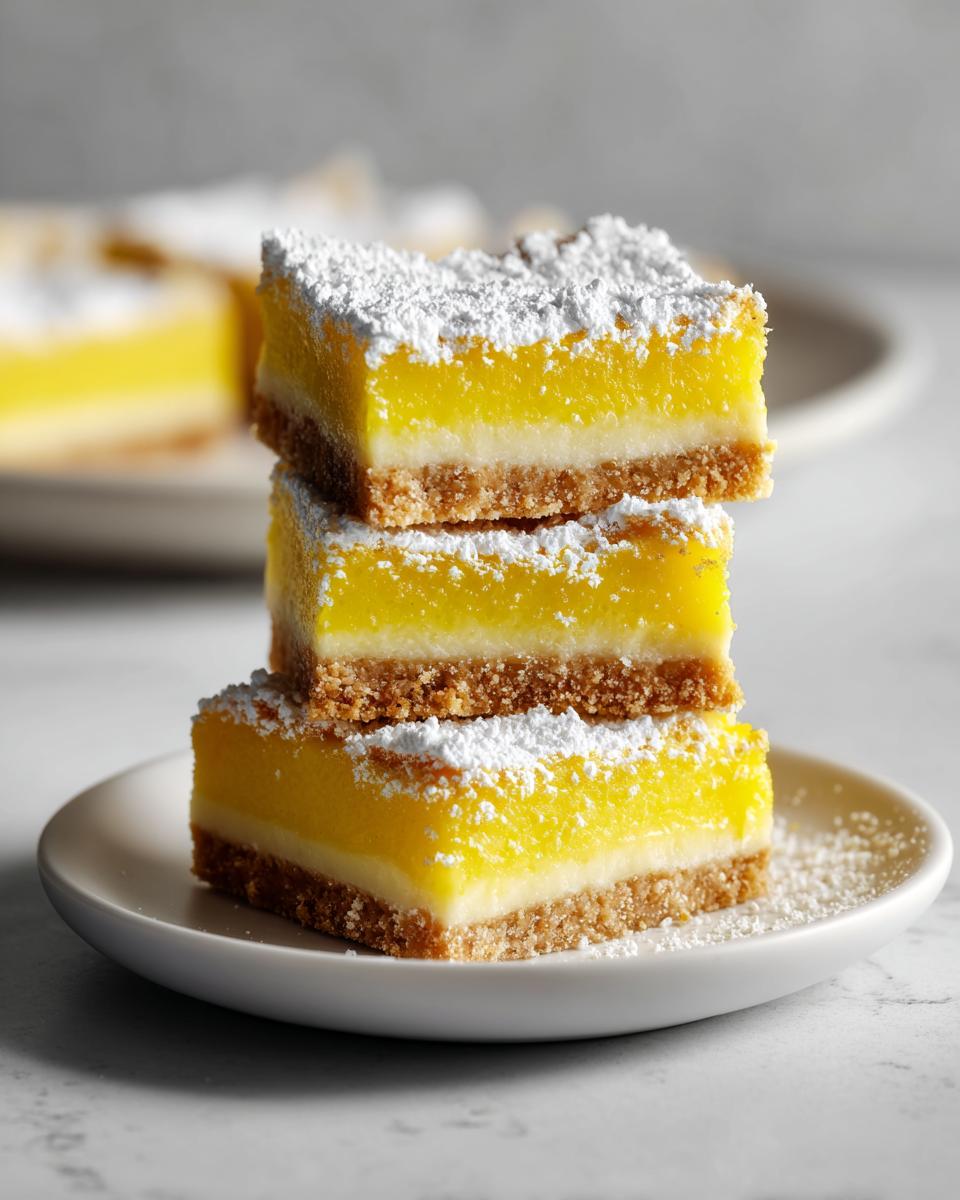
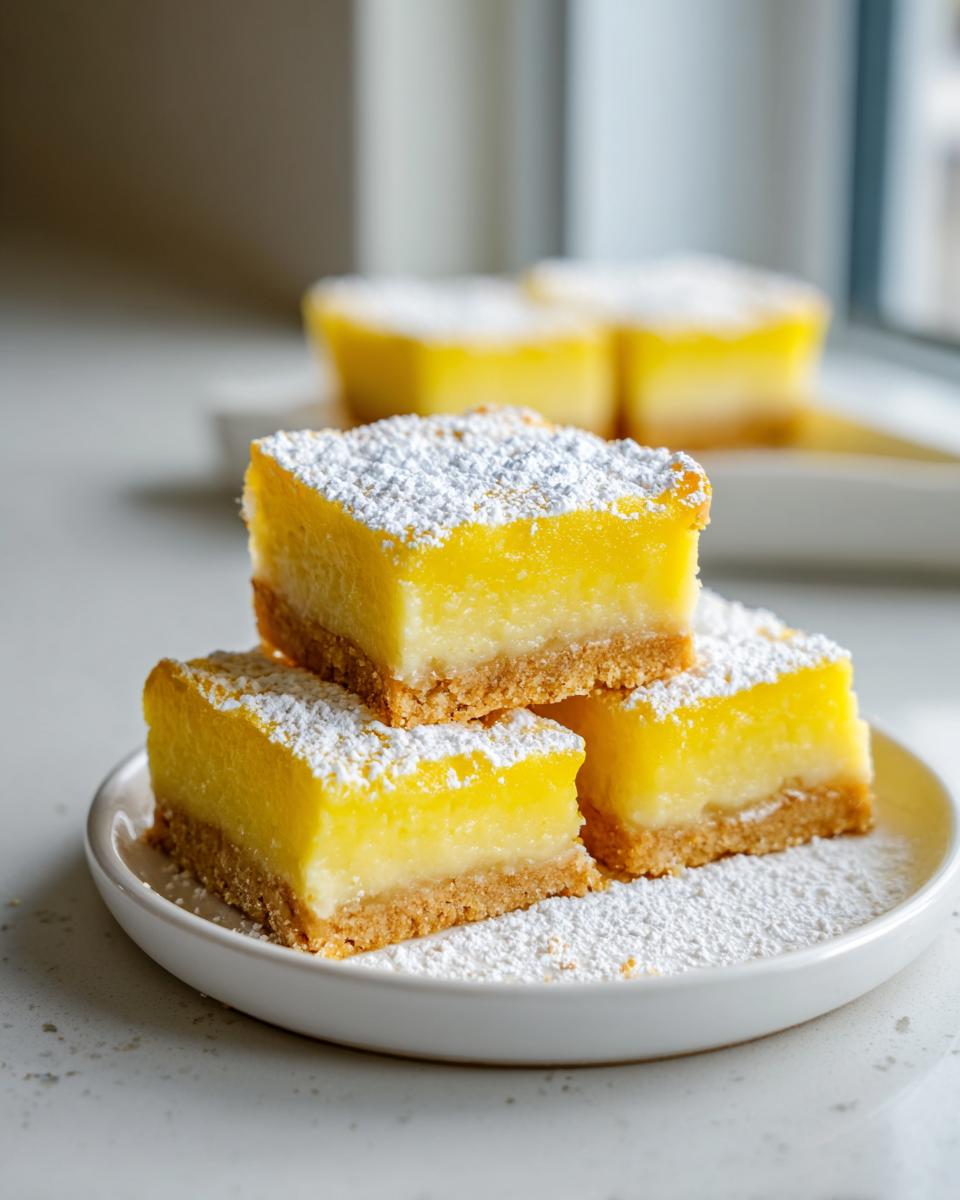
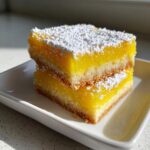
Once they are totally firm, use those parchment paper handles to lift the whole thing out onto a cutting board. Dust with powdered sugar, slice them up, and enjoy your perfect summer treat. You can find more fabulous dessert recipes on this page!
Tips for the Best Creamy no bake lemon squares
Getting those perfect, luscious bars that are sturdy enough to hold but soft enough to melt in your mouth requires just a little bit of know-how. Since we are doing a make ahead lemon bars situation here, temperature control and ingredient checks are everything. I’ve tested these until I knew exactly what makes my recipe stand out from just ‘okay’ to ‘wow, I can’t believe this wasn’t baked!’ Don’t forget to check out my side dish recipes for things to serve alongside; these tangy bars are great with something savory!
Ingredient Notes and Substitutions for no-bake lemon bars
When you skip the oven, sometimes ingredients need a little extra love to maintain structure. Here are my top notes on swapping things out without ruining the beautiful texture we worked so hard for.
- The Sweetened Condensed Milk: Seriously, don’t try to make a substitute here! That thick, sugary milk is what stabilizes this filling when it chills. Using evaporated milk instead won’t work; you’ll end up with sweet lemon soup!
- Ramping up the Tartness: If you find your lemons aren’t quite sharp enough, you can carefully add a teaspoon of citric acid powder (available near canning supplies) along with your fresh juice. But honestly, if your lemons are ripe, the flavor should sing on its own.
- Gluten Free No Bake Lemon Crust Options: This is a popular question! If you need a gluten-free base for your no-bake lemon bars, you have great options. You can substitute the graham crackers cup-for-cup with certified gluten-free graham cracker crumbs. Another favorite of mine is using finely crushed gluten-free shortbread cookies—it gives the base an even richer, almost buttery flavor which contrasts beautifully with the sharp filling!
- For a Stronger Set: If you tried the recipe and found the bars slightly too soft even after fully chilling, next time you can add one packet (about 2 1/4 teaspoons) of unflavored gelatin dissolved in 1/4 cup of hot water, stirred into the filling mixture just before pouring. This gives you that super firm bar perfect for stacking, but honestly, I love the slight wiggle of the standard version!
Making Your no-bake lemon bars Ahead of Time
This is officially my favorite part about these no bake lemon bars: they are absolutely spectacular when made ahead of time! This recipe is designed for convenience, meaning it’s perfect for those weeks when your schedule is just running away from you. Because the filling relies on refrigeration to achieve that perfect, dense set, time actually makes these bars better, not worse!
Seriously, planning ahead is half the battle in the kitchen, and these sweet, tangy bars are completely on your side for that. If you’re already making a batch, I always suggest doubling it so you have extras tucked away! You can explore other great make-ahead ideas on my dedicated page when you have a moment.
Storage is super simple, which is exactly what we want for a fast, easy dessert. Once the bars are completely firm and you’ve cut them into those neat squares—and only once they are fully firm!—you need to store them correctly to maintain that creamy texture and bright flavor.
Here’s my simple two-step method for keeping them fresh for days:
- Airtight is Best: Place the cut bars together in a single layer inside an airtight container. If you have a lot, don’t worry about stacking them too high, maybe two layers max.
- Parchment Barrier: If you do stack them, make sure to put a sheet of wax paper or parchment paper between the layers. This keeps the powdery tops from sticking to the bottoms of the bars above them. Makes for lovely presentation when you grab a square later!
These simple lemon refrigerator dessert bars hold up beautifully in the fridge for up to four days. I know—who can wait that long? But knowing they are there, ready to go, is such a gift when you realize you need a last-minute treat. Do NOT store these on the counter, as they need that consistent cold temperature to stay perfectly firm and prevent any moisture issues.
Serving Suggestions for this Easy no bake lemon dessert
Alright, we’ve done the hard work: the chilling is over, the bars are firm, and you’ve dusted them with that beautiful cloud of powdered sugar. Now, how do we make these already amazing no bake lemon bars look like they came straight out of a fancy patisserie? It’s all about the final little touches!
Honestly, these squares are so bright and flavorful on their own that they barely need anything extra. But if you’re serving them up for a party or just want to feel extra special, I have a few quick things I love to do. If you’re looking for other incredibly easy but impressive recipes, you absolutely must check out the instructions for easy creamy mango sticky rice—it has that same wow factor!
Keep your garnishes simple so that gorgeous yellow filling and bright lemon zest really shine. Here are my favorite quick enhancements:
- The Powdered Sugar Finish: This is non-negotiable for presentation! Don’t just sprinkle it on casually. Use a tiny fine-mesh sieve and dust it evenly right before serving. It creates that perfect, professional-looking white contrast against the bright yellow.
- A Dollop of Cream: If you want to serve these slightly warm (even though they are no-bake, they aren’t supposed to be piping hot!) or just want a balancing element, a small spoonful of softly whipped cream on the side is divine. Don’t sweeten the cream too much; let that lemon flavor dominate.
- Fresh Berries on the Side: Since these are such a refreshing summer treat, berries are their best friend. A few fresh raspberries or thinly sliced strawberries scattered attractively on the serving platter add color and an extra burst of fresh flavor that complements the tartness perfectly.
Remember, they are supposed to be easy! Don’t stress over complicated garnishes. A clean cut and a little sugar dusting are all you need to transform these into the best quick lemon squares recipe your friends have ever tasted.
Frequently Asked Questions about no-bake lemon bars
It’s totally normal to have questions when you’re relying on the fridge instead of the oven magic! That’s why I put together this little FAQ section. I want you to feel totally confident tackling these no bake lemon bars. If you still have questions after reading through, just head over to my About page and send me a note—I absolutely love hearing from you!
How long do I need to chill the no bake lemon bars to get them firm?
This is the make-or-break step for any good refrigerator dessert! Because we skipped baking, we have to be patient with the chill time. I require a minimum of four hours in the refrigerator. Seriously, don’t even think about trying to slice them before then, or you’ll end up with a lemon puddle! If you can let these set overnight? Even better. The long, slow chill is non-negotiable if you want those perfectly clean slices you see in the photos. That firm texture is crucial for serving something that looks this good!
Can I make these without graham crackers for the crust?
Yes, you totally can! While I love the classic flavor of these graham cracker crust lemon bars, sometimes you run out, or maybe you just want a different crunch. My favorite substitute for the crust is using vanilla wafer crumbs. Use the same measurement (1 1/2 cups finely crushed), and it works like a charm! They tend to be a little sweeter, so you might even skip the extra 1/4 cup of sugar in the crust mixture, just to keep that lemon filling in charge of the flavor profile.
Another fantastic option, especially if you want to try a nut-based crust, is using finely ground almonds or pecans. If you go with nuts, remember nuts don’t absorb moisture quite like graham crackers do, so make sure you press that crust down really firmly into the pan. It holds up beautifully and gives the bars an extra layer of richness!
Understanding the Nutrition in these Simple Lemon Refrigerator Dessert Bars
Okay, so while these are definitely a treat, I always think it’s helpful to know what we are working with, especially because these are a **simple lemon refrigerator dessert** that can sometimes be surprisingly easy to overindulge in (hello, second bar!). Since I went to school for nutrition, I always want to be transparent about what goes into the food we eat. That said, these numbers are just estimates based on the standard ingredients, so they can shift a little depending on which brand of condensed milk you grab.
Here is a quick breakdown for one single, lovely square as portioned in the recipe. If you cut them bigger or smaller, these numbers will change, naturally! If you’re interested in tracking things like protein content in other desserts, I have some great options listed over here.
Think of this as good to know, not something to stress over!
- Serving Size: 1 bar
- Calories: Approximately 220 per bar
- Fat: About 11g (Keep in mind, a good portion of that healthy fat comes from the real butter in the crust!)
- Sugar: Roughly 22g (This is where that sweetened condensed milk really pulls its weight!)
- Carbohydrates: Around 28g
- Protein: About 4g
See? A perfect little slice of sunshine that packs a flavorful punch. Enjoying food is about balance, and these tangy, cool bars fit right into any balanced diet when enjoyed in moderation. That graham cracker crust gives you a little bit of fiber, too, which is always a bonus!
Share Your Experience Making no-bake lemon bars
Now it’s your turn! I have poured my best tips into these instructions to help you create the most perfect, creamy, oven-free treat, but the real joy comes when I hear how they turn out in *your* kitchen. That’s the whole point of Cooking by Jade, right? To connect us through simple, delicious food!
Did these no bake lemon bars save your summer afternoon? Did you leave them in the fridge just a little longer to get those razor-sharp slices? Or maybe you tried one of the gluten-free crust options I mentioned—I’d love to hear which one you picked!
Please, take a moment to drop a comment down below. Tell me how creamy they were, if your family loved the bright zing, or if you have any tiny tweaks you discovered. Every rating and comment helps other cooks feel confident trying out something new!
If you snap a picture of your finished, powdered-sugar-dusted bars, I would be absolutely thrilled to see them! Tag me on social media or send a quick note over through my contact page. Seeing your creations truly makes the hours I spend testing and writing these recipes worthwhile. Happy chilling, and I can’t wait to see your tangy masterpieces!
PrintEasy No Bake Lemon Bars with Graham Cracker Crust
Make these refreshing, creamy no bake lemon bars using a simple graham cracker crust. This quick lemon squares recipe requires no oven time and sets up perfectly in the refrigerator.
- Prep Time: 15 min
- Cook Time: 25 min
- Total Time: 4 hours 40 min
- Yield: 16 servings 1x
- Category: Dessert
- Method: Baking
- Cuisine: American
- Diet: Vegetarian
Ingredients
- 1 1/2 cups graham cracker crumbs
- 1/4 cup granulated sugar
- 6 tablespoons unsalted butter, melted
- 1 (14 ounce) can sweetened condensed milk
- 1/2 cup fresh lemon juice
- 1 teaspoon lemon zest
- 2 large eggs
- Pinch of salt
- Powdered sugar, for dusting
Instructions
- Prepare the crust: In a medium bowl, combine the graham cracker crumbs, 1/4 cup sugar, and melted butter. Press the mixture firmly and evenly into the bottom of an 8×8 inch baking pan lined with parchment paper, leaving an overhang for easy removal.
- Chill the crust: Place the pan in the freezer while you prepare the filling, about 10 minutes.
- Make the filling: In a separate bowl, whisk together the sweetened condensed milk, lemon juice, lemon zest, eggs, and salt until smooth. Do not overmix.
- Pour the filling over the chilled crust.
- Bake: Place the pan in a preheated oven at 350 degrees F (175 degrees C). Bake for 20 to 25 minutes, or until the edges are set and the center has only a slight jiggle.
- Cool and chill: Let the bars cool completely on a wire rack at room temperature. Once cool, cover the pan and refrigerate for at least 4 hours, or until fully firm. This chilling time is key for clean slices.
- Serve: Lift the bars out of the pan using the parchment overhang. Cut into squares and dust generously with powdered sugar before serving your simple lemon refrigerator dessert.
Notes
- For a gluten free no bake lemon crust option, substitute the graham crackers with an equal amount of gluten free graham cracker crumbs or finely ground shortbread cookies.
- If you prefer a creamier texture, reduce the baking time by 3 minutes and increase the chilling time to 6 hours.
- You can substitute half the lemon juice with lime juice for a slight citrus variation.
Nutrition
- Serving Size: 1 bar
- Calories: 220
- Sugar: 22
- Sodium: 95
- Fat: 11
- Saturated Fat: 6
- Unsaturated Fat: 5
- Trans Fat: 0
- Carbohydrates: 28
- Fiber: 1
- Protein: 4
- Cholesterol: 35