
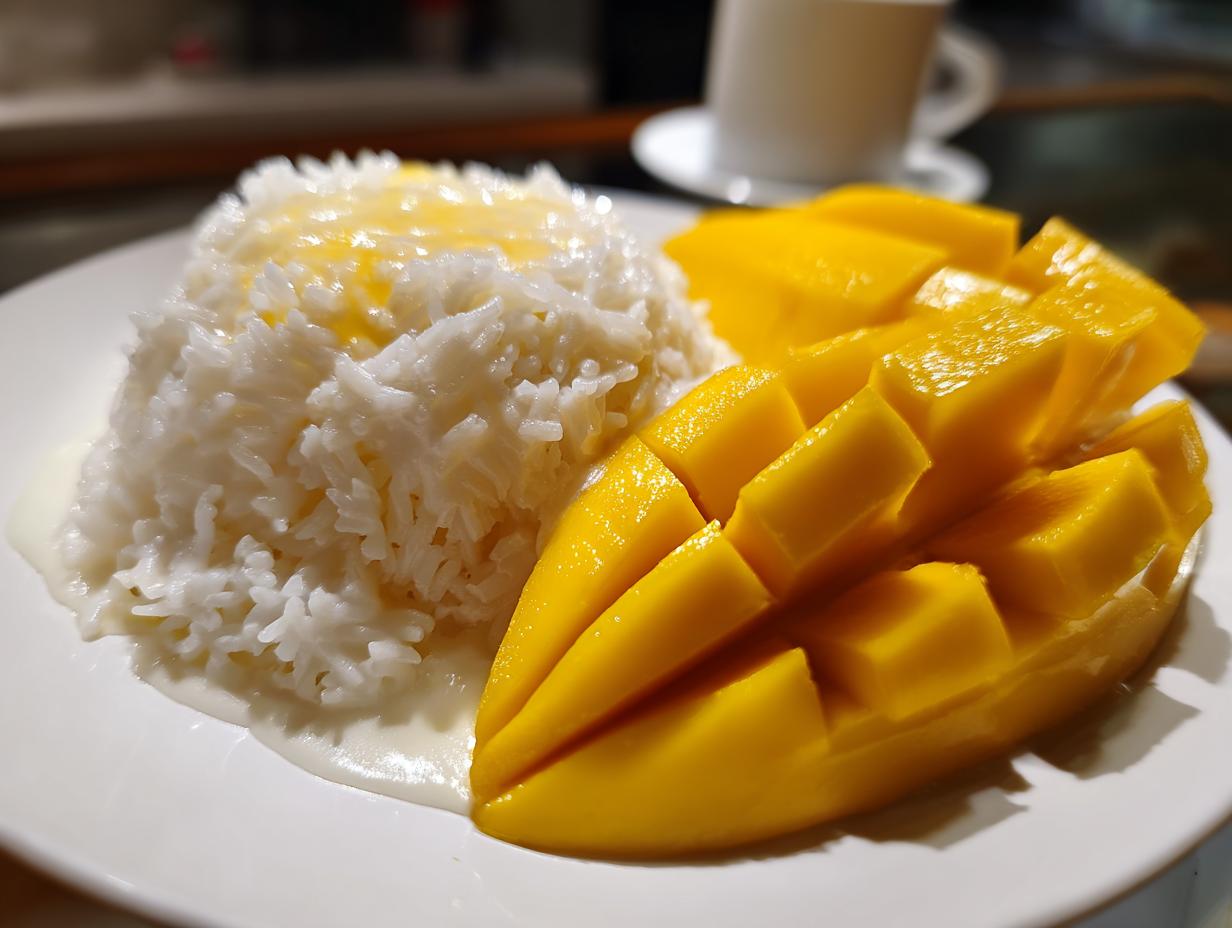
Oh my gosh, are you ready for a total tropical vacation right in your own kitchen? When I think of pure, sunny indulgence, my mind immediately goes to this dessert. It’s the ultimate sweet escape, and yes, I’m talking about the perfect mango sticky rice! I know some people find Thai dessert recipes intimidating, but trust me, these few simple moves turn humble sticky rice into something magnificent. This Easy & Creamy Mango Sticky Rice captures that authentic street food flavor we all crave. After spending time in the test kitchen, I truly believe I’ve landed on the foolproof method for a foolproof recipe. Getting those simple ingredients—the rice, the mango, and that heavenly coconut sauce—to align perfectly is pure joy, and I can’t wait for you to try it! If you want to know more about how I approach simple, reliable cooking, you can always read more about my journey here.
- Why This Easy Mango Sticky Rice Recipe Works (Expert Tips)
- Gathering Ingredients for Authentic Mango Sticky Rice
- Step-by-Step Instructions: How to Make Mango Sticky Rice
- Serving Suggestions for This Thai Dessert
- Storage and Reheating for Your Creamy Coconut Sticky Rice
- Troubleshooting Common Issues with Mango Sticky Rice
- Dietary Information for This Vegan Dessert Recipe
- Frequently Asked Questions About Khao Niao Mamuang
- Share Your Homemade Mango Sticky Rice Experience
Why This Easy Mango Sticky Rice Recipe Works (Expert Tips)
Listen, I get it—you want restaurant-style Thai dessert flavor without spending a whole afternoon babysitting the stove. That’s why this recipe cuts through the noise and gives you results you can rely on. When I test recipes professionally, my goal is always foolproof execution, and this one is no exception. It’s all about creating that amazing balance. I also have a great section on other easy meals you can put together quickly right here.
Here’s what makes this method consistently reliable for that sweet tropical dessert:
- Silky coconut sauce that coats every grain.
- Foolproof rice texture—no gummy messes!
- The perfect balance every single time, even if your mangoes aren’t perfect.
The Secret to Perfect Glutinous Rice for Mango Sticky Rice
Okay, the rice itself is where we build the foundation, so please pay attention! You absolutely must use true glutinous rice—it’s called sweet rice for a reason! If you try using basmati or jasmine, you’ll end up with plain, slightly tacky rice, not this creamy coconut sticky rice magic. My biggest tip for you is to rinse those grains until the water comes out totally clear. Seriously, keep rinsing. Once it’s rinsed, you have to respect the soak time. At least four hours, or better yet, overnight. This guarantees that when you steam it or pop it in the rice cooker, it cooks evenly and gets that beautiful, soft chewiness we’re looking for.
Gathering Ingredients for Authentic Mango Sticky Rice
Getting the right stuff is half the battle when you’re aiming for that restaurant-style Thai dessert flavor. Don’t try to skimp on the coconut milk here, trust me! This recipe relies on full-fat coconut milk—the stuff in the can, not the refrigerated carton. That fat content is what gives you that luscious coconut sauce we’re dreaming about. We’re keeping the ingredient list short and sweet, which is perfect when you want an easy Asian dessert without running to five different specialty stores.
Here’s everything you need for two generous servings:
- 1 cup glutinous sweet rice (you know, the *sticky* stuff!)
- 1 cup water just for soaking the rice
- 1 can full-fat coconut milk (we’ll use most of this for the final creamy coconut sticky rice texture, so grab a good quality one!)
- 1/2 cup more full-fat coconut milk (just for the sauce, don’t confuse it!)
- 1/4 cup granulated sugar
- 1/2 teaspoon salt—don’t skip it! This balances the sweetness beautifully.
- 1 perfectly ripe mango, sliced up right before serving.
- A tiny sprinkle of toasted sesame seeds for garnish, if you’re feeling fancy.
If this is your first time making homemade Thai sweets, you’ll be thrilled how simple these components come together. If you love this approach to minimizing ingredients, you should check out my recipe for moist chocolate banana bread right here!
Ingredient Notes and Substitutions for Your Mango Sticky Rice
Let’s talk about the two stars: the mango and the rice. For the mango, you want something that smells sweet and gives just a little when you press it gently—Ataulfo or Honey mangoes are my absolute favorite because they are less fibrous. If you use a harder mango, well, it just won’t melt in your mouth the way it should!
And again, please, only glutinous rice. Regular rice will dissolve into mush in the sauce. Glutinous rice holds its shape perfectly while soaking up all that coconut-y goodness. It’s important to know that this entire recipe is naturally a wonderful vegan dessert recipe and a fantastic gluten free sweet treat. It’s an amazing tropical fruit recipe that just happens to fit almost every dietary need—naturally!
Step-by-Step Instructions: How to Make Mango Sticky Rice
This process is broken down into three main parts for you, and I promise, it’s so much easier than it sounds. If you can rinse rice and gently heat milk, you can nail this easy Asian dessert! We need to move fast once the rice is cooked, so have your sauce ready to go. I like to get my rice soaking the night before—it’s just the best way to ensure softness! For anyone looking for a truly quick sticky rice recipe, remember that soaking is the key time saver!
Preparing the Luscious Coconut Sauce for Mango Sticky Rice
While your rice is steaming or cooking away (I’ve totally used my rice cooker for this when I’m in a rush—just use about 1/2 cup of water instead of the full amount you usually use for regular rice!), we make the decadent sauce. Grab a small saucepan—nothing too big!—and pour in that 1/2 cup of full-fat coconut milk. Toss in your sugar and salt. Now, here is the super important part, so listen up! We are heating this gently over medium-low heat. You want everything dissolved, nice and smooth, but PLEASE do not let it boil!
Boiling separates the coconut milk and changes the texture completely. We are aiming for that smooth, luscious coconut sauce, not clumpy sauce. Just stir until you can’t feel any grit from the sugar or salt on the bottom of the pan. Once it’s dissolved, take it right off the heat. It’s like magic how that little bit of salt elevates the entire coconut milk dessert base.
Combining and Resting the Mango Sticky Rice
Once your rice is perfectly tender—20 to 25 minutes steaming is usually perfect—you need to get it into a bowl right away. Don’t let it cool down! While it’s piping hot, pour about 3/4 of that warm sauce mixture right over the rice. You are going to stir this very gently. I use a wooden spoon and fold it in, taking care not to smash those beautiful soft grains. We are keeping the integrity of the rice intact!
After stirring, cover the bowl right away. This is the secret weapon step that really makes this a knockout dish and ensures the creamy coconut sticky rice texture: you *must* let it rest for about 15 minutes. This resting time is when the rice completely absorbs the flavor and becomes that signature soft, sweet base. If you’re looking for more guidance on making creamy homemade sauces, I have a great post on creamy homemade sauces that you might enjoy, though this coconut sauce is much simpler!
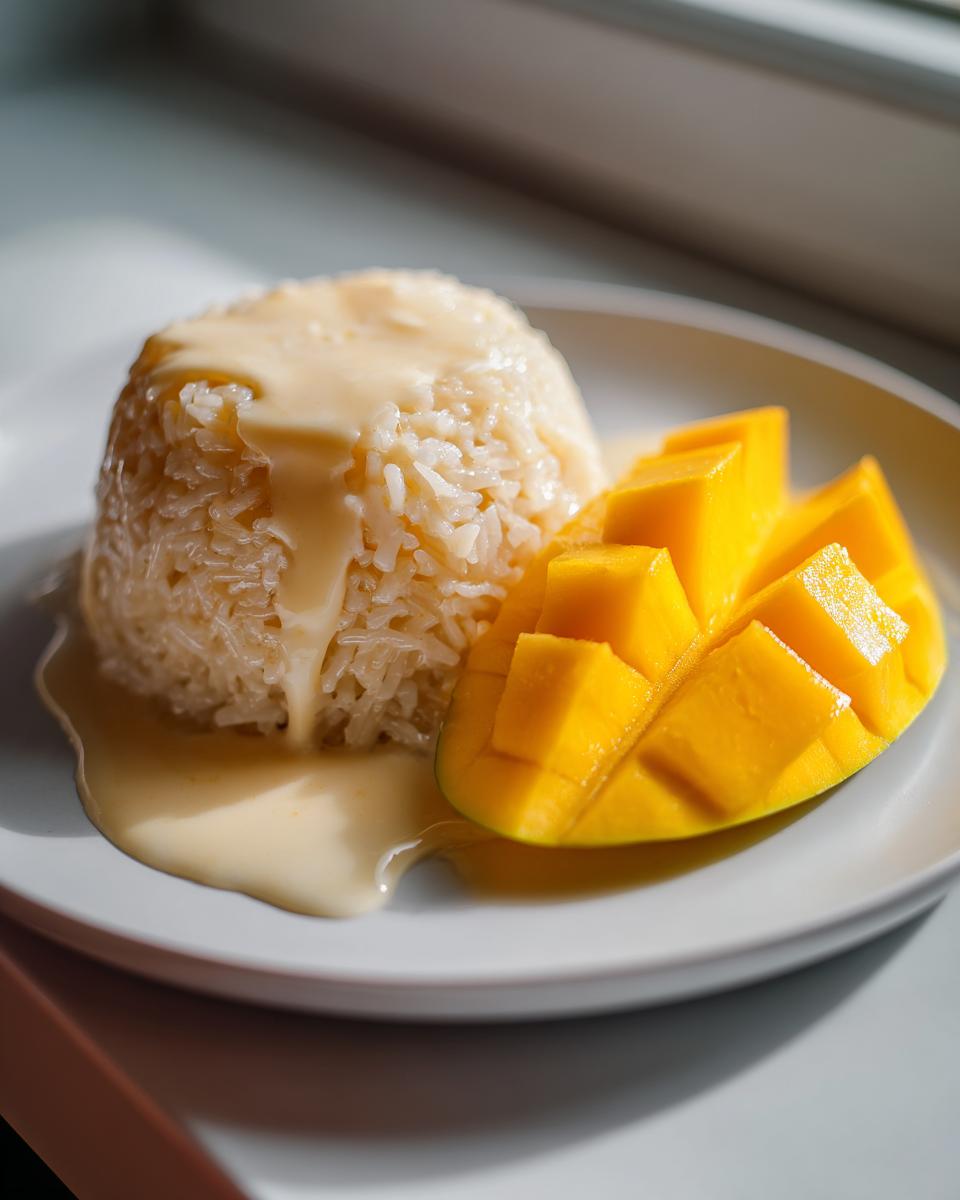
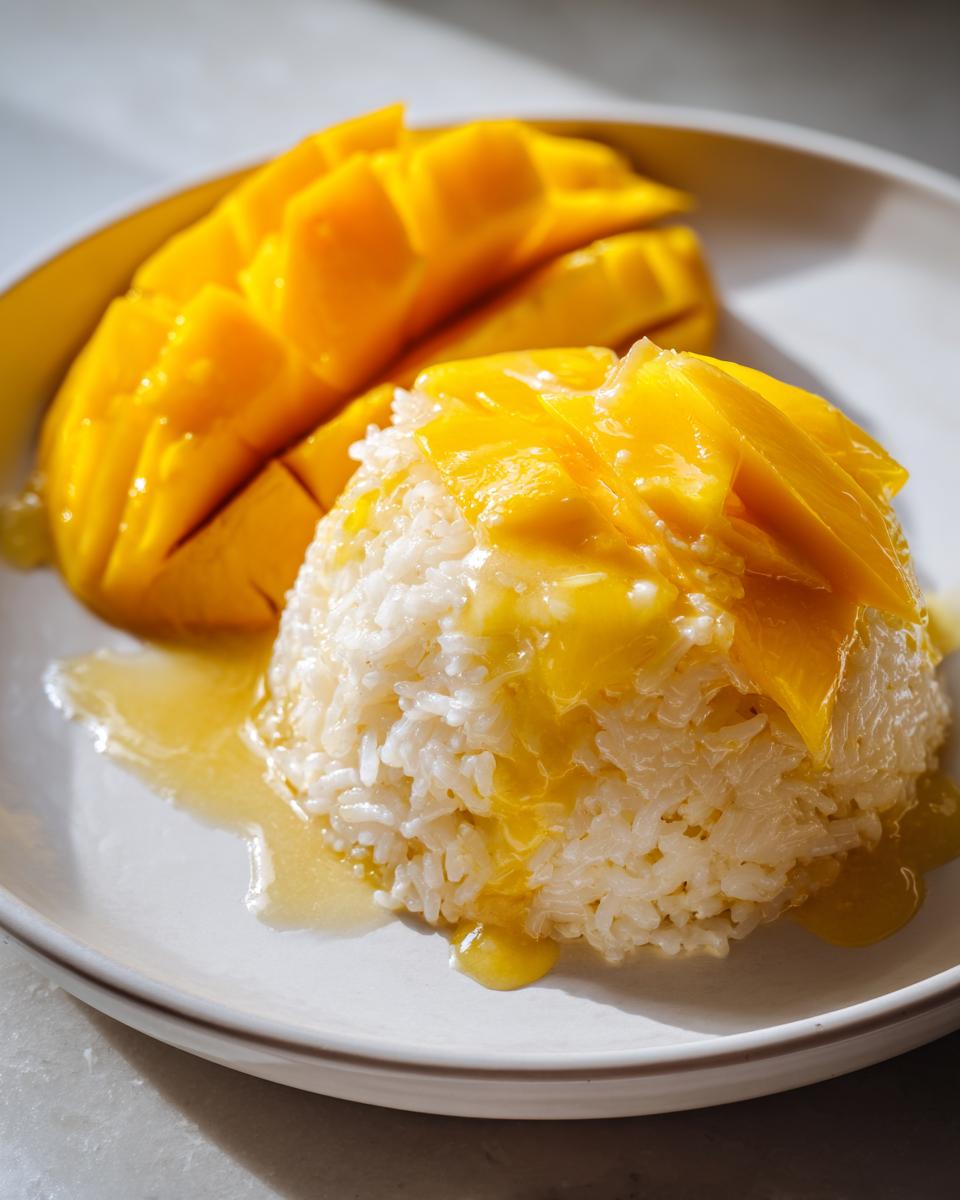
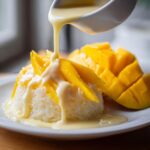
After resting, you are ready to serve! Scoop a portion of that sweet, coconut-soaked rice next to your freshly sliced mango. If you want the absolute best flavor experience, drizzle any extra sauce you have left right over the top. If someone made this and shared their photo, I’d love to see it! You can find a great example of people making this exact dessert at this link!
Serving Suggestions for This Thai Dessert
The big moment is here! Serving this up is almost as fun as making it. For the most beautiful presentation, take your time plating this tropical feast. Arrange those gorgeous, bright slices of fresh mango right next to a perfectly scooped mound of that warm, creamy coconut sticky rice. Don’t be shy—drizzle any extra luscious coconut sauce you reserved right over the rice and the plate.
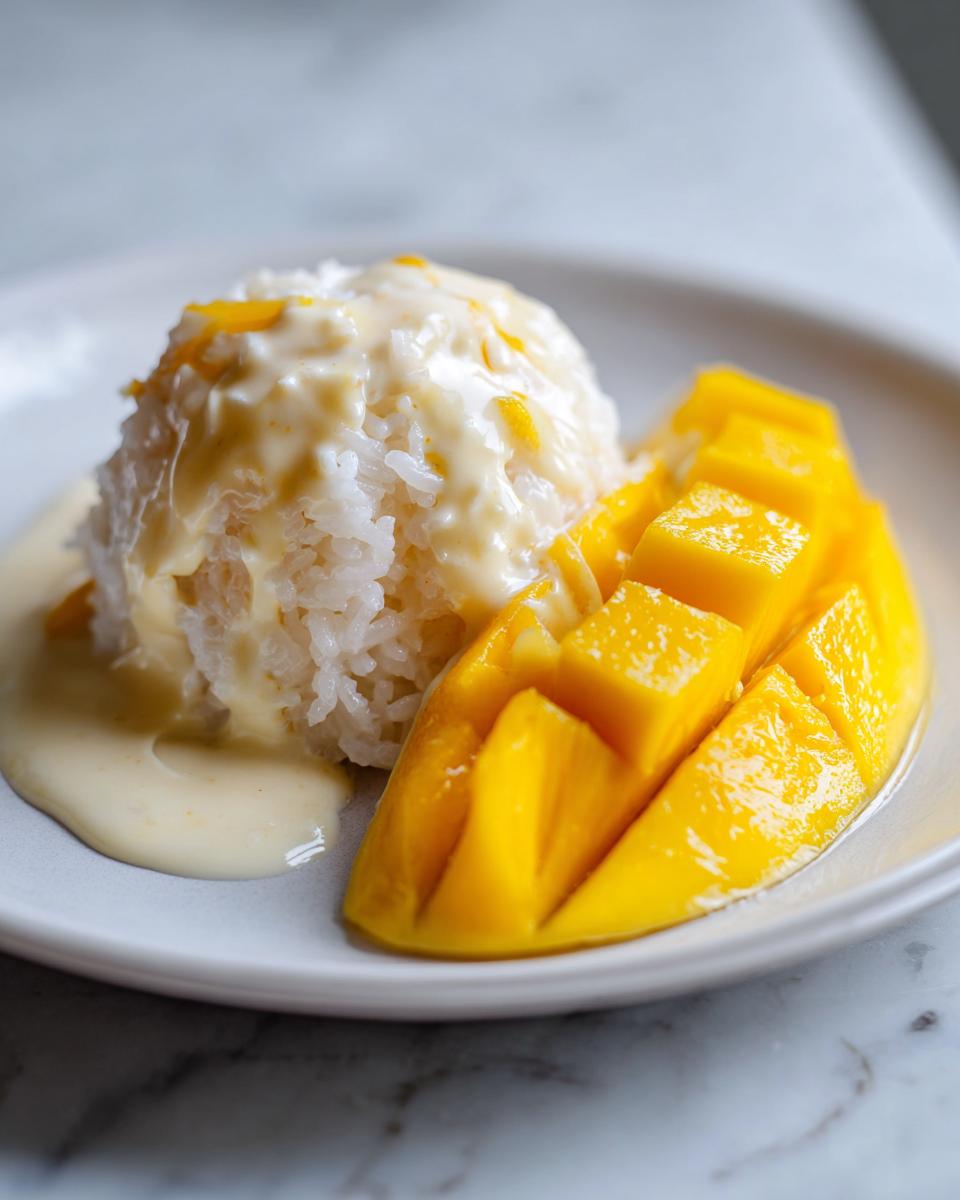
Seriously, this dish is what dreams are made of, and it’s guaranteed to impress guests dessert night. A tiny sprinkle of those toasted sesame seeds adds a fantastic little crunch, but honestly, even plain, this Thai dessert sings! If you’re ever looking for another easy appetizer you can whip up fast, check out my whipped ricotta dip. But first, enjoy this! If you want more inspiration on plating, check out how others style this dish online here.
Storage and Reheating for Your Creamy Coconut Sticky Rice
Now, let’s be real—this dessert is so good you often won’t have leftovers! But if you are lucky enough to have some creamy coconut sticky rice left over, we need to treat it right so it doesn’t turn into a sad, hard lump. It’s best eaten the day you make it, naturally, but if you do need to save it, keep it stored in an airtight container in the fridge. You can usually keep it good for about two days.
The tricky part is reheating. Please, please do not jump straight to the microwave and blast it for 30 seconds. That heat gets uneven and can make the starches seize up, turning your rice tough. I’d much rather you gently steam it for just a few minutes to bring the moisture back. If you absolutely must use the microwave, put just a tiny splash of water or extra coconut milk—maybe a teaspoon—over the portion you are reheating. Cover it with a damp paper towel and heat it in very short bursts, like 10 seconds at a time, stirring well in between each burst. You want it warm and soft, not piping hot and dry!
If you’re saving the extra coconut sauce separately, that’s even easier! Keep the sauce in a small jar and just warm it slightly on the stovetop before you drizzle it over the warmed rice. That little bit of extra warmth makes it feel brand new again. For more tips on saving baked goods (though this is different!), you can check out my thoughts on keeping my chocolate crinkle cookies fudgy over here.
Troubleshooting Common Issues with Mango Sticky Rice
Even with the best guidance, sometimes things happen in the kitchen, right? Don’t panic if your mango sticky rice isn’t looking exactly like the picture in your mind. When I’m testing recipes, things rarely go perfectly on the first try, and that’s how we learn the fixes! The beauty of knowing the science behind this is that we can recover almost any situation. If you’ve ever struggled with creamy homemade recipes, I have some great tips on making emulsions work!
Here are the two main hiccups I see people run into, and how you can save your dessert disaster:
My Rice is Hard or Won’t Soak Up the Sauce!
This almost always means one of two things: you didn’t soak it long enough, or you didn’t use true glutinous rice. If you’re past the soaking stage and the rice is just too firm, don’t toss it! We can try to rescue it by encouraging more steam absorption.
Here is my expert fix: take that hard rice and pour just a little bit of hot liquid over it—I mean a splash, maybe two tablespoons total. You can use hot water, or if you want extra richness, use some leftover coconut sauce mixed with a little water. Stir it gently, cover the bowl tightly with plastic wrap or a lid, and let it sit in a warm spot for another 20 minutes. If that doesn’t work, put the whole covered bowl into your steamer basket for maybe 5 to 8 minutes. That extra gentle heat and steam usually coaxes those grains into submission.
My Coconut Sauce Is Too Thin or Watery
If your sauce won’t cling nicely to the rice, it’s usually because the coconut milk you used wasn’t quite full-fat enough, or maybe you added a little too much milk when you tried to thin it out later.
To fix a thin sauce, remember we said specifically not to boil it? If it’s too thin, you need to gently reheat it on the lowest stove setting. You aren’t trying to scramble anything; you’re just trying to evaporate a bit of the liquid. Stir constantly while heating gently. If you notice it is still separating after heating, take it off the heat immediately and whisk it vigorously in a separate bowl. Often, just the aggressive whisking action will bring the fats and liquid back together into a cohesive, luscious coconut sauce.
If the sauce is just slightly thin but not separated, don’t stress about it! Sometimes, that runnier sauce just soaks deeper into the rice, which isn’t a bad thing at all, especially if you served it warm. Just make a mental note for next time to use that thickest part of the can!

Dietary Information for This Vegan Dessert Recipe
One of the things I absolutely love about this incredible sweet tropical dessert is how naturally compliant it is! When I developed this recipe, I was very focused on making sure the core components just worked without needing complicated swaps, which is great for everyone, whether you’re hosting guests with different needs or you’re just eating clean at home. This recipe is a shining example of how delicious food can be when you stick to whole ingredients.
I’m happy to confirm that this mango sticky rice is completely vegan dessert recipe friendly! Why? Because we are relying entirely on coconut milk for that creamy texture—there isn’t a drop of dairy anywhere in sight! No butter, no cream, nothing animal-derived. It keeps that luscious coconut sauce rich and decadent purely from the coconut itself.
And for my friends who need to dodge gluten? Great news! This is also a wonderful gluten free sweet treat. Since the entire base of the dessert is rice—glutinous rice, specifically—we aren’t touching any wheat flour or grains that contain gluten during the cooking process. It’s wonderful to serve something that feels truly indulgent without any worry!
It’s fantastic that this tropical fruit recipe crosses over so easily into dietary specialties. If you’re interested in exploring other desserts that are amazing while being low-carb or gluten-free, I have a cheesecake recipe you might enjoy checking out here sometime. But honestly, this sticky rice needs no modification to be perfect!
If you want to see how other cooks approach this naturally plant-based dessert, it’s always interesting to see alternatives online; others have great success, too—you can peek at some other methods here.
Frequently Asked Questions About Khao Niao Mamuang
It’s totally normal to have questions when you’re trying a new authentic Thai dessert recipe for the first time, especially one that relies on a specific ingredient like glutinous rice. I’ve gathered the most common things I hear when people are trying to figure out exactly how to make mango sticky rice perfectly. Don’t worry, these aren’t tricky questions, they are just essential tips for success!
If you’re whipping up dinner soon and need something simple alongside your sweets, I’ve got some ideas for quick dinners you can check out.
Can I use regular white rice instead of glutinous rice for this recipe?
Oh, honey, absolutely not if you want this to be mango sticky rice! This is the one area where you cannot substitute. Regular rice—like jasmine or long-grain—is designed to absorb water and stay separate and fluffy. Glutinous rice (or sweet rice) has that high starch content that makes it gluey and sticky when cooked. If you swap them out, you will end up with regular rice swimming in coconut milk, and it just won’t have that satisfying, chewy texture that defines this amazing tropical treat. Stick to the sweet rice for your how to make mango sticky rice experience to succeed!
What is the best way to make the sticky rice without a steamer?
I get asked this all the time! Honestly, if you don’t have a proper bamboo steamer basket, the rice cooker is your absolute best friend here. It’s the quickest way to get that fluffy, cooked texture. The key when using a rice cooker for your rice cooker sticky rice method is remembering that you’ve already soaked the rice, so it needs less liquid than usual.
Normally for regular rice, you might use a 1:2 rice-to-water ratio. For this pre-soaked glutinous rice, I recommend using closer to a 1:1 ratio, or maybe just slightly less water than the amount of rice you have, otherwise, it can get a little soupy. The beauty of the rice cooker is it handles the heat cycling for you beautifully well. Just toss in the drained, soaked rice with the appropriate amount of plain water and let it run its course!
How sweet should the coconut milk dessert sauce be?
This is purely a matter of taste, and frankly, it depends on how sweet your mangoes are! If you get those fantastic, deep-orange, incredibly sweet Ataulfo mangoes, you might want to dial back the sugar in the sauce just a tiny bit. If your mangoes are fantastic but still a little tart, you can leave the sugar as called for.
My rule is to always taste the sauce before you pour it over the rice. Remember, you’re adding this sugary, salty liquid to the rice, which will absorb all of it. So, when you taste the sauce on your spoon, it should actually taste slightly *too* sweet and a little strong on the salt. Why? Because once it hits the bland sticky rice, that intensity will mellow out perfectly. If it tastes perfect on the spoon, it will taste bland on the final dessert!
Share Your Homemade Mango Sticky Rice Experience
Well, that’s it! You’ve made it through the whole process, from soaking the rice to lovingly placing those mango slices next to your beautiful, creamy coconut sticky rice. Doesn’t that smell amazing? I really hope you take a moment to just enjoy that sweet, tropical aroma.
Now, this is where you become part of the Cooking by Jade family! I live for hearing about your successes in the kitchen. Did this easy Asian dessert come out perfectly for you? Did you manage to get that sauce silky smooth, or did you try the rice cooker trick? Please, please leave a comment below and tell me how it went!
If this recipe brightened your day and became a new favorite, could you do me a huge favor and give it a solid 5-star rating? It really helps other home cooks find reliable recipes like this one. Your feedback is how I know I’m hitting the mark, ensuring every recipe I share is truly worth your time and effort.
I can’t wait to see your creations! If you want to send me a note directly or have specific questions after you’ve tried out this Thai dessert, you can always reach out to me through my contact page. And hey, if you want to see how others have styled their wonderful plates of mango sticky rice, you can peek at some beautiful examples right here!
PrintEasy & Creamy Mango Sticky Rice (Authentic Thai Dessert)
Make authentic, creamy Mango Sticky Rice at home. This recipe uses simple steps for perfectly cooked sticky rice and a luscious coconut sauce, creating a satisfying tropical dessert.
- Prep Time: 15 min
- Cook Time: 30 min
- Total Time: 45 min
- Yield: 2 servings 1x
- Category: Dessert
- Method: Steaming
- Cuisine: Thai
- Diet: Vegan
Ingredients
- 1 cup glutinous sweet rice (sticky rice)
- 1 cup water for soaking
- 1 cup full-fat coconut milk (for soaking rice)
- 1/2 cup full-fat coconut milk (for sauce)
- 1/4 cup granulated sugar
- 1/2 teaspoon salt
- 1 ripe mango, sliced
- 1 tablespoon toasted sesame seeds for garnish (optional)
Instructions
- Rinse the sticky rice several times until the water runs clear. Soak the rice in 1 cup of water for at least 4 hours, or preferably overnight.
- Drain the soaked rice completely. Steam the rice for 20 to 25 minutes until it is tender and cooked through. Alternatively, you can cook the rice in a rice cooker with 1/2 cup of water until done.
- While the rice cooks, prepare the coconut sauce. In a small saucepan, combine the 1/2 cup coconut milk, sugar, and salt. Heat over medium-low heat, stirring until the sugar and salt dissolve completely. Do not boil.
- Once the rice is cooked, transfer it to a bowl. Pour the warm coconut sauce over the hot sticky rice. Stir gently to combine. Cover the bowl and let the rice rest for 15 minutes to absorb the sauce.
- Serve the creamy coconut sticky rice warm or at room temperature alongside slices of fresh, ripe mango. Drizzle any remaining sauce over the top and sprinkle with toasted sesame seeds if you use them.
Notes
- For the best texture, use true glutinous rice (also called sweet rice), not regular short-grain rice.
- If you do not have a steamer, you can cook the rice in a rice cooker using less water than usual for regular rice.
- Adjust the sugar in the sauce to match the sweetness of your mangoes.
Nutrition
- Serving Size: 1 serving
- Calories: 450
- Sugar: 25
- Sodium: 250
- Fat: 18
- Saturated Fat: 16
- Unsaturated Fat: 2
- Trans Fat: 0
- Carbohydrates: 68
- Fiber: 3
- Protein: 5
- Cholesterol: 0