
Oh, I totally get it. You’re scrolling through your phone after a tough workout, feeling virtuous, but your brain is screaming for something rich, decadent, and totally indulgent. That’s exactly where I was when I first developed this recipe! I needed that classic, velvety cheesecake experience, but I just couldn’t justify the sugar and the fat bomb that usually comes with it. So, I went into the test kitchen, relying on everything I learned about nutrition and reliable baking techniques. What emerged is this amazing, creamy baked Protein Cheesecake that tastes incredible while absolutely supporting your fitness journey. Trust me, this is the Protein Cheesecake you’ve been waiting for—it’s foolproof, high in protein, and just pure comfort! If you want to know more about my philosophy coming from nutrition school and the test kitchen, you can check out my About Page!
- Why This Baked Protein Cheesecake is Your New Favorite Healthy Cheesecake Recipe
- Essential Ingredients for Your Low Calorie Cheesecake
- Step-by-Step Instructions for the Perfect Protein Cheesecake
- Tips for Success Making a Macro Friendly Dessert
- Variations: Beyond the Classic Protein Cheesecake
- Storage & Reheating Instructions for Your Protein Cheesecake
- Frequently Asked Questions About High Protein Dessert
- Estimated Nutritional Data for This Protein Cheesecake Slice
- Share Your Creamy Protein Dessert Experience
Why This Baked Protein Cheesecake is Your New Favorite Healthy Cheesecake Recipe
When you’re serious about macros but serious about treating yourself, you need structure, right? That’s why I stick to this specific baked method. It’s an absolute game-changer for anyone looking for a Low Calorie Cheesecake that doesn’t taste like a compromise. We use simple ingredients to hit those big numbers without sacrificing happiness!
- It delivers a fantastic, guilt-free slice of High Protein Dessert goodness.
- It keeps sugar super low—we’re talking a naturally sweet treat here.
- Absolutely free from gluten, making it accessible for everyone.
- It is the ultimate Macro Friendly Dessert for meal prepping!
If you’re into planning healthy meals ahead of time, check out my ideas for Healthy Lunch Ideas; this cheesecake fits right into that lifestyle!
Achieving That Creamy Protein Dessert Texture
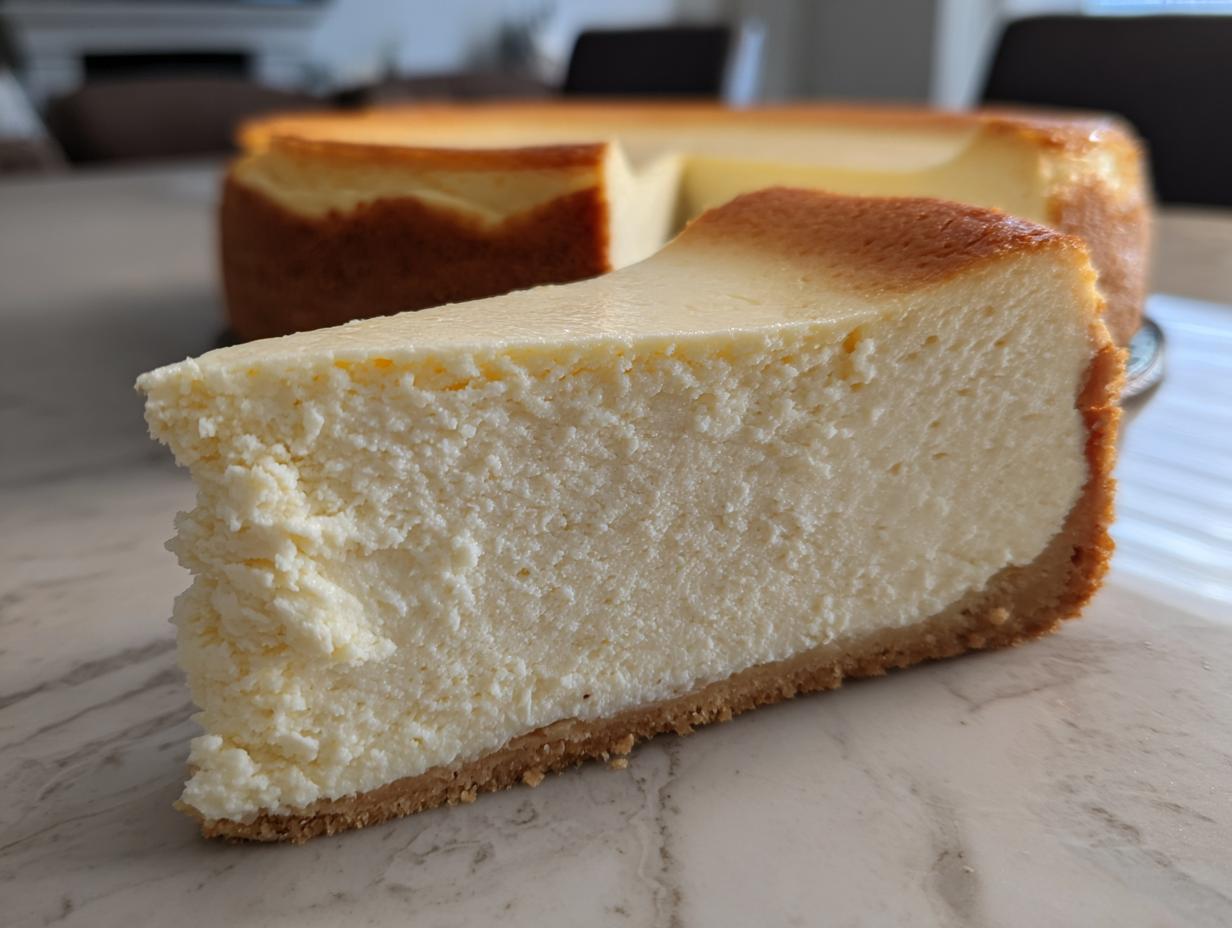
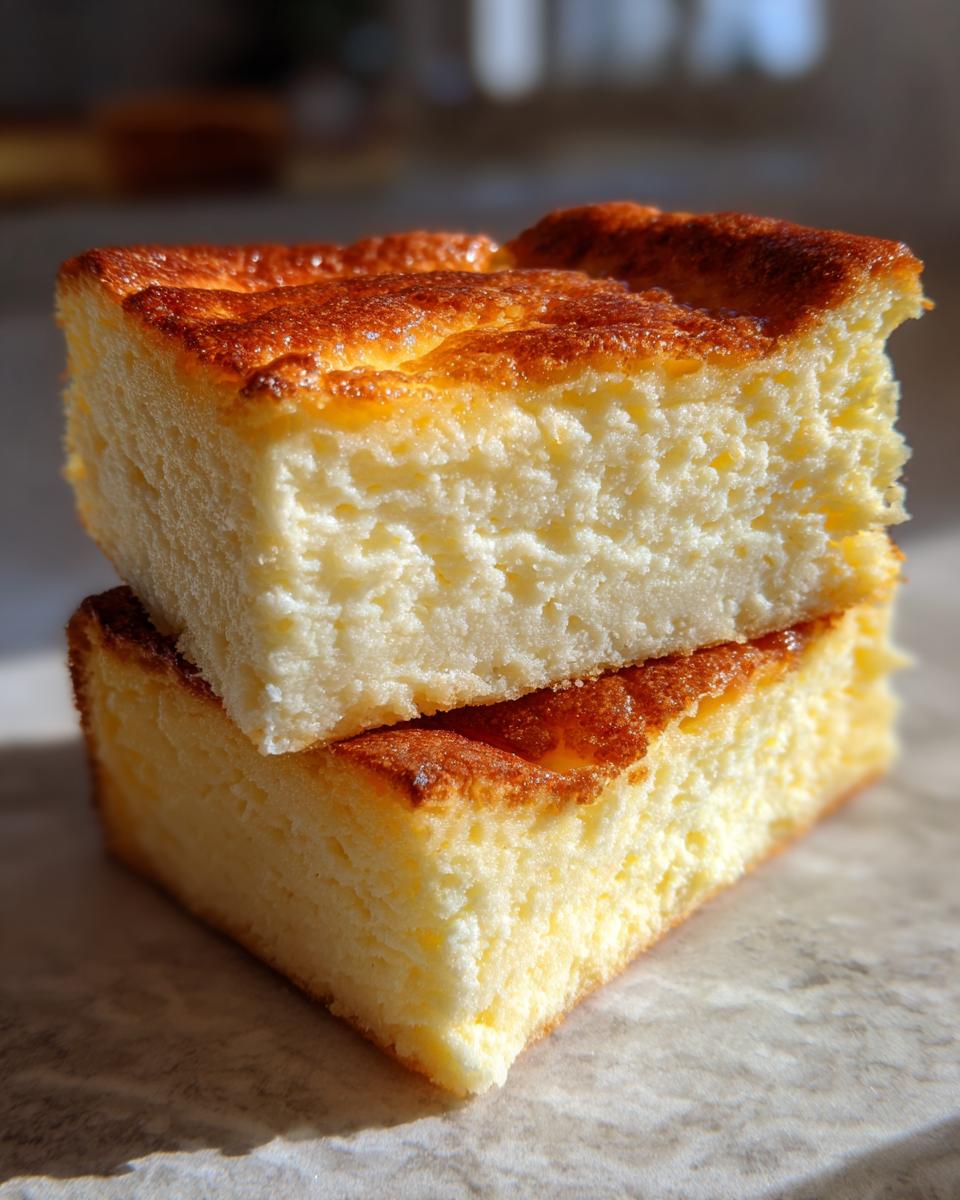
You have to bake this one, folks. Seriously. While no-bake versions are fast, they often turn out thick and slightly gummy. Baking this Protein Cheesecake allows the ingredients to meld perfectly. The blend of cottage cheese and cream cheese sets up beautifully, giving you that incredibly smooth, melt-in-your-mouth experience. It’s the dreamy texture you deserve in a Creamy Protein Dessert.
Macro Profile: High Protein Cheesecake Nutrition Facts
This is where the magic really happens for fitness folks. Each slice packs a serious punch—we’re looking at around 18 grams of protein! And because we skipped the refined sugar, the carbs are low, making it perfect for hitting your daily targets. This Gluten Free Cheesecake truly proves that eating clean doesn’t mean saying no to dessert.
Essential Ingredients for Your Low Calorie Cheesecake
Okay, grabbing the right components is half the battle when you are aiming for a Low Calorie Cheesecake that still tastes like a dream. I’m meticulous about measuring here because we are balancing protein, fat, and sweetness perfectly. Don’t try to eyeball the dry stuff! I find that using almond flour for the base gives us that crunch we want without the gluten or the heavy carbs. If you love baking with almond flour, you should see my Almond Flour Pancake recipe—it’s fantastic!
For the filling, the secret to keeping this a genuine High Protein Dessert is doubling up on protein sources. We use protein powder, of course, but that creamy texture comes from incorporating low-fat cottage cheese or Greek yogurt alongside the cream cheese. It seriously works wonders!
Crust Components for this Protein Cheesecake
- 1 cup almond flour
- 2 tablespoons erythritol or preferred sweetener
- 4 tablespoons melted coconut oil
Filling Ingredients for the Creamy Protein Dessert
- 16 ounces cream cheese, softened
- 1 cup low-fat cottage cheese or Greek yogurt (Your choice for your Protein Cheesecake!)
- 1 scoop vanilla protein powder (about 30g)
- 1/2 cup erythritol or preferred sweetener
- 2 large eggs
- 1 teaspoon vanilla extract
- Pinch of salt
Step-by-Step Instructions for the Perfect Protein Cheesecake
Okay, now that we have all our beautiful ingredients ready, it’s time to assemble this masterpiece. Don’t rush these steps! The process is straightforward, but paying attention to temperature and mixing stages is how you guarantee that perfect, unbelievably creamy texture for your Protein Cheesecake. Think of this as a quiet, mindful process—a little bit of science, a lot of dedication!
Preparing the Gluten Free Crust and Preheating
First things first, we need to get that oven warm! Go ahead and preheat it to 325°F (160°C). While that’s heating up, you want to prepare your 7-inch springform pan. I like to grease mine lightly and then always line the bottom with parchment paper. It gives you insurance for easy release later. For the crust, just mix your almond flour and the smaller amount of sweetener with the melted coconut oil until everything looks nicely combined. Press that mixture firmly into the bottom of your prepared pan. Then, pop that crust into the preheated oven for just 8 minutes. Once it’s done, pull it out so it can cool down a bit before we add the filling.
Mixing the High Protein Cheesecake Filling
This is where we build the body of our High Protein Dessert. Grab your largest bowl! Start by beating that softened cream cheese until it’s super smooth—no lumps allowed, please! Next, we introduce the cottage cheese (or Greek yogurt if you prefer!), the vanilla protein powder, the rest of the sweetener, vanilla, and a tiny pinch of salt. Beat all that until it’s totally uniform. Now listen closely—this is Jade’s crucial tip for success! When adding eggs to your Protein Cheesecake batter, mix only until they disappear. Overmixing after this point incorporates too much air, which can cause cracks during baking. If you want more tips on careful mixing, I talk about it a bit when I explain my Easy Egg Bites recipe!
Baking and Slow Cooling for the Best Protein Cheesecake
Once your filling is perfectly mixed, pour it right over that slightly cooled, pre-baked crust. Smooth the top gently. Now, bake it for about 40 to 50 minutes. You’ll know it’s nearly done when the edges look set, but if you gently nudge the pan side-to-side, the very center should still have a little jiggle—that’s the secret to avoiding a dry dessert! The most important step for texture comes next: turn the oven off, crack the door open just a bit, and let your Protein Cheesecake cool inside the oven for a full hour. This slow cooling process keeps it from slamming down and cracking, ensuring a gorgeous top. After that hour, take it out, let it finish cooling on the rack, and then chill, chill, chill. You need at least four hours, but honestly, overnight is best!
Tips for Success Making a Macro Friendly Dessert
Creating a Macro Friendly Dessert that actually turns out right every time is all about knowing a few simple tricks up front. Once you master the temperature and storage game with this wonderful Protein Cheesecake, you won’t even think twice about making it again. It becomes totally automatic, which is exactly what we want when we’re busy!
Ingredient Temperature Matters for Creamy Protein Cheesecake
I cannot stress this enough: your cream cheese absolutely needs to be at room temperature! If it’s cold, you will end up whipping it forever trying to get rid of those annoying lumps. When the cream cheese is soft, it blends seamlessly with the cottage cheese and eggs, creating that beautiful, uniform batter you saw in the photos. Cold ingredients just don’t incorporate well, period.
Making This an Easy Protein Treat for Meal Prep Dessert
This is definitely an Easy Protein Treat to prep! After it chills overnight, slice the whole thing carefully. I usually use a hot, dry knife—wipe it clean between cuts—to get those sharp edges. Once sliced, wrap each individual piece tightly in plastic wrap and slide them into an airtight container. They hold up wonderfully in the fridge for about five days. That means grab-and-go dessert all week long! If you need some other ideas for quick cooking, definitely take a look at my easy weeknight dinners for inspiration!
Variations: Beyond the Classic Protein Cheesecake
You know I love this basic vanilla version—it’s the foundation! But once you master the technique for this creamy baked Protein Cheesecake, you can totally start playing around with flavors. Why stick to one lane when you can switch it up? This is where you start making this recipe truly yours. We can tweak the base flavor, or we can go wild with the topping, depending on what you’re craving that day. It’s simple customization, promise!
Even though we are deep into perfecting the baked method here—which gives you that unbeatable texture—I know some people still lean toward a No Bake Protein Cheesecake for speed. If you feel like trying that route another time, the base filling ratios will be different, but the flavor-swapping ideas I have below work for almost any creamy structure!
Flavor Swaps for Your Next Protein Cheesecake
Making a simple swap in the filling ingredients is so easy, and it drastically changes the final taste profile. Changing your protein powder is the fastest switch you can make! If you use a great quality chocolate protein powder instead of vanilla, you instantly have a rich, dark base perfect for a Healthy Cheesecake Recipe. Just remember that chocolate powder tends to absorb a bit more moisture, so keep an eye on the texture.
Another winner for me is adding brightness. When I’m making this for a spring gathering, I always grate about a teaspoon of fresh lemon zest right into the filling mixture along with the vanilla. That zest cuts through the richness perfectly and makes it taste so fresh, even if it’s stored for your next meal prep dessert!
If you are looking for something truly over-the-top decadent, you could even check out my recipe for German Chocolate Cheesecake sometime—though obviously, that one won’t be quite as macro-friendly!
Storage & Reheating Instructions for Your Protein Cheesecake
The best part about this Protein Cheesecake is that it gets even better after a good chill! You absolutely must let it refrigerate for a minimum of four hours, but I strongly recommend chilling it overnight. That time lets the structure fully set up and deepens all those creamy flavors. Stored tightly covered in the fridge, it stays wonderfully fresh for about five days—perfect for planning ahead!
When it comes to serving, honestly, this baked version is fantastic served straight from the cold. If you prefer it slightly softer, just let an individual slice sit on the counter for maybe 15 minutes before digging in. Trust me, you won’t need to reheat this if you’re already planning it as an easy grab-and-go dessert. If you’re making something else creamy later, my Pumpkin Bars with Cream Cheese Frosting also store beautifully!
Frequently Asked Questions About High Protein Dessert
I know you probably have a few lingering questions after diving into this recipe. That’s completely normal! When you’re trying to keep things light but still crave that classic cheesecake feel, details really matter. I’ve pulled together the most common things people ask about making a High Protein Dessert that actually tastes amazing! If you have even more questions, feel free to reach out on my Contact Page; I love hearing from you!
Can I make this Protein Cheesecake without baking?
This specific recipe is drafted entirely around baking because that’s how we guarantee that incredibly smooth, classic texture. Baking sets the structure perfectly and prevents that slightly gummy feel you sometimes get from no-bake versions. While you can certainly find great No Bake Protein Cheesecake recipes out there—usually relying more heavily on gelatin or just chilling time—this baked method gives you a true, sturdy slice for your meal prep dessert!
What is the best protein powder for this Healthy Cheesecake Recipe?
This is a fantastic question, and the answer depends a little on what you have on hand! For this baked Protein Cheesecake, a whey/casein blend tends to work beautifully because it offers good structure and mixes smoothly. If you use straight casein powder, sometimes it can thicken up a little too much. Pure whey isolates are great for flavor and mixability, so they are also a wonderful choice for creating this Healthy Cheesecake Recipe!
Estimated Nutritional Data for This Protein Cheesecake Slice
I always want you to know exactly what you’re putting into your body, especially when we are focused on hitting specific fitness goals with a High Protein Dessert like this cheesecake. Based on the ingredients listed above—using the low-fat cottage cheese and erythritol—here is the tracking breakdown for one serving. Remember, this is an estimate; your exact numbers will shift slightly depending on the brand of protein powder or sweetener you choose. Nutrition information is key when you’re making a delicious, Macro Friendly Dessert!
Keep in mind that this incredible Protein Cheesecake recipe yields 8 servings, so these numbers reflect one slice only:
- Calories: Around 220 per slice
- Protein: Approximately 18g (Wow!)
- Fat: About 15g
- Carbohydrates: Roughly 8g
- Sugar: Only 3g, which is just naturally occurring!
This data shows you exactly why this recipe is so fantastic for meal prep—you get a rich, indulgent flavor experience while keeping things incredibly lean. If you want to know more about how I handle data and privacy on the site, you can always check out my Privacy Policy.
Share Your Creamy Protein Dessert Experience
I genuinely want to know how this turned out for you! Did you manage to get that baked texture just right for your Creamy Protein Dessert? Seriously, take a minute, leave a rating down below—I live for those little star reviews! And tell me, what topping did you decide on? Did you add raspberries or maybe some sugar-free chocolate drizzle? I always love seeing how you customize these recipes. And hey, while you’re here checking out the fine print, make sure you read my Terms of Use. If you end up loving this, I saw a similar version over at the Diet Expert site that’s also worth checking out for inspiration: High-Protein Baked Cheesecake!
PrintHigh-Protein Baked Cheesecake (Low Calorie, Gluten-Free)

Make a creamy, indulgent baked cheesecake that supports your fitness goals. This recipe delivers rich flavor with high protein content and is low in calories and sugar, using gluten-free ingredients.
- Prep Time: 15 min
- Cook Time: 50 min
- Total Time: 65 min
- Yield: 8 servings 1x
- Category: Dessert
- Method: Baking
- Cuisine: American
- Diet: Gluten Free
Ingredients
- 1 cup almond flour
- 2 tablespoons erythritol or preferred sweetener
- 4 tablespoons melted coconut oil
- 16 ounces cream cheese, softened
- 1 cup low-fat cottage cheese or Greek yogurt
- 1 scoop vanilla protein powder (about 30g)
- 1/2 cup erythritol or preferred sweetener
- 2 large eggs
- 1 teaspoon vanilla extract
- Pinch of salt
Instructions
- Preheat your oven to 325°F (160°C). Lightly grease and line the bottom of a 7-inch springform pan with parchment paper.
- Prepare the crust: Mix the almond flour, 2 tablespoons of sweetener, and melted coconut oil until combined. Press this mixture firmly into the bottom of the prepared pan. Bake the crust for 8 minutes, then remove and let it cool slightly.
- Prepare the filling: In a large bowl, beat the softened cream cheese until smooth. Add the cottage cheese (or Greek yogurt), protein powder, 1/2 cup sweetener, vanilla extract, and salt. Beat until the mixture is completely smooth and no lumps remain.
- Beat in the eggs one at a time, mixing only until just combined after each addition. Do not overmix the batter once the eggs are added.
- Pour the filling over the cooled crust in the springform pan.
- Bake for 40 to 50 minutes. The edges should look set, but the center should still have a slight jiggle.
- Turn off the oven, crack the door open slightly, and let the cheesecake cool inside the oven for 1 hour. This slow cooling prevents cracking.
- Remove the cheesecake from the oven and let it cool completely on a wire rack. Cover and chill in the refrigerator for at least 4 hours, or preferably overnight, before slicing and serving.
Notes
- For a truly creamy texture, ensure your cream cheese and cottage cheese are fully softened to room temperature before mixing.
- If you want a low-carb dessert that tastes decadent, this baked version provides the best texture.
- This recipe is excellent for meal prep; slice it and store individual portions in airtight containers.
Nutrition
- Serving Size: 1 slice
- Calories: 220
- Sugar: 3
- Sodium: 250
- Fat: 15
- Saturated Fat: 8
- Unsaturated Fat: 7
- Trans Fat: 0
- Carbohydrates: 8
- Fiber: 2
- Protein: 18
- Cholesterol: 65