
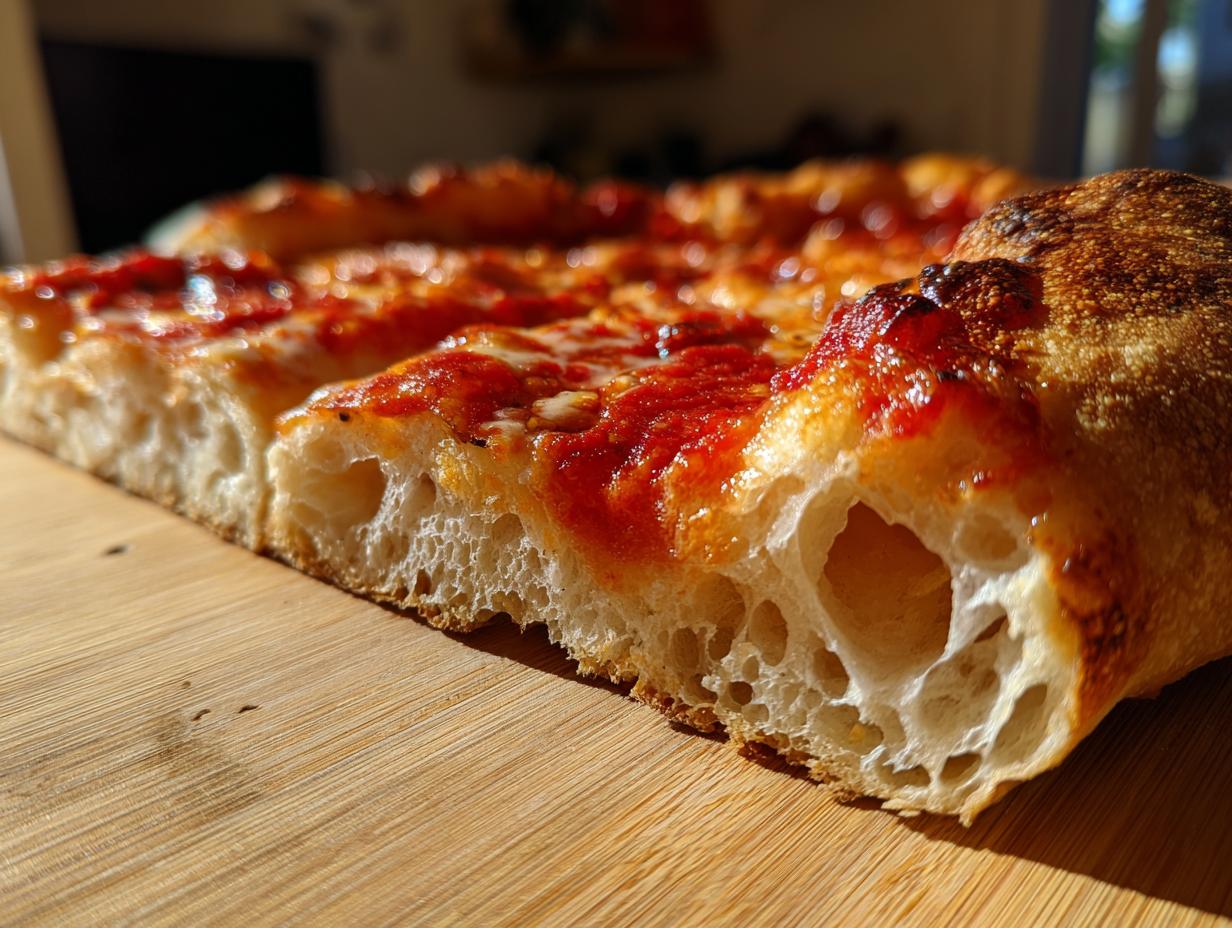
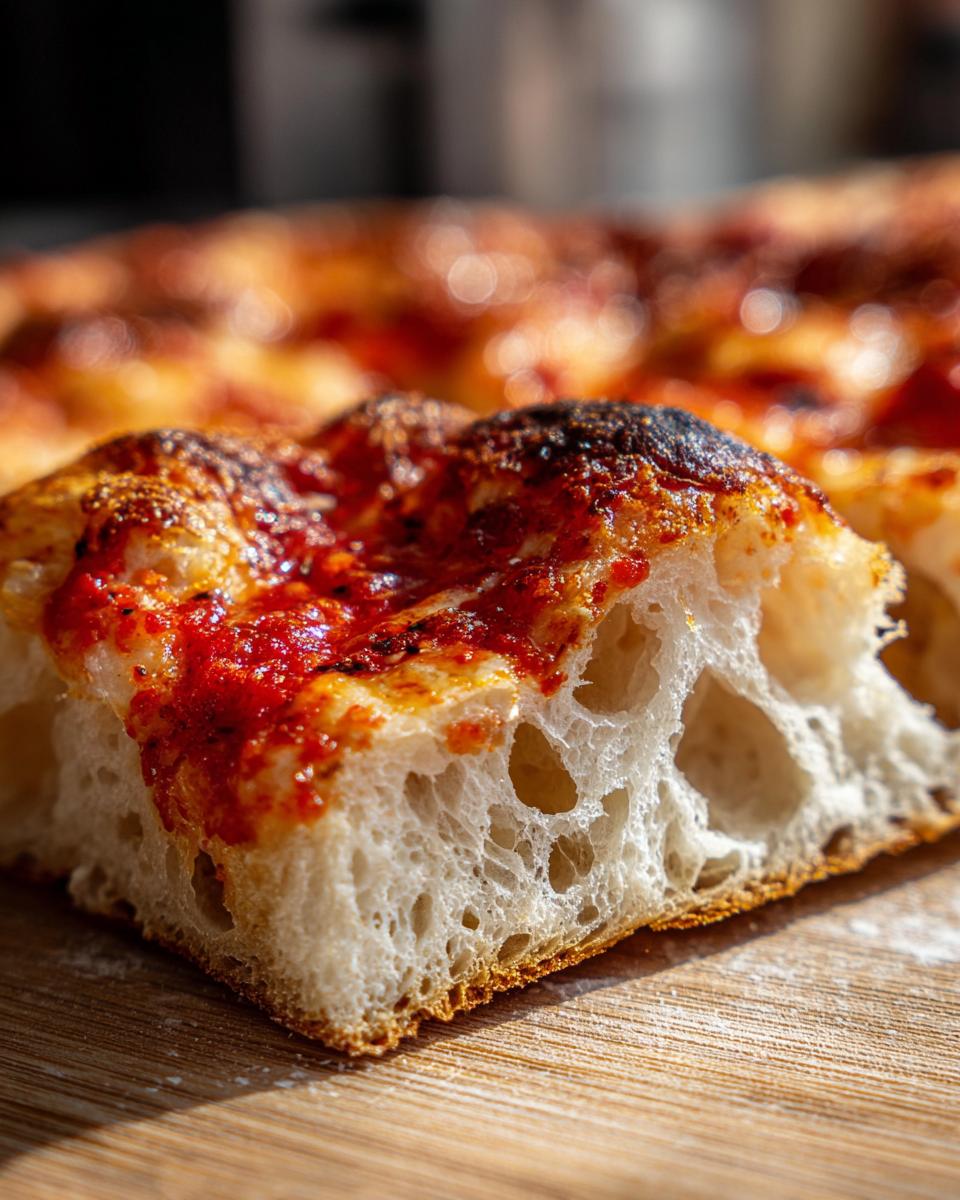
There’s just something soul-satisfying about pulling a real, substantial pizza out of your own oven, right? I’m not talking about those flimsy, cracker-thin crusts that collapse under one slice of pepperoni. I’m talking about a base that actually stands up to all your favorite gooey cheese and heavy toppings. Trust me, as someone who cut her teeth in professional test kitchens, I know what makes a dough reliable. This simple recipe is my promise to you: it delivers rock-solid, sturdy, **thick-crust pizza dough** every single time. We are aiming for that perfect contrast: a fluffy interior that’s wonderfully chewy, hugged by a wonderfully crisp bottom crust. If you’re looking for something even quicker sometime, you can check out my recipe for easiest pizza bagels, but for the real deal, stick with this one. Get ready for your new favorite homemade thick crust!
- Why This is the Best Thick-Crust Pizza Dough Recipe
- Gathering Ingredients for Your Thick-Crust Pizza Dough
- Step-by-Step Fluffy Pizza Dough Instructions for Thick Dough Recipe
- Achieving the Perfect Crispy Bottom Crust Technique
- Tips for Success with Homemade Thick Crust Dough
- Storage and Reheating Instructions for Leftover Thick-Crust Pizza Dough
- Troubleshooting Common Issues with Fluffy Pizza Dough Instructions
- Estimated Nutritional Data for This Thick Dough Recipe
- Share Your Best Thick Crust Recipe Creations
Why This is the Best Thick-Crust Pizza Dough Recipe
When you go thick, you have to do it right! This isn’t just about making a thicker version of a thin-crust recipe; it needs proper structure. My goal, born from years of testing, was reliability. You’ll love this recipe because it guarantees:
- Serious structural integrity—this base handles mountains of meat and veggies without breaking.
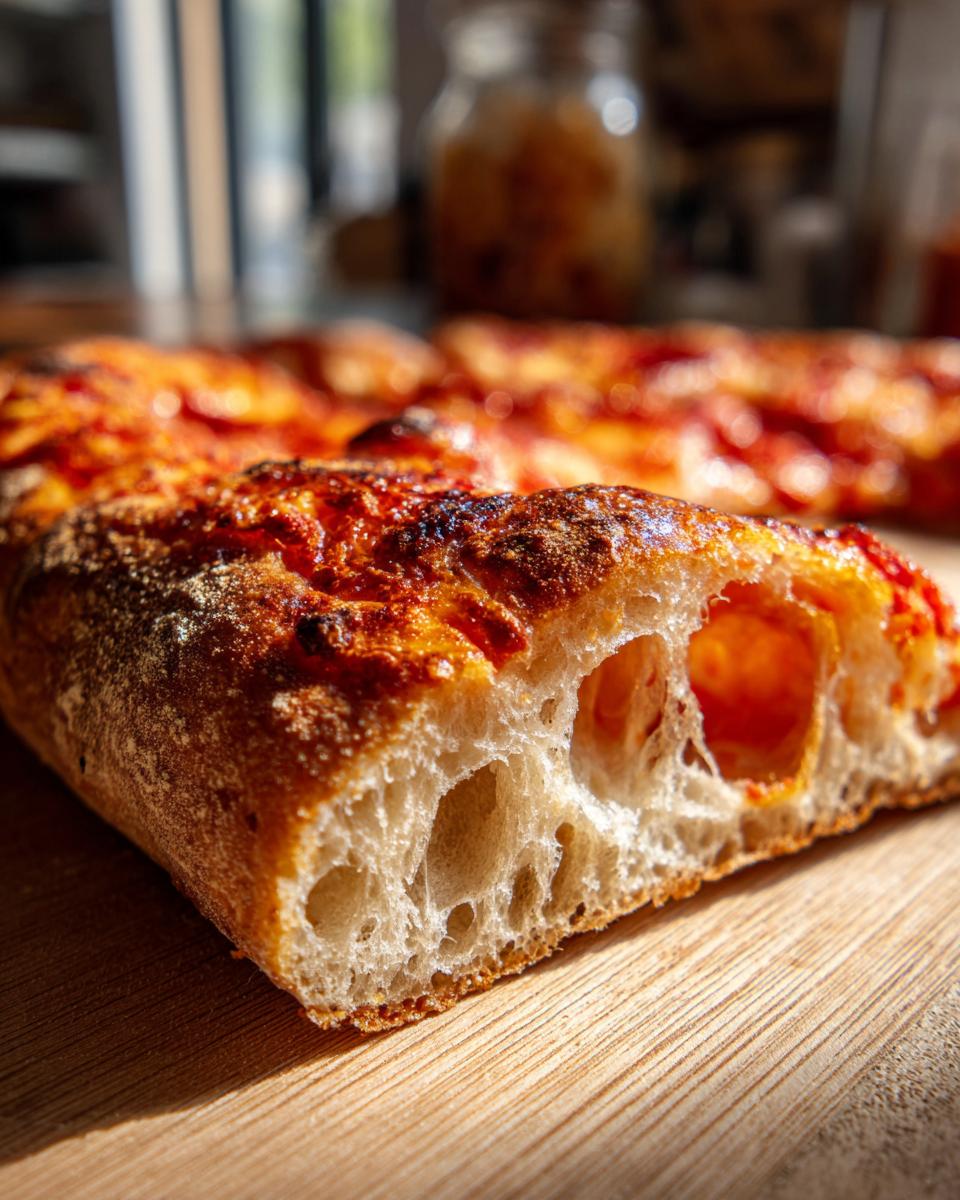
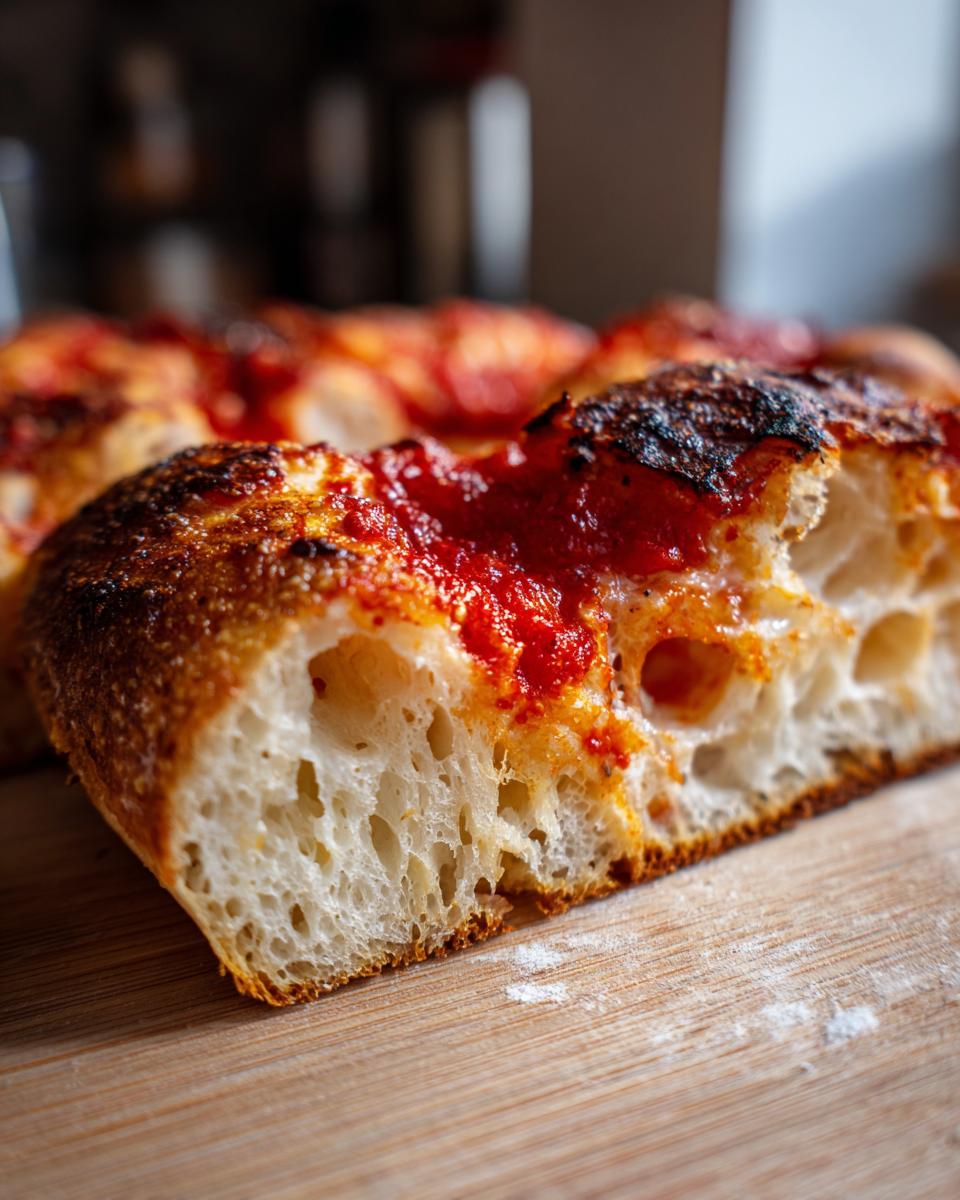
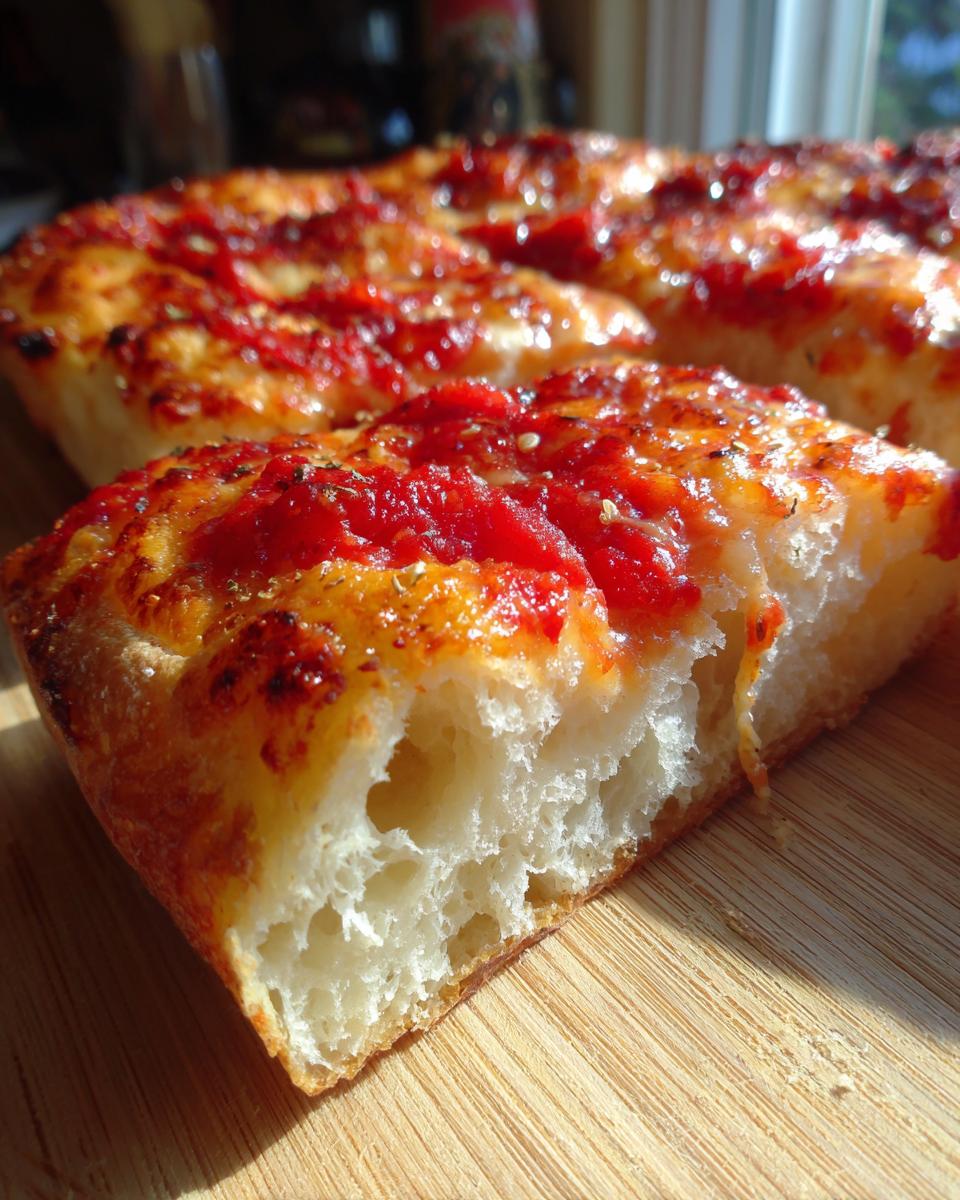
- That perfect internal architecture; it’s wonderfully airy and chewy inside, not dense like a brick.
- The required fluffy pizza dough instructions that give you that satisfying rise.
- A foolproof **crispy bottom crust technique** that keeps things light, not soggy.
It’s the foundation that transforms a good pizza into a great, satisfying meal.
Gathering Ingredients for Your Thick-Crust Pizza Dough
Okay, gathering what you need is half the battle, and honestly, it’s all pantry staples! Make sure you’ve got three cups of all-purpose flour and exactly one cup of warm water—and I mean warm, aim for 105 to 115°F so you don’t burn the yeast. You need 2 and 1/4 teaspoons of that active dry yeast and a teaspoon each of salt and sugar. Don’t forget the two tablespoons of olive oil, and put a little extra oil near your mixing bowl for later. That’s it! Simple stuff makes for the best homemade thick crust.
Step-by-Step Fluffy Pizza Dough Instructions for Thick Dough Recipe
Activating Yeast and Mixing the Thick Italian Pizza Dough
First things first, we need happy yeast! In a big bowl, whisk together your warm water, sugar, and yeast. Don’t rush this part; let it sit for a solid five to ten minutes until it looks foamy and frothy on top. If it doesn’t foam, ditch it and start over—your yeast is dead, and we won’t get that rise we need!
While that’s bubbling away, grab a separate bowl and quickly whisk your flour and salt together. Once your yeast is foamy, pour in that olive oil. Now, start adding your flour mixture slowly. I like to mix it with a wooden spoon until it just comes together into a shaggy mess. That’s okay! It looks rough now, but trust the process.
Kneading for a Chewy Pizza Base and First Rise
Time to get your hands dirty! Dump that shaggy dough onto a lightly floured surface. This step is non-negotiable for a proper chew, so don’t cheat yourself here. You need to knead this, really get in there, for a full eight to ten minutes until it feels super smooth and elastic. If you skip this, you won’t develop the necessary gluten structure to support a great **deep dish pizza recipe**.
Once it feels good, grab a clean bowl and coat the inside liberally with olive oil. Tuck your dough ball inside and turn it over so it’s coated all around. Cover it tightly with plastic wrap—I like to use plastic wrap for the first rise because it traps moisture best. Let it sit in a warm spot for one to one-and-a-half hours. That long rest is key. It’s what gives your **chewy pizza base** all that lovely airiness later on.
Shaping and Proofing Your Pan Pizza Dough
When it’s doubled, gently punch the dough down—sorry, little dough, time’s up! Now, turn it out and gently stretch or roll it until it’s about half an inch thick. This is what gives you that substantial feel. Transfer it right onto your oiled baking sheet or pan. You want to use a bigger pan size here, maybe 12 inches round, to keep that thickness!
Before you start loading up the sauce, cover it loosely again and let it rest for just another 20 to 30 minutes. This final little nap lets the air pockets settle back in before the heat hits them. For more dough adventures, check out my thoughts on using sourdough discard in dough recipes!
Achieving the Perfect Crispy Bottom Crust Technique
Look, a thick crust can sometimes mean a sad, soggy bottom, and we absolutely cannot have that! This is where the pan prep is everything. After you transfer your shaped dough to the oiled pan, I highly recommend brushing the bottom lightly again with a tiny bit more olive oil. That oil acts like a shield, frying the dough ever so slightly as it bakes, guaranteeing you a fantastic crispness.
If you’re feeling extra about it, sprinkle some fine cornmeal right onto the oiled surface before the dough goes in. That gives it that little bit of grit and crunch that you find in great commercial places. And hey, for an ultra-sturdy base, don’t be afraid to par-bake! Pop that bare dough onto a sheet for about 5 minutes before you add your toppings. It’s the secret weapon for heavy layers. You might also love this trick when making my Yorkshire pudding; crisp edges matter there too!
Tips for Success with Homemade Thick Crust Dough
When you’re making any kind of **thick dough recipe**, the temperature of your water is your biggest friend or your worst enemy! If that water is too hot—say, over 120°F—it will just shock and kill your yeast, and then you’ll be staring at a flat disc instead of a lovely, rising **homemade thick crust**.
This recipe is absolutely perfect if you’re specifically craving a true **deep dish pizza recipe**, since the structure holds up so well under lots of sauce. If your dough feels a little sticky when you first turn it out to knead, don’t panic and don’t add too much flour!
My tip from the test kitchen is simple: just let your hands do the work. If it’s sticking, turn the dough over frequently while kneading; your hands will warm it up just enough to become workable. A little bit of oil on your palms goes a long way. It helps you get that beautiful elasticity without adding excess flour that leads to toughness. We want soft and airy, remember? We talk about great weeknight solutions all the time over at my weeknight dinner ideas page, but pizza night deserves this attention!
Storage and Reheating Instructions for Leftover Thick-Crust Pizza Dough
If you’re anything like me, you probably made a double batch because the ingredients seem so easy! For any leftover **thick-crust pizza dough**, you have two options. For short-term storage, place the kneaded ball in an oiled, sealed container and keep it in the fridge for up to three days. For longer storage, wrap it tightly in plastic wrap and then foil before freezing it for up to three months.
When you want to use refrigerated dough, just let it sit on the counter for an hour or so to warm up a bit before stretching. If you’re reheating leftover baked pizza, skipping the microwave is vital for keeping that excellent **chewy pizza base**! Use an oven or air fryer to bring the crisp back.
Troubleshooting Common Issues with Fluffy Pizza Dough Instructions
Even with perfect recipes, dough can sometimes be fussy! Because I’ve spent so much time in the test kitchen, I can usually spot the problem right away. The most common issue I see when people try this **thick-crust pizza dough** is that it just won’t rise properly. If your dough is flat after the first hour, I can almost guarantee it was your water temperature. If it was too hot, it killed the yeast, and you won’t get the volume we need for a **fluffy pizza dough**. Next time, use a thermometer—115°F is the sweet spot!
Another frequent helper plea is about dough that feels impossible to handle—super sticky and just clinging to everything. Don’t panic and reach for a ton of extra flour! Adding too much flour is the quickest way to make this **chewy pizza base** turn hard and tough. If it’s just a little sticky when you turn it out for kneading, gently flour your hands and the counter, but mostly let the kneading process itself work the stickiness out. Remember, this **thick dough recipe** needs a good 8 to 10 minutes of work to develop that airiness!
If your finished pizza crust turns out dense instead of airy, go back to your kneading time. Did you really hit that 8-minute mark? That kneading develops the structure needed to hold all those bubbles. And don’t forget that second, shorter proofing time once the dough is shaped! That final rest makes a huge difference in the final height. If you ever need a great sauce accompaniment, you absolutely must check out my recipe for easy creamy garlic aioli!
Estimated Nutritional Data for This Thick Dough Recipe
I always think it’s smart to know what’s in the food we make! Since this recipe yields one big crust that we typically cut into 8 slices, these numbers are based on that serving size. Remember, this is just the raw dough nutrition before you load up on the cheese and pepperoni, so keep that in mind when you’re planning your meal. As I learned in my nutrition studies, ingredients matter, and these staple items keep things fairly reasonable!
- Serving Size: 1/8th of dough
- Calories: Around 280 per slice
- Fat: About 5 grams
- Carbohydrates: 50 grams
- Protein: 9 grams
This dough is a solid, satisfying base for any meal. If you’re looking for ways to lighten up the toppings, you might want to check out my ideas for healthy lunch ideas!
Share Your Best Thick Crust Recipe Creations
Now that you’ve got the most reliable **thick-crust pizza dough** in your arsenal, I seriously want to see what you make! Did you manage to get that super airy-yet-chewy interior I talked about? Let me know how this **best thick crust recipe** worked for your **pan pizza dough** setup.
Please leave a quick rating right below this—it helps other folks trust this recipe just like you do now. And if you’ve got a photo of your amazing, sturdy creation holding up a mountain of toppings, tag me! I’m always so thrilled to see all the delicious meals you’re bringing to your own tables. If you want to learn more about how we test and perfect these classic recipes, you can head over to my About Page. Happy baking!
PrintReliable Thick-Crust Pizza Dough for a Fluffy, Sturdy Base

Follow these clear instructions to make a substantial, fluffy, and sturdy thick-crust pizza dough perfect for holding heavy toppings. This recipe focuses on achieving a chewy interior and a crisp bottom.
- Prep Time: 20 min
- Cook Time: 20 min
- Total Time: 140 min
- Yield: One 12-inch thick crust 1x
- Category: Main Course
- Method: Kneading and Rising
- Cuisine: American
- Diet: Vegetarian
Ingredients
- 3 cups all-purpose flour
- 1 cup warm water (about 105-115°F)
- 2 1/4 teaspoons active dry yeast
- 2 tablespoons olive oil, plus more for the bowl
- 1 teaspoon salt
- 1 teaspoon sugar
Instructions
- Activate the yeast: In a large bowl, combine the warm water, sugar, and yeast. Let this mixture sit for 5 to 10 minutes until it becomes foamy. This confirms the yeast is active.
- Mix the dry ingredients: In a separate bowl, whisk together the flour and salt.
- Combine: Add the olive oil to the yeast mixture. Gradually add the flour mixture to the wet ingredients, mixing first with a spoon and then with your hands until a shaggy dough forms.
- Knead for texture: Turn the dough out onto a lightly floured surface. Knead for 8 to 10 minutes until the dough is smooth and elastic. For a thick, chewy base, proper kneading is important.
- First rise (Bulk Fermentation): Lightly coat a large bowl with olive oil. Place the dough in the bowl, turning it once to coat. Cover the bowl tightly with plastic wrap or a clean kitchen towel. Let the dough rise in a warm place for 1 to 1.5 hours, or until it has doubled in size. This long rise helps develop the fluffy texture.
- Shape the dough: Gently punch down the risen dough. On a lightly floured surface, stretch or roll the dough into a circle or rectangle, about 1/2 inch thick, fitting your desired pan size (a 12-inch round or 10×14 inch rectangle works well for a deep dish pizza recipe).
- Prepare for baking: Transfer the dough to a lightly oiled pizza pan or baking sheet. If you prefer a crispy bottom crust technique, brush the bottom lightly with a small amount of olive oil before adding toppings.
- Second rise (Proofing): Cover the shaped dough loosely and let it rest for another 20 to 30 minutes. This final proofing adds airiness.
- Top and bake: Add your sauce, cheese, and toppings. Bake according to your topping recipe, typically at 425°F (220°C). For a very sturdy base, you can par-bake the crust for 5 minutes before adding toppings.
Notes
- For a slightly crispier bottom, press cornmeal lightly onto the oiled pan before placing the dough.
- If your dough does not rise enough, check the temperature of your water; it may have been too hot and killed the yeast.
- This dough recipe is suitable for a pan pizza dough or a standard thick dough recipe.
Nutrition
- Serving Size: 1/8 of dough
- Calories: 280
- Sugar: 1.5
- Sodium: 350
- Fat: 5
- Saturated Fat: 0.7
- Unsaturated Fat: 4.3
- Trans Fat: 0
- Carbohydrates: 50
- Fiber: 2
- Protein: 9
- Cholesterol: 0