
Oh man, there is absolutely nothing like pulling a tray of piping hot **homemade dinner rolls** out of the oven. Seriously, that warm, yeasty smell just signals that a meal is special. Forget those dry bakery boxes! I’m here to show you how easy it is to make the softest, most pillowy homemade dinner rolls from scratch you’ve ever tasted. I learned my tricks from studying food science, but I only share what actually works when I’m rushing to get dinner on the table at home. Trust me, these yeast bread buns are going to become your go-to for every family gathering. If you want to know more about my philosophy blending test kitchen precision with real-life home cooking, check out the story behind Cooking by Jade. Ready to impress your crew?
- Why You Will Make These Homemade Dinner Rolls Again and Again
- Gathering Ingredients for Soft Dinner Rolls From Scratch
- Expert Tips for Perfect Homemade Dinner Rolls
- Step-by-Step Instructions for Tender Homemade Dinner Rolls
- Make-Ahead and Storage Tips for Your Homemade Dinner Rolls
- Troubleshooting Common Issues with Homemade Dinner Rolls
- Frequently Asked Questions About Fluffy Dinner Rolls From Scratch
- Estimated Nutritional Data for Homemade Dinner Rolls
- Share Your Experience Baking These Homemade Dinner Rolls
Why You Will Make These Homemade Dinner Rolls Again and Again
I promise these aren’t going into the “one and done” messy recipe pile. Folks ask me back every single time I bring these to a gathering! Here’s why I know you’ll love them too:
- They are shockingly tender—truly the softest dinner rolls from scratch you’ll ever experience.
- The dough comes together quickly; perfect for when you need quick yeast bread buns for weeknight dinners.
- Shaping them close together means you get amazing, irresistible soft pull-apart rolls.
- They freeze beautifully, making them the ultimate homemade holiday bread prep strategy.
Gathering Ingredients for Soft Dinner Rolls From Scratch
Before we even think about mixing anything, let’s talk ingredients. This list looks pretty standard, but the small details—like the temperature of the milk and the state of the butter—are actually what guarantee those fluffy dinner rolls from scratch.
You will need:
You start with one cup of milk. And this is important: the milk absolutely must be warm, right between 105 to 115 degrees Fahrenheit, otherwise the yeast throws a fit! Next, we use 2 and 1/4 teaspoons of active dry yeast, because you really need that good, reliable rise you get from the active kind.
For sweetness and structure, gather 1/4 cup of granulated sugar, one teaspoon of salt, and one large egg. The fat content is key for texture, so make sure you have 1/2 cup of unsalted butter specifically listed as softened—not melted, softened!
Finally, you’ll need about 3 and 1/2 cups of all-purpose flour, but keep a little extra handy for dusting your surface later. Once those rolls are baked, have four tablespoons of unsalted butter melted and ready to go; that’s our secret weapon for that incredible soft top!
Expert Tips for Perfect Homemade Dinner Rolls
This recipe isn’t hard, but it’s all about respecting the yeast and knowing when the dough is happy. Listen, making great yeast bread buns isn’t magic; it’s just following a couple of very important rules, especially if you want those amazing results that lead to beautiful, **soft pull-apart rolls**.
Activating the Yeast: The First Step for Fluffy Dinner Rolls
Always, always check your milk temperature! If it’s too cold, your active dry yeast just sleeps in there, and you get flat buns. Too hot? You literally kill it. We need that perfect sweet spot between 105 and 115°F. When the yeast is happy, it starts eating the sugar and produces carbon dioxide. You’ll know you did it right when the surface of the milk looks bubbly and foamy, like the head on your favorite root beer!
Kneading Homemade Dinner Rolls Dough to Elasticity
The kneading stage is where we build structure. If you’re using a stand mixer with a dough hook, aim for about 6 to 8 minutes. If you’re doing it by hand—which I sometimes prefer because you can really feel the dough transform—it takes a little longer, maybe 8 to 10 minutes.
Don’t over-flour your surface! You want the dough to feel slightly tacky, not dry and stiff. When it’s done, it should transform from a messy lump into a smooth, pillowy ball that springs back slowly when you poke it. That springiness means you’ve developed enough gluten for those perfect soft dinner rolls from scratch.
Step-by-Step Instructions for Tender Homemade Dinner Rolls
Okay, now that our yeast is happy and our dough is smooth, it’s time to turn that shaggy mass into something beautiful! This process relies heavily on patience during the rising stages, but trust me, it’s worth every minute while you wait for those amazing yeast bread buns to puff up. We have two main rising periods here—the bulk rise and the final proof.
First Rise and Shaping the Yeast Bread Buns
Once the dough has doubled in size after that first warm rest, you need to gently deflate it—that’s the punch-down. Turn it out onto your counter and divide it into 12 equal bits. I try to just eyeball it because, honestly, nobody is cracking out a scale for dinner rolls!
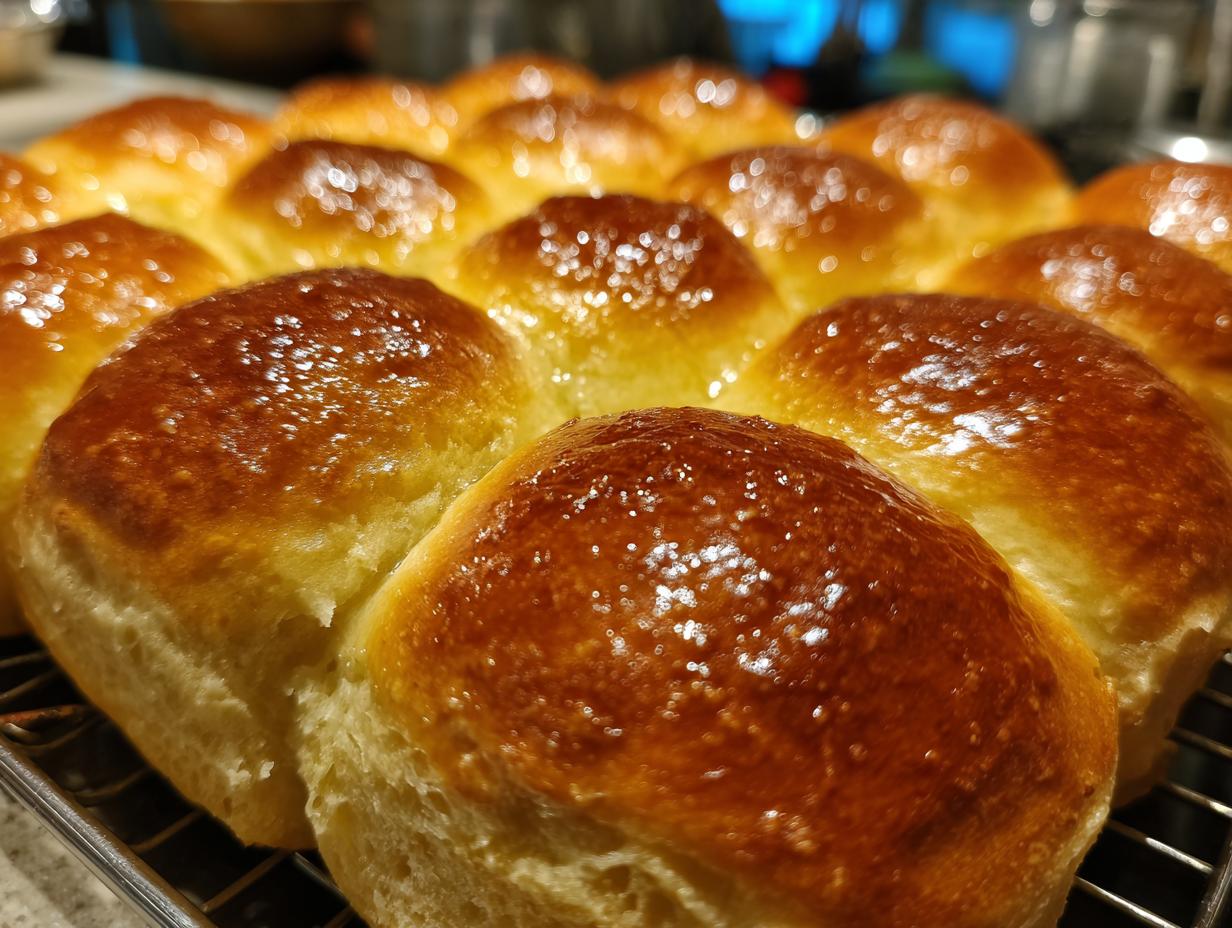
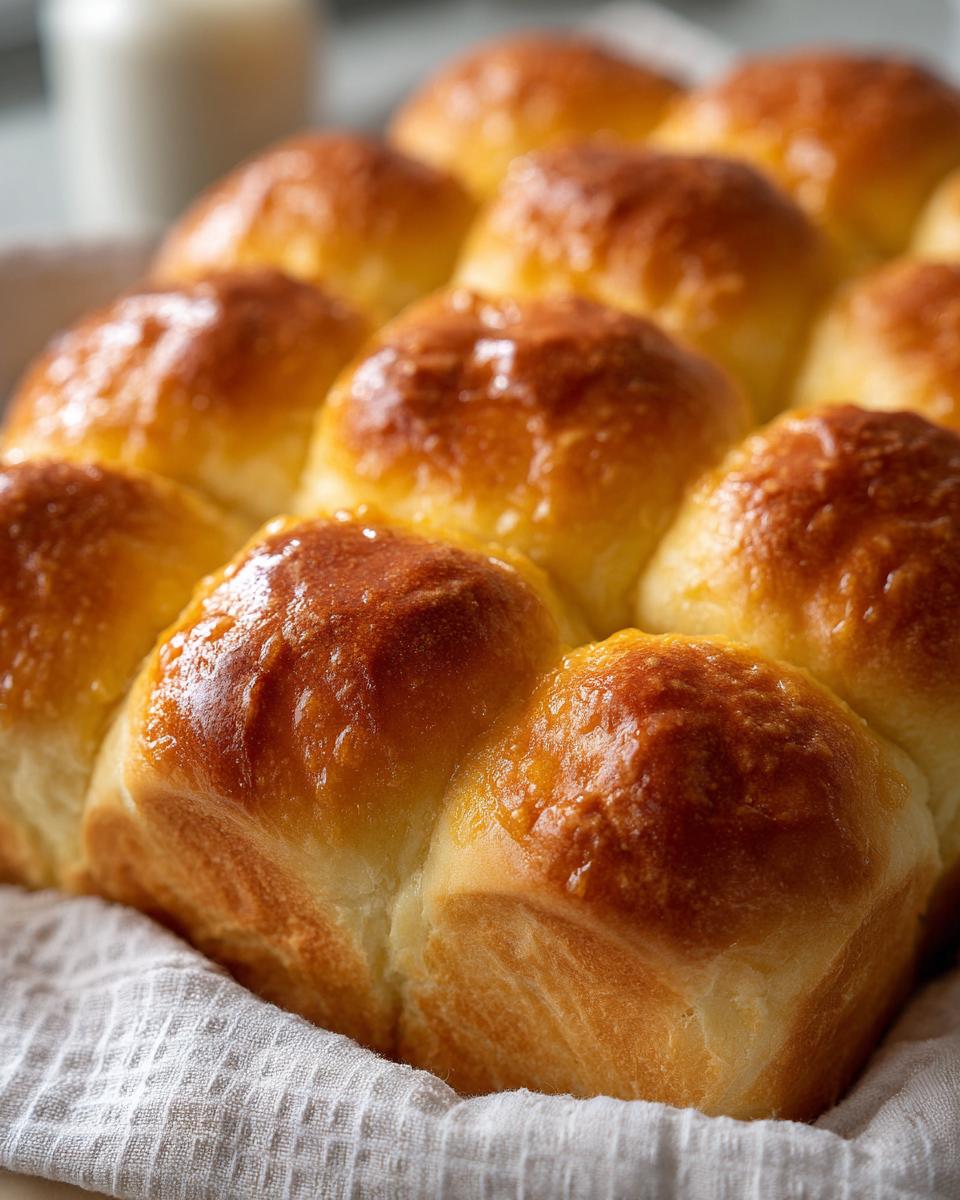
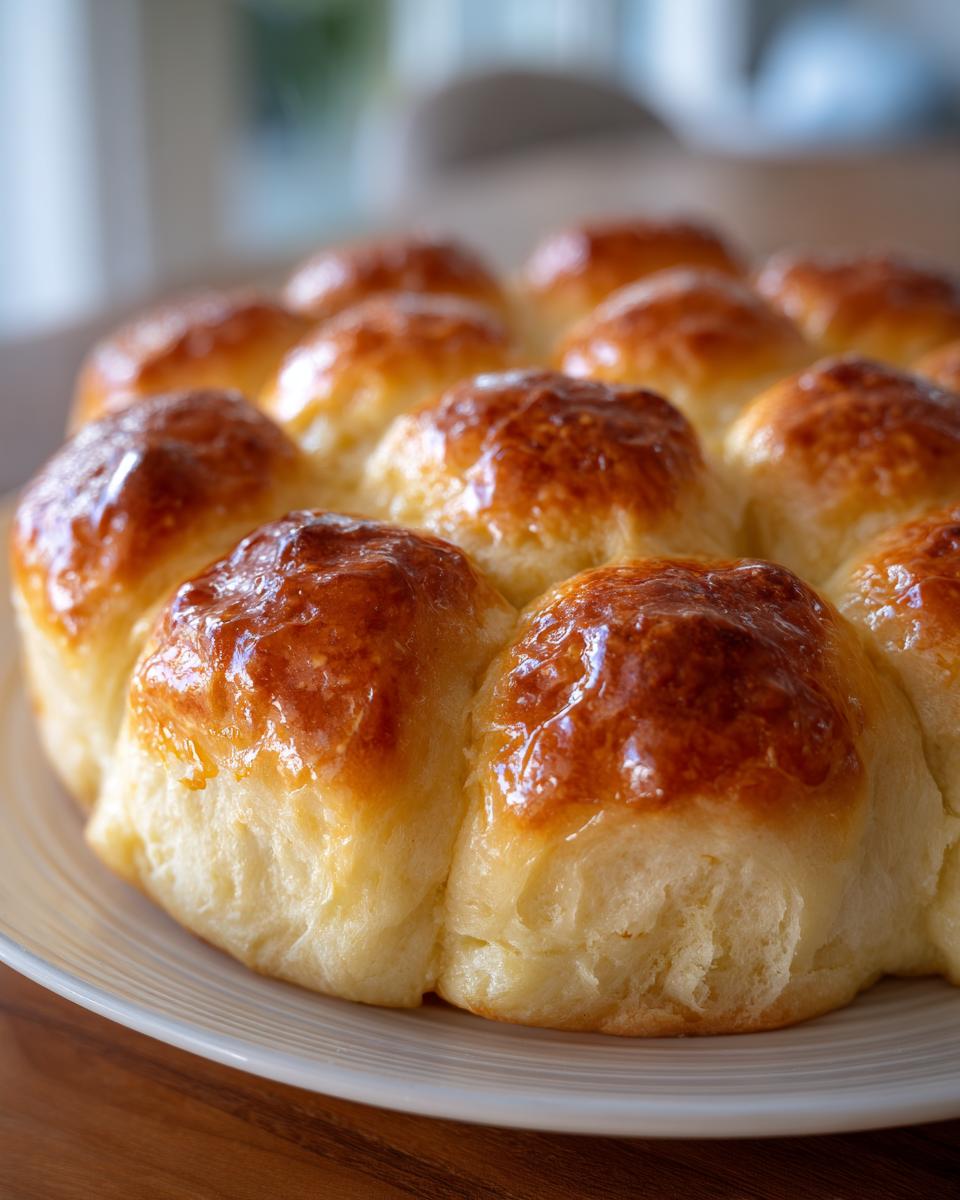
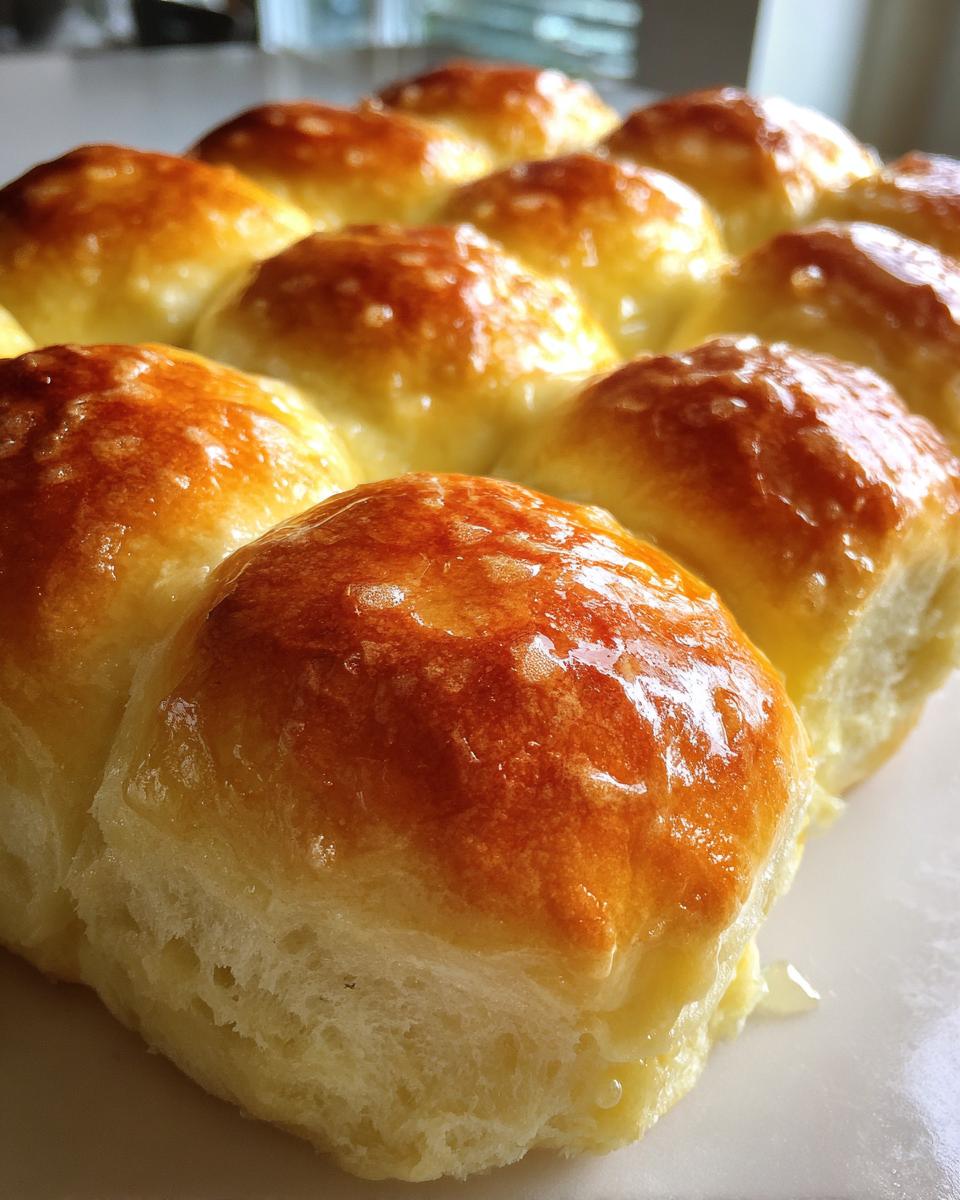
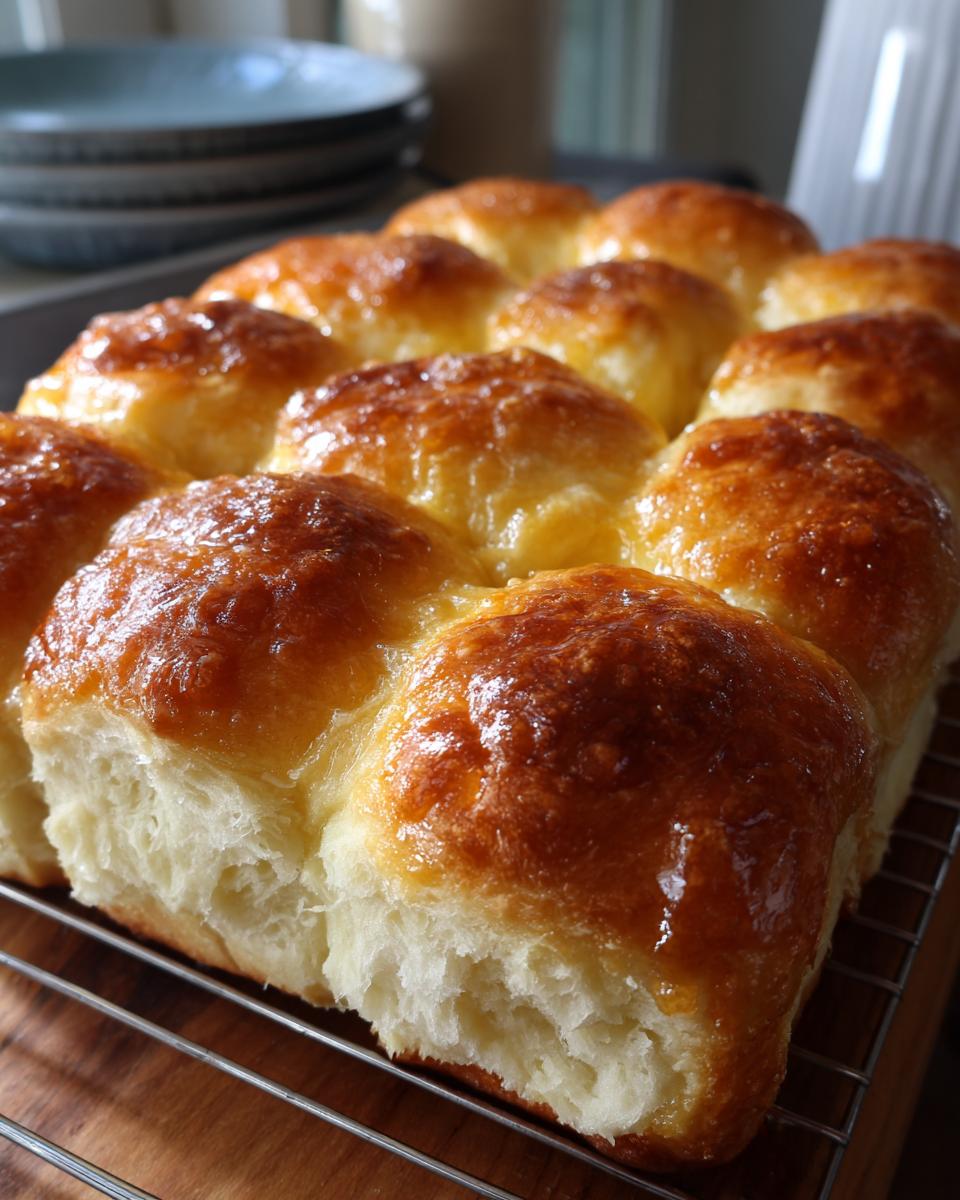
Make each piece into a tight little ball. You do this by cupping your hand around a piece and gently rotating it against the counter until that surface gets nice and taut. Line these balls up close together in your buttered 9×13 inch pan. Putting them this close means they bake into those glorious, soft pull-apart rolls that everyone fights over!
Cover it up lightly and let them rest again for about 30 to 45 minutes until they look puffy and airy throughout the pan.
Baking and the Final Butter Finish for Homemade Dinner Rolls
While they are puffing up for the second time, preheat that oven to 375°F (190°C). You’re looking for them to bake for about 15 to 18 minutes. We want them golden brown on top, but not dark brown—we’re going for golden, not crunchy!
This next step is non-negotiable if you want truly soft dinner rolls from scratch. The absolute second they come out of the oven, grab that melted butter and brush it all over the hot tops generously. The heat of the rolls melts the butter slightly, letting it soak in just enough to keep the crust incredibly soft and adds that rich flavor we want in homemade holiday bread.
Make-Ahead and Storage Tips for Your Homemade Dinner Rolls
I know when you’re cooking for a big crowd or making homemade holiday bread, timing is everything! You absolutely can get ahead of the game with these dough guys. After that first big rise when your dough has doubled, skip ahead and gently punch it down.
Here is the trick: wrap that dough up super tight in plastic wrap—I mean airtight! Pop it in the fridge for up to 24 hours. It will slowly rise a little more, but it basically just chills out. When you’re ready the next day, take it out and let it sit on the counter for maybe 30 minutes to take the edge off before you divide and shape it.
Once they are baked and totally cooled down, the best way to keep these soft pull-apart rolls soft is to toss them into a simple airtight container. They stay perfect for about three days like that. If you made too many (hard to believe, I know!), they freeze wonderfully too!
Troubleshooting Common Issues with Homemade Dinner Rolls
Don’t panic if your first batch of homemade dinner rolls doesn’t look exactly like mine! Yeast bread buns can be temperamental, but usually, the fixes are super easy once you know what went wrong. Did your yeast bread buns refuse to rise after the first hour? Nine times out of ten, it’s either your yeast is old and doesn’t have any life left, or your milk temperature was off. If the dough just sits there looking unimpressed, try gently warming the bowl in a warm spot or re-activating some fresh yeast in warmer milk.
Now, if your rolls turned out dense or tough? That means we got a little too aggressive with the gluten development! You either added way too much flour during kneading, or you mixed it for too long, even on the mixer. Remember, we are aiming for elastic, not concrete! Keep the counter lightly floured. A slightly sticky dough bakes up much softer!
Frequently Asked Questions About Fluffy Dinner Rolls From Scratch
Why didn’t my yeast bread buns rise properly?
This is the number one panic situation for new bread bakers! If your dough didn’t double, it usually comes down to two suspects: yeast that wasn’t active or temperature issues. Make sure your milk is right in that 105°F to 115°F sweet spot—not scalding hot! If you used instant yeast and mixed it straight into your dry ingredients, make sure the liquid you added was warm enough to wake it up. If you see no foam after 5 minutes, toss the batch and try again with fresh yeast. It sounds dramatic, but it saves hours of waiting!
How do I get that amazing soft pull-apart roll texture?
The secret to soft pull-apart rolls isn’t magic; it’s placement! When you shape your dough balls, place them close together—touching, even—in your greased baking pan. As they go through that second rise (the proofing), they expand and push against their neighbors. This forces them to rise up instead of out, giving you those perfectly tender sides that tear away easily when served warm. It’s all about that cozy crowd!
Can I use a different type of flour in my homemade dinner rolls from scratch?
While the recipe calls for all-purpose flour, you can try substituting about 1/4 of the flour content with bread flour if you have it. Bread flour has a higher protein content, which can lead to even more structure and a slightly chewier crumb, which some people prefer in their yeast bread buns. However, if you swap out too much, your rolls might end up a little too dense, so stick to mostly AP flour for the fluffiest results we are aiming for here!
What’s the best way to keep these rolls soft overnight?
Once they are baked and brushed with that glorious melted butter, let them cool on a rack for just 10 minutes. Then, wrap them tightly in aluminum foil before placing them in an airtight container. The foil traps the steam the rolls release during cooling, which keeps the crust soft. If they start to look sad the next day, just pop them in a 300°F oven for five minutes and they’ll spring right back!
Estimated Nutritional Data for Homemade Dinner Rolls
You know I always focus on flavor first, not chasing perfect macros, but I know some of you are curious about the details! Based on the ingredients for these soft dinner rolls from scratch, here’s the general breakdown per roll:
Each roll clocks in around 210 calories, has about 8 grams of fat, 31 grams of carbohydrates, and 5 grams of protein.
Now, this is super important: These numbers are just estimates, okay? They are calculated based on standard flour and butter measurements. The exact brand of milk or the size of your egg can change things a little bit. Have fun, and don’t stress too much over the exact grams!
Share Your Experience Baking These Homemade Dinner Rolls
I’ve shared all my secrets for getting those impossibly soft, pull-apart results, and now I want to hear all about yours! Did you manage that perfect second rise?
If these homemade dinner rolls from scratch brought pure comfort and satisfaction to your table, please take a second to leave a star rating right here on the page. Five stars if you thought they were wonderfully fluffy!
And don’t just leave the praise in your head! Jump down to the comments below and tell me everything. Did you make them for a holiday? Did your family even leave any for you? I love seeing pictures, so tag me if you share them online!
If you have any questions that popped up while you were kneading or proofing, ask away! I check in often, and I’m happy to look at photos if something didn’t go quite right the first time around. I’m always refining things, so your feedback helps me make this the best recipe possible.
If for some reason you need to reach out directly about something tricky, you can always send me a message through the Contact Page. Happy baking, and enjoy those fantastic yeast bread buns!
PrintSoft Homemade Dinner Rolls From Scratch

Make soft, pillowy dinner rolls that rival any bakery. This recipe uses simple steps to create tender, buttery yeast bread buns perfect for any family meal.
- Prep Time: 25 min
- Cook Time: 18 min
- Total Time: 1 hour 58 min
- Yield: 12 rolls 1x
- Category: Baking
- Method: Baking
- Cuisine: American
- Diet: Vegetarian
Ingredients
- 1 cup warm milk (105-115°F)
- 2 1/4 teaspoons active dry yeast
- 1/4 cup granulated sugar
- 1/2 cup unsalted butter, softened
- 1 large egg
- 1 teaspoon salt
- 3 1/2 cups all-purpose flour, plus more for dusting
- 4 tablespoons unsalted butter, melted, for brushing
Instructions
- Combine the warm milk and yeast in a large bowl. Let stand for 5 minutes until foamy. This proves the yeast.
- Stir in the sugar, softened butter, egg, and salt into the yeast mixture. Mix until combined.
- Gradually add the flour, mixing until a shaggy dough forms.
- Turn the dough out onto a lightly floured surface. Knead by hand for 8 to 10 minutes until the dough is smooth and elastic. Alternatively, use a stand mixer with a dough hook for 6 to 8 minutes.
- Place the dough in a lightly oiled bowl, turning to coat. Cover the bowl with plastic wrap or a clean towel. Let the dough rise in a warm place for 1 to 1.5 hours, or until doubled in size.
- Gently punch down the risen dough. Turn it out onto a lightly floured surface. Divide the dough into 12 equal pieces.
- Shape each piece into a tight ball. Place the balls close together in a greased 9×13 inch baking pan. They should be touching for pull-apart rolls.
- Cover the pan loosely and let the rolls rise again for 30 to 45 minutes, or until puffy.
- Preheat your oven to 375°F (190°C).
- Bake for 15 to 18 minutes, or until the tops are golden brown.
- Immediately brush the tops of the hot rolls generously with the 4 tablespoons of melted butter.
- Serve warm for pure comfort and satisfaction.
Notes
- For a shinier crust, you can brush the shaped rolls with one beaten egg mixed with 1 teaspoon of water before the second rise instead of using butter after baking.
- You can make this dough ahead. After the first rise, punch it down, wrap it tightly, and refrigerate for up to 24 hours. Allow the dough to warm up slightly before shaping.
- Use instant yeast if you prefer to skip the initial proofing step; mix it directly with the dry ingredients before adding the wet ingredients.
Nutrition
- Serving Size: 1 roll
- Calories: 210
- Sugar: 5
- Sodium: 250
- Fat: 8
- Saturated Fat: 5
- Unsaturated Fat: 3
- Trans Fat: 0
- Carbohydrates: 31
- Fiber: 1
- Protein: 5
- Cholesterol: 30