
Oh, I’m so excited you’re here! There’s just something about biting into a perfect treat that makes everything feel instantly cozy, right? Forget complicated steps; we’re making magic with just a few basic things you likely already have. This recipe for classic butter cookies is the one I landed on after years of testing. Seriously, these are the cookies you remember—crisp around the edges, but they truly melt in your mouth the second you try one. After working in professional test kitchens, I learned exactly how to nail the balance between flavor and texture every single time. This ensures you get foolproof results, whether this is your first time baking or your fiftieth! I learned so much about reliable baking science during that time!
When I developed this recipe, I wanted to strip away all the fuss. We are focusing on pure, rich vanilla flavor and that incredible, tender interior that separates a good cookie from a great one. If you’ve ever been intimidated by piping dough—which is common with these types of cookies—don’t worry! I’ll show you a couple of ways around it, but trust me, once you see how easy these buttery delights come together, you’ll be hooked. Ready to fill your kitchen with that amazing, warm, buttery dessert aroma?
- Why This is the Best Butter Cookie Recipe You Will Ever Make
- Gathering Ingredients for Classic Butter Cookies
- How to Prepare Your Easy Homemade Butter Cookies
- Making Chocolate Dipped Butter Cookies for Gifting
- Tips for Success When Making Your Classic Butter Cookies Recipe
- Storage & Reheating Instructions for Fresh Butter Cookies
- Frequently Asked Questions About Rich Vanilla Cookies
- Estimated Nutrition for These Buttery Dessert Recipes
- Share Your Homemade Butter Cookies Creations
- Estimated Nutrition for These Buttery Dessert Recipes
- Share Your Homemade Butter Cookies Creations
Why This is the Best Butter Cookie Recipe You Will Ever Make
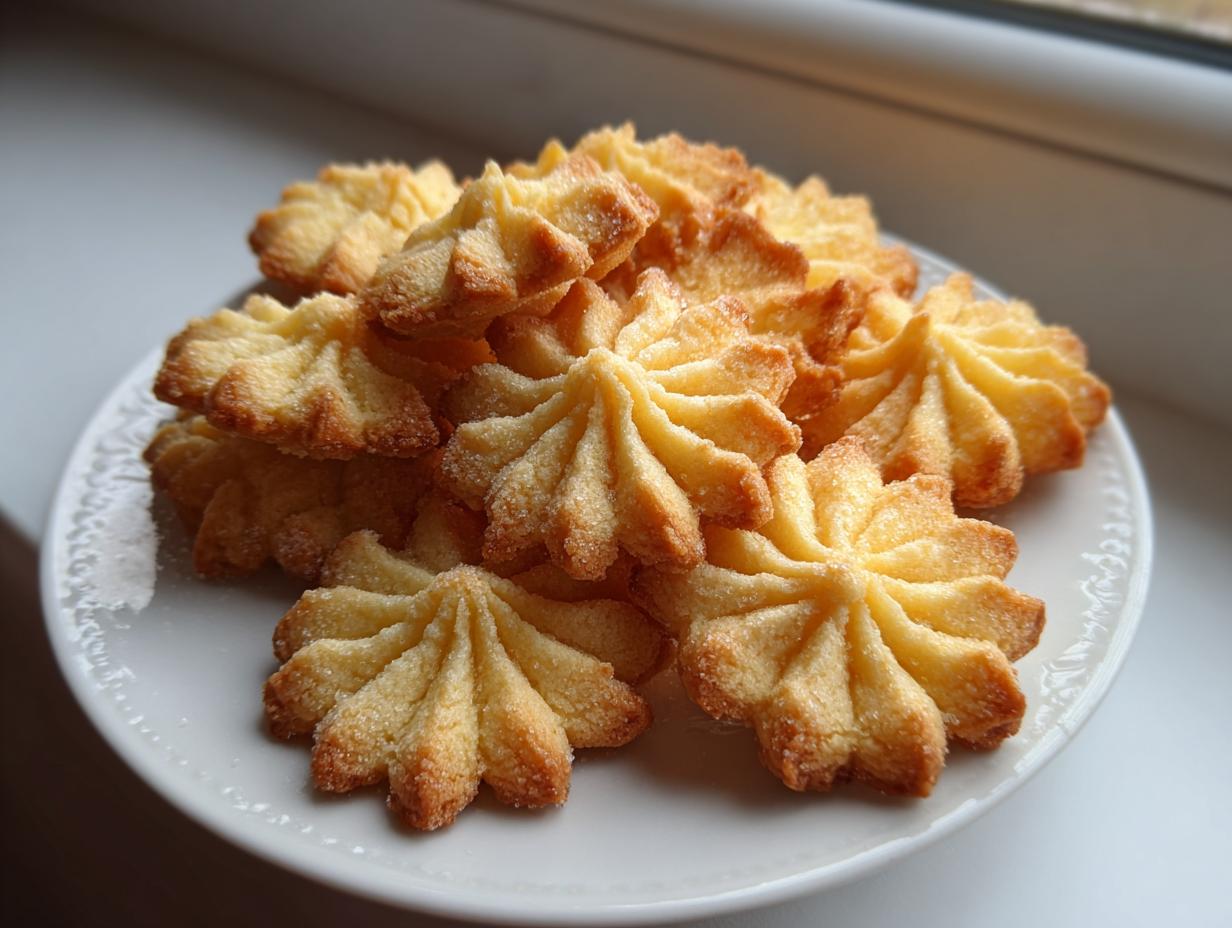
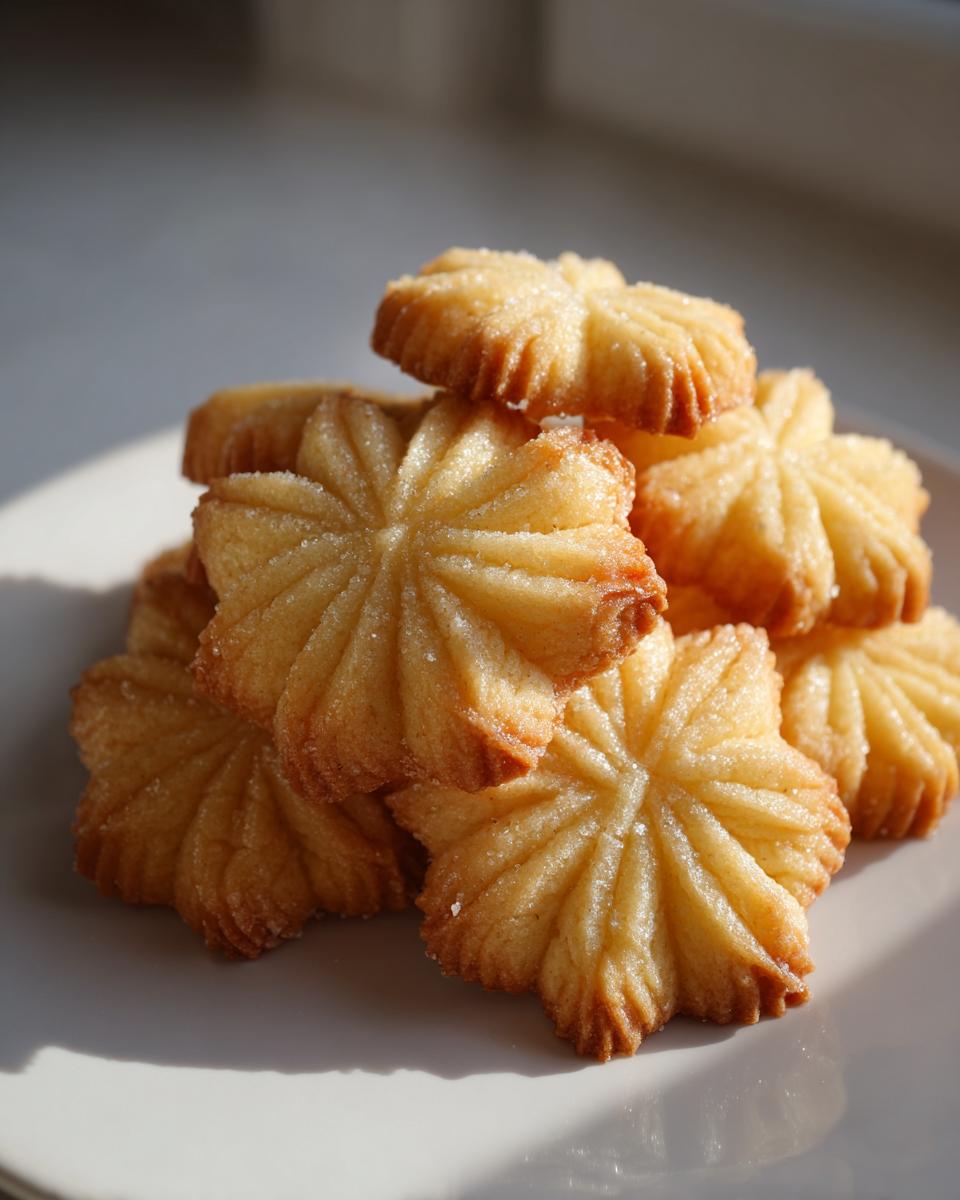
I promise you, folks, this truly is the best butter cookie recipe out there. Why am I so sure? Because it nails that tricky balance everyone chases: the edge gets just slightly crisp when you bite in, but the center dissolves instantly. We are talking about real melt in your mouth cookies here, not those dry, crumbly things that end up sitting on the platter forever. When I was working through ratios in the test kitchen, I realized that using exactly two sticks of butter paired with the specific volume of flour dictated by the creamed sugar volume was the key. It sounds scientific, but trust me, this ratio gives you the structural integrity needed for piping while keeping the tenderness locked in.
It means less stress for you! You don’t have to worry about chilling the dough forever or guessing when they’re done—they are incredibly reliable. If you want easy, spectacular results, you’ve found your go-to recipe. My goal is to make sure that when you bake these, you get compliments every single time.
Achieving That Perfect Buttery Texture in Your Butter Cookies
The secret to the texture is all in the first step: creaming. You must use butter that is properly softened—not melted! When you beat that soft butter with the sugar until it’s pale and fluffy, you’re beating essential air into the dough. Those little air pockets are what cause the cookie to rise just slightly and keep it tender in the oven. Then, you add the flour mix gently. If you overmix flour, you develop gluten, which makes things tough. We want tender, buttery richness, so we stop mixing the second the flour disappears! That’s how you get that glorious crumb every time.
Gathering Ingredients for Classic Butter Cookies
Okay, look at this ingredient list. I want you to take a deep breath because this is why this recipe is just so great! It proves you don’t need twenty fancy items to make something truly spectacular. When we talk about easy homemade butter cookies, we mean using stuff you probably already have in your fridge and pantry right now. Seriously, these are humble components.
You absolutely need two full sticks of unsalted butter—remember, butter is where the ‘butter’ in butter cookies comes from, so don’t skimp on quality here! Then we have granulated sugar, a single large egg yolk (that yolk is key for richness and binding!), and of course, vanilla extract for that beautiful, comforting aroma. For the dry side, it’s just all-purpose flour and a little salt to wake everything up. If you want to decorate, have some semi-sweet chocolate ready for dipping later, but that’s totally optional!
Ingredient Substitutions and Notes for Perfect Butter Cookies
I get asked all the time: “Jade, can I use margarine?” And honestly, I always say no if you want truly rich vanilla cookies. Margarine is mostly water, and butter has the fat content that creates that perfect tender texture we’re aiming for. If you *must* substitute, use a high-fat baking stick, but know the texture will change slightly.
For the vanilla, please use real vanilla extract! The imitation stuff won’t carry that warm flavor through the bake. Regarding the sugar, make sure your granulated sugar is level, not packed down. If you grab that cup of sugar you pack tight like brown sugar, your cookies will spread too much and won’t pipe nicely. Keep it light when measuring the flour and sugar, and use good quality butter—it really does make the whole batch taste so much richer and more buttery.
How to Prepare Your Easy Homemade Butter Cookies
Alright, here’s the part where we turn those lovely ingredients into fantastic baked goods! This process is actually really straightforward, which is why I call these simple cookie recipes for beginners. Just follow these steps, and you’ll be amazed at how quickly you end up with a platter full of glorious butter cookies. I always make sure my oven is preheating to 350°F (175°C) while I’m still mixing the dough; don’t wait until the dough is done to start heating!
Creaming Butter and Sugar: The Foundation of Great Butter Cookies
Step one is the most critical, remember? Grab your big bowl and your electric mixer—while Grandma probably used elbow grease, I highly recommend an electric one here for consistency! You need your butter softened nicely, not melted at all. Beat that butter with the granulated sugar for a full three minutes. Yes, three minutes! You need those three minutes to whip air into the mixture. When it looks light, fluffy, and almost pale yellow, you’ve incorporated enough air to promise those melt in your mouth cookies we talked about. Next, beat in just the egg yolk and vanilla; mix only until combined. Scrape down the sides aggressively; you don’t want any unmixed pockets hiding down there!
Piping Butter Cookies Tutorial: Shaping Your Dough
Now we mix in the dry stuff—the flour and salt—gradually, on low speed, just until it forms a soft dough. As soon as you can no longer see dry streaks, STOP! Overmixing here is the quickest way to ruin the tenderness. If you want those pretty, classic swirls, use a piping bag fitted with a large star tip, like the Wilton 1M. Some people find their dough is just too soft to hold a perfect shape right out of the bowl, especially if your kitchen is warm. If that happens, don’t panic! Just cover the bowl and pop the dough into the fridge for about 15 minutes to firm up. That little rest makes all the difference in keeping your piped shapes beautiful when they hit the heat.
If piping feels like too much trouble, you can skip it! Just use a cookie scoop to drop dough mounds onto your lined baking sheets. Either way, leave about two inches between them because they spread just a tiny bit.
Baking Times and Visual Cues for Tender Cookies
When baking these rich vanilla cookies, we are aiming for color contrast. We want the definition of the piped edges to show, but we definitely do *not* want them turning dark brown. Bake them for 10 to 12 minutes, but keep a close eye around the 10-minute mark. The visual cue for perfectly soft and tender cookies is seeing the edges just barely turning a light, pale gold. The centers should still look light, almost pale white. If they look golden all over, you’ve gone too far and you’ll get a crispier cookie than we intended!
When you pull them out, resist the urge to touch them! Leave them sitting right there on the hot baking sheet for a full five minutes. They are very delicate when hot, and this brief rest allows them time to set up structurally. After five minutes, gently use a thin offset spatula to move them over to a wire rack to cool completely. If you’re planning on dipping them in chocolate later, they must be dead cold before touching melted chocolate—I have a great guide on making things like frosting, but for the cookies themselves, cool is key!
If you want more tips on getting flawless baking results, check out some of the foundational techniques I learned over at Beyond Frosting.
Making Chocolate Dipped Butter Cookies for Gifting
Now that you have these perfect, pale, buttery discs of deliciousness, we get to the fun part—making them look like they belong on one of those amazing holiday cookie trays! Chocolate dipped butter cookies are always a huge hit, whether you’re packaging them up for neighbors or just making your own platter look extra fancy. This step is super easy, but you need a little patience for the setting!
First, make sure those cookies are completely, totally cool. If they are even slightly warm, the melted chocolate will just slide right off, or worse, melt the structure of the cookie itself. For the chocolate, here’s my shortcut: skip trying to temper fancy couverture chocolate unless you’re having a very serious baking day! For reliable results that keep that beautiful snap, I highly recommend using good quality chocolate melting wafers or high-quality chocolate chips.
Melt the chocolate gently. You can use a microwave in 30-second bursts, stirring hard in between, until it’s smooth. Or, if you prefer a double boiler, that works great too! You only want to dip about halfway up the cookie. Hold the cookie gently by the edge, swirl it into the chocolate, lift it out, and let the extra drip off for a second.
If you are adding texture and color, do it right away! If you are using those festive sprinkles or some coarse crystal sugar, dust it on immediately before the chocolate sets up. Then, place the cookies carefully onto parchment paper. This is important: you need a dedicated spot where they won’t be bumped while they cool and the chocolate hardens completely. If you rush this, the chocolate will smear everywhere, and your beautiful presentation is ruined! Pop them in the fridge for about 10 minutes to speed up the setting if you’re in a hurry, but room temperature works fine too.
These chocolate-dipped versions are wonderful for gifting. When I pack mine up for the holidays, I often think about how similar these are to the traditional ones you get in those fancy blue tins; Danish butter cookies fans appreciate this easy upgrade. Just make sure you keep them in a single layer or use parchment dividers between layers so the chocolate doesn’t stick together. If you’re already planning your holiday menu, these cookies pair perfectly with something hearty, like my Christmas Breakfast Casserole!
Tips for Success When Making Your Classic Butter Cookies Recipe
Even though this is one of the most straightforward recipes for classic butter cookies, a few expert pointers will take them from “good” to “OMG, what is in these?!” My experience tells me it all comes down to respecting the temperature of your fat and keeping your mixing hands gentle!
Here are the few critical things I always check before I even turn the mixer on:
- Butter’s “Just Right” Stage: I cannot stress this enough! Your butter needs to be genuinely softened—meaning it yields easily when pressed, developing a slight dent. However, if it looks greasy, shiny, or shows finger marks easily, it’s too warm. Warm butter melts too fast in the oven, causing your beautifully piped shapes to spread into flat puddles. For the best butter cookie recipe results, aim for cool, pliable butter every time.
- The Danger of Overmixing Flour: Remember when we talked about the creaming? That whipped air needs to stay! Once you start adding that flour and salt mixture, you must switch your mixer to the lowest possible setting or even finish by hand. Mix just until the streaks of flour disappear. If you keep mixing once the flour is hydrated, you’re creating gluten strands, which means your melt in your mouth cookies will turn out stiff. Seriously, stop immediately!
- Baking for Paleness: Don’t wait for them to look golden brown! These cookies get their tender texture because they bake quickly at a moderate temperature. You want them pale with just the slightest hint of color on the very lowest edge of the cookie. If you see dark edges, they will taste distinctly crunchy rather than crisp-tender. Trust the look of the center, not the color spreading across the top.
- Keep It Homemade: If you’re having a rough time with the piping—and trust me, it happens—do not try to add flour to stiffen the dough. That throws off the whole fat-to-flour ratio and ruins the wonderful buttery flavor. Instead, if the dough is too soft, chill it for 20 minutes, or better yet, skip the piping and roll the dough into a log and slice it thick, like a simple shortbread cookie variation. Perfection should never cause stress!
Sticking to these basics is how you ensure that every batch of these rich vanilla cookies is absolutely foolproof. If you are looking for other simple, satisfying baked goods that are easier than you think, you should check out my tips on making light and crisp meringue cookies! And if you’re specifically looking for that soft texture outside of butter cookies, research from Owl B Baking confirms that dough temperature is often the main culprit for disappointing texture.
Storage & Reheating Instructions for Fresh Butter Cookies
One of the best things about these butter cookies—besides how amazing they taste, of course—is how well they hold up! If you’re doing some serious holiday baking ahead of time or just made a huge batch because you couldn’t stop yourself (I’ve been there!), storage is easy. You can absolutely make these in advance.
For the plain, un-dipped cookies, I rely on a simple airtight container. You can stack them, but if you’re worried about crushing those beautiful piped edges, use parchment paper as a divider between layers. This keeps the air out, and because this recipe is so rich in butter, they stay wonderfully fresh and tender for up to a week at room temperature. Seriously, they taste almost as good on day five as they do on day one!
Now, if you went ahead and made those gorgeous chocolate-dipped versions, you need to take an extra step to keep that chocolate shell looking perfect. We need to make sure the chocolate stays hard and glossy, not soft or hazy. Do not store the chocolate-dipped cookies in the refrigerator unless your kitchen is swelteringly hot. Cold air can sometimes cause condensation when you bring them back out, which can make the chocolate look dull or “bloom.”
Keep the chocolate-dipped butter cookies in a single layer in a cooler part of your pantry, making absolutely sure they are protected from light and anything that might crush them. If you’re storing them longer than a week, you can freeze them! Just wrap them tightly—first in plastic wrap, then in aluminum foil—and they should be good for about two months. When you want to enjoy one, just pull it out and let it thaw on the counter still wrapped for an hour or so. That wrapping traps any moisture, keeping your cookie just as soft and tender as the day you baked it.
Frequently Asked Questions About Rich Vanilla Cookies
It never fails—I put out a recipe that’s supposed to be simple, and you folks still have the best questions! That’s fine by me; it means you’re invested in getting these rich vanilla cookies absolutely perfect. Here are a few things I hear regularly when people are first diving into this classic butter cookies recipe.
Can I use a cookie press instead of a piping bag?
Yes, you absolutely can! A cookie press is fantastic for making beautiful, uniform shapes with these easy homemade butter cookies. The dough consistency we aim for here—soft but firm enough to hold its shape—is usually perfect for a press right out of the bowl, so you might even skip the chill time! Just make sure the metal plate you attach is clean and lightly greased if you notice the dough sticking during the first few presses. You’ll get that signature shape that reminds everyone of store-bought Danish butter cookies, but homemade ten times better!
Do I have to chill the dough to make these butter cookies?
This is my favorite part! Unlike so many other sandwich cookies or cut-out recipes, this one is famously a no chill butter cookie recipe! We use minimal liquid and a high-fat ratio, which keeps the dough manageable at room temperature. You should only need to chill it if your kitchen is very warm, or if you’ve piped a shape and the edges are starting to look greasy or droopy before they hit the oven. If everything is cool and you’re working quickly, you can usually pipe and bake immediately. That’s what makes these such a winner for quick Christmas cookie baking ideas!
Are these cookies meant to be soft or crisp?
Great question! The goal here is to create soft and tender cookies, which is why they are often called “melt in your mouth cookies.” We want the edges to be *set* and just barely kissed with gold, but the centers should remain pale. When you bake them less, they set up perfectly crisp on the outside but remain incredibly soft inside. If you bake them until they are golden brown all over, you’ll get a harder, crunchier cookie, more like a traditional shortbread. So, for that perfect texture, err on the side of slightly under-baking rather than over-baking them!
Can I substitute shortening or oil for the full amount of butter?
While technically you *could*, I strongly advise against it if you want the best flavor. Shortening gives you excellent structure and prevents spreading, but it doesn’t have the flavor complexity that real, high-quality butter brings to these buttery dessert recipes. Oil works similarly but contributes zero structure when creaming. For the best results, stick to the 2 sticks of unsalted butter specified in the recipe. That high-fat content is exactly what makes these simple cookie recipes for beginners taste luxurious!
If you are looking for other simple, satisfying baked goods that are easier than you think, you should check out my tips on making light and crisp meringue cookies! And if you’re specifically looking for that soft texture outside of butter cookies, research from Owl B Baking confirms that dough temperature is often the main culprit for disappointing texture.
Estimated Nutrition for These Buttery Dessert Recipes
I always like to give a rough idea of what goes into these wonderful treats, even though they disappear so fast! Remember, nutrition facts are just estimates here, calculated based on my recipe notes and using standard ingredient volumes. Things like how much you dip in chocolate or the exact brand of butter you use will change the final numbers, but this gives you a good starting point for these buttery dessert recipes.
- Serving Size: 1 cookie (about 1/12th of the batch, un-dipped)
- Calories: 135
- Fat: 9g
- Saturated Fat: 5g
- Carbohydrates: 13g
- Sugar: 8g
- Protein: 2g
- Cholesterol: 30mg
We have a fairly high fat content, which is what makes these butter cookies so satisfying! The ingredients are simple—a true testament to how good food doesn’t need extra additives. If you are watching your intake, know that the dipping chocolate will add significantly to the sugar and fat content, but it’s worth it for a holiday treat!
For other recipes that focus on balancing flavor with nutrition goals, you might want to bookmark my Moist Greek Yogurt Banana Bread recipe for a slightly different kind of indulgence.
Share Your Homemade Butter Cookies Creations
Now you have no excuses! You have the best recipe, the science behind why it works, and all my little tricks to guarantee success right here. When you make these classic butter cookies, I truly want to see them! Getting that perfect piped shape or that beautiful chocolate dip is so satisfying, and I love seeing your results.
When you finish baking, please come back here and leave a review. If you loved how these turned out, giving the recipe 5 stars is the absolute best way to tell me, and it helps other folks who are nervous about baking find this easy homemade butter cookies guide! If you snap a picture of your platter, tag me on social media—I always check my tags! And if you have any lingering questions about the process, pop over to my contact page, and let’s chat through it. Happy baking, friends!
Estimated Nutrition for These Buttery Dessert Recipes
I always like to give a rough idea of what goes into these wonderful treats, even though they disappear so fast! Remember, nutrition facts are just estimates here, calculated based on my recipe notes and using standard ingredient volumes. Things like how much you dip in chocolate or the exact brand of butter you use will change the final numbers, but this gives you a good starting point for these buttery dessert recipes.
- Serving Size: 1 cookie (about 1/12th of the batch, un-dipped)
- Calories: 135
- Fat: 9g
- Saturated Fat: 5g
- Carbohydrates: 13g
- Sugar: 8g
- Protein: 2g
- Cholesterol: 30mg
We have a fairly high fat content, which is what makes these butter cookies so satisfying! The ingredients are simple—a true testament to how good food doesn’t need extra additives. If you are watching your intake, know that the dipping chocolate will add significantly to the sugar and fat content, but it’s worth it for a holiday treat!
For other recipes that focus on balancing flavor with nutrition goals, you might want to bookmark my Greek Yogurt Banana Bread recipe for a slightly different kind of indulgence.
Share Your Homemade Butter Cookies Creations
Now you have no excuses! You have the best recipe, the science behind why it works, and all my little tricks to guarantee success right here. When you make these classic butter cookies, I truly want to see them! Getting that perfect piped shape or that beautiful chocolate dip is so satisfying, and I love seeing your results.
When you finish baking, please come back here and leave a review. If you loved how these turned out, giving the recipe 5 stars is the absolute best way to tell me, and it helps other folks who are nervous about baking find this easy homemade butter cookies guide! If you snap a picture of your platter, tag me on social media—I always check my tags! And if you have any lingering questions about the process, pop over to my contact page, and let’s chat through it. Happy baking, friends!
PrintClassic Melt-in-Your-Mouth Butter Cookies
Follow this easy recipe to make classic, rich butter cookies that are crisp on the edges and tender inside. These simple cookies use basic ingredients and are perfect for beginners or holiday baking.
- Prep Time: 20 min
- Cook Time: 12 min
- Total Time: 32 min
- Yield: 3 dozen 1x
- Category: Dessert
- Method: Baking
- Cuisine: American
- Diet: Vegetarian
Ingredients
- 1 cup (2 sticks) unsalted butter, softened
- 3/4 cup granulated sugar
- 1 large egg yolk
- 1 teaspoon vanilla extract
- 2 1/2 cups all-purpose flour
- 1/2 teaspoon salt
- Optional: 4 ounces semi-sweet chocolate, melted (for dipping)
- Optional: Sprinkles or coarse sugar (for topping)
Instructions
- In a large bowl, cream the softened butter and granulated sugar together with an electric mixer until the mixture is light and fluffy. This takes about 3 minutes.
- Beat in the egg yolk and vanilla extract until just combined. Scrape down the sides of the bowl as needed.
- In a separate medium bowl, whisk together the all-purpose flour and salt.
- Gradually add the dry ingredients to the wet ingredients, mixing on low speed until a soft dough forms. Do not overmix.
- Transfer the dough to a piping bag fitted with a large star tip (like a Wilton 1M) for decorative shapes, or use a cookie scoop for simple mounds. If the dough is too soft to pipe, chill it for 15 minutes.
- Preheat your oven to 350°F (175°C). Line baking sheets with parchment paper.
- Pipe or drop mounds of dough onto the prepared baking sheets, leaving about 2 inches between each cookie.
- Bake for 10 to 12 minutes, or until the edges are lightly golden brown. These are best when they remain pale in the center for a soft texture.
- Let the cookies cool on the baking sheet for 5 minutes before carefully transferring them to a wire rack to cool completely.
- If dipping, melt the chocolate according to package directions. Dip half of each cooled cookie into the melted chocolate and immediately sprinkle with sprinkles or coarse sugar, if using. Let the chocolate set completely before serving.
Notes
- For a softer cookie, reduce the baking time by one minute.
- If you do not have a piping bag, press the dough into a disk and slice into wedges, similar to shortbread cookies.
- These rich vanilla cookies store well in an airtight container at room temperature for up to one week.
Nutrition
- Serving Size: 1 cookie
- Calories: 135
- Sugar: 8
- Sodium: 45
- Fat: 9
- Saturated Fat: 5
- Unsaturated Fat: 4
- Trans Fat: 0
- Carbohydrates: 13
- Fiber: 0
- Protein: 2
- Cholesterol: 30