
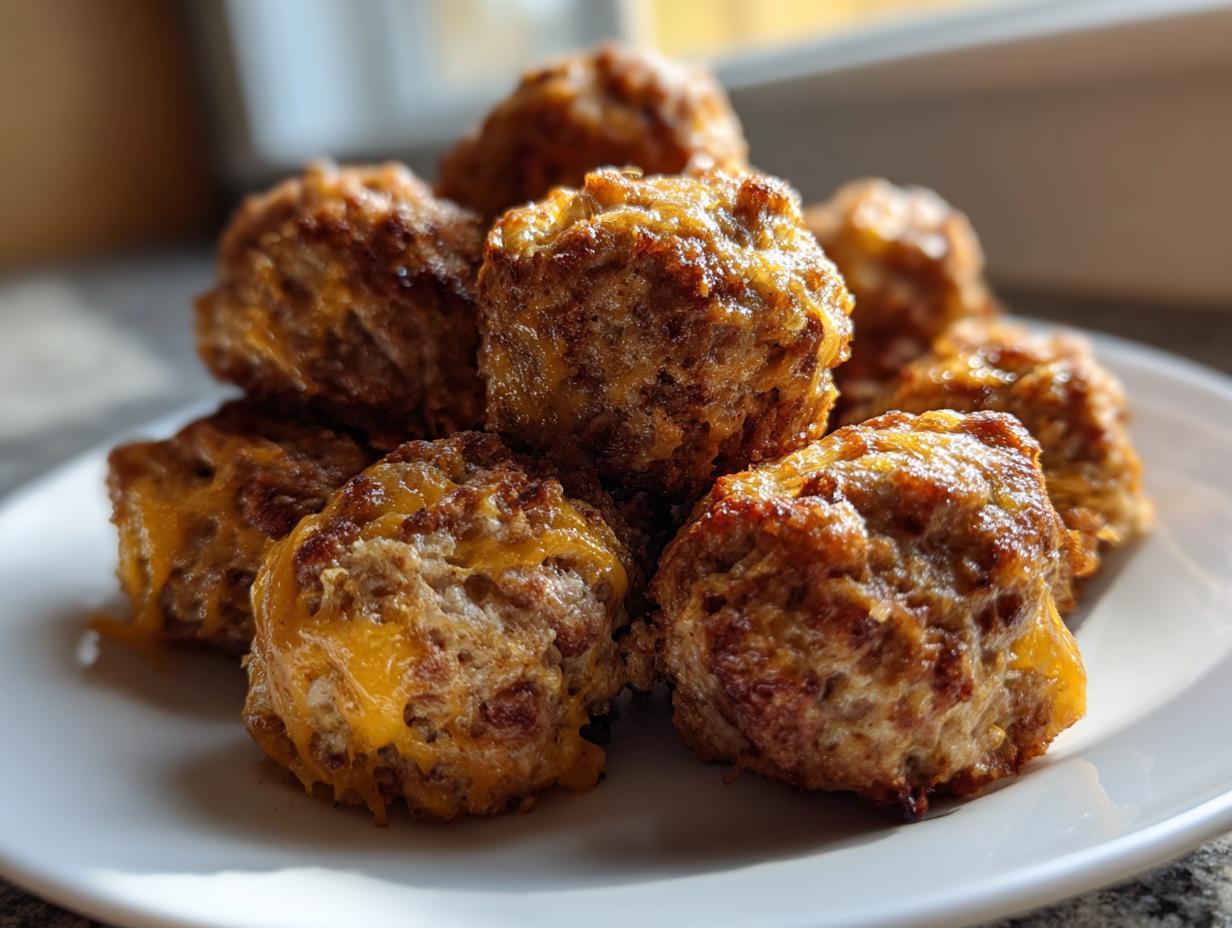
Okay, let’s talk about party prep stress, or rather, the complete *lack* of it when you have this recipe tucked into your back pocket. Seriously, the secret weapon for any last-minute gathering, holiday platter, or even just a cozy weekend brunch, is the classic **bisquick sausage balls**. I learned early on, standing on that wobbly stool in my childhood kitchen, that the most beloved foods—the ones people always ask for—are often the simplest. Forget fancy techniques! These are the ultimate 3-ingredient appetizer that always disappears first. They’re savory, they’re cheesy, and best of all, they require almost no thought once you’ve learned the magic ratio. We’re making the original, foolproof version right now!
- Why This Classic bisquick sausage balls Recipe Works Every Time
- Gathering Your Ingredients for bisquick sausage balls
- Step-by-Step Guide to Making Your bisquick sausage balls
- Tips for Success with Your Easy Sausage Balls Recipe
- How to Store and Reheat Make Ahead Sausage Balls
- Variations on the Classic Sausage Ball Recipe
- Serving Suggestions for bisquick sausage balls
- Frequently Asked Questions About bisquick sausage balls
- Nutritional Estimate for this Simple Baking Mix Recipe
- Share Your Perfect bisquick sausage balls
Why This Classic bisquick sausage balls Recipe Works Every Time
When you see other recipes shoving in eggs, sour cream, or other binders, you can just smile because you know the secret: this tried-and-true combo is superior. For the best crowd pleasing appetizer, we only need three things: sausage, cheese, and Bisquick. That’s it! I’ve tested versions with everything under the sun, and folks always come back to this simple, classic mix.
- It needs zero extra moisture. The fat from the sausage and the cheese keeps everything supremely tender.
- It stays put! You won’t end up with greasy puddles on your baking sheet, which happens when you overcomplicate the base dough.

The Perfect Texture of bisquick sausage balls
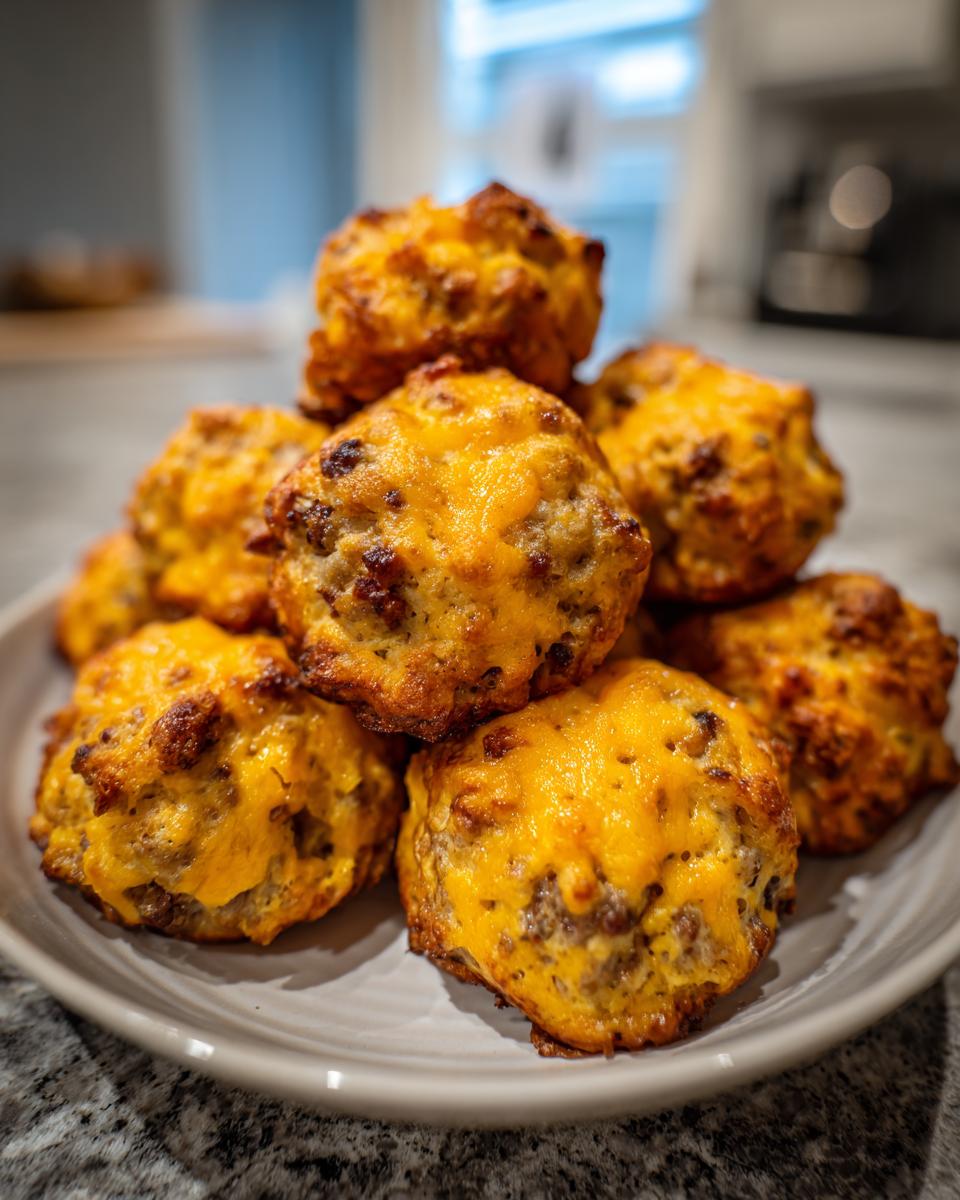
This is where the baking mix really shines, folks. Bisquick isn’t just flour; it has leavening agents already mixed in—and that’s our structure! That little bit of lift, combined with the fat, ensures you get a soft, fluffy interior rather than a hard, dense brick. It absorbs just enough sausage grease during baking and puffs up perfectly. That’s straight-up kitchen science right there!
Ideal for Game Day Snacks and Parties
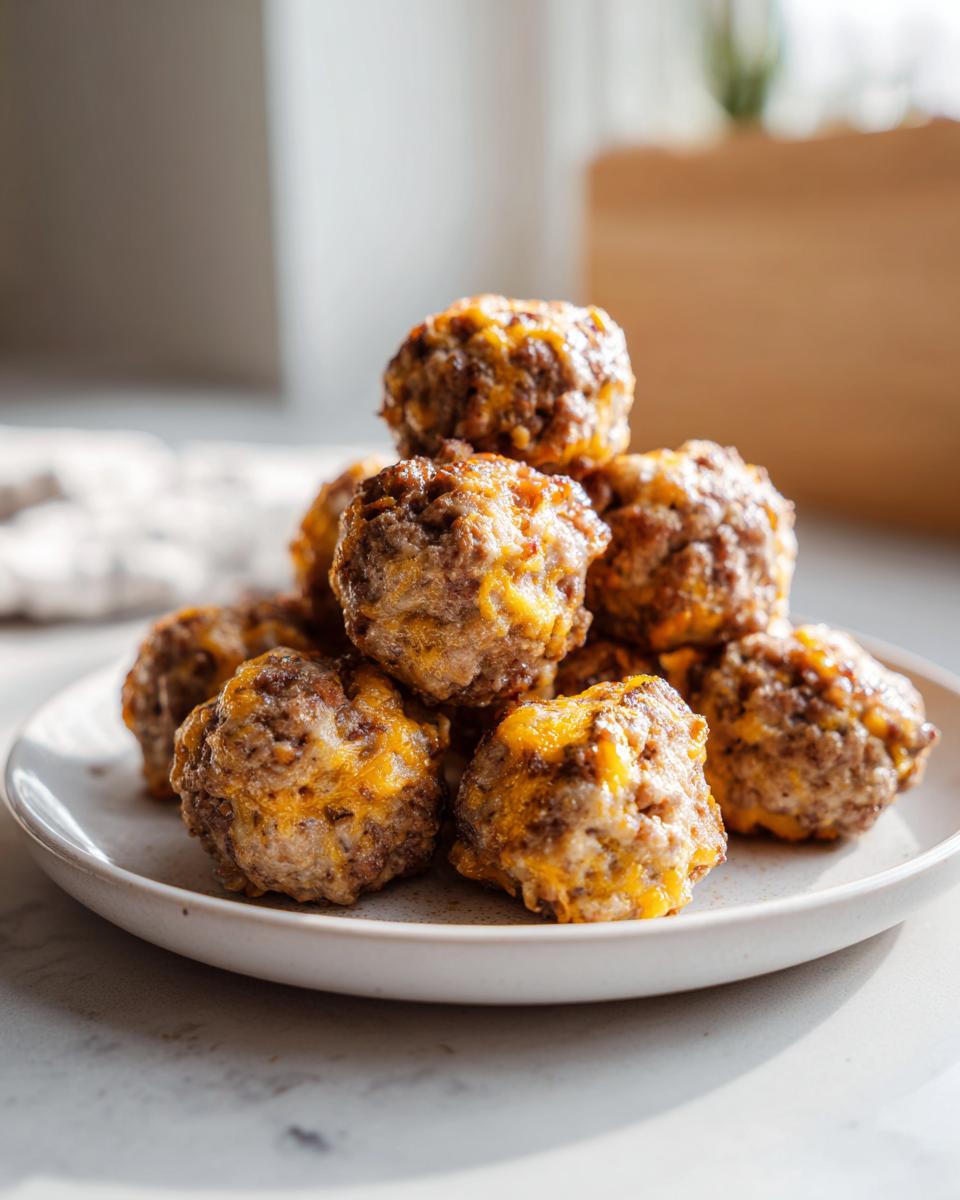
Because they are so reliable and only have three ingredients, these become my go-to for last-minute hosting. Need something for your next round of Game Day Snacks? Done. They are the definition of low-fuss, high-reward Party Sausage Appetizers. They bake up gold and smell absolutely divine.
Gathering Your Ingredients for bisquick sausage balls
Honestly, gather your ingredients? That’s about all the effort this section takes! This is the beauty of the true **3 Ingredient Appetizer**—no running to five different specialty stores needed. When I first started cooking, I loved feeling like I was making something complex, but now I truly treasure these simple recipes that taste incredible without the fuss. For our classic batch, which yields about two dozen perfect bites, here is everything you need. Keep in mind, using good quality sausage really makes a difference here!
Ingredient Breakdown and Preparation Notes
These proportions are what make the difference between a good sausage ball and the absolute *best* one. Don’t eyeball the Bisquick; it’s the binder that sets the structure!
- 1 pound ground pork sausage (raw). You can use mild or spicy here. I usually lean toward spicy because the sharp cheddar balances it so nicely. If you’re serving kids, mild is safer!
- 1 cup sharp cheddar cheese, shredded. This is vital: please use freshly shredded cheddar if you can! The pre-shredded bags have anti-caking agents that sometimes prevent that perfect melt and ooze we want.
- 1 1/2 cups Bisquick Original Baking Mix. This is the magic component! Don’t try to substitute it with regular flour, as you’ll end up with dense hockey pucks. We need that lift from the mix.
That’s it, friends. Once you have these three things ready, you can whip up a batch today, long before your next Quick Easy Breakfasts emergency strikes!
Step-by-Step Guide to Making Your bisquick sausage balls
Okay, here’s where we put our beautiful ingredients to work! First things first, heat up that oven to 350 degrees F. Don’t forget to grab a baking sheet now and give it a light grease—or line it with parchment paper if you’re like me and hate scrubbing off baked cheese later. Trust me, setting that temp first keeps you moving smoothly through the mixing process, which is surprisingly quick!
Mixing the Dough for Cheesy Sausage Bites
In a large bowl, dump in your sausage, your shredded cheese, and that Bisquick. Now, you absolutely must use your hands for this part. I tried spoons once, and it was a disaster! Gently squeeze and fold everything together. The absolute expert secret here is to stop mixing the second you don’t see any dry streaks of Bisquick left. If you overwork this dough, they get tough quick. We want tender Cheesy Sausage Bites, not rubber!
Shaping and Baking the bisquick sausage balls
Once it’s just combined, you’re ready to roll! Use a small scoop or just your fingers to form little balls. I aim for about 1 inch across—think slightly smaller than a golf ball. Place them on your prepared sheet, making sure to leave about an inch of space between each one so they have room to breathe and brown evenly. Pop them into that 350-degree oven for 15 to 18 minutes. You’re looking for golden brown perfection on the outside. Once they come out, just let them sit on the pan for a few minutes before moving them to a cooling rack. They are so much better warm!
Tips for Success with Your Easy Sausage Balls Recipe
When I was testing this recipe hundreds of times (yes, hundreds—a girl’s gotta be sure!), I learned a few tiny things that take these from good to absolutely unforgettable. These aren’t complex steps, but they are the little details that people who have been making these for decades swear by. You’ve got the easy foundation, now let’s perfect the execution!
First, let’s talk sausage choice, because this is where you can tailor the whole flavor profile. Most folks default to standard, mild pork sausage, which is totally fine and works perfectly for a neutral, crowd-pleasing bite. But if you’re looking for that little kick that really wakes up the cheese, reach for the hot ground sausage. It heats up beautifully in the oven and gives these **cheesy sausage bites** a fantastic, savory depth. I use spicy whenever I’m making these for a grown-up gathering.
Next up is the cheese—and I cannot stress this enough: shred it yourself! Pre-shredded cheddar is coated in things like potato starch or cellulose to keep it from clumping in the bag. That powder means your cheese won’t melt as smoothly and beautifully as it should. We want that glorious, melty fat content to coat the Bisquick and sausage almost like a glue. Take five extra minutes to shred a block of sharp cheddar; it makes the texture heavenly and ensures everything holds together properly. Don’t skip this step if you want truly superior flavor!
One final thought: chilling the mixture. If your kitchen is warm, or if you’re making a huge batch and your hands are warming up the dough too much while rolling, pop the whole mixing bowl (covered, of course) into the fridge for about 15 minutes. Slightly colder dough is easier to handle, rolls into neater balls, and helps prevent sticking. This is a lifesaver, especially when you’re planning to make these as freezer friendly appetizers later on!
How to Store and Reheat Make Ahead Sausage Balls
This is one of the best things about this truly magnificent **Easy Sausage Balls Recipe**: you can make them way ahead of time, which means less stress when company shows up! Whether you’re prepping for a huge holiday party or just want quick breakfast bites ready for the week, these hold up beautifully. I always try to make a double batch because they keep so well, and frankly, they taste amazing reheated the next day.
You have two options here: keeping them ready to bake raw, or cooling them completely after they come out of the oven. Both are pretty simple, but you need to treat them differently to make sure they don’t dry out!
Preparing Unbaked Sausage Balls for Storage
If you know you won’t bake until the next day, mixing the dough ahead is a genius move. Simply roll them into those perfect 1-inch balls just like you would for baking. Place them onto a baking sheet lined with parchment paper so they aren’t touching each other. Cover that tray tightly with plastic wrap and slide it into the refrigerator. This is perfect for keeping them fresh for up to 24 hours. When you’re ready to serve, just slide that whole tray right into the 350°F oven—you might need to add about 5 extra minutes since they are starting out cold, but they will come out perfect!
Freezing Baked bisquick sausage balls
If you want longer keeping, freezing is the way to go. Bake them completely as the recipe directs, let them cool down totally on a wire rack—this is crucial! If you bag them warm, you’ll steam them, and nobody wants soggy **Game Day Snacks**. Once they are completely cool, pop the baked and cooled sausage balls into a heavy-duty freezer-safe bag. Seal it up tight (suck out any extra air if you can!).

These **Make Ahead Sausage Balls** are safe and delicious in the deep freeze for up to 3 months. Honestly, they rarely last that long around here! When you need a quick snack, you can reheat them straight from frozen. Just pop them on a baking sheet at 350°F for about 15–20 minutes, or zap them in the microwave for 45 seconds until hot all the way through. See? Easy, easy, easy! You can find more handy tips for making delicious make-ahead breakfasts on my prep guide.
Variations on the Classic Sausage Ball Recipe
Part of the joy of a recipe this foundational is knowing you can tweak it slightly to hit exactly the right note for your crowd! Because the core structure—sausage, cheese, Bisquick—is so sturdy, we have a little wiggle room to play around without ruining that perfect melt and texture. We’re not adding wet binders or extra flour here, though; we’re just jazzing up the flavor profile!
If you want to amp up the spice game beyond using hot sausage, try swapping out some of that standard sharp cheddar. This is where you can turn these simple bites into amazing cheddar sausage balls with a little extra flair. Monterey Jack is a fantastic swap because it melts beautifully, similar to cheddar, but offers a milder, creamier flavor. However, my favorite way to add a little heat without going full-on spicy sausage is by using Pepper Jack cheese. It gives you those little flecks of spice that look really appealing when the balls are baked!
Another simple addition that elevates these immensely—especially if you are serving them as a savory breakfast item—is dried herbs. A teaspoon of dried sage works magic with pork sausage. You just crumble it right into the mix along with the other three ingredients. The sage hits that earthy, comforting note that makes these feel more intentional, even though it only took you two seconds longer to mix!
Don’t go crazy though! Remember, the whole point of this recipe is keeping it simple. A great rule of thumb is: if an ingredient adds a lot of liquid (like diced jalapeños if they aren’t perfectly dry), skip it, or you risk having to add more Bisquick, which throws off that perfect ratio we worked so hard to establish!
Serving Suggestions for bisquick sausage balls
So, you’ve pulled a tray of perfectly golden and savory **bisquick sausage balls** out of the oven. What now? While they are seriously fantastic standing all on their own—especially served piping hot right off the tray—they become a real showstopper when you pair them with the right companion. Think of these as the perfect savory counterpart to whatever else you’re serving, whether it’s a big brunch spread or just an afternoon snack while watching the game. They are robust enough to handle a dipping sauce, too!
If you are leaning into the **Game Day Snacks** vibe, you need something tangy to cut through that rich sausage and cheese. I often serve these with a classic honey mustard, but I’ve recently been obsessed with making a quick whipped dip. If you want something incredibly easy that tastes gourmet, you have to try whipping up some whipped goat cheese! You just blend goat cheese, a touch of cream cheese, maybe a little splash of milk, and some black pepper until it’s airy. It’s tangy, slightly salty, and unbelievably good dragged across one of these warm bites.
For a breakfast or brunch setting, skip the heavy sauces and play up the savory nature of the pork. They are wonderful served alongside fresh fruit bowls—something bright like melon or citrus helps balance the richness. You can also serve a small bowl of pepper jelly right beside them. It sounds strange, but that sweet heat mixture with the savory sausage is a classic Southern combination for a reason; it just works! These versatile little guys truly shine no matter what you pair them with.
Frequently Asked Questions About bisquick sausage balls
When I perfected this recipe in my test kitchen, I wrote down every single question that came up because I knew if I had that doubt, you probably would too! Dealing with simple recipes sometimes brings up the most specific questions, right? Don’t worry; we’re clearing up all the little details about making these perfect **Party Sausage Appetizers** so you can bake them with total confidence every time.
Can I substitute the Bisquick?
Oh, I get asked this one all the time! The short answer is: you *can*, but you really shouldn’t if you want *this* specific result. The reason this is such a fantastic **Simple Baking Mix Recipe** is because Bisquick already contains flour, salt, and a leavening agent (baking powder/soda). If you substitute it with plain all-purpose flour, you are missing that lift, and you’ll have to add baking powder yourself—and even then, the texture won’t be quite the same. Trust me, for the best, fluffiest result, stick with the original baking mix for this classic formula.
What is the best cheese for these Party Sausage Appetizers?
Sharp cheddar is the classic superstar here, and for good reason! It offers the perfect combination of sharp flavor to cut through the richness of the sausage, and it melts beautifully. If you’re making these for a crowd and want to mix it up, I highly recommend using half sharp cheddar and half Monterey Jack. That Jack cheese absolutely melts like a dream and keeps things super moist. For a little kick, go for Pepper Jack! It keeps the structure reliable while boosting the flavor profile just a touch without needing any extra spices.
Another question I often get is about keeping hands clean when rolling. If you are making a huge batch, keep a small bowl of water nearby and dip your hands quickly between rolling every three or four balls. It stops the raw sausage and cheese from sticking relentlessly! If you’ve tried these out, please reach out via my contact page and let me know how they turned out!
Nutritional Estimate for this Simple Baking Mix Recipe
Now, I know some of you are tracking what goes into your bodies, even when enjoying the best party food, right? Since these **bisquick sausage balls** use just three core ingredients—sausage, cheese, and the mix—the numbers are pretty straightforward. But listen, I have to be clear: this is just USDA and standard nutritional estimations based on using average ground pork sausage and sharp cheddar.
When you make these, the final count can definitely shift depending on how fatty your sausage is or if you decide to use a lighter cheese. That said, it’s great to know what you’re serving! Because we aren’t adding extra binders or heavy dips, these lean nicely into being a fantastic, protein-packed option for your next gathering. If you’re looking for other simple ways to eat well during the week, check out my thoughts on healthy lunch ideas!
Here is the breakdown for one standard 1-inch ball:
- Serving Size: 1 ball
- Calories: About 110
- Fat: Roughly 8g (A little over 3g saturated)
- Carbohydrates: Only 5g
- Protein: A solid 6g
- Sugar: Less than 1g!
See? Pretty excellent for something that tastes this comforting and delicious! They offer a good balance of protein and fat, making them a satisfying snack for any event.
Share Your Perfect bisquick sausage balls
Alright, now that you know the magic behind the classic, foolproof recipe, I honestly can’t wait to hear about your batch! Knowing that you successfully whipped up these **bisquick sausage balls** without a hitch is what makes all my recipe testing worthwhile. Sharing food is all about connection, whether it’s around my kitchen table or yours.
So please, when you’ve made yourself a batch of these incredibly easy **Southern Sausage Appetizer** delights, come back here and leave your thoughts! Did you stick strictly to the three ingredients, or did you try one of my variation tips?
- I’d love it if you left a rating—tapping those five stars tells me you loved them as much as my family does!
- Tell me what occasion you served them at. Were they the hit at a giant tailgate party, or were they just a Tuesday night snack for your kiddos?
Your feedback truly helps other home cooks gain the confidence to try this simple recipe. It’s how we grow our skills together! And hey, for peace of mind regarding your privacy when you leave a comment, you can always check out my privacy policy notes. Happy cooking, everyone!
PrintClassic 3-Ingredient Bisquick Sausage Balls

Make these easy sausage balls using Bisquick mix, ground sausage, and cheddar cheese. This simple recipe creates a perfect, savory appetizer for parties or quick breakfasts.
- Prep Time: 10 min
- Cook Time: 18 min
- Total Time: 28 min
- Yield: About 24 balls 1x
- Category: Appetizer
- Method: Baking
- Cuisine: American
- Diet: Low Calorie
Ingredients
- 1 pound ground pork sausage (mild or spicy)
- 1 cup sharp cheddar cheese, shredded
- 1 1/2 cups Bisquick Original Baking Mix
Instructions
- Preheat your oven to 350 degrees F. Lightly grease a baking sheet or line it with parchment paper.
- In a large bowl, combine the ground sausage, shredded cheddar cheese, and Bisquick baking mix.
- Use your hands to mix the ingredients thoroughly until they are completely combined. Do not overmix.
- Roll the mixture into balls about 1 inch in diameter. Place the balls onto the prepared baking sheet, leaving about 1 inch of space between them.
- Bake for 15 to 18 minutes, or until the sausage balls are golden brown and cooked through.
- Remove from the oven and let them cool slightly on the baking sheet before serving.
Notes
- For a spicier bite, use hot ground sausage instead of mild.
- You can make these ahead of time; store unbaked balls on a tray in the refrigerator for up to 24 hours before baking.
- These sausage balls freeze well. Place baked, cooled balls in a freezer-safe bag and freeze for up to 3 months. Reheat in the oven or microwave.
Nutrition
- Serving Size: 1 ball
- Calories: 110
- Sugar: 1
- Sodium: 350
- Fat: 8
- Saturated Fat: 3
- Unsaturated Fat: 5
- Trans Fat: 0
- Carbohydrates: 5
- Fiber: 0
- Protein: 6
- Cholesterol: 25