
Oh, there is just nothing in the world that smells quite like a truly homemade blackberry pie baking in the oven. It just pulls you right back to childhood, doesn’t it? I swear, the aroma alone makes me want to find an old stool and watch someone bake all day! Well, forget those flimsy, sad store-bought things. What I’m sharing with you today is my absolute favorite—the Classic Homemade Blackberry Pie with Flaky All-Butter Lattice Crust. This recipe takes that cozy, Old Fashioned Pie feeling and pairs it with the reliability you get when a recipe developer like me, Jade Carter, tests it until it’s absolutely foolproof. Trust me, we nailed the crust on this one!
- Why This Homemade Blackberry Pie Recipe Is a Must-Try
- Gathering Ingredients for Your Blackberry Pie Recipe
- How to Make Blackberry Pie from Scratch: Step-by-Step
- Tips for the Best Blackberry Pie Success
- Serving Suggestions for Your Old Fashioned Pie
- Storing and Reheating Your Blackberry Pie
- Frequently Asked Questions About Blackberry Pie
- Estimated Nutritional Data for This Blackberry Pie Recipe
- Share Your Homemade Blackberry Pie Creations
Why This Homemade Blackberry Pie Recipe Is a Must-Try
I know you’ve searched for just the right Blackberry Pie Recipe, and here it is! I developed this one blending my test kitchen experience with the soul of genuinely comforting food. You don’t need to stress over the results, because these instructions just *work*. It’s all about trust, right?
- It’s designed for absolute reliability, giving you that showstopper look every time you pull it out of the oven.
- We handle the berries perfectly to guarantee that famous, addictive sweet-tart flavor.
- This recipe is so versatile—it handles gorgeous fresh summer berries or those solid frozen ones you keep tucked away!
Achieving the Perfect Flaky Double Crust
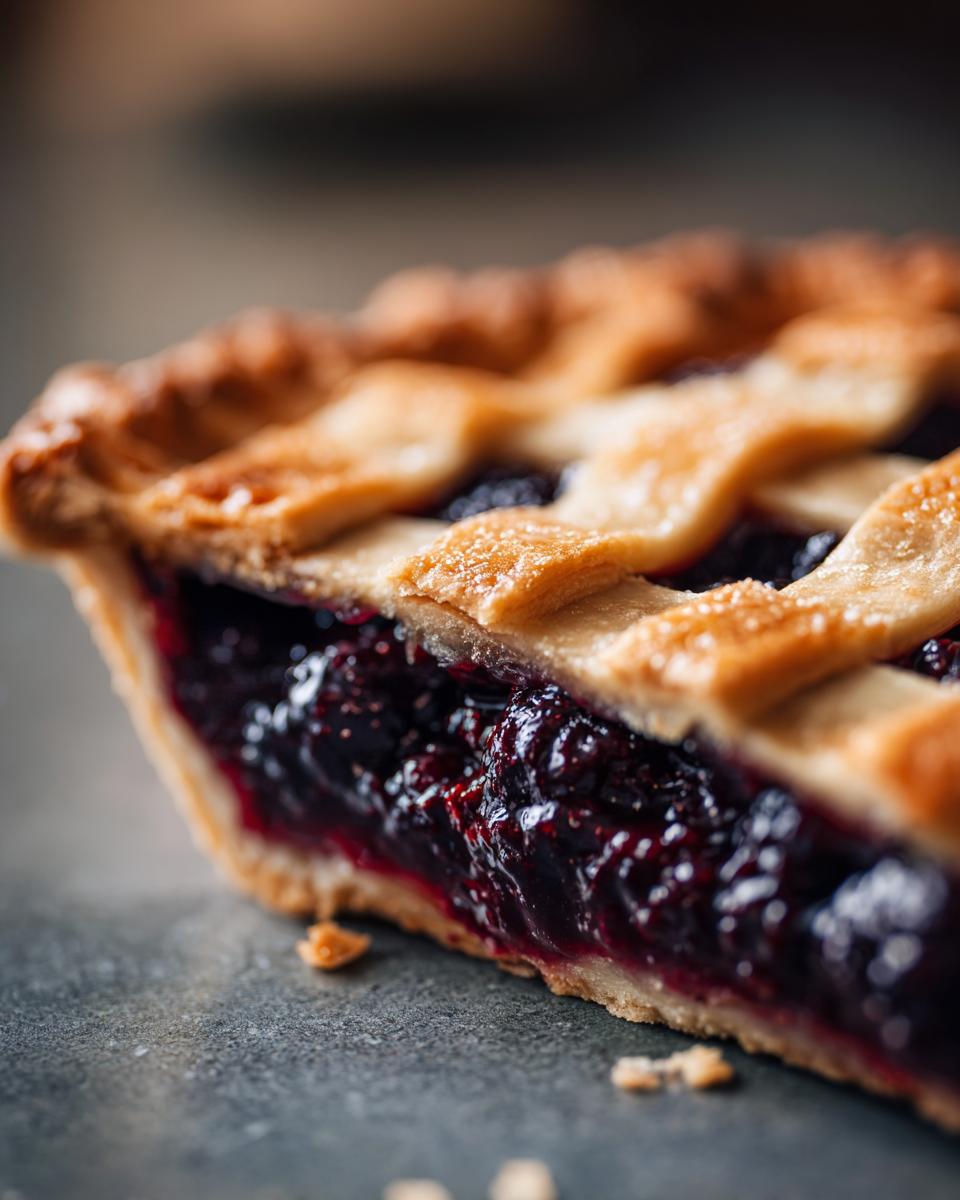
The crust is everything in a Homemade Blackberry Pie, so we focus heavily on that Buttery Pie Shell. The absolute secret here is keeping everything frigid—your butter, your water, even your bowl if you can manage it! This extreme cold creates steam pockets in the oven, meaning you get those wonderful flakes and dramatically help you avoid that dreaded No Soggy Bottom Pie scenario. It’s all technique, and it’s easier than you think!
The Secret to Sweet Tart Berry Filling
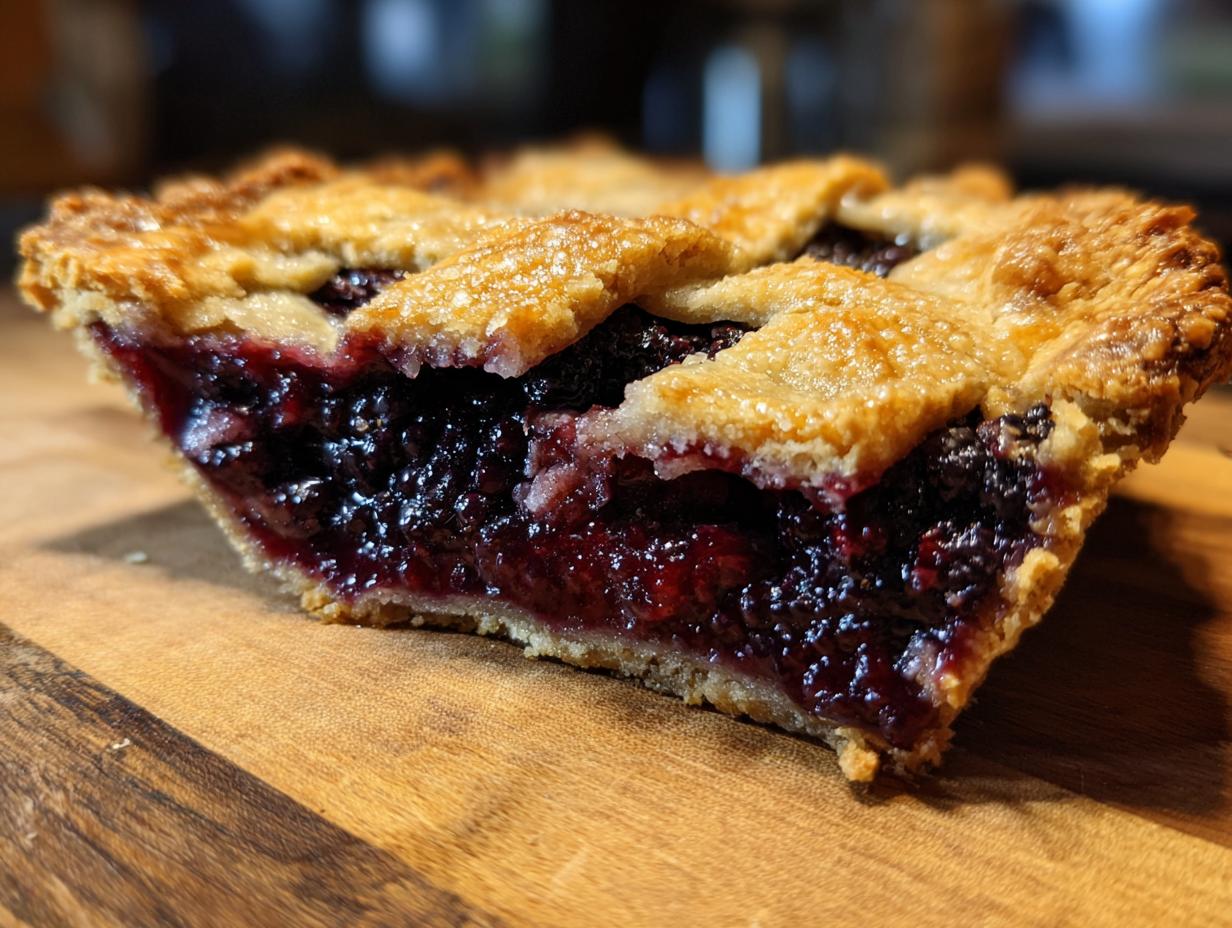
Nobody likes a pie that tastes like pure sugar syrup, right? That beautiful flavor balance comes from carefully measuring the sugar against that sharp hit of fresh lemon juice and zest. This is what makes our Blackberry Filling sing! Whether you’re grabbing berries from the patch or pulling a bag from the freezer, this ratio holds up perfectly, ensuring you get that authentic, juicy experience.
Gathering Ingredients for Your Blackberry Pie Recipe
Okay, the fun part! Getting ready to make magic. The best part about this Classic American Dessert is that we aren’t hunting down fancy foreign ingredients. These are mostly things you probably already have in your pantry or freezer. Since we are focusing on that amazing flaky crust, make sure your cold butter is ready to go!
For the Flaky Pie Crust Dough
Remember, for this Flaky Pie Crust, the temperature of these ingredients is mission-critical. Don’t skip the chilling steps later!
- 2 1/2 cups all-purpose flour
- 1 teaspoon salt
- 1 cup (2 sticks) cold unsalted butter, cut into cubes
- 1/2 cup ice water (plus more if needed)
For the Sweet Tart Blackberry Filling
This is where the flavor explosion happens. Don’t be tempted to skimp on the cornstarch; that guarantees your beautiful Blackberry Filling sets up nicely.
- 6 cups fresh or frozen blackberries
- 1 1/2 cups granulated sugar (you can tweak this a touch if your berries are ultra-sweet)
- 1/4 cup cornstarch
- 1 tablespoon lemon juice
- 1 teaspoon lemon zest
- 1/4 teaspoon ground cinnamon
- Pinch of salt
- 1 large egg, beaten with 1 tablespoon milk (for egg wash)
- 1 tablespoon coarse sugar (for sprinkling)
How to Make Blackberry Pie from Scratch: Step-by-Step
Alright, let’s get down to business! Making a real blackberry pie from scratch sounds intimidating, but honestly, it’s just a series of simple, satisfying steps. Since we put so much work into that dough—and you truly want that Flaky Pie Crust—we have to treat it gently. We’re going to walk through this slowly so you see exactly how to get that gorgeous, golden result. Don’t forget, if you’re looking for that deep-dive on the crust process, check out the section above on the Old-Fashioned Blackberry Pie! For now, let’s build this beauty.
Mixing and Chilling the Buttery Pie Shell
First up, the dough! In a big bowl, you’ll whisk your flour and salt. Now, for the butter—you want those pea-sized chunks. I use my fingers mostly, just pinching and rubbing until that’s what I see. If you use a pastry blender, be quick! The goal is to keep the butter cold so it doesn’t melt into the flour. Once the butter looks right, start dripping your ice water in, maybe a tablespoon at a time. You stop the second the dough just clumps together when squeezed. Seriously, stop mixing then! Wrap those two disks tightly and send them straight to the fridge for at least an hour. That chill time is non-negotiable for a truly Buttery Pie Shell that holds its shape.
Assembling the Blackberry Filling
While the world waits for your crust to chill, move onto the filling. This is where we marry sweet and tart! In a separate bowl, gently mix your berries—fresh or frozen, remember!—with the sugar, cornstarch, zest, juice, cinnamon, and salt. I mean *gently* toss them. You don’t want to crush the berries and bleed out all that lovely purple juice before they even hit the oven. Just enough stirring so that powdery cornstarch disappears across all the fruit. Set that bowl aside; it’s waiting its turn.
Creating the Lattice Pie Topping
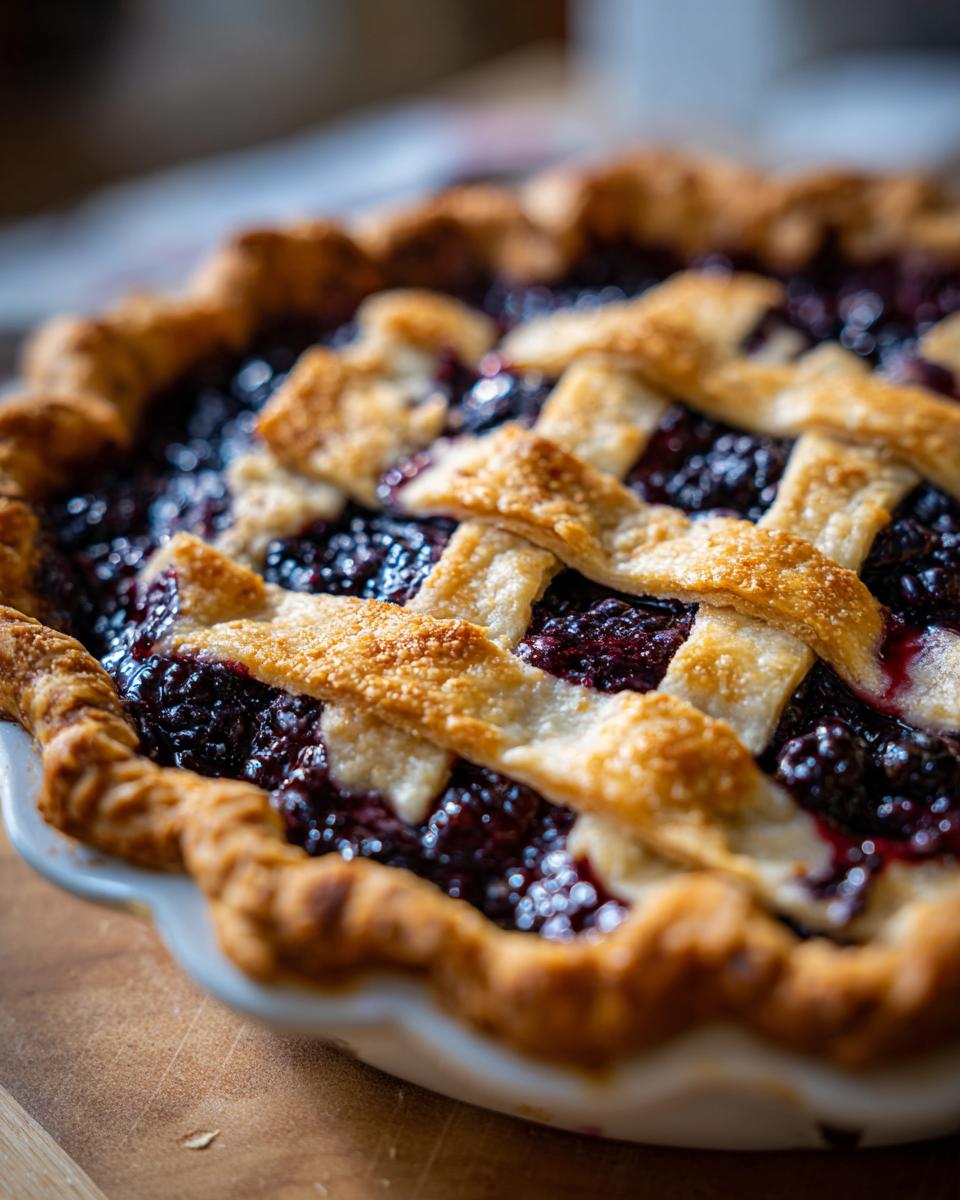
Time for the fancy part! Roll out your second chilled dough disk into a circle, keep it about 11 inches across. Now, slice it into strips about three-quarters of an inch wide. This is how we create that beautiful Lattice Pie Topping. Weaving them over the filling takes a little patience, but it looks so impressive! Once your top is woven, trim the edges neatly, fold the bottom overhang up over the lattice strips, and crimp it tightly. To really lock in that flakiness and ensure a No Soggy Bottom Pie experience, pop the whole thing—filling and all—back into the fridge to chill for 15 minutes. Cold dough in a hot oven equals happiness!

Baking Your Perfect Blackberry Pie
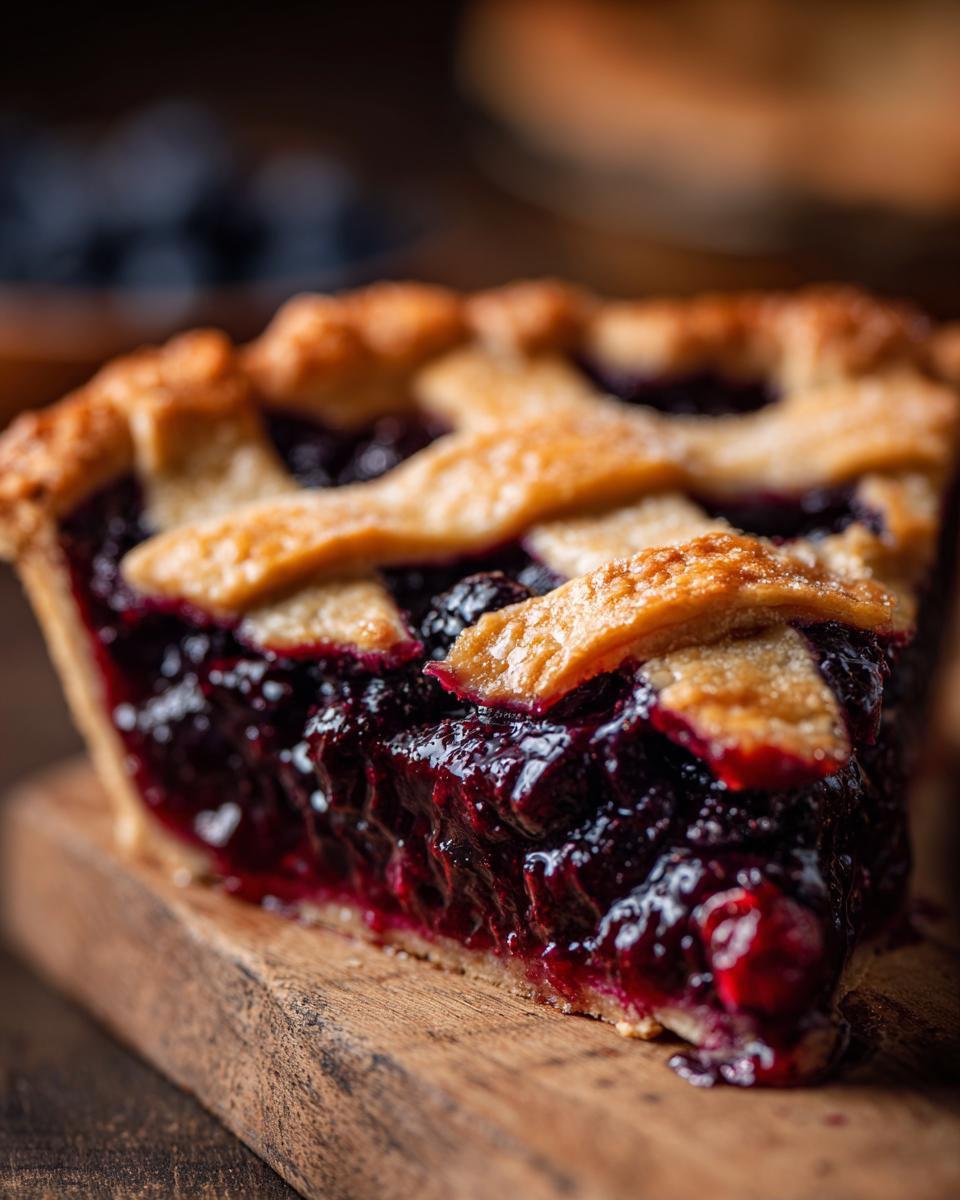
Okay, oven time! Preheat to 400°F (200°C). Place the pie on a rimmed baking sheet—trust me on this, those berry juices *will* bubble over! Bake it hard at 400°F for about 20 minutes. Then, drop the temperature down to 375°F (190°C) and let it bake for another 35 to 45 minutes. If you notice the edges of your Homemade Blackberry Pie crust browning too fast (and they will!), grab some foil and loosely wrap it around the perimeter. You’re looking for a deeply golden crust and seriously thick, bubbly filling!
I’m so excited for you to try this! You can review our privacy policy here: Privacy Policy Link.
Tips for the Best Blackberry Pie Success
We’ve navigated the dough and the assembly, but these final little pointers are what separate a good blackberry pie from the *best* one on the block! These are lessons I learned the hard way in test kitchens—little shortcuts that save you stress and guarantee that impressive slice.
Handling Frozen Blackberry Pie Berries
This tips comes straight from the little notes I added by the ingredients: If you’re using frozen blackberries, please, please do not bother thawing them first! Seriously, don’t do it. If you thaw them, they get mushy before they even hit the oven, and you end up with way too much liquid weeping into your beautiful crust. Just toss those frozen berries straight into your sugar mixture. You might need to add about five or ten extra minutes to the baking time, but it’s worth it for that structure.
The Crucial Cooling Period for Blackberry Pie
This is the hardest part, I admit it! You’ve just pulled out this gorgeous aroma bomb, and you want to cut into it right away, right? You absolutely must resist that urge! Your Blackberry Pie needs to cool for a minimum of three to four hours. Why? Because the cornstarch we added to the filling needs time to cool down and set up properly. If you slice it early, even if it seems bubbly, you’ll end up with a runny, soupy mess rather than those picture-perfect slices you deserve. Think of the cool-down time as the final step of baking. Visit our friends for a great serving tip while you wait!
Serving Suggestions for Your Old Fashioned Pie
Whew! If you managed to wait those crucial cooling hours, you’ve earned the best part—eating it! This gorgeous Old Fashioned Pie isn’t just great on its own, though. It screams out for a cool companion, especially when you’re enjoying it as part of those glorious Summer Dessert Recipes.
My go-to recommendation? You absolutely need vanilla ice cream. The contrast between the warm (but set!) spiced berries and that slowly melting, creamy coldness is just heaven. It’s a whole experience for your mouth! If you’re keeping things just a little lighter, a big swirl of freshly whipped cream makes everything taste instantly luxurious. My friends who prefer less sweet things often say that the plain whipped cream does the best job of balancing that sweet-tart burst from the berries.
You can find some amazing inspiration for styling your slice over here: Check out these ideas! Honestly, serve it however you like, but don’t forget to tell me how you enjoyed your slice!
Storing and Reheating Your Blackberry Pie
So, you made it through the cooling period and devoured at least one slice—congratulations! Now we talk about the sad, but necessary, part: storage.
Where you keep your leftover blackberry pie actually matters a lot, especially since this one is packed with juice. Generally, because of the high sugar content in the filling and the rich butter in the crust, you can leave the pie covered loosely on the counter for about a day. I usually prefer to cover mine with a big cake dome or loosely tent some foil over it so it doesn’t dry out.
If you know you won’t finish it within 24 hours, or if your kitchen is just super warm, move it into the fridge. I highly recommend bringing it back to room temperature for an hour or so before serving cold slices, just so the crust softens up a little bit. Don’t store it in an airtight container, though; that traps moisture and will absolutely make that beautiful Flaky Pie Crust start to turn soggy!
Warming Up That Last Slice
If I’m serving my final slice of Homemade Blackberry Pie, I never, ever zap the whole thing in the microwave. That just turns the filling hot and soupy while making the crust rubbery. No thanks!
The absolute best way to reheat a slice is in the toaster oven or a regular oven set low—maybe 325°F (160°C). Pop your slice on a small baking sheet for about 8 to 10 minutes. This warms the berries up just enough to get that lovely gooey texture back while helping the crust re-crisp slightly. It brings back that fresh-baked magic without drying everything out. If you’re going for that perfect pairing with melting ice cream, just the toaster oven method is all you need!
Frequently Asked Questions About Blackberry Pie
It’s totally normal to have questions when you’re baking something really special like this! I’ve pulled together the most common things readers ask me when they tackle their first blackberry pie. Getting these little details right is what turns a good bake into a fantastic one.
Can I use a crumble topping instead of a lattice for this blackberry pie?
Oh, absolutely you can! A streusel or crumble topping is delicious, especially if you want a super rustic, Easy Berry Pie feel. However, I have to be honest: this specific recipe is built around developing that gorgeous, golden Lattice Pie Topping. If you switch to a crumble, just remember that the top crust won’t be there to shield the berries, so you might want to watch your bake time closely!
What is the best way to thicken the Blackberry Filling?
The secret sauce for a Sweet Tart Berry Filling that actually sets up—and doesn’t spill all over your oven—is the cornstarch we included. It’s a powerhouse thickener! Make sure you whisk that cornstarch in really well with the sugar *before* you toss it with the berries. This prevents clumps and ensures that by the time your pie is cool, you have that perfect, jammy consistency that makes it a real Showstopper Dessert instead of a mess!
How far in advance can I make the pie dough?
This is fantastic news for planners! You can definitely make the dough ahead of time. Remember how I stressed extreme cold for the Buttery Pie Shell? Well, that cold needs time to let the gluten relax, which is why we chill it for an hour minimum. You can wrap those disks tightly and keep them in the fridge for up to three days! If you need longer, freeze them for up to three months. Just let the dough defrost slowly in the fridge before you roll it out. If you have any burning questions while tackling that dough, don’t hesitate to reach out via my contact page!
Estimated Nutritional Data for This Blackberry Pie Recipe
Now, I know we aren’t really baking this blackberry pie for the numbers, we’re baking it for the pure joy and the memory-making! But since I studied nutrition, I always like to include a little breakdown for those who track things. Remember, since this is such a rich, homemade dessert using real butter and tons of fresh fruit, these figures are just estimates based on the standard ingredients list. Your results might vary depending on how sweet your berries are and exactly how much butter sneaks its way into the crust!
- Serving Size: 1 slice
- Calories: 420
- Sugar: 45g
- Fat: 24g
- Saturated Fat: 15g
- Carbohydrates: 55g
- Protein: 5g
- Sodium: 210mg
See? Worth every single bite! Don’t stress over the sugar content; that’s the natural sugar from a whole cup of berries mixed with the molasses sweetness from the brown sugar we used in the crust. Keep enjoying this fantastic Classic American Dessert!
Share Your Homemade Blackberry Pie Creations
Oh wow, we made it! You’ve successfully navigated the world of flaky dough and sweet-tart filling to create a real, actual Old Fashioned Pie. That is something to be incredibly proud of! Now that you have this incredible dessert cooling on the rack, I really, really want to see what you’ve done. Did you master that Lattice Pie Topping? Did your filling set up perfectly?
Please, take a moment after you’ve had your first slice to come back here and leave a rating. If you loved this Blackberry Pie Recipe, give it five stars! It helps other home cooks know they are in the right place for a great bake. And if you made any tiny tweaks—maybe you swapped cinnamon for cardamom, or used all fresh berries—tell us about it in the comments below! I love hearing how this recipe fits right into your own family traditions.
If you took a picture of your glorious, golden masterpiece, please tag me on social media! I adore seeing your finished bakes. It truly makes my day to see your success with these recipes. You’ve conquered the art of the perfect Homemade Blackberry Pie, so go show the world that you’re a baking superstar!
PrintClassic Homemade Blackberry Pie with Flaky Lattice Crust
Make an old-fashioned blackberry pie from scratch featuring a sweet-tart filling and a perfectly flaky, buttery double crust. This recipe works well with fresh or frozen blackberries.
- Prep Time: 45 min
- Cook Time: 65 min
- Total Time: 1 hour 50 min
- Yield: 8 servings 1x
- Category: Dessert
- Method: Baking
- Cuisine: American
- Diet: Vegetarian
Ingredients
- 2 1/2 cups all-purpose flour
- 1 teaspoon salt
- 1 cup (2 sticks) cold unsalted butter, cut into cubes
- 1/2 cup ice water (plus more if needed)
- 6 cups fresh or frozen blackberries
- 1 1/2 cups granulated sugar (adjust based on berry sweetness)
- 1/4 cup cornstarch
- 1 tablespoon lemon juice
- 1 teaspoon lemon zest
- 1/4 teaspoon ground cinnamon
- Pinch of salt
- 1 large egg, beaten with 1 tablespoon milk (for egg wash)
- 1 tablespoon coarse sugar (for sprinkling)
Instructions
- Prepare the Pie Crust: In a large bowl, whisk together the flour and 1 teaspoon salt. Cut in the cold butter using a pastry blender or your fingers until the mixture resembles coarse crumbs with some pea-sized pieces of butter remaining. Gradually add the ice water, one tablespoon at a time, mixing until the dough just comes together. Do not overmix. Divide the dough in half, flatten each half into a disk, wrap in plastic, and chill for at least 1 hour.
- Prepare the Filling: In a separate bowl, gently combine the blackberries, granulated sugar, cornstarch, lemon juice, lemon zest, cinnamon, and a pinch of salt. Toss lightly until the berries are evenly coated. Set aside while you roll out the bottom crust.
- Assemble the Bottom Crust: On a lightly floured surface, roll out one disk of dough into a 12-inch circle. Carefully transfer the dough to a 9-inch pie plate. Trim the edges, leaving a 1-inch overhang. Place the pie plate in the refrigerator.
- Create the Lattice Top: Roll out the second disk of dough into an 11-inch circle. Cut the dough into even strips (about 3/4 inch wide) for the lattice.
- Fill and Top the Pie: Pour the blackberry filling into the chilled bottom crust. Place the dough strips over the filling in a lattice pattern. Trim the strips, fold the bottom crust overhang over the lattice edges, and crimp the edges to seal.
- Chill and Bake: Brush the top crust with the egg wash and sprinkle with coarse sugar. Chill the assembled pie for 15 minutes before baking to help prevent shrinkage and a soggy bottom. Preheat your oven to 400°F (200°C).
- Bake the Pie: Place the pie on a baking sheet (to catch drips). Bake at 400°F for 20 minutes. Reduce the oven temperature to 375°F (190°C) and continue baking for another 35 to 45 minutes, or until the crust is golden brown and the filling is bubbling thickly. If the edges brown too quickly, cover them loosely with foil.
- Cool Completely: Let the blackberry pie cool on a wire rack for at least 3 to 4 hours before slicing. This cooling time allows the filling to set properly.
Notes
- For a guaranteed flaky crust, keep all butter and water extremely cold before mixing.
- If using frozen blackberries, do not thaw them first; use them straight from the freezer, but you may need to add 5-10 minutes to the total bake time.
- Serve this classic American dessert warm with vanilla ice cream or fresh whipped cream.
Nutrition
- Serving Size: 1 slice
- Calories: 420
- Sugar: 45g
- Sodium: 210mg
- Fat: 24g
- Saturated Fat: 15g
- Unsaturated Fat: 9g
- Trans Fat: 0.5g
- Carbohydrates: 55g
- Fiber: 4g
- Protein: 5g
- Cholesterol: 60mg