
If you’ve ever walked into a high-end bakery and thought, “I could never make something that looks this amazing,” I want you to stop right there. Seriously, wipe that idea clean!
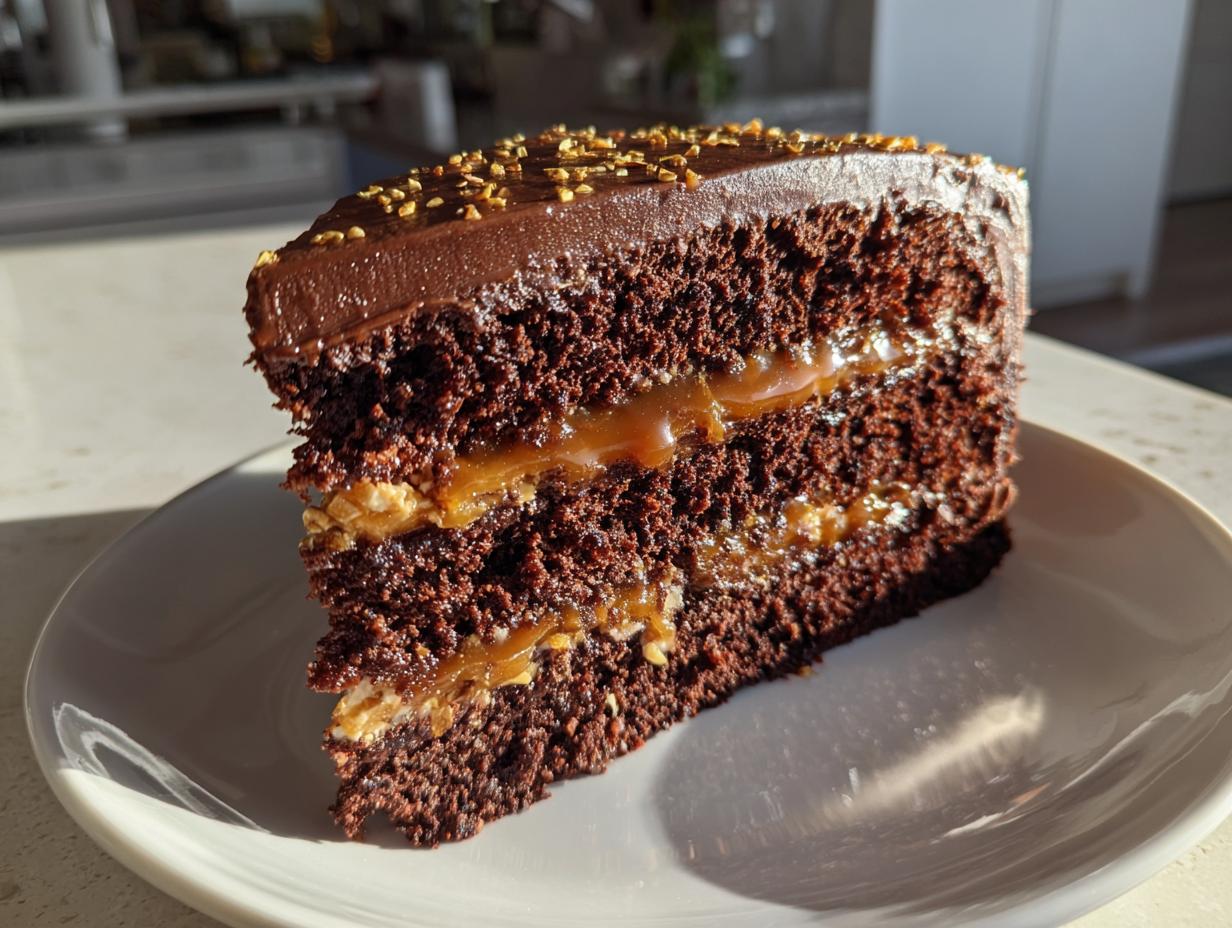
I know good food; I’ve spent years in testing kitchens combining the science of baking with the warmth I learned watching my family make dinner back home in the Midwest. That’s why I’m thrilled to share this recipe for the ultimate chocolate caramel toffee crunch cake. It’s a true showstopper, loaded with textures—moist chocolate, gooey salted caramel, and that satisfying crunch.
Trust me, this dessert looks like it belongs on a magazine cover, but I promise, the steps are straightforward. We stripped away all the unnecessary fuss so you can create a bakery-style masterpiece right on your own countertop. Come on in; let’s bake something incredible together. If you love deep chocolate flavors, you might also want to check out my deep chocolate salted caramel cake when you’re planning your next indulgence!
- Why You Will Bake This Chocolate Caramel Toffee Crunch Cake
- Ingredients for Your Chocolate Caramel Toffee Crunch Cake
- Step-by-Step Guide to the Chocolate Caramel Toffee Crunch Cake
- Tips for the Perfect Chocolate Caramel Toffee Crunch Cake
- Ingredient Notes and Substitutions for Your Chocolate Caramel Toffee Crunch Cake
- Storing and Reheating Your Chocolate Caramel Toffee Crunch Cake
- Serving Suggestions for This Decadent Chocolate Cake
- Frequently Asked Questions About the Chocolate Caramel Toffee Crunch Cake
- Share Your Chocolate Caramel Toffee Crunch Cake Creation
Why You Will Bake This Chocolate Caramel Toffee Crunch Cake
I know, I know, some combination names sound way more complicated than they actually are. But this cake truly delivers on every single promise in that title! It’s the total package, and honestly, it’s become my go-to for birthdays and big family dinners because it always knocks everyone’s socks off.
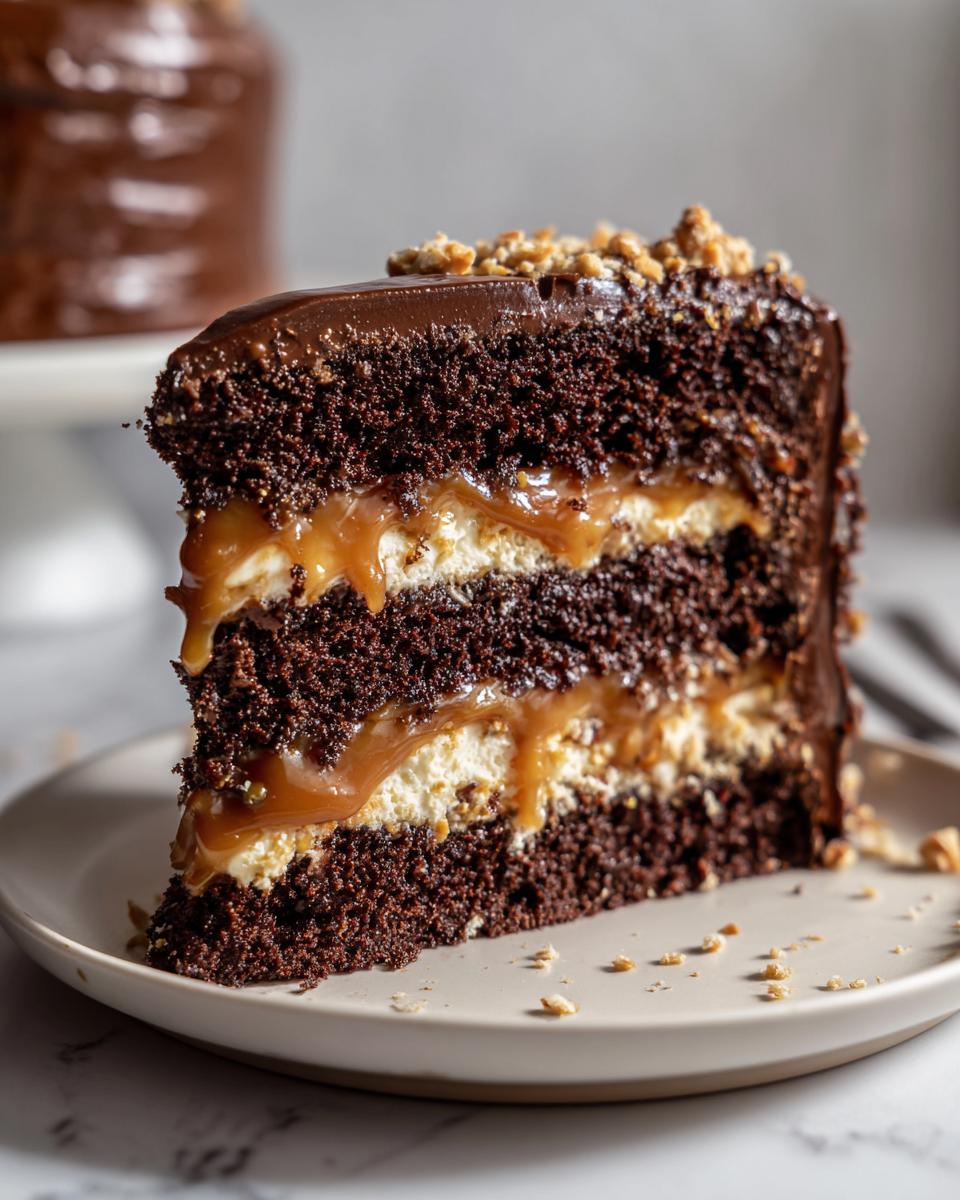
- That Texture Combo? Unbeatable. We’re talking perfectly moist chocolate cake layers that practically melt, smothered in gooey, slightly salty caramel, and then finished with a satisfyingly crisp toffee crunch. Every bite is different, and trust me, you won’t stop at one slice.
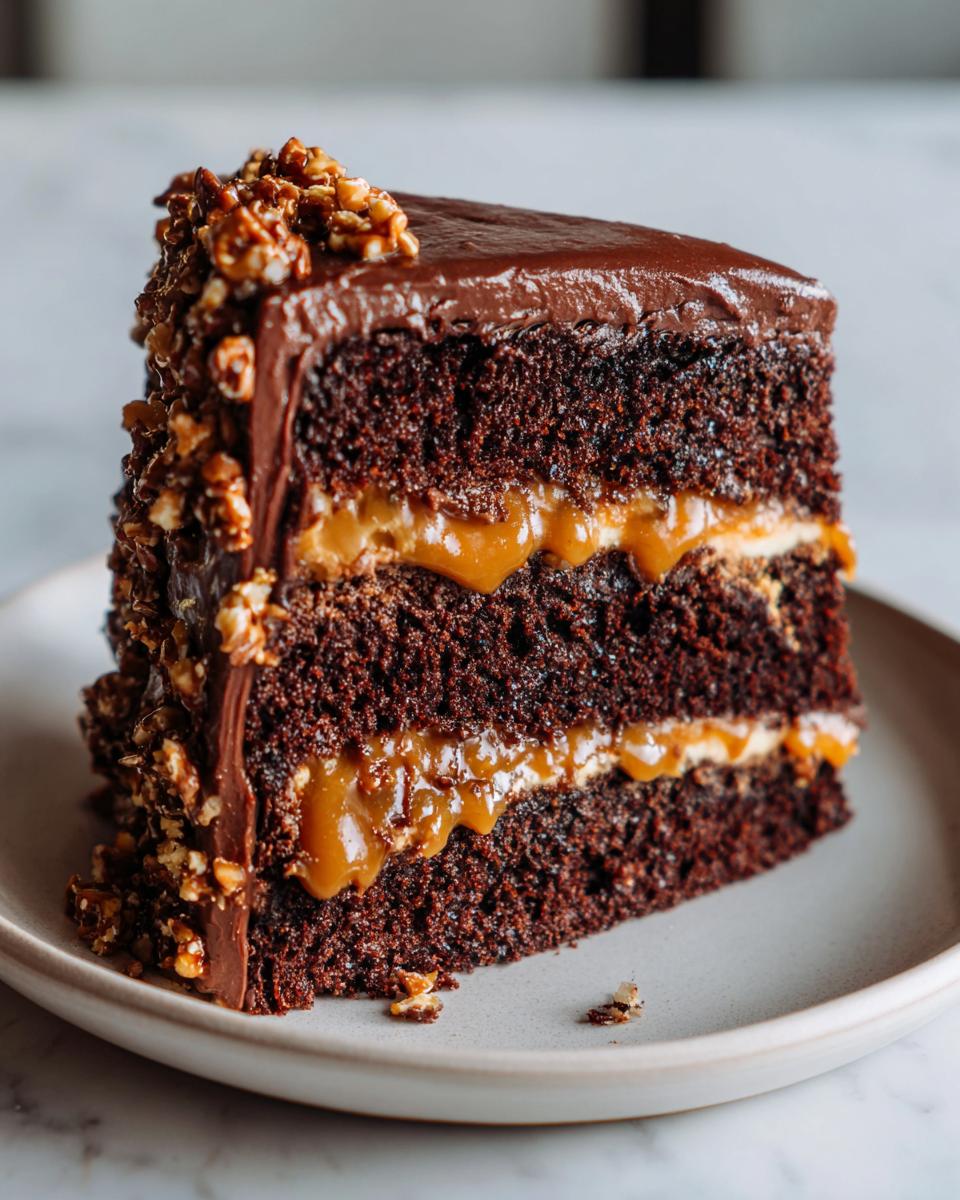
- A Certified Showstopper. Seriously, this cake is the definition of a centerpiece dessert. Even if you skip frosting and just use the drizzle, the visual appeal of that caramel drip and the scattered toffee bits is stunning. It looks like you spent all day slaving away at it!
- Surprisingly Easy Assembly. This is the part I love the most! While it has three main components—cake, caramel, and crunch—putting it together is simple once everything is cooled and set. It requires way less fancy piping than you’d think to get that professional bakery look.
- The Ultimate Indulgence. Sometimes you just need a chocolate cake that goes above and beyond. This isn’t your average Tuesday night treat; this is a celebration cake that says, “I love you and I want you to have the best dessert ever.”
Ingredients for Your Chocolate Caramel Toffee Crunch Cake
Okay, gathering supplies is half the battle, right? Don’t let this ingredient list scare you! It’s broken down into three simple parts, so you can tackle them one at a time. I promise, once you have these lined up, the baking process is smooth sailing. When you’re ready for something wonderfully comforting next time, check out my go-to chocolate banana bread recipe!
For the Moist Chocolate Cake Layers
This dry mix is what gives us that deep, dark chocolate flavor. You absolutely must use hot brewed coffee here! It helps “bloom” the cocoa powder, unlocking maximum flavor so you get that intense, rich taste we look for in a bakery-style cake. No coffee flavor comes through, just pure, deep chocolate!
- 1 3/4 cups all-purpose flour
- 1 3/4 cups granulated sugar
- 3/4 cup unsweetened cocoa powder
- 1 1/2 teaspoons baking soda
- 3/4 teaspoon baking powder
- 3/4 teaspoon salt
- 2 large eggs
- 1 cup buttermilk
- 1/2 cup vegetable oil
- 2 teaspoons vanilla extract
- 1 cup hot brewed coffee
For the Salted Caramel Sauce
This is the gooey heart of the cake! When we get to the instructions, remember that the heavy cream *must* be warm. If you dump cold cream into that hot, molten sugar, you’re going to get a giant, hard caramel rock—and nobody wants that stress! Warming it up makes sure that gorgeous mixture stays silky smooth.
- 1 cup granulated sugar
- 1/4 cup water
- 1/2 cup heavy cream, warmed
- 6 tablespoons unsalted butter, cut into pieces
- 1 teaspoon sea salt
For the Toffee Crunch and Optional Ganache
You can totally cheat here and buy those lovely little crunch bits—no judgment here! If you are going for the full professional finish, you’ll want the chocolate and cream ready to whip up a quick ganache, which makes a lovely, stable base for our caramel drizzle.
- 1 cup toffee bits (store-bought or homemade)
- 1 cup heavy cream (for ganache)
- 8 ounces semi-sweet chocolate, chopped (for ganache)
Step-by-Step Guide to the Chocolate Caramel Toffee Crunch Cake
We’ve got the ingredients measured, the oven is preheating, and now it’s time to put this masterpiece together! I broke this down into three clear sections. Just follow along step-by-step, and don’t rush the cooling phases—that’s where the real cake stability happens. If you want to see my technique for ultra-fudgy centers, you have to check out my fudgy brownies later!
Baking the Rich Chocolate Layer Cake
First things first! Make sure your oven is set to 350°F (175°C). You need two 8-inch round cake pans ready to go—grease them up well and dust them with flour so nothing sticks when the time comes.
You’re going to start by whisking all your dry ingredients together in a big bowl—that’s the flour, sugar, cocoa, leavening agents, and salt. Get some air in there!
Next, add the wet ingredients: your eggs, buttermilk, oil, and vanilla. Beat this with your mixer on medium speed for a full two minutes. Don’t stop early! This is important for texture.
Now, the secret weapon: carefully stir in that hot brewed coffee right at the end. Don’t panic when you see it; the batter will thin out to be *very* liquidy. That’s exactly what you want for a super moist crumb. Divide that thin batter evenly between your two pans.
Bake these beauties for 30 to 35 minutes. I always start checking at 30. When your wooden pick comes out clean, they’re done! Let them cool in the pans for exactly 10 minutes before you delicately flip them out onto a wire rack. They need to be completely cool before we start layering later on.
Creating the Gooey Salted Caramel Sauce
This caramel is magic, but it demands your attention! Get a heavy-bottomed saucepan—this prevents scorching. Combine your sugar and the water in the pan over medium heat. Here’s the number one rule for perfect caramel: Do not stir it with a spoon! You can gently swirl the pan around sometimes, but let the heat do the work.
You have to watch this carefully for about 8 to 10 minutes until it turns a gorgeous, deep amber color. If it gets too dark, it’ll taste bitter, so keep an eye on it! Once it hits that perfect color, immediately pull the pan off the heat.
Now, add the warm heavy cream—and I mean *warm*, or it will seize up on you! It’s going to bubble like crazy, so step back for a second. Whisk until it smooths out, then whisk in the softened butter pieces until everything is incorporated. Finally, stir in that sea salt.
Let this cool down until it thickens up slightly, which usually takes about 30 minutes. Once it’s cooled down a bit, scoop half of it into a separate bowl; that’s going into the middle of the cake. The rest will be our stunning drizzle!
Assembling Your Showstopper Chocolate Caramel Toffee Crunch Cake
This is the fun part, but you need patience here first! I cannot stress this enough: both cake layers must be completely cool, or you’ll end up with melted caramel soup. If you’re rushing, pop them in the fridge for 20 minutes to firm up.
Place your first cake layer on your serving plate or cake stand. Spread about half of your slightly cooled, thickened salted caramel sauce evenly across the top. Then, sprinkle half of your toffee bits right over that caramel. That crunch needs to be nestled in there!
Gently place the second cake layer on top. Now, take the remaining caramel sauce and drizzle it slowly over the top center, letting gravity pull wonderful ribbons down the sides of your glorious creation. If you decided to make a ganache, spread that thin over the tops and sides *before* this final caramel drizzle.
Finish it off by sprinkling the remaining toffee bits all over the top surface. You want that crunchy texture as the very last thing people see. Let it sit for about 15 minutes so the caramel firms up just a touch before you bring it to the table. For more decadent ideas, check out what the pros are doing at Devour Dish!
Tips for the Perfect Chocolate Caramel Toffee Crunch Cake
Even with the most reliable recipe in the world, sometimes a little extra know-how is what takes a cake from great to absolutely legendary. Since I’ve made this chocolate caramel toffee crunch cake more times than I can count—both in my test kitchen and for my own family—I’ve picked up a few tricks to ensure your layers stay level and your caramel is never stiff!
Here are my absolute best pieces of advice for nailing this indulgent dessert every single time:
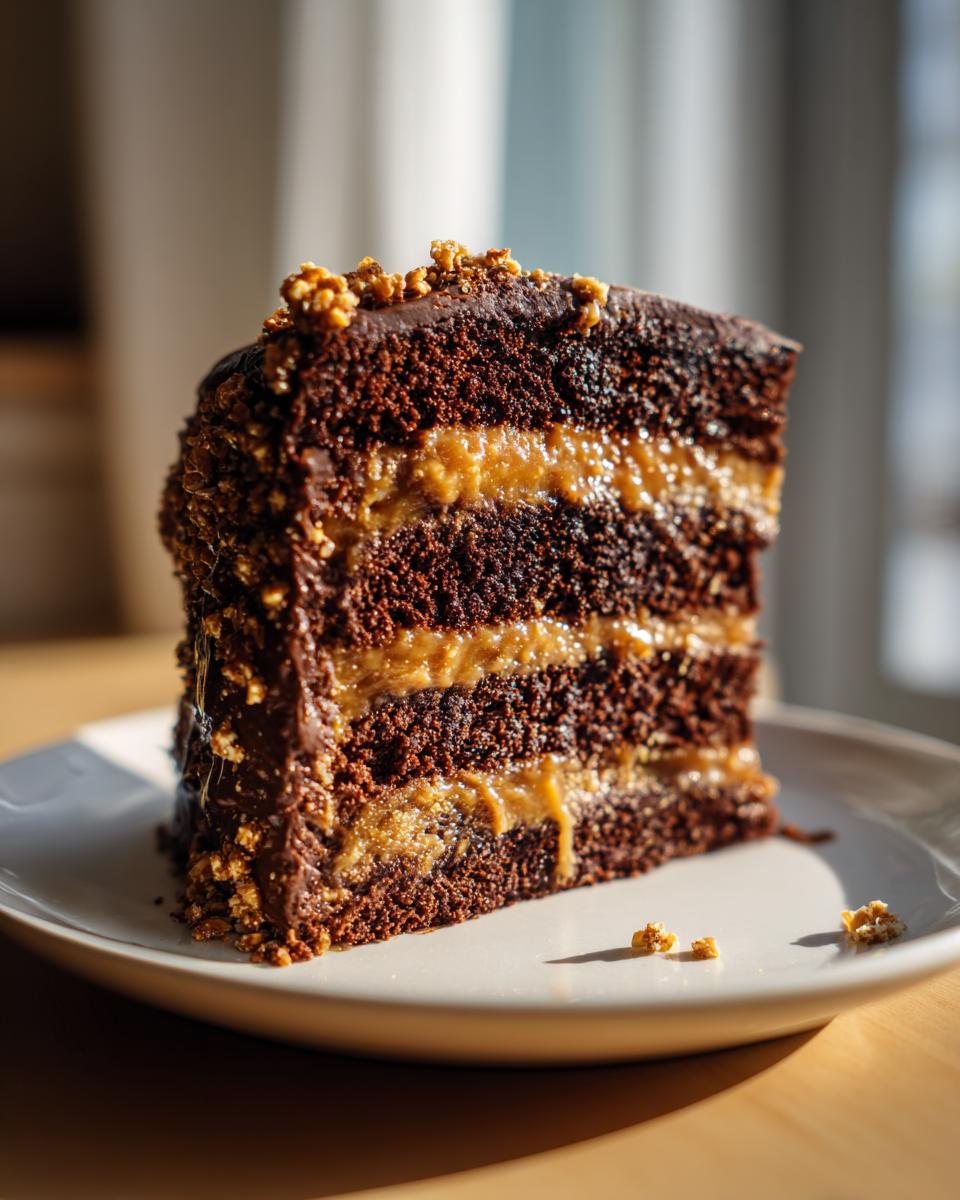
- Chill Makes It Beautiful: This is my number one expert tip, especially since we aren’t using a heavy layer of frosting that can hide imperfections. Once you’ve assembled the cake with the caramel and toffee, wrap it loosely and chill it in the fridge for at least 30 minutes, or even an hour. This firms up the caramel so when you slice it, you get those perfect, stunning layers rather than a gooey mess sliding everywhere. It’s the secret to that clean, bakery-style cut!
- Use the Right Pan Prep: I know I mentioned it in the instructions, but these chocolate cakes can sometimes cling! Don’t skip greasing *and* flouring your pans, or better yet, use parchment circles on the bottom of your 8-inch rounds. It’s cheap insurance against losing the bottom layer when you try to flip them out. For other frosting ideas, you might love checking out my recipe for fluffy vanilla buttercream to top this!
- Salt is Your Friend in Caramel: When I say sea salt in the caramel, I really mean it. Don’t substitute standard table salt if you can help it. Sea salt has large, irregular flakes that dissolve beautifully but leave behind tiny, distinct salty bursts that cut right through the intense sweetness of the sugar and chocolate. It keeps the overall flavor profile balanced. If you love deep caramel flavor, take a look at the techniques over at Juicy Recipe too!
- Don’t Overmix the Batter: Remember how thin that batter gets once you add the hot coffee? Good! That thinness means we haven’t developed too much gluten. Stop beating the minute the last streaks of coffee disappear. Overmixing this liquid batter will result in a cake that tastes dense and chewy instead of moist and tender. We want cloud-like chocolate layers, not something stiff!

Ingredient Notes and Substitutions for Your Chocolate Caramel Toffee Crunch Cake
It happens to all of us! You’re ready to bake this dreamy chocolate caramel toffee crunch cake, and you hit a snag—you’re out of buttermilk, or maybe you’re wondering if you dare swap out the oil. Don’t sweat it! While I developed this recipe using the exact ingredients listed because they give the best results, I know substituting is sometimes necessary for home cooks. I always want you to succeed, so here are a few swaps I’ve tested in a pinch.
If you’re missing buttermilk, that’s an easy fix. Just take one cup of regular milk—whole milk works best—and stir in one tablespoon of white vinegar or fresh lemon juice. Let it sit on the counter for about five to ten minutes until it looks slightly curdled. That’s your homemade buttermilk, ready to go. You can check out how I use this trick in my tall, flaky biscuits recipe too!
What about those toffee bits? If you want to make them from scratch and have a little extra baking time, go for it! It involves cooking butter, sugar, and maybe a touch of vanilla until it reaches the hard-crack stage before pouring it out to cool and eventually smashing it into tiny pieces. But honestly, if you’re in a rush, a high-quality store-bought brand works just fine, especially since we’re already covering the chocolate and caramel!
Also, if you don’t have vegetable oil, melted coconut oil is a decent swap, though it might give the cake a *very* subtle background flavor. Stick to neutral oils like canola or vegetable oil if you want that pure chocolate flavor to shine without interruption. Remember, we are aiming for rich chocolate flavor, gooey caramel, and crunch—and these simple swaps help get you there without drama!
Storing and Reheating Your Chocolate Caramel Toffee Crunch Cake
You made this incredible, towering **chocolate caramel toffee crunch cake**, and now you have leftovers—which is a luxury, truly! How you store it makes a huge difference, especially because of that gooey salted caramel nestled inside. You want to make sure the cake stays moist and the toffee bits hang onto their crunch as long as possible!
Because we are dealing with a lot of sugar and moisture from the caramel, refrigeration is your safest bet, though it’s not my absolute favorite. If you can store this cake in an airtight container at cool room temperature (think 68°F or below) for up to two days, that’s ideal for texture.
However, if your kitchen is warm, or if this is staying around for longer than two days, definitely cover it well and place it in the fridge. It will last beautifully for about four days this way. Just make sure it’s sealed tightly so it doesn’t absorb any fridge smells!
Now, here’s the most important part: Reheating! If you refrigerate it, that caramel will get pretty firm, and the cake layers might feel a little dense. Don’t even think about eating it straight from the cold! Pull a slice out about an hour before you plan to eat it. Letting it come slowly back to room temperature is the best way to restore the perfect gooey texture to the caramel without making the chocolate layers heavy.
If you’re in a real rush, you can give it a *very* quick zap in the microwave—maybe 10 seconds max—just to soften that caramel slightly. But honestly, patience is a baker’s best friend here. Let that cake warm up naturally, and you’ll get the intended texture of this indulgent dessert!
Serving Suggestions for This Decadent Chocolate Cake
We’ve reached the finish line! You’ve baked the layers, made the gooey caramel, and sprinkled on the crunch. Now, how do we present this magnificent chocolate caramel toffee crunch cake? Presentation is everything when you’ve worked this hard, but luckily, this cake is so inherently gorgeous, it barely needs any help!
Honestly, the best approach is often simplicity, letting those textures and colors speak for themselves. You don’t need elaborate frosting designs when you have that glistening caramel drip catching the light!
For a truly unforgettable experience, especially if you’re serving this after a big meal, you have to pair it with something cold and creamy. A big scoop of high-quality vanilla bean ice cream is the absolute perfect companion. The slight chill of the ice cream contrasts beautifully with the room-temperature, gooey caramel, and the vanilla acts as a perfect counterpoint to the rich dark chocolate.
If you’re serving this cake in the evening, skip the heavy after-dinner drink and opt instead for a strong, simple cup of coffee. A dark roast or even a shot of espresso really enhances the depth of the cocoa flavor. It cuts through the sweetness just enough to make you want another bite of that crunchy toffee.
If you happen to have any extra caramel sauce left over (which I highly doubt, but I can dream!), warm it up just slightly and pour a tiny extra drizzle onto the plate right before setting the slice down. It makes the whole plate look thoughtful and intentional. If you’re looking for another amazing dessert that satisfies that creamy craving, you should really save my recipe for best homemade bread pudding for your next weekend bake!
Frequently Asked Questions About the Chocolate Caramel Toffee Crunch Cake
I know when you read a recipe like this—a full-on chocolate caramel toffee crunch cake—your brain immediately jumps to, “Is this going to take me three days?” I totally get it! I’ve taken the most common things people ask me when they decide to tackle a big, layered bake, and put the answers here. We want this to feel accessible, even if the end result looks like it belongs in a professional bakery case!
Can I make the components of this chocolate caramel toffee crunch cake ahead of time?
Yes, absolutely! That’s one of the best things about a big celebration cake like this—you can break up the work. The chocolate cake layers are sturdy. Once they are completely cool, wrap each one tightly in plastic wrap (you can even add a layer of foil) and they freeze perfectly for up to a month. Just let them thaw on the counter for a few hours before assembling.
For the salted caramel sauce, you can whip that up days ahead of time! Store it in an airtight jar in the fridge. It will get quite thick and stiff when cold, but don’t worry. Just set the jar out on the counter for an hour or two before you plan to assemble, or give it a quick 15-second warm-up in the microwave to make it perfectly pourable for filling and drizzling over your layered chocolate celebration cake.
How do I achieve a professional look for this showstopper birthday cake?
The secret to that amazing, professional finish on this **showstopper birthday cake** really comes down to two things: temperature and smoothing! You’ve already heard me preach about cooling the layers, but once they are cooled, chilling the assembled cake is crucial, especially if you are using the optional ganache or frosting.
If you’re frosting, apply a very thin “crumb coat” first, chill for 15 minutes, and then apply your final layer. Use a long, smooth offset spatula to get those sides as straight as you can. Don’t aim for perfection, aim for *smooth.* After you have your final coat on (or if you’re skipping frosting and just dealing with the caramel), let the whole cake sit in the fridge for 30 minutes.
When you drizzle that final layer of caramel, do it slowly, starting in the center and working your way out so the drips look natural. The chilled cake underneath keeps the caramel from just running all the way to the floor! For more insight into getting that polished look, take a peek at how the team at My Cook Passion tackles their layering—it’s all visual!
Got more questions on how to make this the best one yet? I’ve got answers! I even have a whole section of general baking tips, like how to make amazing sauces, over here: easy creamy garlic aioli (though you probably won’t put that on your cake!).
Share Your Chocolate Caramel Toffee Crunch Cake Creation
Now listen, the greatest reward for me isn’t just knowing that you baked a truly decadent cake; it’s knowing that you made something delicious that brought joy to your table. That’s really what this site is all about—connection! I want to see what you did with your ultimate chocolate caramel toffee crunch cake!
When you finish assembling this masterpiece, please don’t just hide it away! Take a quick picture—grab a forkful shot to show off those amazing layers of chocolate, caramel, and crunch—and share it with me. You can tag me on your favorite social platforms. I absolutely love seeing your interpretations, whether you kept it simple with the drizzle or went all out with a full frosting job.
And if you have a moment, drop a rating down in the comments section below. Did you love the coffee in the batter? Did the toffee stay crunchy? Your feedback isn’t just helpful for me as I keep testing and refining; it helps other home cooks feel confident enough to tackle this amazing indulgence, too. Don’t be shy, your kitchen confidence is growing every time you bake something this impressive!
If you ran into any snags or have questions about substitutions, please leave a comment there as well! You can always reach out directly through my contact page if you have a private question. Happy baking, and enjoy every glorious, crunchy bite!
PrintThe Ultimate Showstopper: Moist Chocolate Caramel Toffee Crunch Cake
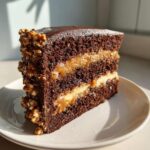
Create a bakery-style, showstopper dessert at home. This recipe delivers moist chocolate layers, gooey salted caramel, and an irresistible crunchy toffee topping. It is surprisingly simple to assemble for an indulgent centerpiece.
- Prep Time: 45 min
- Cook Time: 35 min
- Total Time: 1 hour 55 min
- Yield: 10 servings 1x
- Category: Dessert
- Method: Baking and Assembly
- Cuisine: American
- Diet: Vegetarian
Ingredients
- For the Moist Chocolate Cake:
- 1 3/4 cups all-purpose flour
- 1 3/4 cups granulated sugar
- 3/4 cup unsweetened cocoa powder
- 1 1/2 teaspoons baking soda
- 3/4 teaspoon baking powder
- 3/4 teaspoon salt
- 2 large eggs
- 1 cup buttermilk
- 1/2 cup vegetable oil
- 2 teaspoons vanilla extract
- 1 cup hot brewed coffee
- For the Salted Caramel Sauce:
- 1 cup granulated sugar
- 1/4 cup water
- 1/2 cup heavy cream, warmed
- 6 tablespoons unsalted butter, cut into pieces
- 1 teaspoon sea salt
- For the Toffee Crunch:
- 1 cup toffee bits (store-bought or homemade)
- For Assembly/Frosting (Optional Ganache or Buttercream):
- 1 cup heavy cream (for ganache)
- 8 ounces semi-sweet chocolate, chopped (for ganache)
Instructions
- Prepare the Cake Layers: Preheat your oven to 350°F (175°C). Grease and flour two 8-inch round cake pans.
- In a large bowl, whisk together the flour, sugar, cocoa powder, baking soda, baking powder, and salt.
- Add the eggs, buttermilk, oil, and vanilla extract to the dry ingredients. Beat with an electric mixer on medium speed for two minutes.
- Carefully stir in the hot coffee until the batter is smooth. The batter will be thin.
- Divide the batter evenly between the prepared pans. Bake for 30 to 35 minutes, or until a wooden pick inserted into the center comes out clean.
- Let the cakes cool in the pans for 10 minutes before inverting them onto a wire rack to cool completely.
- Make the Salted Caramel Sauce: Combine the sugar and water in a medium, heavy-bottomed saucepan over medium heat. Do not stir, but you can gently swirl the pan occasionally.
- Cook until the mixture turns a deep amber color. This takes about 8 to 10 minutes. Watch carefully to prevent burning.
- Remove the pan from the heat. Carefully pour in the warm heavy cream (it will bubble vigorously). Whisk until smooth.
- Whisk in the butter pieces until fully melted and incorporated. Stir in the sea salt. Let the caramel cool until it thickens slightly, about 30 minutes. Reserve half for filling and half for drizzling.
- Prepare the Topping: If making homemade toffee, follow your preferred recipe. If using store-bought bits, set them aside.
- Assemble the Cake: Once the cakes are completely cool, place one layer on your serving plate. Spread half of the cooled salted caramel sauce evenly over the top. Sprinkle generously with half of the toffee bits.
- Place the second cake layer on top. Drizzle the remaining caramel sauce over the top layer, allowing it to drip down the sides.
- Sprinkle the remaining toffee bits over the top. If using ganache or frosting, apply it before the final caramel drizzle and toffee sprinkle.
- Allow the cake to set slightly before slicing and serving.
Notes
- For a truly bakery-style finish, chill the assembled cake for 30 minutes before slicing. This helps the layers and caramel set firmly.
- If you want a thicker, creamier filling instead of just sauce, mix 1/2 cup of the cooled caramel with 1 cup of softened cream cheese or softened butter before spreading between the layers.
- Use high-quality cocoa powder for the deepest chocolate flavor in your cake layers.
Nutrition
- Serving Size: 1 slice
- Calories: 550
- Sugar: 65
- Sodium: 350
- Fat: 32
- Saturated Fat: 18
- Unsaturated Fat: 14
- Trans Fat: 0.5
- Carbohydrates: 68
- Fiber: 3
- Protein: 6
- Cholesterol: 110