
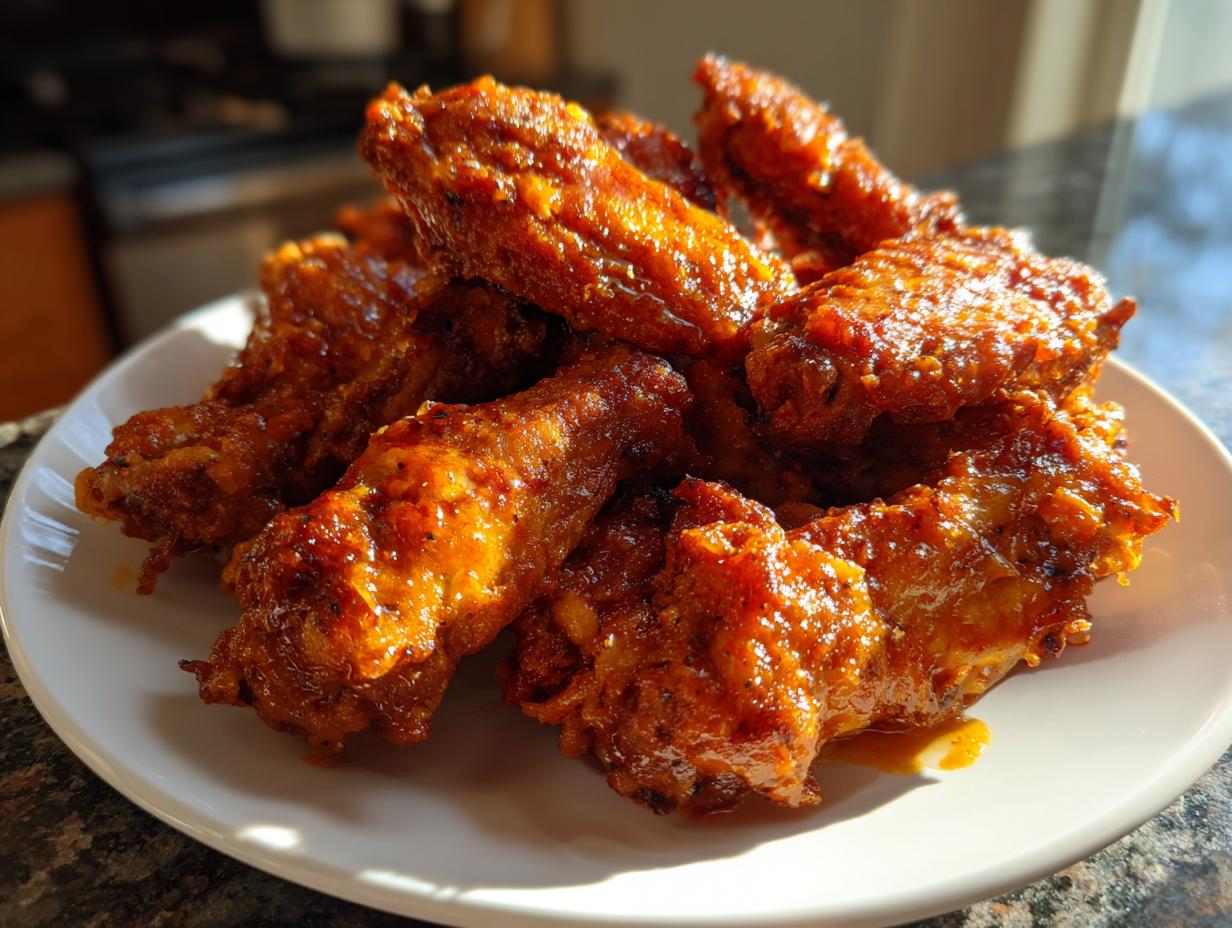
Oh, the heartbreak of a soggy chicken wing! We’ve all been there, haven’t we? You look forward to that satisfying crunch, only to bite into something greasy and floppy. Well, friends, that chapter ends today! I made it my mission to conquer the dreaded soggy wing in my time working in test kitchens, blending my nutrition background with food science to crack the code. I’m here to tell you that you absolutely can achieve shatteringly **crispy baked chicken wings** with a foolproof, no-fry method. Yes, you read that right—this is your ticket to better-than-fried texture using just your oven, thanks to one simple pantry staple! If you want to know more about my passion for bringing simple, delicious food to your table, you can hop over to the About Page and read all about it!
- Why You Need This Recipe for Crispy Baked Chicken Wings (Better Than Fried!)
- The Essential Ingredients for Ultra Crispy Baked Chicken Wings
- How to Make Crispy Baked Chicken Wings: The Oven Fried Wing Technique
- Flavor Variations and Wing Seasoning Ideas
- Tips for Success with Oven Baked Chicken Wings
- Serving Suggestions for Your Game Day Chicken Wings
- Storage and Reheating Instructions for Crispy Baked Chicken Wings
- Frequently Asked Questions About Making Crispy Baked Chicken Wings
- Nutrition Information for This Easy Baked Chicken Recipe
- Share Your Ultra Crispy Baked Chicken Wings Success
Why You Need This Recipe for Crispy Baked Chicken Wings (Better Than Fried!)
I know why you clicked on this. You’re looking for that perfect crunch, and frankly, you’re tired of the mess and the guilt that comes with deep frying. Trust me, this **Best Baked Wing Recipe** is the answer! We are achieving results here that are genuinely **Better Than Fried Wings**, all while keeping things quick and clean. You deserve wings that snap when you bite them!
Here’s what makes this method a total game-changer for your kitchen:
- No Fuss Crunch: Achieve superior crispiness consistently, meaning no more sad, soggy wings ruining your game day vibe.
- Healthy Fried Chicken Alternative: We skip the heavy oil, making these wings a much lighter option for snacking or dinner.
- Juicy Inside Guaranteed: The high heat cooks fast, locking that incredible moisture inside the meat.
- Speedy Snack Time: Prep and cook time wraps up in about 45 minutes total! That’s fast comfort food right there.
If you’re looking to sneak these amazing **Oven Baked Chicken Wings** into your rotation for quick meals, check out my guide on easy weeknight dinners!
The Essential Ingredients for Ultra Crispy Baked Chicken Wings
When we talk about getting that amazing crunch, the ingredients matter, but the prep matters even more! Don’t panic; this list is super approachable. You probably have most of this stuff sitting in your pantry right now. The real star here is that secret ingredient that transforms the skin from rubbery to rock-solid crispy. Seriously, don’t skip it!
Here is what you’ll need for the perfect dry coating:
- 2 lbs chicken wing sections (flats and drumettes)
- 1 tablespoon baking powder (aluminum-free recommended)
- 1 teaspoon kosher salt
- 1 teaspoon garlic powder
- 1 teaspoon onion powder
- 1/2 teaspoon black pepper
- 1/4 teaspoon cayenne pepper (optional)
- 1 tablespoon olive oil
- Your favorite wing sauce (for tossing after baking)
Ingredient Notes and Substitutions for Crispy Baked Chicken Wings
Okay, let’s talk about the MVP: baking powder. This is my **secret weapon** for making **crispy baked chicken wings** in the oven. It raises the pH level on the skin, helping it brown faster and rendering out all that nasty moisture that leads to sogginess. I always grab the aluminum-free kind; it just seems to bake cleaner for me, though either will work if you forgot to grab the right one.
Also, make sure you use standard kosher salt, not fine table salt, as it helps with texture development! For the wings themselves, using a mix of drumettes and flats is totally fine—that’s what I used that yielded the results you see here. They cook at basically the same rate, so no need to separate them.
How to Make Crispy Baked Chicken Wings: The Oven Fried Wing Technique
Alright, listen up, because this is where the magic happens! You can have the best ingredients in the world, but if your technique isn’t right, you’re going to end up with sad, flabby wings. We are aiming for that deep-fried texture right in your home oven, and achieving **crispy baked chicken wings** comes down to two things: getting rid of moisture and blasting it with heat. Based on my time perfecting these methods in a professional setting, I can tell you that skipping a step here leads to disappointment. That’s why my instructions are laid out like a foolproof roadmap!
Step 1: Mastering Wing Preparation and Coating
First things first: moisture is the absolute enemy of crispiness. Grab those wings, whether they are flats or drumettes, and grab a massive stack of paper towels. You need to pat every single wing until it feels dry to the touch. I mean *bone-dry*. Seriously, if you think they look dry, pat them three more times. If you skip this, the baking powder won’t work its magic, and you’ll steam them instead of crisping them!
While you’re drying your birds, mix up your spice blend—that baking powder, salt, garlic powder, all of it—in a big bowl. Once your wings are desert-dry, toss them into that bowl. Now, this needs thorough mixing! Make sure every nook and cranny has that powdery coating clinging to it. My top-tier, next-level pro tip? If you have the foresight (maybe for tomorrow’s game day!), put these coated wings on a rack in the fridge, uncovered, for at least two hours, or even overnight. That extra time in the cold air draws out even more moisture, setting the stage for pure crunch.
Step 2: The Crucial Baking Setup for Crunchy Oven Wings
This step is non-negotiable if you want true **Crunchy Oven Wings**. You cannot just pile them onto a foil-lined pan. If you do that, the moisture released during cooking pools underneath, and guess what? Soggy bottoms! We need air circulation all the way around.
So, here’s the setup: line a sturdy, rimmed baking sheet with foil (for cleanup, you’re welcome!). Then, you MUST place a wire cooling rack directly on top of that foil. Think of it like a little cooling tower for your delicious wings! Arrange your coated wings on that rack. They need their space! Make sure none of the pieces are touching. Giving them breathing room ensures the hot air circulates, browning every surface evenly. For more fantastic insights on getting this texture, check out the tips over at Spend With Pennies!
Also, make sure your oven is fully preheated to 425°F (220°C). We are going high heat right from the start!
Step 3: High Heat Baking Schedule for Crispy Baked Chicken Wings
The high heat is what helps that baking powder coating react and puff up perfectly. We bake these in two stages to ensure we get maximum crispiness without overcooking the inside. Remember, underneath the crunch, we want wonderfully **Juicy Baked Wings**! If you’re ever looking for other ways to get that fantastic texture, my recipe for Parmesan Crusted Chicken uses a similar science!
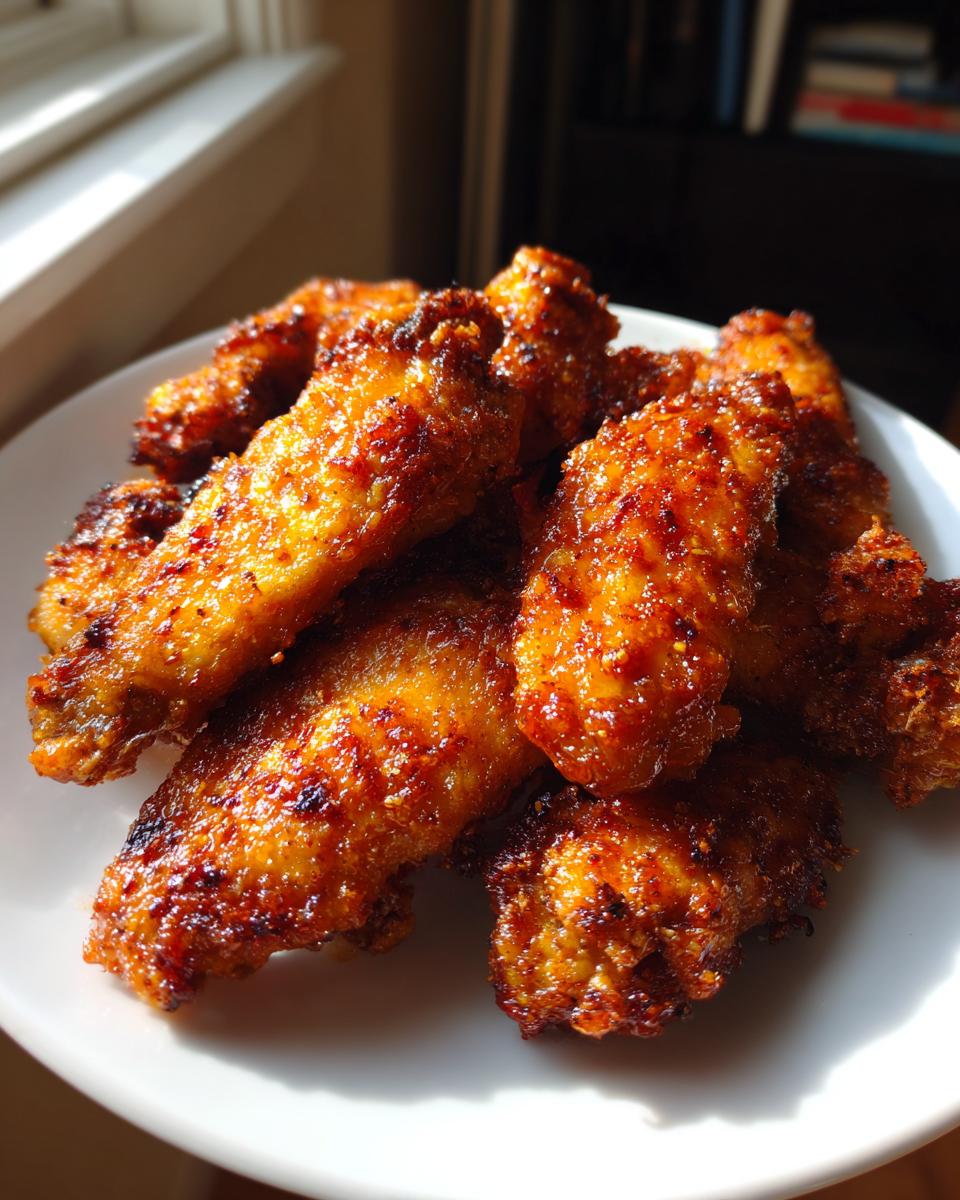
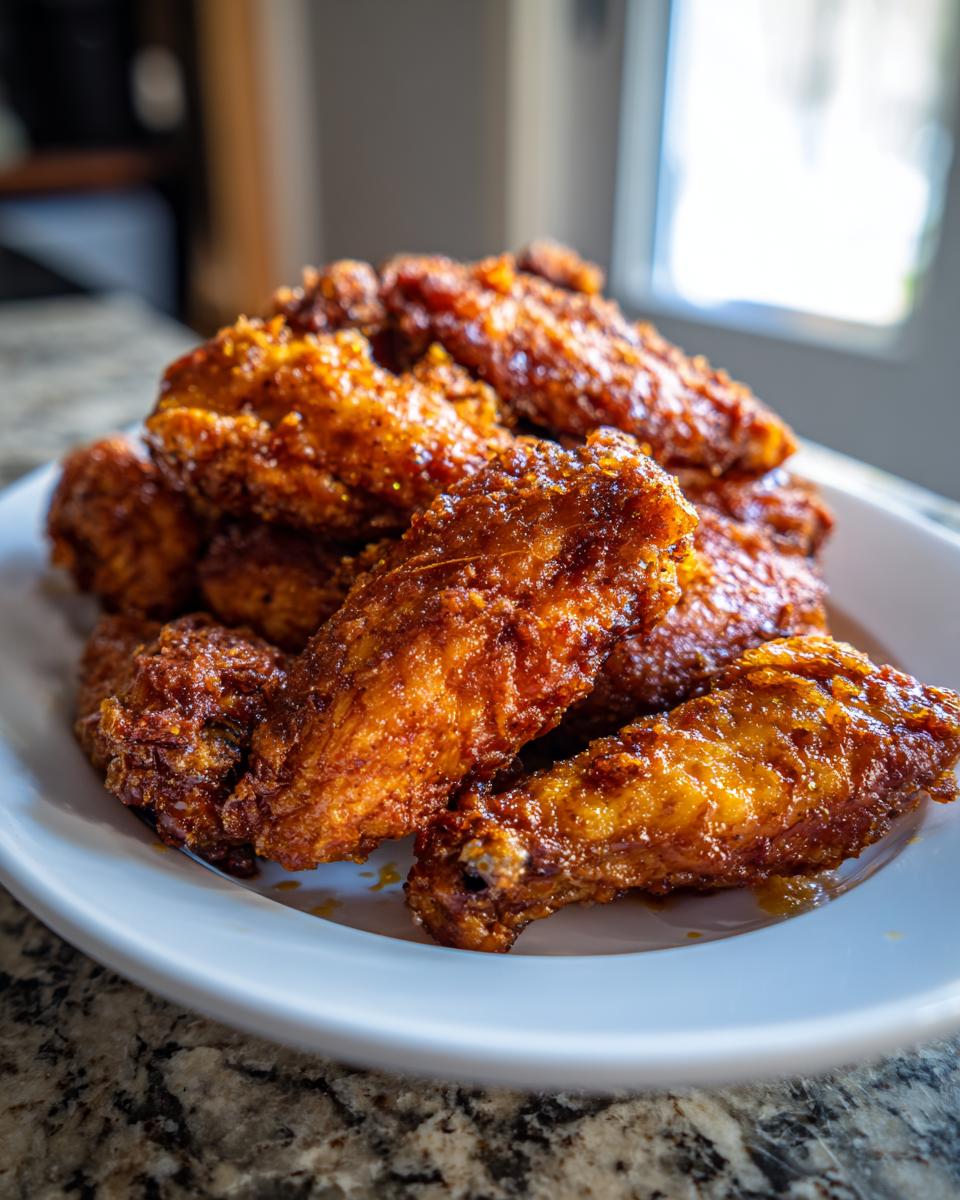
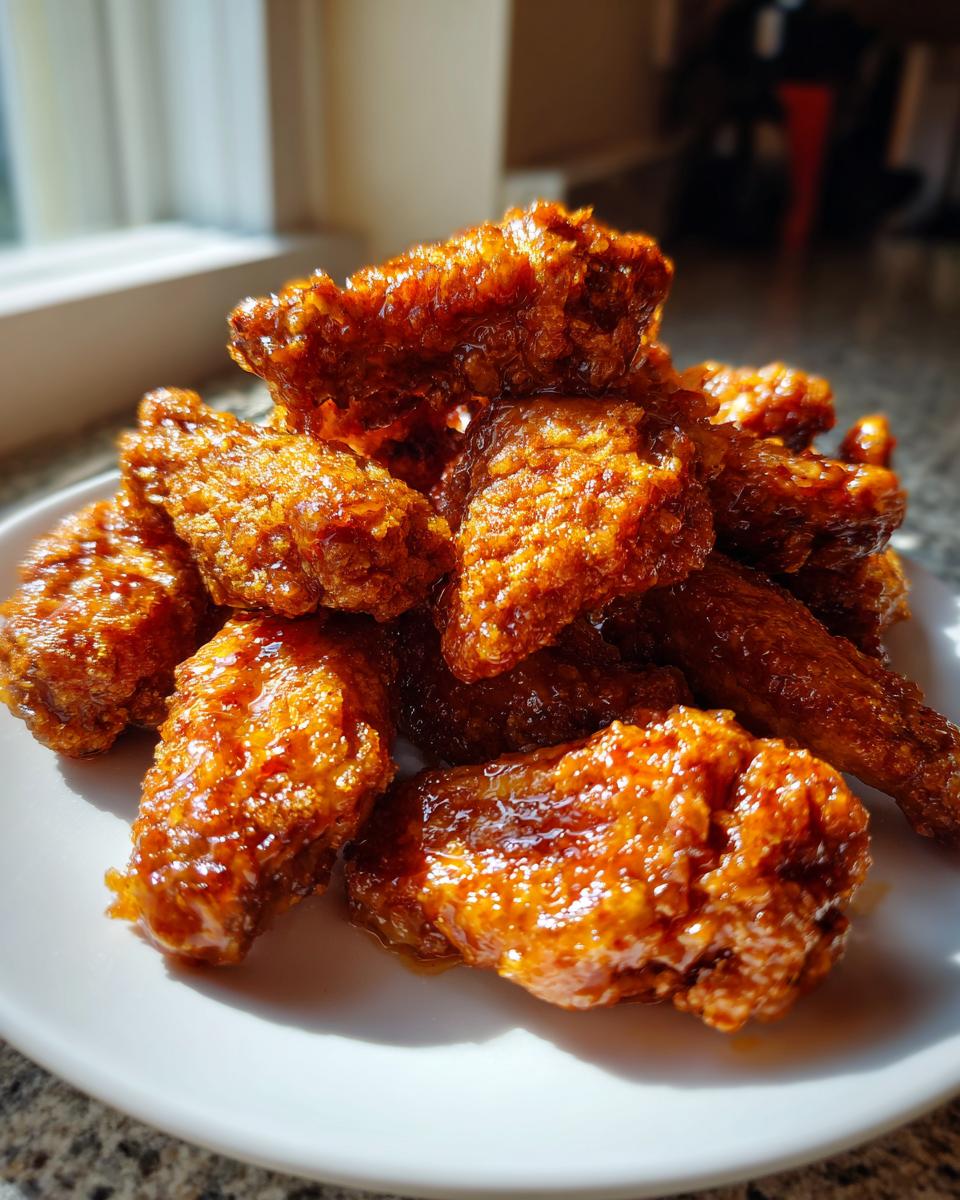
First bake is straightforward: pop that tray into your blazing hot, 425°F oven for about 25 minutes. After that time, pull them out carefully. Now, flip every single wing over. This ensures uniform browning later on. This is also when those wings get a tiny drizzle of olive oil—just enough to help the seasoning adhere and brown up beautifully, but not so much that it adds grease back in. Pop them back in for a second bake, this time for another 15 to 20 minutes. When they look deep golden brown and you poke one slightly—it should feel firm—you know they’re done and perfectly crisp!
Flavor Variations and Wing Seasoning Ideas
Now that you’ve mastered the crunch—which, let’s be honest, is the hardest part—you get to play! Since our base spice mix is savory and fantastic, adding a sauce right after they come out of the oven is super easy. Honestly, tossing them while they’re piping hot helps that sauce stick right to that crunchy exterior. This is where you can have a blast with different **Wing seasoning ideas**!
For a classic kick, a homemade buffalo sauce whisked together with melted butter is heavenly. But if you want something sticky and sweet, you have to try a smoky BBQ glaze tossed on hot off the rack. If you love that sweet heat vibe, you should definitely check out my recipe for Hot Honey Chicken Tenders—just adapt that sauce to toss your wings in. That sweet, spicy coating combined with the baked crunch is just unbelievable. It truly takes this simple appetizer to the next level for any party!
Tips for Success with Oven Baked Chicken Wings
Okay, we’ve covered the main roasting technique, but sometimes, even with the best direction, little things can trip up the process. As someone who spent way too much time in test kitchens trying to perfect this exact snack, I have a few last-minute **Wing Prep Tips** to ensure you hit that perfect crunch every time. Think of these as my little behind-the-scenes secrets!
The very first thing I cannot stress enough is the drying process. If you feel like you’ve patted them dry enough, do it again! Seriously! Moisture is the enemy of crispy skin, and any remaining liquid will just steam those wings instead of giving you that beautiful, golden crust we are aiming for. I mentioned the overnight chill earlier, and if you can prep them the day before, do it. It gives the skin time to really dry out in the fridge uncovered, promoting amazing texture.
Secondly, we talked about the rack, but let’s be clear: you cannot bake them directly on foil or parchment paper. That rack is key! Tasting Tipster agrees that air circulation prevents that awful sogginess that plagues so many home cooks. That rack lifts the wings so the bottom isn’t sitting in its own rendered fat!
Finally, don’t be tempted to sauce them too early! I know that beautiful golden skin makes you want to dive in, but if you toss them immediately in a cold sauce, you drop the temperature too fast, and the skin starts to deflate. Once they are off the rack, toss them in a bowl with your warm sauce, do a quick, enthusiastic job coating them, and serve immediately. If you want an extra layer of flavor right then, I have a recipe for an Easy 5-Minute Creamy Garlic Aioli that is phenomenal for dipping! It adds richness without getting the actual wing skin wet too soon.
Serving Suggestions for Your Game Day Chicken Wings
These **Game Day Chicken Wings** are such a crowd-pleaser, they can honestly be the star all by themselves! But you know me—I love a good spread. If you’re setting these out for a big watch party, you have to balance that spice and crunch with something fresh. Forget those heavy sides; we need easy **Party Finger Foods**!
I always serve a huge platter of crisp celery sticks and carrot sticks alongside these. They are perfect for dipping and offer that cooling contrast to spicy sauces. If you want an amazing dip that tastes fancy but is zero work, you have to try my Whipped Ricotta Dip! It’s creamy, has a little kick, and is just spectacular for dipping those crunchy flats after they come out of the oven. Trust me on this pairing; it’s heavenly!
Storage and Reheating Instructions for Crispy Baked Chicken Wings
Okay, sometimes we make too many, or maybe you need to prep them before the party starts. I totally get it! But here’s a very important rule if you want to save leftovers: NEVER store your wings already tossed in sauce. That just guarantees sogginess when you open the container the next day. If you have leftovers, keep the sauce in a separate little container for dipping later!
When reheating, please, please, please avoid the microwave; it turns them rubbery instantly. The best way to revive that glorious crunch is to use high heat in your oven or, if you’re feeling extra speedy, toss them in an air fryer for just 3-4 minutes. I’ve found that reheating them on a rack on a baking sheet at 400 degrees for about 8 minutes works like a charm. If you own an air fryer, you already know it’s the king of reheating crispy things, check out how great it is for Air Fryer Gnocchi—it works wonders on wings too!
Frequently Asked Questions About Making Crispy Baked Chicken Wings
I know you might still have questions buzzing around because getting those truly **crispy baked chicken wings** without frying seems like a culinary myth sometimes! Don’t worry, I’ve answered the top ones I always get from friends and readers asking about my **Oven Fried Wing Technique**. If you have a burning question I missed, please don’t hesitate to reach out on my Contact Page!
Can I make these crispy baked chicken wings ahead of time?
You absolutely can prep ahead, which is amazing for party planning! The best part is prepping the dry coating. You can toss your totally dry wings in the baking powder mixture and keep them on the rack in the fridge overnight. That extra time really helps dry out the skin. However, for peak crispiness—the crunchiest of the crunchy—you should always bake them fresh right before serving. If you absolutely must sauce them early, know that the skin will soften a bit, but they’ll still be delicious!
What is the difference between using baking powder and baking soda?
This is a fantastic question and hits right on the science of getting these **Crunchy Oven Wings**! You must use baking powder here, not just baking soda. Baking soda is a pure base; it’s strong and can leave a metallic or soapy taste if used alone, especially at high heat. Baking powder is a combination of base (soda), acid (like cream of tartar), and a starch. When this mixture hits the heat, it creates CO2 bubbles that help lift and dry the skin surface gently while also raising the pH level just enough to promote beautiful browning. Stick to the powder for that perfect texture!
Why didn’t my wings come out crispy?
If you followed the steps and they still weren’t crispy, I bet we can trace it back to just one of two culprits: either the wings weren’t patted dry enough in the first step, or you didn’t use the wire rack. If there was moisture, the baking powder couldn’t work effectively, and the wings steamed. If you laid them directly on the pan, the bottom surface boiled in its own juices. Remember, for **easy baked chicken recipe** success, dryness and elevation are your best friends!
Can I use frozen wings for this recipe?
Oh, please don’t try to use them frozen, honey! You need to thaw them completely first. Even then, you need to treat them like fresh wings and dry them aggressively. Ideally, I always recommend fresh, but if you are using frozen, be prepared to spend an extra 15 minutes just patting them dry because they hold onto so much more internal moisture after thawing!
Nutrition Information for This Easy Baked Chicken Recipe
I know that for a lot of you, especially those of you who are focused on healthier eating, knowing what’s in your favorite game day snack is important. Since I actually studied nutrition before I started cooking professionally, I always try to give you the best frame of reference I can!
Keep in mind that these numbers are based just on the wing, the dry rub, and that tiny bit of olive oil—they don’t factor in any sauce you add at the end, because honestly, that can swing wildly depending on if you use a tangy vinegar-based sauce or a thick, sugary honey glaze. If you’re tracking macros, these are a fantastic, relatively low-carb option compared to standard fried wings!
Here is the estimated breakdown per serving (which we set at 4 wings):
- Calories: Approximately 250 per serving
- Protein: A whopping 26 grams! (Great for keeping you satisfied)
- Fat: About 15 grams total
- Carbohydrates: Very low, around 1 gram
As you can see, this **Easy Baked Chicken Recipe** is packed with protein and keeps the carbs way down before you even consider dipping them. If you’re looking for other ways to build a balanced meal around chicken that skips the fryer, you should definitely browse my ideas for healthy lunch ideas!
Share Your Ultra Crispy Baked Chicken Wings Success
Okay, you’ve done the drying, you’ve used the magic powder, and I bet your kitchen smells absolutely incredible right now! I am so eager for you to try taking that first bite. Did they snap? Were they juicy? PLEASE come back and let me know how your **crispy baked chicken wings** turned out!
Leaving a star rating right below the recipe helps other folks trust the process, and dropping a comment below tells me what kind of sauces you ended up using! If you snap a picture of those golden, crunchy beauties, tag me on social media—I absolutely live for seeing your success stories. We made these **Easy Baked Chicken Recipe** winners together!
If you have any pressing concerns about the recipe or just want to send compliments (hint, hint!), you can always send a message through my Privacy Policy contact form, but for general feedback, the comments section is the best place to start!
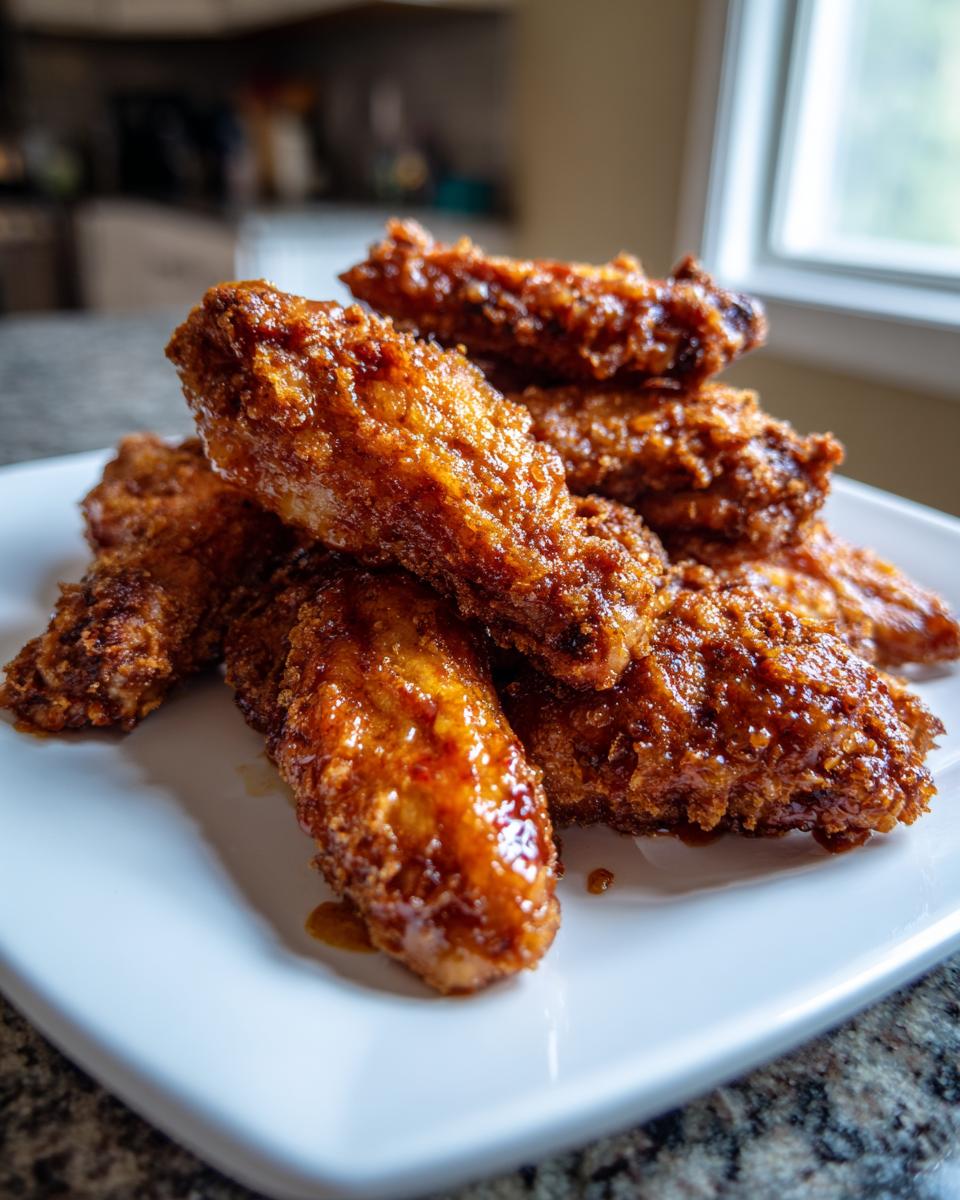
PrintUltra Crispy Baked Chicken Wings: The Foolproof No-Fry Method

You achieve shatteringly crispy skin on these baked chicken wings without deep frying. This easy oven method guarantees a juicy interior and a satisfying crunch every time you make them, perfect for game day or a quick dinner.
- Prep Time: 15 min
- Cook Time: 45 min
- Total Time: 60 min
- Yield: 4 servings 1x
- Category: Appetizer
- Method: Baking
- Cuisine: American
- Diet: Low Fat
Ingredients
- 2 lbs chicken wing sections (flats and drumettes)
- 1 tablespoon baking powder (aluminum-free recommended)
- 1 teaspoon kosher salt
- 1 teaspoon garlic powder
- 1 teaspoon onion powder
- 1/2 teaspoon black pepper
- 1/4 teaspoon cayenne pepper (optional)
- 1 tablespoon olive oil
- Your favorite wing sauce (for tossing after baking)
Instructions
- Prepare the wings: Pat the chicken wings completely dry using paper towels. Moisture is the enemy of crispiness.
- Mix the dry coating: In a large bowl, combine the baking powder, kosher salt, garlic powder, onion powder, black pepper, and cayenne pepper.
- Coat the wings: Add the dried wings to the bowl. Toss thoroughly until every piece is evenly coated with the baking powder mixture.
- Prepare for baking: Line a large, rimmed baking sheet with aluminum foil for easy cleanup. Place a wire cooling rack on top of the baking sheet. This allows air to circulate completely around the wings, preventing sogginess.
- Arrange the wings: Place the coated wings on the wire rack in a single layer, ensuring they do not touch each other.
- Preheat the oven: Preheat your oven to 425 degrees Fahrenheit (220 degrees Celsius). High heat is essential for crisping.
- First bake: Bake the wings for 25 minutes.
- Flip and oil: Carefully flip each wing. Lightly brush or drizzle the olive oil over the wings.
- Second bake: Return the wings to the oven and bake for another 15 to 20 minutes, or until the skin is deeply golden brown and very crisp.
- Sauce and serve: Remove the wings from the oven. Immediately transfer the hot, crispy wings to a clean bowl. Pour your desired amount of sauce over the wings and toss to coat evenly. Serve immediately for the best texture.
Notes
- The baking powder reacts with the chicken skin proteins during the high-heat bake, creating a dry surface that mimics deep-fried texture. Do not skip this ingredient.
- For the absolute crispiest results, after drying the wings, place them uncovered on a rack in the refrigerator for at least 2 hours, or overnight, before coating and baking. This further dries the skin.
- If you prefer a saucier wing, toss them in sauce immediately after baking and serve. If you want a slightly caramelized glaze, return the sauced wings to the oven under the broiler for 1-2 minutes, watching closely to prevent burning.
Nutrition
- Serving Size: 4 wings
- Calories: 250
- Sugar: 0
- Sodium: 350
- Fat: 15
- Saturated Fat: 4
- Unsaturated Fat: 11
- Trans Fat: 0
- Carbohydrates: 1
- Fiber: 0
- Protein: 26
- Cholesterol: 85