
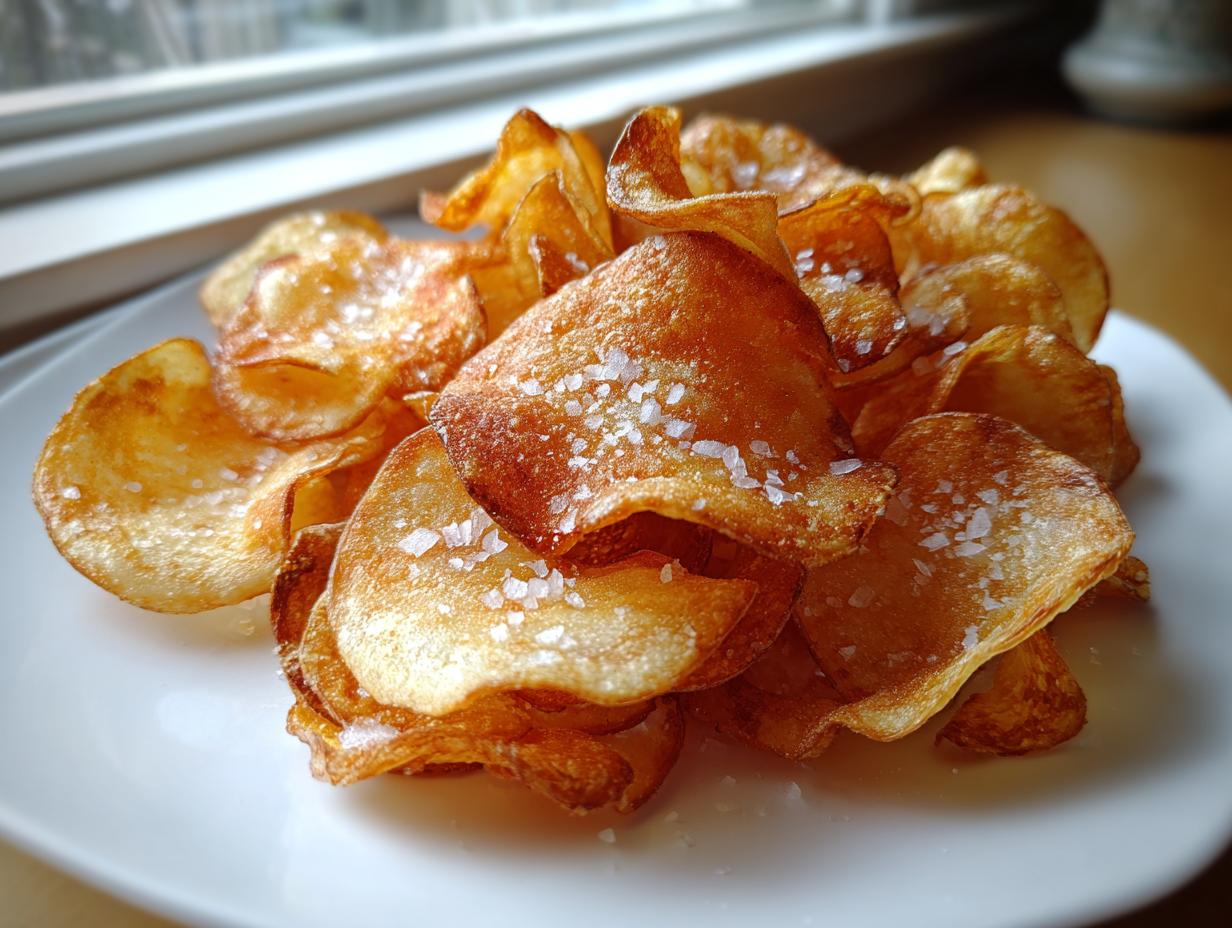
Oh, stop what you’re doing right now because I have cracked the code on the most satisfying snack imaginable. Forget digging through bags of store-bought options hoping for a good crunch! We’re making potato chips from absolute scratch, and they will shatter when you bite them—I promise. When I first started developing recipes, the goal was always to simplify the hard stuff, and making chips seemed incredibly technical. That quest for simple, soulful cooking is what led me to create this whole site, as you can read over on the About Page!
But after testing and tasting way too many batches (oops!), I figured it out. I’m giving you three amazing ways to get that perfect crunch: the rich, classic deep-fry method, a decent oven-baked version for those healthier days, and the super-quick air fryer technique. Whether you’re looking for an easy potato chip recipe for movie night or a simple snack, this is the only guide you’ll ever need!
- Why You Will Love This Easy Potato Chip Recipe
- The Essential Ingredients for Perfect Potato Chips
- How to Make Crispy Potato Chips: Three Foolproof Methods
- The Final Step: Seasoning Your Homemade Potato Chips
- Potato Chip Making Tips for Maximum Crispiness
- Storage and Serving Suggestions for Your Potato Chips
- Frequently Asked Questions About Homemade Potato Chips
- Estimated Nutritional Data for These Potato Chips
- Share Your Perfect Potato Chips Experience
Why You Will Love This Easy Potato Chip Recipe
Seriously, once you taste the real deal, you’ll never look back. This isn’t just another recipe; it’s your new secret weapon for the best crunchy homemade snacks.
- Achieves maximum crispiness using one of three simple methods.
- This easy potato chip recipe cuts out the mystery ingredients found in bags.
- Total versatility: Fry them up when you want indulgence, or bake/air fry for healthier chip alternatives!
- It’s so rewarding to serve something incredible that you made yourself.
If you need quick meals to go along with this snack, check out my favorites for easy weeknight dinners!
The Essential Ingredients for Perfect Potato Chips
Listen up, because the ingredients list is short, but the quality of those ingredients makes or breaks this entire snack experience. You need three main things: potatoes, oil (if you’re frying), and salt. For the potatoes, I have one big requirement: you absolutely must use Russet potatoes. They have the right starch-to-water ratio which is key for that shatteringly crunchy result we are looking for.
When it comes to seasoning, if you want that classic, almost addictive flavor similar to what you find in a bag, you have to use fine sea salt. Coarse salt won’t stick properly or dissolve right into the thin slices. For custom flavors later, regular garlic powder and a touch of paprika are my go-to extras, but salt is non-negotiable!
Ingredient Notes and Potato Slicing Guide
Okay, this is where the science comes in, and I learned this in the test kitchen: starch hates crispiness! That’s why the soaking step is mandatory. You cut your potatoes super thin—I mean paper-thin—and then you completely submerge them in cold water for at least half an hour. This process draws out the excess starch clinging to the surface. Without soaking, the starch gets sticky when heated, and instead of getting a brittle chip, you get a floppy, chewy bite.
If you have a mandoline slicer, use it! It’s the only way to guarantee every slice is the exact same thickness, which means every slice fries or bakes evenly. Aim for about 1/16th of an inch. You want them uniform so none burn while others are still soft in the middle. After soaking, make sure to dry them aggressively; use clean towels and pat, pat, pat!
How to Make Crispy Potato Chips: Three Foolproof Methods
Alright, now that you’ve got your starch-free, perfectly dry slices, it’s time for the fun part: turning them into amazing potato chips! Remember, the prep work gets you 90% of the way there, but the cooking method changes everything about the final result. Do you want that rich, authentic indulgence? Or are you aiming for something lighter? We can do it all. Before we dive in, make sure you pause here and check out my recipe for amazing potato soup if you have extra cooked potatoes lying around, or just need the next culinary adventure booked! That soup is divine.

Method 1: Classic Fried Potato Chips Technique
If you want that loud, satisfying crunch that store-bought chips just can’t touch, you have to fry them. It sounds scary, I know! But trust me on the temperature. You want about two inches of vegetable oil in a heavy pot, and you must bring it up to 325°F (160°C). If it’s hotter, they’ll burn before they crisp up beautifully. Gently drop the slices in—and this is my huge expert tip—only a small handful at a time! Don’t crowd the pot!
Crowding drops the oil temperature instantly, leading to soggy, greasy potato chips. Let them bubble away gently for about 4 to 6 minutes, stirring them occasionally so they don’t stick together. You’ll see the bubbling slow down significantly; that’s your cue that the moisture is cooked out and they are nearly done. Scoop them onto paper towels quickly and listen for that glorious sizzle!
Method 2: Oven Baked Potato Chips for Healthy Chip Alternatives
For those days when you want a healthy chip alternative but still need that satisfying snap, the oven is your best friend. Preheat it to 375°F (190°C). Line those baking sheets with parchment paper—don’t skip that, or you’ll be scraping bits off forever!
Toss your dried slices with just a drizzle of oil—not swimming, just lightly coated. Spread them out in a single layer, ensuring no slices are touching. Bake for about 15 to 20 minutes total. Here’s where trustworthiness comes in: watch them after the 12-minute mark! They go from perfect to burnt in about sixty seconds flat because they are so thin. Make sure you flip them halfway through so both sides get golden brown and wonderfully crisp.

Method 3: Air Fryer Potato Chips for Guilt Free Crispy Snacks
If you have an air fryer, you are in luck! This method gives you that amazing texture with very little oil, creating true guilt free crispy snacks. Set your air fryer to 350°F (175°C). We’re lightly tossing these slices with maybe one teaspoon of oil total, just enough to help the seasoning stick and encourage color.
You absolutely must cook in batches for this one; don’t try to pile them in! Put a single layer in the basket. Air fry for 10 to 15 minutes, but here is the crucial instruction: shake that basket every five minutes, sharp! Shaking redistributes the heat so they cook evenly and get that all-over crunch we are looking for. They’ll look pale, then suddenly brown up fast!
The Final Step: Seasoning Your Homemade Potato Chips
The chips are cooked! Now, listen closely because timing matters immensely here. As soon as they come out of the oil, air fryer, or oven, they have to be seasoned immediately. That tiny bit of residual moisture or oil is what grabs onto the seasoning. Toss them right away into a big bowl. I use a simple mix: fine sea salt, a little dash of garlic powder, and just a whisper of paprika for color.
If you are trying to achieve that perfect store bought potato chip copycat flavor, skip everything but the fine salt. That fine salt is the secret to the best potato chip seasoning that coats perfectly. If you want to dip these later—and you should!—they go amazing with my creamy garlic aioli suggestion.
For other tips on Russet potato chips, folks over at this site have some great related thoughts!
Potato Chip Making Tips for Maximum Crispiness
I have gathered all my best tricks into this little section because I want your potato chips to be shatteringly crunchy every single time. Getting this right is all about precision, even if the overall process is simple. If you’re deep frying, keep a thermometer handy. If the oil drops even 15 degrees when you add the batch, wait for it to climb back up before adding the next batch. That recovery time is everything!
Remember what I said about drying the slices? Please don’t skimp on that step. You can never have too dry a potato slice before it hits the heat. If you want the absolute best results and the most uniform texture, my number one piece of advice from all my potato chip making tips is to use a mandoline slicer for your thinly sliced potatoes. It’s worth the small investment for this snack!
For more amazing techniques wrapped around that perfect crunch, you might want to look at how other cooks handle their cooking; I found some great insights over at this article. And speaking of crunch, if you love this texture, you have to try my recipe for crispy chicken fried steak!
Storage and Serving Suggestions for Your Potato Chips
Look, the honest truth is that these homemade potato chips are worlds best eaten the moment they get seasoned. They are at their peak crunch then! If you absolutely must save some for later, store them in an airtight container at room temperature for a day, but they won’t snap quite the same way. They’re perfect movie night snacks or fantastic party appetizers potatoes when fresh.
If you’re planning ahead for a big event, make sure you keep the sliced potatoes soaking until just before you cook that batch. For a fun presentation, try setting out bowls of different seasonings—like ranch dip mix or smoked paprika—and let everyone customize!
If you need something else easy for entertaining, you have to try my recipe for easy cranberry brie bites!
Frequently Asked Questions About Homemade Potato Chips
I know you’ve got questions swirling around, especially if you’re aiming for that perfect crunch. I get them all the time! Let’s clear up the biggest concerns about making these homemade potato chips.
Can I skip the cold water soak to remove starch?
Oh, please don’t skip this step unless you want chewy chips! Soaking is perhaps the most important part of my potato chip making tips. Removing that starch creates the necessary dehydration barrier so the potatoes crisp up instead of steaming. Skipping it ruins the crispy potato chips texture we are aiming for.
Which cooking method yields the *crispiest* result?
If your main goal is the absolute loudest crunch and the texture most like the bag, deep-frying is the winner—that’s why it’s labeled the classic technique. However, the air fryer method gets surprisingly close if you shake the basket often! If you want healthy chip alternatives, the air fryer or oven are your best bets, but they won’t quite match the deep-fried snap.
Can I use sweet potatoes instead of Russets?
You certainly can, but you need to adjust your expectations! Sweet potatoes have much more natural sugar, which means they will brown much faster and might burn before they fully dehydrate and crisp. If you use them, definitely opt for the oven-baked method at a slightly lower temperature, and definitely check out my twice-baked potato recipe for a different kind of sweet potato goodness!
How do I make these taste exactly like store-bought?
To nail the store bought potato chip copycat flavor, stick to that fine sea salt (no coarse!) and remember to season them the second they come out of the heat. Also, make sure your slices are uniform; uneven slices cook differently! For more tips on achieving that legendary crispiness, I love the advice found over here.
Estimated Nutritional Data for These Potato Chips
Now, before you grab a whole bowlful (we know you want to!), here are the estimated numbers per serving. Remember, this nutrition panel is based heavily on the *baked* or *air-fried* version. If you go all-in on the deep oil for the classic potato chips, your fat and calorie count will shoot up significantly, so keep that in mind when planning those healthy lunch ideas!
- Serving Size: 1/6 of recipe
- Calories: 250
- Fat: 14g (Saturated Fat: 2g)
- Carbohydrates: 30g
- Protein: 3g
Share Your Perfect Potato Chips Experience
That’s it—you now have the knowledge to make the best potato chips, period! I genuinely want to know which method you chose. Did you stick with the classic deep-fried crunch, or did the air fryer win your heart for your next batch of crunchy homemade snacks?
Don’t be shy! Head down to the comments below, tell me how they turned out, and share your favorite seasoning combination. If you need to reach out directly with questions, you can always use the contact page. Happy crunching!
PrintPerfectly Crispy Homemade Potato Chips (Fried, Baked, and Air Fryer Methods)

Learn how to make shatteringly crunchy homemade potato chips using three simple methods: classic deep frying, oven baking for a healthier option, or using your air fryer. Get the foolproof technique for thin slicing and achieving maximum crispiness every time.
- Prep Time: 45 min
- Cook Time: 20 min
- Total Time: 65 min
- Yield: 6 servings 1x
- Category: Snack
- Method: Frying, Baking, Air Frying
- Cuisine: American
- Diet: Vegetarian
Ingredients
- 3 large Russet potatoes
- Vegetable oil, for frying (if using the frying method)
- 1 teaspoon fine sea salt, or to taste
- 1/2 teaspoon garlic powder (optional seasoning)
- 1/4 teaspoon paprika (optional seasoning)
Instructions
- Prepare the potatoes: Wash and peel the potatoes if desired. Use a mandoline slicer or a very sharp knife to slice the potatoes as thinly as possible, aiming for uniform thickness for even cooking.
- Remove starch: Place the thin potato slices into a large bowl and cover completely with cold water. Let the slices soak for at least 30 minutes, or up to 2 hours, changing the water once if possible. This step removes excess starch, which is key for crispiness.
- Dry thoroughly: Drain the potatoes completely. Lay the slices out in a single layer on several layers of paper towels or a clean kitchen towel. Pat them completely dry. Moisture prevents crisping.
- Choose your method: Decide whether you will fry, bake, or air fry the chips.
- Frying Method (Classic Crunchy Snacks): Heat 2 inches of vegetable oil in a heavy-bottomed pot to 325°F (160°C). Working in small batches, carefully add the potato slices to the hot oil. Fry for 4 to 6 minutes, stirring occasionally, until they are golden brown and stop bubbling vigorously. Remove with a slotted spoon and drain on a wire rack lined with paper towels.
- Oven Baked Method (Healthy Chip Alternatives): Preheat your oven to 375°F (190°C). Toss the dried potato slices with 1 tablespoon of oil (if you are not strictly avoiding oil). Arrange the slices in a single layer on baking sheets lined with parchment paper. Bake for 15 to 20 minutes, flipping halfway through, until edges are brown and crisp. Watch closely to prevent burning.
- Air Fryer Method (Guilt Free Crispy Snacks): Preheat your air fryer to 350°F (175°C). Lightly toss the dried slices with 1 teaspoon of oil. Place the chips in a single layer in the air fryer basket; you will need to work in batches. Air fry for 10 to 15 minutes, shaking the basket every 5 minutes, until they are golden and crunchy.
- Season immediately: While the chips are still hot, transfer them to a large bowl. Sprinkle evenly with sea salt and any other desired seasonings, like garlic powder or paprika. Toss gently to coat.
- Serve: Serve your homemade potato chips immediately for the best texture.
Notes
- For the crispiest results, use a mandoline to achieve paper-thin, even slices.
- If you want a copycat flavor similar to classic store-bought chips, use fine salt only; avoid coarse salt.
- If you are aiming for a low-fat option, the air fryer method provides the best balance of texture and reduced oil.
Nutrition
- Serving Size: 1/6 of recipe
- Calories: 250
- Sugar: 1
- Sodium: 150
- Fat: 14
- Saturated Fat: 2
- Unsaturated Fat: 12
- Trans Fat: 0
- Carbohydrates: 30
- Fiber: 3
- Protein: 3
- Cholesterol: 0