
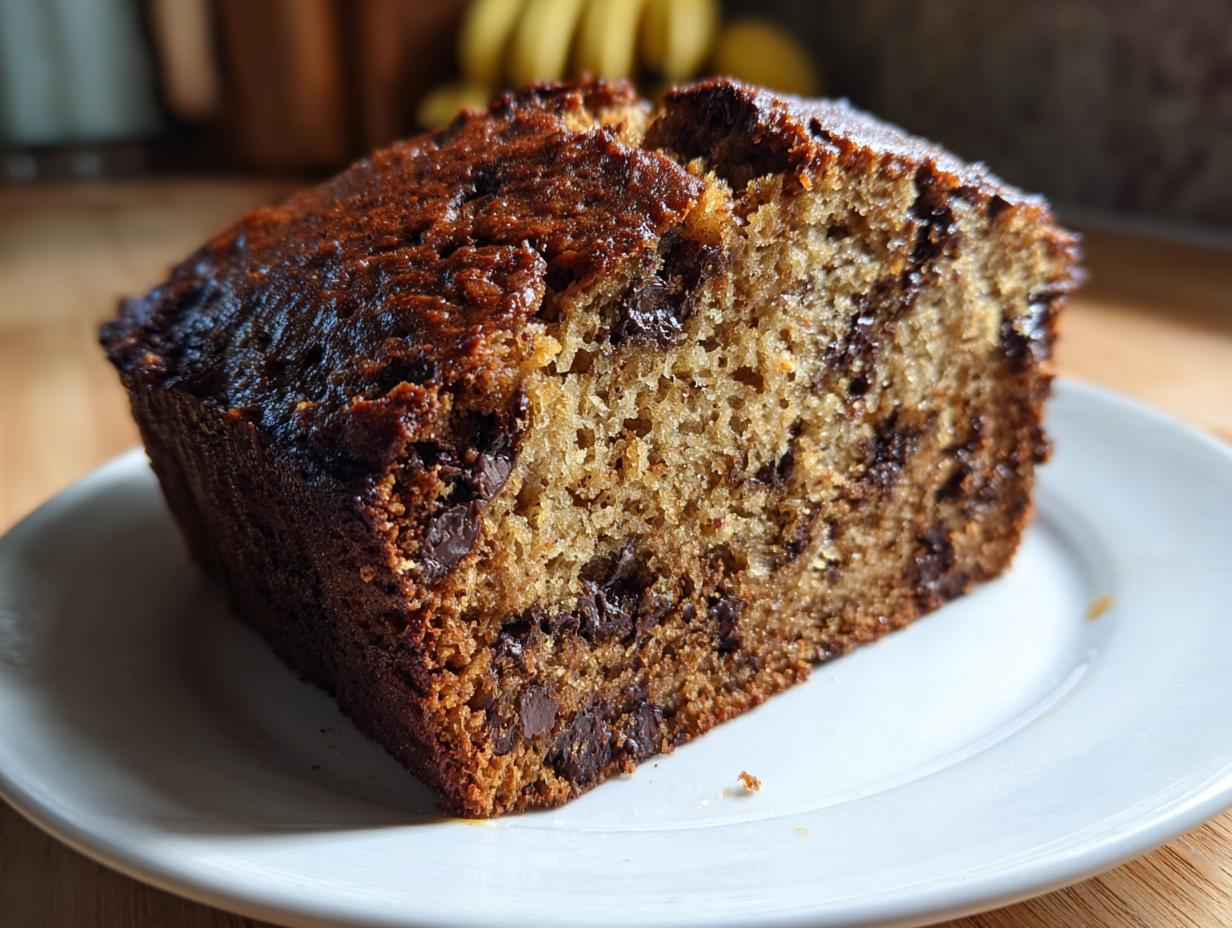
Honestly, who says you can’t have dessert for breakfast? I’m always sneaking a slice of leftover cake in the morning, but now, thanks to this recipe, you don’t have to feel guilty about it! When I set out to create the perfect protein banana bread, my main goal was simple: it had to taste exactly like the rich, sweet, classic loaf we all love, but secretly pack a serious nutritional punch. After years blending my nutrition background with rigorous testing in professional kitchens, I landed on this incredibly moist, foolproof recipe. If you’ve been searching for something similar, you might also love my dedicated Greek yogurt banana bread recipe, but this version kicks up the protein even more. Trust me, this loaf is buttery, tender, and dangerously delicious. It’s the definition of healthy comfort food recipes!
- Why This is the Ultimate Protein Banana Bread Recipe
- Gathering Ingredients for Your Protein Banana Bread
- Step-by-Step Instructions for Easy Protein Loaf Baking
- Tips for Perfect Moist Banana Bread Recipe Results
- Customizing Your Protein Baking Loaf
- Serving Suggestions for Your Healthy Banana Bread
- Storage and Reheating for Meal Prep Banana Bread
- Frequently Asked Questions About Protein Banana Bread
- Nutrition Snapshot for This Low Sugar Quick Bread
Why This is the Ultimate Protein Banana Bread Recipe
I know what you’re thinking: protein baked goods are automatically dry, right? Wrong! This recipe is proof that you can get your macros *and* enjoy a truly tender slice. It easily ticks all the boxes for what you need in a high-protein snack. It’s truly the best kind of guilt free banana bread. And hey, if you ever need some quick wins for your other meals, you can check out my ideas for healthy lunch ideas!
- It tastes like the real deal—rich, sweet, and tastes just like classic healthy comfort food recipes.
- It’s practically a one-bowl wonder, which is huge when you’re rushing out the door.
- It’s ready fast, meaning less waiting between craving and satisfying that craving!
Texture Secrets: Achieving a Moist Protein Banana Bread
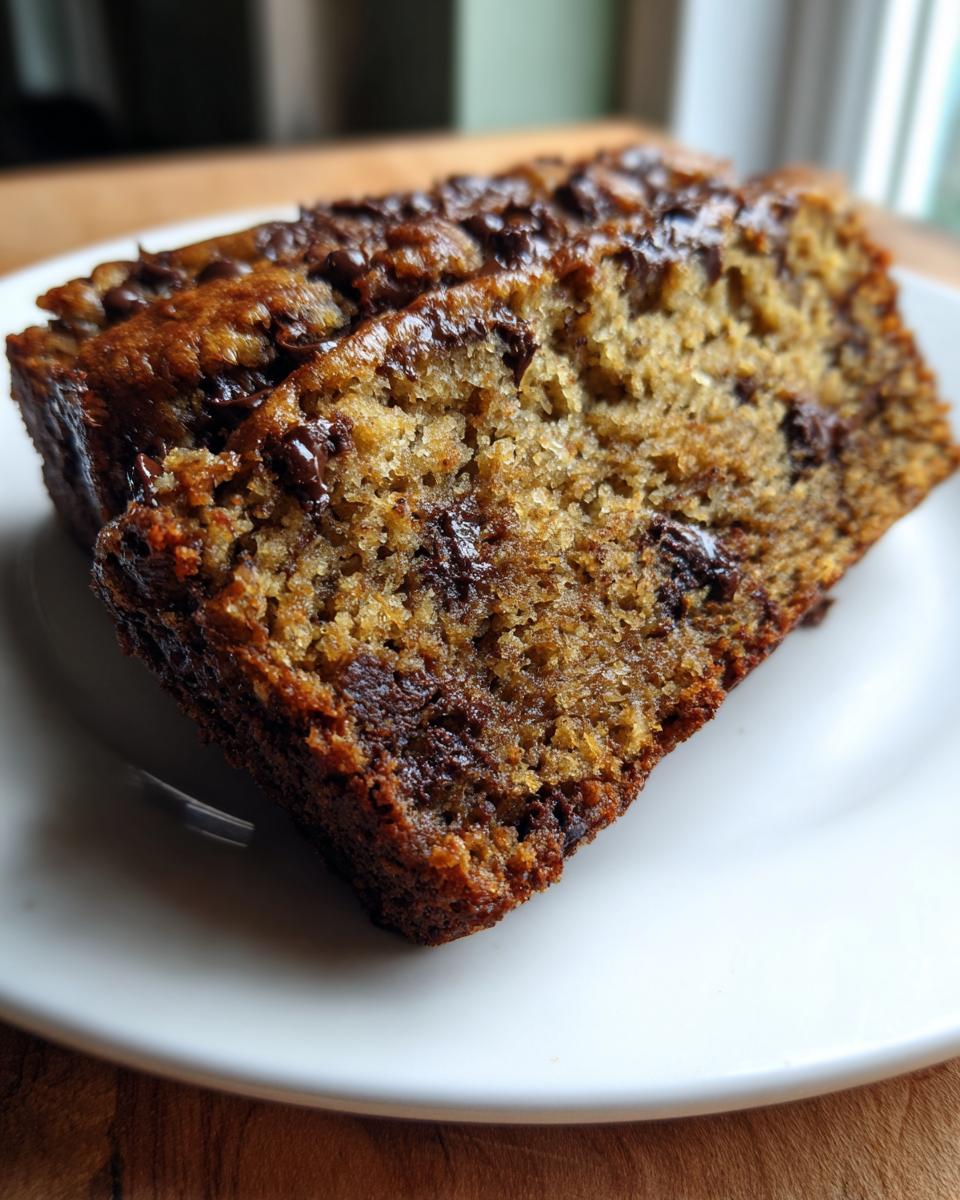
The magic, folks, is the Greek yogurt. Seriously! When you add protein powder, things can get heavy or crumbly fast, but the yogurt steps in to make sure every bite is unbelievably moist. We’re pairing that thick yogurt with bananas that are basically black—the riper they are, the more moisture and sweetness they bring to the party. That’s my top tip for texture!
Perfect for Breakfast Banana Bread and Meal Prep
This loaf is so perfectly balanced for fuel. With 15 grams of protein per slice, this loaf isn’t just a treat; it’s serious breakfast banana bread material. I bake a double batch every Sunday because it’s sturdy enough for sitting on the counter, great for quick post-workout recovery, and it slices perfectly for weekly meal prep.
Gathering Ingredients for Your Protein Banana Bread
Okay, let’s talk about what you need to gather up. This list looks a little different than your standard quick bread, but don’t let the protein powder scare you off! We’re keeping this as natural and delicious as possible. For the best structure and the absolute *moistest* results, pay close attention to the bananas—they need to be practically begging to be mashed, you know, those ones that look over-the-hill with lots of black spots? Those are the ones you want.
I recommend using Greek yogurt that has a little fat in it, like 2% or full fat. It just creates a richer crumb that melts in your mouth, which is usually what happens when you aim for great quick-easy-breakfasts.
- 3 large very ripe bananas, ready for mashing!
- 1 cup plain Greek yogurt (I prefer 2% or full fat, trust me on this one).
- 2 large eggs, just sitting out on the counter.
- 1/4 cup melted coconut oil or unsalted butter (whichever fat you prefer!).
- 1/2 cup pure maple syrup or honey (or your favorite sugar free banana bread sweetener).
- 1 teaspoon vanilla extract.
- 1 3/4 cups whole wheat pastry flour (or use all-purpose flour).
- 1/2 cup vanilla protein powder (whey or plant-based works).
- 1 teaspoon baking soda, to give it a little lift.
- 1/2 teaspoon ground cinnamon for that classic warmth.
- 1/4 teaspoon salt to balance the sweetness.
- 1/2 cup dark chocolate chips—yes, they are mandatory in my book!
Ingredient Notes and Substitutions for Protein Banana Bread
Now for the customization part! If you’re out of protein powder but still want to boost the protein count, you can totally do that. My notes suggest you can sneak in an extra 1/4 cup of unflavored protein powder, but if you do, you need to pull back 1/4 cup of your flour. It’s like a little balance act to keep the batter right.
If you skip the maple syrup for a truly sugar free banana bread vibe, stick to a zero-calorie sweetener you trust, but know that it can change the texture a bit since sugar locks in moisture. Also, since we are using oil or butter, make sure they are cooled slightly after melting so they don’t scramble those eggs when you mix everything together. This recipe is seriously forgiving, which is why I love it for protein baking!
Step-by-Step Instructions for Easy Protein Loaf Baking
Alright, action time! Even though this is a high protein banana bread, that doesn’t mean we skip the basics. First thing, get that oven warmed up to 350°F (175°C). Grab your 9×5 inch loaf pan—I always grease mine really well and then line it with parchment paper that hangs over the sides. It gives you little handles to lift the loaf out later, which is a lifesaver, trust me.
We start by mixing all the wet stuff in a big bowl: the mashed bananas (get ’em mushy!), your Greek yogurt, the eggs, your melted oil or butter, maple syrup, and vanilla. Whisk it until it looks nice and combined. In a separate spot, just whisk the dry ingredients together—that’s your flour, protein powder, soda, cinnamon, and salt. We mix them separately so we don’t accidentally overwork the gluten later on.
Mixing Wet and Dry Components for Protein Banana Bread
Now for the most important part to keep this bread fluffy! Take your dry mix and gently add it to your wet ingredients. You want to fold this together with a spatula, not whisk it like crazy. Stop mixing the second you don’t see big white streaks of flour anymore. If you mix too much, you’ll activate the gluten and end up with a dense, chewy brick instead of a beautiful, tender loaf. A few lumps are perfectly fine—actually, they’re encouraged!
If you decided to use those chocolate chips or any other mix-ins, gently fold those in last. Then, pour the batter right into that prepared pan. Don’t try to smooth the top too much; just get it in there evenly. If you want more ideas for great protein recipes, check out my guide to creamy high-protein overnight oats!
Baking Time and Testing Doneness for Protein Banana Bread
This loaf usually takes about 50 to 60 minutes to bake at 350°F. Keep an eye on it starting around the 50-minute mark. You’re looking for that classic toothpick test—insert one right into the center. If it comes out with wet batter clinging to it, give it 5 more minutes. We want moist crumbs, not wet goo!
Once it’s done, pull it out, but don’t rush the cooling! Let it chill in that hot pan for a full 10 minutes. This lets the loaf firm up just enough so it doesn’t fall apart when you try to move it. After those 10 minutes, gently use those parchment paper handles to move it onto a wire rack so it can cool completely before slicing. You want it cool so those 15 grams of protein per slice have time to set properly!
Tips for Perfect Moist Banana Bread Recipe Results
Baking this high protein banana bread means you get incredible nutrition, but we need to make sure we don’t lose that coveted moist texture. Even when you follow the steps perfectly, a few extra pointers can make the difference between a good loaf and the best loaf. Remember, I developed this recipe from the ground up to fight the ‘dry protein bake’ curse, so these tips are what I rely on every single time I pull out my mixing bowl.
First off, let’s talk about those bananas again. If your bananas look just yellow and sad, they aren’t ready. I’m talking heavy spotting, nearly black skin—that’s when the starches have fully converted to sugar and moisture. If you try to rush it, your bread will taste flat, even with the maple syrup we put in for natural sweetness.
No Notes on Subheadings for this Section
My notes section in the official recipe has a few game-changers, especially if you’re planning ahead, which is perfect for anyone focused on meal prep. The biggest one is probably the freezing instruction. This recipe freezes beautifully!
When I bake a double batch, I wait until the whole loaf is completely cool—and I mean completely cool, no warmth left—then I slice it up. I wrap each slice individually in plastic wrap, like little presents, and then toss them all into a big, heavy-duty freezer bag. They keep for about three months! When you want one, just pull a slice out and let it thaw on the counter for an hour, or nuke it for 20 seconds. It comes back perfectly soft. If you want to see what I do with chocolate chip variations, check out my moist and easy chocolate banana bread!
Another handy hint from my baking log: If you find yourself needing extra protein but don’t want to mess with the flour ratio (which can sometimes make things tough), try adding 1/4 cup of unflavored protein powder for an extra boost. Just remember that different powders soak up liquid differently, so you might need one extra splash of milk or yogurt to keep the batter flowing smoothly.
Customizing Your Protein Baking Loaf
This base recipe for protein banana bread is fantastic on its own, but I love treating it like a blank canvas! Since we’ve already nailed the moisture and the protein content, we can have some fun with mix-ins. The key thing to remember here is that since we’ve added protein powder, we need to be a little gentle with how much extra stuff we fold in. We don’t want to weigh down that gorgeous, fluffy structure we worked so hard to build!
If you’re looking to switch things up from the basics, try adding a cup of fresh blueberries—they burst open beautifully when baked, adding little pockets of tartness. Or, maybe you’re a nut person? Walnuts or pecans chopped roughly work wonderfully. Just make sure whatever you add isn’t sitting in liquid beforehand, especially if you use blueberries; we are controlling the moisture content very carefully here!
This is where that cozy, made-from-scratch feeling really comes through. If you usually gravitate toward my moist carrot cake muffins, you’ll appreciate how easy it is to customize this loaf too!
Adding Chocolate Chip Protein Banana Bread Flavor
Right now, my favorite modification is kicking up the chocolate factor. The recipe calls for dark chocolate chips, and I stand by those—they don’t get pasty when baked. But what if you want full-on chocolate bread? Here’s my trick that keeps it decadent:
Instead of just folding in chips, try making a quick, thick chocolate batter swirl. Whisk together 2 tablespoons of cocoa powder, 1 tablespoon of maple syrup, and maybe a tiny splash of almond milk until you have a thick paste, kind of like frosting. Once your main protein banana bread batter is mixed, dollop this chocolate mixture randomly across the top and swirl it gently with a knife about two times. Don’t over-swirl, or you’ll just get brown bread! This gives you those gorgeous ribbons of rich flavor throughout the loaf, making it feel even more like a true dessert.
Serving Suggestions for Your Healthy Banana Bread
Now that you’ve pulled this magnificent, high-protein loaf out of the oven and let it cool slightly—the hard part is over, and the best part begins. How you serve this healthy banana bread genuinely impacts the experience. Because it’s already loaded with the richness from the yogurt and oil, you don’t *need* a ton of toppings, but why not enjoy it?
I love enjoying a thick slice warmed up just a little bit. You can pop it in the toaster oven for maybe three minutes until the edges get slightly crisp. That warmth softens the crumb right back up, making it feel like it just came out of the oven, even if you pulled it from your meal prep stash!
If you’re serving this as a proper sit-down breakfast, skip the sugary jams. Instead, top a warm slice with a big dollop of plain Greek yogurt—it doubles down on the creaminess and the protein! A drizzle of extra maple syrup (use sparingly if you’re watching your sugar) is lovely, or use some natural peanut butter or almond butter. That healthy fat pairs so well with the sweetness.
For a real treat, have a slice when it’s totally cooled, maybe toasted, with just a thin swipe of softened cream cheese—it brings back that classic bakery feel! We want every bite to be satisfying, whether you’re eating it pre-workout or just needing something comforting. If you’re looking for other amazing, cozy baked ideas, you really need to check out my recipe for French toast muffins next week!
Storage and Reheating for Meal Prep Banana Bread
This is one of the best parts of baking a whole loaf: having easy meal prep banana bread ready for days! Because we used Greek yogurt and melted fat instead of tons of oil, this bread stores really well, but we want to make sure we preserve that incredible moisture we worked for.
If you plan on eating the loaf within three days, you can totally leave it on the counter. Just wrap the entire loaf tightly in plastic wrap or pop it into an airtight container. Keep it at cool room temperature—no need to refrigerate it unless your kitchen is super hot, as the fridge can sometimes accelerate dryness in baked goods. If you do refrigerate it, it will firm up quite a bit.
To bring that refrigerated loaf back to life, give it about 30 minutes on the counter before eating, or microwave a slice for 15 seconds. That little bit of warmth wakes up the moisture again!
As I mentioned before, freezing is my favorite method for long-term storage. Remember how I suggested slicing it first? That’s key! You can pull out singles whenever you need them. For reheating from frozen, I usually wrap the slice in a damp paper towel (just slightly damp—don’t soak it!) and microwave for 30 to 45 seconds. That steam from the towel is the secret to making it seem like you just pulled this protein banana bread out of the oven!
If you are looking for more great make-ahead ideas to keep your routine smooth, you absolutely must check out my guide on easy egg bites—they are another breakfast lifesaver!
Frequently Asked Questions About Protein Banana Bread
I figured you might have a few questions swirling around, especially when you’re trying to get the texture perfect with added protein. Baking is science, right? But don’t worry, I’ve tested every possible scenario so you don’t have to! These answers should cover everything you need to feel totally confident stepping into the kitchen for this protein banana bread.
Can I make this protein banana bread recipe gluten-free?
That’s a great question, especially for folks sensitive to gluten! The main recipe calls for whole wheat pastry flour, which is lighter than regular whole wheat but still contains gluten, giving us great structure alongside the protein powder. If you need gluten free banana bread protein version, you can absolutely swap that flour out. I’ve had success using a 1:1 gluten-free blend that already contains xanthan gum. If your blend doesn’t have it, add about 1/2 teaspoon of xanthan gum to your dry ingredients. This acts like the “glue” that gluten usually provides and helps keep your loaf from crumbling apart. You might need a tiny splash more Greek yogurt, but it works wonderfully!
What is the best protein powder for protein baking?
This is where things get personal! For the absolute best, most ‘dessert-like’ texture, I always lean towards a good quality whey protein isolate, especially the vanilla flavor we use here. Whey blends beautifully and doesn’t dry things out as much as some other types. If you use a standard plant-based blend (like pea or brown rice), just know they tend to be thirstier. When using plant-based protein for protein baking, add another tablespoon or two of Greek yogurt or a splash of milk until the batter looks the right consistency—thick but still easily scoopable.
If you are looking for other ways to get that protein boost without adding powder, you should take a peek at my low-calorie, protein cheesecake recipe!
If you are trying to keep things completely sugar free banana bread, use zero-calorie sweeteners in place of the maple syrup, but like I mentioned before, the texture will be slightly different since sugar contributes to moisture retention. Aim for a blend sweetener you trust!
Nutrition Snapshot for This Low Sugar Quick Bread
I know that for so many of us, tracking macros or just keeping an eye on what we’re eating is part of the routine, especially when we’re intentionally adding protein to our baking. That’s why I always calculate the approximate nutrition for every slice of this high protein banana bread. Knowing you’re getting a solid macro hit while enjoying a delicious treat is the best feeling!
Here is the breakdown based on the recipe details I provided, assuming you used the maple syrup and dark chocolate chips. Remember, this is an estimate—if you use zero-calorie sweetener or fat-free yogurt, those numbers will shift!
- Serving Size: 1 slice (This recipe yields 10 generous slices!)
- Calories: About 245 per slice
- Protein: A whopping 15 grams! That’s fantastic for a low sugar quick bread.
- Carbohydrates: Around 30 grams
- Fat: Roughly 8 grams
See? It’s a perfect post-workout snack or a hearty bit of breakfast banana bread that truly keeps you feeling full. Knowing you’re getting that much protein without a chalky texture is a huge win, in my book. If you want more ways to sneak better nutrition into your day, you can always peek at my guide on healthy lunch ideas for inspiration!
Since we are working with natural sweeteners like maple syrup, the sugar count is higher than a strictly keto loaf, but it’s all natural sugar from the fruit and the syrup, not refined white junk. It’s all about balance, friends!
PrintHigh Protein Banana Bread: Moist, Easy, and Guilt-Free
Make this high protein banana bread using Greek yogurt for a moist, tender loaf that tastes like classic dessert. This easy recipe is perfect for breakfast, meal prep, or a satisfying post-workout snack.
- Prep Time: 15 min
- Cook Time: 55 min
- Total Time: 70 min
- Yield: 10 servings 1x
- Category: Breakfast
- Method: Baking
- Cuisine: American
- Diet: Vegetarian
Ingredients
- 3 large very ripe bananas, mashed
- 1 cup plain Greek yogurt (2% or full fat for best texture)
- 2 large eggs
- 1/4 cup melted coconut oil or unsalted butter
- 1/2 cup pure maple syrup or honey (or sugar-free substitute)
- 1 teaspoon vanilla extract
- 1 3/4 cups whole wheat pastry flour (or all-purpose flour)
- 1/2 cup vanilla protein powder (whey or plant-based)
- 1 teaspoon baking soda
- 1/2 teaspoon ground cinnamon
- 1/4 teaspoon salt
- 1/2 cup dark chocolate chips (optional mix-in)
Instructions
- Preheat your oven to 350°F (175°C). Grease and flour a standard 9×5 inch loaf pan, or line it with parchment paper.
- In a large bowl, combine the mashed bananas, Greek yogurt, eggs, melted oil or butter, maple syrup, and vanilla extract. Whisk until the mixture is smooth.
- In a separate, smaller bowl, whisk together the flour, protein powder, baking soda, cinnamon, and salt.
- Add the dry ingredients to the wet ingredients. Mix gently with a spatula until just combined. Do not overmix; a few streaks of flour are acceptable.
- If using, fold in the chocolate chips.
- Pour the batter into the prepared loaf pan.
- Bake for 50 to 60 minutes, or until a toothpick inserted into the center comes out clean or with moist crumbs attached.
- Let the bread cool in the pan for 10 minutes before carefully transferring it to a wire rack to cool completely before slicing.
Notes
- For the moistest results, use bananas that are heavily spotted or almost black.
- If you prefer a stronger protein boost, add 1/4 cup of unflavored protein powder, reducing the flour by 1/4 cup.
- This bread freezes well. Slice the cooled loaf, wrap individual slices in plastic wrap, and store them in a freezer-safe bag for up to three months.
Nutrition
- Serving Size: 1 slice
- Calories: 245
- Sugar: 14g
- Sodium: 180mg
- Fat: 8g
- Saturated Fat: 4g
- Unsaturated Fat: 4g
- Trans Fat: 0g
- Carbohydrates: 30g
- Fiber: 2g
- Protein: 15g
- Cholesterol: 65mg