
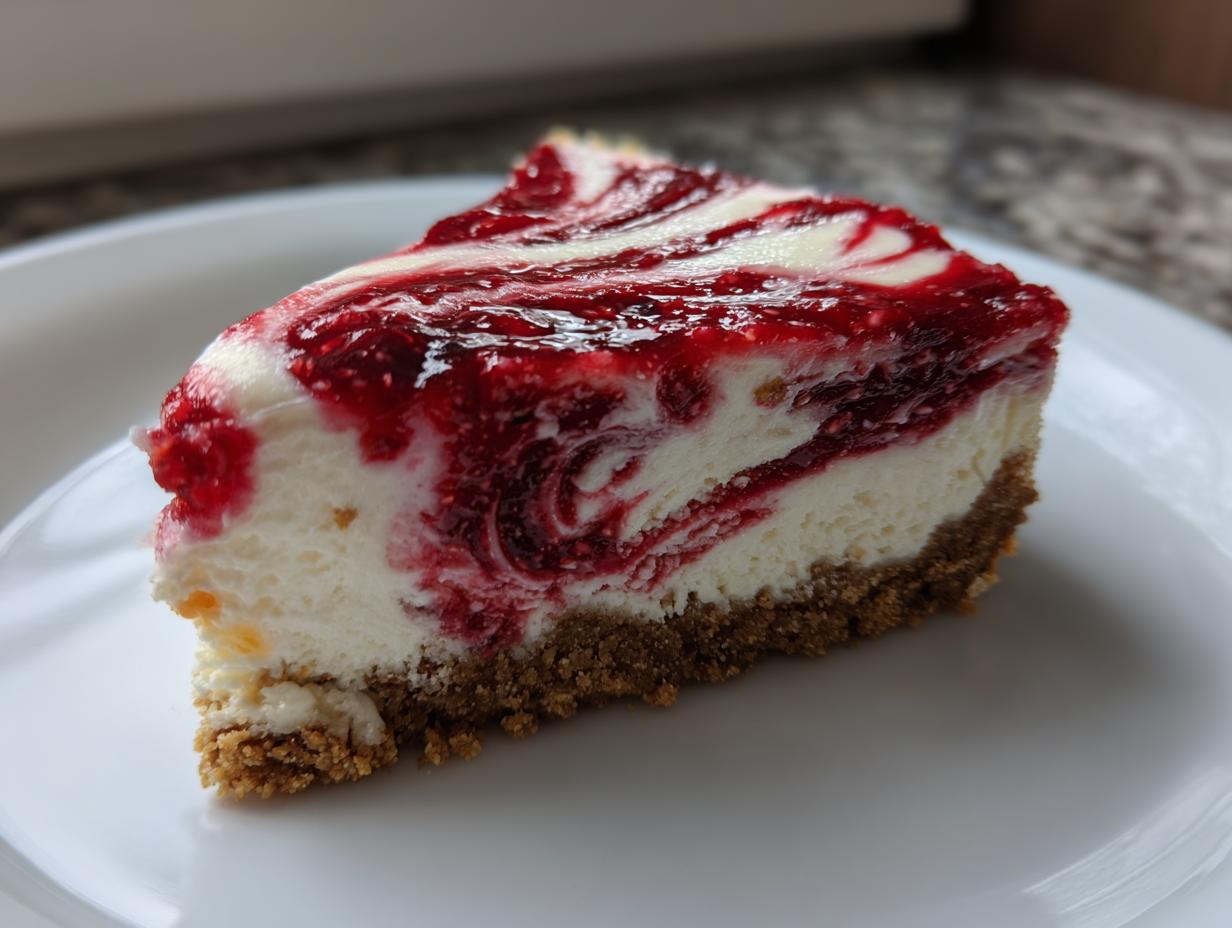
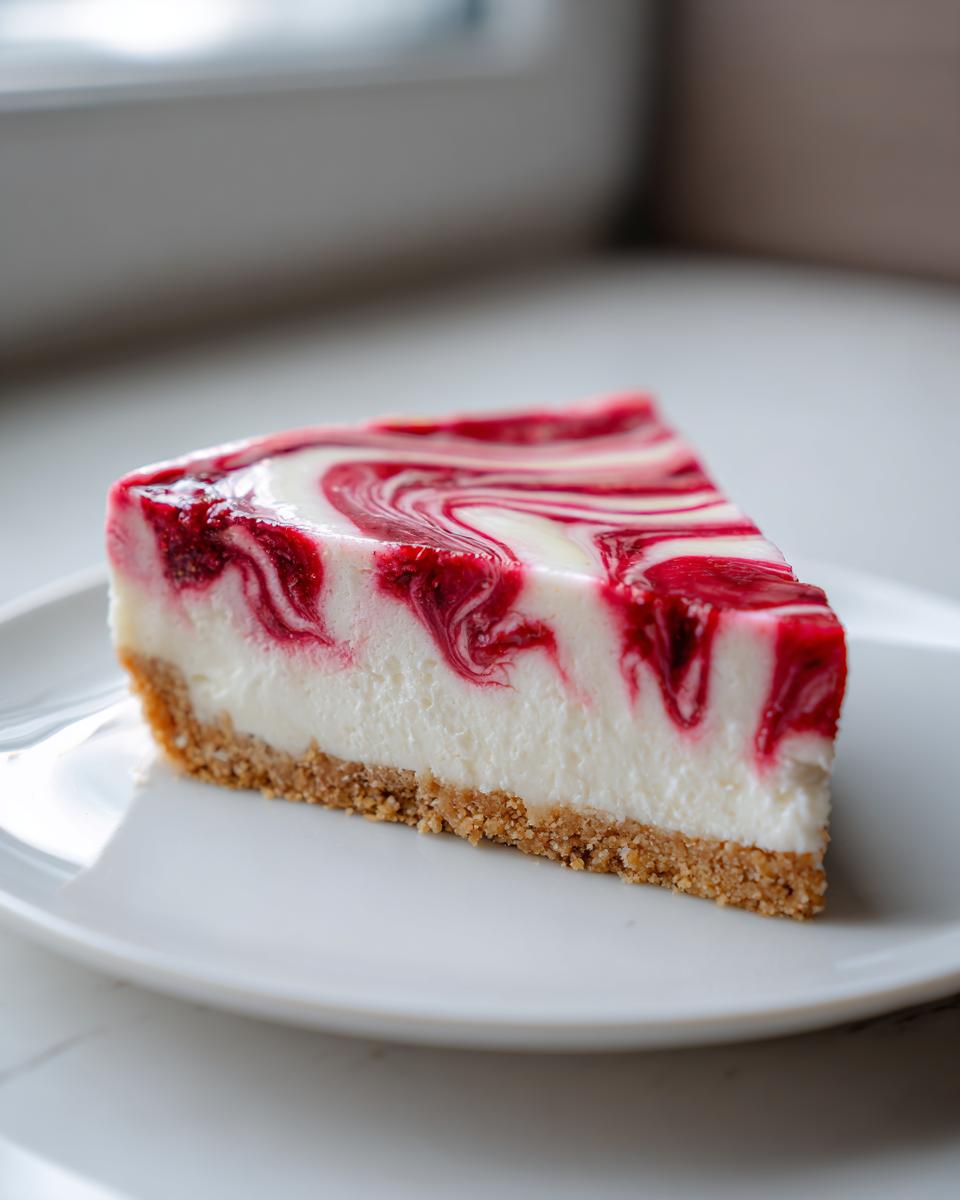
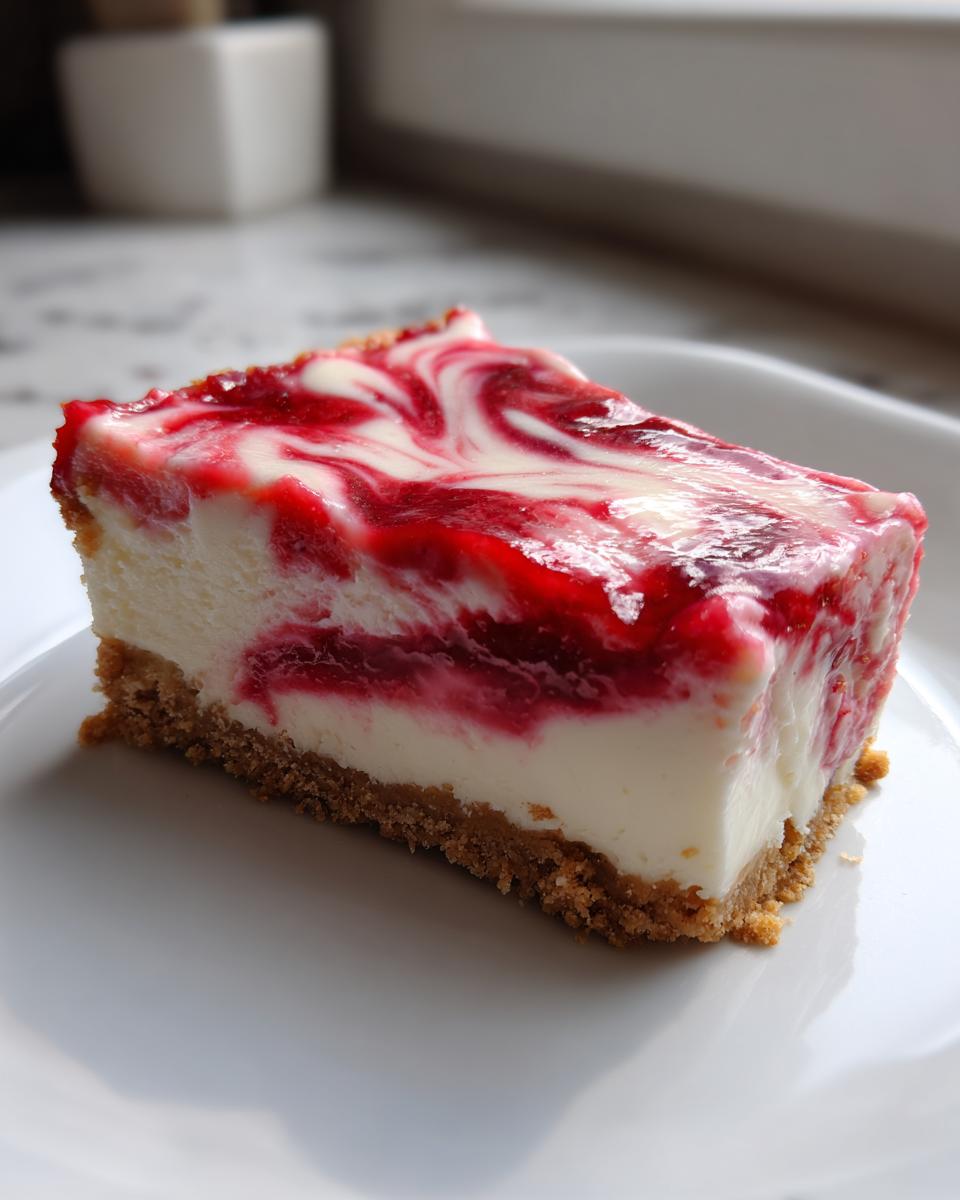
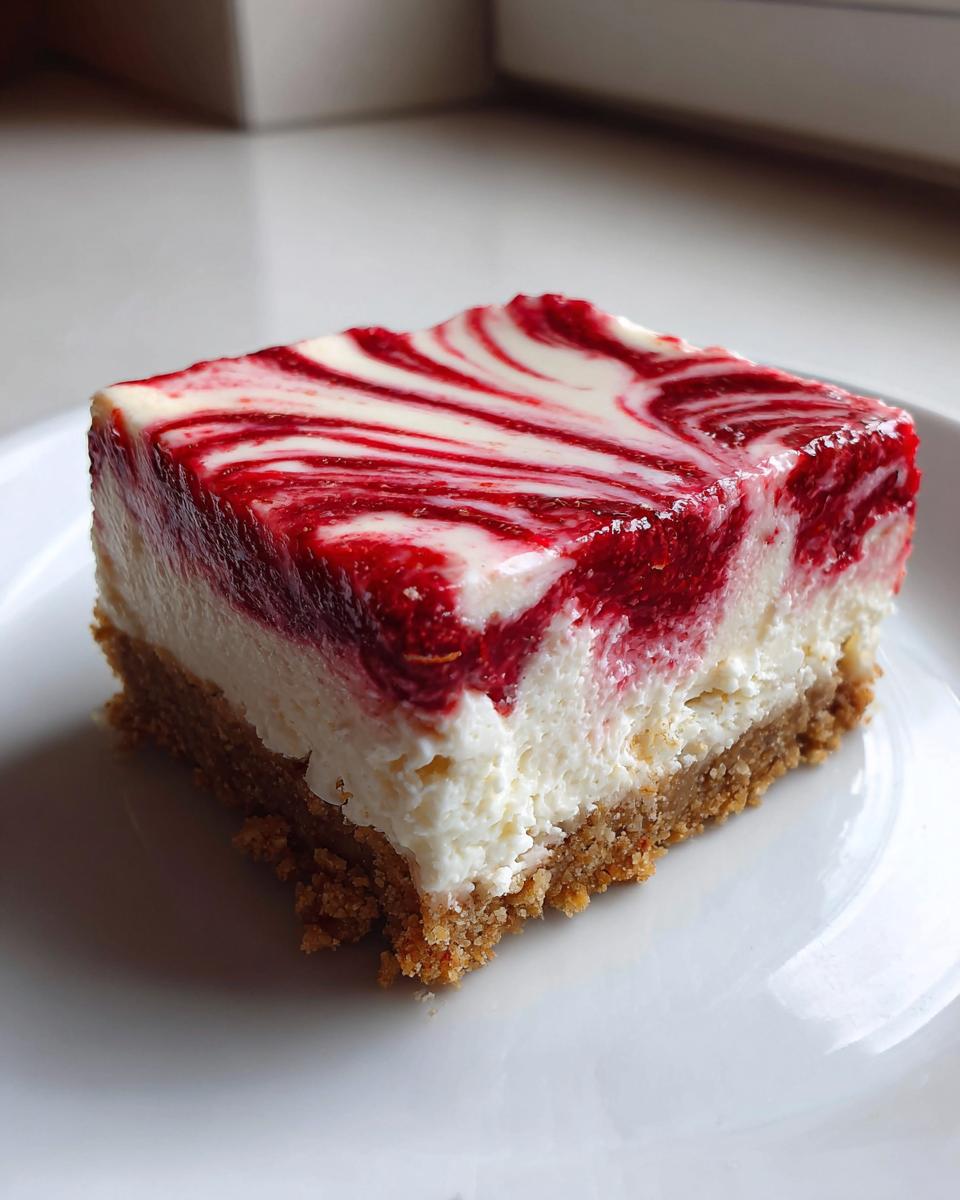
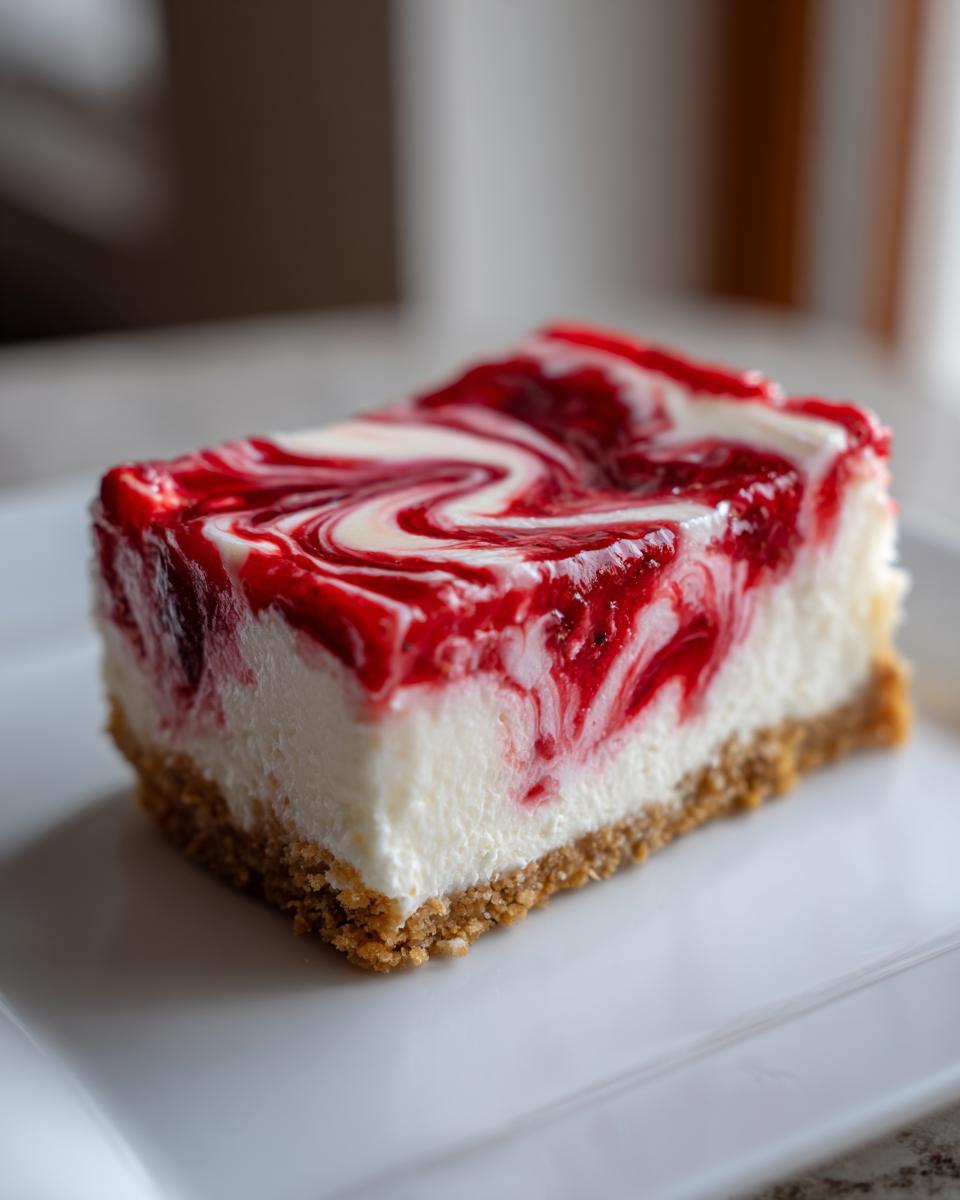
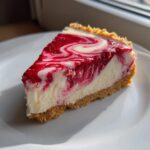
You know those days when only something impossibly decadent—but, like, *easy* decadent—will satisfy that sweet craving? Me too! That’s why I’m handing over my absolute favorite foolproof recipe: the Ultra-Creamy No-Bake Raspberry Cheesecake with Vibrant Swirl. Forget complicated water baths or hours in the oven; this gorgeous raspberry cheesecake comes together with such simple steps. It tastes like you spent all day fussing over it, but honestly, I developed this recipe because I believe amazing desserts shouldn’t require culinary school. It’s creamy, bright, and ready for your special occasion lineup with minimal effort. Check out all my other simple dessert recipes here: my favorite sweet treats.
- Why This Ultra-Creamy No-Bake Raspberry Cheesecake is Your New Favorite
- Gathering Ingredients for Your Raspberry Cheesecake
- Step-by-Step Instructions for No Bake Raspberry Cheesecake
- Tips for the Best Creamy Raspberry Cheesecake Success
- Variations on the Raspberry Swirl Cheesecake
- Storage and Serving Your Raspberry Cheesecake
- Frequently Asked Questions About Raspberry Cheesecake
- Nutritional Estimates for this Decadent Raspberry Dessert
- Share Your Homemade Raspberry Dessert Experience
Why This Ultra-Creamy No-Bake Raspberry Cheesecake is Your New Favorite
I get it—sometimes you want that showstopper dessert without needing an entire afternoon dedicated to baking techniques. This is where this recipe truly shines. It hits all those important notes people are looking for:
- It delivers that unbelievable creamy raspberry cheesecake texture you dream about, thanks to full-fat cream cheese and zero oven time.
- Seriously, it’s an easy raspberry cheesecake recipe. If you can use an electric mixer, you can master this!
- Because it’s no-bake, it’s the ultimate make-ahead dessert for holidays or last-minute gatherings.
Gathering Ingredients for Your Raspberry Cheesecake
Okay, before we get excited about mixing, let’s look at what you need to pull together this showstopper. Since this is a no-bake recipe, ingredient quality really matters, especially for that signature ultra-creamy texture! Please, for my sake, use full-fat cream cheese here. It’s the secret weapon for a truly decadent creamy raspberry cheesecake. Trust me, the low-fat stuff just gets a bit soft and sad when chilled.
For the Graham Cracker Crust
This is our sturdy base, so you need to pack it down tight! You’ll need:
- 1 1/2 cups graham cracker crumbs
- 1/4 cup granulated sugar
- 6 tablespoons unsalted butter, melted
For the Vibrant Raspberry Swirl
This is what gives us that beautiful pop of color and tartness. We cook this down just a touch to concentrate the flavor:
- 1 cup fresh or frozen raspberries
- 2 tablespoons of granulated sugar (match the crust sugar!)
- 1 tablespoon lemon juice
For the Creamy Cheesecake Filling
The key here is temperature control. Make sure your cream cheese is truly softened—I mean butter-soft—before you even think about turning on the mixer. This single step prevents any lumps in your gorgeous raspberry cheesecake!
- 3 (8 ounce) packages of cream cheese, softened
- 1 1/2 cups powdered sugar, sifted (we don’t want lumps here either!)
- 1/4 cup heavy cream
- 1 teaspoon vanilla extract
Step-by-Step Instructions for No Bake Raspberry Cheesecake
Alright, let’s get messy! Honestly, this part is the most fun because you start seeing that gorgeous dessert come together. Remember, this is a no-bake recipe, so timing is about chilling, not baking temperatures. We are building flavor layers that set up perfectly. Take your time making that sauce smooth, and remember to visit my creamy mango sticky rice if things are getting too stressful!
Preparing the Crust and Raspberry Swirl
First things first: The crust needs a head start! Mix your graham cracker crumbs and sugar, then pour in that melted butter. You want it looking like wet sand—just moist enough to hold its shape when you squeeze a handful. Press it really firmly into that 9-inch springform pan. Pop that base into the freezer while you work on the colorful part.
For the raspberry swirl, combine your berries, sugar, and lemon juice in a little saucepan. Let it simmer until the berries break down, which takes about five minutes. My pro tip? Press that cooked mixture through a fine-mesh sieve right now if you hate little raspberry seeds—it makes for the cleanest swirl. Let this sauce cool completely before you use it! If it’s warm, it will melt your beautiful filling.
Mixing the Smooth Cheesecake Filling
This is the secret to a truly creamy raspberry cheesecake, so pay attention! Get your softened cream cheese in a big bowl and beat it on medium speed until it is 100% lump-free. I mean it—scrape down the sides a couple of times. Once it looks like smooth cloud fluff, then start adding the sifted powdered sugar slowly. Once that’s incorporated, mix in the vanilla and the heavy cream until everything is just combined and looks light. Don’t over-beat once the sugar is in!
Assembling and Creating the Raspberry Swirl
Now we layer! Pour half of that luxurious filling over your frozen crust. Drizzle half of your cooled raspberry sauce randomly over it. Top that with the rest of the filling, and then drizzle the remaining sauce on top. To get that fun pattern people love in a raspberry cheesecake, take a thin knife or a skewer and gently drag it through the top layer a few times. Go slow and don’t dig down into the crust! You just want to marble the colors. Then, cover it loosely and get it into the fridge for at least six hours. Overnight is always better!
Tips for the Best Creamy Raspberry Cheesecake Success
Look, even though this is a no-bake beauty, there are still a few little secrets to making it truly the best raspberry cheesecake you’ve ever had. Texture control is everything here. Remember how I stressed room-temperature cream cheese? If it’s even slightly cold, you risk those dreaded little lumps, and nobody wants that in their perfect slice!
Also, resisting the urge to slice into this too soon is the hardest part of making a make ahead cheesecake. Because it relies on chilling to set firm, you absolutely must give it that minimum six hours. Better yet? Make it the day before! The flavors actually meld and improve overnight. It just sets up firmer and cleaner, which is exactly what we want for those beautiful slices.
Finally, when you’re swirling that raspberry sauce, use a lightweight touch. If you stir it in too vigorously, you’ll just end up with a pink cheesecake instead of a vibrant swirl. Keep it gentle!
Variations on the Raspberry Swirl Cheesecake
Since this no-bake base is so trustworthy, it’s begging you to play around with it! I know some people adore a rich, darker profile, and others want that classic baked tang. If you’re feeling ambitious, you could absolutely adapt the crust by swapping half those graham crackers for chocolate wafers; that instantly gives you a profile reminiscent of those fancy $\text{cheesecake factory copycat raspberry}$ versions we all crave!
For a truly decadent twist, you can incorporate white chocolate. Just melt one small package of good quality white chocolate and gently fold it right into the main cheesecake filling base before you start layering. That gives you a dreamy white chocolate raspberry cheesecake! For those who just can’t quit the oven, you can totally use this filling ratio, but you’ll need to transfer it to a regular pie crust (or a pre-baked graham crust) and bake it low and slow, about 45 minutes at 325°F. But trust me, for a quick fix, this original recipe is just perfect. If you want to dig into another rich idea, I have a fantastic German chocolate cheesecake recipe that might tempt you next!
Storage and Serving Your Raspberry Cheesecake
Okay, the hard part—waiting—is finally over! Once your gorgeous raspberry cheesecake is firm, it’s time to think about presentation and keeping those leftovers fresh (like there will be any!). Since this relies totally on that final chill, I can’t stress it enough: overnight is the magic number here. Six hours is the absolute minimum, but when you chill it for 12 to 18 hours, the texture tightens up perfectly, and the flavors really settle in beautifully.
When you’re ready to serve, you need to release the springform pan with care. This is where you make sure your crust doesn’t crumble everywhere! Run a very thin, offset spatula or even a butter knife around the inside edge of the pan—right where the cheesecake meets the metal ring. Go slowly, keeping the blade as flat against the side as possible. Once you feel it release, you can gently unlatch the ring and lift it off. Perfect slices every time!
For storage, the best way to keep your leftover raspberry cheesecake fresh is to cover the exposed top loosely with plastic wrap. Don’t press the plastic right onto the surface, just drape it over so the cheesecake doesn’t pick up any fridge smells. It keeps wonderfully in the refrigerator for three to four days. If you need to keep it longer, freezing slices works great too!
Frequently Asked Questions About Raspberry Cheesecake
I know you might have a few last-minute questions before you dig in—that’s totally normal when trying a brand-new recipe! It’s my job to make sure you have all the confidence you need to succeed. Here are the things I get asked most often about this easy raspberry cheesecake recipe.
Can I use fresh or frozen raspberries for the swirl?
Oh, I love this question! The short answer is yes, you absolutely can use either fresh or frozen raspberries for that vibrant swirl. If you use frozen berries, you don’t even need to thaw them first; just toss them right into the saucepan with the sugar and lemon juice. They’ll release more liquid, so you might need to simmer the mixture for an extra minute or two until it thickens up enough. Either way, remember to strain out those seeds for the smoothest result!
How do I make sure my crust doesn’t crumble when slicing?
This is the #1 fear with any springform pan dessert, isn’t it? You want that clean wedge, not a crumbly mess! The key to preventing a crumbling crust in this no bake raspberry cheesecake is compression. After you mix the melted butter into the crumbs, press the mixture into the bottom of the pan using the flat bottom of a drinking glass or measuring cup. Really pack it down hard! Freezing it for 15 minutes before you add the filling locks everything in place.
Can this No-Bake Raspberry Cheesecake recipe be baked instead?
Since this is specifically designed as a no-bake dessert, the ratios aren’t quite right for baking safely; the high amount of whipped cream in the filling might cause it to deflate or weep if you bake it. If you were seriously craving a baked raspberry cheesecake, you’d want to swap out the heavy cream for an extra package of cream cheese and skip the lemon juice, then bake it low and slow. For now, trust the no-bake method—it’s foolproof and incredibly creamy!
What’s the secret to getting that ultra-creamy texture?
It all comes down to the cream cheese temperature! I cannot say this enough. If your cream cheese is even slightly cool, you end up with little hard lumps in the filling, which ruins that smooth mouthfeel we are aiming for in this creamy raspberry cheesecake. Take the blocks out at least two hours before you plan to mix. They should mash easily with just moderate pressure from your finger. Heat is the enemy of smooth cheesecake, so always mix slowly once the sugar is added!
Can I make this a make-ahead dessert?
Yes! This is one of the best features of the make ahead cheesecake! Make it completely, cover it well, and chill it up to two days in advance. The longer it sits, the firmer it gets, which makes for those perfectly clean slices when you serve it. It’s truly designed for stress-free entertaining!
Nutritional Estimates for this Decadent Raspberry Dessert
I always like to give you a general idea of what you’re getting into with a slice of this rich, decadent raspberry dessert. Keep in mind, since you’re making this wonder at home, these numbers are just good guidelines! They can definitely change depending on the exact brands of cream cheese or butter you use in your specific homemade raspberry dessert creation.
- Calories: About 380 per slice
- Total Fat: Around 24g
- Total Carbohydrates: About 35g
- Protein: Roughly 6g
- Sugar Content: Approximately 32g
But honestly? When it tastes this good, I try not to stress too much about the details. It’s a celebration treat, after all!
Share Your Homemade Raspberry Dessert Experience
I truly hope you’ve had as much fun making this dessert as I do every time I whip one up! When you nail that perfect, vibrant swirl, you need to celebrate!
Seriously, if you made this Ultra-Creamy No-Bake Raspberry Cheesecake, I would be so thrilled if you could hop back here and leave a rating. Five stars if it knocked your socks off, naturally! Telling me whether you stuck to the plan or tried a fun variation helps other home cooks get the confidence to try this easy raspberry cheesecake recipe, too.
Did you try adding white chocolate? How did the chilling time work out for you? Let me know in the comments below! And if you snapped a picture—because this dessert is way too pretty not to photograph—tag me on social media! Seeing your creations brings me such joy and reminds me why I create these recipes for you. Happy baking—well, happy *no-baking*!
PrintUltra-Creamy No-Bake Raspberry Cheesecake with Vibrant Swirl
Make this ultra-creamy, no-bake raspberry cheesecake. It features a smooth filling and a bright raspberry swirl, making it a simple yet stunning dessert perfect for special occasions.
- Prep Time: 20 min
- Cook Time: 0 min
- Total Time: 6 hr 20 min
- Yield: 10 servings 1x
- Category: Dessert
- Method: No Bake
- Cuisine: American
- Diet: Vegetarian
Ingredients
- 1 1/2 cups graham cracker crumbs
- 1/4 cup granulated sugar
- 6 tablespoons unsalted butter, melted
- 3 (8 ounce) packages cream cheese, softened
- 1 1/2 cups powdered sugar, sifted
- 1 teaspoon vanilla extract
- 1/4 cup heavy cream
- 1 cup fresh or frozen raspberries (for swirl)
- 2 tablespoons granulated sugar (for swirl)
- 1 tablespoon lemon juice (for swirl)
Instructions
- Prepare the crust: Mix graham cracker crumbs and 1/4 cup granulated sugar in a bowl. Pour in melted butter and mix until the crumbs are evenly moistened. Press the mixture firmly into the bottom of a 9-inch springform pan. Place the crust in the freezer while you prepare the filling.
- Make the raspberry swirl: In a small saucepan, combine 1 cup raspberries, 2 tablespoons sugar, and lemon juice. Cook over medium heat for about 5 minutes, stirring occasionally, until the raspberries break down and the mixture thickens slightly. Press the mixture through a fine-mesh sieve to remove seeds, if desired. Let the sauce cool completely.
- Prepare the cheesecake filling: In a large bowl, beat the softened cream cheese with an electric mixer until completely smooth and creamy, scraping down the sides.
- Gradually beat in the sifted powdered sugar until fully combined. Mix in the vanilla extract and heavy cream until the filling is light and smooth.
- Assemble the cheesecake: Pour half of the cream cheese filling over the chilled crust. Drizzle half of the cooled raspberry sauce over the filling. Top with the remaining filling. Drizzle the remaining raspberry sauce over the top layer.
- Create the swirl: Use a knife or skewer to gently swirl the raspberry sauce through the top layer of the cheesecake filling. Do not over-mix.
- Chill: Cover the pan loosely with plastic wrap and refrigerate for at least 6 hours, or preferably overnight, until the cheesecake is firm.
- Serve: Release the springform pan sides before slicing. Serve cold.
Notes
- For the creamiest texture, ensure your cream cheese is truly at room temperature before mixing.
- This make ahead cheesecake tastes best when chilled overnight.
- If you prefer a baked raspberry cheesecake, you will need to adjust baking time and temperature.
Nutrition
- Serving Size: 1 slice
- Calories: 380
- Sugar: 32
- Sodium: 210
- Fat: 24
- Saturated Fat: 15
- Unsaturated Fat: 9
- Trans Fat: 0.5
- Carbohydrates: 35
- Fiber: 1
- Protein: 6
- Cholesterol: 75