
Oh, my friends, let’s be honest: sometimes, cutting out adorable, perfectly shaped sugar cookies feels like a marathon, not a celebration! Especially when you’re juggling a million holiday things, who has time for endless rolling, dusting flour everywhere, and hoping shapes stay intact? That’s why I put my test kitchen training to good use and developed this recipe. Forget the fuss; these are the ultimate sugar cookie bars you’ll ever make!
This recipe is designed to give you that incredible, buttery flavor and that melt-in-your-mouth, soft, chewy texture, all baked right up in one pan. It’s my absolute promise to you: this is the no-roll solution you’ve been searching for. For me, the mission behind Cooking by Jade is simplifying baking so that genuine joy comes back into your kitchen, and these simple cookie bars do just that for holidays, parties, or just a Tuesday craving.
- Why This is the Best Sugar Cookie Bars Recipe You Will Make
- Essential Ingredients for Perfect Sugar Cookie Bars
- Step-by-Step Guide to Making Your Sugar Cookie Bars
- Crafting the Perfect Vanilla Frosted Sugar Cookie Bars Topping
- Tips for Making Holiday Sugar Cookie Bars
- Storage and Serving Suggestions for Your Sugar Cookie Bars
- Troubleshooting Common Sugar Cookie Bars Issues
- Frequently Asked Questions About Easy Sugar Cookie Bars Recipe
- Share Your Homemade Sugar Cookie Bars Creations
Why This is the Best Sugar Cookie Bars Recipe You Will Make
Seriously, if you hate cutting out cookies, this recipe is your new best friend. We skip the rolling pin entirely, which saves you cleanup and stress. Plus, since these sugar cookie bars are baked in a pan, they become the perfect bake in a pan dessert for sharing because they aren’t messy like individual cookies can be. Everyone gets a beautiful, thick square! I honestly think these are the best cookie bar recipes for quick holiday satisfaction.
- These are truly melt in your mouth cookie bars—so buttery you won’t believe how easy they are.
- They have the perfect balance for frosting; they hold up beautifully but are still wonderfully rich.
- Perfect for big crowds or cookie exchanges because they are so simple to slice and transport.
Achieving Soft Sugar Cookie Bars Texture
The secret to getting those incredible soft sugar cookie bars that everyone fights over is simple: don’t overbake them! I mean it. You want to pull them just when the edges start looking light golden, but the center still looks a little soft. Trust me, they set up perfectly as they cool on the rack. This slight underbake ensures they stay unbelievably tender instead of getting stiff or dry. That’s the key to that chewy quality!
Essential Ingredients for Perfect Sugar Cookie Bars
When we talk about the best sugar cookie bars recipe, it all comes down to what you put in the bowl! Like any good recipe, quality matters, but we aren’t reaching for anything complicated here. Everything you need is probably already in your pantry, which keeps this fun and accessible. I’ve broken down exactly what goes into the base cookie and what we need for that lovely, fluffy topping.
For the bars themselves, here’s the list:
- 1 cup unsalted butter, softened
- 1 cup granulated sugar
- 2 large eggs
- 1 teaspoon vanilla extract
- 3 cups all-purpose flour
- 1 teaspoon baking powder
- 1/2 teaspoon salt
- 1/2 cup milk
And for the topping—that incredible vanilla frosting—you’ll need:
- 4 cups powdered sugar
- 1/2 cup unsalted butter, softened
- 1 teaspoon vanilla extract
- 3-4 tablespoons milk
- Pinch of salt
- Sprinkles for topping (optional!)
Ingredient Notes and Simple Substitutions
The most important thing for the base is using room temperature butter and eggs. Don’t rush the butter softening; if it’s too melted, we won’t get the air pockets needed for that chewy texture later on. Same goes for the eggs! When you look at the Notes section, you’ll see I mention pan size. If you decide to use a smaller pan, like a 9×9 inch square instead of the recommended 9×13 inch pan to get thicker bars, you absolutely must add extra baking time, or they won’t set right in the middle.
Step-by-Step Guide to Making Your Sugar Cookie Bars
Okay, let’s get baking! This is where we turn those lovely ingredients into something perfectly delicious. Remember what I said about not overmixing? That’s the secret weapon for achieving those chewy sugar cookie bars everyone loves. We start by getting that oven nice and hot—preheat to 350°F (175°C).
First, grab your 9×13 inch pan. I always grease mine first, then line it completely with parchment paper, leaving those big overhangs on the sides. Those parchment “handles” are lifesavers later when we need to lift the whole thing out! This ensures we protect the bottom of our bars perfectly.
Preparing the Dough for Your Sugar Cookie Bars
In your biggest bowl, take that softened butter and the sugar and cream them together really well until they look light and fluffy. Don’t skimp on this step; we’re building structure! Then, beat in your eggs one at a time. Once that’s smooth, whisk your flour, baking powder, and salt separately. Now you alternate! Add a bit of the dry mix, then a splash of milk, and scrape down the sides. Repeat until everything is just combined. Seriously, stop mixing the second you don’t see any more dry streaks. The dough consistency at this stage should be thick, just like you’d expect from really good cut-out cookie dough.
Baking and Cooling the Sugar Cookie Bars
Press that wonderful dough evenly into your prepared pan—use your hands or the bottom of a glass for a nice, flat surface. Pop it into the oven for about 20 to 25 minutes. You are looking for edges that are just turning a *light* golden color. The center should look set, but keep in mind, we are aiming for soft! Pull them out and let them cool completely on a wire rack sitting right in the pan. I cannot stress this enough: if you try to frost them warm, you’ll end up with sweet soup! When you’re ready for the topping, you’ll find instructions on my favorite sugar cookie icing recipe works like a dream right here.
Crafting the Perfect Vanilla Frosted Sugar Cookie Bars Topping
Once those sugar cookie bars are totally cool—and I mean *completely* cool, no cheating here!—it’s time for the dressing. This is what separates the good bars from the truly spectacular, frosted sugar cookie bars everyone asks the recipe for! This vanilla frosting is rich, fluffy, and spreads like butter.
We start by beating the softened butter until it’s just smooth. Then, here’s where you need patience: gradually add in that powdered sugar, a cup at a time, scraping down the bowl often. Once it gets thick, we introduce the liquid. Add the vanilla, salt, and then start with just three tablespoons of milk. You’re looking for a spreadable but firm consistency. If it seems too stiff, add that fourth tablespoon drop by drop. I learned the hard way that too much milk makes it soupy!
Once it looks perfect, spread it evenly over your cooled batch. My little tip for getting magazine-worthy slices? Pop the fully frosted bars into the fridge for just about 15 minutes before you slice them. It helps the frosting firm up just enough so you get those clean, beautiful squares. If you want tips on other fantastic creamy toppings, you should check out my guide on the best cream cheese frosting!
Tips for Making Holiday Sugar Cookie Bars
If you’re making these for Christmas or another big celebration, you absolutely need to step up the festive factor! These Christmas sugar cookie bars look fantastic with just a simple mix of red and green sprinkles scattered over that fluffy vanilla frosting. Don’t be afraid to get colorful!
Here’s a little trick I use when it’s the holidays: swap out half of that teaspoon of vanilla extract in the base dough for almond extract. Almond and vanilla together give you such a classic, nostalgic, almost circus-cookie vibe that screams winter celebration. It really elevates these from everyday cookie bars to a proper holiday dessert bar centerpiece. For more seasonal inspiration, I always look at fun flavor combinations like the ones I use in my seasonal jam recipes!
Also, if you are heading to a cookie exchange, linking up with friends to make different colors is so fun—you can see how others decorate theirs, like the amazing ideas on this site for inspiration!
Storage and Serving Suggestions for Your Sugar Cookie Bars
Now that you’ve made this amazing batch of bars, the next big question is how to keep them perfect until you serve them! Since these are generously covered in that lovely vanilla frosting, storage is key to keeping everything neat and preventing drying. I always store my frosted sugar cookie bars in a single layer in a large, airtight container.
If you plan on eating them within three days, leaving them on the counter at room temperature is totally fine, especially if your kitchen isn’t too warm. If you made a giant batch and know they have to last closer to a week, pop that sealed container into the fridge. They firm up a bit more when chilled, which honestly makes them even easier to handle if you’re taking them somewhere!
When it comes to serving, these are honestly what I call my default dessert bars for parties! They travel so well—just grab a piece from the pan, and there’s no need for plates or forks, which cuts down on dish duty for me! They are especially fantastic alongside a warm mug of coffee in the afternoon or served slightly chilled after dinner. Honestly, they are perfection any time you need a sweet square.
Troubleshooting Common Sugar Cookie Bars Issues
Baking should be fun, not frustrating! Even with the easiest sugar cookie bars recipe, sometimes things don’t go exactly to plan. Don’t panic if your bars look a little different than mine did on the first try. We’ve all been there, wrestling with a batter that just won’t behave. I want to share a couple of things that sometimes trip people up so you can fix it fast and get back to enjoying your treat!
My number one issue when I was first testing these was inconsistent texture. If your bars come out crumbly after cooling, or they just fall apart when you try to lift them out of the pan, you probably added too much flour or didn’t cream the butter and sugar long enough to incorporate air. Since flour settles in the bag, always spoon and level your flour instead of scooping directly from the canister!
What about the frosting? If your beautiful vanilla frosted cookie bars topping looks too thin and runny after you mix it, it means you added too much milk too quickly. That’s an easy fix! Just take a half-cup of additional powdered sugar, start mixing it in slowly, and keep testing the consistency with a spatula. If you add it slowly, you can always thicken it up, but you can’t easily take milk back out!
And if your bars look raw in the middle even after the full 25 minutes? That usually means your oven runs a little cool, or you’re using a darker pan absorbing more heat. Next time, check your oven temperature with a separate thermometer. For this batch, just slide them back in for 3 to 5-minute increments until the center looks set, not jiggly. It’s all about watching the edges!
Frequently Asked Questions About Easy Sugar Cookie Bars Recipe
I always get questions about these bars, which just tells me how much everyone loves making this easy sugar cookie bars recipe! Since we want these to be perfect every time, whether you’re making them for a quick weekday treat or as a festive centerpiece, I gathered the most common things folks ask me right here. Hopefully, this helps you feel totally confident before you even turn the oven on.
Plus, if you’re looking for more quick wins in the kitchen, check out my guide on easy weeknight dinners; simplicity is my passion!
Can I skip the milk in these sugar cookie bars?
Honestly, I really wouldn’t recommend skipping the milk entirely. The recipe is carefully balanced between the flour binding everything up and the liquid keeping the dough pliable enough to press into the pan without being too dry. If you skip it, you are going to end up with much crumblier bars—more like shortbread than our soft sugar cookie bars. If you are trying to avoid dairy, try using unsweetened almond milk or even a little bit of water, but don’t leave the moisture component out completely!
How do I ensure my vanilla frosted cookie bars stay soft?
This brings us back to my biggest rule: don’t cook them too long! If you see beautifully brown edges, pull those beautiful vanilla frosted cookie bars out immediately before the center cooks through completely. They firm up as they cool down! Also, keeping them stored correctly makes a huge difference. Once they are frosted, keep them sealed up in an airtight container at room temperature. That seal locks in the moisture and keeps them delightfully soft for days.
Share Your Homemade Sugar Cookie Bars Creations
That’s it—you’ve made something truly special! I absolutely love seeing your creations come to life in your kitchens. Did you make these for a birthday, a holiday, or just because you needed a sweet fix? Leave a rating below letting me know how yours turned out, and please tell me about your favorite part in the comments!
If you snapped a picture of your beautiful frosted squares, tag me on social media; I’d be thrilled to see them! And if you ever need to get in touch with me, Jade, for recipe questions, you can always reach out via my contact page. Happy baking, everyone!
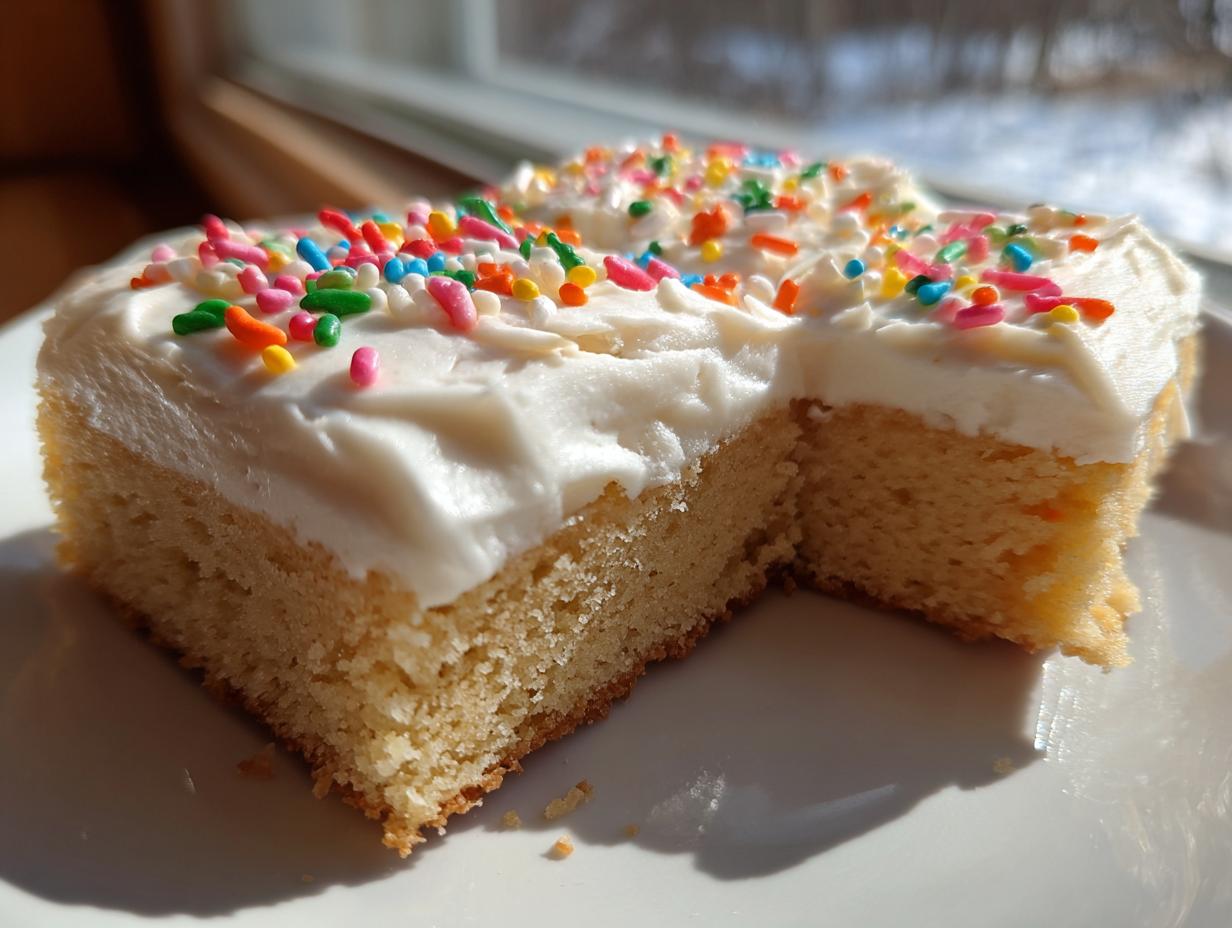
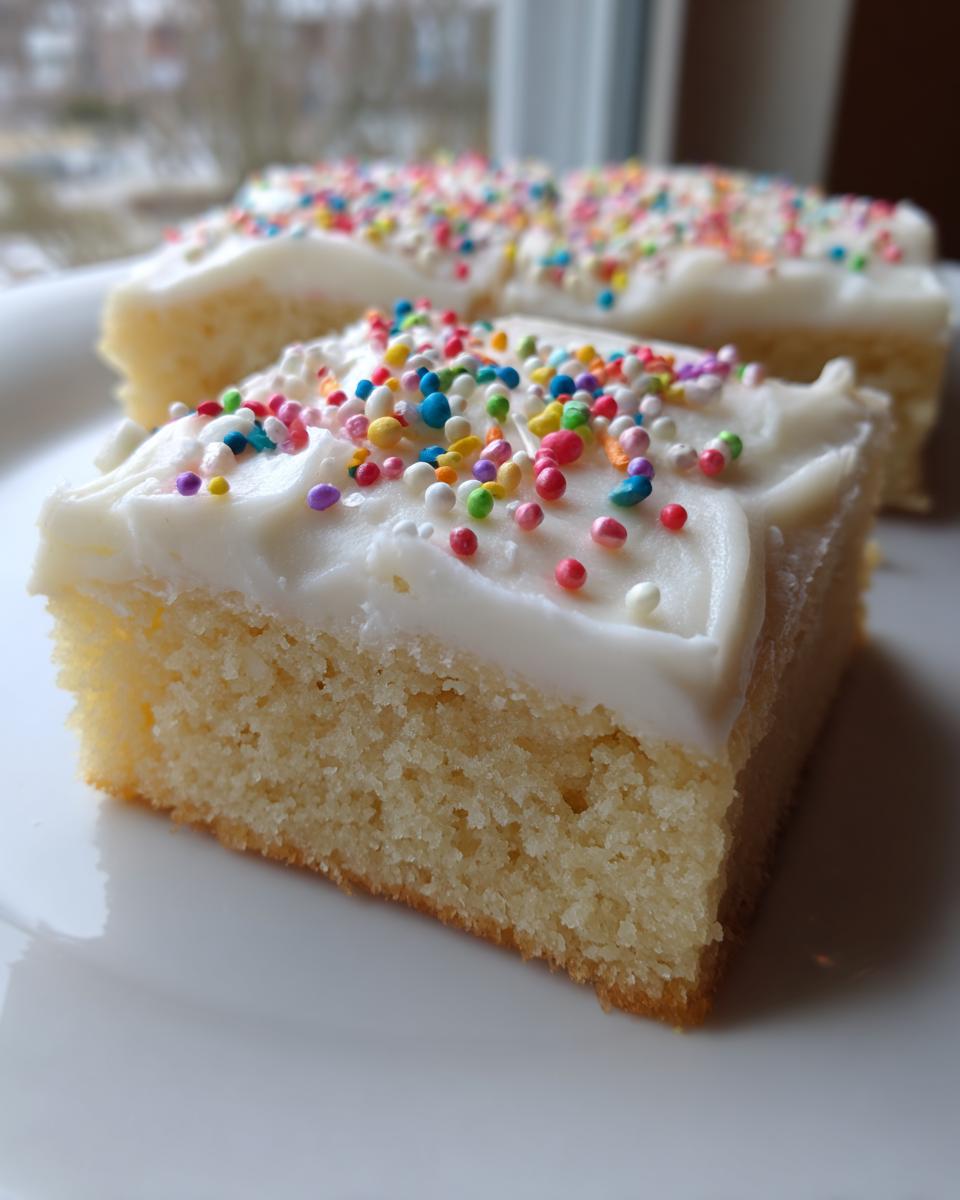
PrintThe Ultimate Soft & Chewy Frosted Sugar Cookie Bars (No Roll Recipe)
You can make delicious sugar cookie bars easily for your holiday get-togethers. These soft, sweet bars are perfect for sharing because they are less messy than cutting out individual cookies. This recipe delivers buttery cookie bars with a fluffy vanilla frosting.
- Prep Time: 20 min
- Cook Time: 25 min
- Total Time: 45 min
- Yield: 24 servings 1x
- Category: Dessert
- Method: Baking
- Cuisine: American
- Diet: Vegetarian
Ingredients
- 1 cup unsalted butter, softened
- 1 cup granulated sugar
- 2 large eggs
- 1 teaspoon vanilla extract
- 3 cups all-purpose flour
- 1 teaspoon baking powder
- 1/2 teaspoon salt
- 1/2 cup milk
- For the Frosting:
- 4 cups powdered sugar
- 1/2 cup unsalted butter, softened
- 1 teaspoon vanilla extract
- 3–4 tablespoons milk
- Pinch of salt
- Sprinkles for topping (optional)
Instructions
- Preheat your oven to 350°F (175°C). Grease and line a 9×13 inch baking pan with parchment paper, leaving an overhang on the sides for easy removal.
- In a large bowl, cream together the softened butter and granulated sugar until light and fluffy.
- Beat in the eggs one at a time, then mix in the vanilla extract.
- In a separate bowl, whisk together the flour, baking powder, and salt.
- Gradually add the dry ingredients to the wet ingredients, alternating with the milk, mixing until just combined. Do not overmix.
- Press the sugar cookie dough evenly into the prepared baking pan.
- Bake for 20 to 25 minutes, or until the edges are lightly golden. The center should look set but still soft.
- Let the cookie bars cool completely in the pan on a wire rack.
- To make the frosting, beat the softened butter until smooth. Gradually add the powdered sugar, vanilla extract, and salt. Add milk one tablespoon at a time until you reach a smooth, spreadable consistency.
- Spread the vanilla frosting evenly over the cooled cookie bars.
- Decorate with sprinkles, if using. Once frosted, cut into squares or rectangle sugar cookies.
Notes
- For the softest sugar cookie bars, avoid overbaking. They should be slightly underdone when you remove them from the oven.
- If you want a thicker bar, use a 9×9 inch pan instead of a 9×13 inch pan, and adjust the baking time accordingly.
- Chill the frosted bars for 15 minutes before cutting for cleaner slices.
Nutrition
- Serving Size: 1 bar
- Calories: 280
- Sugar: 30
- Sodium: 110
- Fat: 14
- Saturated Fat: 8
- Unsaturated Fat: 6
- Trans Fat: 0
- Carbohydrates: 37
- Fiber: 0
- Protein: 3
- Cholesterol: 45