
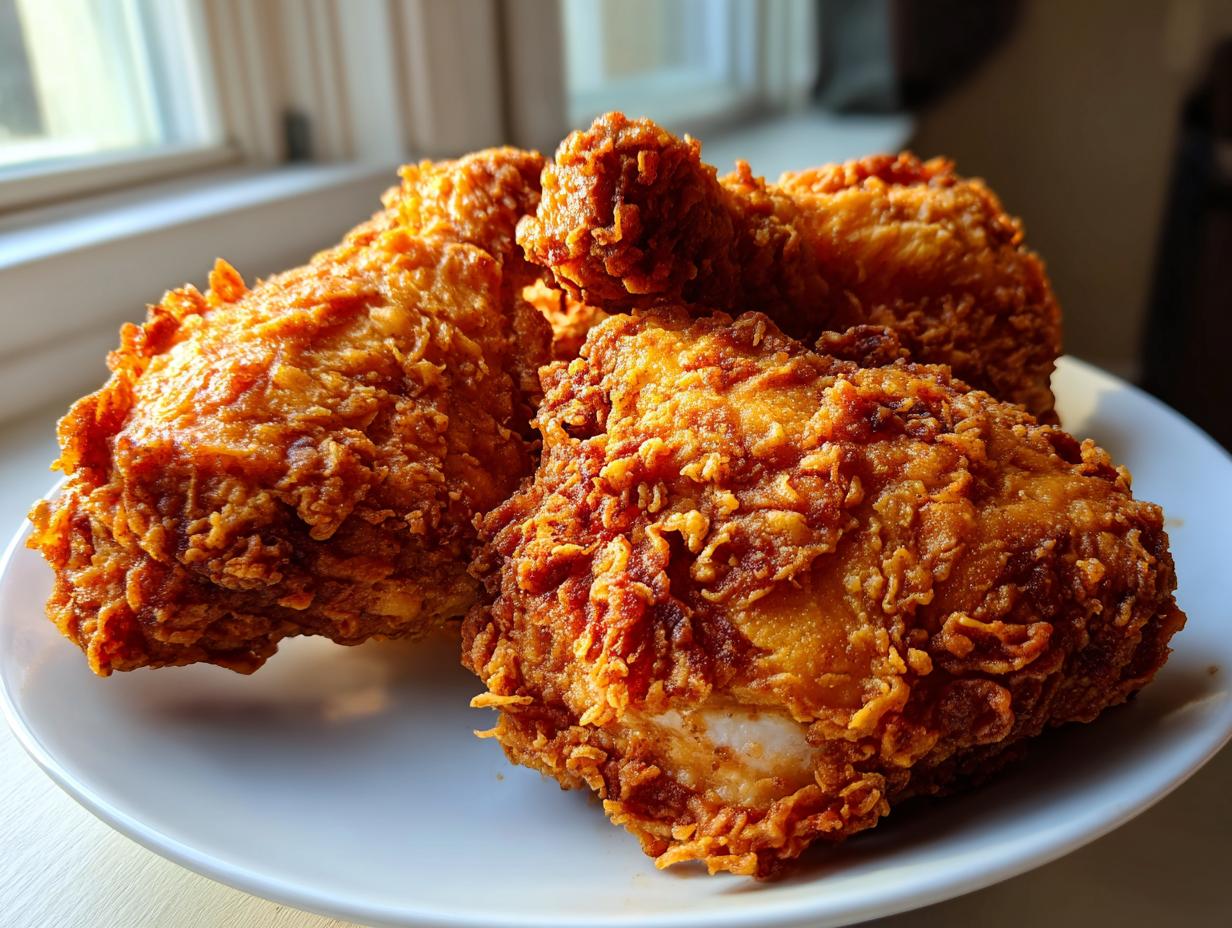
Oh, friends, let’s talk about the moment of truth. You pull that chicken out of the hot oil, and the sound alone—that deep, crackling sizzle—tells you everything. Nothing beats the satisfaction of truly perfect fried chicken. I mean, the kind that looks like a golden, craggy masterpiece and breaks apart to reveal meat so juicy it practically melts. Forget what you think about tricky deep-frying; I’ve taken everything I learned in professional test kitchens and married it with the tried-and-true comfort methods from my own home, and the result is this recipe.
This isn’t just any recipe; this is my commitment to you: Southern Fried Chicken that offers that signature crunch without drying out the interior. We’re talking juicy, tender meat wrapped in an unbelievably crisp shield. If you’ve struggled with soggy breading or dry breasts, trust me, we’re fixing that right now. I’ve tweaked, tested, and perfected every single step so you can skip the takeout and master the Best Homemade Fried Chicken right on your own stovetop!
- Why This Is The Best Homemade Fried Chicken Recipe
- Gathering Ingredients for Classic Fried Chicken
- How To Make Perfect Fried Chicken Step-by-Step
- Tips for Southern Fried Chicken Secrets and Success
- Serving Suggestions for Your Easy Family Fried Chicken Dinner
- Storing and Reheating Crispy Fried Chicken
- Frequently Asked Questions About Fried Chicken
- Nutritional Estimates for This Fried Chicken
- Share Your Deep Fried Chicken Perfection
Why This Is The Best Homemade Fried Chicken Recipe
Look, I’ve seen a lot of fried chicken recipes out there, but most of them fall short because they skip one crucial step or use the wrong ratio of flour to starch. That’s where my professional testing meets my family roots. When you follow this method, you aren’t just making dinner; you’re creating an experience. This is the Best Homemade Fried Chicken Recipe because it guarantees that perfect Southern experience every time you fire up the oil.
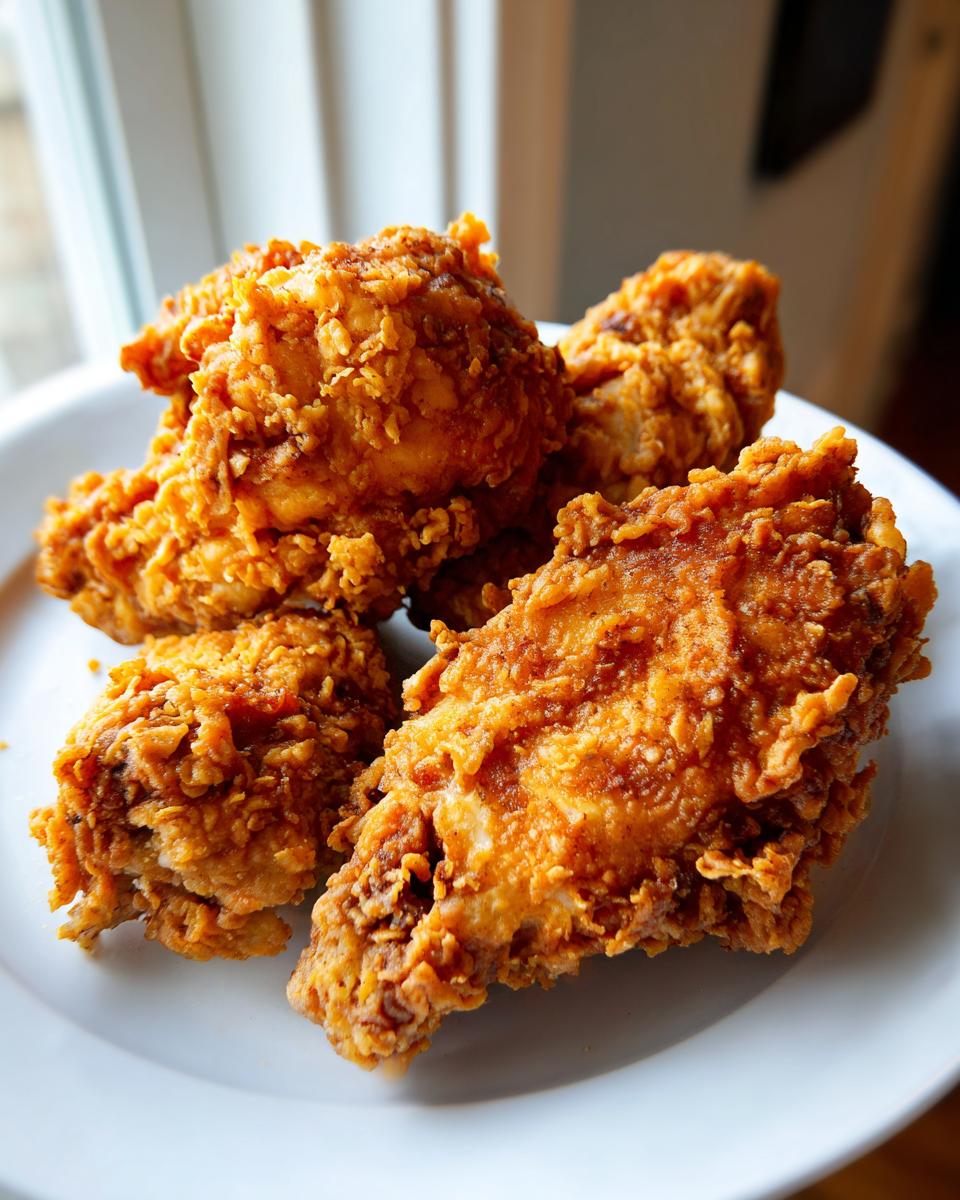
- It delivers that deep, satisfying color—truly Golden Brown Chicken Recipe perfection.
- It guarantees a thick, craggy exterior that stays crunchy until the last bite.
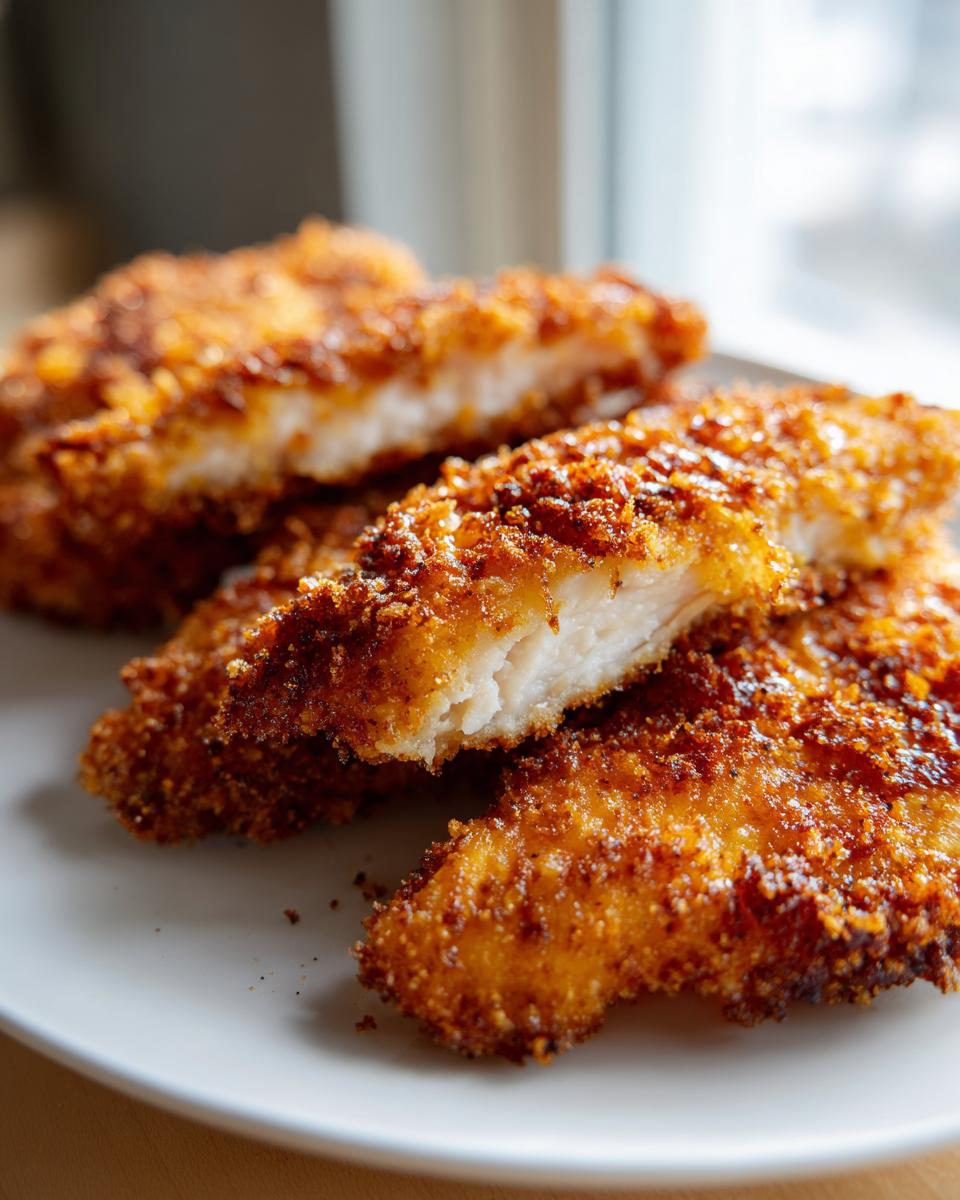
- You get unbelievably Juicy Fried Chicken thanks to a rich, tangy marinade that breaks down the proteins.
If you love dishes where the exterior crunch is just as important as the interior flavor, stick with me. This is a classic comfort food chicken winner.
Achieving Ultra Crispy Chicken Coating
The crunch? That’s science, baby! We aren’t just relying on flour here. We’re adding cornstarch and a little kick of baking powder to the dry mix. This combination creates tiny pockets that shatter when they hit the hot oil. The key to that signature look is the rigorous double-dredging process. You need to press that seasoning blend right into the meat after the second dip in the milk. That’s what builds the strong, Ultra Crispy Chicken Coating that stays on through the frying process!
The Secret to Juicy Fried Chicken: Buttermilk Brine
Honestly, if you skip the brine, you’re just making baked chicken that happens to be submerged in hot oil for a few minutes. The buttermilk is non-negotiable! It’s slightly acidic, which tenderizes the meat ever so slightly, but more importantly, it hydrates the skin deeply. This process is essential for a Buttermilk Fried Chicken Tutorial that results in meat that’s nearly impossible to dry out, even the dreaded white meat!
Gathering Ingredients for Classic Fried Chicken
Okay, now that you know why this recipe works its magic, let’s talk about what you need to gather. Seriously, don’t substitute! The magic of great fried chicken comes from balance—that savory brine meeting the seasoned flour. I always use bone-in, skin-on pieces for this; they handle the heat so much better and the skin provides incredible flavor and that stunning crunch we are aiming for. Don’t try this with boneless, skinless cuts unless you want dried-out planks! Get your pieces ready, and let’s assemble the two crucial stations: the brine bath and the coating.
For side dishes that are just as good, make sure to check out my recipe for tall, flaky buttermilk biscuits. They are the perfect partner!
Buttermilk Brine Components
This is where the tenderness starts! Make sure your buttermilk is fresh. We are mixing the buttermilk with seasonings to create a flavorful bath that sits right against the meat. You want everything submerged completely. And yes, I know the hot sauce is optional, but trust me, it just adds a background complexity that keeps people asking for seconds!
- 4 cups buttermilk
- 2 tablespoons hot sauce (This is my little secret addition!)
- 2 teaspoons salt
- 1 teaspoon black pepper
- 1 teaspoon paprika
- 1 teaspoon garlic powder
- 1 teaspoon onion powder
Seasoned Flour for the Ultimate Crispy Fried Chicken Coating
This is the structure that holds all the flavor. We need the flour for body, but the cornstarch and baking powder are what really deliver that shattery texture for that perfect Golden Brown Chicken Recipe finish. Mix this up really well so those leavening agents are evenly distributed!
- 3 cups all-purpose flour
- 1 cup cornstarch
- 1 tablespoon baking powder
- 1 teaspoon cayenne pepper (Only if you like a little heat!)
- 1 teaspoon salt (Reserved from the brine)
- 1 teaspoon pepper (Reserved from the brine)
How To Make Perfect Fried Chicken Step-by-Step
This is it—the moment we turn simple ingredients into legendary fried chicken. Because I want you to succeed, I’m going to walk you through every single transition, just like I do when I’m testing recipes here in the kitchen. Don’t rush through this! The time you invest in the marinade and the dredging pays off tenfold in texture and juiciness. We are aiming for that beautiful, rugged crust that sticks tight to the meat.
The Essential Buttermilk Soak for Juicy Fried Chicken
Remember, this bath is key to getting that incredibly Juicy Fried Chicken we promised you. You need to place all your seasoned chicken pieces—make sure they are totally submerged—into that buttermilk mixture we mixed up. Then, cover it tight! You can’t rush tenderness here. The absolute minimum soaking time is four hours. If you can, let it sit overnight in the fridge. Seriously, overnight is best! Leaving it in that tangy buttermilk allows the enzymes to work their magic, tenderizing the fibers so when it hits the oil, it stays moist and flavorful right down to the bone. Trust me, this soak is half the battle won.
Mastering the Double-Dredge for Crunchy Chicken Coating at Home
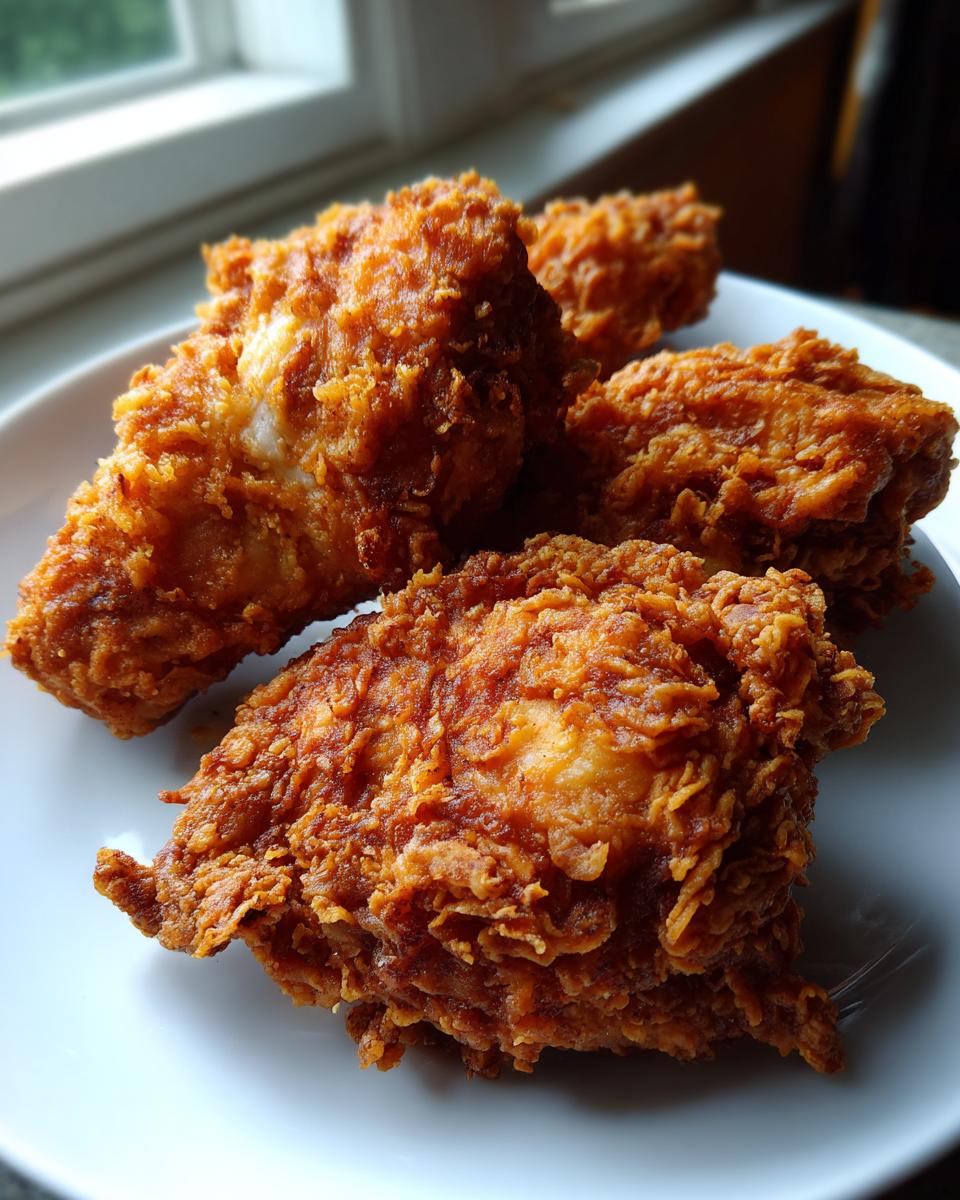
This step is what separates the great fried chicken from the merely good; it creates that Crunchy Chicken Coating at Home. We are doing a wet-dry-wet-dry process. Take one chilled, drippy piece out of the buttermilk. Give it a quick shake, but don’t let it dry out! Plunge it straight into your seasoned flour—and this is vital—you must press the flour onto the chicken using your hands. Apply real pressure so the flour adheres and starts to form craggy little flakes. Then—quick dip!—back into the buttermilk for just a second to re-wet that flour layer. Immediately, press it again into the dry mix, really packing it on this time. When you pull that piece out, you should see thick, beautiful little peaks and valleys on the coating. Place it on a clean wire rack to rest while you coat the next piece. We’ll talk about why resting is important next!
Frying Technique for Deep Fried Chicken Perfection
Now we move to the hot oil. To achieve Deep Fried Chicken Perfection, heat control is everything. You must use a heavy-bottomed pot—a Dutch oven is ideal—and you absolutely need a thermometer. Don’t guess! We are targeting a steady 325°F. If the oil is too cold, your chicken will get greasy and heavy. If it’s too hot, the outside burns before the inside cooks. Carefully place just 3 or 4 pieces in at a time. Overcrowding is the enemy; it drops the oil temperature immediately! Fry each side for about 6 to 8 minutes. Keep an eye on that thermometer and adjust the heat to keep it just hovering around 325°F. Once they are beautifully deep golden brown, pull them out and place them on a clean rack, not paper towels, so air can circulate underneath to keep the bottom crispy too. Let them rest for five minutes before you dare cut into them! If you love this crispy technique mixed with savory gravy, you should also check out my recipe for Chicken Fried Steak.
Tips for Southern Fried Chicken Secrets and Success
I’ve walked you through the brine and the crucial double-dredge, but if you want to elevate this from a great meal to Southern Fried Chicken Secrets that your family will brag about, you need these final execution tips. These little nuggets of knowledge are what I learned in the test kitchen—the small adjustments that make the difference between chicken that’s good and chicken that makes you close your eyes when you take a bite. Remember, consistency is key!
Resting the Dredged Chicken Before Frying
Don’t be tempted to drop that coated chicken straight into the oil! This is a major step that people often skip. Once you’ve finished dipping and coating every piece, let them sit on that wire rack for about 15 minutes before frying. Why? When the coating is super craggy and freshly applied, it can sometimes be too dry or fragile. That short rest allows the moisture from the buttermilk in the coating to hydrate the flour mixture slightly. If you skip this, the coating often cracks off in the hot oil. Patience really does result in a better crust!
Temperature Control for Flawless Fried Chicken
I know I mentioned it before, but I have to hammer this home: the oil temperature is your master control. You absolutely need a decent fryer thermometer—it’s the only way to master flawless fried chicken. We aim for 325°F. If you’re dropping in a big batch of cold thighs, the oil temp is going to plunge fast. If you see it drop below 310°F, cut the heat down while the chicken is frying until it climbs back up. If you see the chicken browning too quickly, boost the heat back up once you take a batch out. It’s a constant dance, but learning to adjust the flame based on what the thermometer tells you is the best way to guarantee that golden, crunchy exterior without burning the seasoning. For other crispy coatings, you might try my Parmesan Crusted Chicken, but for true Southern style, temperature is everything!
Serving Suggestions for Your Easy Family Fried Chicken Dinner
Now that you’ve created the most spectacular, Crunchy Chicken Coating at Home, you can’t just leave that beautiful fried chicken sitting naked on a plate! This dish absolutely requires the perfect Southern sides to complete that Easy Family Fried Chicken Dinner experience. You need creamy, cool contrasts to balance that salty, hot crunch.
My top recommendations? You absolutely must pair this with my incredibly rich creamy, roasted garlic mashed potatoes—they are perfect for soaking up any extra flavor. And you simply cannot serve Southern fried chicken without warm, buttery buttermilk biscuits on the side. It’s the rule!
Storing and Reheating Crispy Fried Chicken
I know, right? Sometimes there’s leftover fried chicken, and frankly, I think it tastes just as good cold the next day, standing over the fridge eating it over the sink! But if you want to save it properly to enjoy later—especially if you want that crunch back—you have to treat it right. The number one enemy of leftover fried chicken is steam. Steam equals soggy coating, and we simply won’t allow that in my kitchen!
When you’re done frying, let the chicken cool down completely on that wire rack until it’s room temperature. Don’t cover it while it’s still warm, or you’re trapping heat and moisture right there. Once it’s totally cool, transfer the pieces into an airtight container. You can place a paper towel in the bottom to absorb any residual grease, but don’t stack them too tightly. It should easily keep in the fridge for about three days.
How to Reheat Fried Chicken and Keep It Crunchy
Okay, here is the most important part: Reheating. If you throw your beautiful crusty chicken into the microwave, I might just cry for you! The microwave cooks from the inside out with radiation and turns that gorgeous crunch into sad, damp breading. We need dry, crisp heat.
The best way, hands down, is in the oven. Preheat your oven to about 375°F. You want to place the chicken pieces directly onto a wire rack set over a baking sheet. This allows the heat to circulate completely around the piece. Let it bake for about 10 to 15 minutes, or until the internal temperature reads 165°F. This method wakes up that coating and actually re-crisps it beautifully.
If you want an even faster solution and have an air fryer, that works wonders too! Toss the chicken in the air fryer basket—don’t overlap them too much—and cook at 350°F for about 6 to 8 minutes, flipping halfway. It brings back amazing texture! I use my air fryer all the time for quicker crisping, even for things like air fryer gnocchi, but for this classic fried chicken, it’s a lifesaver for leftovers too.
Frequently Asked Questions About Fried Chicken
It’s totally normal to have questions when you’re tackling something as crucial as making the absolute best fried chicken! I’ve gathered the ones I hear most often from folks who want to achieve that true Southern standard without any guesswork. Let’s clear these up so you can head to the fryer with total confidence!
Can I make this fried chicken recipe in an air fryer?
Oh, that’s the million-dollar question these days! Look, if you want that truly deep, dark, craggy, and satisfying crunch that authentic Deep Fried Chicken Perfection demands, you need the hot oil bath. The air fryer just can’t replicate that crust structure. I’d advise against trying the whole batch in the air fryer as it tends to dry out the meat before a proper crust forms. However, the air fryer is an *amazing* tool for reheating leftovers—it brings that crispiness right back to life without making it greasy!
What is the best oil to use for classic comfort food chicken?
When you’re making Classic Comfort Food Chicken, you need a neutral oil with a high smoke point. That’s the only way you can maintain that steady 325°F without the oil breaking down on you. My go-to is usually plain old vegetable oil because it’s affordable and handles the heat beautifully. Shortening works wonders, too! It gives a lovely mouthfeel, but I usually stick with vegetable oil for ease of cleanup. Just make sure you use enough—about two inches deep—to properly submerge the chicken pieces for even cooking!
How do I prevent the coating from falling off my fried chicken?
This is the most common panic moment, isn’t it? Nothing is worse than seeing those beautiful flakes float away! As we talked about, the secret here is twofold and relies on what we call the Ultra Crispy Chicken Coating technique. First, you must press firmly during both dredging steps. You need to physically squeeze that flour onto the chicken, not just lightly toss it. Second, and this is crucial, you *must* let the coated chicken rest on the rack for at least 15 minutes before it ever touches the hot oil. That short rest marries the wet buttermilk coating to the dry flour mix. Do those two things, and that crust will stick like glue!
Nutritional Estimates for This Fried Chicken
Now, let’s talk real talk for a second, because I know some of you count things, and I respect that! Since this is truly indulgent, delicious fried chicken, remember that these numbers are based on averages for mixed pieces (thighs, breasts, drums) using standard vegetable oil for frying. These are my best estimates based on the ingredients list, not a guaranteed lab analysis, okay? Every batch of oil and every cut of meat varies slightly, so just use this as a general guide for this incredibly satisfying Classic Comfort Food Chicken.
- Serving Size: 1 piece (mixed)
- Calories: 450
- Fat: 28g
- Carbohydrates: 18g
- Protein: 30g
- Sodium: 650mg
Share Your Deep Fried Chicken Perfection
Whew! You made it! You took the plunge and created your very own legendary batch of fried chicken. I’m honestly so excited for you! Seriously, I want to see it! When you achieve that deep, golden color and hear that first amazing crunch, you have to tell me about it.
Sharing your cooking journey is truly what this entire site—and my passion—is all about. Don’t keep this success story to yourself! Please take a photo of your perfectly crisp bird and tag me on social media! Seeing your results validates every test batch, every thermometer check, and every bit of effort we put into perfecting this recipe.
If you followed these instructions, I know you ended up with the best homemade chicken you’ve ever made. Did you manage that perfect 15-minute rest before frying? Did you keep the oil right at 325°F? Drop your experience in the comments below! I love reading about how this **Classic Comfort Food Chicken** turned out for your family dinners, whether you served it with corn or my amazing Southern sides.
And hey, if you want to see what other cooks are saying—or maybe compare notes on that incredible coating—check out some other great takes on this classic dish, like the one here: The Best Southern Fried Chicken. But when you come back, let me know your rating! Your feedback helps make sure this remains the most reliable recipe out there for everyone looking to achieve true Deep Fried Chicken Perfection.
PrintGrandma’s Ultimate Crispy Southern Fried Chicken

Make the best homemade fried chicken with this classic Southern recipe. You get juicy, tender meat inside a perfectly seasoned, ultra-crispy, golden-brown coating every time you cook it.
- Prep Time: 30 min
- Cook Time: 25 min
- Total Time: 4 hr 55 min
- Yield: 4 servings 1x
- Category: Dinner
- Method: Deep Frying
- Cuisine: Southern American
- Diet: Vegetarian
Ingredients
- 4 lbs bone-in, skin-on chicken pieces (thighs, drumsticks, breasts)
- 4 cups buttermilk
- 2 tablespoons hot sauce
- 2 teaspoons salt
- 1 teaspoon black pepper
- 1 teaspoon paprika
- 1 teaspoon garlic powder
- 1 teaspoon onion powder
- 3 cups all-purpose flour
- 1 cup cornstarch
- 1 tablespoon baking powder
- 1 teaspoon cayenne pepper (optional, for heat)
- Vegetable oil or shortening, for frying (enough to reach 2 inches deep)
Instructions
- Prepare the chicken: Place the chicken pieces in a large bowl. In a separate bowl, whisk together the buttermilk, hot sauce, 2 teaspoons salt, 1 teaspoon pepper, paprika, garlic powder, and onion powder. Pour the buttermilk mixture over the chicken, ensuring all pieces are submerged. Cover the bowl and refrigerate for at least 4 hours, or preferably overnight. This step ensures a juicy interior.
- Prepare the dredging station: In a wide, shallow dish, whisk together the flour, cornstarch, baking powder, cayenne pepper (if using), and the remaining 1 teaspoon salt and 1 teaspoon pepper.
- Dredge the chicken: Remove one piece of chicken from the buttermilk, letting excess drip off briefly. Place it into the flour mixture and press the flour firmly onto all sides of the chicken to create a thick coating. This is the first dredge.
- Second dredge for crispiness: Dip the floured chicken piece back into the remaining buttermilk mixture for just a second or two, allowing the liquid to adhere to the flour. Immediately return it to the flour mixture and press firmly again to create a thick, craggy crust. Place the coated chicken on a wire rack set over a baking sheet. Repeat with all pieces.
- Heat the oil: Pour vegetable oil into a large, heavy-bottomed skillet or Dutch oven to a depth of about 2 inches. Heat the oil over medium-high heat until it reaches 325 degrees Fahrenheit. Use a thermometer to monitor the temperature; maintaining this heat is key for crispy perfection.
- Fry the chicken: Carefully place 3 to 4 pieces of chicken into the hot oil, ensuring you do not overcrowd the pan, which lowers the oil temperature. Fry the chicken for about 6 to 8 minutes per side, turning carefully with tongs, until it is deep golden brown and cooked through. Adjust heat as needed to maintain 325°F.
- Drain and rest: Remove the cooked chicken from the oil and place it on a clean wire rack set over paper towels to drain excess grease. Allow the chicken to rest for 5 minutes before serving. Serve immediately for the best crunchy chicken coating experience.
Notes
- For the crispiest coating, let the dredged chicken rest on the wire rack for 15 minutes before frying. This allows the coating to hydrate slightly, preventing it from falling off in the oil.
- If you are using larger pieces like breasts, you may need to reduce the heat slightly to 300°F after the initial sear to ensure the center cooks without burning the exterior.
- Use a deep-fry thermometer to maintain oil temperature; this is the secret to avoiding greasy, undercooked chicken.
Nutrition
- Serving Size: 1 piece (mixed)
- Calories: 450
- Sugar: 2
- Sodium: 650
- Fat: 28
- Saturated Fat: 8
- Unsaturated Fat: 20
- Trans Fat: 0
- Carbohydrates: 18
- Fiber: 1
- Protein: 30
- Cholesterol: 110