
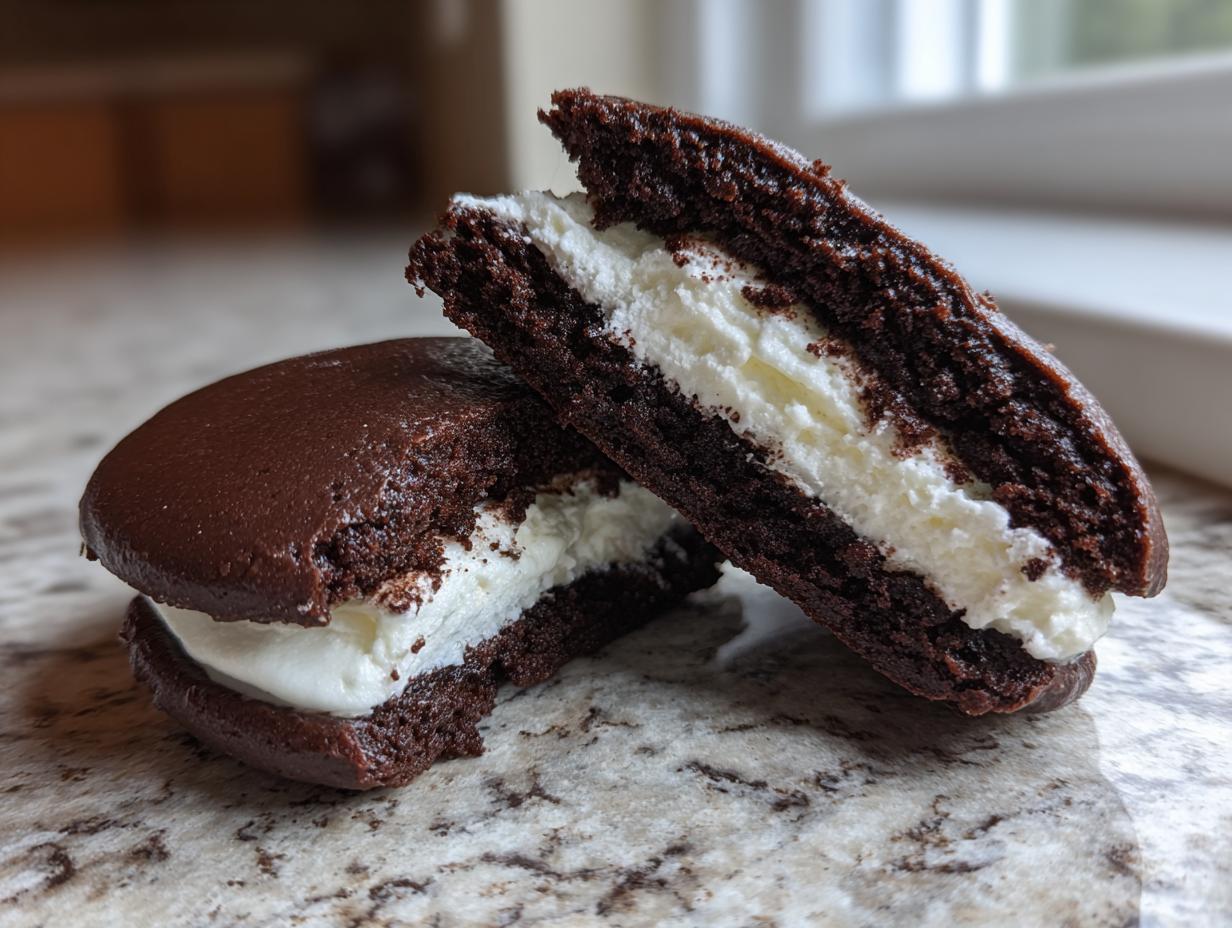
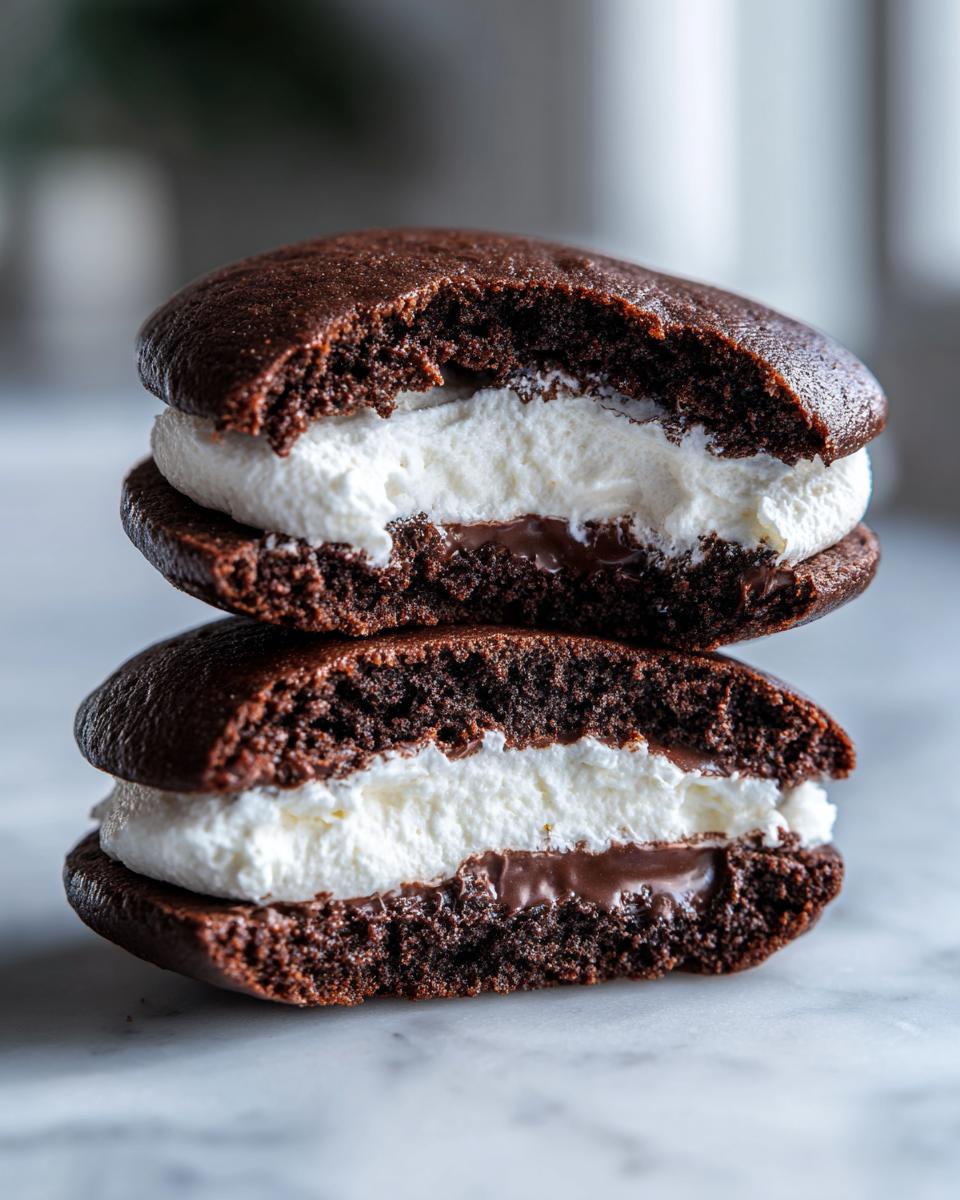
There are some nostalgic desserts that just teleport you straight back to childhood with one single bite, right? For me, that taste is all about the classic whoopie pies. Forget those flat, dry ones you might have grabbed from a gas station once or twice. Today, we’re making the absolute gold standard: our Classic Chocolate Whoopie Pies with Fluffy Marshmallow Cream Filling.
I spent years perfecting recipes in a test kitchen, learning exactly *why* something works, and I promise you, these homemade whoopie pies from scratch are soft, perfectly cake-like, and use a filling so airy it practically floats off the plate. If you want the best, you’ve found it!
- Why You Will Love These Classic Whoopie Pies
- Gathering Ingredients for Perfect Whoopie Pies
- Step-by-Step Instructions for Homemade Whoopie Pies from Scratch
- Tips for Achieving Bakery Style Whoopie Pies
- Storage and Reheating Instructions for Whoopie Pies
- Common Questions About Classic Whoopie Pies Recipe
- Exploring Whoopie Pie Variations
- Estimated Nutritional Data for Whoopie Pies
- Share Your Homemade Whoopie Pies Creations
Why You Will Love These Classic Whoopie Pies
When you commit to making these from scratch, you’re getting something way beyond the store-bought imitation. These aren’t just cookies; they’re tender, dark chocolate little cakes!
- They boast an unmatched soft, cake-like cookie texture.
- The marshmallow cream filling is outrageously fluffy—truly cloud-like!
- We use buttermilk for that signature, subtle tanginess that elevates the chocolate.
- This reliable recipe guarantees success for your first batch of homemade whoopie pies.
Gathering Ingredients for Perfect Whoopie Pies
Okay, getting the right ingredients ready is half the battle when you’re aiming for the very best homemade whoopie pies from scratch. This chocolate shell is incredibly fudgy, but it needs the right balance of wet and dry elements to stay soft. That’s where buttermilk comes in! In my experience, that little bit of acid is crucial for that classic tang and tender crumb. It sounds so simple, but trust me when I say it makes a huge difference in how these dessert sandwich cookies turn out. If you want to see why buttermilk is my secret weapon (outside of these whoopie pies, of course!), check out my thoughts on why it makes such a difference in baking.
Now let’s look at exactly what we need to gather for this project.
For the Soft Chocolate Cake Shells
- 1 3/4 cups all-purpose flour
- 1 3/4 cups granulated sugar
- 3/4 cup unsweetened cocoa powder
- 1 1/2 teaspoons baking soda
- 1/2 teaspoon salt
- 1 cup buttermilk (room temperature is best!)
- 1/2 cup vegetable oil
- 2 large eggs
- 1 teaspoon vanilla extract
- 1 teaspoon white vinegar
- 1 cup boiling water (Don’t skip this—it blooms the cocoa!)
For the Fluffy Whoopie Pie Filling
The filling needs to be perfectly light, so make sure your butter is truly softened—not melted! If you want to see how I get my frostings perfectly airy every time, I talk about stabilization right here.
- 1 cup (2 sticks) unsalted butter, softened
- 3 cups powdered sugar, sifted
- 1 teaspoon vanilla extract
- 1/4 cup light corn syrup
- 1/4 cup vegetable shortening
- 1/4 cup milk or cream
Step-by-Step Instructions for Homemade Whoopie Pies from Scratch
Making these fantastic whoopie pies is a two-part show: baking the chocolate shells and whipping up that gorgeous filling. Don’t be intimidated by the ingredients list; the process is super straightforward, just like my favorite fudge cookies I shared last week. The most important rule? Don’t overmix! These layers need to stay soft, and that means we respect the gluten and stop mixing when we’re supposed to.
Preparing the Chocolate Cake Layers
First things first, preheat your oven to 350°F (175°C) and line those baking sheets with parchment paper—it saves so much cleanup later. Whisk all your dry bits—flour, sugar, cocoa, soda, salt—together in a big bowl. In another bowl, mix up the wet ingredients like the buttermilk and eggs. Pour the wet into the dry and only mix until they *just* start to come together. Seriously, stop there! The big secret that makes these so wonderfully soft is adding the cup of boiling water last. Yes, boiling! Stir it in gently until the batter is smooth. You’ll notice it’s quite thin—almost like a thick soup. That is exactly what you want for those signature soft cake like cookies!
Next, use rounded tablespoons to drop the batter onto your prepared sheets, leaving about two inches between each one since they’ll spread a bit. Pop them in the oven for only 10 to 12 minutes. Overbaking ruins everything! Let them sit on the pan for five minutes to firm up slightly before moving them to a wire rack to cool completely. If you’re looking for how other pros handle this, you might want to peek at Martha Stewart’s method over here.
Creating the Fluffy Whoopie Pie Filling
While those chocolate rounds are cooling down—and they *must* be totally cool—we whip up the filling. Start by beating your softened butter and shortening together until they look creamy and pale. Now, slowly stream in that sifted powdered sugar, mixing well after every addition so you don’t end up with a sugar cloud explosion in your kitchen! Add your vanilla and corn syrup next. The final magic step? Beat that mixture on high speed for a solid three minutes with some milk or cream. This is what transforms it from heavy frosting into that airy, fluffy whoopie pie filling you’re dreaming about.
Assembling Your Dessert Sandwich Cookies
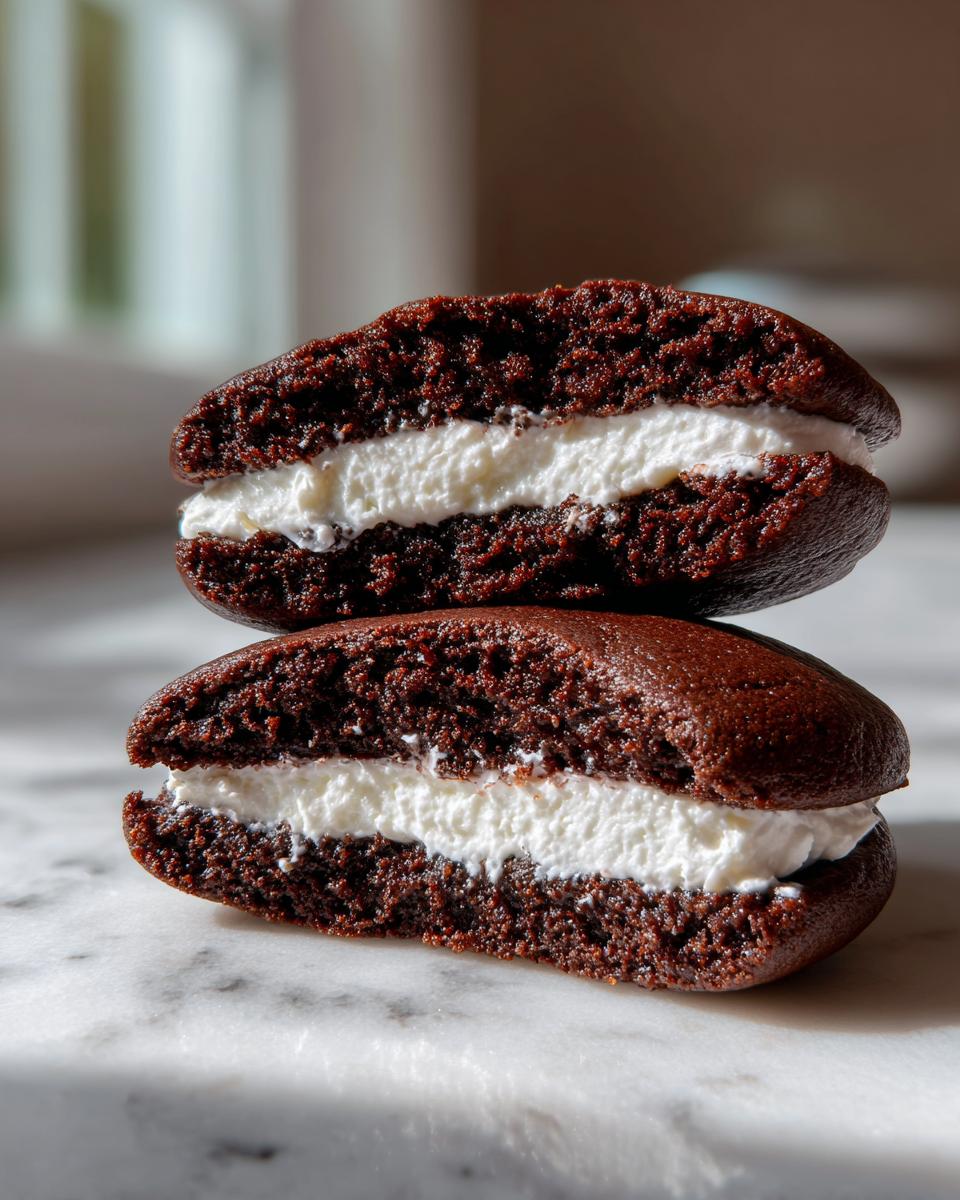
This is my favorite part! Once everything is cooled off, you’re ready to build your dessert sandwich cookies. Take two chocolate cakes that are roughly the same size—this makes them look so professional. Spoon a generous dollop of that fluffy filling onto the flat side of one shell, and then gently press the flat side of the second shell on top. Press just enough so the filling reaches the edges beautifully. Keep assembling, and you’ll have a dozen glorious, ready-to-eat treats!
Tips for Achieving Bakery Style Whoopie Pies
If you want your treats to taste like they came right from a fantastic bakery display case, a few special touches take these whoopie pies from good to absolutely unforgettable. The main ticket item here, beyond not overbaking those delicate shells, is making sure that buttermilk really does its job. That slight acidity reacts with the baking soda to give you those signature soft cake like cookies we are aiming for, plus that slight tang balances the heavy sweetness of the filling.
For presentation, if you’ve got a piping bag handy, skip the knife spreading! A large round tip helps you pipe a perfectly even layer of that fluffy whoopie pie filling, which looks so professional. If the filling seems too soft, chill it briefly before assembling. For more genius tips on balancing richness, check out my guide to making the best stable frostings.
Honestly, just treating the ingredients with respect—especially the cocoa and buttermilk—is what achieves that classic, rich flavor. If you want to compare notes with other great bakers, see how others tackle presentation over here!
Storage and Reheating Instructions for Whoopie Pies
These wonderful whoopie pies are actually better the next day, which is great news for planning ahead! Because these aren’t dry cookies but rather delicate cake layers, you want to store them carefully. I always keep mine in a single layer in an airtight container at room temperature. If you pile them up, you risk squishing that beautiful, fluffy whoopie pie filling!
They stay wonderfully fresh, maintaining that soft cake like cookies texture, for about three days this way. If you make a huge batch and need to keep them longer, they actually freeze really well, assembled or unassembled. Pop them in an airtight container with some wax paper between layers, and they sail right through to freezing land for up to three months!
Common Questions About Classic Whoopie Pies Recipe
It’s totally normal to have a few questions when you’re diving into a beloved treat like a classic whoopie pies recipe. These are more delicate than your average drop cookie, after all! I’ve gathered the most frequent things folks ask about ensuring these taste like the old fashioned whoopie pies we grew up loving.
Can I substitute the buttermilk in this whoopie pie recipe?
Oh, absolutely! While buttermilk is my number one recommendation for flavor and texture, I totally get it if you run short. If you look back at my notes, I gave a super easy fix. Just take one cup of regular milk—whole milk is best—and stir in one tablespoon of white vinegar or lemon juice. Let that mixture sit on the counter for about five minutes until it curdles just a tiny bit. Poof! You have a homemade substitute that gives you that essential tang for those authentic old fashioned whoopie pies.
How do I keep my chocolate whoopie pies from drying out?
This is the biggest fear, isn’t it? The secret lies in two places! First, you must not overbake them. I said 10 to 12 minutes in the instructions, and I mean it—pull them out when they look *set*, not rock hard. Second, which I covered in the last section, is storage. Always keep them in an airtight container, and they’ll stay soft and glorious. If you’re looking for other ways to simplify your baking week, maybe check out some easy weeknight dinners while you wait for your next batch to cool!
Exploring Whoopie Pie Variations
Once you master this foundational recipe for whoopie pies, the sky is truly the limit! Because the chocolate cake layers are so soft and moist, they love hosting other flavors. You can easily create fun whoopie pie variations right in the batter. Have you ever thought about adding a teaspoon of strong coffee extract to the chocolate batter? Wow, it just deepens that cocoa flavor beautifully.
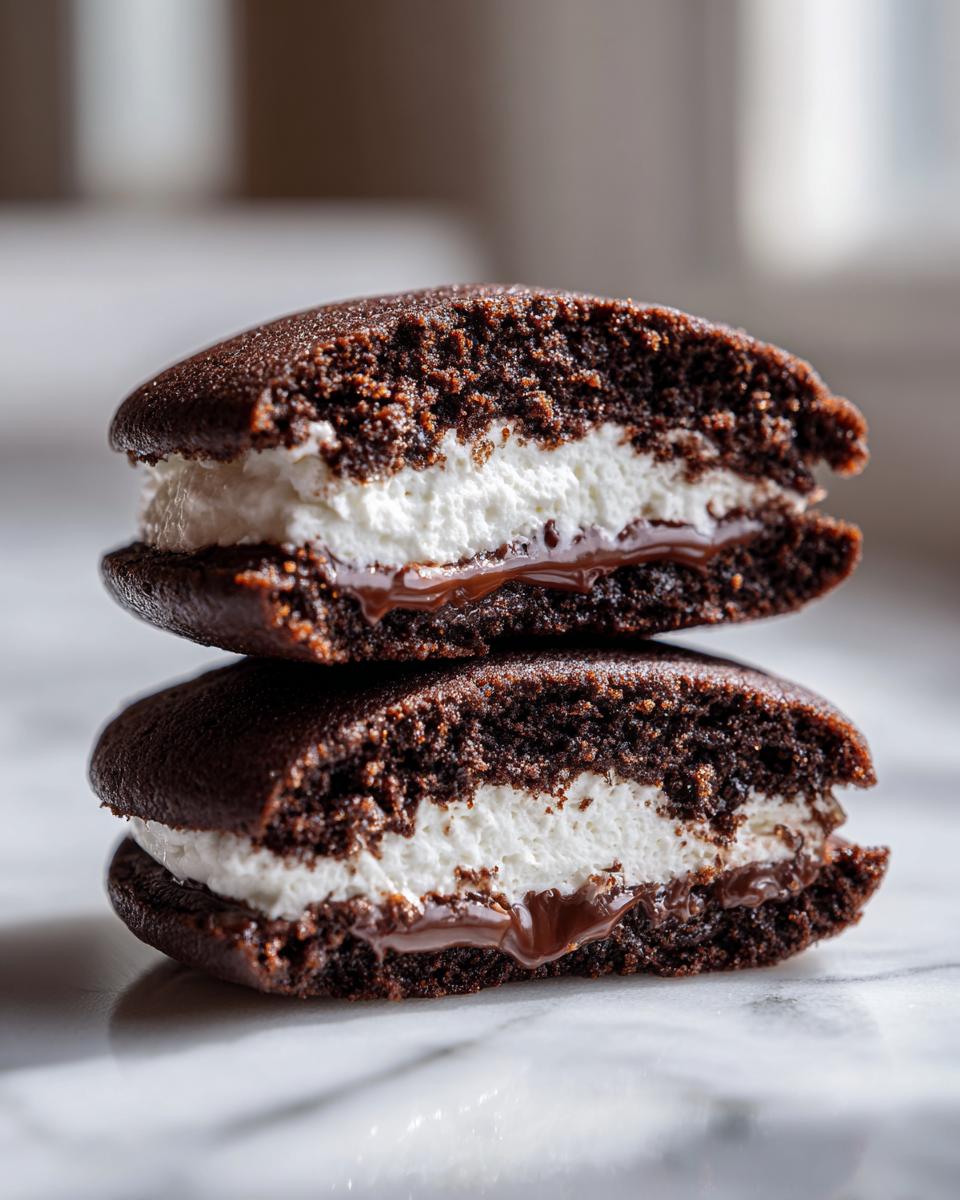
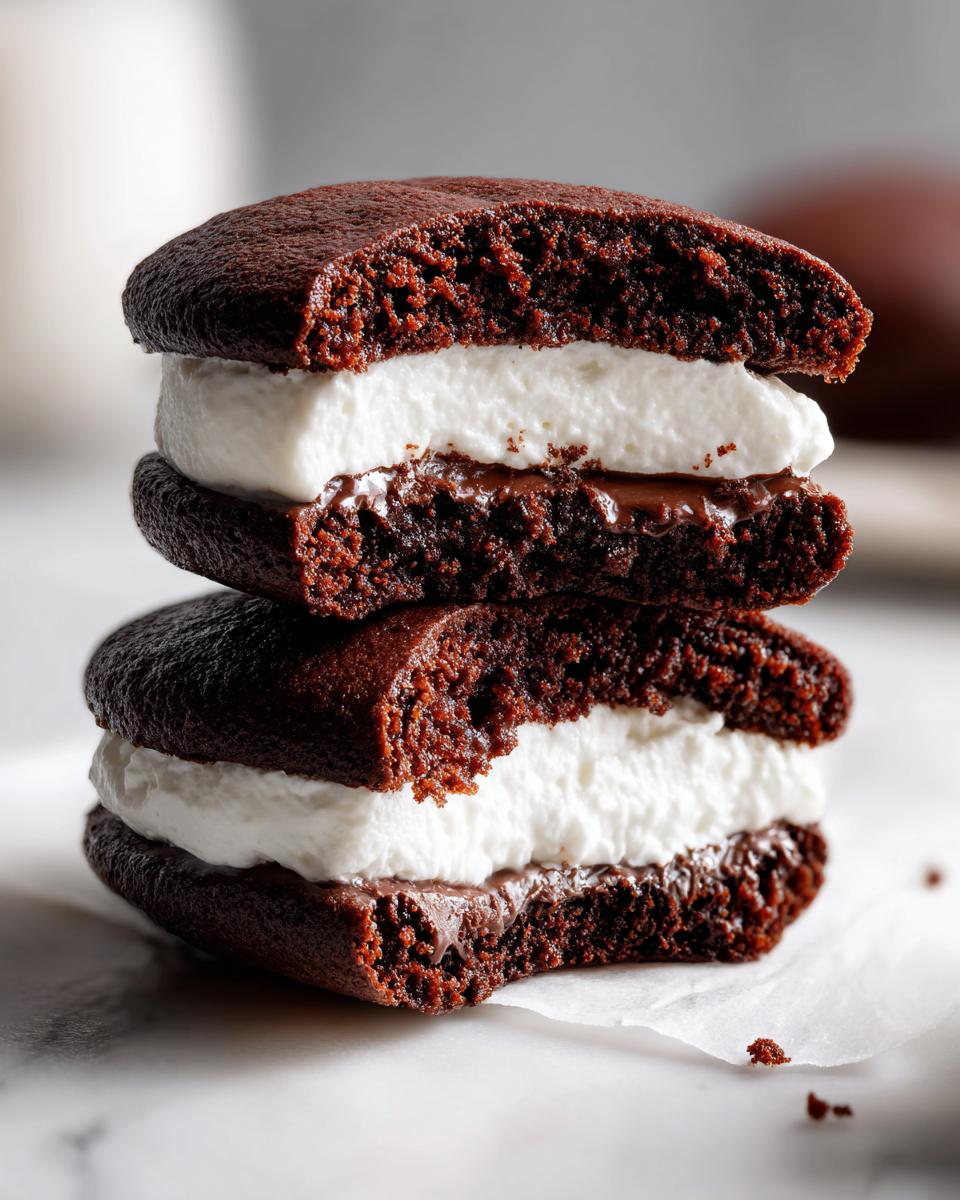
Or let’s talk filling swaps! Instead of that marshmallow cream, try beating in a half-cup of creamy peanut butter, or maybe some melted and cooled salted caramel for a decadent homemade treat. If you’re feeling adventurous and want to try something fruity after mastering this chocolate classic, you can see a beautiful example of how switching up the whole profile works with strawberry whoopie pies. I also love taking inspiration from deeper, richer flavors, which you can see in my recipe for deep chocolate and salted caramel!
Estimated Nutritional Data for Whoopie Pies
When we talk about making delicious, comfort food dessert recipes at home, we know we aren’t aiming for light salads! These luxurious chocolate whoopie pies are rich, satisfying treats. I always calculate the values roughly, and I want to be totally clear about what you can expect in a single sandwich cookie here.
Please remember that these numbers are just my best estimates for one serving based on standard ingredient brands. If you swap out the oil for something different, or use a premium brand of chocolate, those figures will shift a bit—that’s just the reality of baking, right? I include this breakdown because transparency in the kitchen is important to me, even when we are talking about pure indulgence! The goal is connection, not calorie counting, but it’s good to have an idea.
- Serving Size: 1 whoopie pie
- Calories: 450
- Sugar: 55g
- Sodium: 250mg
- Fat: 24g
- Saturated Fat: 12g
- Carbohydrates: 60g
- Protein: 4g
Share Your Homemade Whoopie Pies Creations
Seriously, making these whoopie pies brought so much joy to my kitchen, and now I hope they’ve done the same for yours! If you loved these comfort food dessert recipes as much as I do, please take a moment to rate the recipe below. I’d be thrilled if you shared a picture of your finished sandwich cookies with me on social media—I love seeing everyone’s beautiful results! If you have questions or want to say hello, feel free to reach out on my contact page!
PrintClassic Chocolate Whoopie Pies with Fluffy Marshmallow Cream Filling

Make soft, cake-like chocolate sandwich cookies filled with a sweet, fluffy marshmallow cream. This recipe delivers bakery style whoopie pies from scratch.
- Prep Time: 20 min
- Cook Time: 12 min
- Total Time: 32 min
- Yield: 12 sandwich cookies 1x
- Category: Dessert
- Method: Baking
- Cuisine: American
- Diet: Vegetarian
Ingredients
- 1 3/4 cups all-purpose flour
- 1 3/4 cups granulated sugar
- 3/4 cup unsweetened cocoa powder
- 1 1/2 teaspoons baking soda
- 1/2 teaspoon salt
- 1 cup buttermilk
- 1/2 cup vegetable oil
- 2 large eggs
- 1 teaspoon vanilla extract
- 1 teaspoon white vinegar
- 1 cup boiling water
- For the Filling:
- 1 cup (2 sticks) unsalted butter, softened
- 3 cups powdered sugar, sifted
- 1 teaspoon vanilla extract
- 1/4 cup light corn syrup
- 1/4 cup vegetable shortening
- 1/4 cup milk or cream
Instructions
- Preheat your oven to 350°F (175°C). Line baking sheets with parchment paper.
- In a large bowl, whisk together the flour, sugar, cocoa powder, baking soda, and salt.
- In a separate bowl, whisk together the buttermilk, oil, eggs, vanilla extract, and vinegar.
- Pour the wet ingredients into the dry ingredients and mix until just combined. Do not overmix.
- Carefully stir in the boiling water until the batter is smooth and thin.
- Drop rounded tablespoons of batter onto the prepared baking sheets, spacing them about 2 inches apart. You will need to work in batches.
- Bake for 10 to 12 minutes. The edges should look set. They will look like soft cake like cookies.
- Let the cakes cool on the baking sheet for 5 minutes before transferring them to a wire rack to cool completely.
- To make the filling, beat the softened butter and shortening together until creamy.
- Gradually add the sifted powdered sugar, beating well after each addition.
- Mix in the vanilla extract and corn syrup.
- Add the milk or cream one tablespoon at a time until the filling is light and fluffy. Beat on high speed for 3 minutes until airy.
- To assemble, match up two cooled chocolate cakes of similar size. Spread a generous amount of filling onto the flat side of one cake and top with the flat side of the second cake.
- Repeat with the remaining cakes and filling.
Notes
- Using buttermilk provides the necessary tanginess that balances the sweetness of the chocolate cake and the filling.
- For a more bakery style appearance, use a piping bag fitted with a large round tip to pipe the filling onto the cookies.
- If you do not have buttermilk, mix 1 cup of regular milk with 1 tablespoon of white vinegar or lemon juice and let it sit for 5 minutes before using.
Nutrition
- Serving Size: 1 whoopie pie
- Calories: 450
- Sugar: 55
- Sodium: 250
- Fat: 24
- Saturated Fat: 12
- Unsaturated Fat: 10
- Trans Fat: 0.5
- Carbohydrates: 60
- Fiber: 1
- Protein: 4
- Cholesterol: 55