
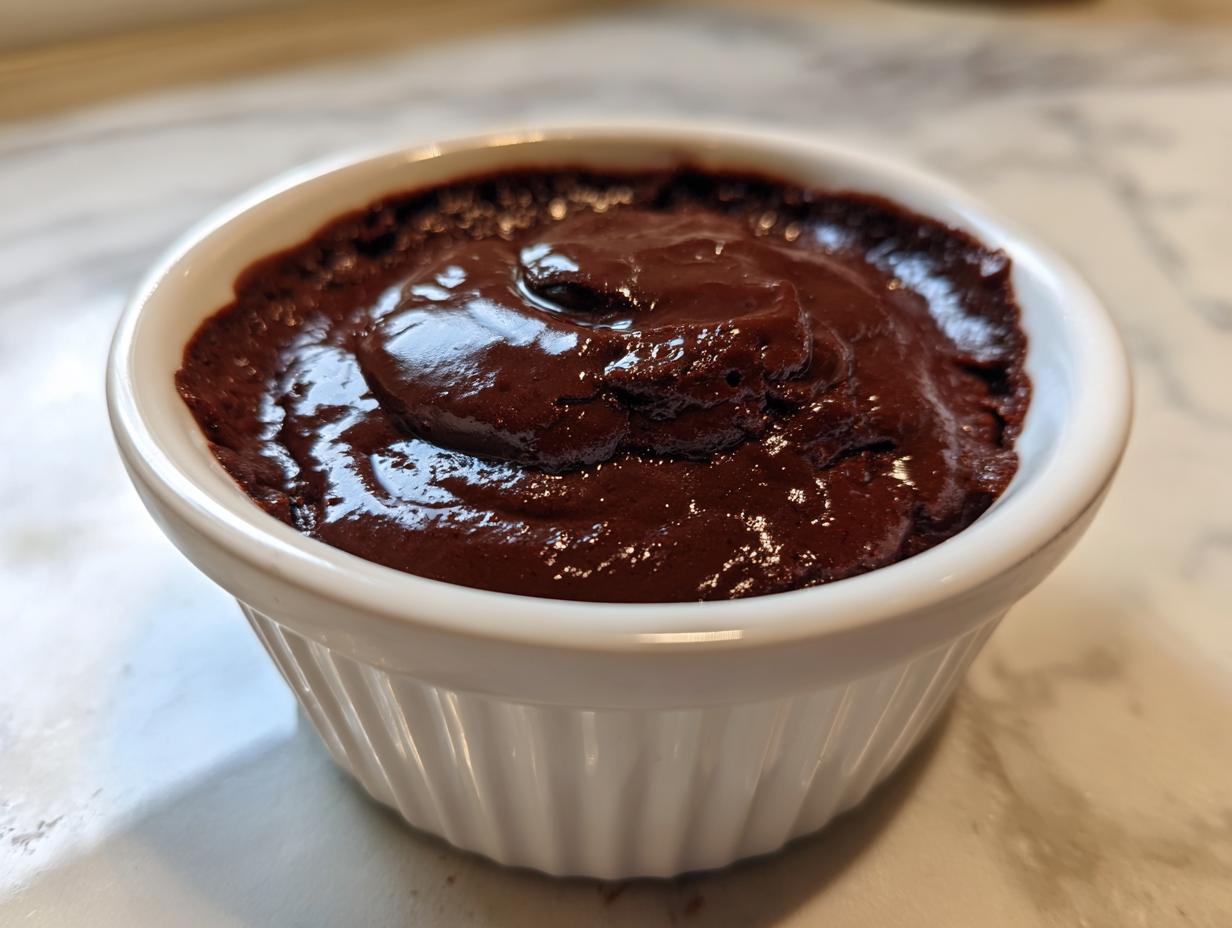
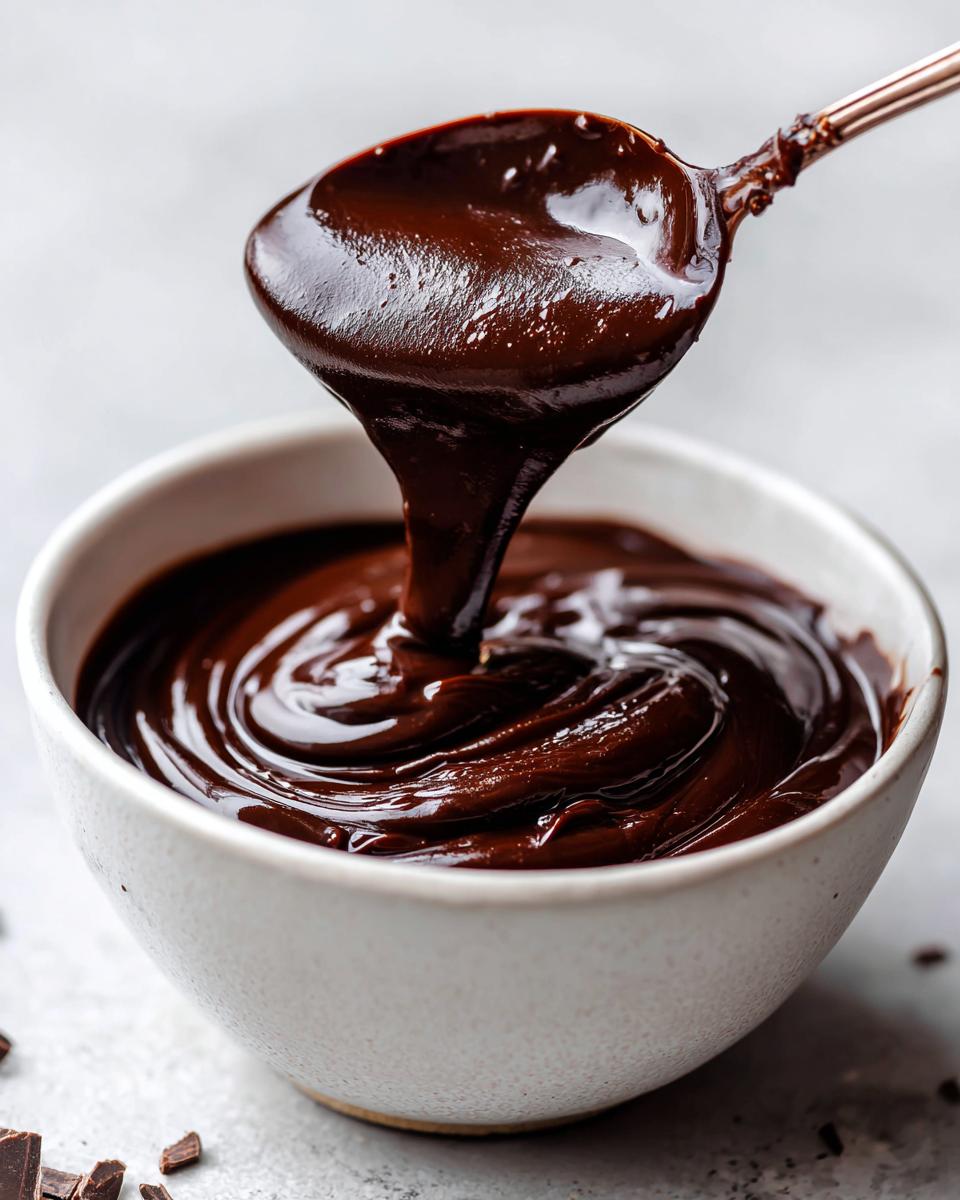
When I think about true comfort food desserts, nothing beats a bowl of rich, warm chocolate scooped straight from the pot. Forget those powdery, slightly artificial flavors from a box mix. I am here today to share what I promise is the absolute best homemade chocolate pudding from scratch you’ll ever eat. This recipe yields that deep cocoa flavor and the unbelievably silky, velvety texture we all crave. For me, Jade Carter, cooking is all about making reliable magic with simple ingredients, and this classic chocolate pudding recipe proves that the most satisfying treats are often the easiest ones to master!
- Why This Homemade Chocolate Pudding Recipe Is Your New Favorite
- Gathering Ingredients for the Best Chocolate Pudding Recipe
- Expert Tips for Making Chocolate Pudding From Scratch
- Step-by-Step Instructions: How to Make Chocolate Pudding
- Serving Suggestions for Rich Chocolate Dessert
- Storage and Reheating for Your Chocolate Pudding
- Frequently Asked Questions About Chocolate Pudding
- Estimated Nutritional Data for Chocolate Pudding
- Share Your Experience Making This Classic Chocolate Dessert
Why This Homemade Chocolate Pudding Recipe Is Your New Favorite
I know you want that luscious, thick texture that screams decadent, not runny. Trust me, this homemade chocolate pudding delivers exactly that—it’s the gold standard for creamy chocolate pudding. It’s so much better than anything you can pour out of a box; that’s why I keep developing recipes that rely on true, scratch-made flavor.
- It’s the ultimate comfort food dessert, perfect for a cozy night in.
- You only use pantry staples, so you can whip it up whenever a craving hits.
- It sets up perfectly—no lumps, just pure, glorious richness.
Achieving Silky, Velvety Texture
The secret to that incredible mouthfeel, that perfect velvety chocolate dessert quality, comes down to two things we do in the cook time: using just the right amount of cornstarch to thicken everything beautifully, and carefully tempering those egg yolks. Tempering is key—it adds richness without ever letting them curdle. That’s what gives you that smooth, glossy finish every single time.
Simple Steps for Perfect Chocolate Pudding
Don’t let the egg yolks scare you; this is still a wonderfully quick chocolate pudding to cook on the stovetop. Honestly, the active time is minimal! Since it’s a pure stovetop recipe, it’s completely no bake pudding, meaning we skip the oven entirely. Just a little whisking magic, a short simmer, and then it heads to the fridge to set like a dream.
Gathering Ingredients for the Best Chocolate Pudding Recipe
Okay, let’s talk about what actually goes into making this deeply satisfying chocolate pudding from scratch. Since this recipe is so simple—truly just pantry staples—the quality of what you use matters so much for that final rich flavor. I always recommend using the best unsweetened cocoa powder your budget allows; it’s where all that deep chocolate flavor comes from!
Here is the lineup for four perfect servings. Grab these out before you start whisking, because once the heat is on, things move fast:
- 1/4 cup unsweetened cocoa powder
- 3/4 cup granulated sugar
- 1/4 teaspoon salt
- 1/4 cup cornstarch (Our secret weapon for thickness!)
- 2 cups whole milk (Please stick to whole milk; it gives the best body!)
- 2 large egg yolks (This adds necessary richness and color)
- 2 tablespoons unsalted butter
- 1 teaspoon vanilla extract
See? Nothing scary in there! That combination is what makes this recipe so reliable and keeps it squarely in the ‘classic chocolate dessert’ category. Quality counts here, especially with the butter and cocoa!
Expert Tips for Making Chocolate Pudding From Scratch
I’ve tested this from scratch pudding recipe hundreds of times, and I’ve learned a few things that help move it from ‘good’ to ‘absolutely unforgettable.’ Because we’re using simple ingredients, paying attention to the details makes all the difference in achieving that perfect, rich, velvety finish. Don’t worry about complexity; these are just little chef secrets to ensure success!
First off, I want to put your mind at ease: this recipe is naturally gluten free chocolate pudding! We rely on cornstarch for our main thickening agent, so those with gluten sensitivities can dive right in without worry. That said, let’s get into the specific ingredient tweaks.
Ingredient Notes and Substitutions for Chocolate Pudding
When it comes to cocoa powder, please don’t grab the cheapest can you see! Since cocoa is the main flavor driver of your homemade chocolate pudding, using a high-quality, deeply dark unsweetened cocoa powder will give you that intense, slightly bitter counterpoint to the sugar. It’s what makes it taste so grown-up and decadent.
Now, about the milk. I call for whole milk because the fat content is essential for that deep, luxurious mouthfeel that sets this apart from thinner puddings. If you absolutely must use something else, 2% will work in a pinch, but I strongly caution against skim. Skim milk just won’t give you the body needed for a truly creamy chocolate pudding. Also, a quick note—if you accidentally use 3 tablespoons of cornstarch instead of 4, don’t panic! It will result in a softer, slightly looser pudding, but it will still be delicious, just maybe a little less firm.
Step-by-Step Instructions: How to Make Chocolate Pudding
This stovetop method is where the magic happens! To get that unbelievably creamy chocolate pudding texture we’re aiming for, you really need to give this process your full attention for about 15 minutes. I know cooking on the stove sounds intimidating, but that constant stirring is what keeps everything perfectly smooth. Stick with me through these steps, and you’ll see why ditching the box is totally worth it!
Combining Dry Ingredients and Milk
First things first, grab a medium saucepan—this is where we cook everything. Before the heat even goes on, you need to fight future lumps! Whisk together your cocoa powder, sugar, salt, and the cornstarch until you see a single, uniform color. No streaks of white cornstarch allowed! Once that’s mixed, start pouring in the whole milk slowly while you keep whisking. Keep going until that mixture is totally smooth, like chocolate soup, before setting it over medium heat.
Tempering the Egg Yolks for Creamy Chocolate Pudding
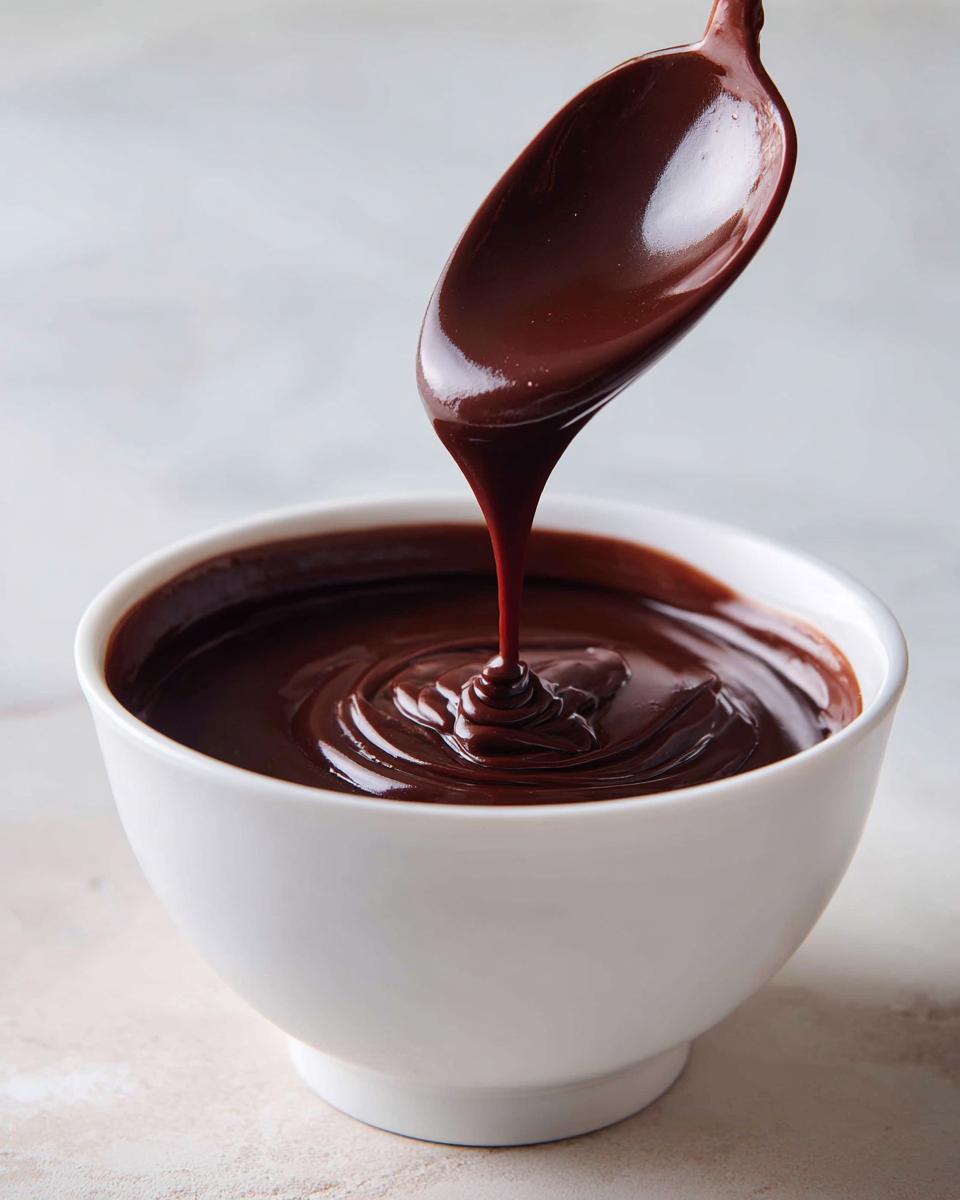
Once the milk mixture is heating up, you have to pay close attention. You need to stir constantly, not just occasionally, for about 8 to 10 minutes until it starts to bubble gently. While that’s happening, get your two egg yolks ready in a small side bowl. Remember, we don’t want scrambled eggs! This is where tempering saves the day. Slowly drizzle about half a cup of that hot, steamy pudding right into your yolks while you whisk those yolks like crazy. This brings them up to temperature gently. Once they look happy, pour that tempered yolk mixture right back into the main saucepan.
Keep cooking, stirring non-stop, for just 1 or 2 more minutes. You’ll notice it gets *very* thick. Remember not to let it boil too hard! Take it off the heat immediately. Now, stir in your butter and that teaspoon of lovely vanilla extract until everything is melted and glossy. That’s the sign of a perfect chocolate dessert recipe base!
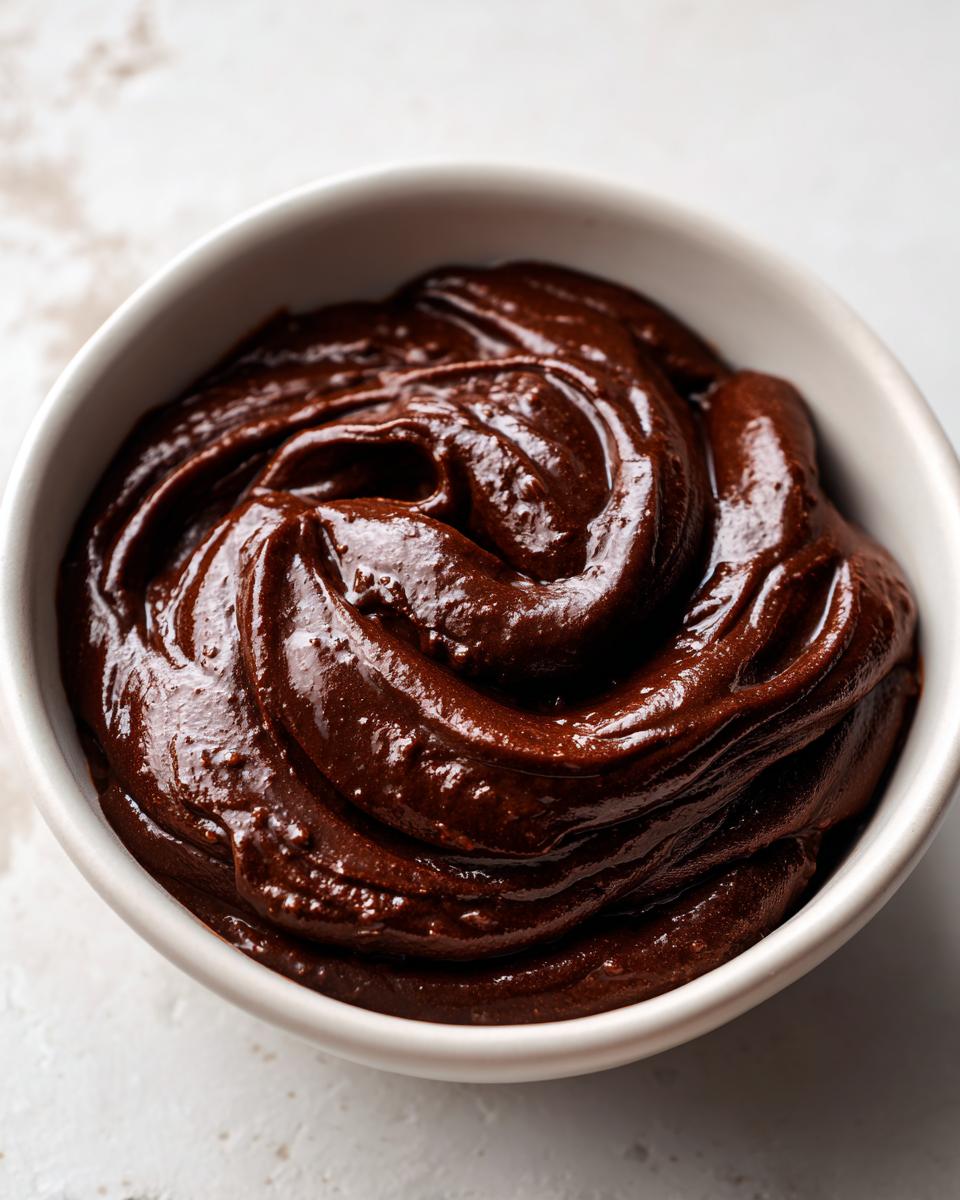
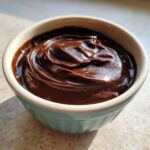
Chilling and Setting Your Homemade Chocolate Pudding
Pour your fresh, hot pudding right away into the individual serving dishes or one big bowl. Here is another essential tip: to guarantee that super smooth top without any weird film forming, take a piece of plastic wrap and press it directly onto the surface of the pudding. Seriously, smoosh it right down so it has zero contact with the air. Then, chill everything for at least 2 hours. That time in the fridge is non-negotiable; it lets the starches fully set and makes your homemade chocolate pudding firm up perfectly!
Serving Suggestions for Rich Chocolate Dessert
Now that you have this deeply satisfying, velvety chocolate dessert chilling in the fridge, it’s time for the fun part: dressing it up! While this rich chocolate dessert is seriously perfect all on its own—you can tell by how smooth it is, right?—sometimes a little topping pushes it over the edge into truly celebratory territory.
I love keeping things classic because the pudding itself is so flavorful, but here are a few ways I usually serve mine up:
- Fresh Whipped Cream: You simply can’t go wrong here. A hefty dollop of freshly whipped cream is light, airy, and the perfect textural contrast to the dense, cool pudding. I don’t even sweeten mine much because the pudding is sweet enough!
- Fresh Berries: A few tart raspberries or sweet sliced strawberries sprinkled on top cut through the chocolate beautifully. It makes the whole thing feel instantly lighter, even though it’s still pure indulgence.
- A Dusting of Contrast: Sometimes, I just take a fine-mesh sieve and dust the top lightly with extra unsweetened cocoa powder, or maybe even a tiny sprinkle of flaky sea salt right before serving. That salt just makes the chocolate flavor pop!
- For the Chocolate Lover: If you’re like me and feel that one type of chocolate isn’t enough, shave some high-quality dark chocolate curls over the top right before you take it to the table.
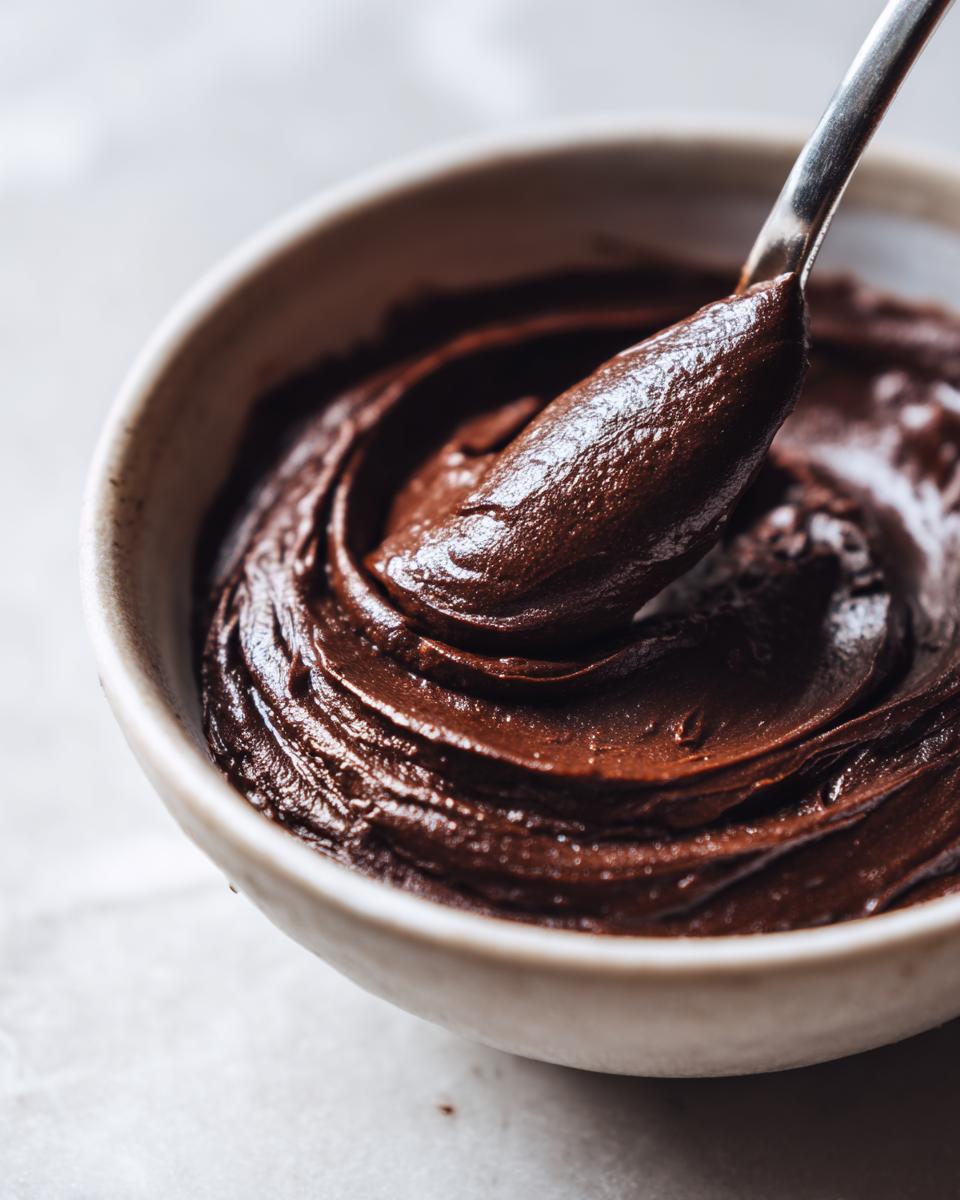
Seriously, don’t overcomplicate it! This homemade chocolate pudding is the star of the show. Just make sure you scoop it up with a spoon that lets you get a little bit of that creamy edge!
Storage and Reheating for Your Chocolate Pudding
This is one of the great things about making a stovetop pudding—it keeps so wonderfully! Since this homemade chocolate pudding relies on cornstarch and eggs rather than gelatin, it holds up beautifully in the fridge. You’ve got plenty of time to enjoy your labor of love.
The most important thing you need to remember about storing your pudding is that plastic wrap trick we talked about! Peel it off carefully before serving, but make sure you press a piece of plastic wrap directly onto the surface of the pudding when you put it away. This traps the moisture right where it needs to be and prevents that slightly tacky, dry skin from forming on top. That skin ruins the silky experience, doesn’t it? Trust me on this one—zero air contact!
Stored tightly sealed this way, the final rich chocolate dessert will stay perfect in the refrigerator for about four to five days. I find the flavor seems to intensify after the second day, making the chocolate taste even deeper and more satisfying. It’s a genuine comfort food dessert that tastes even better as leftovers the next day!
Now, about reheating: don’t! This pudding is meant to be served cold and firm right from the fridge. If you try to heat it up you are just going to end up with warm, thicker chocolate sauce. If you absolutely can’t enjoy it cold, you can let it sit on the counter for about 15 minutes before serving to take the chill off slightly, but heating it on the stove will break down the texture we worked so hard to achieve when we tempered those yolks.
Frequently Asked Questions About Chocolate Pudding
I know you might have a couple of lingering questions about making your own chocolate pudding from scratch—that’s totally normal when you’re upgrading from a box mix! I’ve gathered the most common things I hear from folks learning this recipe. Getting these little details right is what separates a good pudding from an unforgettable, velvety chocolate dessert!
Can I make this chocolate pudding vegan or dairy-free?
That’s a great question, and since this base recipe relies heavily on whole milk and those two egg yolks for richness, making it fully vegan requires a little shift. To keep it dairy-free, you can swap the whole milk for a rich, full-fat oat milk or soy milk—those tend to thicken better than almond milk. Now, the egg yolks are trickier because we use them for body. If you need a truly vegan version, I recommend looking up a dedicated vegan chocolate pudding simple recipe where they often use extra cornstarch or different thickeners entirely. For this specific recipe, swapping the butter for a good vegan block butter is easy, but skip the yolks at your own risk since it drastically changes the texture from that iconic creamy chocolate pudding we love!
How do I prevent a skin from forming on my chocolate pudding?
Ah, the dreaded pudding skin! It shows up because moisture evaporates off the top while the pudding cools and sets. The absolute best way to stop this is the technique I stressed earlier: pressing plastic wrap directly onto the surface before chilling. You want that plastic touching the pudding—no air gap whatsoever! Think of it like giving your pudding a little protective blanket. By sealing the surface away from the circulating air in the fridge, you trap all the moisture underneath, keeping the top surface perfectly smooth and silky, just like it should be for a true classic chocolate dessert.
Is this recipe suitable as a quick chocolate dessert?
It truly is a deceptively quick chocolate dessert when you look at the active time! You spend about 15 minutes actively cooking it on the stovetop, whisking constantly, and you’re done with the heat part! That said, for the best experience, you need patience for the setting. The recipe calls for at least 2 hours of chilling time so that it firms up properly into that satisfying, scoopable texture. So, while the active time is fast, plan for about 2 hours of downtime before you can dig into your delicious homemade chocolate pudding!
Estimated Nutritional Data for Chocolate Pudding
I always believe in being upfront about what goes into our bodies, even when we are treating ourselves to something truly comforting like this rich chocolate dessert. Since this recipe uses real ingredients like whole milk and egg yolks, it’s certainly more substantial than the powder-in-a-box stuff, but WOW, is it worth it for that velvety taste!
Keep in mind that these numbers are just estimates based on standard ingredient measurements. If you swap out the whole milk for 2% or use dark chocolate instead of straight cocoa, the values will shift a bit. But for a standard serving of this decadent goodness, here is the breakdown:
- Serving Size: 1 serving
- Calories: 285
- Sugar: 35g
- Fat: 11g (with 6g saturated)
- Carbohydrates: 42g
- Protein: 7g
- Cholesterol: 85mg
See how that protein content is higher than some other simple sweets? That comes from the milk and the egg yolks! It’s a very satisfying comfort food dessert that truly hits the spot. Don’t stress too much about the numbers, though; this homemade chocolate pudding is best enjoyed one slow, creamy spoonful at a time!
Share Your Experience Making This Classic Chocolate Dessert
Wow, we did it! We transformed simple pantry staples into a rich, decadent bowl of chocolate pudding from scratch. I hope that first taste of the hot, cooked pudding, followed by that perfectly set, cool, velvety result, showed you just how rewarding it is to skip the box and make something truly classic at home.
This is where my philosophy comes to life: cooking should be joyful, not stressful! If you followed these steps, you now have proof that you can make a truly impressive, top-tier creamy chocolate pudding without needing fancy equipment or hours in the kitchen. That satisfying richness proves that simple recipes, handled with care, always win.
I absolutely love hearing how these recipes turn out for you all. Did you top yours with fresh berries, or did you stick to that simple dusting of cocoa? Did your kids devour it? Please, don’t be shy! Drop a comment down below and let me know what you thought. If you have a favorite topping or a substitution you tried, share that too—we’re building this community kitchen together!
If this recipe brought a little moment of sweet, reliable joy to your day, would you mind leaving it a 5-star rating? It helps other home cooks find this guide to the absolute best homemade chocolate pudding recipe. Happy stirring, and I can’t wait to see your beautiful, smooth bowls of chocolate bliss!
PrintThe Best Homemade Chocolate Pudding Recipe: Silky and Rich From Scratch
Make the creamiest homemade chocolate pudding from scratch. This simple, no-bake recipe delivers a velvety texture and deep cocoa flavor that beats any boxed mix. It is a classic comfort food dessert.
- Prep Time: 10 min
- Cook Time: 15 min
- Total Time: 2 hours 25 min
- Yield: 4 servings 1x
- Category: Dessert
- Method: Stovetop
- Cuisine: American
- Diet: Vegetarian
Ingredients
- 1/4 cup unsweetened cocoa powder
- 3/4 cup granulated sugar
- 1/4 teaspoon salt
- 1/4 cup cornstarch
- 2 cups whole milk
- 2 large egg yolks
- 2 tablespoons unsalted butter
- 1 teaspoon vanilla extract
Instructions
- In a medium saucepan, whisk together the cocoa powder, sugar, salt, and cornstarch until combined.
- Gradually whisk in the milk until the mixture is smooth.
- Place the saucepan over medium heat. Cook, stirring constantly with a whisk, until the mixture thickens and just begins to bubble. This takes about 8 to 10 minutes. Do not stop stirring.
- In a small bowl, whisk the egg yolks lightly.
- Temper the egg yolks by slowly pouring about 1/2 cup of the hot pudding mixture into the yolks while whisking constantly.
- Pour the tempered yolk mixture back into the saucepan with the remaining pudding.
- Cook over medium heat, stirring constantly, for 1 to 2 more minutes until the pudding is very thick. Do not let it boil rapidly.
- Remove the saucepan from the heat. Stir in the butter and vanilla extract until the butter is fully melted and incorporated.
- Pour the pudding into individual serving bowls or a single large bowl. Press plastic wrap directly onto the surface of the pudding to prevent a skin from forming.
- Chill in the refrigerator for at least 2 hours, or until completely cold and set.
Notes
- For an extra rich flavor, use high-quality cocoa powder.
- If you want a slightly thinner pudding, reduce the cornstarch to 3 tablespoons.
- This recipe is naturally gluten free.
- Serve topped with fresh whipped cream or a sprinkle of sea salt for contrast.
Nutrition
- Serving Size: 1 serving
- Calories: 285
- Sugar: 35
- Sodium: 150
- Fat: 11
- Saturated Fat: 6
- Unsaturated Fat: 5
- Trans Fat: 0
- Carbohydrates: 42
- Fiber: 2
- Protein: 7
- Cholesterol: 85