
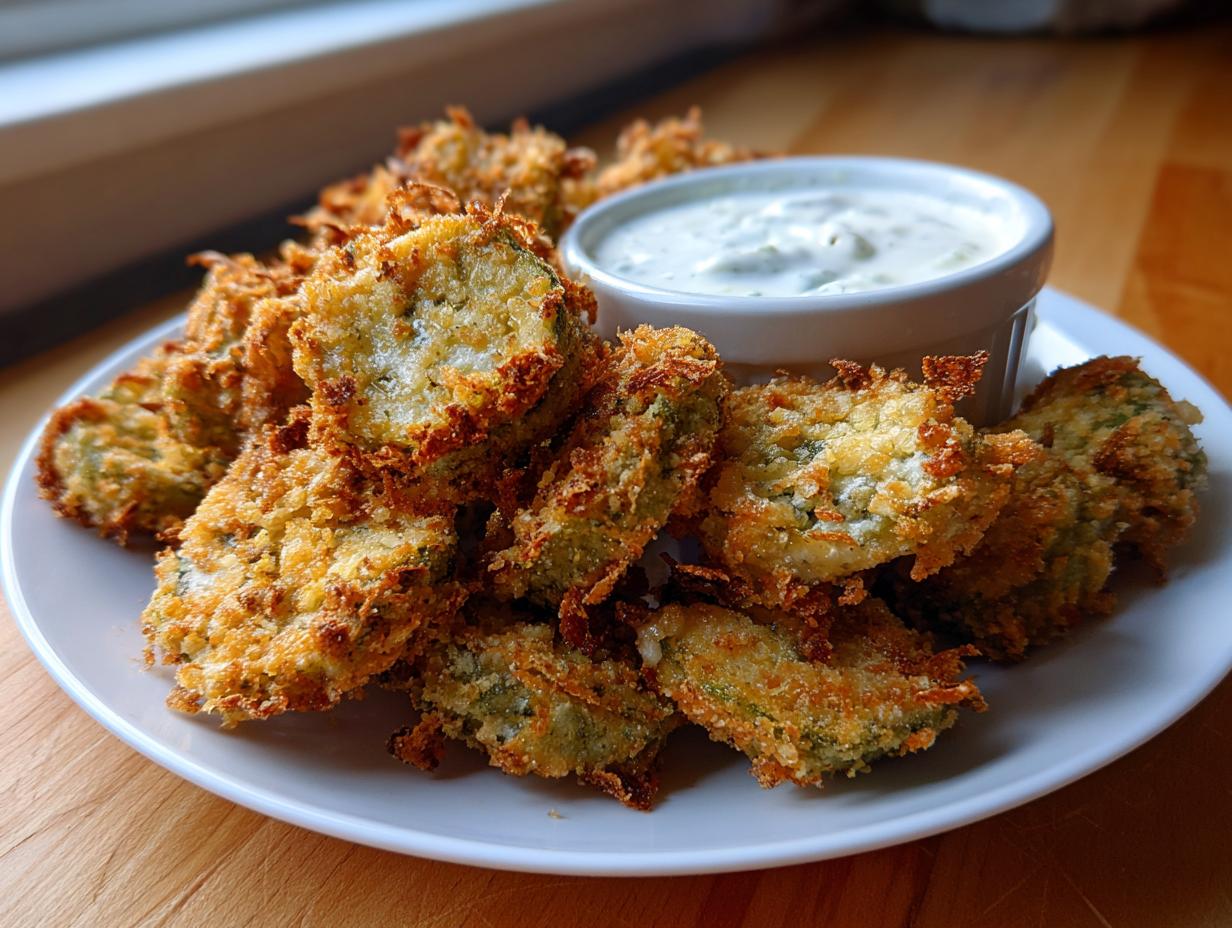
Oh, you know that craving I mean! When you need that salty, tangy, ridiculously crunchy snack that just screams game day victory or Friday night indulgence? Well, stop scrolling, because I’ve cracked the code on the absolute best Fried Pickles you will ever make at home. Forget soggy restaurant versions; these are the ultimate, easy recipe for that Texas Roadhouse style perfection, guaranteeing maximum crunch—I promise. You know I spent ages in test kitchens perfecting batter consistency, and I can tell you this coating is totally foolproof. If you love finding those amazing copycat recipes, you’ll want to check out my thoughts on the Parmesan Crusted Chicken Copycat!
We’re doing this in under 30 minutes, and trust me, the homemade ranch dip on the side makes the whole experience totally restaurant-worthy. I’m thrilled to finally share these secrets with you!
- Why This Is the Best Easy Fried Pickle Recipe (Achieving Ultimate Crispiness)
- Ingredients for Perfect Texas Roadhouse Copycat Fried Pickles
- Step-by-Step Instructions for Deep Fried Pickles
- Alternative Method: Air Fryer Fried Pickles
- Tips for Making the Best Fried Pickle Batter
- Serving Suggestions for Your Party Snack Ideas
- Storage and Reheating Instructions for Leftover Fried Pickles
- Frequently Asked Questions About Homemade Fried Pickles
- Estimated Nutritional Data for Fried Pickles
Why This Is the Best Easy Fried Pickle Recipe (Achieving Ultimate Crispiness)
I know what you’re thinking: fried things are usually soggy disasters waiting to happen. Not here! This Easy Fried Pickle Recipe is designed specifically to deliver those shatteringly Crispy Fried Pickles we crave. The difference really comes down to two small things I insist on. First, you have to treat the pickles like you’re handling delicate glass; patting them bone-dry is non-negotiable for a good crunch.
Second, we’re ditching standard breadcrumbs for panko. Panko breadcrumbs are flaky and light, which means more airy crunch and less oily density. It’s that textural upgrade that really makes people ask where you bought these. When you need that tangy fried snack fast, this preparation method is your best friend.
Quick Prep Time for Your Fried Pickles
The best part? We’re talking less than 30 minutes total for this incredible appetizer. That means you can whip these up on a whim when that craving hits, or easily pull them together before the guests even arrive. Seriously, for a Quick Pickle Appetizer that tastes this good, the speed is shocking. If you’re looking for other quick wins for busy nights, my guide to easy weeknight dinners might give you some ideas too!
Ingredients for Perfect Texas Roadhouse Copycat Fried Pickles
Okay, grabbing your ingredients is where the magic—and the success—starts for these copycats. You need to have everything organized before you even think about oil, trust me, especially since we’re moving fast. I’ve broken down exactly what you need for the pickles themselves and that creamy, dreamy dip we can’t skip. If you want to make another amazing dipping sauce later, check out my Easy 5-Minute Creamy Garlic Aioli!
The quality of your drained pickles matters, but honestly, the breading is 90% of the battle here. Making sure you have three bowls ready to go is key to getting that professional-level coating!
For the Best Fried Pickle Batter
This coating is what gives us those perfectly Crispy Fried Pickles. Do not skip the cayenne unless you absolutely hate flavor, but even a pinch adds a nice background warmth!
- 1 jar (16 ounces) dill pickle chips or spears, drained well (We want them as dry as possible!)
- 1 cup all-purpose flour
- 1 teaspoon salt
- 1 teaspoon black pepper
- 1 teaspoon garlic powder
- 1/2 teaspoon paprika
- 1/4 teaspoon cayenne pepper (if you like a little spark!)
- 2 large eggs
- 1/2 cup milk
- 1 cup panko breadcrumbs (This is the crunch secret weapon!)
For the Homemade Ranch Dipping Sauce
You absolutely need this ranch for those perfect Fried Pickles with Ranch Dip moments. It’s so much brighter than anything out of a bottle.
- 1/2 cup mayonnaise
- 1/4 cup sour cream
- 2 tablespoons buttermilk
- 1 teaspoon dried parsley
- 1/2 teaspoon dried dill
- 1/4 teaspoon onion powder
- 1/4 teaspoon garlic powder
- Pinch of salt and pepper
Step-by-Step Instructions for Deep Fried Pickles
Now that we have all our beautiful ingredients ready to go, let’s get frying! I know frying sounds intimidating, but if you follow these steps—especially the prep—you’ll have a phenomenal Deep Fried Pickles Appetizer ready in a flash. If you ever need a quick dipping sauce alternative, my Easy Homemade Tartar Sauce is fantastic too, though this ranch is really the classic pairing here.
Drying the Pickles: The Key to Crispy Fried Pickles
Listen, this is the single most important thing you can do to get crunchy results. Step one is critical: take those drained pickles and lay them out between plenty of paper towels. You need to press down—gently, but firmly—to wick away all that excess moisture. If the pickle is wet, the batter won’t stick right, and guess what happens? Soggy pockets! We are not having soggy pockets in this kitchen, okay?
Dredging Technique for Perfect Coating
Once they are dry, set up your action station! We use a classic three-stage breading process. First, coat the pickle completely in the seasoned flour and shake off the excess. Second, dip it in the egg wash mixture. Third, and this is where the crunch happens, press that egg-washed pickle *firmly* into the panko breadcrumbs. You want that panko stuck on there tight all around. Lay these coated beauties on a clean rack while you heat the oil.
Frying Temperature and Timing for Deep Fried Pickles Appetizer
For the best outcomes, heat about two inches of oil in a heavy pot until it hits exactly 375°F (190°C). I really rely on my thermometer here because if the oil isn’t hot enough, the coating soaks it up like a sponge! Carefully drop your pickles in, but don’t overcrowd the pot—this drops the oil temperature too fast. Fry them for just about 2 to 3 minutes total, flipping them halfway, until they are that perfect golden brown color. Scoop them out right onto a rack to drain immediately!
Alternative Method: Air Fryer Fried Pickles
I totally get it—sometimes you want that crunch without plunging things into hot oil. It saves on cleanup, and honestly, it feels a little less dive-bar appetizer style, haha! If you want to try making these Air Fryer Fried Pickles, you absolutely can, and they turn out surprisingly great! I tested this method extensively to make sure we weren’t sacrificing texture, and it works beautifully.
The key here is ensuring your pickles are *extra* dry, since the air fryer relies on circulating dry heat rather than immersion in oil. Once you have them breaded according to the steps above, you’re going to want to spray them really well with cooking spray—don’t be shy here! Treat it like coating them lightly in oil before they go in.
Set your air fryer to 400°F (200°C). Work in batches so everything has space to breathe and crisp up! Pop them in and let them cook for about 8 to 10 minutes total. You must remember to flip them halfway through so they brown evenly on both sides. If you’re looking for another great appliance recipe, you have to see my Air Fryer Chicken with Garlic Parmesan!
They won’t be quite as dense and dark as the deep-fried ones, but they are wonderfully crunchy and definitely curb that craving with less fuss!
Tips for Making the Best Fried Pickle Batter
I’ve learned a ton from testing these over the years in the kitchen, especially when trying to recreate that perfect, tangy crunch, and a few tips separate the merely good fried pickles from the truly addictive ones. Consistency is everything, and that starts right before you drop anything into the oil.
My biggest piece of hard-won advice? Watch your oil temperature like a hawk! You absolutely must keep it at that 375°F mark. If the oil cools down when you add the cold pickles, that beautiful batter—the one we worked so hard to get crispy—starts to soak up the oil instead of sealing itself into a golden crust. Keep a thermometer handy, seriously. It’s the best friend for any deep-fried delight.
Also, I can’t stress this enough: Panko is the MVP here. Regular breadcrumbs just don’t give you that same structural integrity. The large, airy flakes of panko create pockets of crunch that stay crispier longer. It sounds like a small change, but trust me, it makes a huge difference when you’re aiming for the best flavor and texture.
If your final product seems a little greasy, that almost always points back to the oil not being hot enough. If it’s too hot, the outside burns before the pickle gets warm, so it’s a delicate dance. Finding that sweet spot is how you get that satisfying, crunchy exterior that perfectly complements the tangy interior. And hey, if you ever need a great base for another dip besides our ranch, my recipe for Homemade Mayo is the perfect starting point!
Serving Suggestions for Your Party Snack Ideas
You’ve successfully made the ultimate batch of Fried Pickles—now what? These aren’t just a snack you eat alone while standing over the sink, tempting as that might be! These crunchy, tangy bites shine brightest when they are shared, especially when hosting big gatherings.
If you’re planning your ultimate spread around these, think about pairing them up. They make absolutely incredible Game Day Food because they’re sturdy finger food that travels well and they pair perfectly with salty flavors like wings or sliders. You’ve got your tangy element covered now, so look for something a little richer to balance it out.
I always find that combining a handful of different textures makes any snack table look amazing. If you’re making these for a party, you’ll want a few other easy wins alongside them. For example, my recipe for Easy Cranberry Brie Bites offers a warm, sweet contrast that everyone devours right alongside the pickles!
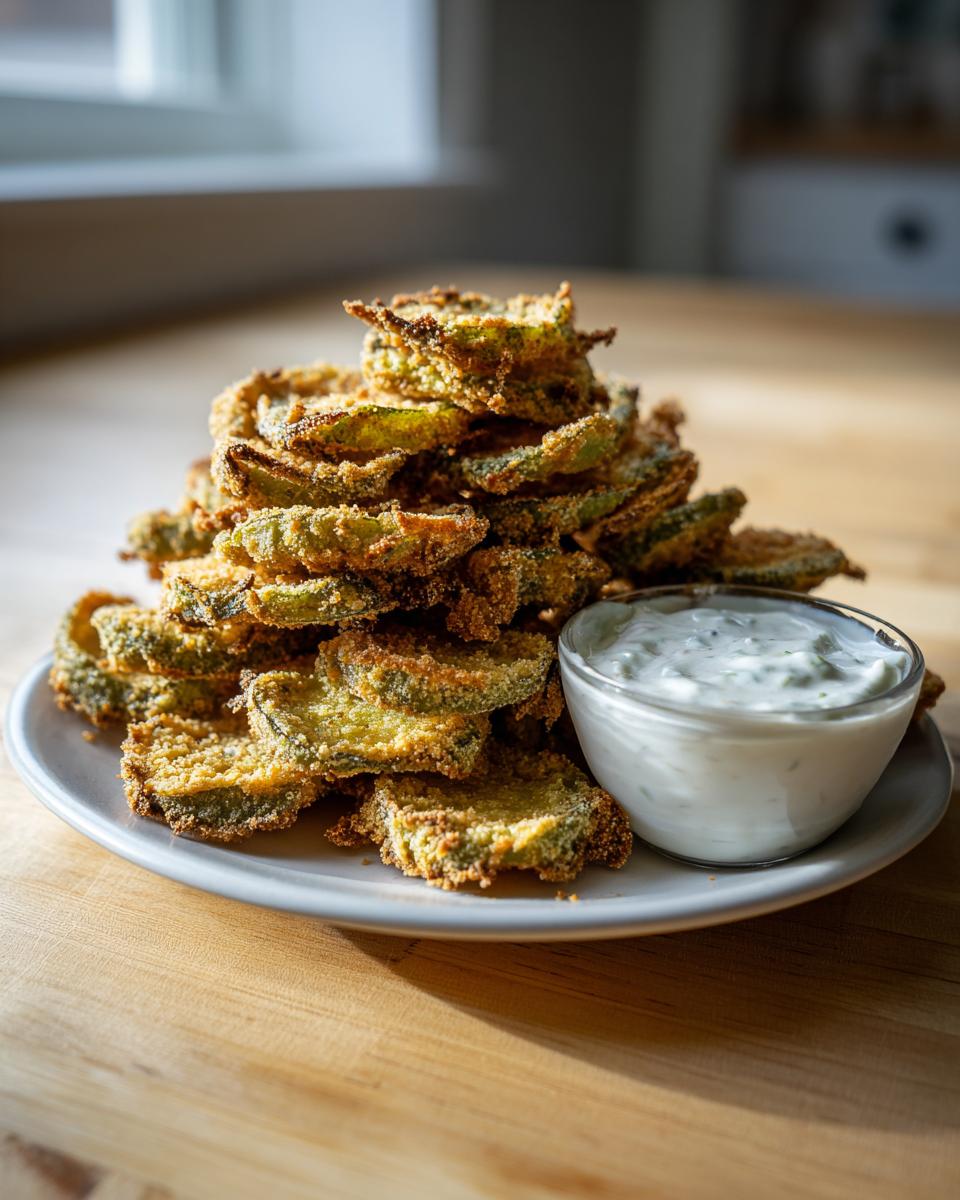
When you put together your platter of Party Snack Ideas, make sure you nestle the ranch dip right in the middle. A generous bowl of that homemade ranch makes these irresistible. Seriously, I’ve never seen a single batch survive past halftime when I brought them over for a game night. They disappear that fast!
Storage and Reheating Instructions for Leftover Fried Pickles
Okay, let’s be real: these crispy fried pickles are designed to be inhaled the second they come out of the oil, right? That glorious crunch fades fast once they cool down completely. But if, by some miracle, you have leftovers—maybe you made a gigantic batch for the tailgate—I have a couple of secrets to help you revive them the next day.
First, storage is key. Never store them in an airtight container for too long, especially if they have any lingering moisture from the draining rack. That trapped steam is the enemy of crispiness! If you’re keeping them overnight, an open paper bag or a plate loosely tented with a paper towel in the fridge is your best bet. This lets them breathe while protecting them from getting tossed around. If you’re into making things last, you might want to check out my guide on Refrigerator Pickles, but these cooked ones need different handling.
Now for the crucial part: reheating them. Please, promise me you won’t even think about the microwave. The microwave heats the water molecules inside the breading, turning them instantly rubbery and sad. No, no, no! We need dry heat to suck that residual moisture out and bring back the crunch.
The toaster oven or, even better, the regular oven works a charm. Spread your leftover fried pickles in a single layer on a wire rack set over a baking sheet—the rack is vital for air circulation underneath! Pop them into a preheated 350°F (175°C) oven for about 5 to 7 minutes. Watch them closely, but that short blast of dry heat will crisp them right back up. They won’t be *quite* as spectacular as fresh-out-the-fryer hot, but they’ll be delightfully crunchy and ready for round two!
Frequently Asked Questions About Homemade Fried Pickles
I always get the same questions when people try this recipe for the first time, especially about swapping out ingredients or troubleshooting that satisfying crunch. It makes sense because getting that perfect Tangy Fried Snack quality every time takes a little know-how! Don’t worry, I’ve answered the most common things I hear. If you happen to have questions about super fast meals after snacking, I put together some great ideas for quick and easy breakfasts for the morning after!
Can I use pickle spears instead of chips for my Fried Pickles?
Absolutely, you can use spears! In fact, some people prefer the spear shape—it gives you a bigger, satisfying bite. The main thing you need to watch for is the cooking time. Chips are thin, so they cook really fast, maybe those 2 minutes are all they need. Spears are thicker, which means they need a bit more time submerged to make sure the pickle itself heats up nicely inside all that lovely crunchy coating. I’d bump your frying time up to about 3 or maybe even 4 minutes, just keep an eye on that gorgeous golden-brown color!
What is the secret to making the best Fried Pickle Batter?
If I had to boil down the secret to the absolute best texture, it comes down to that two-part punch in the breading station. It’s not just about one thing, but how they work together! First, you need that egg wash because it’s the sticky glue—it’s the binder that makes everything stick. If your egg wash is too thin, the coating falls off during the fry. Second, and this is what delivers the crunch, you need the panko breadcrumbs. Remember, panko are airy and flaky, and they crisp up like tiny shards of deliciousness instead of becoming dense and heavy like regular breadcrumbs would. That combination is what gives you that perfect crunch you’re looking for!
Estimated Nutritional Data for Fried Pickles
I always include this part because I know so many of us care about what we’re putting into our bodies, even when we are enjoying something deep-fried and delicious! This data is based on making the recipe exactly as written, which means deep-frying the pickles and having a serving with a bit of that glorious homemade ranch dip.
Remember, these numbers are just estimates, kind of like how my spice measurements are always “a little bit more than that.” The exact brand of pickles, how much oil they absorb during frying, or if you decide to skip the ranch entirely will seriously change the final count. If you use the air fryer method I shared earlier, you’ll see the fat numbers drop significantly! For more ideas on keeping things balanced, sometimes I look at my list for healthy lunch ideas to balance out the indulgence!
Here’s a breakdown per serving (which is about a quarter of the total recipe):
- Calories: Approximately 350
- Fat: Around 25g (Be mindful of that deep fry!)
- Saturated Fat: About 5g
- Carbohydrates: About 25g
- Protein: About 6g
- Sodium: This is higher, around 850mg, because of the pickles and the salt in the breading.
No matter how you count it, these Fried Pickles are a fantastic, indulgent appetizer, best enjoyed in moderation alongside good company!
PrintUltimate Crispy Fried Pickles with Homemade Ranch Dip
Make restaurant-quality crispy fried pickles at home. This easy recipe delivers a perfectly crunchy, tangy snack ideal for game day or parties, served with a simple homemade ranch dipping sauce.
- Prep Time: 15 min
- Cook Time: 10 min
- Total Time: 25 min
- Yield: 4 servings 1x
- Category: Appetizer
- Method: Deep Frying
- Cuisine: American
- Diet: Vegetarian
Ingredients
- 1 jar (16 ounces) dill pickle chips or spears, drained well
- 1 cup all-purpose flour
- 1 teaspoon salt
- 1 teaspoon black pepper
- 1 teaspoon garlic powder
- 1/2 teaspoon paprika
- 1/4 teaspoon cayenne pepper (optional, for heat)
- 2 large eggs
- 1/2 cup milk
- 1 cup panko breadcrumbs (for extra crispiness)
- Vegetable oil, for deep frying
- For the Ranch Dip: 1/2 cup mayonnaise, 1/4 cup sour cream, 2 tablespoons buttermilk, 1 teaspoon dried parsley, 1/2 teaspoon dried dill, 1/4 teaspoon onion powder, 1/4 teaspoon garlic powder, pinch of salt and pepper
Instructions
- Prepare the pickles: Place the drained pickle chips or spears between several layers of paper towels. Press gently to remove as much moisture as possible. Excess moisture prevents crispiness.
- Set up the dredging station: In one shallow bowl, whisk together the flour, salt, pepper, garlic powder, paprika, and cayenne pepper. In a second bowl, whisk the eggs and milk until combined. In a third shallow bowl, place the panko breadcrumbs.
- Dredge the pickles: Working in small batches, dip each pickle piece first into the flour mixture, shaking off any excess. Next, dip it into the egg wash, letting the extra drip off. Finally, press the pickle firmly into the panko breadcrumbs, coating completely. Place the breaded pickles on a clean plate or wire rack.
- Prepare the oil: Pour about 2 inches of vegetable oil into a heavy-bottomed pot or deep fryer. Heat the oil to 375°F (190°C). Use a thermometer to monitor the temperature; maintaining the correct heat is key for crispy results.
- Fry the pickles: Carefully lower the breaded pickles into the hot oil, ensuring you do not overcrowd the pot. Fry for 2 to 3 minutes, turning once, until they are deep golden brown and crunchy.
- Drain: Remove the fried pickles with a slotted spoon and place them immediately on a wire rack set over a baking sheet or on a plate lined with paper towels to drain excess oil. Sprinkle lightly with extra salt while hot.
- Make the ranch dip: While the pickles are frying or draining, combine all ranch dip ingredients in a small bowl. Stir well until smooth.
- Serve immediately: Serve your hot, crispy fried pickles with the homemade ranch dipping sauce.
Notes
- For the best crunch, ensure your oil temperature stays consistent. If the oil is too cool, the batter absorbs too much oil and becomes soggy.
- If you prefer an air fryer method, spray the breaded pickles lightly with cooking spray and air fry at 400°F (200°C) for 8-10 minutes, flipping halfway, until golden brown.
- Use dill pickle spears or chips, but always pat them very dry before breading.
Nutrition
- Serving Size: 1 serving (approx. 1/4 of recipe)
- Calories: 350
- Sugar: 3
- Sodium: 850
- Fat: 25
- Saturated Fat: 5
- Unsaturated Fat: 20
- Trans Fat: 0
- Carbohydrates: 25
- Fiber: 1
- Protein: 6
- Cholesterol: 80