
If you’ve ever baked a loaf of **whole wheat bread** only to have it turn out looking and feeling more like a dense brick than a fluffy dream, trust me, I know the struggle! That’s usually the trade-off we make for a healthier loaf, right? Wrong! After years working in professional test kitchens and leaning on my nutrition background, I found the exact trifecta of ingredients and timing needed to banish the dreaded density for good. This recipe is my gold standard for homemade whole grain goodness—it’s reliable, super straightforward, and consistently delivers the softest, fluffiest loaf you’ll ever pull out of your home oven. You deserve bread that’s hearty *and* light, and I promise this recipe gives you both. Let’s ditch the heavy loaves and bake some magic!
- Why This Soft and Fluffy Whole Wheat Bread Recipe Works
- Gathering Ingredients for Perfect Whole Wheat Bread
- Step-by-Step Instructions for Easy Whole Wheat Baking
- Baking Your Bakery Style Wheat Bread to Perfection
- Tips for Success: Mastering Homemade Whole Wheat Bread
- Storage and Reheating Instructions for Your Whole Wheat Bread
- Serving Suggestions for Hearty Yet Soft Bread
- Frequently Asked Questions About Making Whole Wheat Bread
- Nutritional Estimate for This Wholesome Bread Recipe
Why This Soft and Fluffy Whole Wheat Bread Recipe Works
If you’re coming here looking for a **Soft Wheat Bread Recipe** that refuses to be heavy, you’ve landed in the right spot! The number one question I get is how to avoid the density trap. Whole wheat flour is fantastic for fiber, but it has those rougher bran pieces that can cut the gluten strands when you knead. That’s why we need a few strategic additions—these are my best **Never Dense Bread Tips** I learned perfecting recipes in the test kitchen. You can check out how I apply similar principles to help doughs rise in my homemade English muffins recipe!
I promise, knowing *why* a recipe works is half the battle won. We’re focusing on structure and hydration here so you get that dreamy, bakery-worthy crumb.
The Role of Vital Wheat Gluten in Your Whole Wheat Bread
Listen, this is the real MVP, the game-changer! Vital wheat gluten is pure protein, and it’s my top **Bread Making Secret** for whole wheat. Since the natural gluten in whole wheat is weak, we just give it a helping hand. By adding just a tablespoon, we provide the dough with extra scaffolding so it can trap those fermentation gases and rise high and light. It’s what gives you that lofty slice rather than a sad, flat disk.
Choosing the Right Flour for Fluffy Whole Grain Loaf
You have a choice here, and it matters for the final look! I highly recommend starting with white whole wheat flour. It comes from a lighter wheat berry, so it gives you that beautiful golden color and much softer texture we are aiming for in this **Fluffy Whole Grain Loaf**. If you’re nervous about using 100% whole grain on your first go, don’t panic! I always note that you can swap out a quarter cup for regular all-purpose flour. That little bit of white flour acts like a pillow for the whole wheat, guaranteeing success.
Ready to see the full ingredient list? We keep it simple!
Gathering Ingredients for Perfect Whole Wheat Bread
Okay, let’s get our supplies ready! Since this recipe is designed to be easy, we aren’t using a ton of fussy stuff, but the few ingredients we use are key to getting that amazing soft texture. Remember, every measurement counts when you’re working with whole grains!
You’ll need:
- 1 cup warm water (make sure it’s between 105-115°F—if it burns your wrist, it’s too hot for the yeast!).
- 2 teaspoons instant yeast.
- 1/4 cup honey (this sweet stuff keeps everything moist!).
- 1 room temperature large egg.
- 2 tablespoons melted unsalted butter or a nice, neutral oil.
- 1 teaspoon salt.
- 1 tablespoon vital wheat gluten (our secret weapon!).
- 3 cups white whole wheat flour, plus a little extra just for dusting later.
- 1/4 cup all-purpose flour (this is optional, but I really like it for making things extra pillowy).
That’s it! If you’re looking for the perfect spread to go with this fresh loaf, you absolutely have to try my easy creamy garlic aioli recipe. Truly divine!
Step-by-Step Instructions for Easy Whole Wheat Baking
Don’t let the word ‘yeast’ scare you off! This is truly an easy whole wheat baking process, even if you’ve never touched bread dough before. We’re keeping things simple and guided so you end up with that perfect, sliceable loaf every time. Follow these steps closely, and you’ll have your very first beginner bread recipe success story!
Activating Yeast and Mixing the Whole Wheat Bread Dough
First things first, we wake up the yeast! Pour your warm water into a big bowl. It must be between 105°F and 115°F—seriously, use a thermometer if you can, because water that’s too hot kills the yeast, and water that’s too cool just makes it lazy. Sprinkle the yeast on top and give it five minutes until it gets happy and foamy. Once it’s bubbling, whisk in the honey, the room-temperature egg, melted butter, salt, and that crucial vital wheat gluten. Then, slowly start adding the white whole wheat flour, mixing it until it gets shaggy. If you decided to use that optional all-purpose flour, toss that in now too.
Kneading and the First Rise for Your Fluffy Whole Grain Loaf
Time to get your hands dirty! Turn that sticky mess out onto a lightly floured surface. Now, you have to knead it for five to seven minutes. I know, whole wheat dough feels different—it often feels slightly tacky or stickier than white flour dough, but fight the urge to add a ton of flour! That slight stickiness is what contributes to the soft texture later on. Once it’s smooth and elastic, lightly oil a clean bowl and tuck the dough in there, covered. Let it sit in a warm spot for about an hour and a half, or until it’s doubled. That slow first rise is key to preventing density.
Shaping and Second Proofing for the Whole Wheat Loaf for Sandwiches
Gently punch the air out of your dough—just a quick press will do! Now, shape it into a tight log and nestle it right into your greased 9×5 inch loaf pan. Cover it loosely again and let it rise a second time for about 30 to 45 minutes. You know it’s ready when it has crowned about an inch over the top edge of the pan. Pro tip while you wait: use the last 15 minutes of this rise to preheat your oven to 375°F. Getting that heat steady is important for this **Whole Wheat Loaf for Sandwiches** to bake evenly.
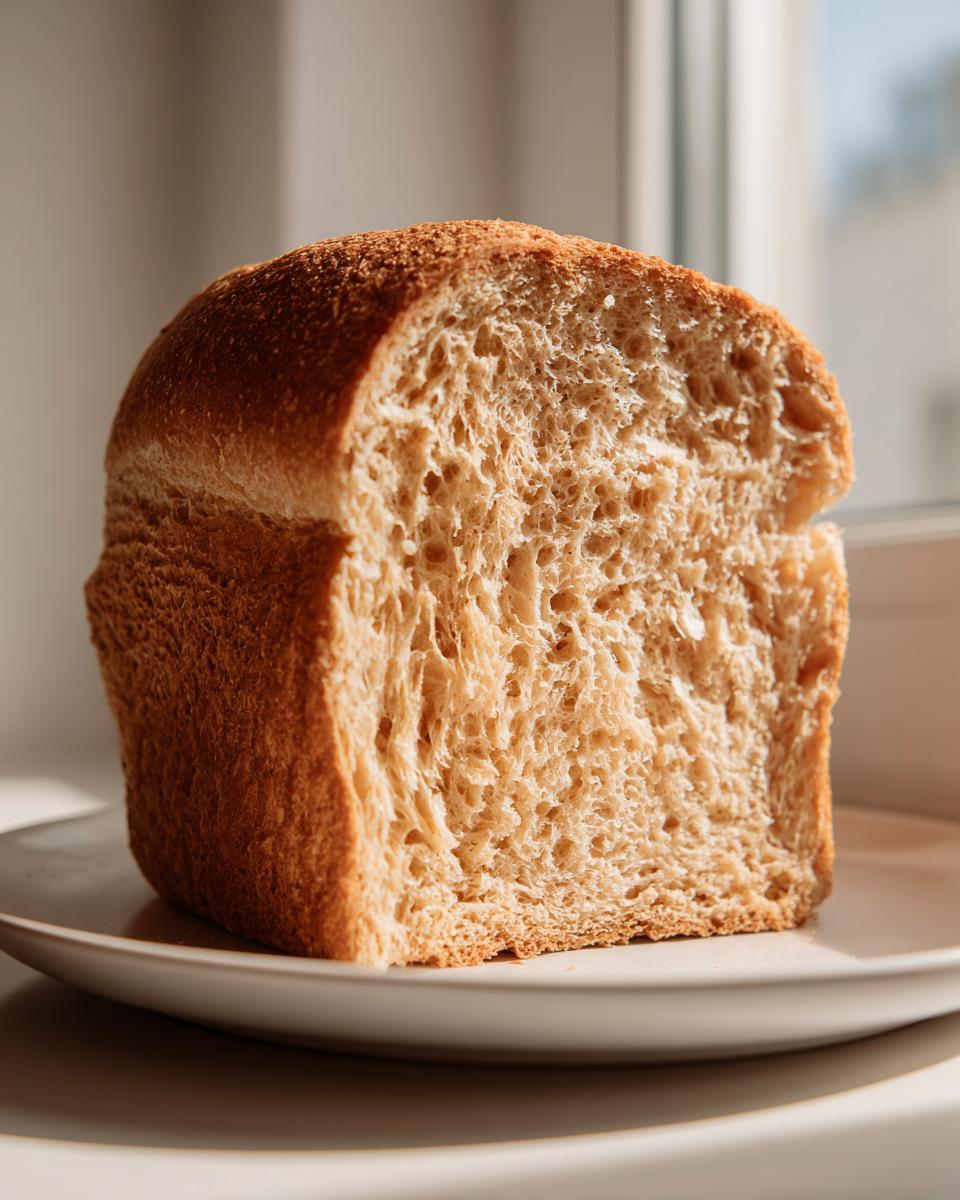
Baking Your Bakery Style Wheat Bread to Perfection
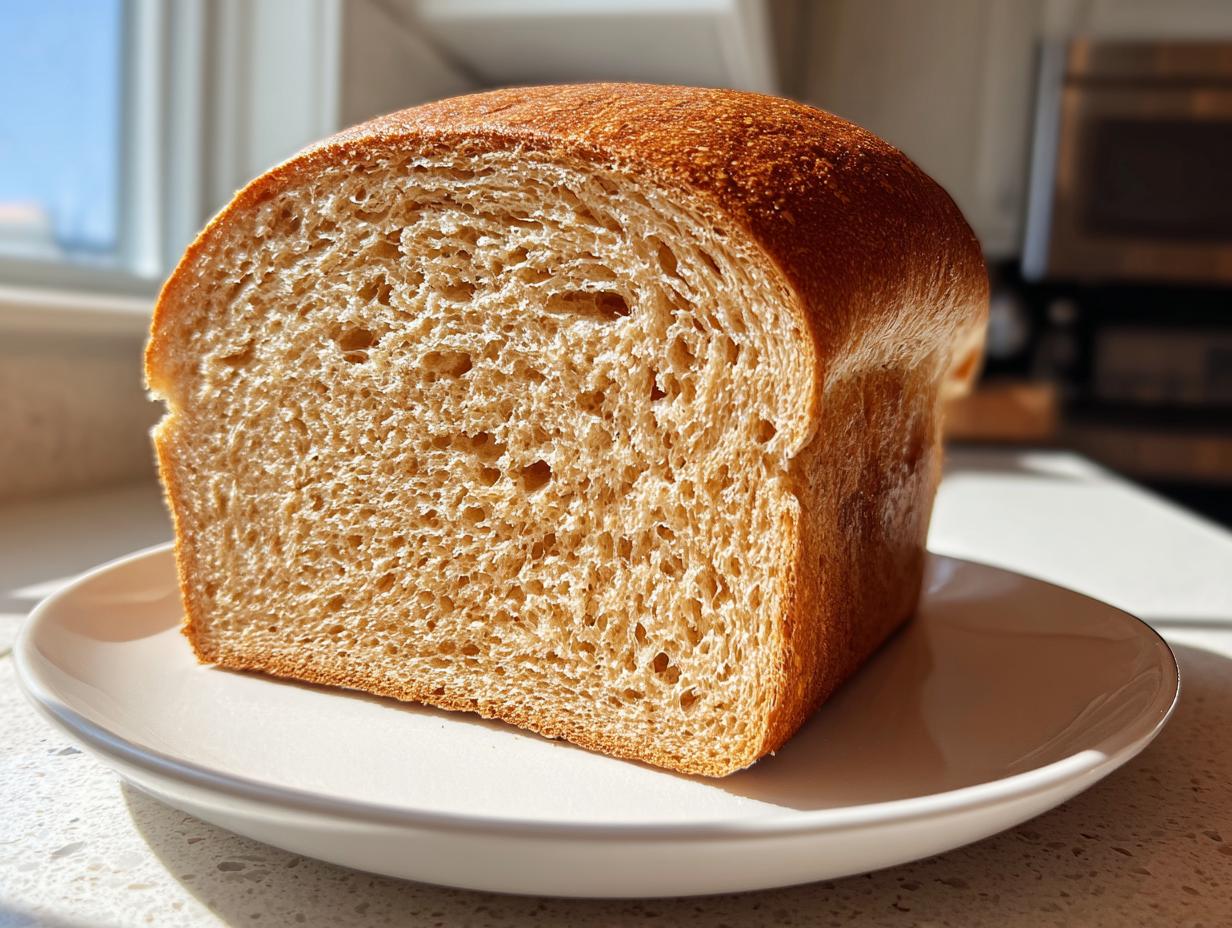
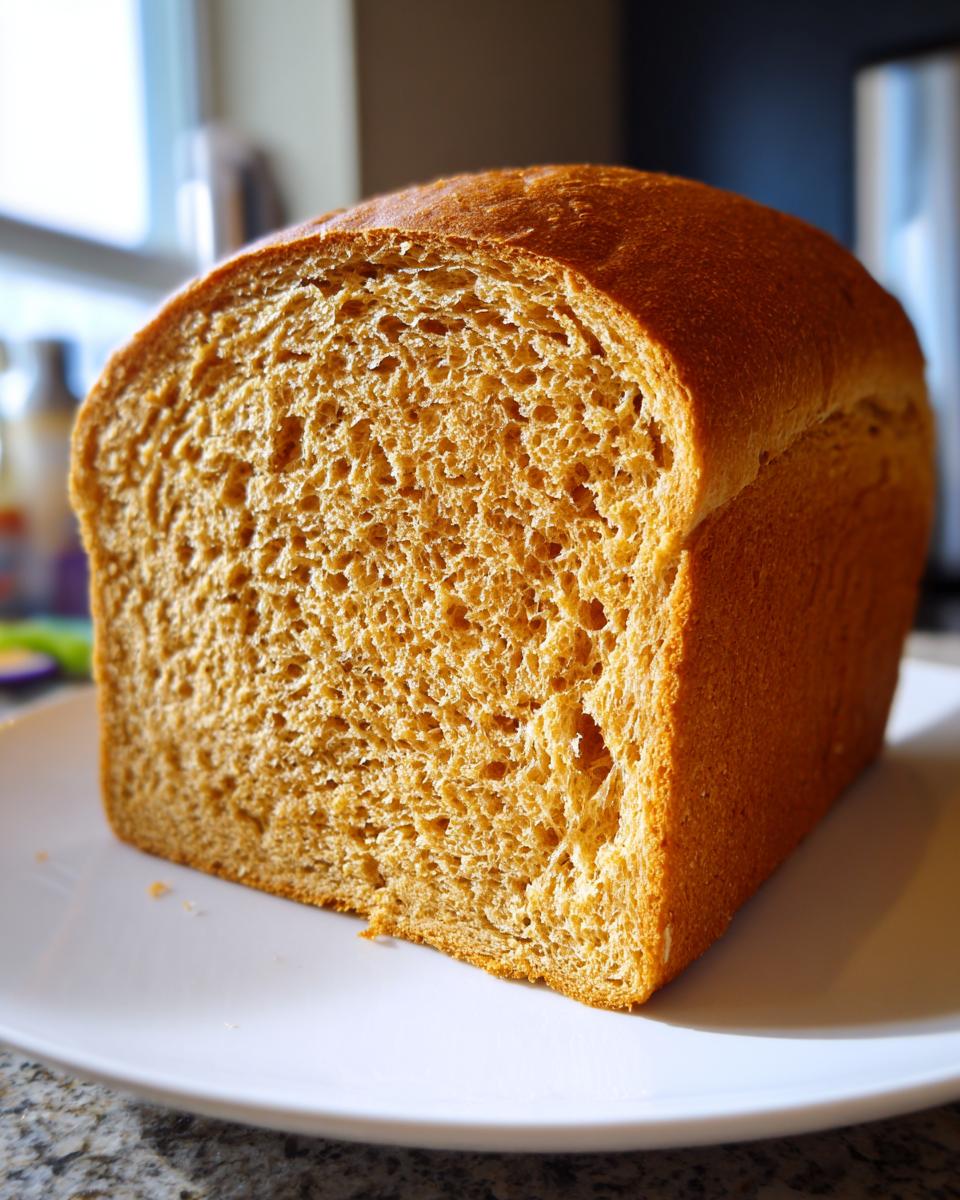
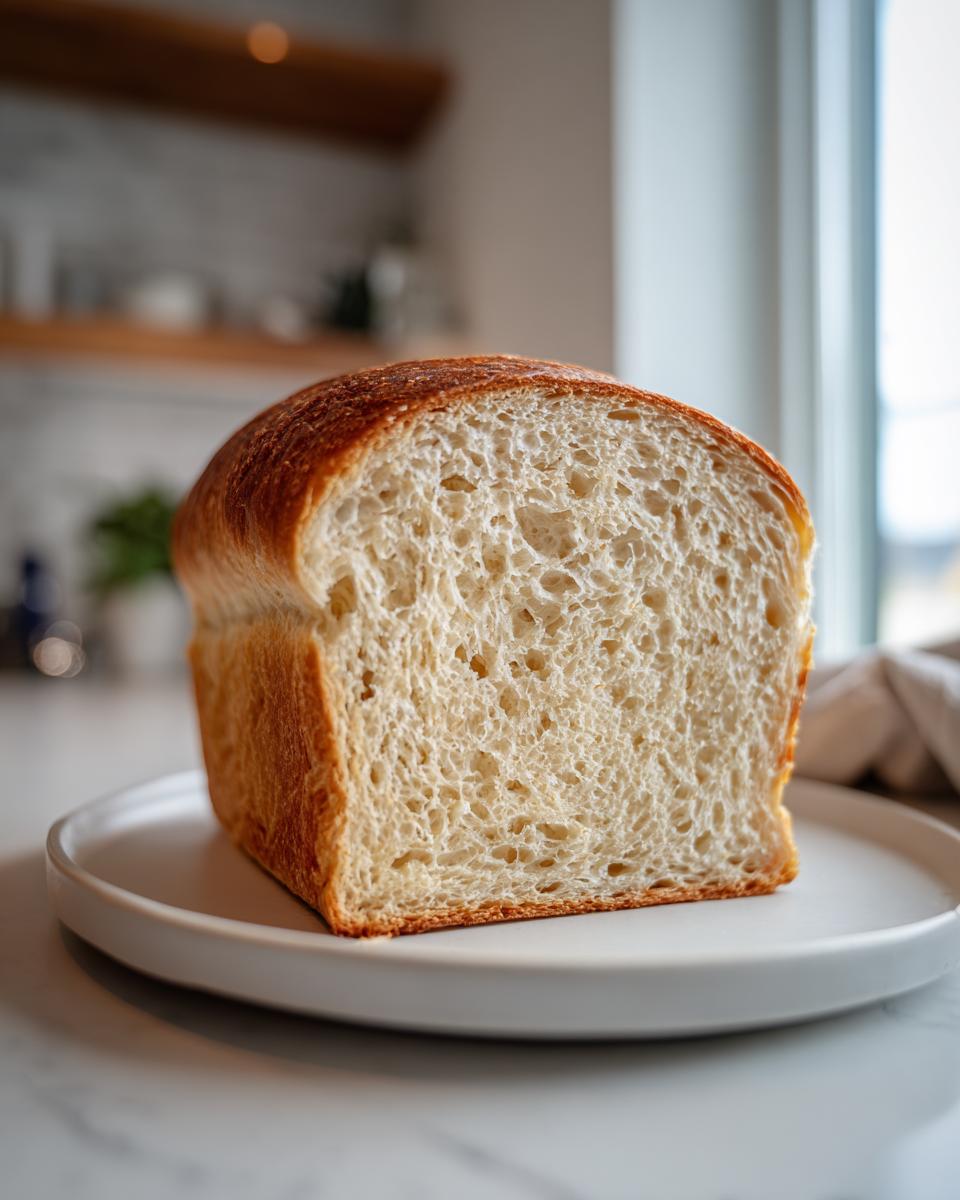
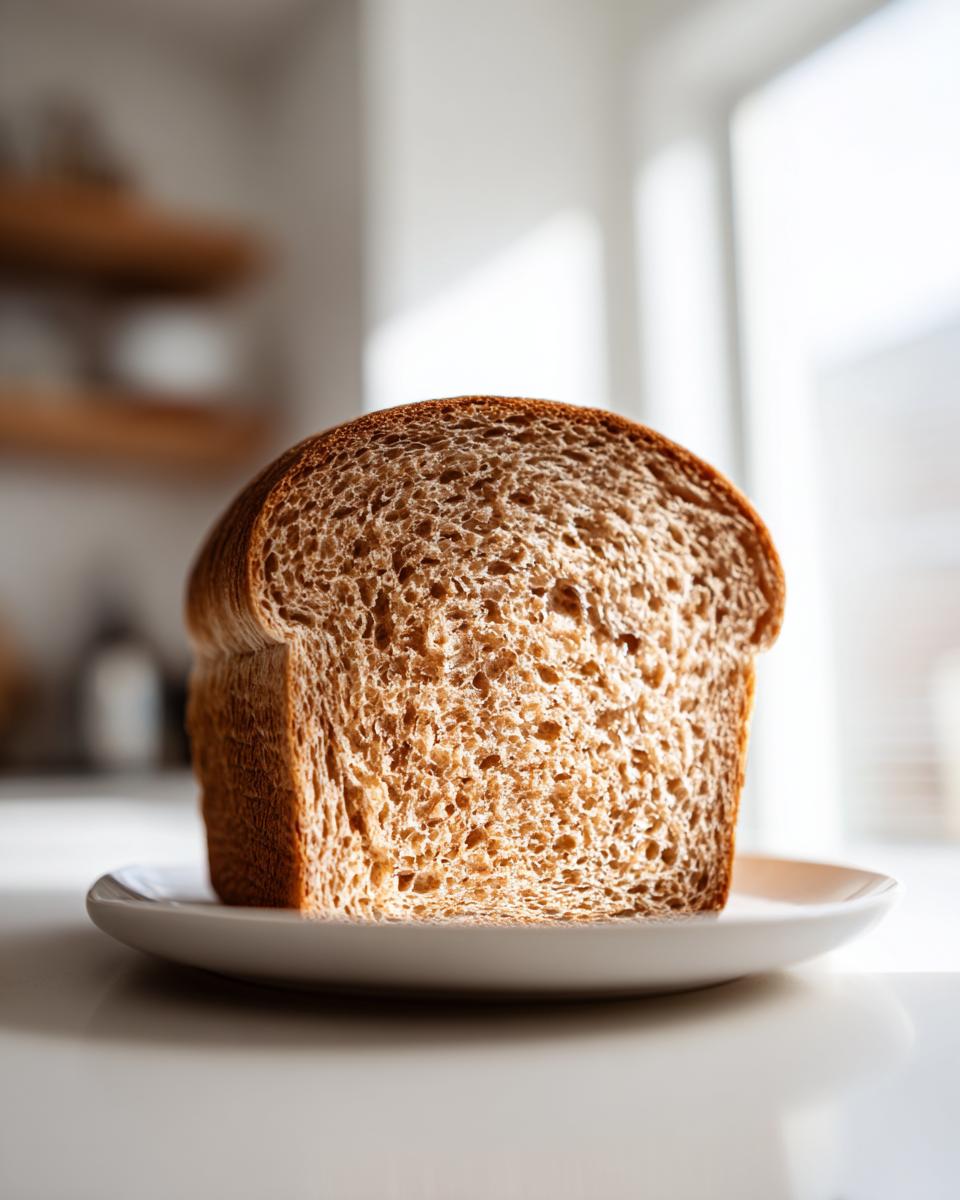
We’ve done the hard work with the kneading and the rising, so let’s get this loaf golden! Pop that pan into your preheated 375°F oven. It usually takes about 30 to 35 minutes. You want the top to look beautifully brown, but the real test is when you check the internal temperature—it should hit 190°F. If you don’t have a thermometer, just tap the top; it should sound hollow!
Now, here’s a baking step I learned the hard way: as soon as it comes out, get it *out* of the pan immediately and set it on a wire rack. Seriously, resist the urge to slice into it! If you cut into this **Bakery Style Wheat Bread** while it’s hot, all that beautifully trapped moisture turns into steam and settles back into the crumb, making it gummy. Patience pays off; let it cool completely while enjoying the amazing smell filling your kitchen. It’s the final step to achieving that ultra-soft crumb you’re dreaming of. If you’ve mastered this, you’re ready to tackle puffy delights like my Yorkshire pudding recipe!
Tips for Success: Mastering Homemade Whole Wheat Bread
I want you to feel completely confident walking into this bake, so I wanted to pull out the most important takeaways from the recipe notes. Think of these as my quality control checks from the test kitchen. If you follow these little bits of advice, you seriously cannot fail to get that light, **Hearty Yet Soft Bread** we’re aiming for.
First, let’s talk about the flour again. Remember how I stressed using white whole wheat flour? That’s not just for color! If you’re going for true softness, sticking to that lighter grain makes a huge difference compared to the traditional, heartier red wheat. If you absolutely must use 100% red whole wheat, make sure you add the optional all-purpose flour just to give the structure a little boost.
My biggest, non-negotiable tip for any **From Scratch Bread** is temperature. Make absolutely sure your water and your egg are at room temperature! Cold ingredients shock the yeast and they won’t activate properly, which leads straight to a dense outcome. Room temperature ingredients ensure a lively yeast activity and a smoother incorporation into the dough.
And finally, the second most important thing after the gluten? Cooling! Seriously, let it cool *completely*. If you slice it too soon, it collapses in on itself, no matter how perfectly you mixed it. If you need a super satisfying spread for that first warm slice—though I advise waiting!—my easy creamy sushi bake recipe uses a beautiful homemade sauce that would pair well with the nuttiness of the wheat.
Storage and Reheating Instructions for Your Whole Wheat Bread
Now that you’ve baked this incredible, soft loaf, we need to keep it that way! The enemy of soft bread is usually the refrigerator; the cold dries it out super fast, turning that fluffiness into—you guessed it—a mild brick. For best results, keep your **Homemade Whole Wheat Bread** sealed tight in an airtight container at room temperature for up to three days. If you’re not going to eat it all that quickly, my advice is to slice it first and freeze what you won’t eat in the next two days. It freezes beautifully!
When you’re ready for toast or a sandwich, a quick zap in the microwave for 10 seconds brings back that fresh-from-the-oven softness. It’s just as good as my moist chocolate banana bread when reheated properly!
Serving Suggestions for Hearty Yet Soft Bread
This loaf is truly versatile, which is why mastering that soft texture is so important! Since we aimed for a sliceable, sturdy loaf—perfect for your daily needs—it shines in pretty much any scenario.
For the ultimate savory experience, this **Hearty Yet Soft Bread** makes the best foundation for a lunch sandwich. Because it holds its structure, you can load it up with veggies, deli slices, or cheese without it tearing or getting soggy right away. You have to try it with some homemade topping; my homemade mayonnaise recipe gives your sandwich the richest flavor boost!
On the sweet side, don’t even try to resist slicing a piece while it’s slightly warm (even though I told you to wait!). A thick slice, lightly toasted, smeared with good quality butter and a drizzle of extra honey? It’s pure comfort food. That subtle sweetness from the honey in the dough really comes alive when toasted!
Frequently Asked Questions About Making Whole Wheat Bread
It’s totally natural to have questions when you’re switching to baking with whole grains! I get asked the same things all the time, especially when people are worried about that heaviness we talked about. Use these answers to troubleshoot or just build your confidence for your next batch of **wholesome bread recipe**!
Can I make this a No Knead Whole Wheat recipe?
That’s a great question for **Easy Whole Wheat Baking**! While I did give you an easy kneading time (5-7 minutes), this recipe is structured around that little bit of mixing to help the vital wheat gluten get activated and start building strength. You *can* try a no-knead method, but be warned: you’ll end up with a much more rustic, dense loaf that looks more like a classic artisan bread than the soft **whole wheat sandwich bread** you’re aiming for here. For that fluffy result, the 5-minute knead is worth it!
Why is my homemade whole wheat bread heavy?
Ugh, the heavy loaf! It almost always comes down to one of three things, or maybe a combination. First, your yeast might not have been happy—check that water temp next time! Second, if you skipped the vital wheat gluten, the structure just isn’t there to support the weight of the whole grains, leading to a dense outcome. And the most common mistake? Slicing it before it’s fully cooled. If you cut it warm, you squash all those beautiful air pockets we worked so hard to create. Make sure it’s room temp before you slice!
Can I use all 100 Percent Whole Wheat flour?
Absolutely, yes! You can definitely go **100 Percent Whole Wheat**! That’s what I often use myself, especially when using white whole wheat flour. However, if you’re using the regular red whole wheat flour, I really push you to include that optional 1/4 cup of all-purpose flour, or certainly make sure you keep that vital wheat gluten in the recipe. Those extra steps help compensate for the heavier bran in the red wheat so you don’t lose that lovely softness we’re chasing for your **Healthy Sandwich Bread** rotation. If you need quick dinner ideas that pair well with hearty bread, check out my collection of easy weeknight dinners!
Nutritional Estimate for This Wholesome Bread Recipe
Now, because I spent time studying nutrition and I always want you to know what you’re feeding your family, here’s a little breakdown for this loaf. Remember, this is just an estimate because I know we all use slightly different brands of honey and butter, but it gives you a great general idea of what’s going into your delicious, **wholesome bread recipe**.
These numbers are based on 14 standard slices, so if you cut thicker slices for your big sandwich needs, adjust accordingly!
- Serving Size: 1 slice
- Calories: 135
- Sugar: 4g
- Sodium: 180mg
- Fat: 3g (with only 1.5g being saturated fat—that’s pretty good!)
- Carbohydrates: 25g
- Fiber: 3g
- Protein: 6g
The best part? You’re getting 3 grams of fiber per slice, which is fantastic for a bread made entirely from scratch. It’s proof that healthy bread doesn’t need to taste heavy! If you’re looking for more ideas on how to build a healthy plate around this bread, check out my favorite healthy lunch ideas for inspiration. Enjoy knowing you’re eating something truly nourishing!
PrintSoft and Fluffy 100% Whole Wheat Sandwich Bread

You can achieve a soft, non-dense loaf with this straightforward recipe for 100% whole wheat bread. This recipe uses honey and vital wheat gluten to give you a fluffy, bakery-style texture perfect for your daily sandwiches and toast.
- Prep Time: 20 min
- Cook Time: 35 min
- Total Time: 2 hours 50 min
- Yield: 1 loaf (about 14 slices) 1x
- Category: Baking
- Method: Mixing and Baking
- Cuisine: American
- Diet: Vegetarian
Ingredients
- 1 cup warm water (105-115°F)
- 2 teaspoons instant yeast
- 1/4 cup honey
- 1 large egg, room temperature
- 2 tablespoons melted unsalted butter or oil
- 1 teaspoon salt
- 1 tablespoon vital wheat gluten
- 3 cups white whole wheat flour, plus more for dusting
- 1/4 cup all-purpose flour (optional, for extra softness)
Instructions
- In a large bowl, combine the warm water and instant yeast. Let it sit for 5 minutes until foamy.
- Add the honey, egg, melted butter, salt, and vital wheat gluten to the yeast mixture. Whisk until combined.
- Gradually mix in the white whole wheat flour, one cup at a time, until a shaggy dough forms. If you are using the optional all-purpose flour, add it now.
- Turn the dough out onto a lightly floured surface. Knead for 5 to 7 minutes until the dough is smooth and elastic. The dough will feel slightly sticky; this is normal for whole wheat.
- Lightly grease a large bowl with oil. Place the dough in the bowl, turning to coat. Cover the bowl with plastic wrap or a clean kitchen towel.
- Let the dough rise in a warm spot for 1 to 1.5 hours, or until it has doubled in size. This slow rise helps prevent density.
- Gently punch down the risen dough. Shape it into a uniform log and place it in a greased 9×5 inch loaf pan.
- Cover the loaf pan loosely and let it rise again for 30 to 45 minutes, or until the dough has crested about 1 inch above the rim of the pan.
- Preheat your oven to 375°F (190°C) during the last 15 minutes of the second rise.
- Bake for 30 to 35 minutes, or until the top is golden brown and the internal temperature reaches 190°F (88°C).
- Remove the bread from the pan immediately and let it cool completely on a wire rack before slicing. This step is crucial for a non-dense crumb.
Notes
- Using white whole wheat flour instead of traditional red whole wheat flour contributes significantly to a lighter color and softer texture.
- Vital wheat gluten is the secret ingredient here; it adds the necessary structure that whole wheat flour sometimes lacks, preventing a brick-like loaf.
- For the softest possible loaf, ensure all your wet ingredients (water, egg) are at room temperature before mixing.
- If you prefer a slightly less hearty loaf for sandwiches, substitute 1/4 cup of the whole wheat flour with all-purpose flour.
Nutrition
- Serving Size: 1 slice
- Calories: 135
- Sugar: 4
- Sodium: 180
- Fat: 3
- Saturated Fat: 1.5
- Unsaturated Fat: 1.5
- Trans Fat: 0
- Carbohydrates: 25
- Fiber: 3
- Protein: 6
- Cholesterol: 20