
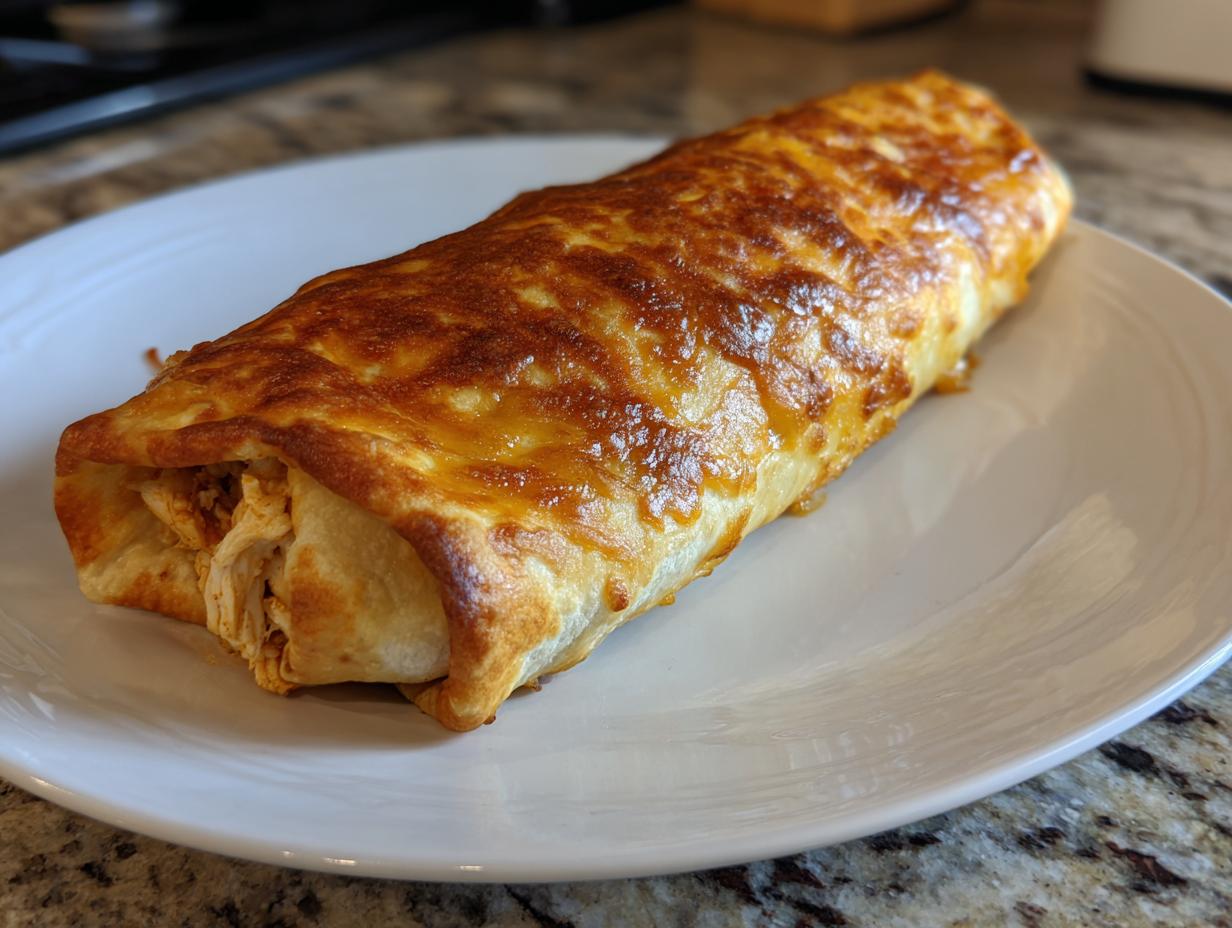
Oh, you know that feeling? When you’re absolutely craving that rich, comforting taste of a classic Tex-Mex dinner, but the thought of deep-frying fills you with dread? I get it! That’s why I had to crack the code on making the best Baked Chicken Chimichangas that still deliver that satisfying crunch. When I was developing recipes—coming from a background where I studied nutrition but also worked hands-on in professional test kitchens—I knew we didn’t have to sacrifice texture for health. The secret isn’t frying; it’s all about technique to get those Crispy Baked Tortillas. Trust me, these are so simple, they’ll be added to your rotation for the quickest easy weeknight dinners list immediately!
- Why You Will Make These Baked Chicken Chimichangas Every Week
- Essential Ingredients for Flavorful Baked Chicken Chimichangas
- The Oven Fried Chimichangas Technique for Crispy Baked Chicken Chimichangas
- Step-by-Step Instructions for Perfect Baked Chicken Chimichangas
- Tips for Success with Your Crispy Baked Tortillas
- Making Ahead and Storing Your Baked Chicken Chimichangas
- Serving Suggestions for Guilt Free Mexican Food
- Frequently Asked Questions About Baked Chimichangas Recipe
- Nutritional Estimates for Your Healthy Chicken Dinners
Why You Will Make These Baked Chicken Chimichangas Every Week
I promise these oven-baked miracles are going straight into your regular rotation. They hit every sweet spot, ticking off all those boxes when you’re busy but still craving something bold. You get the flavor you want without the grease you don’t!
- They are lightning fast—seriously, under 45 minutes total for a family meal!
- You get that coveted crunch without dirtying a single pot of oil.
- This recipe uses your leftover shredded chicken, turning simple ingredients into a hearty, guilt-free Mexican comfort food makeover.
Essential Ingredients for Flavorful Baked Chicken Chimichangas
When we skip the deep fryer, we have to make sure the inside is bursting with flavor, right? That’s why the filling is everything! I’m not fooling around when it comes to seasoning here. If you’re short on time—and who isn’t?—using pre-cooked rotisserie chicken is my top secret to making these the fastest easy-creamy-garlic-aioli-recipe style dinners!
Main Components for the Chicken Chimichangas Filling
You need about two cups of perfectly cooked and shredded chicken to start. Then, for that rich, slightly tangy filling that holds everything together beautifully, aim for:
- 1/2 cup cream cheese, softened until almost spreadable
- 1/2 cup shredded cheddar cheese (use the good stuff!)
- 1/4 cup sour cream, for that smooth texture
- Spices are key: 1 teaspoon chili powder, 1/2 teaspoon cumin, and a pinch each of garlic powder and onion powder.
- Don’t forget salt and pepper to taste!
For the outside, you’ll use 8 large flour tortillas—the burrito size—and whatever you use to get them golden, whether that’s a light spray of cooking oil or a gentle brush of melted butter.
The Oven Fried Chimichangas Technique for Crispy Baked Chicken Chimichangas
Listen up, because this is where we prove that you don’t need a vat of oil to get that amazing, crackly shell! If you want true Baked Chicken Chimichangas, you need to master the Oven Fried Chimichangas Technique. It all starts before anything hits the tray: Preheat that oven to 400°F (200°C). A ripping hot oven is crucial for achieving that nice puffy texture right away.
Once you’ve rolled those tight little beauties, don’t skimp on the exterior coating. This golden layer is what mimics the deep-fry. You can use cooking spray, which is super fast, but if you want a richer color and that extra oomph of crunch, gently brushing them with melted butter works like magic. Just make sure the entire surface is coated. It sounds simple, but this step is the difference between a soft wrap and a genuinely crispy chimichanga shell. My notes for my light and puffy Yorkshire Puddings taught me that a hot start is everything with dough, and the same rule applies here!
Step-by-Step Instructions for Perfect Baked Chicken Chimichangas
Okay, now that we have that amazing, flavorful chicken mixture ready to go, let’s get these things rolled! I found that when I was first testing these Baked Chicken Chimichangas, timing was everything. You want the filling cold and the tortillas warm. It makes rolling so much easier! If you need a great recipe for a main dish involving chicken, check out my thoughts on easy baked chicken parmesan, but for right now, focus only on getting these wraps sealed up tight!
Preparing the Creamy Chicken Filling
Grab your medium bowl and toss in that shredded chicken, that softened cream cheese, the cheddar, and the sour cream. Now sprinkle in all your spices—chili powder, cumin, garlic, onion powder—and a little salt and pepper. You need to mix this up thoroughly. I mean it! Keep stirring until everything is evenly combined and creamy. You absolutely do not want pockets of dry chicken or blobs of plain cream cheese left over!
Rolling and Preparing Baked Chicken Chimichangas for the Oven
Before you even touch the filling, take those big tortillas and warm them up just a hair—15 seconds in the microwave is perfect. This makes them super pliable so they don’t split when you’re tucking everything in. Put about a third of a cup of filling towards one edge. Fold the sides in first, nice and tight over that filling. Then, roll the whole thing away from you until you have a snug little cylinder. This is important: place every rolled chimichanga seam-side down on your greased baking sheet. Then, grab your brush or spray and coat the tops completely! That light coating is what guarantees that perfect crunch.

Tips for Success with Your Crispy Baked Tortillas
You asked for crispy, and I’m going to deliver! Getting those Crispy Baked Tortillas to hold up and turn perfectly golden in the oven is easier than you think, but it does require focusing on a couple of specific details. Don’t cheat on the preheating—that 400°F oven is your best friend here for quick structure!
If you want maximum crunch, forget the spray just once and whip out the melted butter. Brushing them lightly ensures every single surface area is covered and crisps beautifully, much like how I get my buttermilk biscuits nice and flaky on the outside. Another big tip for speed, especially if you’re using these for Weeknight Chicken Meals, is using that rotisserie chicken! It cuts your prep time down to almost nothing, leaving you more time to set the table.
Also, remember they need flipping! Seriously, don’t just set them and forget them for 20 minutes. Flipping them halfway through ensures even browning on both sides so you get that satisfying crunch all the way around. That’s the key to treating them like “oven fried” but keeping them lighter!
Making Ahead and Storing Your Baked Chicken Chimichangas
I know sometimes even 35 minutes feels like too much when the afternoon’s running away from you! The good news is that these make-ahead friends are perfect for busy families, supporting my goal of filling your week with fantastic make-ahead breakfast and dinner inspiration. You can absolutely assemble these chimichangas completely, seam-side down on the tray, then cover them tightly and pop them in the fridge. They are good for up to 24 hours!
Now, here’s the important part if you cook them straight from the cold state: you have to account for the temperature difference. If you skip the warming step and cook them chilled, you’ll need to add a little extra time in that 400°F oven—think maybe 5 to 8 extra minutes until they are golden. Just check that internal temperature to make sure everything is heated through properly. This planning ahead makes them fantastic for spontaneous Weeknight Chicken Meals!
Serving Suggestions for Guilt Free Mexican Food
We’ve made this meal lighter, so let’s keep the sides right there with it! We aren’t interested in loading up on heavy, greasy toppings here. The star of the show is the crispy, savory filling, so we want toppings that add freshness and zip. Think bright, bold flavors that complement the seasoned chicken.
Instead of just grabbing the tub of full-fat sour cream, try swapping that out for plain Greek yogurt. It gives you the same creamy texture for your dip, but with way better nutritional stats. You can find some awesome fresh ideas for pairing these up in my guide to healthy lunch ideas, but for these chimichangas, you can’t go wrong with a big bowl of fresh, chunky pico de gallo or some cool, homemade guacamole for dipping. A little bit of that makes for fantastic Guilt Free Mexican Food!
Frequently Asked Questions About Baked Chimichangas Recipe
It’s funny how many questions pop up once you stop deep-frying things! I love sorting through these because it means you are getting ready to make a fantastic, healthier dinner. Don’t worry if you have doubts about the crisp factor; we’re covering all the little tricky bits here.
Can I use ground beef instead of chicken in these Baked Chicken Chimichangas?
Absolutely, you can switch things up! Ground beef works great, but you have to change your prep slightly. Since ground beef releases a lot of fat when it cooks, you need to brown your beef first on the stovetop until it’s completely cooked through. Make sure you drain off all that grease really well before you mix it into the cream cheese and seasoning. Too much grease in the filling, and your Baked Chimichangas Recipe might get soggy instead of crispy!
How do I make these Baked Chimichangas Recipe extra cheesy?
Oh, I’m a cheerleader for extra cheese! If you want your Baked Chicken Chimichangas to be mega-cheesy, do it in two stages. Use the amount listed in the filling, mix it well, and roll them up. BUT, before they go into that hot oven, sprinkle a little extra cheddar right on top of each rolled chimichanga. That top layer melts and gets bubbly and browned by the time they are ready. It’s totally worth the extra minute of prep time!
Are these truly like Chi-Chi’s Baked Chicken Chimichangas?
That’s the million-dollar question! When I developed the spice blend for this recipe, I was definitely aiming for that recognizable, bold Tex-Mex flavor profile that we all remember. While every kitchen has its own little nuance when it comes to seasoning (and I’m sure Chi-Chi’s had their secrets!), I made sure the ratio of cumin to chili powder gives you that classic, restaurant-quality taste you’re looking for in your Chicken Chimichangas Baked Not Fried. They are definitely inspired by that style, just made much lighter!
If you’re looking for more comfort food that hits the spot without weighing you down, maybe check out my low-stress recipe for classic comfort food chicken noodle soup next week!
Nutritional Estimates for Your Healthy Chicken Dinners
I always feel better when I know what’s fueling my family, even when we’re having comfort food! Since these Baked Chicken Chimichangas are a wonderfully lighter twist on the classic, I wanted to give you a ballpark idea of what you’re eating. Remember, this isn’t strict science; these numbers are just estimates based on the ingredients I listed, so they can change based on what kind of cheese or sour cream you might grab. Think of this as your starting guide for these delicious Healthy Chicken Dinners!
- Serving Size: 1 chimichanga
- Calories: 320
- Fat: 14g (6g saturated)
- Carbohydrates: 30g
- Protein: 19g
See? That protein count is fantastic, and keeping the sugar low means we aren’t crashing halfway through the evening. It’s proof that you can absolutely enjoy that restaurant experience right at home without any guilt about the fat or calories!
PrintThe Crispiest Oven-Baked Chicken Chimichangas (Easy Weeknight Tex-Mex)
You can make flavorful, crispy chicken chimichangas without deep frying. This easy, oven-baked recipe delivers that satisfying crunch and bold Tex-Mex flavor, making it a perfect, guilt-free choice for your weeknight dinner rotation.
- Prep Time: 15 min
- Cook Time: 20 min
- Total Time: 35 min
- Yield: 8 servings 1x
- Category: Dinner
- Method: Baking
- Cuisine: Tex-Mex
- Diet: Vegetarian
Ingredients
- 2 cups cooked, shredded chicken
- 1/2 cup cream cheese, softened
- 1/2 cup shredded cheddar cheese
- 1/4 cup sour cream
- 1 teaspoon chili powder
- 1/2 teaspoon cumin
- 1/4 teaspoon garlic powder
- 1/4 teaspoon onion powder
- Salt and pepper to taste
- 8 large flour tortillas (burrito size)
- Cooking spray or melted butter
- Optional toppings: Salsa, guacamole, shredded lettuce
Instructions
- Preheat your oven to 400°F (200°C). Lightly grease a baking sheet or line it with parchment paper.
- In a medium bowl, combine the shredded chicken, cream cheese, cheddar cheese, sour cream, chili powder, cumin, garlic powder, onion powder, salt, and pepper. Mix well until the filling is evenly combined and creamy.
- Warm the tortillas briefly in the microwave or a dry skillet for about 15 seconds each. This makes them pliable and prevents tearing when rolling.
- Place about 1/3 cup of the chicken mixture near one edge of a tortilla. Fold the sides of the tortilla inward over the filling, then tightly roll the tortilla away from you, creating a snug cylinder.
- Place the rolled chimichanga seam-side down on the prepared baking sheet. Repeat with the remaining filling and tortillas.
- Lightly spray the tops and sides of the chimichangas with cooking spray or brush them with melted butter. This step helps achieve the crispy baked texture.
- Bake for 15 to 20 minutes, flipping them halfway through, until they are golden brown and crispy.
- Serve immediately with your favorite toppings like salsa or guacamole for a delicious, healthy chicken dinner.
Notes
- For extra crispiness, you can lightly brush the tortillas with melted butter before baking instead of using cooking spray.
- If you are short on time, use pre-cooked rotisserie chicken for the shredded chicken base.
- You can prepare these ahead of time; assemble the chimichangas, cover, and refrigerate for up to 24 hours before baking. Add a few extra minutes to the baking time if cooking straight from the refrigerator.
Nutrition
- Serving Size: 1 chimichanga
- Calories: 320
- Sugar: 2
- Sodium: 450
- Fat: 14
- Saturated Fat: 6
- Unsaturated Fat: 8
- Trans Fat: 0
- Carbohydrates: 30
- Fiber: 2
- Protein: 19
- Cholesterol: 55