
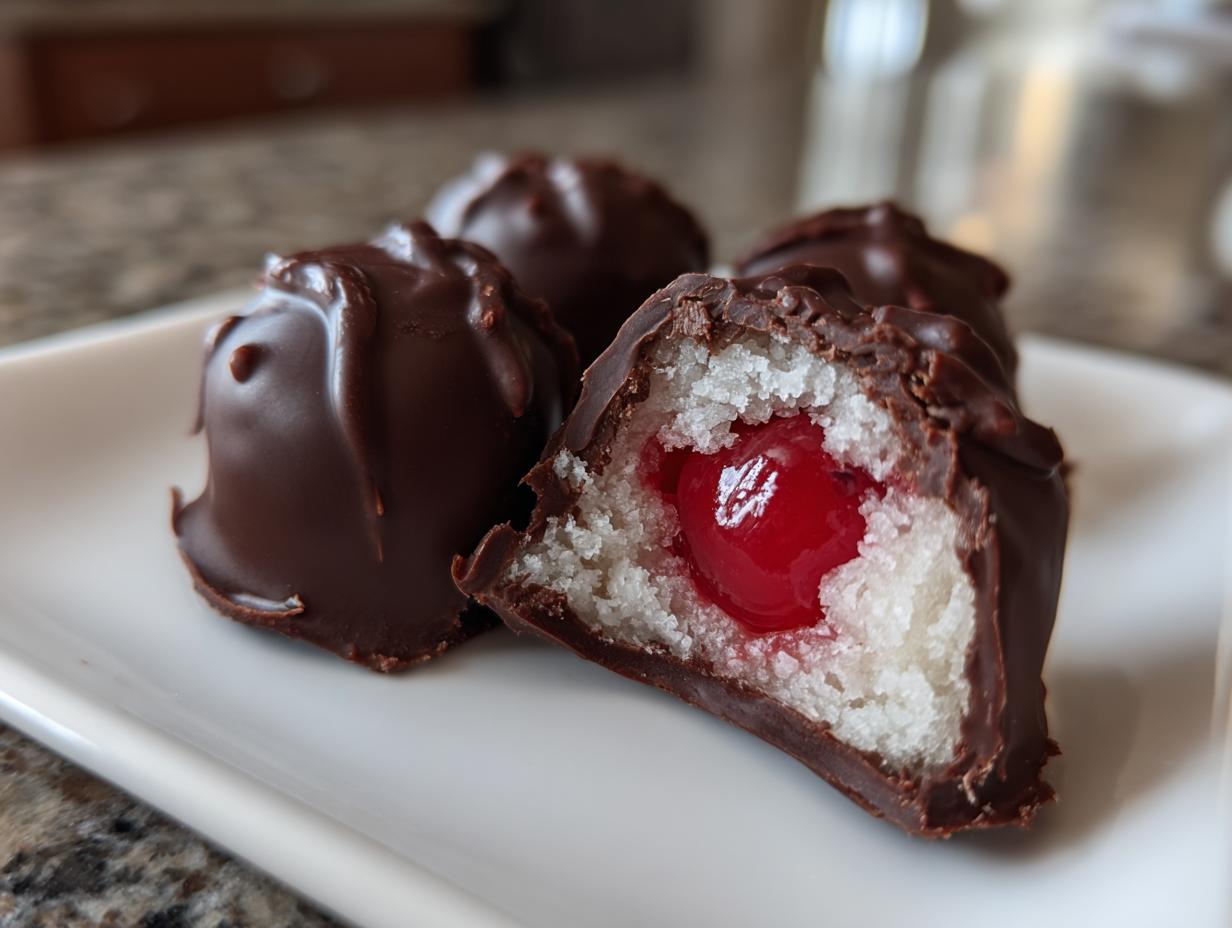
If you’re like me, nothing says “special occasion” quite like biting into a perfect, glossy candy that just melts in your mouth. For years, I thought the store-bought versions of chocolate covered cherries were the only way to go, but I was so wrong! Coming from a family that values heartfelt holiday baking, perfecting this classic has been on my list forever. I took my test kitchen knowledge and made this recipe completely foolproof. We’re talking about that wonderful homemade fondant center wrapped around a juicy cherry, all sealed up in rich chocolate. Trust me, once you realize just how easy these are to make for gifting or enjoying, you’ll never look back. These aren’t just treats; they’re little pieces of edible nostalgia that come together faster than you think!
- Why You Will Love These Homemade Chocolate Covered Cherries
- Essential Ingredients for Perfect Chocolate Covered Cherries
- Step-by-Step Guide to Making Fondant Filled Cherries
- Mastering Easy Chocolate Dipping for Your chocolate covered cherries
- Tips for Perfect Chocolate Covered Cherries Every Time
- Storage and Shelf Life for Your Homemade Candy Recipes
- Variations on Classic Chocolate Covered Sweets
- Frequently Asked Questions About chocolate covered cherries
- Nutritional Estimate for This Simple Chocolate Confection
Why You Will Love These Homemade Chocolate Covered Cherries
Listen, I know you might look at candy making and think, “Nope, too fussy!” But that’s why I developed this recipe to be truly different. These treats look elegant, but honestly, they are designed for speed and simplicity. You’ll be whipping these up for Valentine’s Day or just because without breaking a sweat.
- They require no actual baking! It’s all mixing, chilling, and dipping.
- The fondant center is unbelievably easy to make—just powdered sugar, butter, and a little magic.
- These are prime candidates for quick chocolate gifts; just stack them in a cute tin!
- We focus on giving you the best tips for easy chocolate dipping so you don’t end up with a huge mess.
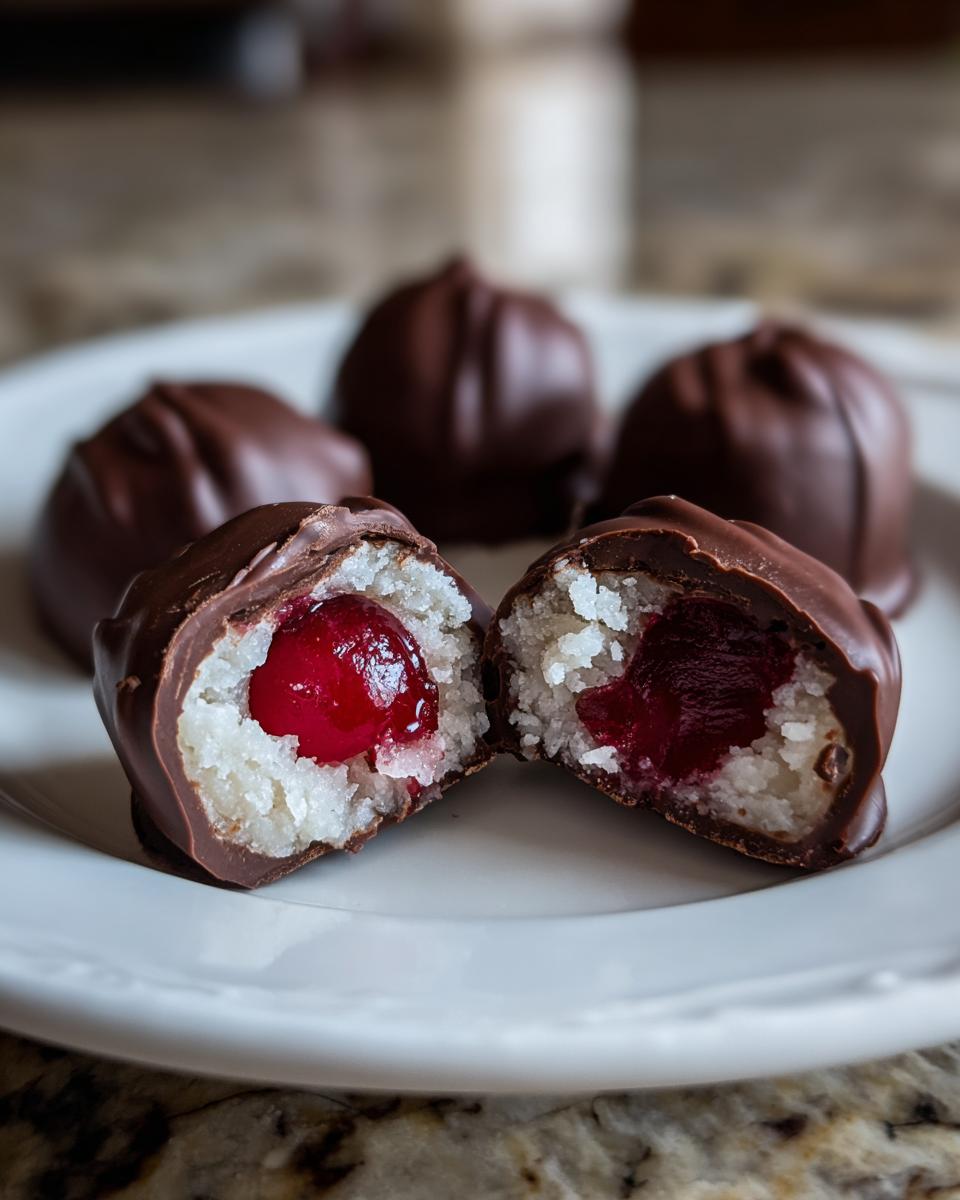
- The texture is spot on: a firm, slightly chewy fondant layer giving way to that iconic juicy cherry.
- You absolutely control the chocolate quality, making these far superior to anything store-bought.
Essential Ingredients for Perfect Chocolate Covered Cherries
Okay, let’s talk about what goes into this masterpiece. Since this is a no-bake recipe, the quality of your ingredients really shines through. Seriously, you only need a handful of things, so pick the best ones you can find! Don’t try to skimp here; it makes all the difference when you are making gourmet cherry chocolates at home.
Here is what you’ll need to gather before we start rolling anything:
- One (10 ounce) jar of maraschino cherries. The most important action here is that they must be drained really well and then patted completely dry. If they are wet, the fondant won’t stick, trust me on this one—I learned that the hard way!
- One cup of powdered sugar, plus a little extra for dusting your hands later when we’re working the fondant.
- One tablespoon of butter, making sure it is nice and softened.
- One teaspoon of light corn syrup. This is the secret weapon to keep the fondant smooth and pliable, not crumbly.
- A tiny splash—just 1/4 teaspoon—of almond extract. This adds that classic, nostalgic cordial flavor!
- One cup of dark chocolate melting wafers or chips. Now listen closely: use the best dark chocolate you can find! Since there aren’t a ton of ingredients here, a high-quality dark chocolate makes these the elegant homemade desserts they deserve to be.
- One tablespoon of shortening or coconut oil (this is optional, but I really recommend it!). This helps thin the chocolate just enough for easy chocolate dipping and gives you that beautiful, glossy shell.
That’s it! Five main ingredients plus your chocolate and optional helper fat. It feels simple, but that combination is what delivers that true, decadent chocolate treat experience.
Step-by-Step Guide to Making Fondant Filled Cherries
Alright, this next part is where we turn simple ingredients into those dreamy fondant filled cherries. It’s hands-on, but honestly so satisfying! We’re going to wrap those juicy little guys in a sweet blanket before they ever see chocolate. Just follow these first six steps, and you’ll have perfectly prepared centers ready for their chocolate bath. Remember, patience here pays off hugely when we move to dipping later on! For other sweet fillings, remember you can always find great ideas for making things like homemade jam, too.
Preparing the Maraschino Cherries
This first step is non-negotiable. If you skip the drying part, your whole candy batch is going to be a gooey disaster because the water from the cherries fights the fondant. You need to drain that jar completely—I mean really drain it! Then, spread the cherries out in a single layer on a stack of paper towels. Let them sit there while you prep the other ingredients, and then pat them down again, pressing until they feel almost like tacky little sponges instead of wet fruit. They must be as dry as possible for the best texture in your final chocolate covered cherries.
Mixing and Shaping the Fondant for chocolate covered cherries
In a separate bowl, we’re making the wrapper. Mix that softened butter, corn syrup, and almond extract until it’s smooth—it should look creamy, not separated. Now, add the powdered sugar gradually. It starts messy, but keep mixing! Eventually, you need to ditch the spoon and use your hands to bring it together into a stiff dough. When it feels right, it should be firm enough that it holds its shape easily, almost like soft playdough, but still smooth. Don’t overwork it, though! Once it’s one cohesive ball, it’s ready for shaping around those dried cherries we prepped earlier, just like wrapping a present!
Mastering Easy Chocolate Dipping for Your chocolate covered cherries
Now for the fun part—the chocolate coating! We’ve got these perfectly chilled, fondant-wrapped cherries, and they need a gorgeous, hard shell. This is what makes these chocolate covered cherries feel truly decadent. Getting this chocolate melted smoothly is key to success; nobody wants seizing chocolate that looks chunky or grainy, right? If you want that professional look, adding a tiny bit of shortening or coconut oil is my top secret for easy chocolate dipping.
Melting Chocolate for a Smooth Coating
You have two paths here. You can use a double boiler, which is the safest way to go, keeping the heat gentle and consistent. Or, if you’re rushed, use the microwave, but you have to watch it like a hawk! Melt in 30-second bursts, stirring really well in between each one. We stop heating while there are still a couple of little lumps because that residual heat finishes the job. That little bit of shortening or oil we added helps keep the mixture fluid so it coats beautifully without tearing. If you really want that thick, satisfying snap, don’t be shy about doing a second dip once the first chocolate layer has hardened up!
The Dipping Technique for Gourmet Cherry Chocolates
Once that chocolate is perfectly smooth, you need to move! The chilled cherries will start bringing down the chocolate temperature fast, so speed is essential. I grab a dipping fork, drop a cherry in, swirl it around to cover every inch, and then lift it out. Here’s the trick: gently tap the fork against the side of your bowl. You want that excess chocolate to drip right back in; you are going for a nice coating, not a fat lump of chocolate sitting at the bottom. You can check out some great visuals for this step over at this wonderful site. Place them straight onto your prepared parchment paper. This technique is what elevates these from simple homemade fun to genuinely gourmet cherry chocolates.
Tips for Perfect Chocolate Covered Cherries Every Time
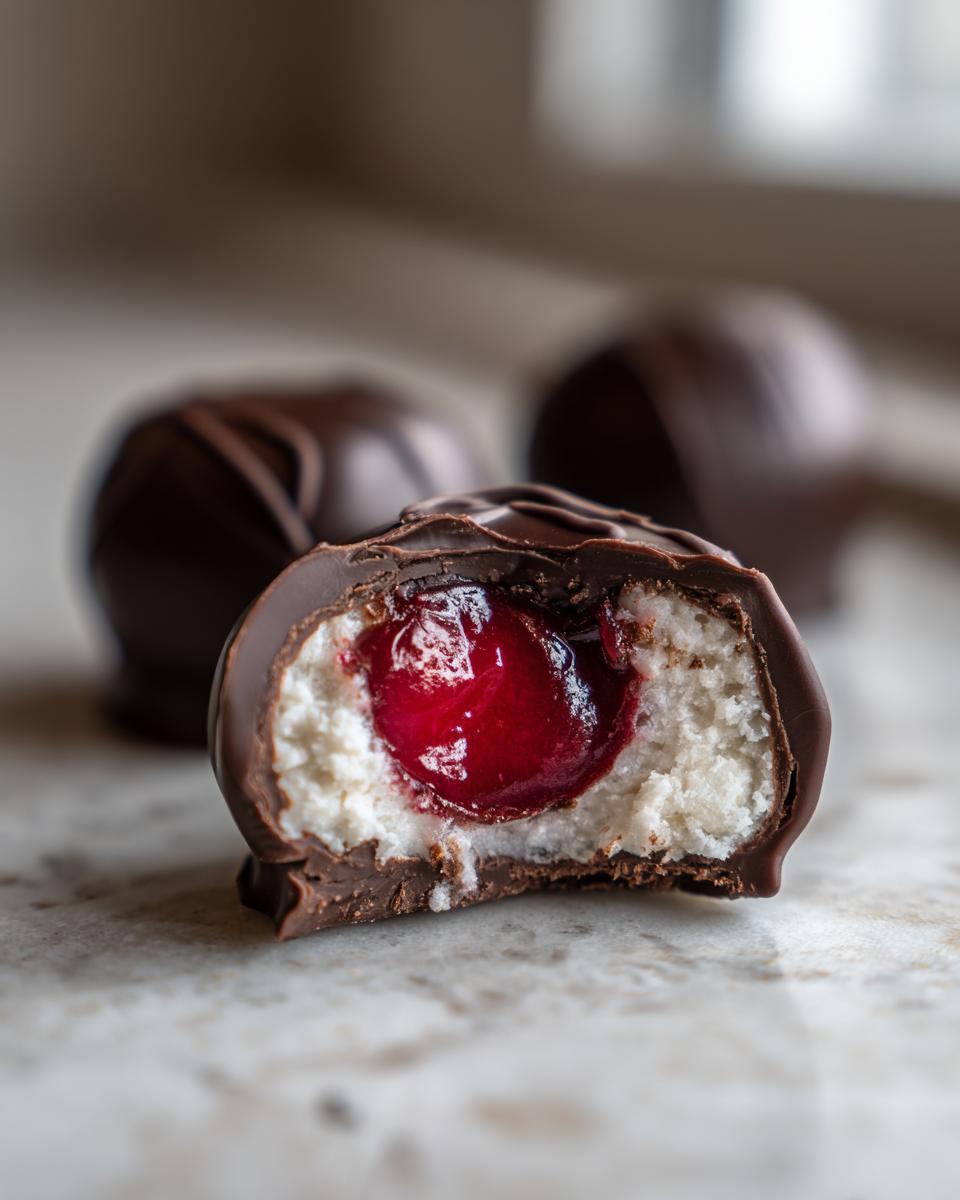
We’ve covered the mixing and the dipping, but the real magic—the *cordial* effect—happens in the waiting. Don’t panic if you open your airtight container a few days later and notice a little bit of liquid pooling beneath a cherry! That’s actually what you want; it means the sugar in the fondant and the cherry juice have done their osmotic dance, creating that signature gooey burst we love. This is the hallmark of a true, classic cordial, and it’s why these are such amazing holiday candy making projects.
To help achieve that perfect texture and keep things tidy, make sure your chilling step is non-negotiable. The fondant shell needs to be rock solid before it hits that warm chocolate! If it’s soft, the chocolate melts it, and you get a giant mess rather than a neat candy. If you are planning on a second coat? Make sure that first layer is completely cool and hard to the touch—give it 15 minutes just to be safe.
Another thing I learned from my test kitchen days is to always use a cooling rack placed over parchment paper when you are dipping. If you put them straight onto flat parchment, the chocolate pools at the bottom where the fork lifted, creating a flat foot. If you dip twice, that foot is even thicker! A wire rack allows the excess chocolate to drip completely away. Then, if you have any of those little feet remaining, you can gently knock them off with the fork before the chocolate fully sets, or just leave them—they taste just as good!
If you’re interested in other small, simple delights that are perfect for gifting during the holidays, make sure you check out my fudgy chocolate crinkle cookies recipe too. They always disappear first!
Storage and Shelf Life for Your Homemade Candy Recipes
Storing these beauties properly is almost as important as dipping them! Since we are aiming for that classic cordial experience—where the center gets a little juicier over time—you can’t just leave them in a sunny spot on the counter. Store your finished chocolate covered cherries in an airtight container. A cool, dry spot is best, but honestly, if your house is warm, placing them in the fridge for an hour before serving them is smart.
Because these are part of our collection of amazing homemade candy recipes, they rely on that fondant structure. They’ll stay fantastic for about two weeks at room temperature if kept cool, but keeping them totally airtight stops them from drying out or picking up any weird fridge smells. Enjoy them quickly, especially if you love that slightly soft center!
Variations on Classic Chocolate Covered Sweets
Part of the joy of making homemade candy recipes is putting your own little spin on things! While my recipe nails the classic dark chocolate coating, these treats are so forgiving you can totally mix up the flavor profile without messing up that fondant center. Sometimes I get bored with the same old thing, and a little adjustment makes everything feel new again.
Want something brighter? Swap out that dark chocolate. Milk chocolate is delightful, though it might look a little softer when it sets up. White chocolate is a huge crowd-pleaser for parties, but be warned, white chocolate melts faster, so you have to be quick on the dipping action!
My absolute favorite seasonal twist is adding flavor right into the chocolate coating. If you’re making these around Christmas, melt 1/4 teaspoon of peppermint extract right into your dark chocolate while it’s warming up. It gives you a wonderful cool mint finish that pairs unbelievably well with that sweet cherry. It immediately turns a regular treat into something really special, perfect for sharing alongside something like my moist chocolate banana bread.
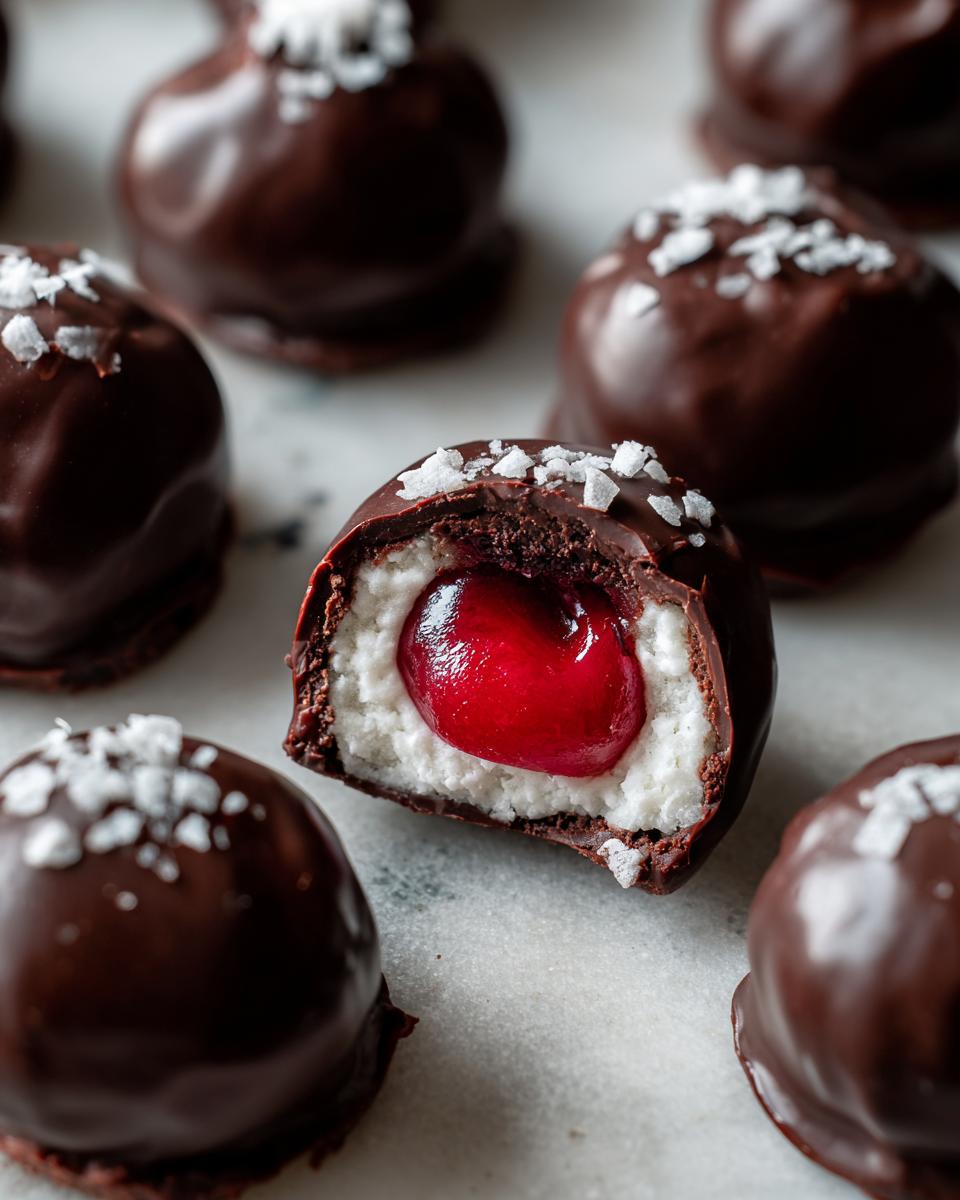
For a little kick in your classic chocolate covered sweets, try finishing them off right after dipping. Try sprinkling just a few flakes of sea salt over the chocolate while it’s still wet. That salty crunch right before you hit the sweet cherry center is just divine. It balances out the sweetness perfectly without changing the fundamental steps of the recipe at all!

Frequently Asked Questions About chocolate covered cherries
I know sometimes after baking up a big batch of homemade candy recipes, you end up with a few random questions! That’s totally normal, especially with a recipe as classic as this. I’ve gathered the things I hear most often about making these perfect little chocolate covered cherries, so you can put your mind at ease and get back to enjoying your treats!
How long do homemade chocolate covered cherries last?
This depends a tiny bit on how cool your house stays, but generally, they are great for about two weeks if kept in an airtight container away from direct heat. Since we are wrapping them in a sugar-based fondant, they stay pretty stable! If you notice that the centers getting runnier (which is the good news, remember?), that means they are doing exactly what they should be doing. If you’re worried about keeping them fresh, storing them in the fridge works, but let them sit out for about 15 minutes before serving so the chocolate isn’t super hard.
Can I use fresh cherries instead of maraschino cherries for this recipe?
Oh, honey, I really wouldn’t recommend it for this specific style of candy. Using fresh cherries introduces a lot of uncontrolled moisture and enzymes that fight with the sugar-based fondant we are making. The whole premise of this recipe—making that dense shell that might eventually turn into a liquid center—relies on pre-treated, extremely low-moisture maraschino cherries. If you wanted to use fresh cherries, you’d need to completely alter the filling and skip the fondant to make something more like a fresh ganache dipping project, which is a whole different beast. Stick with the jarred ones for this one!
What is the secret to making a perfect cherry cordial center?
The secret isn’t really a secret; it’s science! The center getting slightly runny or liquid over time is called osmosis. The sugar in our fondant is determined to suck up any tiny bit of moisture it can find. Since the maraschino cherry syrup is still slightly present inside the fruit, the sugar actively draws that moisture out over a few days. That slightly liquid core that bursts when you bite down—that’s the sign of a perfect, authentic cordial! Don’t try to stop it; that gooey center is what makes this one of the best classic chocolate covered sweets you can make.
If you are looking for some delicious ways to start your day after all that candy making, be sure to check out my recipes for quick and easy breakfasts!
Nutritional Estimate for This Simple Chocolate Confection
Now, I always like to give a little heads-up when it comes to nutrition facts, especially with luscious, homemade candies like these chocolate covered cherries. Remember, I’m a cook, not a scientist reading food labels every day! These numbers are just an estimate based on the ingredients listed in the recipe. Since we are using specific brands of chocolate or slightly different amounts of butter, your final count will vary a bit.
But for a fun, indulgent treat that you made yourself, these are surprisingly moderate! If you are looking for a guide on what to expect from one piece of this simple chocolate confection, here is the general breakdown:
- Calories: Around 120 calories
- Fat: About 6 grams
- Carbohydrates: Roughly 17 grams
- Protein: Just 1 gram
- Sugar: Approximately 15 grams
There you have it! A perfect benchmark for your indulgent, homemade candy. Enjoy them knowing exactly what’s in them!
PrintHomemade Chocolate Covered Cherry Cordials

Make classic chocolate covered cherries at home using maraschino cherries wrapped in a simple fondant and coated in rich chocolate. This recipe is straightforward and yields decadent treats perfect for gifting.
- Prep Time: 30 min
- Cook Time: 10 min
- Total Time: 1 hour 40 min
- Yield: About 20 candies 1x
- Category: Dessert
- Method: No Bake
- Cuisine: American
- Diet: Vegetarian
Ingredients
- 1 (10 ounce) jar maraschino cherries, drained well and patted dry
- 1 cup powdered sugar, plus more for dusting
- 1 tablespoon butter, softened
- 1 teaspoon light corn syrup
- 1/4 teaspoon almond extract
- 1 cup dark chocolate melting wafers or chips
- 1 tablespoon shortening or coconut oil (optional, for smoother dipping)
Instructions
- Place the drained maraschino cherries on paper towels and pat them completely dry. Set aside.
- In a medium bowl, combine the softened butter, corn syrup, and almond extract. Mix until smooth.
- Gradually add the powdered sugar to the butter mixture, mixing until a stiff dough forms. You may need to use your hands to bring it together.
- Dust your hands lightly with extra powdered sugar. Take a small piece of fondant (about 1 teaspoon) and flatten it in your palm. Place one dried cherry in the center.
- Wrap the fondant completely around the cherry, sealing it tightly. Roll it gently into a smooth ball shape. Place the wrapped cherries on a parchment-lined baking sheet.
- Chill the fondant-covered cherries in the refrigerator for at least 1 hour, or until firm. This step is important for successful dipping.
- Melt the chocolate and shortening (if using) together using a double boiler or in the microwave in 30-second intervals, stirring until completely smooth.
- Working quickly, use a dipping fork or two regular forks to dip each chilled cherry into the melted chocolate, ensuring it is fully coated. Tap the fork gently on the side of the bowl to let excess chocolate drip off.
- Return the coated cherries to the parchment-lined baking sheet. Allow the chocolate to set completely at room temperature, or chill briefly if needed.
- For a thicker shell, you can dip the cherries a second time after the first layer has set.
Notes
- The fondant center may become slightly liquid over time, creating the classic cordial effect. Store finished candies in an airtight container in a cool place.
- If you prefer a stronger cherry flavor in the fondant, add 1/4 teaspoon of the reserved maraschino cherry juice instead of the almond extract.
- Use high-quality dark chocolate for the best flavor in your gourmet cherry chocolates.
Nutrition
- Serving Size: 1 piece
- Calories: 120
- Sugar: 15
- Sodium: 5
- Fat: 6
- Saturated Fat: 4
- Unsaturated Fat: 2
- Trans Fat: 0
- Carbohydrates: 17
- Fiber: 1
- Protein: 1
- Cholesterol: 3