
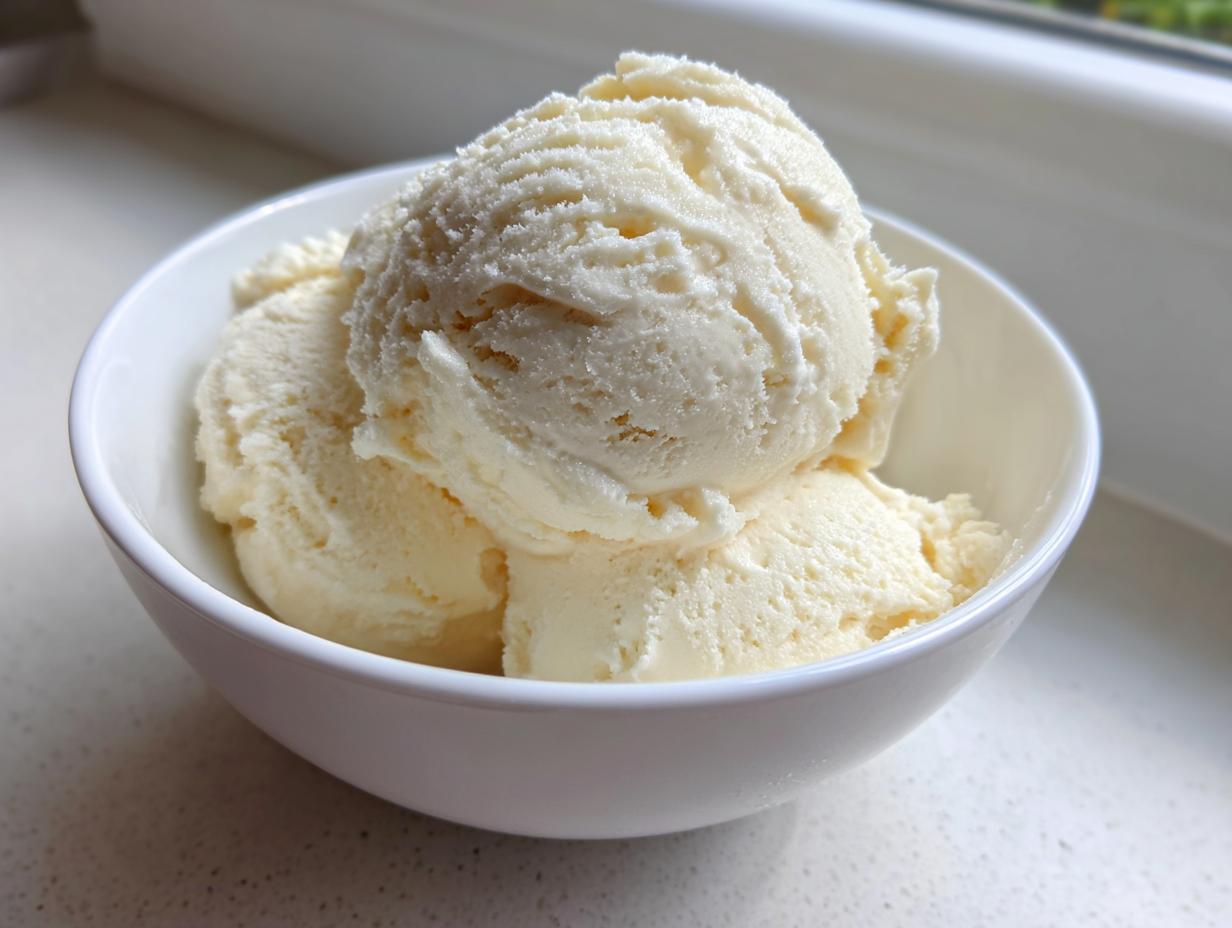
If you’ve been scrolling around lately, you’ve probably seen the buzz about making real, satisfying ice cream out of cottage cheese. I know, I know—it sounds wild, right? But trust me, when you’re looking for a truly indulgent healthy dessert that doesn’t crash your macros, this is it. I’m Jade Carter, and after years studying nutrition and testing recipes in professional kitchens, I developed this, the absolute best creamy vanilla cottage cheese ice cream recipe. It’s high in protein, no-churn friendly, and tastes shockingly like the real deal. Forget everything you thought you knew about healthy dessert ideas; we’re about to make magic!
- Why This Creamy Vanilla Cottage Cheese Ice Cream is Your New Favorite Healthy Frozen Dessert
- Essential Ingredients for Perfect Cottage Cheese Ice Cream
- Step-by-Step Guide to Making No Churn Cottage Cheese Ice Cream
- Variations: Customizing Your Cottage Cheese Ice Cream Base
- Tips for Making the Best Cottage Cheese Ice Cream Every Time
- Storage and Make Ahead Tips for Your Cottage Cheese Ice Cream
- Frequently Asked Questions About High Protein Cottage Cheese Ice Cream
- Nutritional Snapshot of This Guilt Free Sweet Treat
- Share Your Creamy Cottage Cheese Ice Cream Creations
Why This Creamy Vanilla Cottage Cheese Ice Cream is Your New Favorite Healthy Frozen Dessert
Listen, I get it. You want that cold, creamy indulgence, but life (and maybe your fitness goals) just won’t allow for a whole pint of sugary stuff. That’s why this high protein ice cream is a total game-changer. We use cottage cheese, but don’t panic! You absolutely will not taste it once it’s blended properly. This no churn ice cream recipe means zero fussing over an ice cream maker, making it one of the simplest easy summer desserts you’ll ever make. It hits all the right notes: satisfyingly cold, amazingly rich, and totally guilt-free.
Seriously, this is a true protein packed snack disguised as dessert. It’s what I whip up when I need something sweet fast but don’t want to ruin my day. The texture is what sells it, though. Once frozen, it’s perfectly scoopable, not icy like you might expect from a healthier treat. It’s pure magic, I promise.
Achieving Maximum Smoothness in Cottage Cheese Ice Cream
The number one goal here is silky perfection. I want zero graininess, so you should plan on blending this mixture longer than you think you need to. You’ve got to completely obliterate those cottage cheese curds. When the base is liquid-smooth before it even hits the freezer, that’s your guarantee for a wonderfully creamy ice cream later on. Don’t rush this blending part, or you’ll end up with something that tastes great but feels disappointing in the mouth.
The High Protein Advantage of Cottage Cheese Ice Cream
This is where we feel good about digging in! Traditional ice cream is mostly sugar and fat, right? This recipe flips that script. Cottage cheese loads us up with protein, which keeps you full far longer than a standard frozen treat. It’s truly a guilt free sweet treat. You get that rich flavor and satisfying chill, all while knowing you’re fueling your body with something substantial. It’s smart snacking, cottage cheese style.
Essential Ingredients for Perfect Cottage Cheese Ice Cream
Okay, let’s talk what you actually need to pull this incredible healthy dessert together. Because this recipe is so simple, the quality and preparation of your few ingredients really jumps to the forefront. We aren’t hiding behind five different powders here; we need the base to be perfect. For this vanilla version, you’ll need two cups of full-fat cottage cheese, a quarter cup of your chosen sweetener—I prefer a low-carb option like monk fruit—one teaspoon of pure vanilla extract, and, if you’re feeling extra decadent, a quarter cup of heavy cream.
Ingredient Notes and Substitution Tips
The cottage cheese! This is non-negotiable: you MUST drain it well. If you want that creamy base, that excess liquid has to go, or your ice cream will just turn into icy soup. I like to press mine lightly between some paper towels to get it as dry as possible before it hits the blender. If you are aiming for a true low carb ice cream, use erythritol or monk fruit blend; these won’t add the unnecessary sugar that regular granulated sugar would. If you *are* using regular sugar, you might notice the texture changes just a tiny bit, but it will still be delicious!
The heavy cream is optional, but honestly, use it for the best results. It just adds that mouthfeel we crave in premium ice cream. Don’t skip the vanilla, either; pure extract makes a difference when you only have four main flavor components.
Step-by-Step Guide to Making No Churn Cottage Cheese Ice Cream
Now that we have our perfect ingredients ready to go, let’s get this cottage cheese ice cream into the freezer! This whole cooking process takes about 10 minutes, as it’s all about what happens next in the cold. Remember, we are aiming for that luxurious, creamy homemade ice cream feel, and every step here directly impacts the final texture. Don’t worry if you don’t have the fancy machine everyone talks about; this no-churn method is foolproof if you follow the blending rules!
The Critical Blending Step for Silky Cottage Cheese Ice Cream
This isn’t just mixing; we are emulsifying! Get that drained cottage cheese, sweetener, and vanilla into your high-speed blender or food processor. You need to run this thing until it looks like liquid silk—I mean it! Stop and scrape down the sides a couple of times. You should see absolutely no evidence of curds. If you see any little white bumps when you look closely, keep blending! This is the absolute secret to making sure this turns out as a healthy frozen dessert and not something gritty. If you’re adding the heavy cream, pulse it in right at the end until just combined, but keep that main blend time dedicated to liquefying the cheese base.
Freezing Protocol for Scoopable Cottage Cheese Ice Cream
Once it’s perfectly smooth, pour that luscious base into a freezer-safe loaf pan or any airtight container you have handy. Here’s the pro tip for preserving that smoothness: take a sheet of plastic wrap and gently press it right onto the surface of the mixture. This sounds extra, but trust me, it stops those nasty ice crystals that form on the exposed liquid, which ruin the texture of any healthy dessert ideas you’re trying to freeze! Cover the whole thing, and then it heads into the freezer for at least six hours. I usually make this the night before so it’s ready when I need it.
When you finally pull it out, let it sit on the counter for about five to ten minutes. That little softening period is crucial so you can actually scoop it without breaking a spoon. Enjoy that guilt free sweet treat!
Variations: Customizing Your Cottage Cheese Ice Cream Base
The vanilla base we just made is wonderful on its own, but the best part about keeping it simple is how easy it is to customize! Suddenly, your single batch of cottage cheese ice cream can turn into a week’s worth of different flavors. This is where things get fun—and frankly, this is why I love this recipe so much. You can easily cater to any craving.
If you’re craving chocolate, that’s a breeze. Just add about a quarter cup of unsweetened cocoa powder right into the blender when you’re adding the vanilla and sweetener. Make sure you blend it long enough to incorporate it fully; you want deep, rich color everywhere. For something fruity, like a creamy strawberry cottage cheese ice cream, you need to add about half a cup of frozen strawberries along with the base ingredients. Frozen fruit works better than fresh here because it helps keep that base super cold before freezing.
I’ve also experimented with swirling in peanut butter—look up my creamy mango sticky rice recipe sometime, because texture matters!—or even maple syrup for a diner-style treat. If you’re adding a swirl, blend your main base first, pour it into the pan, and then drizzle your swirl on top before you start the freezing process. So many options for this amazing, high-protein base!
Tips for Making the Best Cottage Cheese Ice Cream Every Time
Even with a foolproof map like this, sometimes we need a little extra nudge to turn good into spectacular. When it comes to getting that perfect, melt-in-your-mouth texture for our cottage cheese ice cream, small details make a huge difference. Remember, my background is in making sure recipes work reliably, whether you’re using old tools or shiny new gadgets.
My biggest flavor secret, when I’m not sticking strictly to the vanilla, involves what I did with egg yolks in mayo—it’s about richness! For this ice cream, if you look at the recipe, the optional heavy cream is your friend for ultimate indulgence. If you skip the cream, your high protein ice cream will be slightly firmer, which leads me beautifully into the next point about machines.
Using Your Ninja Creami for Lightning-Fast Cottage Cheese Ice Cream
Okay, if you have one of those trendy Ninja Creami machines, you’re going to love this! You absolutely can use this base in your machine, and it speeds things up incredibly. The key is that you prepare the base exactly as written—blend it until it’s perfectly smooth—and pour it into the Creami canister. Process it according to your machine’s standard ice cream setting. I always advise users to process it once, and then if it looks a little crumbly, run it through one more spin cycle. That re-blending action simulates what we do with extra blending time in a traditional blender, ensuring that ridiculously smooth texture people expect from a Ninja Creami Cottage Cheese Recipes creation.
Addressing Serving Temperature for Scoopability
This is the final hurdle for any homemade frozen dessert, especially those that are lower in artificial stabilizers. Because this is a low carb ice cream alternative, it sometimes freezes up a bit harder than the store-bought stuff loaded with corn syrup. So, please don’t try to scoop it straight from the deep freeze! You must give it 5 to 10 minutes on the counter first. This brief warming period softens those key ice crystals just enough so you get those beautiful, easy scoops every single time. It’s the smallest pause that makes the biggest difference in how satisfying this healthy delicious dessert is to eat.
Storage and Make Ahead Tips for Your Cottage Cheese Ice Cream
One of the real perks of this recipe is that it works perfectly as a make ahead frozen yogurt style treat. You can totally make a huge batch and keep it tucked away for when a craving strikes. Since we’re aiming for that creamy texture, storage is really important. Keep it in an airtight container, and always make sure you press plastic wrap directly onto the surface before you seal the lid shut. This prevents those sneaky freezer burns or ice crystals from forming on top.
Generally, this homemade cottage cheese ice cream tastes best within the first week, but honestly, it holds up well for two weeks if stored correctly. If you let it sit too long, it might get a little harder than when you first froze it, but just give it a good 15-minute counter rest, and it comes right back to life. It’s perfect for planning ahead!
Frequently Asked Questions About High Protein Cottage Cheese Ice Cream
I get so many questions whenever I post this recipe online! It’s totally normal when you’re trying something new that sounds a little strange, even if the results are amazing. People always want to know how to get that perfect texture or if they can tweak it for their specific diet. I pulled together a few of the most common ones I see to help you nail this high protein ice cream every single time.
Can I use low-fat cottage cheese in this cottage cheese ice cream recipe?
You technically can, but I really, really advise sticking with the full-fat version if you can manage it. The fat content is what provides richness and keeps the final product tasting indulgent rather than tasting icy or a bit watery. Low-fat cottage cheese has more water suspended in it, and that water is what turns into those hard ice crystals when you freeze it. If you must use low fat, make absolutely sure your draining step is intense, and consider adding an extra tablespoon of heavy cream to compensate for the lost richness. It’s your low carb ice cream, but fat equals creaminess in this case!
How do I avoid icy texture in my cottage cheese ice cream?
Avoiding ice crystals comes down to two main battles we fight in the freezer: blending and storage. First, you have to blend it until it’s completely, utterly smooth—I mean, turn your blender on high until you think you’ve gone too long, and then blend for another 30 seconds! Second, when you freeze it, you must press plastic wrap directly onto the surface before putting the lid on. This blocks air contact. Air is the enemy and it’s what causes rough, icy spots on the top layer, which we definitely don’t want in this creamy treat!
Nutritional Snapshot of This Guilt Free Sweet Treat
I always feel better enjoying something delicious when I know the numbers back up that it’s a smart choice. Since this recipe is built around being a high protein ice cream and uses low-carb sweeteners, it’s fantastic for tracking your goals. Here are the approximate nutritional details based on using the base ingredients listed (full-fat cottage cheese and zero-calorie sweetener).
Just remember, I always say these are estimates! Once you start adding things like peanut butter or real maple syrup instead of the low-carb options, those numbers are certainly going to shift around slightly. But for this base vanilla version, this is what we are working with:
- Serving Size: 1/2 cup
- Calories: 180
- Protein: 20g (Yes, twenty grams! Amazing for a frozen treat!)
- Fat: 8g
- Carbohydrates: 10g
- Sugar: 4g
See? Twenty grams of protein in a half-cup serving of cottage cheese ice cream that tastes like dessert! That’s why I call this a powerhouse protein packed snack. It’s truly bridging the gap between what we want to eat and what our bodies need. If you’re looking for a truly keto ice cream alternative, this base makes it easy to adjust for those counts, too.
Share Your Creamy Cottage Cheese Ice Cream Creations
I truly hope taking the time to blend this up brings you as much guilt free sweet treat joy as it brings me! Making recipes is only half the fun; the best part is hearing how you all have made this creamy homemade ice cream your own. Seriously, I want to know if you tried the chocolate version or maybe went bold with a swirl of salted caramel.
Please don’t keep your successes a secret! Leave a rating for this recipe right down below—five stars if it blew you away with how smooth and protein-packed it was! And if you tried a fun variation, like tossing in espresso powder or some crushed nuts, tell me about it in the comments. Your ideas inspire the next batch I make here in my kitchen.
If you snapped a picture of your beautiful scoops, I would absolutely love to see it! Tag me on social media when you share your healthy dessert ideas! Connecting with you all and seeing my reliable recipes in your homes are exactly why I put all this work into testing everything perfectly. If you ever have questions or just want to connect, you can always reach out via my contact page. Happy scooping!
PrintThe Best Creamy Vanilla Cottage Cheese Ice Cream (No Churn, High Protein)

Make this incredibly creamy, high-protein vanilla ice cream using cottage cheese. This no-churn recipe delivers a smooth, indulgent texture without needing an ice cream maker, making it a perfect healthy frozen dessert.
- Prep Time: 10 min
- Cook Time: 0 min
- Total Time: 6 hr 10 min
- Yield: 4 servings 1x
- Category: Dessert
- Method: No Churn
- Cuisine: American
- Diet: Low Fat
Ingredients
- 2 cups full-fat cottage cheese, drained well
- 1/4 cup sweetener (like monk fruit or erythritol for low carb)
- 1 teaspoon pure vanilla extract
- 1/4 cup heavy cream (optional, for extra richness)
Instructions
- Drain the cottage cheese thoroughly to remove excess liquid. Press it lightly between paper towels if needed to achieve a drier texture.
- Place the drained cottage cheese, sweetener, and vanilla extract into a high-speed blender or food processor.
- Blend on high until the mixture is completely smooth and silky. Stop and scrape down the sides as needed. This step is key for creaminess.
- If using, add the heavy cream and blend for a few more seconds until just combined.
- Pour the mixture into a freezer-safe container, like a loaf pan or an airtight container. Cover the surface directly with plastic wrap to prevent ice crystals.
- Freeze for at least 6 hours, or until firm.
- Before serving, let the ice cream sit on the counter for 5 to 10 minutes to soften slightly for the best scoopable texture.
Notes
- For a Ninja Creami version, blend ingredients until smooth, pour into the canister, and process according to your machine’s instructions, then re-spin if necessary for creaminess.
- Add 1/4 cup of cocoa powder during blending for a rich chocolate cottage cheese ice cream.
- For a strawberry flavor, blend in 1/2 cup of frozen strawberries with the base ingredients.
- This recipe yields a high-protein snack that tastes indulgent.
Nutrition
- Serving Size: 1/2 cup
- Calories: 180
- Sugar: 4
- Sodium: 350
- Fat: 8
- Saturated Fat: 4
- Unsaturated Fat: 4
- Trans Fat: 0
- Carbohydrates: 10
- Fiber: 1
- Protein: 20
- Cholesterol: 25