
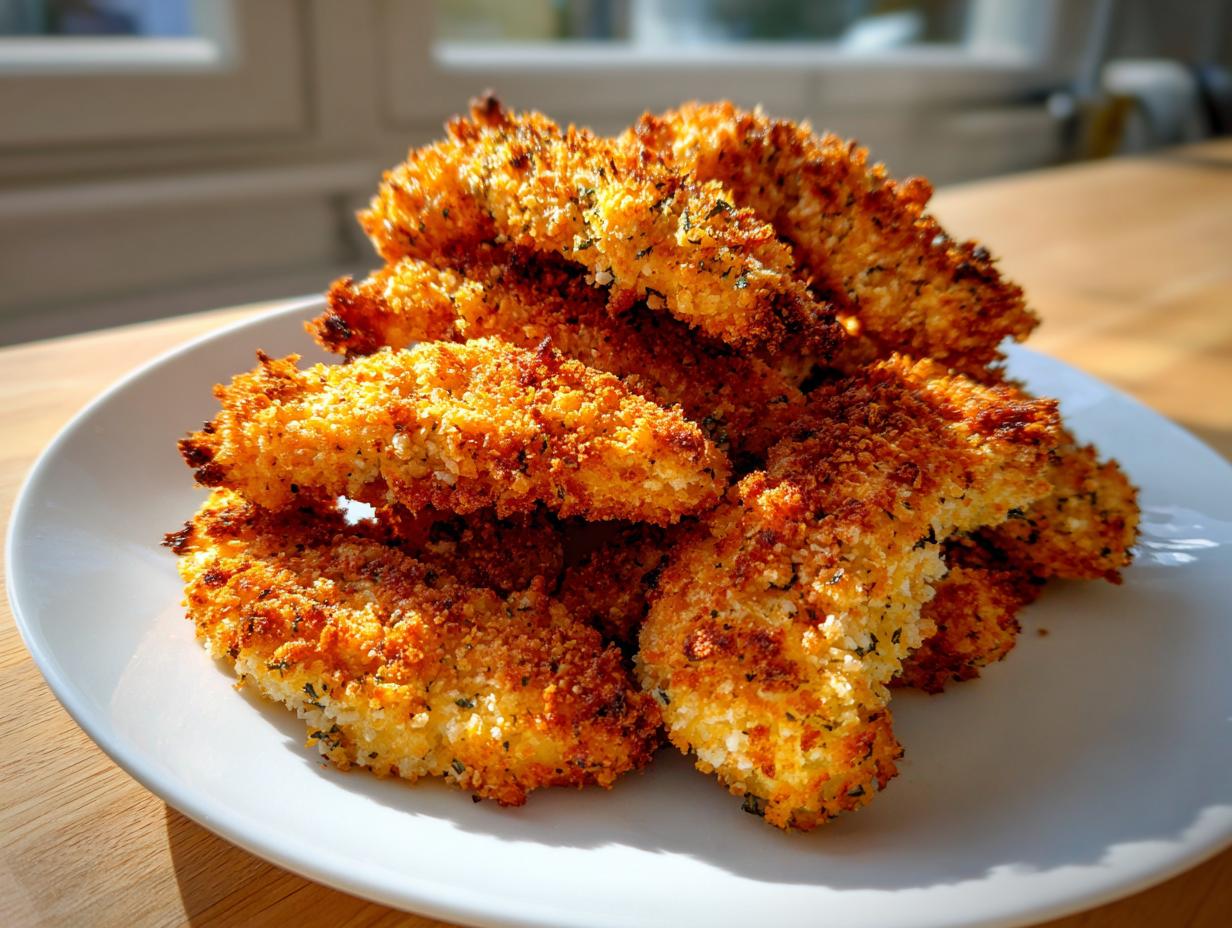
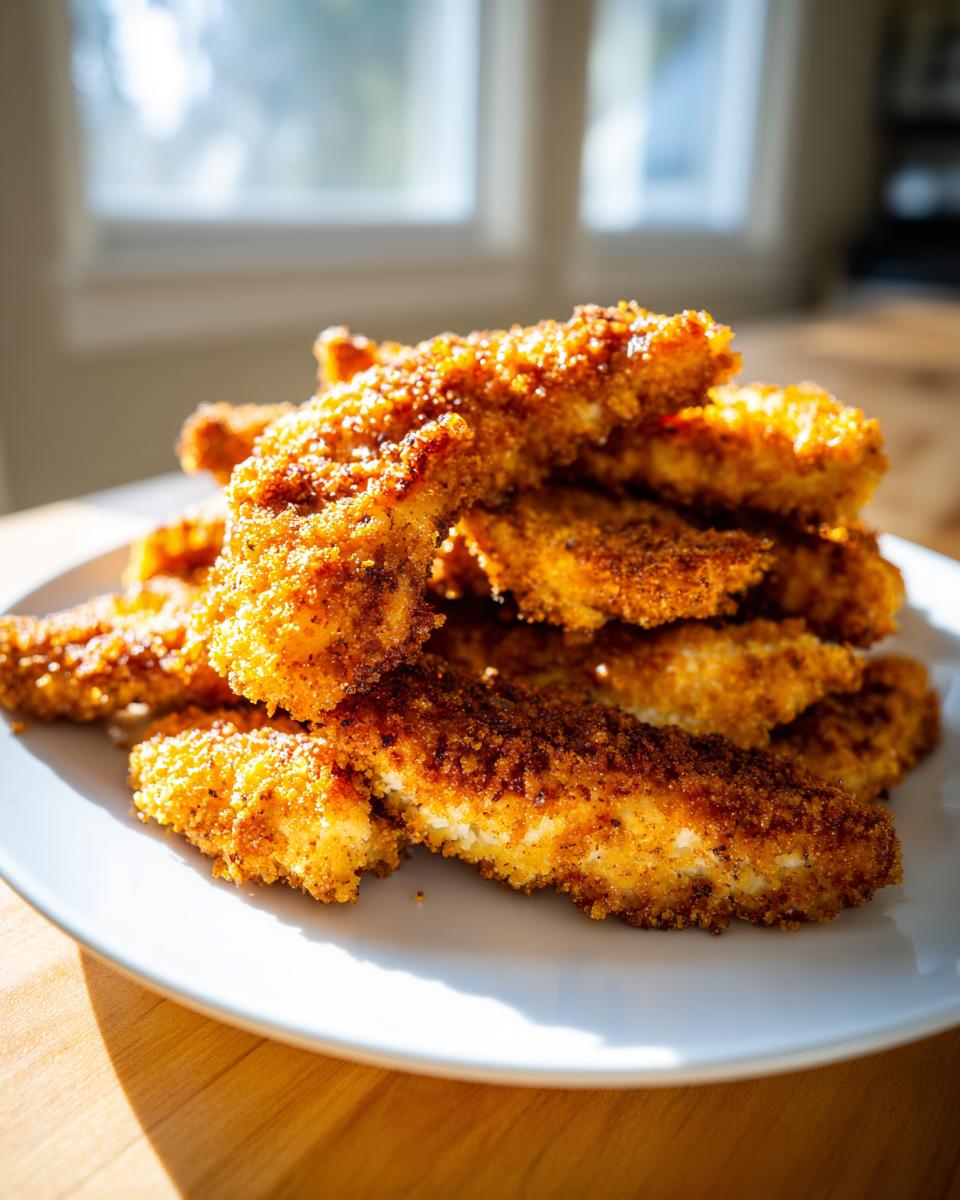
Oh, that feeling when you just need something perfectly crispy, golden brown, satisfying, and just plain comforting? I know it well! That’s why I’m sharing the absolute easiest chicken tender recipe you’ll ever try. Forget the splatter and the smoke alarms; we are getting that perfect crunch right in the oven. Seriously, these homemade chicken strips come out so moist inside, and the outside shatters just right. This baking method is one of my go-tos because, having worked in test kitchens, I know reliability is key, especially when cooking for a busy family. These are the ultimate **chicken tenders** that turn any weeknight into an easy win for even the pickiest eaters.
If you need more simple dinner ideas for busy nights, you can always check out my collection of easy weeknight dinners, but trust me, you’ll want to make this **kid friendly chicken dinner** first!
- Why This Easy Chicken Tender Recipe Delivers Moist Chicken Tenders Every Time
- Gathering Your Ingredients for Homemade Chicken Strips
- Step-by-Step Guide: How to Bread Chicken Tenderloins for Baking
- Baking Instructions for the Best Baked Chicken Tenders
- Adapting This Recipe: Air Fryer Chicken Tenders Recipe Option
- Serving Suggestions for Your Homemade Chicken Strips
- Storage and Reheating Instructions for Healthy Chicken Tenders for Meal Prep
- Frequently Asked Questions About Making Chicken Tenders
- Estimated Nutritional Profile for These Chicken Tenders
Why This Easy Chicken Tender Recipe Delivers Moist Chicken Tenders Every Time
When I developed this recipe, I had one goal: make oven-baked ones that actually taste like you deep-fried them! You shouldn’t have to settle for sad, floppy chicken when you’re trying to keep things easy. We skip the oil mess but still conquer the challenge of getting **crispy chicken tenders how to make** them work in the oven. Trust me, this reliable method works every single time.
- We use Panko instead of standard crumbs for maximum crunch development.
- The light coating of cooking spray mimics the effect of frying oil, creating that lovely golden shield.
- We incorporate an optional step that locks in moisture, guaranteeing juicy results.
The Secret to Crispy Chicken Tenders How to Make Them Baked
It all comes down to two things: Panko and spray! Panko breadcrumbs are lighter and fluffier than regular crumbs, so they crisp up wonderfully when baked. But the real trick to achieving that perfect golden crust without frying is giving the tops a very generous misting of cooking spray right before they hit the oven. It dehydrates the outside just enough to make it shatter.
Achieving Moist Chicken Tenders Recipe Perfection
Nobody likes dry chicken, especially when prepping meals ahead of time. If you have time, I highly recommend throwing your cut strips into a bowl of buttermilk for about thirty minutes before you even start setting up your breading station. The acid in the buttermilk tenderizes the meat fibers beautifully, meaning you end up with incredibly **moist chicken tenders recipe** results, even after reheating.
Gathering Your Ingredients for Homemade Chicken Strips
The best part about making these **homemade chicken strips** is how simple your grocery list looks. We aren’t hunting down specialty items or weird spices here! You probably have most of this stuff already sitting in your pantry. I always make sure I have my good Panko breadcrumbs ready to go because they are the non-negotiable star for achieving that superior crunch we talked about earlier. It’s all about accessible flavor, friends!
Ingredient Notes and Simple Chicken Tender Breading Components
Here is what you’ll need laid out clearly. Remember, having everything measured before you start that breading process just streamlines everything—it keeps you calm!
- 1.5 lbs boneless, skinless chicken breast, cut into 1-inch strips
- 1 cup all-purpose flour
- 2 large eggs, lightly beaten
- 1.5 cups panko breadcrumbs
- 1 teaspoon salt
- 1 teaspoon black pepper
- 1 teaspoon garlic powder
- 1 teaspoon paprika
- 1/2 teaspoon dried oregano
- Cooking spray
That spice blend makes up our **simple chicken tender breading**, and it gives just enough savory flavor without being overly spicy for the kids.
Step-by-Step Guide: How to Bread Chicken Tenderloins for Baking
Alright, this is the fun part—the assembly line! Getting this breading process right is critical for achieving that satisfying crunch on your amazing chicken tenders. It might sound fancy, but setting up a dedicated station keeps everything clean and speedy. I promise, after the first two strips, you’ll be moving like a pro. This standard three-step process is the foolproof way to lock in moisture while ensuring maximum crispiness for your homemade chicken strips.
Setting Up Your Breading Station
You need three shallow dishes lined up right next to each other. In the first dish goes your flour—this is the base layer. Give it a little stir just to make sure that salt and pepper from the spice mix don’t all settle on the bottom. The second dish is just the beaten egg, and the third dish holds your glorious seasoned Panko mixture. When you move the chicken from the flour, you must shake off any flour that clumps. We want a *light* dusting, not a heavy coat, or the egg won’t stick well.
The Dredging and Coating Technique for Perfect Chicken Tenders
Now, pick up one piece of chicken and gently move it through the three dishes in order: flour, then egg, then Panko. This is the secret to answering crispy chicken tenders how to make questions! When you put the egg-coated strip into the Panko, don’t just toss it around. You have to gently press the seasoned breadcrumbs onto the chicken strip with your fingers. Really push them in on the sides and ends. That firm press ensures excellent adhesion, which means fewer crumbs falling off during baking, and a fuller, shatteringly crisp crust overall!
Once they are fully coated, place them immediately onto your prepped baking sheet. Make sure they aren’t touching! We need that hot air circulating around every side of the strip so they all brown evenly.
Need more inspiration for quick mains? Don’t forget to look over my easy weeknight dinners guide for nights when even tenders feel like too much work!
Baking Instructions for the Best Baked Chicken Tenders
Okay, they are breaded, they look beautiful, and now we get them golden brown! Preheating is serious business here—get that oven rocking at 400°F (200°C) before you even touch the strips. Remember, we lined that baking sheet with parchment? That’s your insurance policy against sticking. After you arrange the **chicken tenders** on the pan, make sure there is space between every single one. They can’t be friends during baking; they need their own personal space to crisp up!
We spray the tops generously with cooking spray right before they go in. This final little spritz seals the deal for getting that crispy finish we love. If you’re curious about other oven techniques, I have some notes on using your oven for things like great chicken fried rice, which relies on high, even heat too!
Timing and Temperature for Golden Brown Chicken Tenders
We are looking for 18 to 22 minutes total bake time. However, you absolutely *must* flip them halfway through the cooking time—usually around the 10-minute mark. Flipping ensures that both sides get that gorgeous, crackly texture. Also, please, please use a meat thermometer when you think they are done. For safety and taste, chicken needs to hit an internal temperature of 165°F (74°C). Anything less and you risk it, anything more and you risk dryness. That perfect temperature is how we guarantee those moist, juicy centers!
Adapting This Recipe: Air Fryer Chicken Tenders Recipe Option
I know so many of you have jumped on the air fryer bandwagon, and honestly, so have I! It’s fantastic for getting that super-crisp texture with practically zero added oil. Luckily, this recipe converts beautifully! If you are specifically looking for an air fryer chicken tenders recipe, you don’t have to change a single thing about the prep or the breading station setup. That seasoning mix we put together is perfect for the air fryer basket.
The only changes you need to make are timing and temperature adjustments. When cooking these amazing **chicken tenders** in your air fryer, you’ll want to preheat it to about 380°F (195°C). Because the basket circulates air so intensely, they cook much faster than in the oven. Plan on about 10 to 12 minutes total. Just like with baking, flipping halfway through is essential here! If you don’t flip them, the bottom side will be pale and soft while the top burns, which defeats the purpose of going crispy!
Serving Suggestions for Your Homemade Chicken Strips
Once those beautiful, crispy strips come out of the oven, the fun really begins: dipping! Making these **homemade chicken strips** is already a huge win for a **kid friendly chicken dinner**, but the sauce elevates them to legendary status. You can’t go wrong with classic BBQ or honey mustard, of course. They are fantastic served right alongside some sweet potato fries or a big veggie platter to keep things balanced.
But if you’re feeling adventurous and want a serious game-changer? You have to try a homemade dipping sauce. I have this incredible, super-quick creamy garlic aioli that pairs unbelievably well with the savory breading. Seriously, put out three different kinds of **chicken tender dipping sauces** and watch everyone dive in. It instantly makes the meal feel special without any extra effort from you!
Storage and Reheating Instructions for Healthy Chicken Tenders for Meal Prep
I always make a double batch because these **healthy chicken tenders for meal prep** are perfect leftovers! Once they’ve cooled completely—and I mean totally cool, hot food creates steam and steam creates sogginess—store them in a single layer in an airtight container in the fridge. They hang out happily in there for about three or four days.
Now listen, if you want to keep that gorgeous crispness we worked so hard for, you absolutely MUST avoid the microwave. That thing is the enemy of crunch! For reheating, you have two great options. Pop them on a wire rack set over a baking sheet in a 350°F oven for about 5 minutes, or better yet, throw them back into the air fryer for 3 minutes. That blast of hot, dry air brings them right back to life. You can find more tips on keeping food fresh in my meal prep guide!
Frequently Asked Questions About Making Chicken Tenders
It’s natural to have questions when trying a new recipe, especially when you’re worried about getting that crispiness right! Trust me, I’ve been there plenty of times, standing over the stove wondering if I messed up the spices. I want you to feel totally confident when you make these, so let’s tackle the most common things people ask about making **homemade chicken strips**.
Can I use chicken breast instead of tenderloins for this recipe?
Absolutely, yes! That’s one of the best things about this **easy chicken tender recipe**. Most grocery stores sell chicken breasts that are really thick, so I recommend trimming them down and slicing them into uniform strips about an inch thick. This ensures they cook at the same rate as natural tenderloins. Consistency equals success in the oven, remember?
What is the best way to make krispy chicken tenders no fry?
If you are avoiding frying, this recipe is your ticket! The absolute key to getting those **krispy chicken tenders no fry** results is two-part magic: First, use Panko breadcrumbs; they are just flakier than standard breading. Second, and this is crucial, you must use cooking spray liberally on the top side before they go into the oven. That light coating dehydrates rapidly under high heat, giving you that satisfying crunch without ever touching a pot of oil.
Can I skip the egg wash in the breading process?
Oh, please don’t! I know sometimes people try to cut steps, but I really advise against skipping the egg. The egg wash acts as the glue, the essential binder that makes your **simple chicken tender breading** stick! If you skip the egg, the flour might stick initially, but the Panko breadcrumbs will just fall right off the chicken in the oven, leaving you with sad, naked chicken pieces. It’s worth the extra 30 seconds to dip them in the egg!
Estimated Nutritional Profile for These Chicken Tenders
Now, because we are taking the healthier route by baking instead of deep-frying, these numbers are pretty fantastic! However, I always want to remind you that these figures are just estimates based on the exact recipe measurements I listed. If you use a thicker cut of chicken or decide to double up on the paprika (which I totally support!), the numbers will shift a little bit.
For a standard serving size of four tenders, here’s what you can generally expect from these **chicken tenders**: You’re looking at about 320 calories, a huge boost of 36 grams of protein to keep you full, around 8 grams of fat, and 25 grams of carbohydrates. That’s a powerhouse of a meal that tastes like takeout!
PrintEasy Crispy Baked Chicken Tenders Recipe
Make moist chicken tenders with a crispy coating using this simple baked recipe. These homemade chicken strips are perfect for a kid friendly chicken dinner or meal prep.
- Prep Time: 15 min
- Cook Time: 20 min
- Total Time: 35 min
- Yield: 4 servings 1x
- Category: Dinner
- Method: Baking
- Cuisine: American
- Diet: Low Fat
Ingredients
- 1.5 lbs boneless, skinless chicken breast, cut into 1-inch strips
- 1 cup all-purpose flour
- 2 large eggs, lightly beaten
- 1.5 cups panko breadcrumbs
- 1 teaspoon salt
- 1 teaspoon black pepper
- 1 teaspoon garlic powder
- 1 teaspoon paprika
- 1/2 teaspoon dried oregano
- Cooking spray
Instructions
- Preheat your oven to 400°F (200°C). Line a baking sheet with parchment paper and lightly coat with cooking spray.
- Set up a standard breading station with three shallow dishes. Place the flour in the first dish.
- In the second dish, place the lightly beaten eggs.
- In the third dish, combine the panko breadcrumbs, salt, pepper, garlic powder, paprika, and dried oregano. Mix well. This is your simple chicken tender breading.
- Take one chicken strip and dredge it thoroughly in the flour, shaking off any excess.
- Dip the floured chicken strip into the egg mixture, allowing excess to drip off.
- Press the strip firmly into the seasoned panko breadcrumbs until fully coated.
- Place the breaded chicken tender on the prepared baking sheet, ensuring pieces do not touch.
- Spray the tops of the coated tenders generously with cooking spray to help them crisp up.
- Bake for 18 to 22 minutes, flipping the tenders halfway through the cooking time, until they are golden brown and the internal temperature reaches 165°F (74°C).
- Serve immediately with your favorite chicken tender dipping sauces.
Notes
- For extra moist chicken tenders, you can soak the chicken strips in buttermilk for 30 minutes before starting the breading process.
- To achieve the best crispy chicken tenders how to make results, use panko breadcrumbs instead of regular breadcrumbs.
- This recipe works well for air fryer chicken tenders recipe; cook at 380°F (195°C) for 10-12 minutes, flipping halfway.
Nutrition
- Serving Size: 4 tenders
- Calories: 320
- Sugar: 2
- Sodium: 450
- Fat: 8
- Saturated Fat: 1.5
- Unsaturated Fat: 6.5
- Trans Fat: 0
- Carbohydrates: 25
- Fiber: 1
- Protein: 36
- Cholesterol: 110