
There’s just something about the smell of melted cheese mixed with warm garlic that instantly signals comfort, right? Forget complicated recipes; when you need that cheesy, savory fix fast, you need something foolproof. That’s why I’m sharing my absolute favorite shortcut: this **Cheesy Garlic Pull Apart Bread**. I developed this version by taking my practical home cooking intuition and testing it rigorously in the professional kitchen to make sure it works every single time you bake it. This isn’t just good; it’s the ultimate, easy homemade sensation that makes weeknights feel special. If you need quick wins in the kitchen, make sure you check out my full list of easy weeknight dinners!
- Why This Cheesy Garlic Pull Apart Bread is the Best Cheese Bread
- Ingredients for Your Pull Apart Cheese Bread
- How to Make This Easy Cheese Bread Recipe
- Tips for the Best Cheese Bread Experience
- Variations on Classic Cheese Bread
- Serving Suggestions for Your Cheesy Garlic Bread
- Storage and Reheating Melty Cheese Bread
- Frequently Asked Questions About Cheese Bread
- Nutritional Estimate for This Cheesy Comfort Food
- Share Your Homemade Cheese Bread Creations
Why This Cheesy Garlic Pull Apart Bread is the Best Cheese Bread
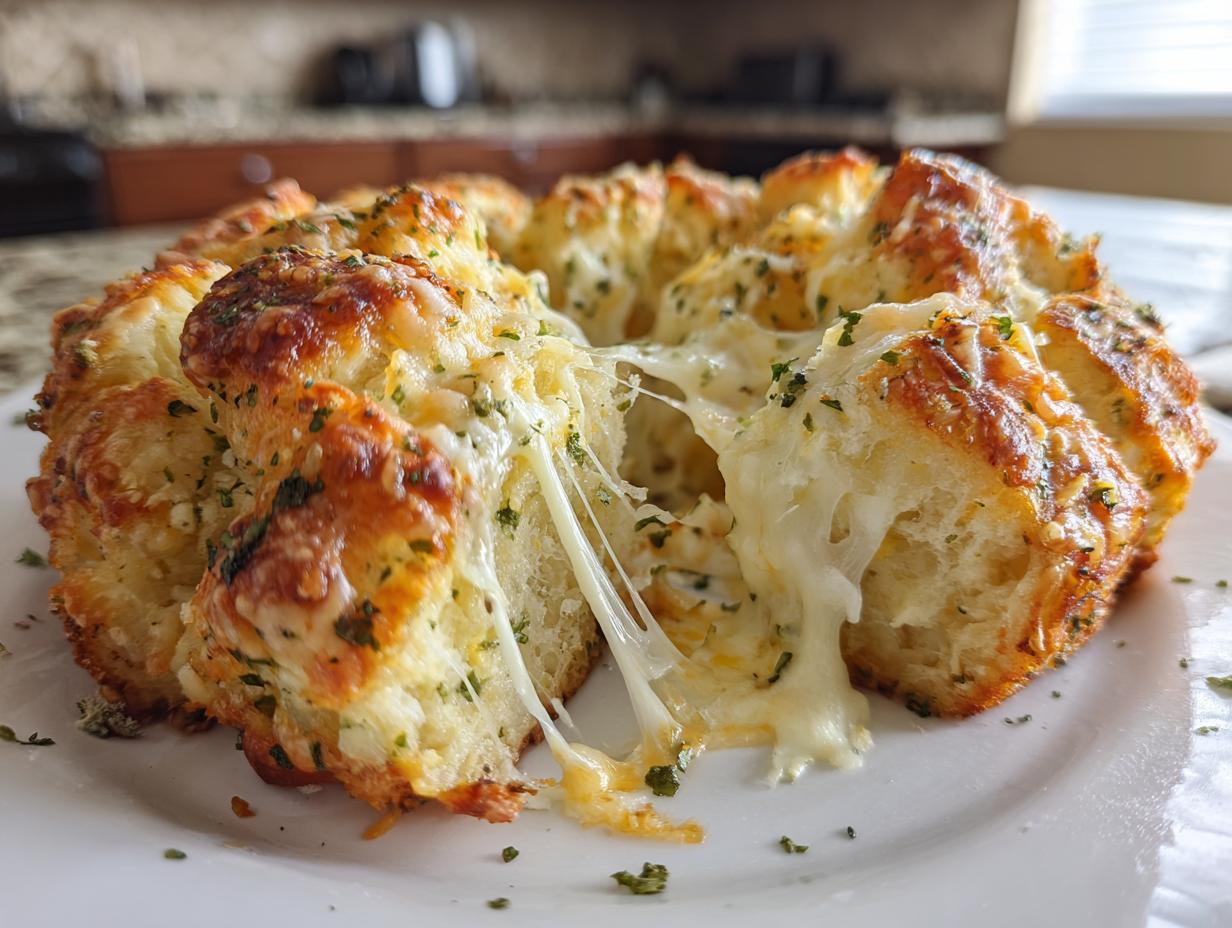
Okay, let’s talk about cravings. When you want savory, cheesy comfort food, you don’t want to wait two hours. This recipe delivers on that gooey promise in under 40 minutes total. It’s designed to be that show-stopping Party Appetizer Bread that disappears first!
- It creates zero mess and is completely built for sharing—just tear and eat!
- The texture is unbelievably soft on the inside while the edges bake up golden and slightly crispy.
- It uses simple shortcuts that let you spend less time mixing and more time enjoying that buttery flavor.
Achieving the Ultimate Gooey Cheese Bread Pull
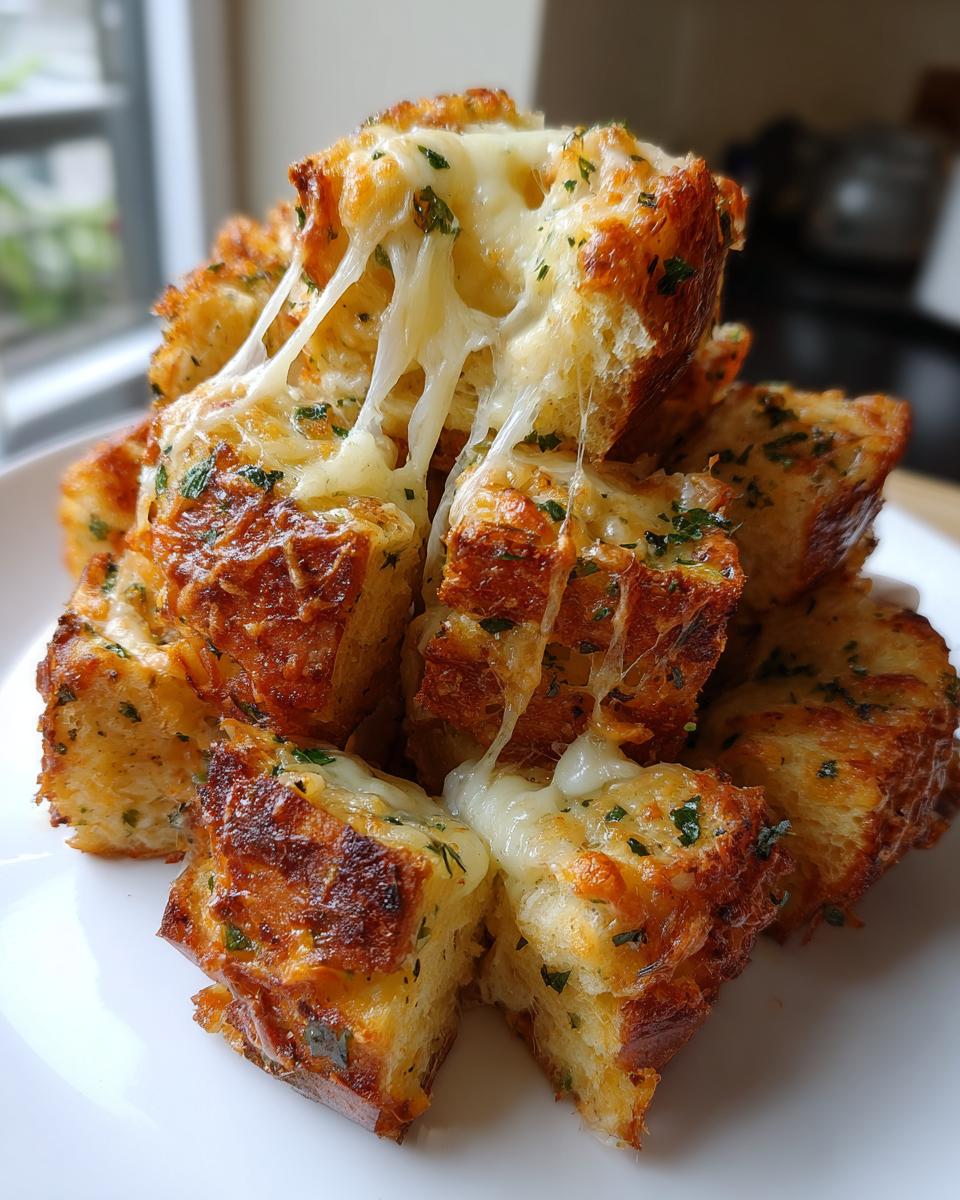
The melt here is everything, and I nailed the cheese blend. We use a base of low-moisture mozzarella because we need that amazing stretch—that’s where the classic pull comes from. But I mix in sharp cheddar! That cheddar melts beautifully while adding a necessary tang that keeps the whole thing from tasting flat. It’s the perfect harmony for Gooey Cheese Bread!
Simple Steps for Homemade Cheese Bread Success
I want you making this on a Tuesday night, not just for holidays! That’s why we rely on refrigerated pizza dough. It saves a ton of time, and honestly, when it’s drenched in that garlic-herb butter, nobody can tell the difference. This secret ingredient makes it the quickest path to achieving that rich, Buttery Cheese Bread experience.
If you love easy appetizers that wow a crowd, you have to check out my recipe for whipped ricotta dip next!
Ingredients for Your Pull Apart Cheese Bread
When you’re making something this easy, the ingredients list has to be short and sweet, but I want you to see exactly what you need! Don’t try to eyeball these amounts, especially the cheese part—we need that guarantee of a truly Gooey Cheese Bread. This isn’t a place to substitute heavy cream for butter, trust me on that!
Dough and Cheese Components for Perfect Cheese Bread
For the actual bread structure, we are leaning on convenience here. You’ll want one standard can of refrigerated pizza dough. Don’t stretch it or flatten it before cutting, just let it be its fluffy little self. For the cheese blend to hit that sweet spot between flavor and stretch, we use three types.
- 1 can (13.8 ounces) refrigerated pizza dough
- 1 1/2 cups shredded mozzarella cheese (This is your gooey stretch!)
- 1/2 cup shredded sharp cheddar cheese (For that beautiful color and bite)
- 1/4 cup grated Parmesan cheese (Adds a salty kick)
The Flavor Base: Garlic Butter for Cheesy Garlic Bread
This garlic butter mixture is what sends this over the top from being ‘nice bread’ to ‘ultimate Cheesy Garlic Bread.’ You need good quality, soft butter here, melted down until it’s liquid gold. The garlic needs to be fresh—jarred garlic just doesn’t give you that vibrant punch we’re after.
- 1/2 cup (1 stick) unsalted butter, melted
- 4 cloves garlic, minced finely
- 1 teaspoon dried Italian seasoning
- 1/4 teaspoon salt
Quick tip from my kitchen: If you’re feeling extra bold and want to really punch up the savory note, I sometimes stir in 1/2 teaspoon of garlic powder right to the wet butter mix. It’s totally optional, but oh so good!
How to Make This Easy Cheese Bread Recipe
This is where we put it all together, and honestly, it moves so fast you barely have time to clean the initial mixing bowl! Remember, patience is key when combining ingredients, even when you’re excited to eat your delicious cheese bread. I like to think of this whole process as less like baking and more like a rapid assembly job before heading into the oven.
Preparation: Cutting and Coating the Cheese Bread Dough
First things first: crank that oven up to 375°F (190°C) and grease your 9×5 inch loaf pan really well. I know it seems simple, but a lightly greased pan is better than a sticky disaster later when you try to serve this beautiful Pull Apart Cheese Bread!
Next, gently unroll your pizza dough. Don’t stretch it; we want fluffiness! Just use a sharp knife or pizza cutter to slice the whole sheet into rough 1-inch squares. Toss those squares into a big bowl—I mean, the biggest one you have because we’re about to add cheese! Now, pour that lovely garlic butter mixture right over the top. Mix it just gently with your hands or a rubber spatula until every piece looks shiny and coated. Now, sprinkle in all three of your cheeses and give it one last, very soft toss. We do not want to overmix this!
Baking Instructions for Golden, Melty Cheese Bread
Spoon your coated dough pieces into that prepared loaf pan, arranging them loosely. We aren’t trying to pack them tightly; they need room to puff up and connect during the bake. Slide that pan right into the hot oven for about 25 to 30 minutes. You want the top baked perfectly golden brown and that cheese bubbly and fully cooked.
Crucially, once it comes out, let it sit there in the pan for about 5 minutes. This resting time is essential! It lets the structure set up so you can carefully flip it out onto your serving platter without it collapsing into a beautiful, cheesy puddle. If you are looking for other great bread recipes, you can sometimes find inspiration over at this site, but trust me, you need this loaf pan method! I always encourage people learning about yeast doughs to check out my guide on making soft homemade dinner rolls for extra practice.
Tips for the Best Cheese Bread Experience
We’ve mastered the assembly, but now it’s time to really push this from ‘good’ to ‘legendary.’ Getting this cheese bread perfect consistently comes down to a few small judgments in quality and timing. These little tricks are what I learned watching experienced bakers—they always pay attention to the little things that add up to big flavor!
Ingredient Quality Matters for Savory Bread Recipe Flavor
I know it’s tempting to grab the jarred minced garlic when you’re in a rush, but please don’t! Fresh garlic is essential here. That raw, pungent garlic gets slightly mellowed and sweet when it bakes into the butter, and jarred garlic just can’t compete with that bright flavor. It’s the difference between an okay piece of bread and a truly unforgettable Savory Bread Recipe.
Also, stick to real butter. Margarine and spreads just don’t have the fat content or the flavor depth to carry those garlic and herb notes properly. You’ll notice the richness immediately if you use good quality, high-fat butter in your melted mix.
Troubleshooting Common Cheese Bread Issues
Sometimes things don’t go exactly to plan, and that’s okay! If you pull your loaf out and realize it’s looking a little pale on top but the cheese is already fully melted, just quickly drape a piece of aluminum foil loosely over the top. Pop it back in for five more minutes. The foil shields the top from browning while letting the center heat up completely.
On the flip side, if your bread comes out feeling a little dense when you test it? Nine times out of ten, that means you didn’t get enough of the garlic butter coating onto every single dough square, or you didn’t toss the cheese around enough. Every single piece needs to be kissed by that buttery goodness to achieve the right airy, pull-apart texture.
When you’re looking for something extra to dip this fantastic bread into, I highly recommend my creamy garlic aioli—it doubles down on that theme!
If you want to see how another great cook handles their garlic bread, I always recommend checking out this garlic cheese bread recipe for comparison!
Variations on Classic Cheese Bread
The beauty of relying on a simple, reliable base like this refrigerated dough—which lets us focus on the toppings—is how easily you can switch things up! While I stand by the simplicity of the mozzarella-cheddar combo, sometimes you want to throw in a curveball, right? These simple adaptations turn your basic cheese bread into something totally new while still keeping that melt factor high.
Adding Herbs for Italian Herb Cheese Bread Flavor
If you love that flavor profile you get from takeout places, adding fresh herbs to the melted butter is the way to go. You don’t need 12 varieties, just pick one or two that resonate with you! I adore adding about a tablespoon of fresh, chopped rosemary to the garlic butter mix before coating the dough pieces. It gives you a wonderfully fragrant, almost woody note that elevates this dish instantly. Basil works too, or even some dried oregano if that’s what you have on hand. This simple trick transforms it into that amazing Italian Herb Cheese Bread flavor you crave.
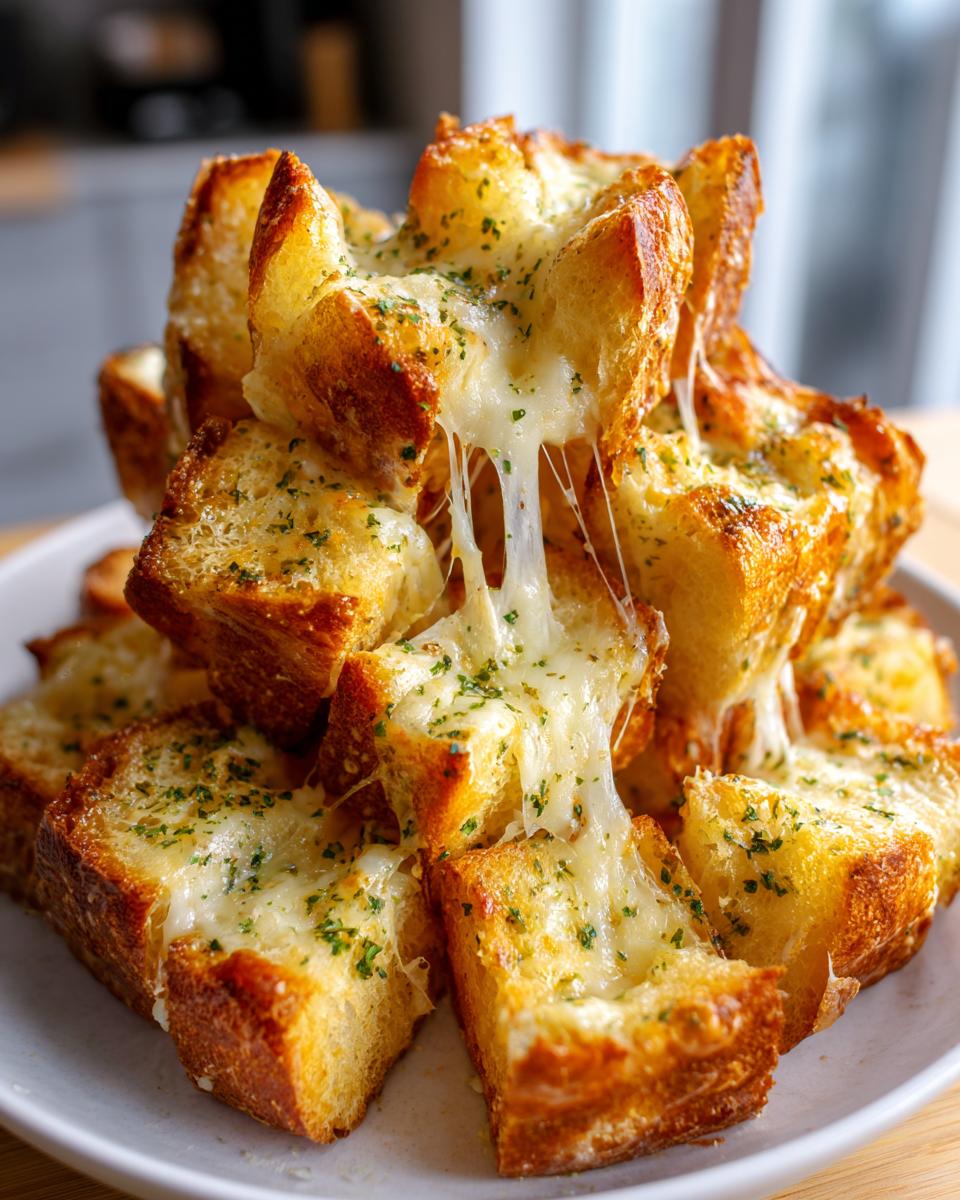
Making Cheesy Breadsticks Instead of a Loaf
If you’ve got a crowd, or if you just prefer things you can grab and dunk easily, skip the loaf pan entirely! The texture changes slightly, which is fantastic if you like a little more crispy edge with your gooey center. Instead of carefully placing the cheesy dough into the loaf pan, just spread all those buttered and cheesed squares out in a single layer across a parchment-lined baking sheet.
Because they are spread out, they bake a bit faster and the edges get lovely and crisp. You end up with perfect, shareable Cheesy Breadsticks. Just keep an eye on them; they might need 2 to 3 minutes less baking time than the loaf, depending on how thick your squares are!
If you make the sticks, you absolutely have to have a dipping sauce ready! My creamy garlic aioli is the perfect companion for dipping those crispy edges!
Serving Suggestions for Your Cheesy Garlic Bread
So you’ve managed to pull this glorious loaf out of the oven—congratulations! Now, what do you serve with it? Honestly, this cheese bread is so rich and flavorful that it can certainly stand on its own, maybe just with a napkin to catch the drips, but I like making it part of a bigger, cozy spread.
The absolute classic pairing, which never fails, is soup. Think about dipping those fluffy, cheesy squares into something warm. My favorite combination in the whole world is serving a generous portion of this garlic bread alongside my classic chicken noodle soup. The salty, garlicky bread soaks up all that wonderful broth—it’s peak comfort food, really.

If you’re serving it as an appetizer before a main course, keep the main simple. This bread is phenomenal dipped into red sauce—marinara, pizza sauce, whatever you have! It’s fantastic for parties because everyone can just grab their piece without needing a serving spoon. If you made the breadsticks version, definitely check out this suggestion for breadstick dipping, though I still prefer a good tomato-based dip myself.
And if you make a big batch, you can always freeze the leftovers (I’ll tell you how to reheat that later!) and use it as a side for pasta nights instead of making garlic toast.
Storage and Reheating Melty Cheese Bread
Nobody wants leftover disappointment, especially when it comes to something as wonderful as this Melty Cheese Bread! Since this recipe relies heavily on the moisture from the dough and the fresh melt of the cheese, you need a plan for day two. The good news is that even though it’s truly best the day it’s made, we can revive it beautifully!
If you happen to have any pieces left over—which, let’s be honest, is rare around my house—storage is super simple. Just let the bread cool completely to room temperature first. Then, wrap the remaining loaf (or pieces) tightly in plastic wrap, and follow that with a layer of foil. You want it sealed tight so that moisture doesn’t escape while it’s sitting in the fridge. It’ll hang out happily for about three days this way.
Now, for the magic of reheating! Forget microwaving it; that just makes it rubbery, and we settled for ‘soft and fluffy,’ not ‘chewy old bagel.’ The best way to bring back that soft interior and that gorgeous, gooey cheese pull is to use the oven or an air fryer.
If you’re reheating the whole loaf, simply unwrap it, pop it onto a baking safe dish, and heat it at a lower temperature—say, 300°F (150°C)—for about 8 to 10 minutes. This gently warms the dough back up without drying out the outside. If you only have a few pieces, the air fryer is your best friend! Toss a handful in for 3 minutes at 325°F (160°C). It crisps the edges up just a tad while making that cheese erupt with warmth again. Either way, you’re back to enjoying fantastic Homemade Cheese Bread!
Frequently Asked Questions About Cheese Bread
I get asked about this recipe all the time, and honestly, that just proves how popular a great cheese bread recipe is! I’ve gathered up the most common questions I hear from folks trying this out for the first time. If you’re worried about swapping ingredients or wondering about variations, chances are the answer is right here. And if you’re looking for ways to integrate this into a meal plan, don’t forget to peek at my easy weeknight dinners section!
Can I use homemade dough instead of refrigerated dough for this cheese bread?
Oh, absolutely! If you love making your own dough, go for it. That’s the beauty of baking, right? Just a note of caution: if you use a fully proofed, lofty homemade dough, you might want to cut it into pieces *before* the final rise, or just use it unrisen straight after kneading. If you let it rise again fully coated in cheese and butter, it can get unexpectedly dense or heavy in the oven. We want that soft, cloud-like texture, so control that final rise!
What is the best cheese for gooey cheese bread?
This is the million-dollar question for any Gooey Cheese Bread enthusiast! I strongly recommend a blend, just like we used in the main recipe. Low-moisture mozzarella is non-negotiable because it’s the stretch champion—it gives you those glorious long strings when you pull a piece away. Then, you absolutely need to mix in a sharper cheese, like that sharp cheddar, for real punchy flavor. I always advise shredding your own cheese, too! The stuff that comes pre-shredded has anti-caking agents that stop it from melting down into that silky, smooth texture we’re after.

Is this recipe similar to Brazilian Cheese Bread (Pão de Queijo)?
That’s a great question, and the answer is a big ‘no’—but they are both delicious in their own right! This Cheesy Garlic Pull Apart Bread is yeast-based and uses standard wheat flour, which gives it that soft, fluffy, bread-like interior that you can tear apart. Brazilian Cheese Bread, or Pão de Queijo, is completely different; it’s naturally gluten-free because it uses tapioca flour, which results in a denser, almost chewy, bouncy texture. They are worlds apart, but both fantastic vehicles for cheese!
Nutritional Estimate for This Cheesy Comfort Food
Now, I know what you’re thinking! When you’re diving into something as decadent and comforting as this Cheesy Comfort Food, you probably don’t want to talk about numbers. And honestly, I usually don’t either! But since I believe in being totally transparent about what we’re putting into our bodies—that’s part of my commitment to you—I want to lay out the estimates we calculated for this loaf.
Remember, since we are using a can of dough and various cheeses, these are just gorgeous ballpark figures. They are based precisely on the exact portions listed in the ingredients list. If you add extra cheese (which, trust me, I sometimes do!), these numbers will shift! If you are looking for ways to trim things down, I always share creative swaps in my healthy lunch ideas section, but for the ultimate cheesy pull, we stick to the plan here!
Here is the breakdown based on an 8-serving yield:
- Calories: Approximately 280 per serving
- Fat: About 16g (with 9g being saturated—that butter is working hard!)
- Carbohydrates: Around 23g
- Protein: A solid 10g from all that glorious cheese
- Sugar: Very low, only about 2g
- Sodium: Around 550mg (This is where the salt and Parmesan contribute, so keep that in mind if you’re tracking sodium intake!)
Think of this as a rich, satisfying side dish or appetizer, not a light snack! Enjoy it fully, knowing you made something incredible from scratch!
Share Your Homemade Cheese Bread Creations
Well, we made it! We’ve taken a simple can of dough and turned it into the most ridiculously delicious, garlicky, gooey reward. Now that you have this amazing masterpiece of cheese bread fresh out of the oven, the best part about my philosophy here at Cooking by Jade is getting to see you succeed and enjoy the process!
I truly pour my heart into making these recipes as foolproof as possible, combining the reliability I learned in the test kitchen with the warmth of home cooking. So, when you finish pulling apart that last cheesy square—which I hope you did straight out of the oven—I’d love to hear about it!
Please take a moment to leave a rating for this recipe right here on the page. Give it the stars it deserves if it brought comfort and cheesy joy to your kitchen! Did you try the extra garlic powder trick? Did you dip it in my creamy aioli?
If you snapped a picture of that incredible cheese pull, I want to see it! Tag me on social media, or better yet, head over to my contact page and send me a quick note and a photo. Knowing that this recipe brought a moment of simple, delicious connection to your table is what cooking is all about for me. Happy baking, friend!
PrintCheesy Garlic Pull Apart Bread: Gooey and Easy Homemade Cheese Bread

Make this gooey, cheesy garlic pull apart bread using simple ingredients. This recipe delivers soft, buttery bread with a melted cheese center, perfect as a restaurant-style appetizer or savory side dish.
- Prep Time: 10 min
- Cook Time: 30 min
- Total Time: 40 min
- Yield: 8 servings 1x
- Category: Appetizer
- Method: Baking
- Cuisine: American
- Diet: Vegetarian
Ingredients
- 1 can (13.8 ounces) refrigerated pizza dough
- 1/2 cup (1 stick) unsalted butter, melted
- 4 cloves garlic, minced
- 1 teaspoon dried Italian seasoning
- 1/4 teaspoon salt
- 1 1/2 cups shredded mozzarella cheese
- 1/2 cup shredded sharp cheddar cheese
- 1/4 cup grated Parmesan cheese
Instructions
- Preheat your oven to 375°F (190°C). Lightly grease a 9×5 inch loaf pan.
- Unroll the pizza dough onto a clean surface. Do not stretch or flatten it. Cut the dough into approximately 1-inch squares.
- In a small bowl, combine the melted butter, minced garlic, Italian seasoning, and salt. Mix well.
- Place the dough squares into a large bowl. Pour the garlic butter mixture over the dough squares and toss gently until all pieces are coated.
- Sprinkle the mozzarella cheese, cheddar cheese, and Parmesan cheese over the dough pieces. Toss lightly to distribute the cheese, but do not overmix.
- Transfer the coated dough pieces into the prepared loaf pan, arranging them loosely.
- Bake for 25 to 30 minutes, or until the top is golden brown and the cheese is fully melted and bubbly.
- Let the bread cool in the pan for 5 minutes before carefully inverting it onto a serving plate. Serve warm for the best melty cheese pull.
Notes
- For extra flavor, you can add 1/2 teaspoon of garlic powder to the butter mixture.
- If you prefer a crispier exterior, bake the bread on a baking sheet instead of a loaf pan.
- This bread is best eaten the day it is made for the softest texture.
Nutrition
- Serving Size: 1 serving (approx. 1 slice equivalent)
- Calories: 280
- Sugar: 2
- Sodium: 550
- Fat: 16
- Saturated Fat: 9
- Unsaturated Fat: 7
- Trans Fat: 0.5
- Carbohydrates: 23
- Fiber: 1
- Protein: 10
- Cholesterol: 35