
Close your eyes for a second—can you smell that bright, sun-drenched citrus? If you’re dreaming of a getaway but stuck at home, this key lime cheesecake is your ticket! I promise you, this is the ultimate version: unbelievably creamy, perfectly tangy, and absolutely stunning when it hits the table. Here at Cooking by Jade, we aren’t about making things harder than they need to be. My whole goal is taking something that looks super impressive, like this beautiful dessert, and making sure the steps are so clear that anyone can create kitchen magic. You can read more about how we approach simplicity over at our About page! Forget intimidating, let’s bake!
- Why This Creamy Key Lime Cheesecake Recipe Works
- Gathering Ingredients for Your Key Lime Cheesecake
- Step-by-Step Instructions for the Best Key Lime Cheesecake
- Cooling and Chilling: Secrets to a Perfect Key Lime Cheesecake
- Tips for the Easiest Key Lime Cheesecake Experience
- Serving Suggestions for Your Key Lime Cheesecake
- Storage and Reheating Instructions for Leftover Key Lime Cheesecake
- Frequently Asked Questions About Key Lime Cheesecake Recipe
- Sharing Your Homemade Key Lime Pie Cheesecake Experience
Why This Creamy Key Lime Cheesecake Recipe Works
When you’re making a creamy key lime cheesecake, you need a recipe you can truly trust, right? That’s what I wanted when I developed this. The reliability comes down to a few key moves. First, we always use that water bath—it sounds fancy, but it’s just a little swimming pool for your pan! This keeps the oven humid, which is the secret weapon against cracks, giving you that perfectly smooth surface.
Also, we aren’t messing around with bottled goo when it comes to the flavor. Using fresh lime juice is non-negotiable if you want that real, bright punch. You can check out some of my favorite creamy techniques, though they are for a different dessert, over here: creamy mango sticky rice is a good example of gentle mixing!
Achieving the Perfect Tangy Lime Dessert Balance
A great tangy lime dessert walks a super fine line between tart and sweet. Too much sugar, and you just have a sweet brick. Too much tartness, and your cheeks pucker up! My specific ratio of sugar to fresh key lime juice is what locks in that perfect sip-worthy flavor.
But listen, the *real* aromatic lift comes from the zest! Don’t skip that step. The zest holds all those bright essential oils that make your nose tingle before you even take a bite. It’s all about balancing that rich cheese with the sharp citrus.
Gathering Ingredients for Your Key Lime Cheesecake
Okay, let’s talk about what you need to pull this beauty off. It’s all in the details here; don’t just toss things in! For the crust, we need a good foundation: about a cup and a half of graham cracker crumbs, which we are mixing with melted butter and a bit of sugar. Make sure that butter is measured correctly, or your crust might turn into a crumbly mess!
For the filling, the star power is three full blocks of cream cheese—and seriously, they have to be softened completely, or you’ll get lumps that look like tiny white mountains in your smooth cake. You also need most of your sugar, that little bit of flour for structure, vanilla, the eggs, and of course, that vital lime juice and zest. Don’t forget the toppings—a little whipped cream is waiting patiently!
- For the Graham Cracker Crust Dessert Base:
- 1 1/2 cups graham cracker crumbs
- 1/4 cup granulated sugar
- 6 tablespoons unsalted butter, melted
- For the Creamy Filling:
- 3 (8 ounce) packages cream cheese, softened to room temperature
- 1 1/2 cups granulated sugar
- 1/4 cup all-purpose flour
- 1 teaspoon vanilla extract
- 1/2 cup fresh key lime juice (about 10-12 limes once squeezed!)
- Zest of 3 key limes
- 4 large eggs, room temperature is best!
- For the Topping:
- Whipped cream and extra lime zest, for garnish when serving
Step-by-Step Instructions for the Best Key Lime Cheesecake
Alright, let’s get down to business! Making the best key lime cheesecake is all about following the flow and being gentle when you need to be. Remember, we are setting this up for success through careful layering. The total bake time is about an hour, but the preparation is really quick if you have your ingredients ready to go. If you want to see another recipe where gentle mixing is key, I have a great one for homemade mayonnaise right here.
Crafting the Buttery Graham Cracker Crust Dessert Base
First things first: get that oven warmed up to 325 degrees F. Grab your 9-inch springform pan—this is super important—and wrap the outside bottom and sides multiple times with heavy-duty aluminum foil. Seriously, wrap it tight! You don’t want any water sneaking in during the water bath later on. For your graham cracker crust dessert base, just mix up those crumbs, sugar, and melted butter until it feels like wet sand. Press it down super firmly into the bottom of that foiled pan. Give it a little 10-minute head start in the oven to set, and then pull it out to cool slightly while you work on the filling.
Mixing the Filling Without Over-Aerating
Now for the texture magic! In a big bowl, beat that softened cream cheese until it’s absolutely lump-free and silky smooth. Scrape the sides down! Then, slowly beat in the rest of your sugar and the flour. This builds the structure. The critical part comes now: add your eggs one by one, mixing on the *lowest* speed only until the yellow yolk disappears. Stop right there! If you incorporate too much air by overmixing after the eggs go in, that’s usually what causes cracking on the top later. We want dense, not fluffy!
Baking the Key Lime Cheesecake Using a Water Bath
Time for the soothing step! Pour that beautiful lime filling right over your cooled crust. Find a big roasting pan bigger than your springform pan. Put the foil-wrapped cheesecake inside the roaster. Then, very carefully, pour hot water into the large roasting pan until it comes about halfway up the sides of the cheesecake pan. This ‘bain-marie’ gives that even heat we need. Bake it for 55 to 65 minutes. You’ll know it’s done when the edges look set, but the very center still has a tiny, nervous wobble when you nudge the pan. Don’t cook it longer than that!
Cooling and Chilling: Secrets to a Perfect Key Lime Cheesecake
Okay, resist the urge to rush this part! I know it’s hard when something smells this amazing, but the cooling process is just as important as the baking when it comes to getting that flawless, creamy key lime cheesecake texture. People always ask me why their desserts crack, and nine times out of ten, it’s because they yanked it straight out of the oven. We are building trust here—trusting the process!
Once that center is just slightly wobbly, turn your oven OFF immediately. Don’t touch the temperature dial; just turn the heat off. Now, prop the oven door open just a crack—I usually use a wooden spoon handle for that—and leave the cheesecake inside that warm environment for a full hour. This slow decrease in temperature stops the cheesecake from shrinking rapidly, which is what causes those ugly fissures on top. You’re gently coaxing it from hot to warm.
After that hour of oven-napping, carefully take the cheesecake out of the water bath and remove the foil wrapping. Let it sit on a wire rack on your counter until it reaches room temperature. Trust me, this might take another couple of hours, and that’s fine! You want it completely cool before it even *thinks* about heading into the fridge.
The final, non-negotiable step is the chill time. This isn’t a quick-set dessert, folks. You absolutely must refrigerate this for a minimum of 6 hours, but I’m telling you, overnight is where the real magic happens. That long, slow chill allows the dairy and lime juices to fully set up, giving you that dense, smooth, sliceable reward that defines the best key lime cheesecake.
Tips for the Easiest Key Lime Cheesecake Experience
If you want this to be an easy key lime cheesecake experience, there are just a couple of things you absolutely must nail before you even start mixing. I know baking can sometimes feel like chemistry, but it’s mostly about paying attention to the details, which is why I always try to keep the process straightforward.
The biggest head start you can give yourself is prepping your ingredients correctly! This is where so many home cooks accidentally introduce problems like lumps or uneven baking. If you’re making dinner first, make sure you pull out the cream cheese and eggs well ahead of time. The science just works better when things are level!
If you’re looking for more recipes to simplify your weekly routine, I have some great ideas over on my easy weeknight dinners post!
Ingredient Notes and Substitutions for Tropical Citrus Cheesecake
Let’s talk about those limes because this is where you guarantee that intense, bright flavor. If you can find genuine key limes, great! They are smaller and much more aromatic and tart. You’ll need that specific, sharp flavor for a true tropical citrus cheesecake experience. If you squeeze them yourself, you skip that weird cooked flavor you get from bottled juice.
But let’s be real, sometimes key limes are impossible to find, right? If you’re stuck with the big Persian limes (the ones you usually find at the store), don’t panic! You can absolutely use them. Just know that you might need to bump up the zest quantity slightly—maybe even add a tiny splash more juice—to get that signature punch you’re aiming for. The fresh zest is your aromatic insurance policy, so zest liberally!
Remember that crucial tip from the ingredient section? Make sure that cream cheese and the eggs are totally at room temperature. Cold cream cheese clumps up when it hits the mixers, and that’s a guaranteed trip to Lumpy Town, and nobody wants that in their cheesecake! A few minutes on the counter makes a huge difference.
Serving Suggestions for Your Key Lime Cheesecake
Once you’ve managed the chilling process—which, trust me, takes serious willpower—it’s time for the fun part: serving! This key lime cheesecake honestly doesn’t need much help because that bright, tangy flavor is the star, but a little finishing touch makes it truly show-stopping.
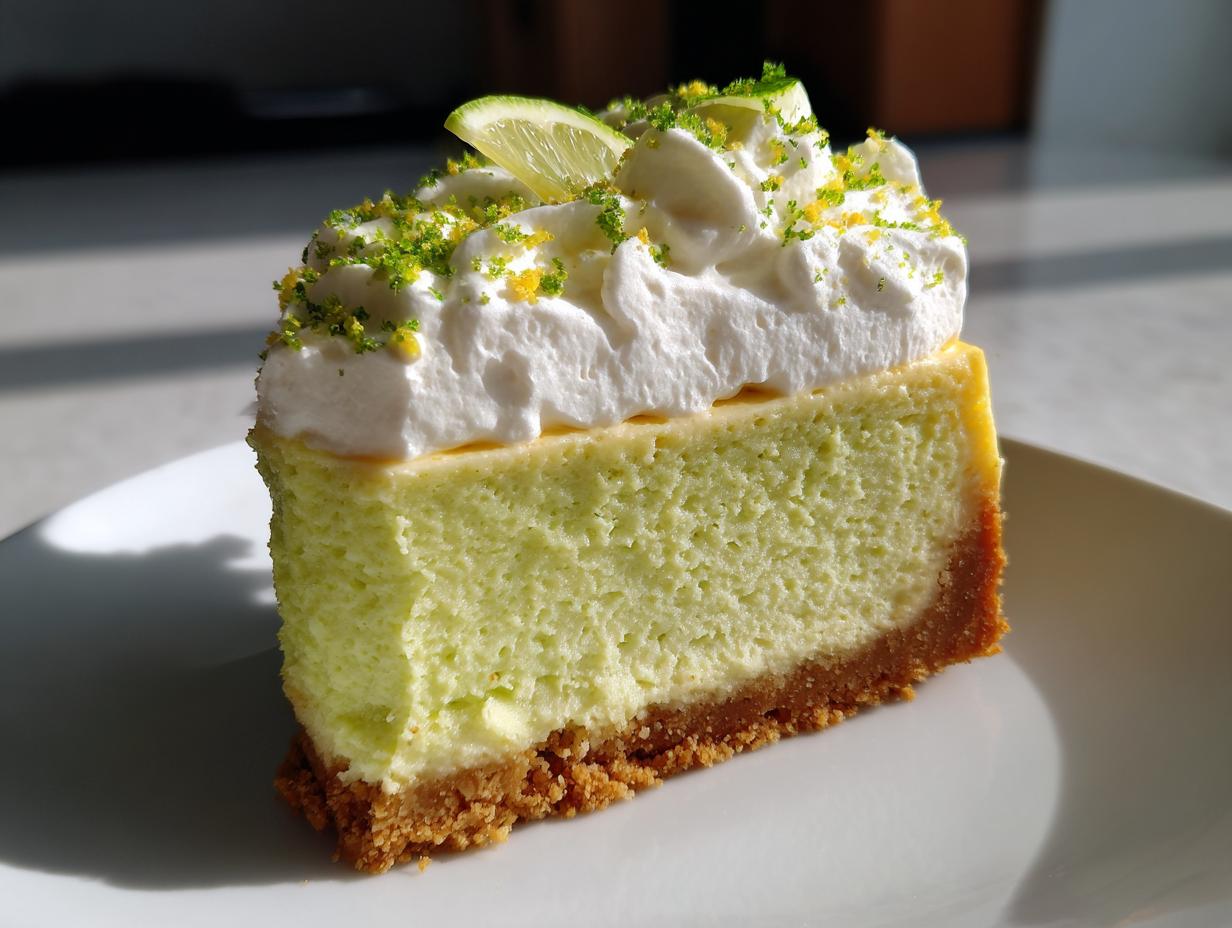
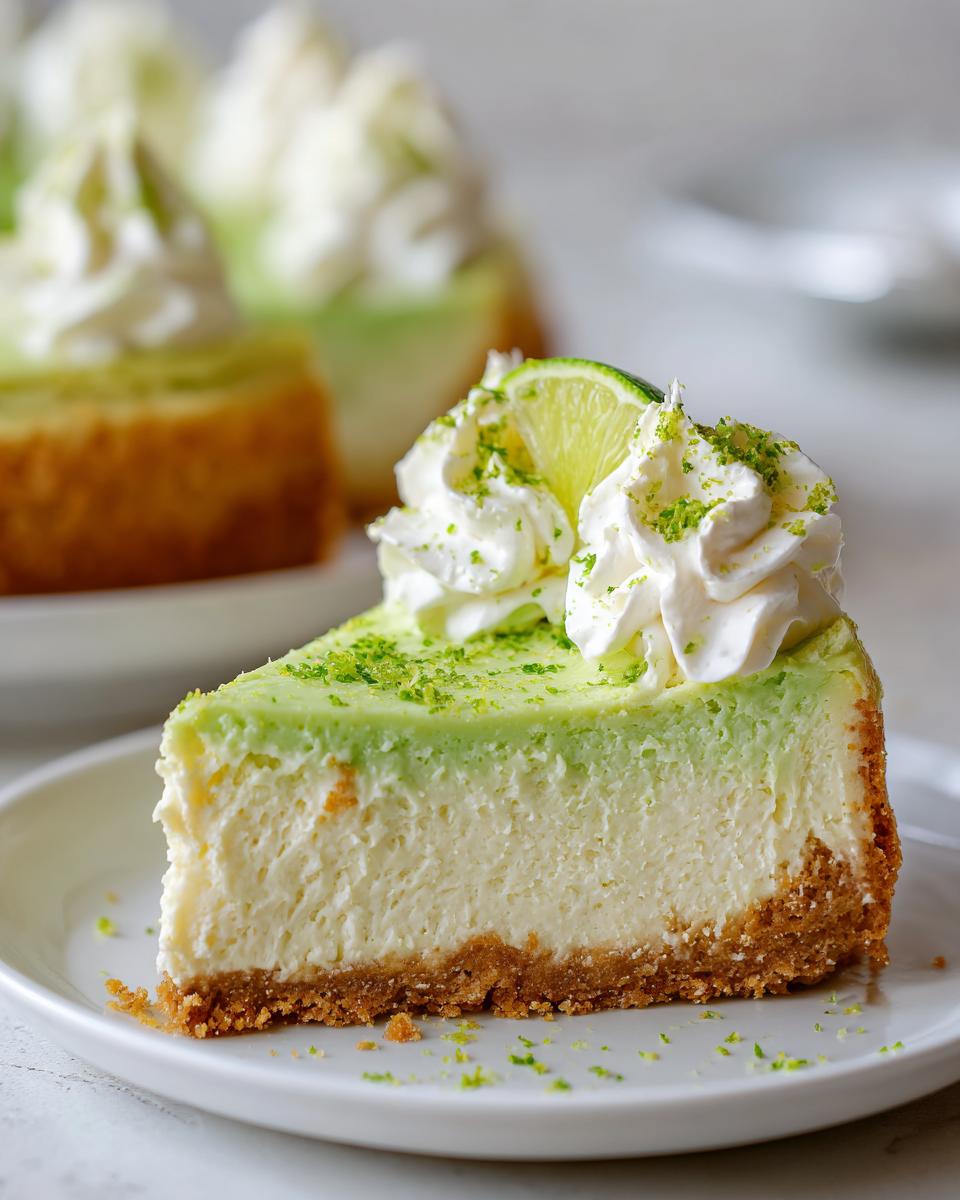
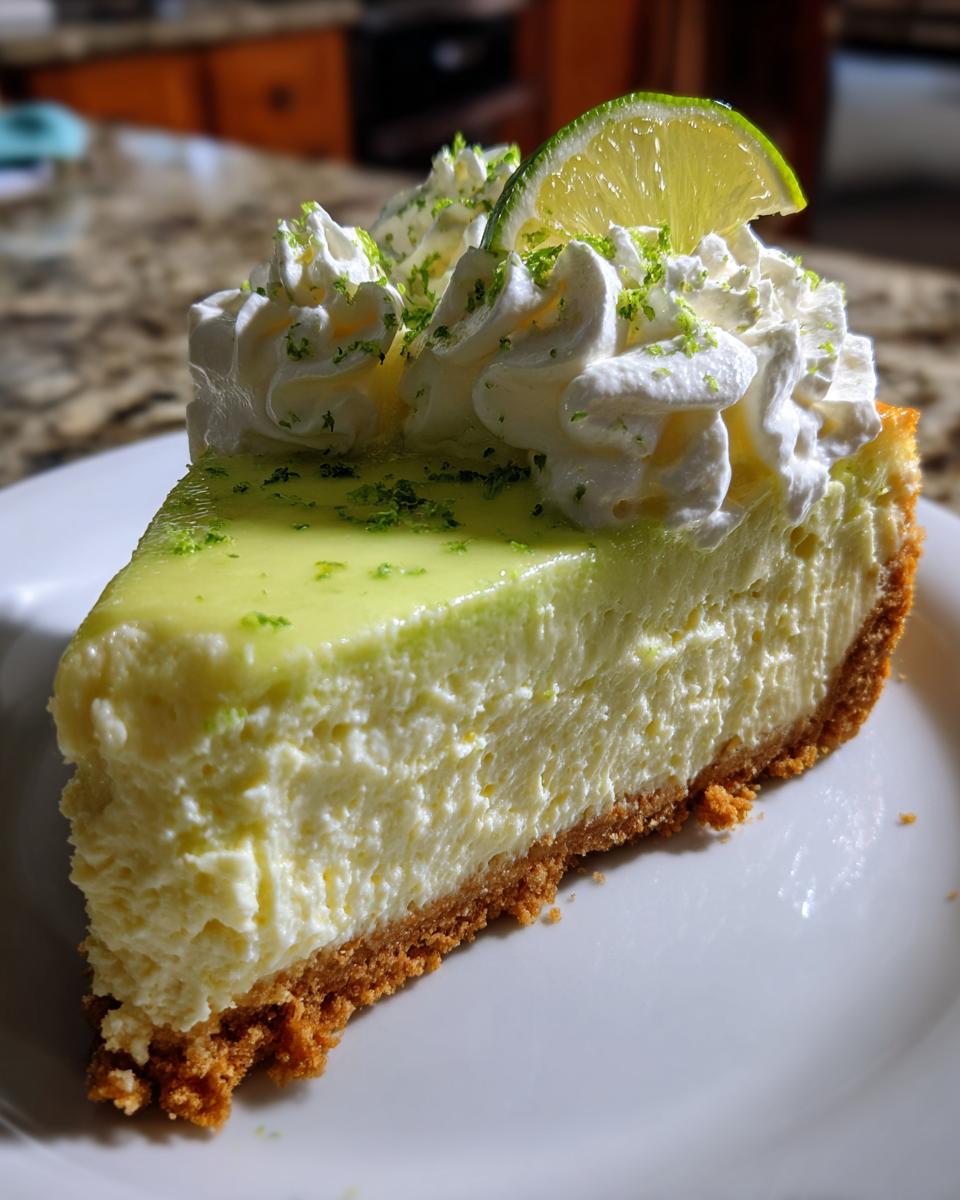
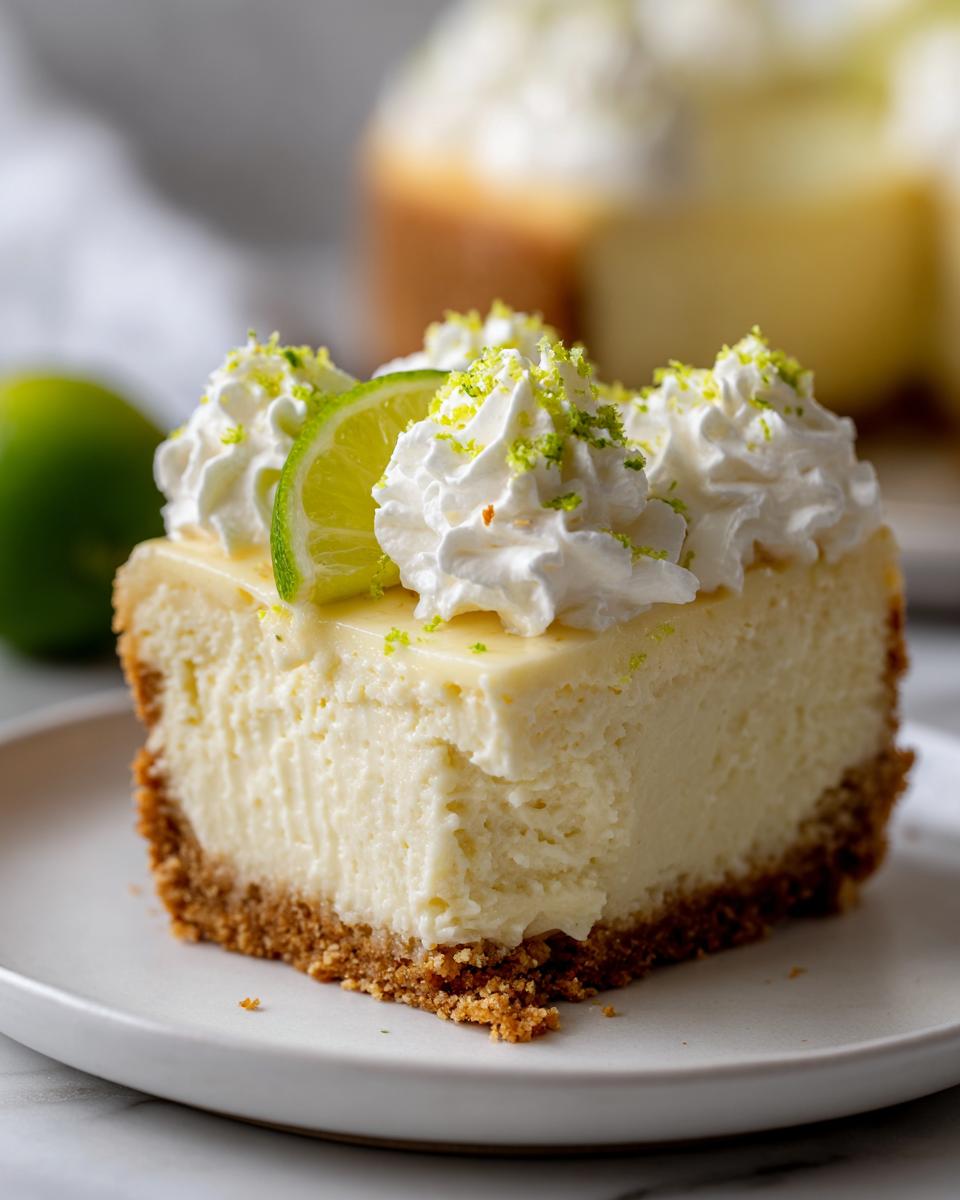
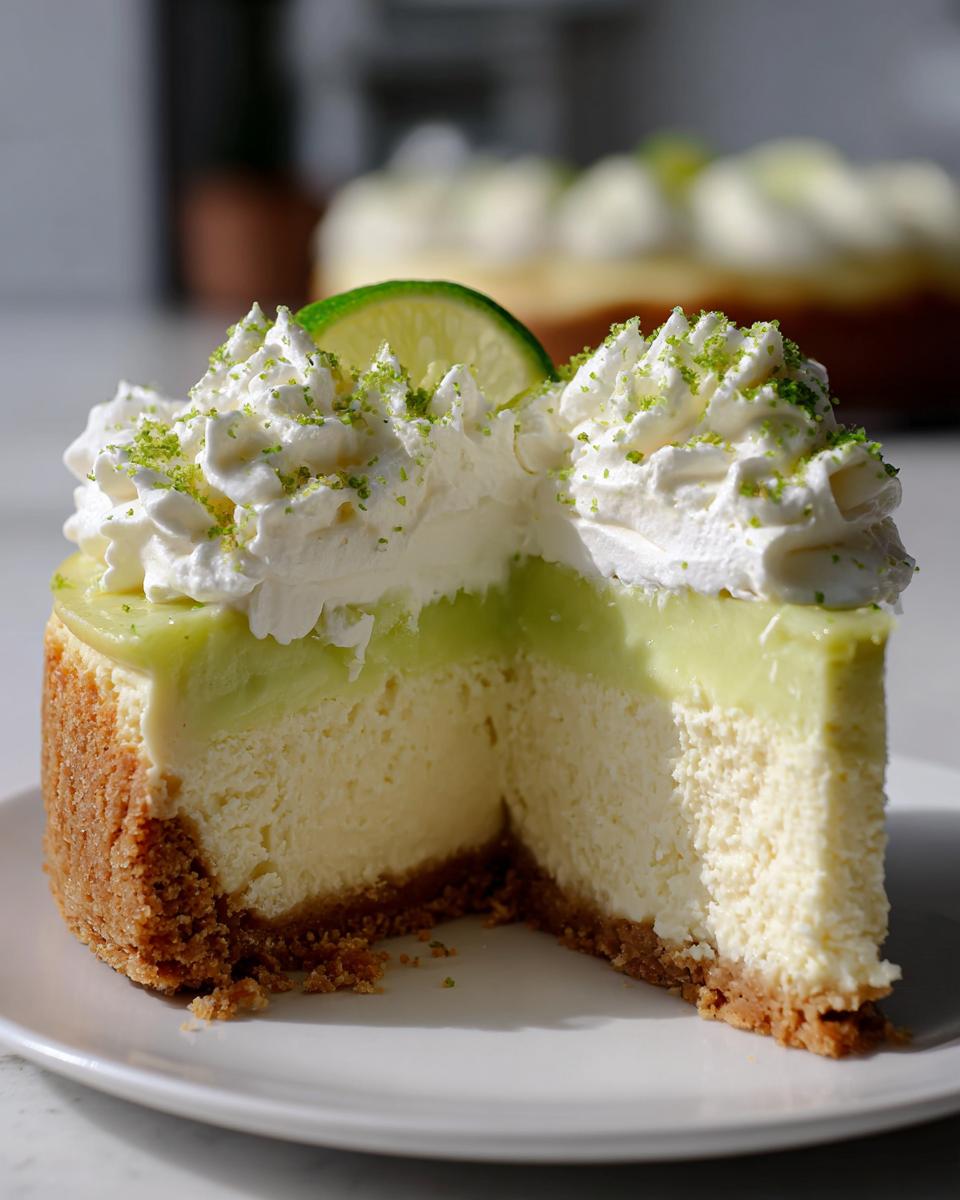
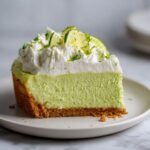
The recipe calls for the essentials, and you should definitely stick to these for the best visual appeal and texture contrast. We’re talking about pillowy dollops of fresh whipped cream piled right on top. Be generous! And don’t forget that final whisper of fresh lime zest sprinkled lightly over the cream. That zest acts like little emerald confetti, signaling exactly what deliciousness awaits underneath.
If I’m serving this as the grand finale to a dinner party, I love pairing it with something that cuts through the richness just a bit. If it’s served after a heavy meal, a simple, hot cup of black coffee or maybe a light herbal tea works wonders. It’s such a beautifully balanced, refreshing summer dessert that you don’t want to weigh it down with anything too heavy!
Now, if you were wanting to get *really* fancy—and I mean, really fancy!—you could always whip up some incredible frosting, though that’s usually overkill for a cheesecake. If you ever need a stunning frosting recipe, I have one for vanilla buttercream that proves simple icing can elevate anything, but for this lime beauty, whipped cream is truly king!
Storage and Reheating Instructions for Leftover Key Lime Cheesecake
So, you finished your dessert, but miraculously, there are still a few glorious slices left! Don’t worry about that—this is actually one of the **key lime cheesecake recipe** secrets: it tastes even better the next day once it’s fully settled in the cold.
The most important thing about storing cheesecake, especially one this rich and creamy, is keeping the air away from it. Air is the enemy because it dries out those beautiful edges. You want to make sure the cheesecake is completely cool and fully chilled *before* you wrap it. If you wrap it while it’s still warm from the fridge, you’ll trap condensation, and that’s not good for texture.
For the refrigerator, my rule is simple: cover it well. Once the springform sides are off, loosely tent the top with plastic wrap first, and then cover the whole thing with another layer of foil to keep out any smells from the fridge. It will stay fantastic and fresh for about four to five days this way. Seriously, it holds up beautifully!
Now, can you freeze it? Yes, you absolutely can freeze leftover **creamy key lime cheesecake**, which is great if you decided to make a double batch—aren’t we always thinking ahead?
If you want to freeze it, slice it first! Trying to wrap a whole cheesecake after it’s been sliced is a nightmare. Wrap each individual slice tightly in plastic wrap, then place those wrapped slices into a freezer-safe bag or an airtight container. It keeps really well in the freezer for up to about a month if you package it right.
Thawing is slow and gentle, just like cooling it! Move the frozen slice from the freezer right into the refrigerator the night before you plan to eat it. Let it thaw slowly in the cold for 8 to 12 hours. Never thaw cheesecake at room temperature, as that can mess with the texture and creaminess. When it’s thawed, let it sit on the counter for maybe 15 minutes before you dig in. Enjoy that perfectly tangy treat!
Frequently Asked Questions About Key Lime Cheesecake Recipe
It’s natural for wonderful recipes like this one to bring up questions! I get asked a lot of the same things, so I’ve gathered the most common ones here to make sure your adventure into making the key lime cheesecake recipe is totally stress-free. We want reliable results, so let’s sort out any last-minute worries!
Can I make a No Bake Key Lime Cheesecake using this recipe?
That’s a great question, especially since summertime makes us look for quick fixes! I know the No Bake Key Lime Cheesecake options are super popular because they feel easy. However, this specific recipe is designed to be baked. The eggs and the flour, combined with the heat from the oven, are what create that signature rich, dense, and unbelievably creamy key lime cheesecake texture we’re aiming for. If you need a no-bake version, you’ll want to search specifically for a recipe that uses stabilizers like gelatin or whipped topping instead of eggs, because this baked method won’t set up correctly without the oven!
What is the difference between Key Lime and Persian Lime in a Tangy Lime Dessert?
This is crucial if you want the authentic flavor! Key limes are tiny, have a thinner, yellowish rind when ripe, and they are significantly tarter and more aromatic than the large, common Persian limes you usually see in the grocery store. When you are aiming for that truly outstanding tangy lime dessert punch, the key lime juice is unbeatable because of those intense oils.
If you have to substitute with Persian limes, you can still make a delicious cheesecake, but you might need to lean a little heavier on the zest to capture some of that intense perfume. Just be mindful; Persian limes are milder, so the resulting dessert will be slightly less sharp and tart overall.
How do I prevent my cheesecake from cracking?
Ah, the eternal mystery of cheesecake—the crack! This is honestly where that “trust the process” advice comes in handy. If you do two things right, you can almost guarantee a beautiful, smooth top. Number one: you absolutely must use that water bath (the bain-marie) when baking. It creates an even, gentle cooking environment for the custard filling, preventing the edges from setting much faster than the middle.
Number two: the slow cooldown. Never, ever take that hot cheesecake out of the oven and set it on the counter. That sudden temperature drop is what makes the cooked structure slam together and crack! Stick to that one hour of cooling inside the turned-off oven with the door propped open. That gentle transition is the key to a flawless presentation!
If you have any more pressing questions about ingredients or troubleshooting, feel free to reach out to me directly at the contact page!
Sharing Your Homemade Key Lime Pie Cheesecake Experience
Well, we did it! We conquered the water bath, we waited patiently during the chilling process, and now you have this stunning, bright, and incredibly homemade key lime pie cheesecake sitting right there on your counter. I truly hope your kitchen smells like a little slice of paradise right now!
I honestly cannot wait to hear how this turned out for you! When I develop these recipes, my biggest joy comes from knowing they worked perfectly in someone else’s kitchen, just like they do in mine. Did you manage to get that perfect, smooth texture? Did the tanginess hit just right for your family?
Please, if you loved this recipe—or even if you learned something new about baking cheesecakes—would you do me a huge favor and leave a star rating right below? It helps other home cooks find reliable recipes they can trust. If you snapped a picture of your gorgeous, creamy cheesecake holding up on a serving platter, share it on social media and tag me! I love seeing your creations!
For even more sweet inspiration, hop over and check out my whole collection of dessert recipes. And if you tried that tangy trick from our friends over at Savor Gleam, I’d love to hear your comparison of their approach to ours when you leave a comment! You can find inspiration over at Savor Gleam. Happy baking, everyone!
PrintCreamy and Tangy Key Lime Cheesecake Recipe
You will make a creamy, tangy Key Lime Cheesecake with a buttery graham cracker crust. This recipe delivers bright citrus flavor and a smooth texture, making it a refreshing summer dessert.
- Prep Time: 25 min
- Cook Time: 65 min
- Total Time: 7 hours 30 min
- Yield: 12 servings 1x
- Category: Dessert
- Method: Baking
- Cuisine: American
- Diet: Vegetarian
Ingredients
- 1 1/2 cups graham cracker crumbs
- 1/4 cup granulated sugar (for crust)
- 6 tablespoons unsalted butter, melted
- 3 (8 ounce) packages cream cheese, softened
- 1 1/2 cups granulated sugar (for filling)
- 1/4 cup all-purpose flour
- 1 teaspoon vanilla extract
- 1/2 cup fresh key lime juice (about 10–12 limes)
- Zest of 3 key limes
- 4 large eggs
- Whipped cream and extra lime zest, for topping
Instructions
- Preheat your oven to 325 degrees Fahrenheit. Wrap the outside of a 9-inch springform pan tightly with heavy-duty aluminum foil.
- Prepare the crust: In a medium bowl, combine the graham cracker crumbs, 1/4 cup sugar, and melted butter. Press the mixture firmly and evenly into the bottom of the prepared springform pan. Bake for 10 minutes. Remove from the oven and let it cool slightly.
- Prepare the filling: In a large bowl, use an electric mixer to beat the softened cream cheese until it is smooth. Scrape down the sides of the bowl.
- Gradually beat in the 1 1/2 cups of sugar and the flour until just combined. Mix in the vanilla extract, key lime juice, and lime zest.
- Add the eggs one at a time, mixing on low speed after each addition only until the yolk disappears. Do not overmix the batter once the eggs are added.
- Pour the filling over the cooled crust in the springform pan.
- Bake the cheesecake using a water bath (bain-marie): Place the foil-wrapped springform pan inside a larger roasting pan. Carefully pour hot water into the roasting pan until it reaches about halfway up the sides of the springform pan.
- Bake for 55 to 65 minutes, or until the edges are set but the center still jiggles slightly when gently nudged.
- Turn off the oven, prop the door open slightly, and let the cheesecake cool inside the oven for 1 hour. This slow cooling prevents cracking.
- Remove the cheesecake from the water bath and let it cool completely on a wire rack. Once cool, cover and refrigerate for at least 6 hours, or preferably overnight, before serving.
- Before serving, carefully remove the sides of the springform pan. Top with whipped cream and extra lime zest.
Notes
- For the best tangy flavor, use fresh key lime juice instead of bottled juice.
- If you cannot find key limes, you can substitute with regular Persian limes, but you may need to slightly increase the zest for intensity.
- To achieve a very creamy texture, bring your cream cheese and eggs to room temperature before mixing.
Nutrition
- Serving Size: 1 slice
- Calories: 450
- Sugar: 35g
- Sodium: 250mg
- Fat: 30g
- Saturated Fat: 18g
- Unsaturated Fat: 12g
- Trans Fat: 0.5g
- Carbohydrates: 40g
- Fiber: 1g
- Protein: 7g
- Cholesterol: 120mg