
Oh gosh, when summer hits, my oven is officially on vacation! If you’re anything like me and just can’t face that extra blast of heat, then you need to know about this recipe. Forget complicated baking; this is The Ultimate Easy No Bake Peanut Butter Pie, and seriously, it’s the best. We are talking about a decadent, rich, creamy filling nestled in that irresistible chocolate Oreo crust. It’s everything you want in a dessert without the fuss. Because I’ve spent so much time testing and perfecting recipes in the professional kitchen, I promise you this no bake peanut butter pie is foolproof—it sets up perfectly every single time. You’re going to love how simple this is for your next gathering!
- Why This Is The Best no bake peanut butter pie
- Gathering Ingredients for Your no bake peanut butter pie
- Step-by-Step Instructions for the Easy Peanut Butter Pie
- Expert Tips for the Perfect no bake peanut butter pie
- Storage and Make Ahead Pies Instructions
- Serving Suggestions for this Simple Summer Pies
- Frequently Asked Questions about the no bake peanut butter pie
- Estimated Nutritional Data for this Indulgent Peanut Butter Treats
- Share Your Easy Peanut Butter Pie Creations
Why This Is The Best no bake peanut butter pie
Listen, I test hundreds of recipes, and I can tell you that many ‘no-bake’ desserts end up being runny messes. Not this one! This is genuinely the best no bake peanut butter pie because it actually holds its structure. It’s the recipe I turn to when I need something truly impressive but have zero time. Trust me, it’s a winner.
- It’s the ultimate last-minute hero!
- The texture is unbelievably rich and smooth.
- And the best part—absolutely zero oven time needed, which is vital when it’s 90 degrees outside.
Quick Fix Dessert Preparation
When I say quick, I mean it! You spend maybe 20 minutes actively mixing things together. The rest is just waiting time while it chills. It’s the perfect way to deliver a huge flavor payoff with minimal fuss. This truly earns the title of a Quick Fix Dessert when company unexpectedly shows up.
Fluffy Peanut Butter Filling Texture
The secret weapon here is using both cream cheese and thawed whipped topping. When you fold them correctly, you get this dense, yet surprisingly light and airy texture. It’s not heavy like fudge; it’s the gold standard for a Fluffy Peanut Butter Filling that just melts in your mouth. Nobody will believe how easy this no bake peanut butter pie was to assemble!
Gathering Ingredients for Your no bake peanut butter pie
Okay, getting all your ducks in a row is key for any no bake peanut butter pie recipe, especially since you can’t bake away any mistakes! Because we’re mixing everything and setting it immediately, things need to be ready to go. I’ve listed everything right here so you can check your pantry first. Remember, softened cream cheese and thawed whipped topping are non-negotiables—it really impacts how smooth this ends up being!
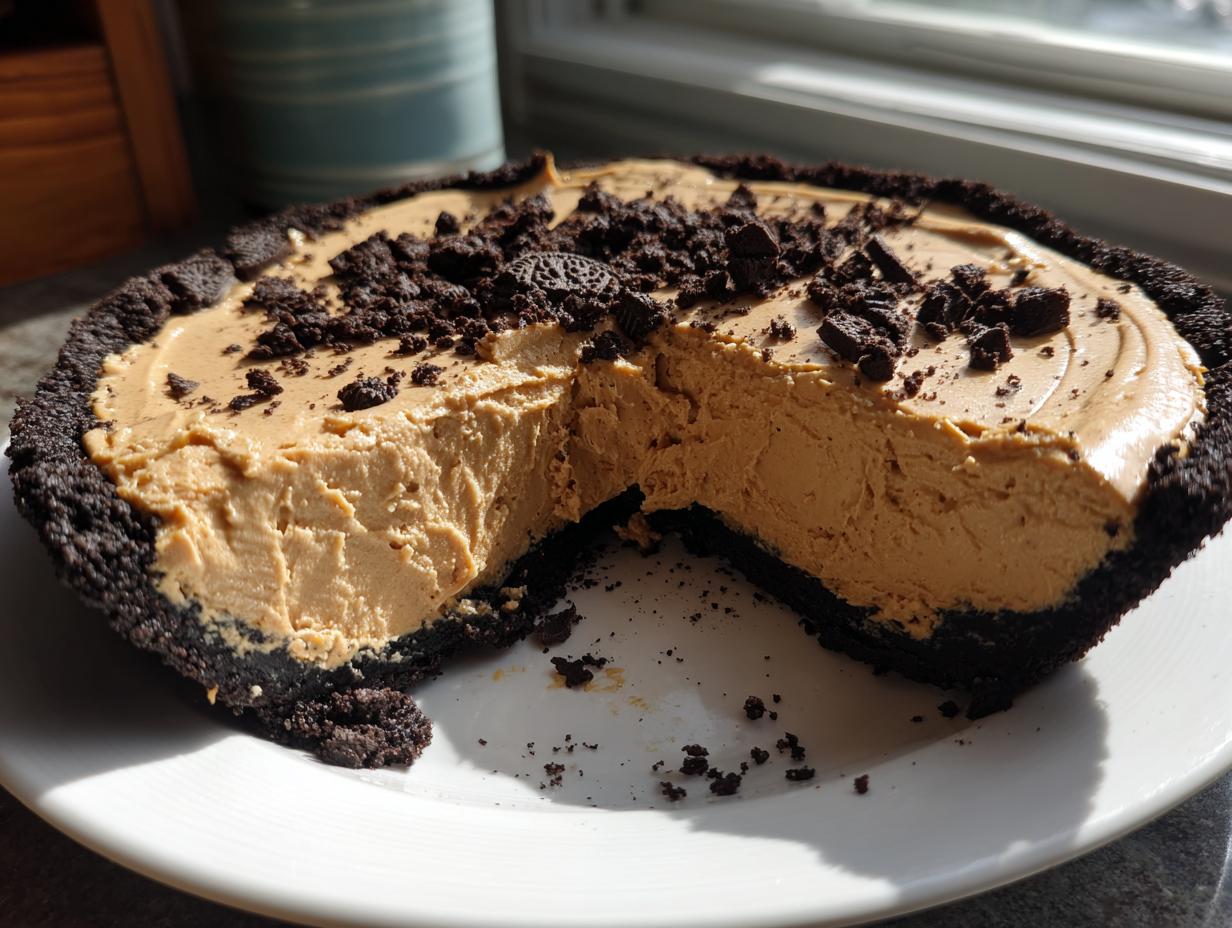
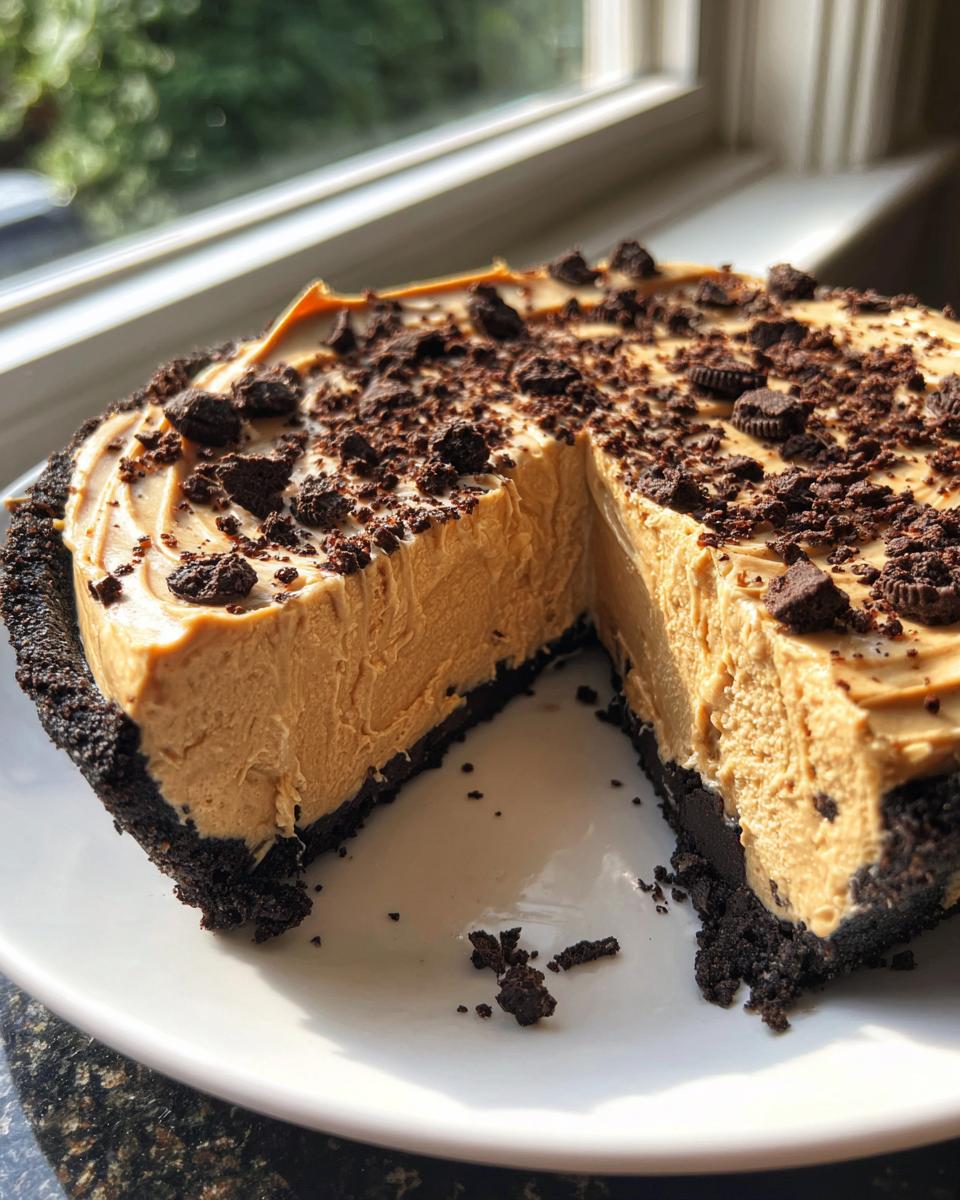
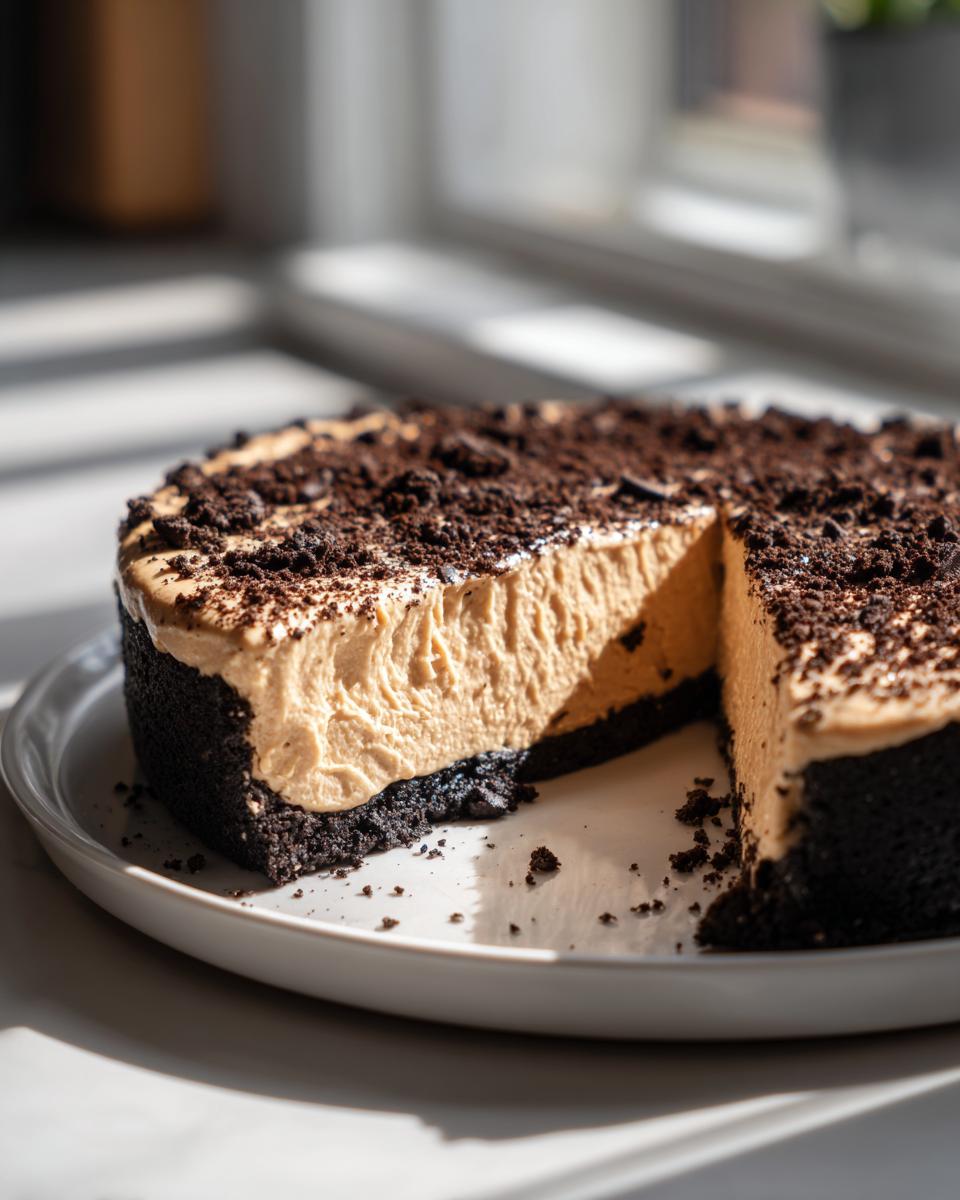
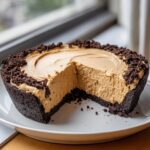
Oreo Crust Pie Recipe Components
The crust is pure chocolatey goodness, and it couldn’t be simpler. For this specific Oreo Crust Pie Recipe, grab your sandwich cookies—the whole thing whole, filling and all! You’ll just need:
- One and three-quarters cups of those sweet chocolate sandwich cookie crumbs.
- Half a cup of good quality, unsalted butter, measured out and melted gently. That’s all it takes for the base!
Creamy Peanut Butter Dessert Filling Ingredients
Now for the star of the show, the filling that makes this the ultimate Creamy Peanut Butter Dessert. Make sure your cream cheese is nice and soft, not cold right out of the fridge:
- One whole 8-ounce block of cream cheese, softened—this is for body!
- One cup of creamy peanut butter (smooth is best here).
- One and a half cups of powdered sugar—don’t substitute granulated here, it won’t dissolve right.
- A single teaspoon of vanilla extract for depth.
- And finally, one 12-ounce container of frozen whipped topping, completely thawed. It absolutely must be thawed, or it won’t fold in correctly!
Step-by-Step Instructions for the Easy Peanut Butter Pie
Alright, this is the fun part where everything comes together so quickly! Since we aren’t turning on the oven, we need to be organized. We need that crust to be solid before we even think about adding the creamy filling. If you want a quick, impressive dessert, following these steps precisely for your no bake peanut butter pie is what guarantees success!
Creating the No Bake Gluten Free Crust Pie Base (Crust Prep)
First things first, let’s lock down that base. Grab a bowl and toss in your chocolate sandwich cookie crumbs—all the crumbs, don’t worry about scraping the filling out! Drizzle in your melted butter and mix it until it looks like damp beach sand. Press that mixture really firmly into a 9-inch pie plate. Pack it up on the bottom and all the way up the sides; you want a good sturdy shell. Once it’s packed, pop that plate into the freezer. We need it super cold while we whip up the filling, so give it a good 15 minutes in there at least before moving on.
Quick note: If you decided to use graham crackers instead, just mix them with a little sugar before adding the butter, like my recipe notes say! While our main recipe has the chocolate crust, this method works for any No Bake Gluten Free Crust Pie variation, so keep that trick in mind!
Mixing the Fluffy Peanut Butter Filling for the no bake peanut butter pie
Now for the payoff! Get that electric mixer ready. Start by beating your softened cream cheese until it’s completely smooth—no lumps allowed! Then beat in the peanut butter until they are one happy, unified mixture. Next, gradually add the powdered sugar until you have that thick, sweet base. The most important part for the texture of this no bake peanut butter pie is the very last step: Gently fold in that thawed whipped topping. And I mean gently! You want those fluffy air pockets, so stop mixing the second you see no more white streaks. If you overmix it, you deflate all the air, and you lose that beautiful fluff! Spoon it immediately into your chilled crust, smooth it out, and then you absolutely must refrigerate it for a minimum of four hours so it sets up like a dream.
Expert Tips for the Perfect no bake peanut butter pie
Since I spent so much time perfecting these kinds of desserts in the test kitchen, I have a few little secrets that keep your no bake peanut butter pie from falling apart or tasting flat. Ingredient temperature is huge here. When you beat the cream cheese, it absolutely must be room temperature soft so it blends smoothly with the peanut butter. Cold cream cheese makes lumps, and nobody wants a bumpy pie!
Also, when you fold in that whipped topping, slow down! It sounds counterintuitive, but you need to treat it like you’re folding egg whites. If you beat it in quickly, you knock all the air out, and your filling turns dense instead of delightfully fluffy. Keep checking that texture; if you want to see a great example of how to build a great dairy base, check out my thoughts on cream cheese frosting—the layering technique is very similar!
Ingredient Notes and Substitutions for Your no bake peanut butter pie
If you don’t have Oreos on hand, don’t panic! You can absolutely swap that out and use graham crackers, just like a few folks do in their versions, like the lovely folks over at no bake peanut butter pie guides online. Just remember to add a couple of tablespoons of sugar to the crumbs if you use graham crackers to make sure the crust isn’t too bland. Another thing: I always stick to creamy peanut butter for the filling because it blends seamlessly, but if you crave an unexpected crunch in your no bake peanut butter pie, swap out half a cup of the creamy stuff for crunchy! It gives you a nice little surprise in every slice.
Storage and Make Ahead Pies Instructions
This is truly one of the best Make Ahead Pies in existence! Because this no bake peanut butter pie doesn’t have any eggs or flour that need cooking, you actually *want* to make it ahead of time. That four-hour chill isn’t just a suggestion; it’s structural engineering! If you cut it sooner, the filling might weep or just collapse, and we absolutely don’t want that.
Keep your pie tightly covered in the fridge. It stays wonderfully fresh like this for up to four days—maybe five if you hide it from my husband! I’ve never tried freezing it, though. Because it relies on the whipped topping for its fluffiness, I worry that the texture might get a little icy or weep when it thaws, so I stick to making it the day before I need it.
Serving Suggestions for this Simple Summer Pies
When you finally pull your perfect no bake peanut butter pie out of the fridge, you have to dress it up a little! This is such a crowd-pleaser for a Simple Summer Pies buffet. I love drizzling mine with a generous swirl of chocolate syrup right before serving—it looks so fancy!
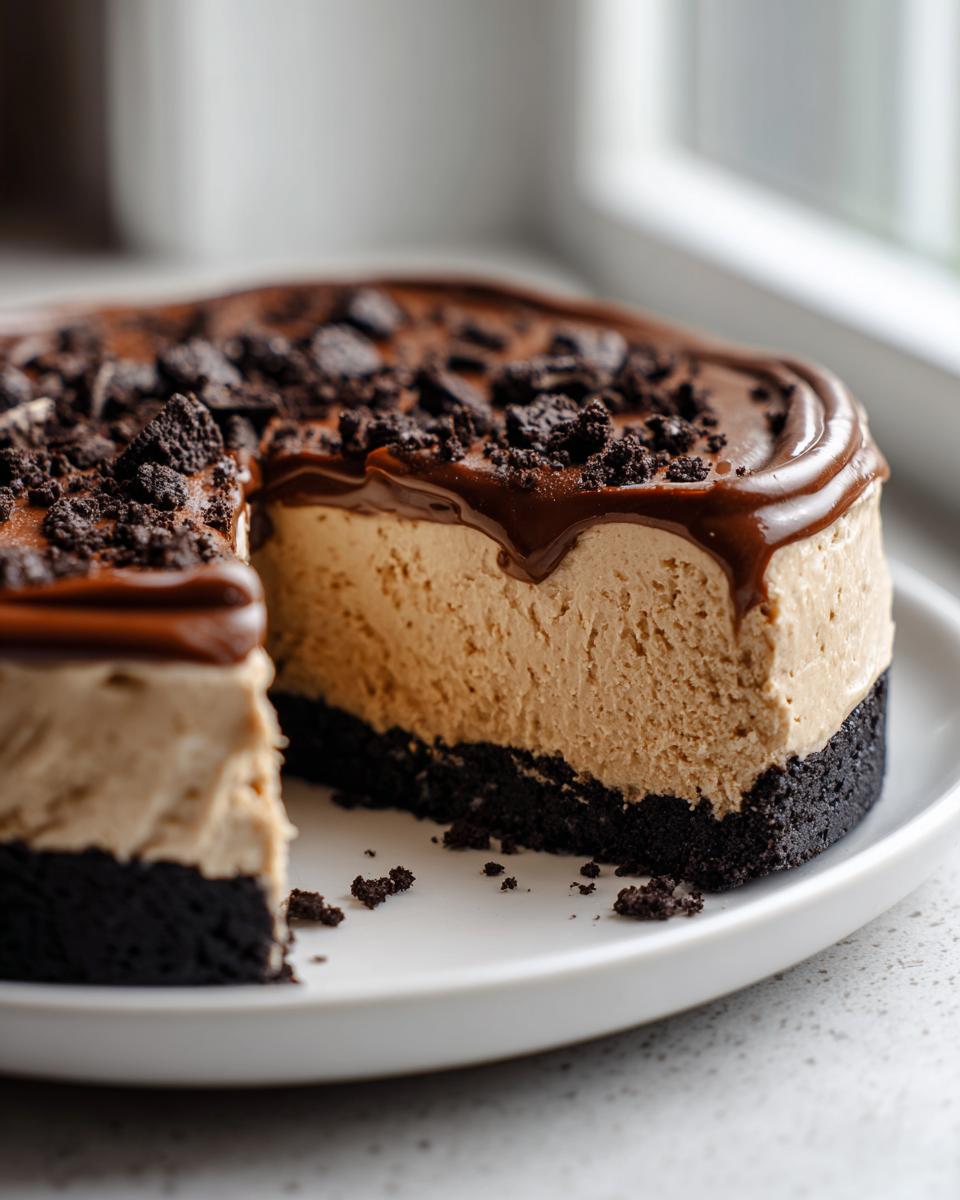
If you want zero extra work but maximum impact, just chop up some mini peanut butter cups and scatter them over the top. They look great and add that extra textural pop. For drinks, you need something bright to cut through the richness. A crisp cold brew coffee or even one of my bright, fruity margaritas makes the perfect pairing for this decadent treat!
Frequently Asked Questions about the no bake peanut butter pie
I always get questions about this recipe because everyone wants to make sure their first attempt at a no bake peanut butter pie turns out perfectly creamy! These are the things that always come up, so let’s just clear them up right now. It’s all about setting expectations for this easy dessert!
Can I make a no bake peanut butter pie without cream cheese?
That cream cheese is really the backbone of this recipe, honestly. It gives the filling that nice, dense structure so it doesn’t turn into soup once it sits. If you totally ditch the cream cheese, you’ll need to beef up the stabilizer. You could try using a little less peanut butter and folding in some extra stabilized whipped cream—I mean, heavy cream whipped up stiffly—but I can’t guarantee the texture will be exactly the same. It will definitely be lighter, maybe even bordering on mousse-like, but it will still taste delicious in your fluffy peanut butter dessert!
What is the best peanut butter to use for this no bake peanut butter pie?
This is a big one! For this specific recipe, you definitely want to stick with that standard, shelf-stable, creamy peanut butter—you know the kind, like Jif or Skippy, where the oil doesn’t separate out. Natural peanut butter is great for toast, but when you’re making a no bake peanut butter pie that needs to set up firm, the extra oil in the natural versions can make everything too runny. Using the stabilized brands ensures you get that signature thick, dreamy filling every time!
Estimated Nutritional Data for this Indulgent Peanut Butter Treats
I am not a certified nutritionist, so please take these numbers with a grain of salt—or maybe a bit of peanut butter! These estimates are calculated based on the ingredients listed for this rich and Indulgent Peanut Butter Treats pie. Because this is a dessert to be savored, be aware that the sugar and fat content is up there!
- Serving Size: 1 slice
- Calories: About 450
- Total Fat: 30g
- Sugar: 35g
- Protein: 10g
This pie is definitely a treat, not an everyday snack, but wow, is it worth it!

Share Your Easy Peanut Butter Pie Creations
Now that you’ve made this incredible Easy Peanut Butter Pie, I just have to know what you think! Did you dress it up with chocolate syrup or maybe try the chopped peanut butter cups? Tell me how it went!
Drop a comment below and let me know if this became your go-to recipe for Dessert Recipes for Parties. And please, snap a picture and tag me! I love seeing these beauties come out of your kitchens!
PrintThe Ultimate Easy No Bake Peanut Butter Pie with Oreo Crust
Make this creamy, rich no bake peanut butter pie using a simple Oreo cookie crust. It requires no oven time and comes together quickly, making it a perfect dessert for parties or warm weather.
- Prep Time: 20 min
- Cook Time: 0 min
- Total Time: 4 hr 20 min
- Yield: 8 servings 1x
- Category: Dessert
- Method: No Bake
- Cuisine: American
- Diet: Vegetarian
Ingredients
- 1 3/4 cups chocolate sandwich cookie crumbs (about 24 cookies)
- 1/2 cup unsalted butter, melted
- 1 (8 ounce) package cream cheese, softened
- 1 cup creamy peanut butter
- 1 1/2 cups powdered sugar
- 1 teaspoon vanilla extract
- 1 (12 ounce) container frozen whipped topping, thawed
- Optional topping: Chocolate syrup or mini peanut butter cups
Instructions
- Prepare the crust: Mix the chocolate cookie crumbs and melted butter in a medium bowl until the crumbs are evenly moistened. Press the mixture firmly into the bottom and up the sides of a 9-inch pie plate. Place the crust in the freezer while you prepare the filling.
- Make the filling base: In a large bowl, beat the softened cream cheese with an electric mixer until smooth. Add the peanut butter and beat until fully combined.
- Add sweetener and flavor: Gradually beat in the powdered sugar until the mixture is smooth. Mix in the vanilla extract.
- Fold in whipped topping: Gently fold in the thawed whipped topping until no streaks remain and the filling is uniform and fluffy. Do not overmix.
- Assemble the pie: Spoon the peanut butter filling evenly into the chilled Oreo crust. Smooth the top with a spatula.
- Chill: Cover the pie loosely with plastic wrap and refrigerate for at least 4 hours, or until the filling is firm.
- Serve: Before serving, top with chocolate syrup or chopped peanut butter cups, if desired. Slice and serve cold.
Notes
- For a graham cracker crust, substitute 1 1/2 cups of graham cracker crumbs for the Oreo crumbs and add 2 tablespoons of sugar to the mix before adding the butter.
- If you prefer a richer flavor, use 1 cup of creamy peanut butter and 1/2 cup of crunchy peanut butter in the filling.
- This pie is best made ahead of time, as it requires significant chilling time to set properly.
Nutrition
- Serving Size: 1 slice
- Calories: 450
- Sugar: 35g
- Sodium: 310mg
- Fat: 30g
- Saturated Fat: 10g
- Unsaturated Fat: 20g
- Trans Fat: 0g
- Carbohydrates: 40g
- Fiber: 2g
- Protein: 10g
- Cholesterol: 35mg