
Are you tired of the same old boring breakfast routine? Me too, sometimes! I think the morning meal should feel like a little celebration, especially on the weekends. That’s where this absolutely wild, unbelievably delicious concept came from: tres leches pancakes. You take the fluffiest, most tender pancake stack you can imagine, and then you soak it—just like the decadent cake—in that sweet, creamy blend of three milks.
When I was first testing this pairing, my kitchen smelled like a bakery explosion! It’s that perfect collision of comfort food concepts that I just adore. This recipe isn’t some fussy, intimidating dessert trick; I’ve rigorously tested every measurement to make sure you get that rich, authentic Tres Leches Flavor without needing a culinary degree.
Trust me, once you pull these impossibly moist pancakes off the griddle, you’ll wonder how you ever lived without them. If you’re ready to upgrade your brunch game, you can check out some of my other quick and easy breakfast ideas right here while you get your ingredients ready!
- Why You Will Make These Tres Leches Pancakes Every Weekend
- Essential Equipment for Perfect Tres Leches Pancakes
- Ingredients for Fluffy Milk Pancakes and the Tres Leches Soak
- Step-by-Step Instructions for Making Tres Leches Pancakes
- Serving Suggestions for Your Decadent Pancake Breakfasts
- Storage and Reheating Instructions for Leftover Tres Leches Pancakes
- Troubleshooting Common Issues with Milk Soaked Pancakes
- Frequently Asked Questions About Tres Leches Pancakes Recipe
- Final Thoughts on Mastering Your Tres Leches Pancakes
Why You Will Make These Tres Leches Pancakes Every Weekend
Honestly, these are going to become your new obsession for a few great reasons. They hit every single mark for an amazing brunch!
- They are unbelievably fluffy pancakes before the bath, and totally decadent after!
- The milk soak delivers that true, rich Authentic Tres Leches Flavor.
- You get incredible texture without any complicated baking steps.
- They are surprisingly fast—ready in under 30 minutes total.
Essential Equipment for Perfect Tres Leches Pancakes
Look, you don’t need a million fancy gadgets for this recipe, which is what I love about it! But having the right simple tools really makes the process smoother and keeps things from getting stressful.
First, you absolutely need a good, reliable flat surface. I usually go for my cast-iron griddle because it holds heat so beautifully, but any non-stick skillet works just fine. Make sure it’s big enough to cook a couple of cakes at once, which speeds things up.
Then, you’ll need two mixing bowls—one medium for your wet ingredients and one large one for whisking up all the dry stuff. Having a sturdy whisk is non-negotiable; it’s how we incorporate just the right amount of air into that buttermilk batter without overmixing later on.
Finally, once they are cooked, you need a shallow baking dish. Think 9×13 or similar. This dish is crucial because it needs to be wide enough to hold your stack of pancakes so the milk mixture spreads evenly across the surface. That’s your soaking bath!
Ingredients for Fluffy Milk Pancakes and the Tres Leches Soak
This is where the magic starts! We need two main components here: the ingredients for the perfectly structured, fluffy pancake batter, and the ingredients for our dreamy, luxurious milk topping. Since we are making Condensed Milk Pancakes that soak up all that goodness, don’t skimp on quality here!
For the Pancake Batter itself, things are pretty standard, but precision matters so they stay light:
- 1 1/2 cups all-purpose flour
- 2 tablespoons granulated sugar
- 2 teaspoons baking powder (this is your lift!)
- 1/2 teaspoon baking soda
- 1/4 teaspoon salt
- 1 1/4 cups buttermilk (this reacts perfectly with the baking soda)
- 1 large egg
- 2 tablespoons melted unsalted butter, plus extra for the griddle
Now for the star of the show—the milk soak that turns these into true breakfast decadence. This is what gives us that Sweet Breakfast Recipes vibe:
- 1/2 cup evaporated milk
- 1/2 cup sweetened condensed milk (the key player!)
- 1/2 cup heavy cream or whole milk
- 1 teaspoon vanilla extract
- 1/4 teaspoon ground cinnamon (we use this in the soak and the topping!)
Don’t forget the garnishes later—whipped cream and fresh berries are your best friends here. If you want a breakdown of how to handle buttermilk if you don’t have any on hand, check out my tips for tall, flaky results in my buttermilk biscuits recipe; the principle for these pancakes is the same!
Ingredient Notes and Substitutions for Your Milk Soaked Pancakes
A couple of quick notes before you start mixing, because this ensures success:
First, about that buttermilk. If you’re fresh out and can’t run to the store? No worries! Just take 1 1/4 cups of your regular milk—any fat percentage works—and stir in 1 tablespoon of white vinegar or fresh lemon juice. Let it sit there for about five minutes until it looks a little curdled. That slightly soured milk works like a charm in place of store-bought buttermilk!
Second, when you prepare the three-milk mixture, you can actually whisk that up hours ahead of time and keep it chilling in the fridge. But here’s the thing everyone gets wrong: when you pour that chilled soak over the pancakes, make sure your pancakes are still piping hot off the griddle. Heat helps the cakes “drink” that milk mixture much better. If the pancakes have cooled down, the liquid just sits on top, and that’s not what we want!
Step-by-Step Instructions for Making Tres Leches Pancakes
Okay, friend, let’s get this brunch party started! The process is actually really straightforward, but we have to respect the science a little bit with the batter mixing so we don’t deflate all that wonderful trapped air.
First things first: get your dry stuff combined. In your biggest bowl, whisk together the flour, sugar, baking powder, baking soda, and salt. Whisking is important here because it acts like a pre-sift, making sure the leavening agents are perfectly distributed. Don’t skip that step!
Next, in your separate, smaller bowl, you put the wet ingredients: the buttermilk, the egg, and the two tablespoons of melted butter. Give that a good, quick whisk until the egg is broken up and everything is happy.
Here is my main rule for fluffy Fluffy Milk Pancakes: combine them gently! Pour all the wet ingredients into the dry ingredients. Use a spatula and just fold everything together until you see no more dry flour streaks. I mean it—stop mixing when you still see a few tiny lumps. If you beat it until it’s perfectly smooth, you’re developing gluten, and that makes tough, chewy pancakes instead of the tender ones we want.
While the batter rests for literally five minutes, quickly prepare your soak. In that medium bowl, combine the evaporated milk, the sticky condensed milk, the heavy cream, and that vanilla. Whisk it really well until it looks unified. Set that soaking mixture right next to your stove.
Now, heat up your griddle over medium heat and give it a light smear of butter. Pour about a quarter cup of batter for each pancake. Watch them carefully! When you see bubbles forming on the surface and the edges start looking set, that’s your cue. Flip them quickly and cook the second side until golden brown—usually just a minute or so less than the first side.
As soon as each pancake comes off the griddle, move it straight into your shallow baking dish. You want that heat transferring! Once your first batch of Milk Soaked Pancakes is stacked up, slowly drizzle that entire three-milk mixture right over the top. Make sure you get the edges evenly coated!
This is the hardest part: waiting. You need to let them sit and soak up all that delicious liquid for at least five minutes before serving. My absolute favorite version lets them bathe for a full fifteen minutes!
Tips for Perfect Absorption in Your Soaked Pancake Tutorial
The success of these pancakes hinges entirely on the temperature game we’re playing! Remember: the milk mixture can be straight from the fridge, but the pancakes must be hot when they meet the liquid.
If you pour the cold soak over room-temperature pancakes, the liquid chills immediately and sits right on the surface, making a soup instead of achieving that wonderful, cake-like texture. You want the heat of the pancake to help the milk absorb deep down into the crumb where the structure is.
Also, don’t try to scoop the pancakes out; use a spatula to gently lift them out of the bath when you serve them. They get super tender and might tear if you try to pick them up roughly. Letting them rest for those key 10 to 15 minutes ensures every bite is perfectly saturated, delivering exactly the result you want in this easy breakfast recipe.
Serving Suggestions for Your Decadent Pancake Breakfasts
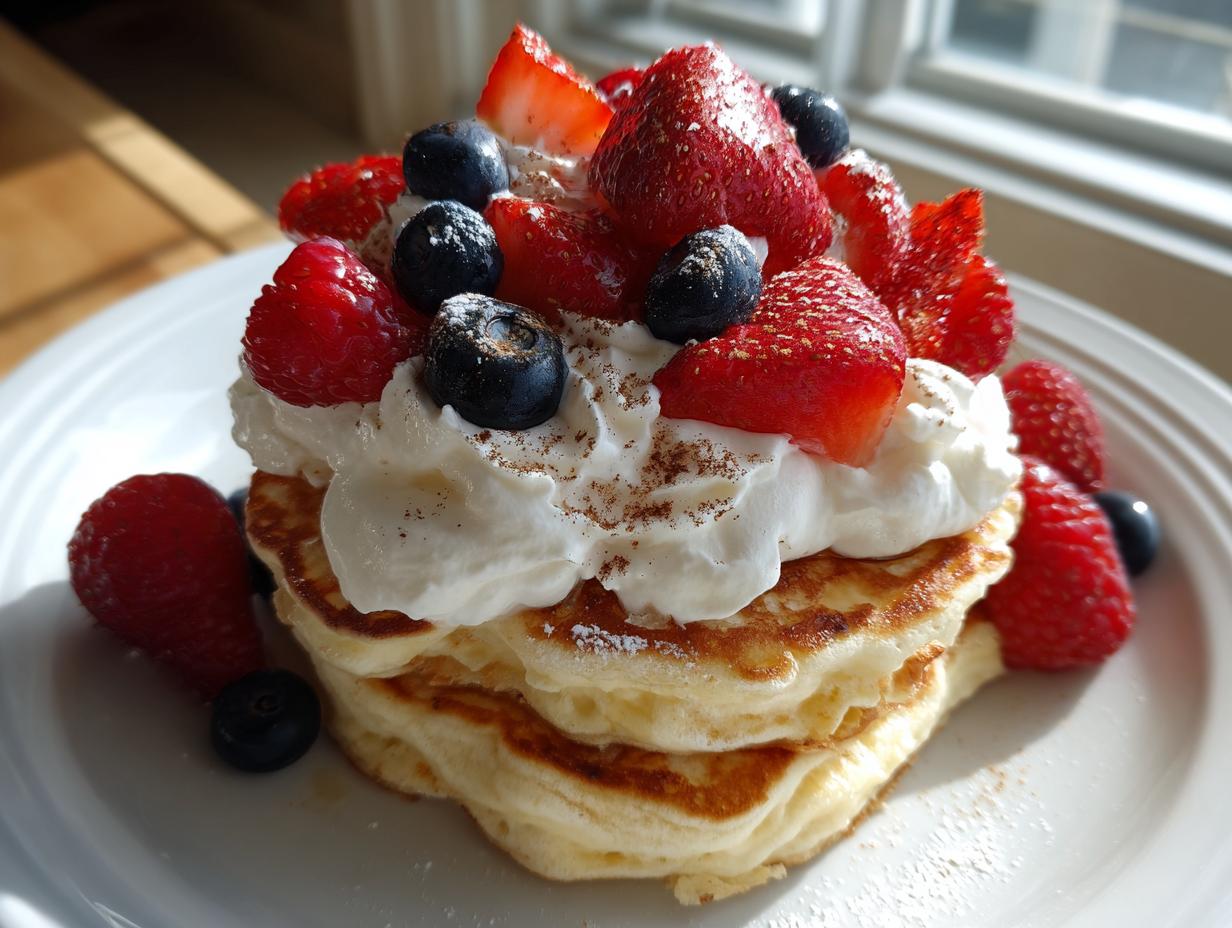
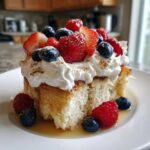
Once your pancakes have had their lovely milk bath and settled for a bit, it’s time for the really fun part: dressing them up! Remember, these are already incredibly rich and moist, falling squarely into that amazing category of Dessert for Breakfast Pancakes, so you don’t need to go overboard, but a little garnish goes a long way!
First up, the essentials for that Decadent Pancake Breakfasts feel: a generous dollop of fluffy, freshly whipped cream on top of the stack. It melts slightly into the warm cake-pancakes, which is just spectacular.
Next, you need some brightness to cut through that richness. Fresh berries are non-negotiable in my book—strawberries, raspberries, or even sliced kiwi if you love tartness! They bring color and a fresh pop of flavor.
And finally, for the classic finish, a light dusting of ground cinnamon over everything. It just screams warm spice and pairs perfectly with the vanilla and milk flavors.
If you still feel like you need something extra, I sometimes like to serve these alongside a tiny side of crispy bacon. Yes, I know, salty and sweet! But if you prefer to keep it strictly dessert-like, a dusting of lightly sifted cocoa powder right over the whipped cream adds a lovely bittersweet note. Enjoy this brunch masterpiece!
Storage and Reheating Instructions for Leftover Tres Leches Pancakes
Now, I know what you’re thinking: are there ever leftovers? If you manage to have any of these incredible Milk Soaked Pancakes remaining, you need to store them correctly to keep that dreamy moisture locked in. Since they are already saturated with that beautiful three-milk mixture, they behave a bit differently than standard pancakes.
The best way to store them is in an airtight container in the refrigerator. Make sure the container is deep enough so the whipped cream (if you added it) isn’t squished, or better yet, just store plain pancakes and add fresh toppings when you reheat them. They will keep well for about two or three days this way. The soak just seeps in deeper the longer they sit!
Reheating is where you need to be gentle. If you throw them straight into the toaster, you’ll ruin the texture completely! For a quick fix, microwave them in short bursts—maybe 15 to 20 seconds—on a microwave-safe plate. This warms them through and brings back some of that soft texture.
For a better result, especially if you have a nice stack, warm them gently in a low oven—say 300°F—tenting them loosely with foil. The foil traps the steam, preventing them from drying out while still warming them through nicely. If they seem a little dry after reheating, just drizzle a splash of cold milk over the top right before eating. It works wonders!
Troubleshooting Common Issues with Milk Soaked Pancakes
Don’t panic if your first batch doesn’t come out looking exactly like the pictures! Making any recipe for the first time can have little hiccups, especially when we’re doing fun mashups like this. I’ve made plenty of pancake messes in my day, which is how I figured out the little fixes.
The most common issue I see when people try these is that the pancakes end up being too dense, almost gummy, instead of those light, fluffy circles we aimed for. If this happens, I can almost guarantee you overmixed the batter. Remember what I said about leaving those lumps? You need to stop stirring the second the dry streaks disappear! Overworked batter equals tough, heavy cakes that just can’t absorb the milk properly.
Another thing that can stump folks is poor absorption. If you pour that beautiful, cold three-milk mixture over your pancakes and it just sits there pooling sadly on the bottom of the dish, it almost always means your pancakes were too cold. The heat is essential! If your griddle is only medium-low, the pancakes cool too fast on the outside before they even hit the pan. Make sure your griddle is hot enough—medium heat is usually spot on—so the pancakes are steaming when you stack them up for their bath.
Finally, if you notice the edges burning before the middle seems done, your heat is too high. You want a gentle, consistent heat so the inside has time to cook through before the exterior gets too dark. A slow and steady cook on the pancake guarantees it’s fully baked and ready to soak up that sweet liquid!
Frequently Asked Questions About Tres Leches Pancakes Recipe
I get so many wonderful questions whenever I share this recipe because it’s such a fun twist on breakfast! Here are a few things I hear often while people are planning their perfect stack of Sweet Breakfast Recipes.
Can I use regular milk instead of buttermilk for these pancakes?
Yes, you absolutely can if you’re in a pinch! Like I mentioned in the notes, if you don’t have buttermilk, just take your regular whole milk or 2% milk and measure out 1 1/4 cups. Then, add 1 tablespoon of white vinegar or lemon juice, give it a quick stir, and let it sit on the counter for about five minutes. It’ll curdle slightly, and that acidity works exactly like buttermilk to react with the baking soda. It’s a lifesaver when you want Brunch Recipe Inspiration right now!
How long do the pancakes need to soak before serving?
Oh, this is critical for the texture! You need at least five minutes just so the milk gets absorbed into the center of the stack. But honestly, if you have the patience, I recommend letting them sit for 10 to 15 minutes. That extra soak time gives them that incredibly tender, cake-like crumb that makes this such a memorable weekend breakfast. Just make sure you don’t let them sit for hours, or they might get *too* soft!
Are these considered a Latino Breakfast Idea?
They totally take inspiration from those wonderful Latin American flavors! Tres Leches cake is a classic throughout Latin America, and by using that distinct three-milk mixture, we are absolutely tipping our hat to that rich tradition. So yes, these are a fun, indulgent take on Latino Breakfast Ideas, perfect for a special weekend treat!
Can I skip the condensed milk? I worry it will be too sweet.
That’s a fair concern! The condensed milk is what gives the soak that characteristic gooey sweetness of the cake, so if you skip it, it’s no longer really a tres leches experience. However, if you find it worrisome, you can slightly reduce the condensed milk to 1/3 cup and increase the heavy cream by that same amount. Just remember, these are meant to be decadent! They are definitely filed under Decadent Pancake Breakfasts for a reason!
Final Thoughts on Mastering Your Tres Leches Pancakes
Seriously, when you pull off this stack of milk-soaked perfection, you’ll feel like you aced a culinary challenge, even though it was so easy! These tres leches pancakes are proof that breakfast can absolutely be the most fun meal of the week. Go make yourself something truly special!
PrintTres Leches Pancakes Recipe
Make fluffy pancakes soaked in a sweet three-milk mixture for a decadent breakfast inspired by Tres Leches cake.
- Prep Time: 10 min
- Cook Time: 15 min
- Total Time: 25 min
- Yield: 4 servings 1x
- Category: Breakfast
- Method: Griddling
- Cuisine: Latin Inspired
- Diet: Vegetarian
Ingredients
- 1 1/2 cups all-purpose flour
- 2 tablespoons granulated sugar
- 2 teaspoons baking powder
- 1/2 teaspoon baking soda
- 1/4 teaspoon salt
- 1 1/4 cups buttermilk
- 1 large egg
- 2 tablespoons melted unsalted butter, plus more for the griddle
- 1/2 cup evaporated milk (for soak)
- 1/2 cup sweetened condensed milk (for soak)
- 1/2 cup heavy cream or whole milk (for soak)
- 1 teaspoon vanilla extract (for soak)
- 1/4 teaspoon ground cinnamon (for topping)
- Whipped cream (for topping)
- Fresh berries (for topping)
Instructions
- Combine dry ingredients: In a large bowl, whisk together the flour, sugar, baking powder, baking soda, and salt.
- Mix wet ingredients: In a separate bowl, whisk together the buttermilk, egg, and 2 tablespoons of melted butter.
- Combine batters: Pour the wet ingredients into the dry ingredients. Mix gently until just combined; do not overmix. A few lumps are fine.
- Prepare the milk soak: In a medium bowl, whisk together the evaporated milk, condensed milk, heavy cream, and vanilla extract. Set aside.
- Cook the pancakes: Heat a lightly buttered griddle or non-stick pan over medium heat. Pour 1/4 cup of batter per pancake onto the griddle. Cook until bubbles appear on the surface and the edges look set, about 2 to 3 minutes. Flip and cook the other side until golden brown, about 1 to 2 minutes more.
- Soak the pancakes: Immediately transfer the hot, cooked pancakes to a shallow baking dish.
- Pour the milk mixture: Slowly and evenly pour the three-milk mixture over the stack of warm pancakes, allowing them to absorb the liquid.
- Rest and serve: Let the pancakes soak for at least 5 minutes, or up to 15 minutes for a moister result. Serve warm, topped with whipped cream, fresh berries, and a sprinkle of cinnamon.
Notes
- For best absorption, ensure your pancakes are warm when you pour the milk mixture over them.
- You can prepare the milk soak ahead of time and keep it refrigerated.
- If you do not have buttermilk, mix 1 1/4 cups of regular milk with 1 tablespoon of white vinegar or lemon juice and let it sit for 5 minutes before using.
Nutrition
- Serving Size: 2 pancakes
- Calories: 450
- Sugar: 35
- Sodium: 350
- Fat: 18
- Saturated Fat: 10
- Unsaturated Fat: 8
- Trans Fat: 0
- Carbohydrates: 60
- Fiber: 2
- Protein: 15
- Cholesterol: 90