

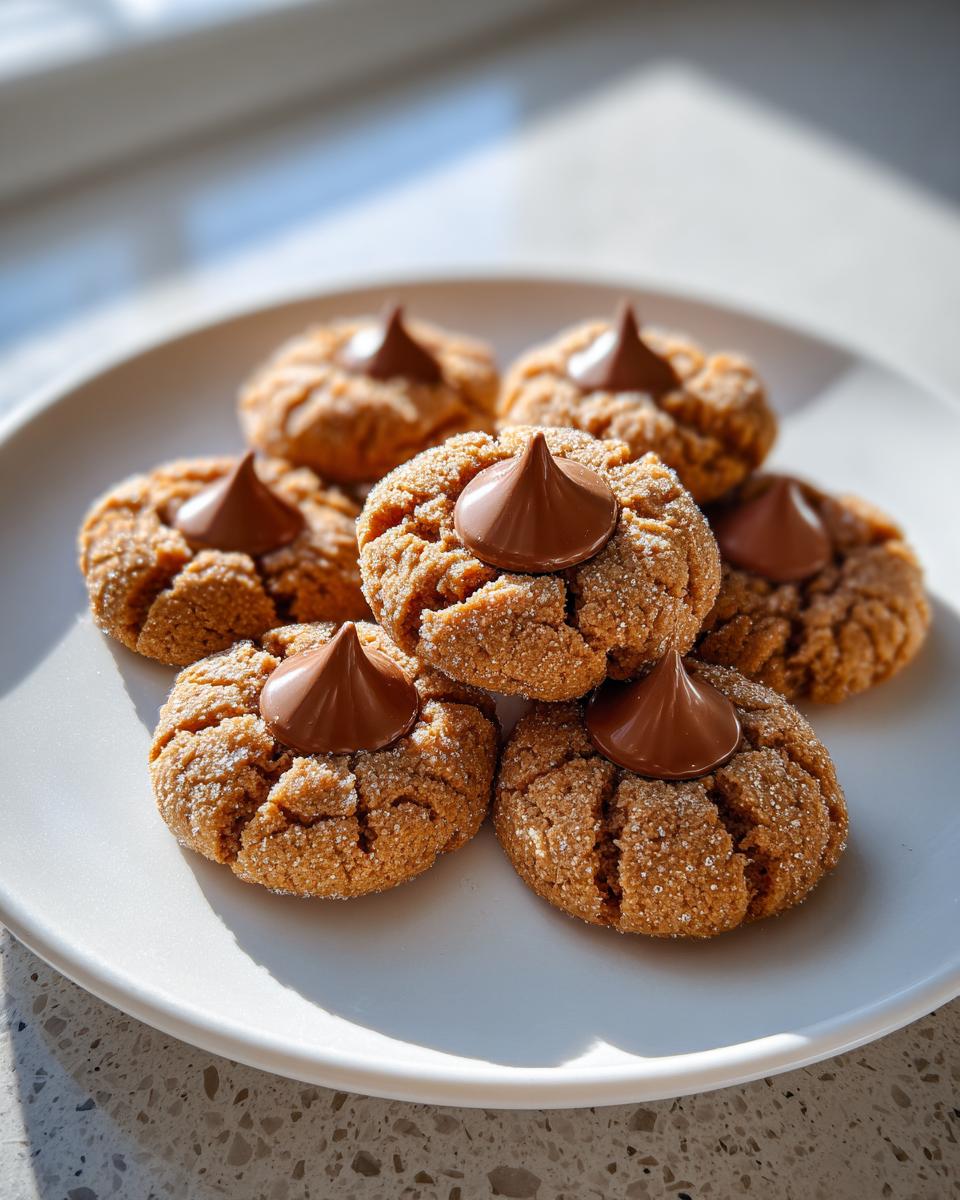
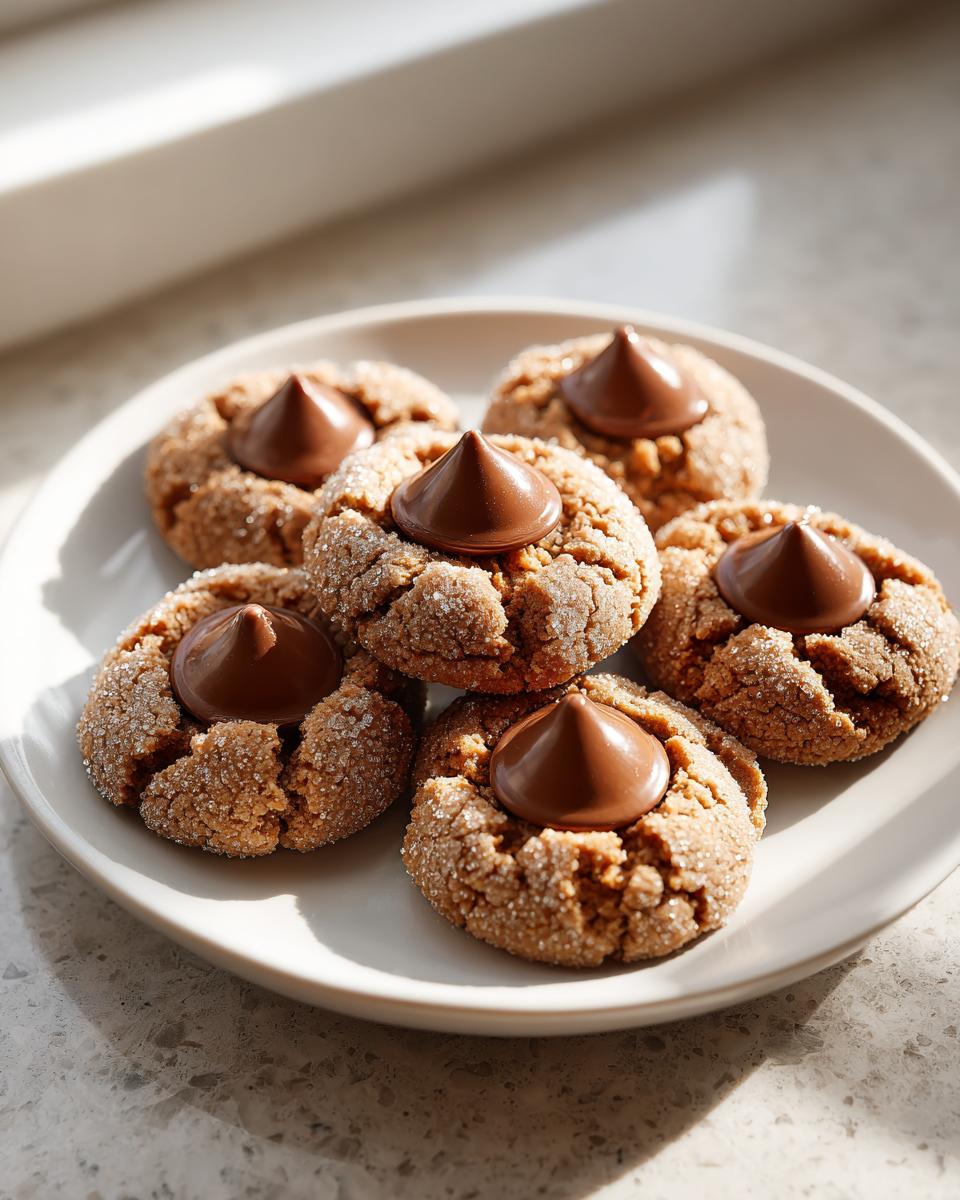
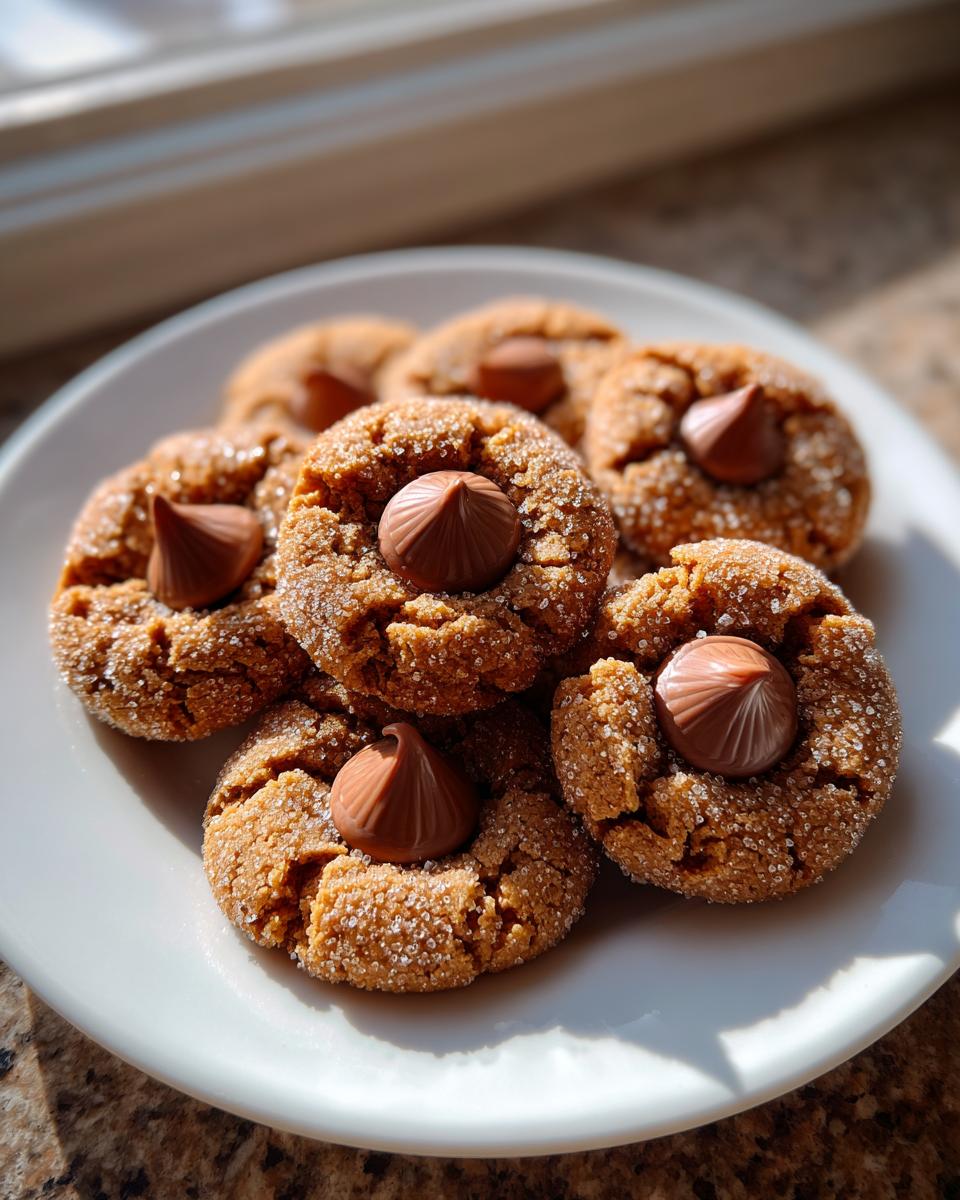
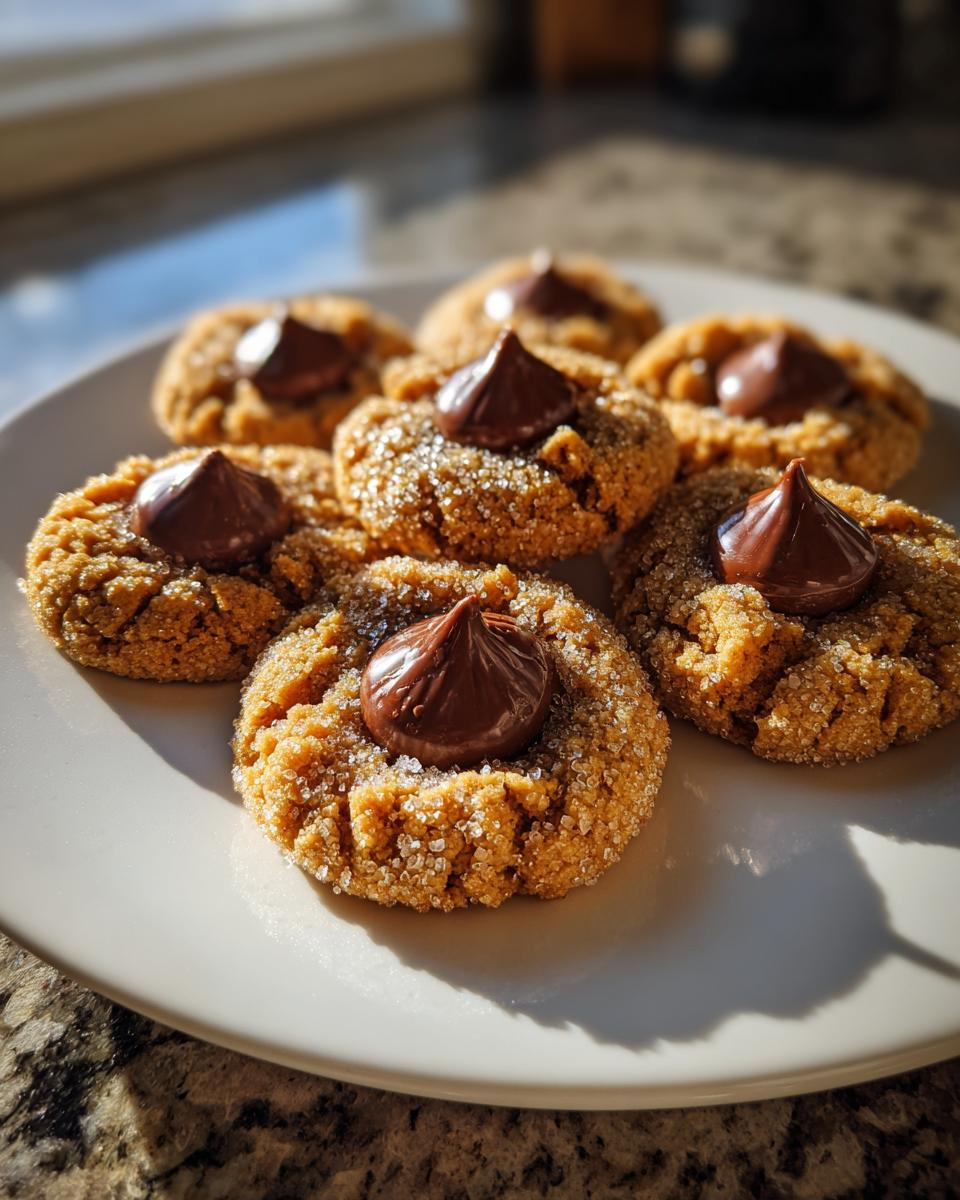
Oh, the holidays! There’s nothing quite like that first whiff of mixed spices and melted sugar filling the kitchen, right? If you ask me, the true star of any cookie platter is the classic, iconic treat that mixes crunchy sugar, soft dough, and deep chocolate. We’re talking about kiss cookies today, and specifically, we are making the absolute best version: the legendary Peanut Butter Blossom. Forget fussy decorations; this cookie is famous because it stays wonderfully chewy, cracks perfectly, and has that signature melted Hershey’s Kiss right on top. I’ve tested so many versions of these—even putting them through the wringer in a professional test kitchen—so trust me when I say these instructions from Jade Carter will give you reliable, melt-in-your-mouth results every single time. You don’t need to stress; we’re keeping this one fun and straightforward! If you love these chocolatey gems, you absolutely have to check out my recipe for fudgy chocolate crinkle cookies next!
- Why These Classic Peanut Butter Kiss Cookies Are a Must-Bake
- Gathering Your Ingredients for Perfect Kiss Cookies
- Step-by-Step Instructions for Classic Peanut Butter Kiss Cookies
- Tips for Making Foolproof Hershey Kiss Cookies Recipe
- Beyond Peanut Butter: Other Kiss Cookies Variations
- Storage and Make-Ahead Tips for Your Kiss Cookies
- Serving Suggestions for Holiday Kiss Cookies
- Frequently Asked Questions About Kiss Cookies
- Estimated Nutritional Data for Classic Kiss Cookies
Why These Classic Peanut Butter Kiss Cookies Are a Must-Bake
Honestly, these are the best cookies you can make when you need something fast but want everyone to think you spent all day baking. I developed this recipe to ensure maximum softness, making them truly memorable. We skip the tedious chilling step because who has time for that when the holidays are approaching?
- They bake up with those beautiful, signature cracked tops that scream ‘homemade classic.’
- The texture is gloriously soft and chewy—never cakey or dry.
- They are ready to go from mixing bowl to serving plate in under 30 minutes! Check out my guide for more perfecting peanut butter cookies for more foundational tips.
The Perfect Texture: Chewy Kiss Cookies
So, what gives you that delightful chewiness? It’s all about the sugars! By using both granulated sugar and brown sugar, we load these cookies with moisture right from the start. Brown sugar, with its molasses content, keeps things soft, while we bake them just long enough for the edges to set without drying out the middle. That slight underbake is the secret to consistently chewy kiss cookies that just melt in your mouth.
Gathering Your Ingredients for Perfect Kiss Cookies
When we talk about making the best kiss cookies, the ingredients list is short, but every single item counts! Since we aren’t doing any chilling, we need that dough mixed perfectly the first time. This is where my test kitchen background really comes in handy—pay attention to the state of your butter and eggs!
You absolutely must make sure your butter is perfectly softened—it should yield easily when pressed but not look greasy or melted. This is vital for the creaming process later on. I also always use large eggs that have sat out on the counter for about thirty minutes so they incorporate smoothly into the peanut butter mixture. No cold ingredients shocking the creamed fats, please!
Here is exactly what you need. Don’t substitute the basics here; we want that classic flavor!
- 1 cup unsalted butter, softened
- 3/4 cup creamy peanut butter (the kind that doesn’t separate is usually best for texture!)
- 3/4 cup granulated sugar, plus 1/4 cup for rolling
- 3/4 cup packed brown sugar
- 2 large eggs
- 1 teaspoon vanilla extract
- 2 1/4 cups all-purpose flour
- 1 teaspoon baking soda
- 1/2 teaspoon salt
- 1 bag (12 ounces) milk chocolate Hershey’s Kisses, unwrapped (Keep these ready nearby!)
Ingredient Notes and Substitutions for Your Kiss Cookies
Okay, let’s talk creative freedom, because sometimes we don’t have exactly what the recipe calls for. If you are out of the classic milk chocolate Hershey’s Kiss, don’t panic! You can absolutely use Hershey’s Hugs (that white and milk swirl is gorgeous) or even the dark chocolate Kisses if you’re serving grown-ups who like a deeper flavor. Peanut butter choice is important for kiss cookies, too. If you use the all-natural, runnier peanut butter, you might need to cut back just a touch on your liquids or add an extra tablespoon of flour, because that natural oil can sometimes make the cookies spread too much.
If you want to try something a little different next time, check out my guide on how to make the perfect sugar cookie icing—you can top those instead!
Step-by-Step Instructions for Classic Peanut Butter Kiss Cookies
Okay, this is where the fun really begins! Since these are fantastic kiss cookies that require no chilling, timing is actually everything, especially right at the end. Preheat your oven now to 375°F—I always line my baking sheets with parchment paper because it makes cleanup a breeze and keeps the bottoms perfectly golden. We are mixing three main components here: the fats/sugars, the wet parts, and then the dry parts. If you love quick afternoon baking, you might also want to check out my article on easy drop cookies for more speedy ideas!
Mixing the Dough: Achieving the Best Peanut Butter Kiss Cookies Base
In your big bowl, get that softened butter, creamy peanut butter, granulated sugar, and brown sugar going. You need to beat this mixture until it’s genuinely light and fluffy, kind of pale yellow. Don’t rush this part! This creaming action incorporates the air that lets our cookies spread just right and gives us that signature crackle later on. Once that’s fluffy, beat in your eggs one at a time, followed by the vanilla. In a separate bowl, whisk your flour, baking soda, and salt together. Then, gently add those dry ingredients to the wet mix until it’s *just* combined. Stop the mixer as soon as you don’t see any white flour streaks anymore. Seriously, overmixing our Peanut Butter Kiss Cookies base is the quickest way to make them tough!
Baking and Setting the Chocolate Kiss Center Cookies
Next, pour that extra 1/4 cup of granulated sugar into a shallow plate. Roll your dough into nice, neat little 1-inch balls and then roll those balls all over in the sugar coating. This sugary crust helps give you that fantastic crackle effect as they bake. Place them about two inches apart on your lined sheets. Bake these beauties for only 8 to 10 minutes. The edges should look set, but I insist that the centers still look a little soft when you pull them out. Now for the critical part to get those perfect Chocolate Kiss Center Cookies: immediately, I mean *immediately*, take your unwrapped Hershey’s Kiss and gently press it right into the center of each cookie. The residual heat melts the chocolate just enough to stick perfectly without melting the whole thing into a puddle!
Tips for Making Foolproof Hershey Kiss Cookies Recipe
Now that you’ve nailed the basic bake—and I know you did because this is a reliable recipe—let’s talk about fixing the weird stuff that sometimes happens when you’re baking these incredible Hershey Kiss Cookies Recipe favorites. I see so many people online get frustrated because their chocolate sinks right through the cookie or spreads out too thin. Don’t worry; this is where my test kitchen experience pays off! We want perfect, crinkled domes with a perfectly seated Kiss.
My number one tip for dealing with spreading is temperature control. If your dough balls are too warm when they hit the oven, they immediately melt downhill before they have a chance to set. If you notice your dough feels a little too soft or greasy when rolling in that final sugar coating, pop the tray in the fridge for just 10 minutes. Seriously, 10 minutes is all you need to firm those beauties up before baking. It’s a life-saver, especially if your kitchen is warm!
If your Kisses are sliding right off or sinking too deep, that almost always means you baked the cookie a bit too long. Remember, we want the cookie edges set, but the center still slightly gooey when it comes out. That residual heat is what gently softens the chocolate so it sticks. If you want them just to sit pretty on top, try letting them cool for about 2 minutes on the hot sheet pan before pressing the Kiss in. It gives the cookie structure but still leaves enough heat to melt the chocolate base. See? Easy fixes for gorgeous kiss cookies! For more tips on getting your drop cookies right, you should bookmark my guide on easy drop cookies.
Beyond Peanut Butter: Other Kiss Cookies Variations
I absolutely love the classic peanut butter version—it’s what everyone expects when they ask for kiss cookies—but you know I can’t stop experimenting! Baking is all about taking a perfect base and seeing where it can go next. The great thing about this general template is that it works beautifully with several other doughs. If you’re decorating for Christmas or Valentine’s Day, switching up the base flavor makes total sense!
We can take inspiration from other recipes out there, like those gorgeous sugar cookies or even rich chocolate ones, and just treat the dough like a blank canvas waiting for that chocolate surprise in the center. For instance, if you want that crinkle look but crave a different flavor, you can transform this cookie or follow recipes for things like other fun Hershey Kiss Christmas Cookies recipes if you’re looking for a large variety!
Think about how stunning a deep red cookie would look with a dark chocolate Kiss pressed on top—hello, Red Velvet Blossom Cookies! Or, for something brighter, using a nice, buttery sugar cookie dough as the base creates a wonderful contrast with the chocolate. You just replace the peanut butter in my main recipe with softened butter, and you basically have a simple sugar cookie base ready for that Kiss topper. If you’re into the red velvet vibe, but maybe want it in a different form, you definitely need to check out my red velvet cinnamon rolls recipe!
Making Snickerdoodle Kiss Cookies
If you are a true spice lover, you have to try Snickerdoodle Kiss Cookies. This one is so easy to pivot to! Everything stays the same—the butter, the eggs, the leavening—but you swap out the peanut butter completely for cream of tartar and slightly adjust the sugar ratios to fit a traditional snickerdoodle dough. Once you roll those balls in your cinnamon-sugar mix instead of plain sugar, you get that lovely spicy scent while baking. Then, right when they come out of the oven, press that Kiss in! The cinnamon and chocolate together are honestly fantastic.
Storage and Make-Ahead Tips for Your Kiss Cookies
One of my favorite things about these classic kiss cookies is how wonderfully they handle being made ahead of time. For my busy readers who are looking for truly quick make-ahead cookies, you’ve hit the jackpot! You have two main options here, and which one you choose depends entirely on how patient you are when it comes time to serve them.
First, you can absolutely freeze the dough balls *before* you roll them in sugar. Scoop them out, put them on a parchment-lined tray, and freeze until solid. Once frozen, transfer the balls into a sealed, airtight freezer bag. They will last beautifully for up to three months! When you are ready to bake, just take out what you need, let them sit on the counter for about 15 to 20 minutes to warm up slightly, roll them in the sugar, and bake them as normal. You might need to add just a minute or two to the baking time.
Now, what if you want to press the Kiss in early? This is fine, but it changes the storage a bit. Once the chocolate Kiss is set (after they have cooled completely), store your kiss cookies in an airtight container at room temperature. Because of the sugar crust and the chocolate, they stay soft and perfectly chewy for a good four to five days. If you stack them, I always put a small square of wax paper between the layers so the chocolate doesn’t stick to the cookie below it. If you’re having a party, make sure you check out my list of quick and easy breakfasts for the morning after!
Do *not* store them in the refrigerator unless you live somewhere extremely hot and humid. Cold temperatures tend to dry out cookies faster and can sometimes make the peanut butter flavor a bit dull. Keep them on the counter, covered up, and they will be happy little treats until the whole batch disappears!
Serving Suggestions for Holiday Kiss Cookies
You’ve done the hard work—now it’s time to enjoy these amazing Christmas Cookie Ideas! While these Peanut Butter Blossoms are amazing on their own (who needs anything else?), presentation absolutely elevates a simple cookie into a showstopping dessert for your next party. If you’re planning a festive spread, having these on the platter is a non-negotiable; they are the ultimate classic among Holiday Cookie Recipes.
My favorite way to serve these is alongside something warm and cozy. They pair unbelievably well with a strong, freshly brewed cup of coffee. The slight bitterness of the coffee really makes the salty-sweet peanut butter and the rich milk chocolate pop. If I’m doing a big holiday brunch or need a family-friendly spread, plain cold milk is always the answer. Seriously, dunking one of these chewy cookies into an ice-cold glass of milk is nostalgic heaven.
When it comes to making a platter that wows, try not to put all your chocolate cookies together. Mix up the colors and textures! These peanut buttery guys look fantastic next to something bright, like lemon bars or maybe even my other soft cookies. If you are feeling extra festive and want a creamy complement, you have to try making a batch of my ultra-rich, seasonal creamy coquito. That combination of spiced coconut cream and chocolate peanut butter is just unbeatable during December!
Since these cookies are so sturdy and hold their shape well after the Kiss sets, they are perfect for stacking, transporting to cookie swaps, or just leaving out on the counter for visitors to graze on. They really are designed to be the easiest, most satisfying cookie on the table!
Frequently Asked Questions About Kiss Cookies
I get so many questions about these beauties once people start baking them at home! It’s totally normal; when a recipe is this popular, people want to make sure they get every detail just right. I’m pulling these answers straight from the notes I took while developing the most reliable kiss cookies recipe ever. If you’ve got a question about technique or substitutions, it’s probably answered right here!
Do I need to chill the dough for these peanut butter kiss cookies?
Oh, thank goodness, no! One of the best things about this specific recipe is that it absolutely does not require chilling time. Because we used the right balance of flour and fat, this dough sets up nicely just by incorporating the ingredients. This means you can roll them, bake them, and have warm, soft cookies ready for their chocolate topper in under 30 minutes. They are perfect for those spontaneous baking moods, making them excellent members of the no chill cookie dough recipes club!
What is the difference between Kiss Cookies and Peanut Butter Blossoms?
This is such a fun one because it gets right to the heart of baking history! To put it simply: there isn’t a difference when it comes to the classic version we are making today! “Peanut Butter Blossoms” is the official, trademarked name for the specific recipe that pairs that crackled peanut butter cookie with a milk chocolate Kiss on top. But out here in the real world, everyone lovingly calls them kiss cookies because, well, they have a Kiss! So if your Aunt Mildred tells you to bring her Peanut Butter Blossoms, and you show up with these glorious treats, she’ll be thrilled. They are the exact same thing!
If you’re ever looking for other homemade favorites that really stand the test of time, you should take a look at my recipe for the best homemade bread pudding. It’s another classic perfected!
Estimated Nutritional Data for Classic Kiss Cookies
Now, listen up! Since we are baking with peanut butter, butter, and sugar—pure deliciousness, right?—we do need to talk quick facts about what’s in these stunning kiss cookies. I pulled all this data together for you based on the ingredients list, but you know how it goes in home baking: your specific brand of peanut butter or the size of your eggs can make numbers shift just a little bit.
Remember, this is just an estimate per cookie serving, and it’s meant to give you a good idea, not to replace tracking if you really need precision. If you’re looking for lighter treats that still pack a flavor punch, you might want to check out my low-calorie cheesecake recipe for dessert planning!
Here’s a peek at what you can expect from one of these chewy, chocolate-topped classic Peanut Butter Blossoms:
- Serving Size: 1 cookie
- Calories: About 180 per cookie
- Sugar: Roughly 14g (That’s the fun part!)
- Fat: Around 10g total fat
- Protein: About 4g (Thanks, peanut butter!)
- Carbohydrates: Around 21g
I always say, these treats are best enjoyed with a glass of milk and zero guilt. It’s a classic for a reason, and nothing beats that homemade flavor!
PrintClassic Peanut Butter Kiss Cookies (Peanut Butter Blossoms)
Make the classic Peanut Butter Blossoms, often called Peanut Butter Kiss Cookies. This recipe delivers soft, chewy peanut butter cookies with a signature crackled top, finished with a melted Hershey’s Kiss center. This is a simple, reliable recipe perfect for holidays or any day.
- Prep Time: 15 min
- Cook Time: 10 min
- Total Time: 25 min
- Yield: About 3 dozen cookies 1x
- Category: Dessert
- Method: Baking
- Cuisine: American
- Diet: Vegetarian
Ingredients
- 1 cup unsalted butter, softened
- 3/4 cup creamy peanut butter
- 3/4 cup granulated sugar, plus 1/4 cup for rolling
- 3/4 cup packed brown sugar
- 2 large eggs
- 1 teaspoon vanilla extract
- 2 1/4 cups all-purpose flour
- 1 teaspoon baking soda
- 1/2 teaspoon salt
- 1 bag (12 ounces) milk chocolate Hershey’s Kisses, unwrapped
Instructions
- Preheat your oven to 375 degrees Fahrenheit. Line baking sheets with parchment paper.
- In a large bowl, cream together the softened butter, peanut butter, granulated sugar, and brown sugar until the mixture is light and fluffy.
- Beat in the eggs one at a time, then mix in the vanilla extract.
- In a separate medium bowl, whisk together the flour, baking soda, and salt. Gradually add the dry ingredients to the wet ingredients, mixing on low speed until just combined. Do not overmix the dough.
- Place the extra 1/4 cup of granulated sugar in a shallow dish. Roll the cookie dough into 1-inch balls. Roll each ball in the sugar to coat completely.
- Place the sugared dough balls about 2 inches apart on the prepared baking sheets.
- Bake for 8 to 10 minutes, or until the edges are set but the centers still look slightly soft.
- Immediately upon removing the cookies from the oven, gently press one unwrapped Hershey’s Kiss into the center of each warm cookie. The heat from the cookie will soften the chocolate.
- Let the cookies cool on the baking sheet for 5 minutes before transferring them to a wire rack to cool completely. The chocolate Kiss will set as the cookie cools.
Notes
- For the best crackled appearance, press the Kiss into the cookie right away. If the cookie cools too much, the chocolate may not sink in properly.
- You can substitute milk chocolate Kisses with Hugs, dark chocolate Kisses, or even peanut butter Kisses for variation.
- This dough does not require chilling, making these quick drop cookies ideal for fast baking.
Nutrition
- Serving Size: 1 cookie
- Calories: 180
- Sugar: 14g
- Sodium: 110mg
- Fat: 10g
- Saturated Fat: 4g
- Unsaturated Fat: 6g
- Trans Fat: 0g
- Carbohydrates: 21g
- Fiber: 1g
- Protein: 4g
- Cholesterol: 20mg