
Oh, the holidays! I know they bring such joy, but sometimes the pressure to create that one perfect, show-stopping dessert makes me want to hide the oven mitts! But you don’t need complicated menus or stress baking this year, trust me. I want to introduce you to a treat that brings all the nostalgia and zero pretense: the Little Debbie Christmas Tree Cake Cheesecake. If you’re looking for that perfect centerpiece, this recipe is it. As someone who spent years perfecting foolproof recipes in a test kitchen, I can absolutely guarantee this fusion of creamy cheesecake and nostalgic snack cake will work beautifully for your party. Like my fudgy chocolate crinkle cookies, this recipe is simple, utterly delicious, and requires almost no decorating skill to look amazing!
- Why This Little Debbie Christmas Tree Cheesecake is Your New Holiday Must-Make
- Gathering Ingredients for Your Christmas Tree Cheesecake Recipe
- Step-by-Step: Preparing the Perfect Christmas Tree Cheesecake
- Decorating Your Showstopper Holiday Cheesecake
- Expert Tips for the Best Christmas Tree Cheesecake Ever
- No Bake Christmas Tree Cheesecake Option
- Storage and Make Ahead Christmas Dessert Planning
- Frequently Asked Questions About This Festive Cheesecake Recipe
- Estimated Nutritional Snapshot for Your Creamy Holiday Treat
- Share Your Christmas Tree Cheesecake Creation
Why This Little Debbie Christmas Tree Cheesecake is Your New Holiday Must-Make
When I tell you this dessert flies off the table faster than Santa takes off in his sleigh, I mean it! This isn’t just a **Festive Cheesecake Recipe**; it’s a time machine disguised as a genuinely rich, creamy holiday dessert. I promise, you don’t need to be a pro baker to make this look incredible, especially since the decorating basics are built right into the flavor profile!
- Instant Nostalgia Hit: Who doesn’t love those iconic Little Debbie Christmas Tree Cakes? We are literally baking the flavor of childhood memories right into the filling. It’s pure comfort in every slice, bringing a little extra magic to your table.
- True Showstopper Holiday Bake: Forget spending hours piping delicate little trees. This **Christmas Dessert Centerpiece** uses simple ganache and sprinkles to create a visually stunning effect. It looks complicated, but you and I both know the secret is simple: cake chunks and good food coloring!
- Make Ahead Christmas Dessert Ease: Cheesecake is your best friend during the holidays because it *needs* to chill. This means you can have the entire base baked and cooled a full day before your party. Less day-of-kitchen stress for you!
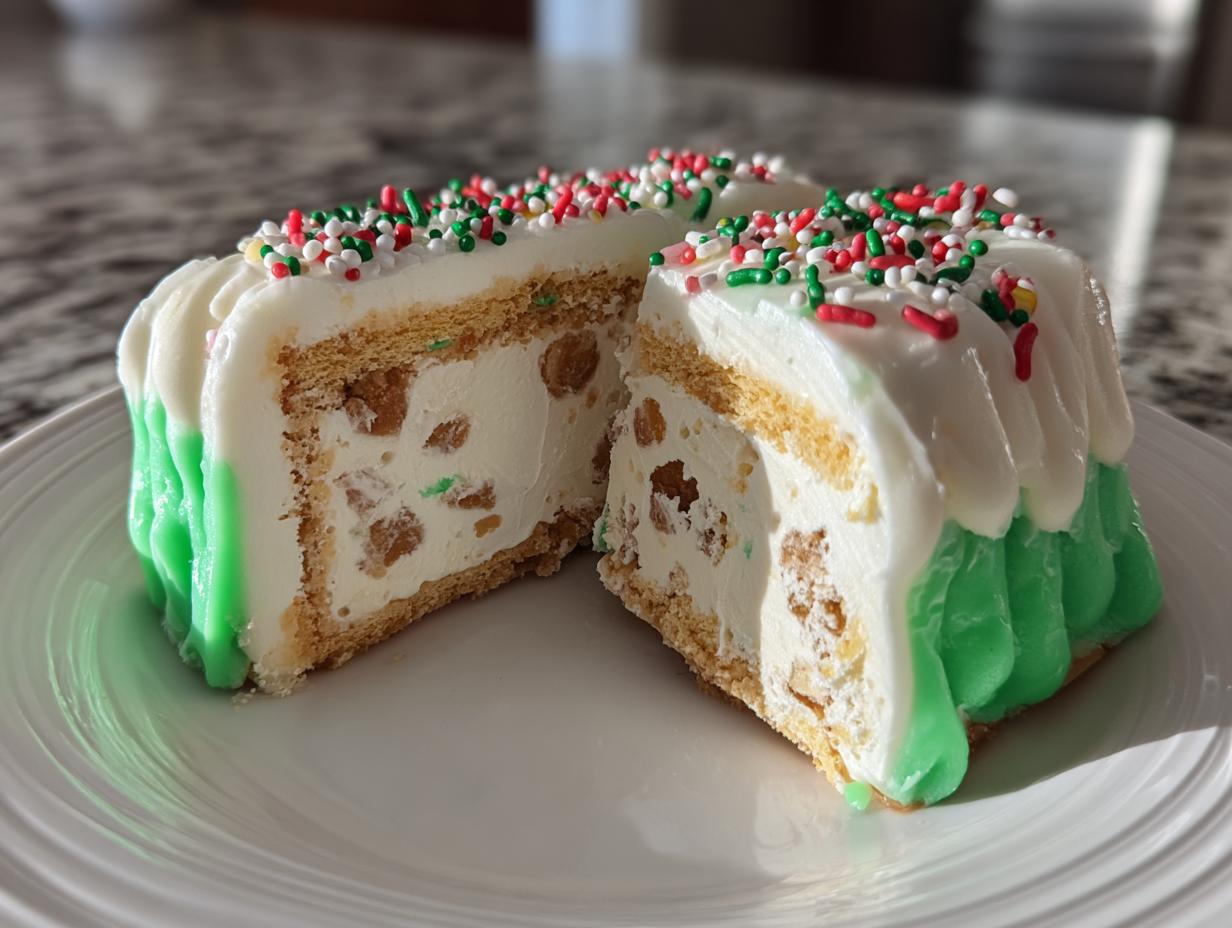
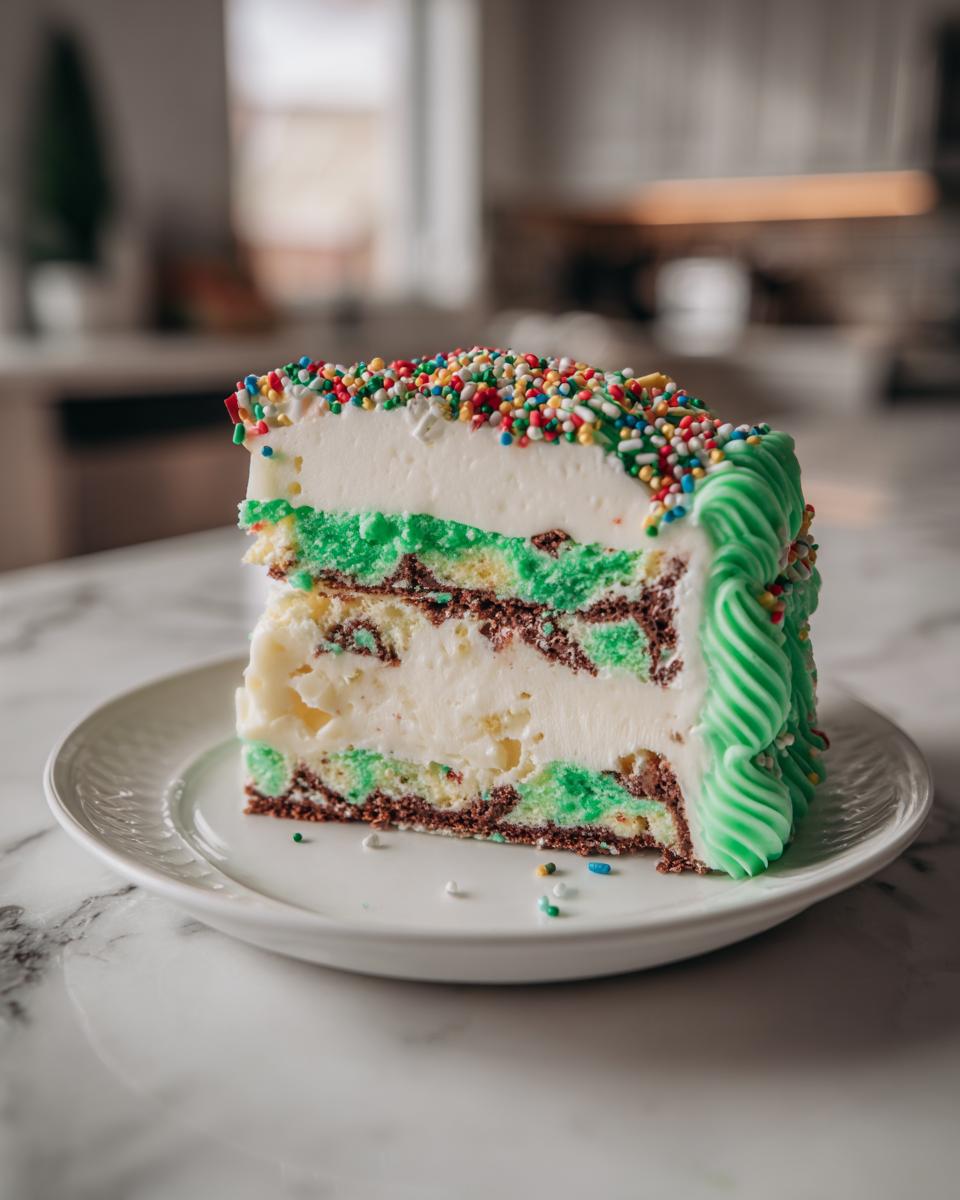
- Perfectly Balanced Texture: You get the buttery snap of the graham cracker crust, the dense, velvety texture of a perfectly baked cheesecake, and the soft, vanilla-laced cake layers all in one bite. If you need a break from fussier holiday bakes, check out my easy creamy mango sticky rice for a flavor change of pace!
This **Creamy Holiday Treat** is what holiday parties are all about—delicious, festive, and made with a little bit of love (and a lot of snack cakes!).
Gathering Ingredients for Your Christmas Tree Cheesecake Recipe
Okay, I know seeing a list of ingredients can sometimes feel like reading a science experiment, but stick with me! Because we are fusing two beloved items—cheesecake and snack cakes—this list is fairly straightforward. The key here is making sure your cream cheese is properly softened; that’s what stops us from getting those frustrating lumps in our filling. Remember, reliability is my whole goal here!
I’ve broken down what you need for the crust, the filling itself, and finally, the topping where most of the magic happens.
For the Buttery Graham Cracker Crust
This is classic, simple, and sets the sturdy foundation for our heavy filling. Don’t skimp on pressing this down firmly!
- 180 g graham cracker crumbs (about 1 ½ cups, packed)
- 85 g unsalted butter, melted (just over a half cup)
For the Nostalgic Cheesecake Filling
This is where the flavor of the Little Debbie Christmas Tree Cakes really shines through. Make sure you let the cream cheese sit out for a solid hour before you mix anything.
- 675 g cream cheese, softened (that’s usually three standard blocks)
- 100 g granulated sugar (about ½ cup)
- 1 teaspoon vanilla extract
- 2 large eggs (room temperature is best, honestly!)
- 1 package (12 count) Little Debbie Christmas Tree Cakes, chopped roughly—save about 1/4 of them for topping!
For the White Chocolate Ganache Topping and Decoration
This topping gives us that beautiful, smooth blanket before we draw the tree onto it. I sometimes like to use my fluffy vanilla buttercream tinted green if I’m in a hurry, but the ganache gives a much richer finish.
- 100 g white chocolate, melted (good quality melts smoother!)
- 120 ml heavy cream (just under ½ cup)
- Green food coloring (gel colors work best for vibrant results)
- Assorted holiday sprinkles and small candies (these are your ornaments!
When you’re getting your base ingredients ready, if you happen to be making a batch of my sugar cookie icing later in the season, grab those sprinkles now—they’ll work perfectly here too!
Step-by-Step: Preparing the Perfect Christmas Tree Cheesecake
This is the part where we turn those lovely ingredients into a baked dream! Cheesecake baking can feel intimidating, but I promise you, the secret to that crack-free, velvety surface is all in a few key techniques. We’re using the water bath method here because it’s the most reliable way I know to get a truly gorgeous, even bake. Don’t skip it; it’s the key to a perfect bake, just like it is for my favorite pumpkin cheesecake.
Building the Crust and Prepping the Pan
First things first, get your gear ready! Preheat that oven to 325°F (160°C). Grab that 9-inch springform pan, give it a light grease—this helps insurance policies never hurt! Now, mix up those graham cracker crumbs and melted butter. You want it to look like wet sand. Press that mixture firmly and evenly into the bottom of the pan. I mean firmly—use the flat bottom of a measuring cup to really pack it down.
Pop that crust into the preheated oven for just 10 minutes. This little pre-bake helps it set up so it doesn’t get soggy later. Once it’s done, pull it out and just let it cool down while you tackle the main event.
Mixing the Creamy Cheesecake Filling
In a large bowl, start beating your softened cream cheese and the sugar together until you see absolutely no lumps—we want smooth sailing here! Mix in your vanilla extract. Now for the eggs: add them one at a time. This is critical! You only mix until the yellow just disappears after each addition. If you overmix once the eggs are in, you are creating air bubbles, and air bubbles mean cracking later. It’s a science, I promise!
Once the base is smooth and slightly puffy, grab those chopped Little Debbie Christmas Tree Cakes. Gently fold in most of them. We are mixing these into the batter with a light hand—we want them suspended in the filling, not beaten into oblivion!
Pour that luscious filling right over your cooled crust. Next, we need to prepare the water bath!
Baking with the Water Bath Technique
This step is your MVP for beautiful cheesecake. Place your springform pan *inside* a larger roasting pan. Carefully pour hot water into that outer roasting pan until the water comes about halfway up the side of the springform pan. The steam created by this water bath keeps the oven humid, which cooks the cheesecake edges gently and evenly, preventing the dreaded surface crack.
Bake this whole setup for about 50 to 60 minutes. You’re looking for the edges to be set firm, but when you gently nudge the pan, the center should still have a slight, soft jiggle left. When it’s done, turn the oven OFF! Crack the door open just a tiny bit—maybe stick a wooden spoon in there to hold it ajar—and let that cheesecake cool down inside the oven for a full hour. This gradual cooling process is just as important as the baking itself. After that hour, remove it from the water bath, let it cool completely on the counter, and then it’s off to the fridge for at least six hours, but honestly, overnight is best for the ultimate texture!
Decorating Your Showstopper Holiday Cheesecake
Okay, the long wait is over, and after chilling, your cheesecake is firm, cold, and perfect! Now for the fun part—making it look like the absolute star of your holiday table! We need to create that look of soft, piney branches without having to wrestle with piping bags for hours. The secret weapon here is a quick white chocolate ganache, slightly tinted green. If you wanted a substitute topping later on, you could always check out my recipe for the best cream cheese frosting, but for this, we’re sticking to ganache!
Start by making the ganache. Just whisk together the heavy cream and the melted white chocolate until it’s super smooth. It should look like liquid velvet.
Now, we split the batch. Pour about two-thirds of that silky mix into one small bowl. Add just a few drops of green food coloring to that portion and mix it gently until you have a lovely, festive green. Leave the rest as pure white. That white ganache will be our base layer, and the green will be our tree decoration!
First, take your perfectly chilled cheesecake out of the springform pan—be careful now! Spread the plain white ganache evenly across the top surface. This creates a clean canvas, just like starting with a fresh sheet of paper.
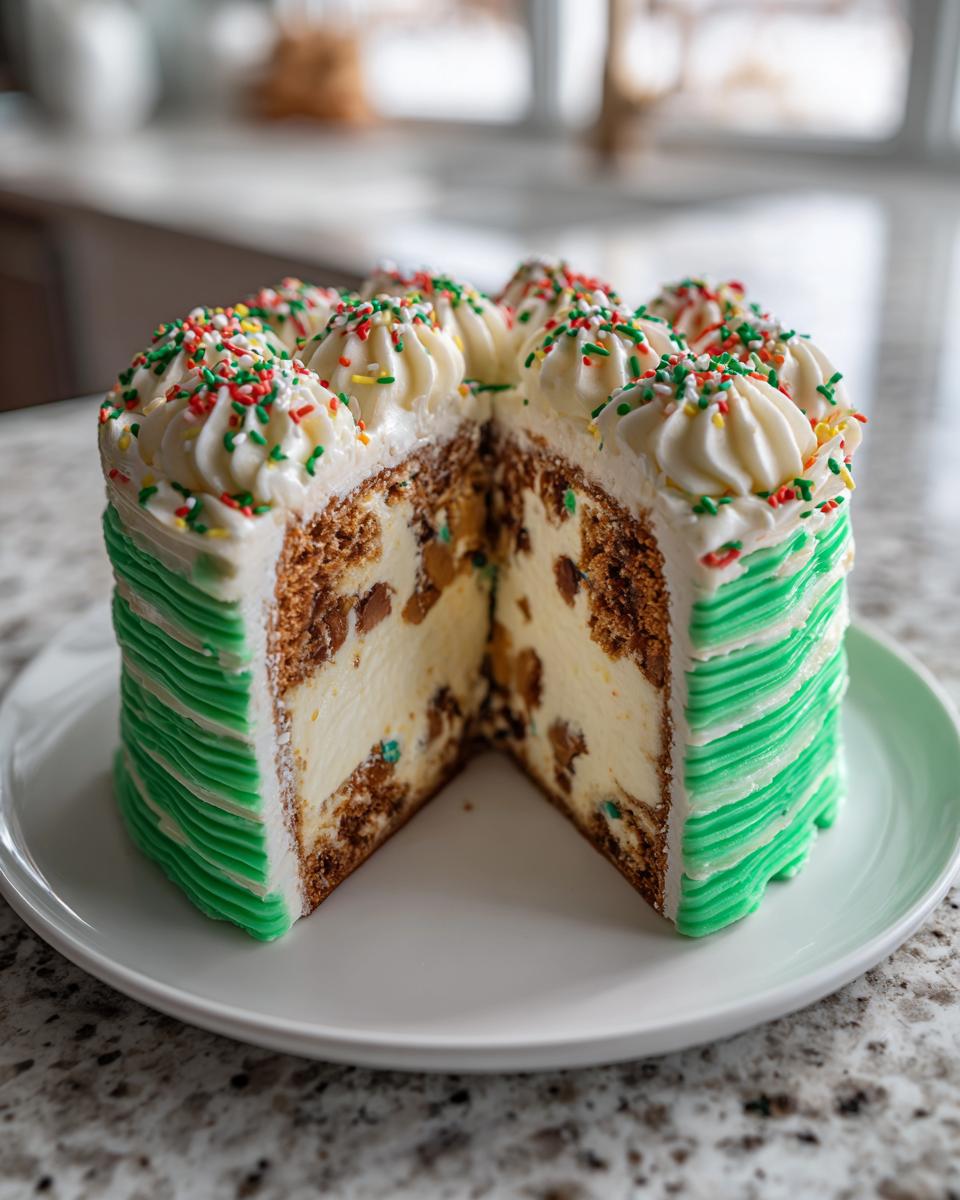
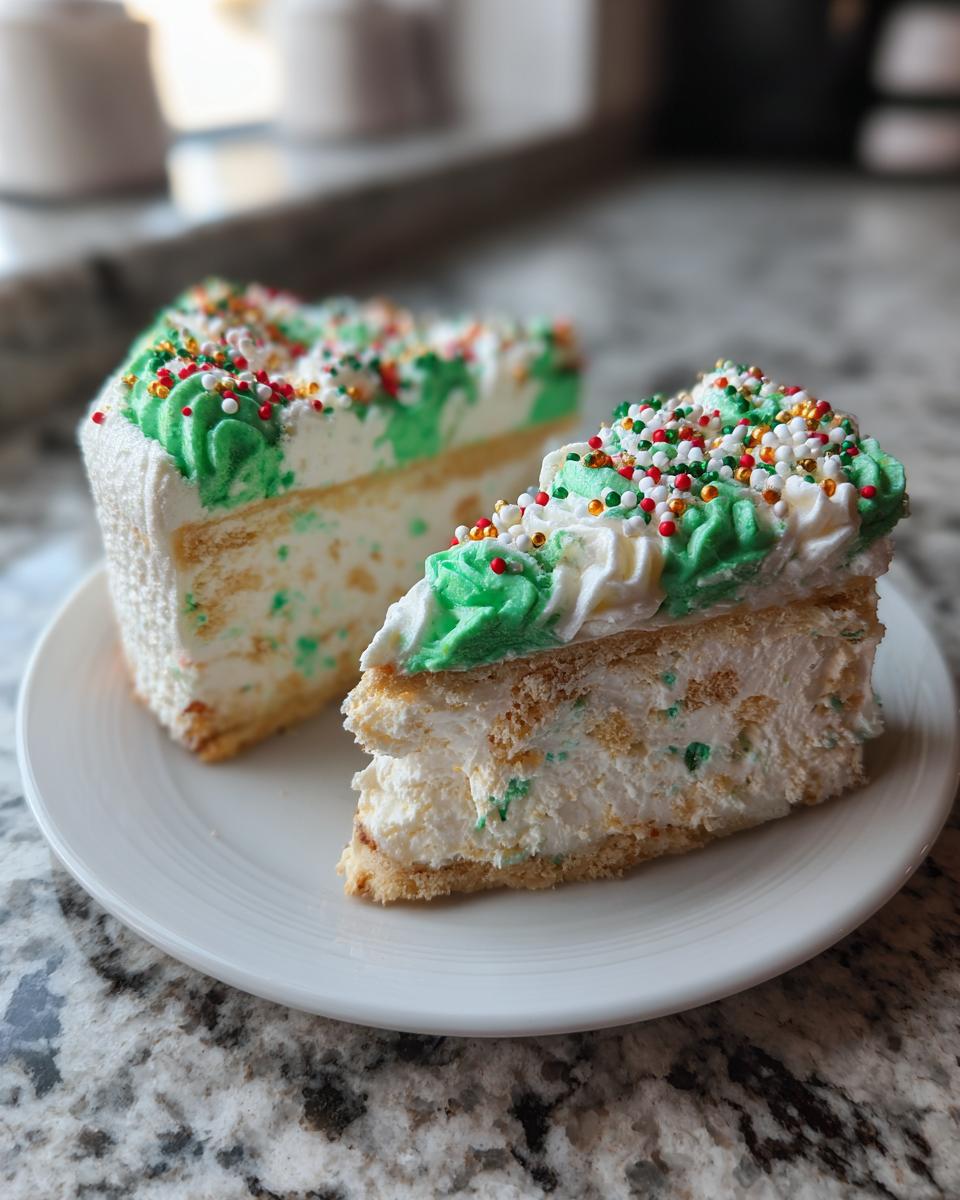
Next, take your green ganache. If you want that classic piped look that mimics branches reaching out, you might need to transfer it to a piping bag fitted with a wide, star tip. Pipe wide, soft lines starting from a central point (or the top edge if you’re making a full conical shape) working your way down. It doesn’t have to be perfect; remember, it’s meant to look fluffy and textured! If piping feels like too much work, just spoon the green over the white, and then softly drag a knife or spatula through it once using a swirling motion to create texture. This technique really makes it pop!
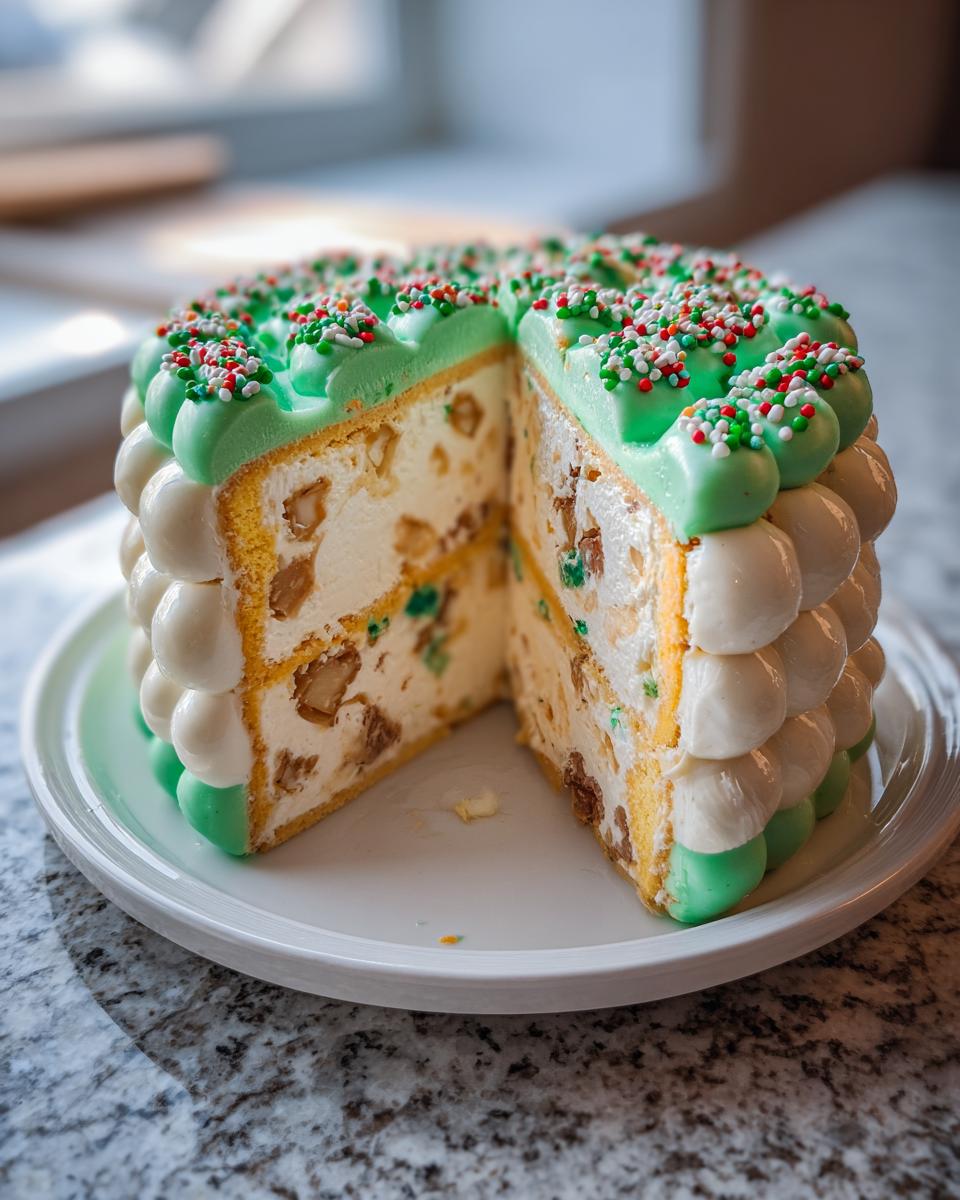
Finally, it’s time to decorate! Take those reserved chunks of Little Debbie Christmas Tree Cakes and tuck them around the base or place a few on top for extra texture. Then, go absolutely wild with your sprinkles and small candies—these are your ornaments and lights! Since this is such a rich dessert, a little goes a long way visually. This gorgeous creation is ready to impress your guests!
Expert Tips for the Best Christmas Tree Cheesecake Ever
I’ve learned a lot over the years making rich desserts like this, and when it comes to cheesecake, the difference between good and *absolutely incredible* is often just a matter of detail. This isn’t about complex flair; it’s about getting the fundamentals right so your filling is velvety smooth and your flavor integrates perfectly. If you master these few points, you’ve basically got the key to every single rich cheesecake recipe out there!
First off, let’s talk about temperature. This is probably my number one thing I stress when teaching anyone how to make a proper cheesecake. If your cream cheese and eggs are cold straight from the fridge, you’re going to introduce lumps when you mix, no matter how good your mixer is. Seriously, set your cream cheese out for at least an hour—90 minutes is better! That way, when you beat it, it creams beautifully with the sugar, creating those tiny air pockets that give you that luxurious, creamy mouthfeel.
Speaking of mixing, remember what I said about the eggs? Mix them in one at a time, and only mix until they disappear. Over-beating after the eggs are added is the #1 way to get a balloon effect in the oven followed by a major collapse and crack when it cools. We want density, not aeration, in this dessert!
The chilling time is non-negotiable. I know you want to cut into that gorgeous decoration right away, but cheesecake needs time for those fats and proteins to firm up properly. Give it that minimum six hours, but if you can wait overnight, you’ll be rewarded tenfold with a slice that holds its shape perfectly when you cut it. It’s the perfect holiday cheesecake idea for planning ahead.
When you are ready to unmold the cake, use a thin offset spatula or a clean knife to gently run around the inside edge of the pan before you undo the spring latch. This prevents the soft edge of the cheesecake from sticking to the metal as you release it. If you are looking for other rich ideas for your holiday spread, you should absolutely check out my recipe for German Chocolate Cheesecake—it’s decadence!
And one last little secret from the pros: if you happen to have any cracks despite your best water bath efforts, don’t panic! That’s why we’re covering this entire stunning bake with ganache and sprinkles. A thin layer of frosting or ganache covers a multitude of sins! If you want to see how they handle cracks professionally, you can peek at how they manage layers in this detailed guide on the Little Debbie Christmas Tree Cheesecake process.
Mastering these little moves means you never have to stress about getting a smooth, perfect base, even when the main event is hiding under Christmas sprinkles!
No Bake Christmas Tree Cheesecake Option
I totally get it—the oven is already packed with cookies or that amazing brisket, and you just don’t have time or space for baking. That is when you should absolutely switch gears and make the **No Bake Christmas Tree Cheesecake** version! It’s just as delicious and captures that creamy, nostalgic flavor we love, but with minimal kitchen time.
The modification here is super simple, but it requires a little more patience afterward. You simply skip the entire pre-baking of the crust and the main baking process altogether. You press your graham cracker crust mixture into the pan (maybe make it a tiny bit firmer since it won’t get that pre-bake set!), and then you pour your filling right over it.
Now, here’s the crucial difference: since there’s no heat setting those eggs, we rely entirely on chilling. You need to let this version chill for a minimum of eight hours. Seriously, make it in the morning and plan to decorate and serve it the next day. If you want it to slice like a dream, chilling overnight is where it’s at. Think of it like my go-to no-bake peanut butter pie—the chill time is non-negotiable for firmness!
Because the texture is softer in the no-bake version, I actually recommend using a slightly thicker topping, perhaps a good stabilized whipped cream or even my cream cheese frosting tinted green, instead of the pourable ganache on top. The lighter topping won’t weigh down the softer filling as much. If you’re really struggling with oven space, this method is a lifesaver, and I found some great tips on handling the setting process over at this site!
Storage and Make Ahead Christmas Dessert Planning
One of the best things about making a showstopper like this **christmas tree cheesecake** is that it’s practically designed for holiday planning! Unlike delicate cookies or fussy pastries, cheesecake thrives when made ahead of time. This is your secret weapon for keeping your sanity right before the big day!
Since cheesecake is a make-ahead marvel, you actually have a few options for planning its spot in your holiday timeline. If you bake it completely—crust, filling, and the whole shebang—and store it undecorated in the fridge, it stays absolutely perfect for up to three days. Just make sure you cover the top gently with plastic wrap or foil to keep any stray fridge smells away from that vanilla-y goodness. I love planning to have the whole cheesecake done baking and chilled by December 22nd, which gives me plenty of buffer room.
But what about that gorgeous topping? If you want to decorate it all up, including the green ganache and those lovely sprinkles, I recommend doing that no more than 24 hours before you serve it. The sprinkles can sometimes start to bleed their color into the white ganache if they sit for too long, and we want those ornaments looking bright and cheerful!
Now, let’s talk about leftovers—because believe it or not, sometimes there are leftovers! Keep any remaining cheesecake tightly covered in the refrigerator. It should stay delicious for about four to five days. Honestly, I find the texture is still excellent towards the end of the week. You won’t be reheating this one, though; cheesecake is definitely best served chilled!
Thinking about timing your entire holiday menu around desserts that can be prepared in advance is such a smart move. For more strategies on keeping your holiday workflow smooth, you absolutely have to check out my tips on make ahead Christmas dessert planning. It has totally changed how I approach December baking so I can spend more time enjoying the family and less time staring at the oven!
Frequently Asked Questions About This Festive Cheesecake Recipe
I always get so many questions after people try something new and amazing, especially when it comes to nailing a **Showstopper Holiday Bake** like this! Cheesecake can sometimes feel mysterious, but once you know the tricks, it’s so easy. Here are a few things readers ask me most often about making sure this **Christmas Tree Cheesecake Recipe** turns out perfectly.
Can I make this Christmas Tree Cheesecake without Little Debbie Cakes?
That is a totally fair question, especially if you’re in an area where those specific snack cakes are hard to find! While I absolutely love how those cakes integrate that unique vanilla flavor and texture, you can definitely adapt this. If you can’t find them, I suggest using chunks of a plain, high-quality store-bought vanilla pound cake or even angel food cake. You want something soft, vanilla-forward, and not overly dense. You could also try breaking up plain shortbread cookies if you want to maintain a bit more structure, but make sure you don’t crush them too finely! This keeps it firmly in the realm of great **Holiday Cheesecake Ideas**, even with a swap.
How do I get the perfect smooth top on my cheesecake?
This is the eternal question, isn’t it? The beautifully smooth, uncracked top comes primarily from two things we talked about in the tips section. First, remember that room temperature cream cheese! If your cheese isn’t soft enough, your batter will be lumpy, and those lumps bake unevenly, leading to texture issues on top. Second, and most importantly, do not overmix once the eggs are added. You are gently folding them in just until they disappear. Those air bubbles we try to avoid are what cause the cake to rise too fast in the oven and then fall and crack as it cools. If you follow the water bath and slow cooling method diligently, you should get that pristine surface for your tree toppings!
If you’re looking for other incredibly reliable recipes that eliminate kitchen guesswork, I always direct people toward my cream cheese corn casserole—simple satisfaction every time!
Estimated Nutritional Snapshot for Your Creamy Holiday Treat
Okay, let’s talk real numbers for a second. Because we are using creamy, rich ingredients like cream cheese, white chocolate, and those delicious little snack cakes, this **Christmas Tree Cheesecake** is definitely an indulgence! Food statistics aren’t my main focus—bringing joy and connection to the table is much more important to me—but being transparent about what we’re eating is key to feeling confident in the kitchen. So, if you’re tracking macros or just curious, here is an estimated breakdown per slice.
Please keep in mind that since we are using a packaged snack cake, these numbers are an educated estimate based on averages. If you make substitutions, like using my protein cheesecake recipe as a starting point instead, these numbers will definitely change!
- Serving Size: 1 slice (This recipe yields 10 substantial slices)
- Calories: 450
- Sugar: 35g (Remember, a lot of this comes from the beautiful Little Debbie cakes!)
- Fat: 30g
- Saturated Fat: 18g
- Carbohydrates: 40g
- Protein: 7g
- Cholesterol: 100mg
This is truly satisfying dessert, so remember that 450 calories reflects a nice, generous piece—the size you’d want for a real holiday showstopper! Enjoy it guilt-free; it’s the holidays, and you deserve a slice of this wonderful, nostalgic **Festive Cheesecake Recipe**!
Share Your Christmas Tree Cheesecake Creation
Well, here we are at the end! I hope reading through this process has made you as excited as I am to get baking. Creating a dessert that tastes like childhood while looking like a glittering centerpiece is such a fun way to celebrate the season. I put my heart into making sure this **Christmas Tree Cheesecake Recipe** is foolproof for you, and now I really want to see what you create!
If you followed along, you now have a slice of pure holiday joy ready to go. When you do finish decorating it—whether you went wild with the tiny candies or kept it slightly more minimalist—please come back and let me know how it went! Taking the time to rate the recipe stars helps other busy home cooks know this recipe is reliable. It means the world to me.
And please, take a picture! I absolutely love seeing your creations pop up online, often turning into someone else’s “must-make” **Holiday Cheesecake Idea** for the next season. You can tag me on social media so I can share your successes in my stories. Seeing your kitchen warmth spill out digitally is why I do this.
Thank you so much for trusting me with your holiday baking plans. Creating meals that bring people together is the greatest reward, whether it’s a simple weeknight dinner or this magnificent **Festive Cheesecake Recipe**. For more reliable inspiration that keeps the joy high and the stress low, feel free to swing by my About Page to learn more about my philosophy!
Happy Holidays and happy baking, friends!
PrintLittle Debbie Christmas Tree Cake Cheesecake

Make this show-stopping, creamy cheesecake that incorporates the nostalgic flavor of Little Debbie Christmas Tree Cakes. It is a festive centerpiece dessert for your holiday table.
- Prep Time: 30 min
- Cook Time: 60 min
- Total Time: 7 hours 30 min
- Yield: 10 servings 1x
- Category: Dessert
- Method: Baking
- Cuisine: American
- Diet: Vegetarian
Ingredients
- 180 g graham cracker crumbs
- 85 g unsalted butter, melted
- 675 g cream cheese, softened
- 100 g granulated sugar
- 1 teaspoon vanilla extract
- 2 large eggs
- 1 package (12 count) Little Debbie Christmas Tree Cakes, chopped
- 100 g white chocolate, melted (for ganache)
- 120 ml heavy cream (for ganache)
- Green food coloring
- Assorted holiday sprinkles and small candies (for decoration)
Instructions
- Preheat your oven to 325°F (160°C). Lightly grease a 9-inch springform pan.
- Prepare the crust: Mix the graham cracker crumbs and melted butter until combined. Press the mixture firmly into the bottom of the prepared springform pan. Bake for 10 minutes. Let cool slightly.
- Prepare the cheesecake filling: In a large bowl, beat the softened cream cheese and granulated sugar until smooth. Mix in the vanilla extract. Beat in the eggs one at a time, mixing just until combined after each addition. Do not overmix.
- Gently fold in most of the chopped Little Debbie Christmas Tree Cakes into the batter, reserving some for topping later.
- Pour the filling over the cooled crust. Place the springform pan into a larger roasting pan. Carefully pour hot water into the roasting pan until it reaches halfway up the sides of the springform pan (this creates a water bath).
- Bake for 50 to 60 minutes, or until the edges are set and the center has a slight jiggle.
- Turn off the oven, crack the door open slightly, and let the cheesecake cool in the oven for 1 hour. Remove from the water bath and cool completely on a wire rack.
- Chill the cheesecake in the refrigerator for at least 6 hours, or preferably overnight.
- Prepare the topping: Whisk together the melted white chocolate and heavy cream until smooth to create a ganache. Divide the ganache into two bowls. Add a few drops of green food coloring to one bowl and mix until you achieve a festive green color. Leave the other bowl white.
- Decorate the cheesecake: Once chilled, carefully remove the cheesecake from the pan. Spread the white ganache over the top surface. Use the green ganache to pipe or spread ‘branches’ or a tree shape onto the cheesecake surface.
- Place the reserved chopped Christmas Tree Cakes around the base or on top as desired. Finish by scattering holiday sprinkles and small candies like ornaments.
Notes
- For a no-bake version, skip the oven steps and chill the filling for 8 hours until firm before decorating.
- If you do not have a springform pan, you can use a standard 9-inch cake pan, but cooling and removal will be more difficult.
- You can use store-bought vanilla frosting tinted green instead of making ganache for the tree decoration if you want a simpler topping.
Nutrition
- Serving Size: 1 slice
- Calories: 450
- Sugar: 35
- Sodium: 300
- Fat: 30
- Saturated Fat: 18
- Unsaturated Fat: 12
- Trans Fat: 0.5
- Carbohydrates: 40
- Fiber: 1
- Protein: 7
- Cholesterol: 100