
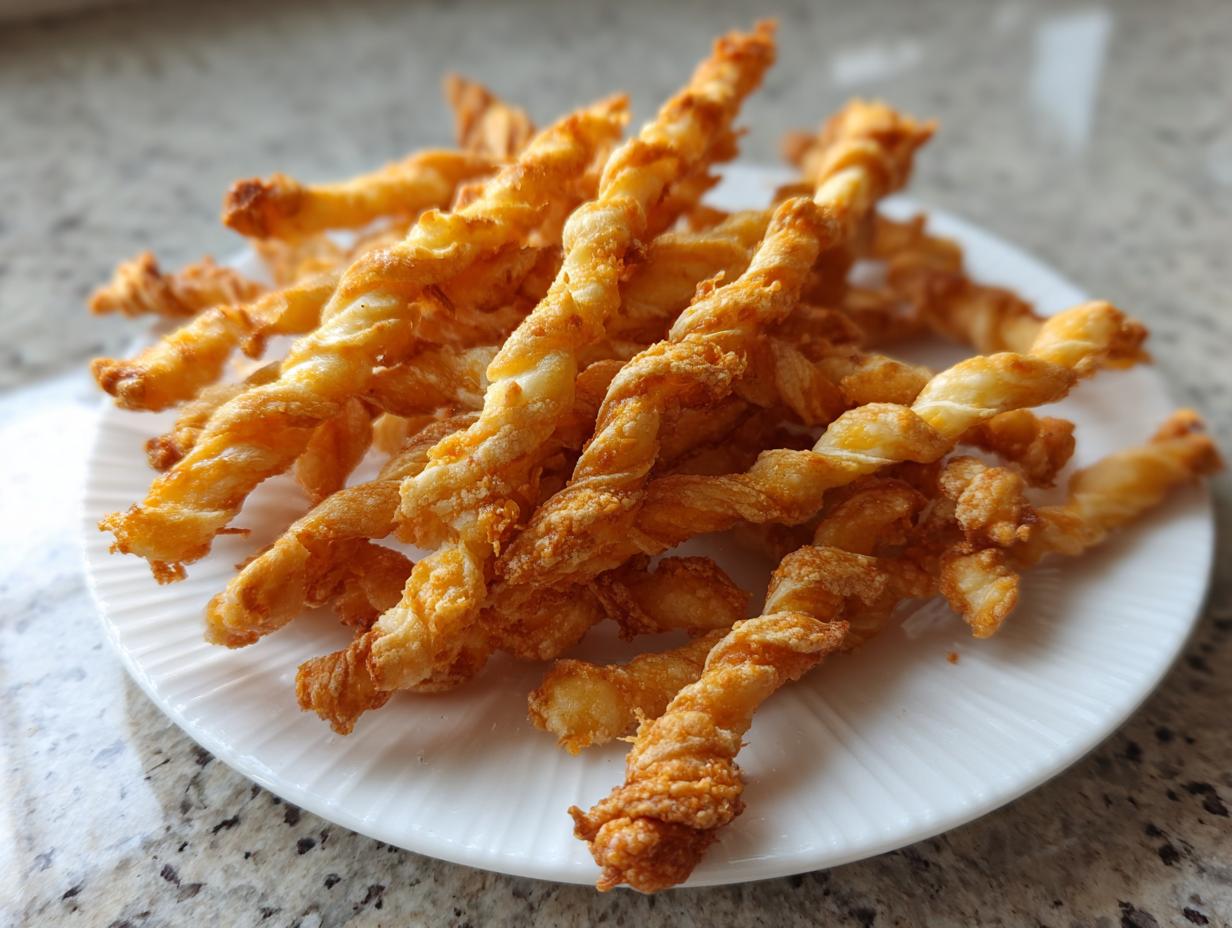
Oh my gosh, be warned: once you dip your hand into a warm bowl of homemade cheese straws, you might not stop until the whole batch is gone! Seriously, these savory little sticks are pure addiction baked into perfect, buttery form. When I think about the simple, wonderful snacks that grounded me in the kitchen—even before I started diving into nutrition studies—it was always things like this. Forget the fussy pastries; we’re getting back to basics with this Southern Cheese Straws Recipe. Trust me, achieving that shatteringly crispy texture that snaps when you bite it is totally within reach, and it all starts with just a few quality items. You deserve truly great homemade cheese snacks, and I’m going to show you exactly how to get them right!
- Why You Will Love These Crispy Cheese Straws
- Essential Ingredients for Perfect Homemade Cheese Straws
- How to Make Southern Cheese Straws Recipe Step-by-Step
- Tips for Success: Achieving Perfect Crispy Cheese Straws Every Time
- Variations: Spicy Cheese Straws and Other Flavor Twists
- Serving Suggestions for Your Cheese Straws
- Storage and Reheating Instructions for Homemade Cheese Straws
- Frequently Asked Questions About Making Cheese Straws
- Nutritional Estimates for Cheddar Cheese Straws
Why You Will Love These Crispy Cheese Straws
I’ve made a lot of snacks in my life, both professionally and just for fun at home, but these little beauties are always the first things to disappear at any party. They’re everything you want in a savory treat, minus any fussiness. You won’t believe how easy it is to get that perfect texture!
- Shatteringly Crispy Texture: This is my promise to you. We nail the science here so you get flaky, crispy cheese straws that snap, not bend. They truly taste like elevated, buttery cheese crackers.
- Ultimate Sharp Cheddar Flavor: We only use sharp cheddar here. It brings that necessary tang and depth that cheap grocery store versions just can’t touch.
- Perfect Savory Party Appetizers: They are bite-sized, addictive, and everyone asks for the recipe. They look way fancier than the effort they require.
- Simple Ingredients You Already Have: No weird trips to specialty stores required! Flour, cold butter, sharp cheese, and a tiny kick of spice—that’s it for these Homemade Cheese Straws.
- Fast Cook Time: Seriously, they are in the oven and done in under 15 minutes. If you need quick appetizers, these are your heroes.
- Great for Making Ahead: You can mix the dough and chill it, which actually helps develop flavor before you bake them into perfect sticks.
Essential Ingredients for Perfect Homemade Cheese Straws
Okay, let’s talk about what you need, because with incredibly simple recipes, ingredient quality really shines through. If you mess with the core four here, you risk turning these into soft, sad crackers instead of the crunchy delightful savory shortbread sticks we are aiming for. For starters, grab your notepad! You’ll need:
- 2 cups all-purpose flour
- 1 teaspoon salt
- 1/4 teaspoon cayenne pepper (optional, but I highly recommend this for a little kick!)
- 1 cup (that’s two full sticks!) unsalted butter, and this part is crucial—it has to be cold!
- 1 1/2 cups freshly grated sharp cheddar cheese
- 1/4 cup ice water
See? It’s minimal! But don’t let the short list fool you. The technique for handling these items is what separates the good ones from the legendary ones. We’re aiming for legendary status here!
Ingredient Notes and Sharp Cheddar Appetizers Tips
I want to pause right here and talk about two ingredients that absolutely cannot be substituted without changing the outcome: the butter and the cheese. These are non-negotiable if you want those beautiful, brittle, crispy cheese straws we dream about.
First, the cheese! You have to grate it yourself. I know, I know, the pre-shredded bags look so convenient, but they’re coated in starch or cellulose—anti-caking agents—to keep them from clumping in the bag. That stuff ruins the texture! It stops the cheese from melting properly into the dough, which results in a denser, less flaky bite. We need that pure, fatty sharp cheddar to melt perfectly, creating those incredible pockets of flavor. This is the secret to amazing sharp cheddar appetizers.
Second, your butter must be COLD. When you cut that cold butter into the flour, you create little barriers. As the straws bake, that cold butter melts, creating steam. That steam pushes apart the layers of dough, resulting in that flaky, airy structure that makes these “crispy cheese straws.” Warm butter just blends right into the flour, and you get a uniform, heavy dough. Keep that butter chilled!
How to Make Southern Cheese Straws Recipe Step-by-Step
Alright, you’ve got your perfect ingredients assembled! Now we move into the fun part: bringing it all together. This process is quick, but paying attention to the textures we’re looking for is the actual key to making them irresistible. Follow these steps, and you’ll have classic, addictive cheese straws from scratch ready for the oven in no time. If you look up how others handle these, you’ll find folks who swear by minor variations, but sticking to cold ingredients is the foundation for this Southern Cheese Straws Recipe.
Mixing the Dough for Flaky Cheese Straws
Start by whisking that flour, salt, and optional cayenne pepper together in a big bowl. Next, grab your cold, cubed butter. You need to cut that butter into the flour mixture until it looks like coarse crumbs—think split peas, maybe a few slightly bigger chunks is fine. This creates those necessary air pockets for flakiness! Once you hit that texture, mix in your beautifully grated sharp cheddar cheese. Now, this is important: add the ice water slowly, maybe a tablespoon at a time, just mixing till the dough finally holds together. Stop stirring the second it clumps up. Seriously, overmixing here is what makes them tough, and we want flaky cheese straws, not hockey pucks!
Chilling and Shaping Your Cheese Straws From Scratch
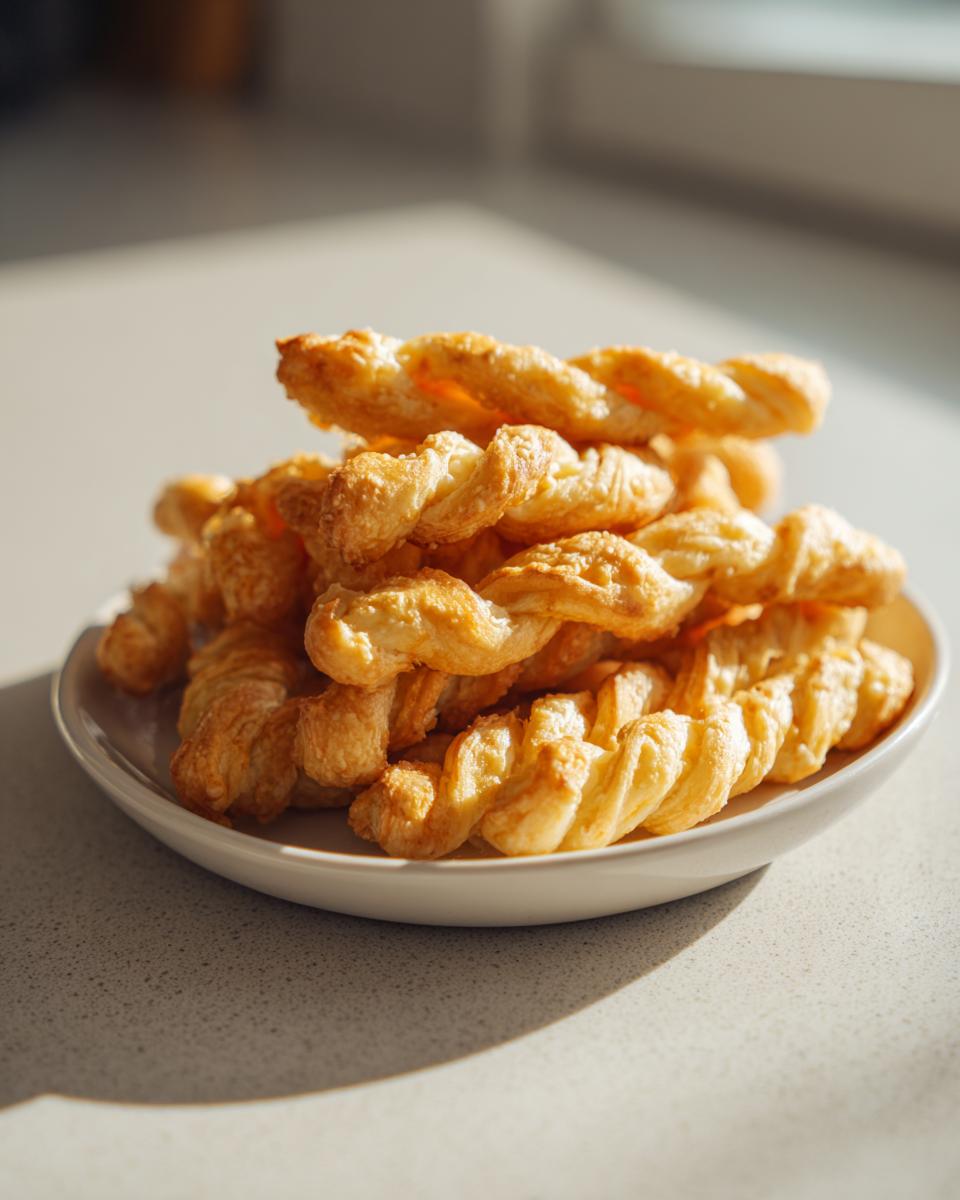
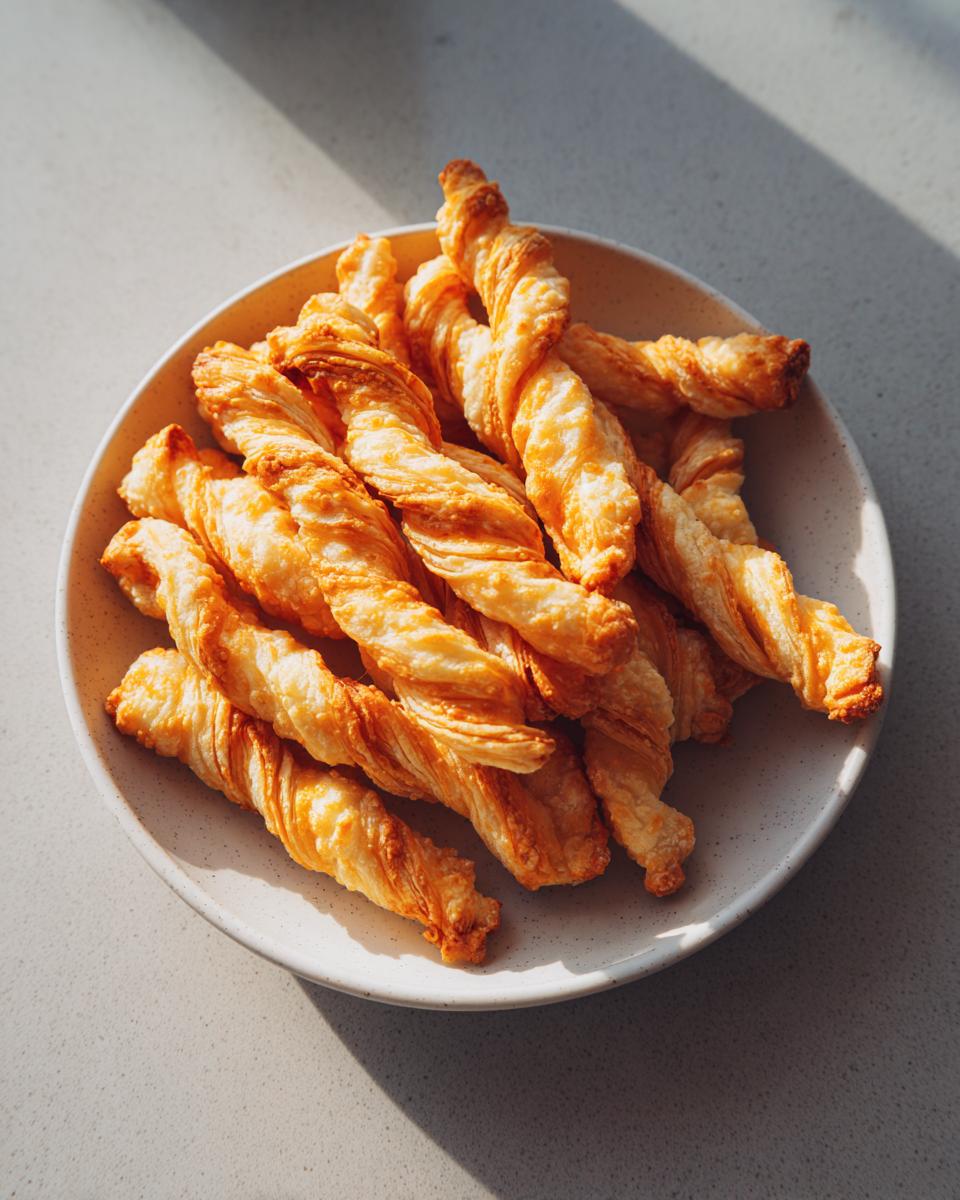
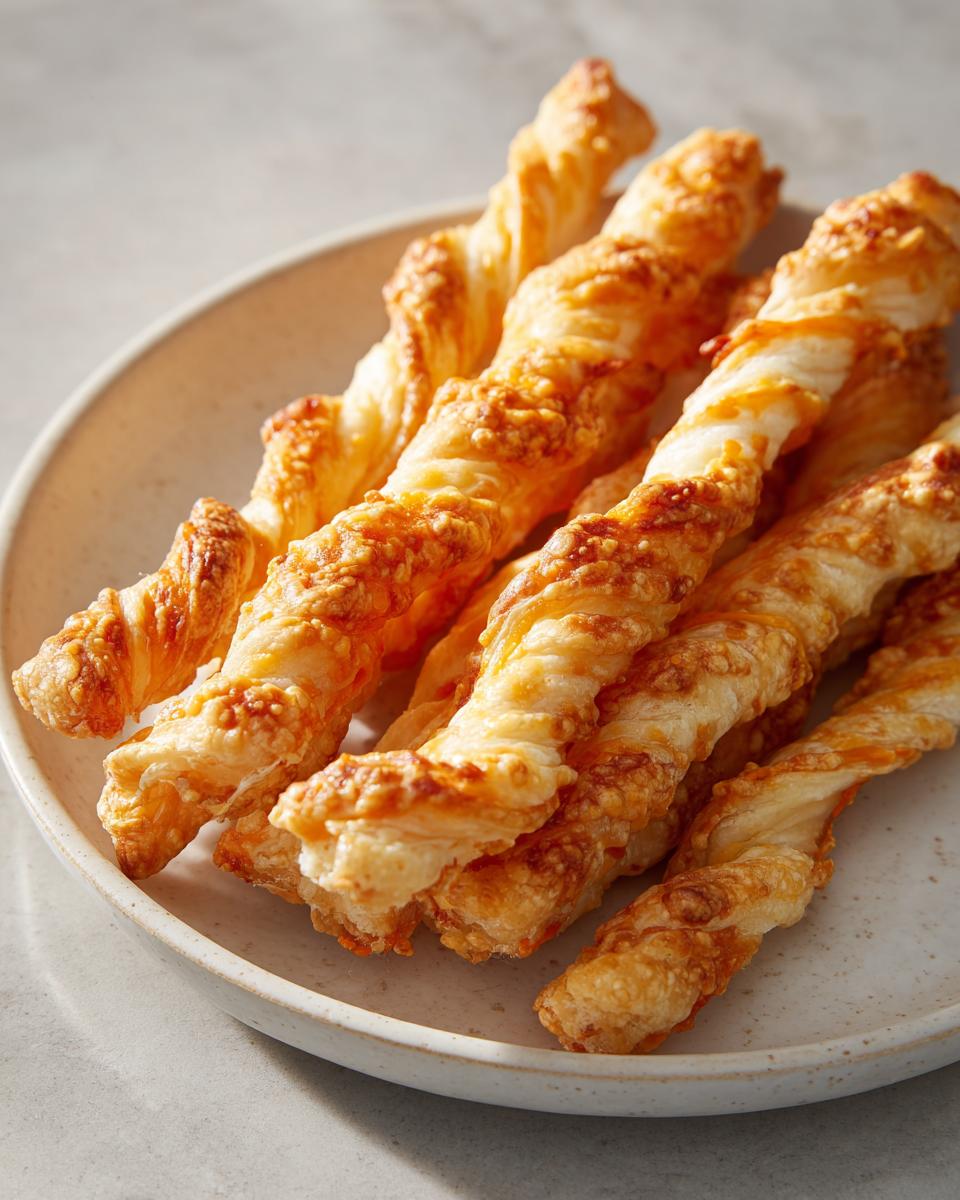
You can’t skip the chill time if you want the best results. Gather that shaggy dough, press it into a flat disk—don’t knead it!—wrap it up snug, and stick it in the fridge for at least 30 minutes. Once it’s chilled, preheat your oven to a hot 400 degrees Fahrenheit (that’s 200 Celsius). Line your baking sheets with parchment paper; this saves you from sticking horrors later! On a lightly floured surface, roll that cold dough out thin—about 1/8-inch thick—and cut it into strips. Mine are usually about 1/2-inch wide and 4 to 6 inches long. If you’re feeling fancy, give each strip a little twist right down the middle for that classic Southern look.

Baking for Ultimate Crispiness in Your Cheddar Cheese Straws
Lay those twisted little guys out on your prepared sheets, leaving just a tiny bit of space between them. Now, watch them! They only need about 10 to 14 minutes. Look for the edges turning golden brown—that’s your cue! If you bake them too short, they’ll be soft when they cool. If you bake them a minute or two longer, they get that signature *snap*. Once they look golden, pull them out immediately and move them right over to a wire rack. They will crisp up even more as they cool down. If you need a fantastic dip for these later, check out my recipe for creamy garlic aioli—it’s perfect for dipping!
Tips for Success: Achieving Perfect Crispy Cheese Straws Every Time
Making cheese straws is easy, but making them truly *crispy* takes a little know-how. Think of the cold butter we used—that was the first hint! To guarantee that satisfying crunch, remember the golden rule: we are baking them until they are definitely golden brown, not just pale yellow. If they look done when you pull them out, they are definitely going to be soft, trust me.
The cooling step is just as important as the mixing! They must cool completely on a wire rack. This lets the steam escape and allows the fat to solidify, firming up that flaky structure. If you leave them on the tray, that trapped heat keeps them soft. Need to restore the crispness a day later? I just flash them back into a 350-degree oven for about four minutes. It works like magic!
Also, don’t forget a tiny sprinkle of salt or paprika on top before they go into the oven for an extra savory touch. If you want even more insight into how the best Southerners achieve perfect texture, you have to check out this great resource on secrets for crispy cheese straws. It reinforces what we do here!
If you’re planning to dip these into something delicious later, make sure your dip is ready to go, like my easy garlic aioli!
Variations: Spicy Cheese Straws and Other Flavor Twists
Part of the fun of making anything from scratch is making it perfectly your own! While this base recipe nails the classic cheddar flavor that makes for the best game day snacks, it’s also a fantastic canvas for adding your own flair. You don’t need a whole new recipe to switch things up; just a little creativity with your add-ins.
If you liked that hint of cayenne in the main recipe, you can easily double down for true spicy cheese straws. Try swapping out half of the sharp cheddar for Pepper Jack cheese—it melts beautifully and brings its own heat. Or, if you want herbaceous notes, stir in about a tablespoon of finely chopped fresh rosemary when you add the cheese. Fresh rosemary mixed with that sharp cheddar is just heavenly; they make amazing entertaining snacks!
We also can’t forget about swapping the cheese entirely, though the sharp cheddar is the classic Southern style. If you want something a little saltier and nuttier, swap out half of the cheddar for freshly grated Parmesan cheese. You’ll end up with something that leans slightly toward a savory cracker. Just remember that Parmesan has different fat content, so you might need just a tiny splash more of the ice water to bring the dough together. Don’t get too heavy-handed, though—we are keeping these buttery cheese crackers light!
Honestly, just play around once you’ve mastered the core technique. A dash of smoked paprika provides color and a subtle smoky flavor that’s fantastic, too. It’s so rewarding when you bake a batch that tastes totally unique but still has that wonderful, reliable crunch!
Serving Suggestions for Your Cheese Straws
Now that you have the crispiest, most shatteringly delicious savory sticks imaginable, you have to decide when to serve them! The great thing about Cheddar Cheese Straws is that they cross over from fancy holiday treat to casual, easy snack without skipping a beat. They are always welcome on my table.
For large gatherings or when you want an impressive spread of savory party appetizers, don’t just put them on a platter alone! Create a wonderful snack board. Mix in some olives, some nice crunchy crudités, and maybe some spicy nuts. They pair beautifully with cured meats if you’re leaning into that style of entertaining.
They are, of course, the absolute best for Game Day Snacks. They are sturdy enough to handle a little jostling, and everyone loves grabbing them between plays. Pair them with a strong, sharp dip—I highly recommend making a batch of my whipped ricotta dip to serve alongside them; the cool creamy texture is a perfect contrast to the hot, spicy, crispy straw.
Don’t think they are just for parties, though! These are wonderful as a simple side dish. They are significantly better than croutons on top of a hearty bowl of soup. They stand up to liquid without getting soggy right away. If you’re making a big pot of comfort food, like my classic chicken noodle soup, crush up a few straws right over the top just before serving. The cheddar flavor totally elevates the whole bowl. Honestly, once you have these on hand, you’ll find excuses to bake them all the time!
Storage and Reheating Instructions for Homemade Cheese Straws
This is such an important question because the joy of a cheese straw is that crisp, shatter-in-your-mouth texture, and we absolutely cannot let them go soft!
The good news is that these homemade cheese straws store really well, provided you follow one golden rule: they must be completely, 100% cool before you pack them away. If you try to store them while even slightly warm, that trapped moisture guarantees they will soften up overnight.
Once they are totally cooled down, grab an airtight container—I mean a true container with a solid seal, not just a container with a loose lid. Storing them this way keeps ambient humidity out, which is key to maintaining their flaky structure. Properly stored, they hold up beautifully on the counter at room temperature for a good four or five days. I’ve packed them for trips, and they are usually perfect when we get there!
If they have been sitting out for a day or two, though, they might lose just a touch of that fresh-from-the-oven snap. Don’t stress; revival is easy! You just need to borrow a little dry heat. Do not use the microwave; that will make them chewy immediately. Instead, lay the cheese straws in a single layer on a baking sheet. Pop them into a 350-degree oven—not the 400 we used for baking—for just about 4 to 6 minutes. If you don’t want to pull out a full sheet, a toaster oven works perfectly fine for reheating just a small batch. You’ll know they are done when they smell fragrant and feel firm when you gently touch them.
I keep all my general tips and tricks for keeping food fresh in my dedicated storage post, just in case you need a refresher anytime you’re dealing with baked goods or make-ahead recipes!
Frequently Asked Questions About Making Cheese Straws
I get so many questions about these addictive little cheddar bites! They seem simple, but getting that perfect cracker-like texture can sometimes trip people up. Here are the top things I hear when people are trying to master their first batch of cheese straws from scratch. I hope this helps you nail that perfect savory crunch! If you’re looking for make-ahead ideas for other snacks, check out my guide on make-ahead breakfast bites, because planning ahead saves so much stress!
Can I make the cheese straws dough ahead of time?
Absolutely, and I recommend it! This is where the flavor really gets to marry together. The original recipe calls for a minimum of 30 minutes of chilling time, which is non-negotiable for structure. But you can safely keep that dough wrapped tightly in the fridge for up to two days before rolling it out. If you chill it longer than that, the butter might start to get too hard, or the dough can dry out slightly. If you go past the 30-minute mark, just let it sit on the counter for 10 minutes before trying to roll it, otherwise, it just fights you! This is a great trick for having easy party appetizers ready to bake when guests arrive.
What is the secret to truly crispy cheese straws?
If you only take one thing away from this whole post, let it be this: Cold, cold, cold ingredients! That’s the number one secret to crispy cheese straws. Cold butter cuts into the flour to create those flakes, and cold water keeps the gluten happy until it hits the hot oven. The second secret is baking time and cooling method. You must bake them until they are visibly golden brown, not just lightly yellow. Then, as soon as they come out, immediately transfer them to a wire cooling rack. Don’t let them sit on the baking sheet for more than five minutes, or that residual heat will steam them soft. That cooling process on the rack is what sets the crispiness!
Can I substitute the sharp cheddar in this easy cheese snack recipe?
You can certainly play around, but I always tell my friends that the sharp cheddar is the foundation of that true, bold Southern flavor. If you substitute all of it, you change the overall result of this specific recipe. However, if you want to try something different, swapping out half the sharp cheddar for an equal amount of nutty, salty Parmesan cheese works wonderfully! This gives you a more complex flavor profile, almost like a salty Parmesan cheese straw. Just be mindful that different cheeses melt differently; if the dough feels a little dry when you add the Parmesan, add that ice water splash by tiny drops until it just comes together. But for the very best, classic taste, stick to that sharp cheddar blend!
Nutritional Estimates for Cheddar Cheese Straws
Since we are making these delicious, buttery treats from scratch, I wanted to share what the nutrition breakdown looks like. Remember, because we are deep in the world of real butter and sharp cheddar here, these wonderful savory party appetizers are best enjoyed in moderation! These estimates are based on the full recipe yield—about 4 dozen straws—and are meant to guide you, not be the absolute law.
Baking with whole, quality ingredients is always worth it to me—you know exactly what’s going into your food! If you are planning out your week and looking for some lighter fare, I keep a whole section of reliable, flavorful ideas over in my guide to healthy lunch ideas.
Here is the breakdown based on a serving size of 4 straws:
- Calories: 110
- Fat: 7g (with 4g being saturated fat)
- Carbohydrates: 8g
- Protein: 3g
- Sodium: 180mg
- Sugar: Less than 1g! (Yay for savory snacks!)
Please keep in mind these are just estimates! If you use a different type of cheese, or maybe end up cutting your straws a little bigger—which I *totally* understand happening when you’re making these irresistible homemade cheese straws—the numbers will shift slightly. Enjoy them responsibly!
PrintClassic Crispy Southern Cheddar Cheese Straws

Make addictive, buttery cheese straws from scratch using sharp cheddar. This simple recipe delivers the shatteringly crispy texture perfect for game day or holiday entertaining.
- Prep Time: 20 min
- Cook Time: 14 min
- Total Time: 54 min
- Yield: About 4 dozen 1x
- Category: Appetizer
- Method: Baking
- Cuisine: American
- Diet: Vegetarian
Ingredients
- 2 cups all-purpose flour
- 1 teaspoon salt
- 1/4 teaspoon cayenne pepper (optional, for a little spice)
- 1 cup (2 sticks) cold unsalted butter, cut into small pieces
- 1 1/2 cups freshly grated sharp cheddar cheese
- 1/4 cup ice water
Instructions
- In a large bowl, whisk together the flour, salt, and cayenne pepper.
- Cut the cold butter into the flour mixture using a pastry blender or your fingertips until the mixture resembles coarse crumbs with some pea-sized pieces of butter remaining.
- Stir in the freshly grated sharp cheddar cheese until evenly distributed.
- Gradually add the ice water, one tablespoon at a time, mixing just until the dough comes together. Do not overmix.
- Gather the dough, form it into a flat disk, wrap it in plastic wrap, and chill in the refrigerator for at least 30 minutes.
- Preheat your oven to 400 degrees Fahrenheit (200 degrees Celsius). Line baking sheets with parchment paper.
- On a lightly floured surface, roll the dough out to about 1/8-inch thickness.
- Cut the dough into strips about 1/2-inch wide and 4 to 6 inches long. You can twist the strips slightly for a classic look.
- Place the cheese straws onto the prepared baking sheets, leaving a small space between them.
- Bake for 10 to 14 minutes, or until the edges are golden brown and the straws are crisp. Baking time affects crispness; watch closely.
- Transfer the cheese straws to a wire rack to cool completely. They will crisp up more as they cool.
Notes
- Use freshly grated sharp cheddar cheese for the best flavor and texture. Pre-shredded cheese contains anti-caking agents that prevent optimal crispness.
- Keeping the butter very cold is key to achieving flaky, crispy cheese straws.
- For extra savory party appetizers, sprinkle a pinch of paprika or garlic powder over the straws before baking.
Nutrition
- Serving Size: 4 straws
- Calories: 110
- Sugar: 0.2
- Sodium: 180
- Fat: 7
- Saturated Fat: 4
- Unsaturated Fat: 3
- Trans Fat: 0.1
- Carbohydrates: 8
- Fiber: 0.3
- Protein: 3
- Cholesterol: 18