

There is such a specific, cozy joy that comes from pulling a pan of perfectly baked goods out of the oven, right? For me, nothing beats the aroma of fresh scones baking, but I know they have a reputation for being tricky. Maybe you’ve tried making them before and ended up with something dense or crumbly? Well, don’t you worry about that anymore! I’m Jade Carter, and after studying nutrition and spending years developing foolproof recipes in professional test kitchens, I promise you this version delivers. We’re going to achieve those tall, flaky, wonderfully buttery scones that melt in your mouth, every single time you bake them. This is the baseline recipe you need for your next brunch! If you love learning about high-rise baking, you should also check out my recipe for tall, flaky Southern biscuits—same principles apply here!
- Why This Is The Best Flaky Scone Recipe You Will Ever Make
- Gathering Ingredients for Your Classic Scones
- Step-by-Step Instructions: How to Make Scones From Scratch
- Tips for Success When Baking Your Scones
- Customizing Your Scones: Sweet Scones Ideas and Savory Variations
- Serving Suggestions for Perfect Scones
- Storage and Reheating Instructions for Your Scones
- Frequently Asked Questions About Making Scones
- Estimated Nutritional Information for Classic Scones
Why This Is The Best Flaky Scone Recipe You Will Ever Make
Honestly, I’ve tried dozens of recipes, and this one just wins every time, especially if you’re aiming for that bakery quality at home. This isn’t just another recipe; it’s engineered for success. We’re delivering the best flaky scone recipe by focusing on just two things: keeping everything ice cold and mixing as little as possible. Follow these principles, and I promise you’ll master the art of moist scones tips without even trying hard. They come together so quickly, making them the absolute best breakfast or brunch item! If you ever need a simple flavorful sauce to go with savory breakfast items, check out my easy homemade teriyaki sauce recipe.
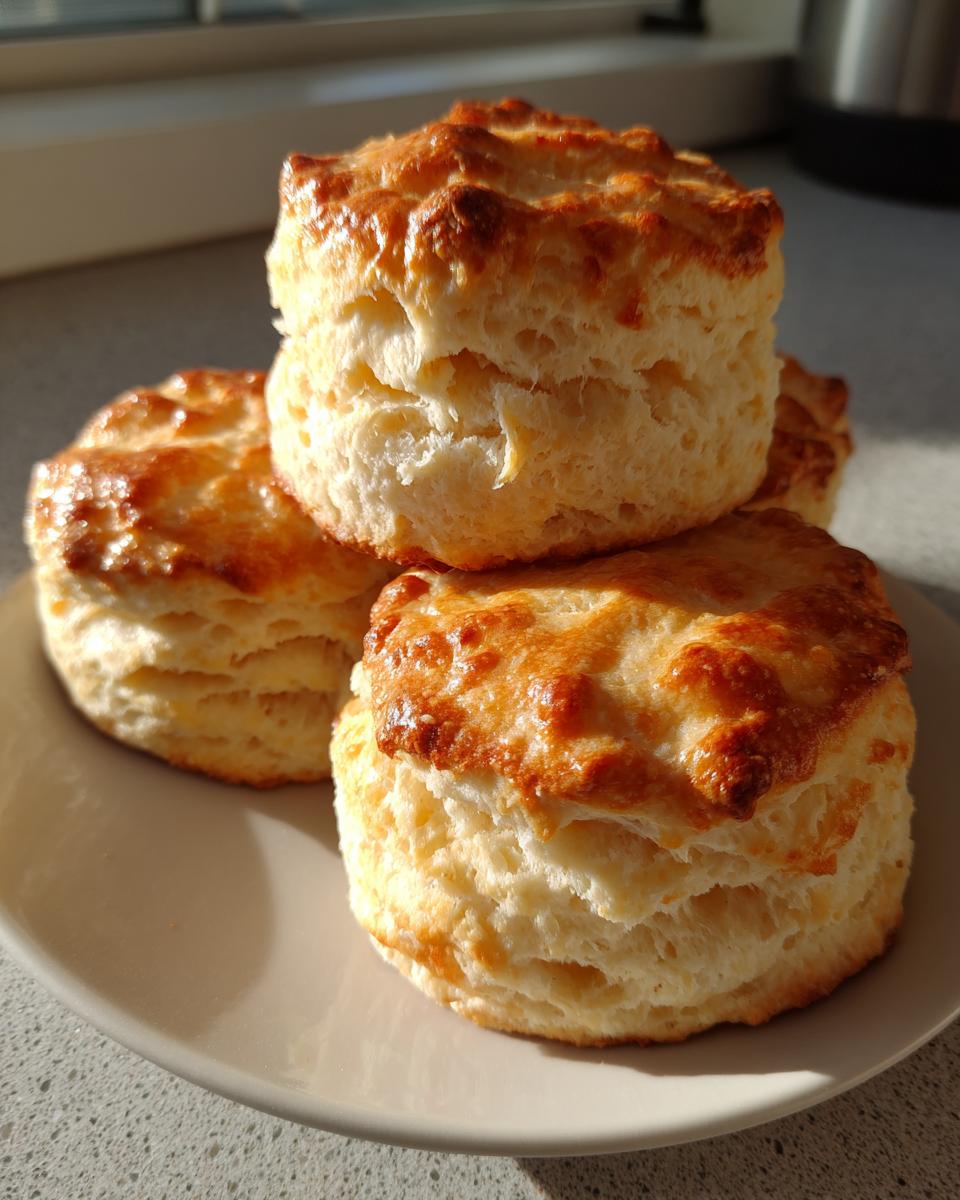
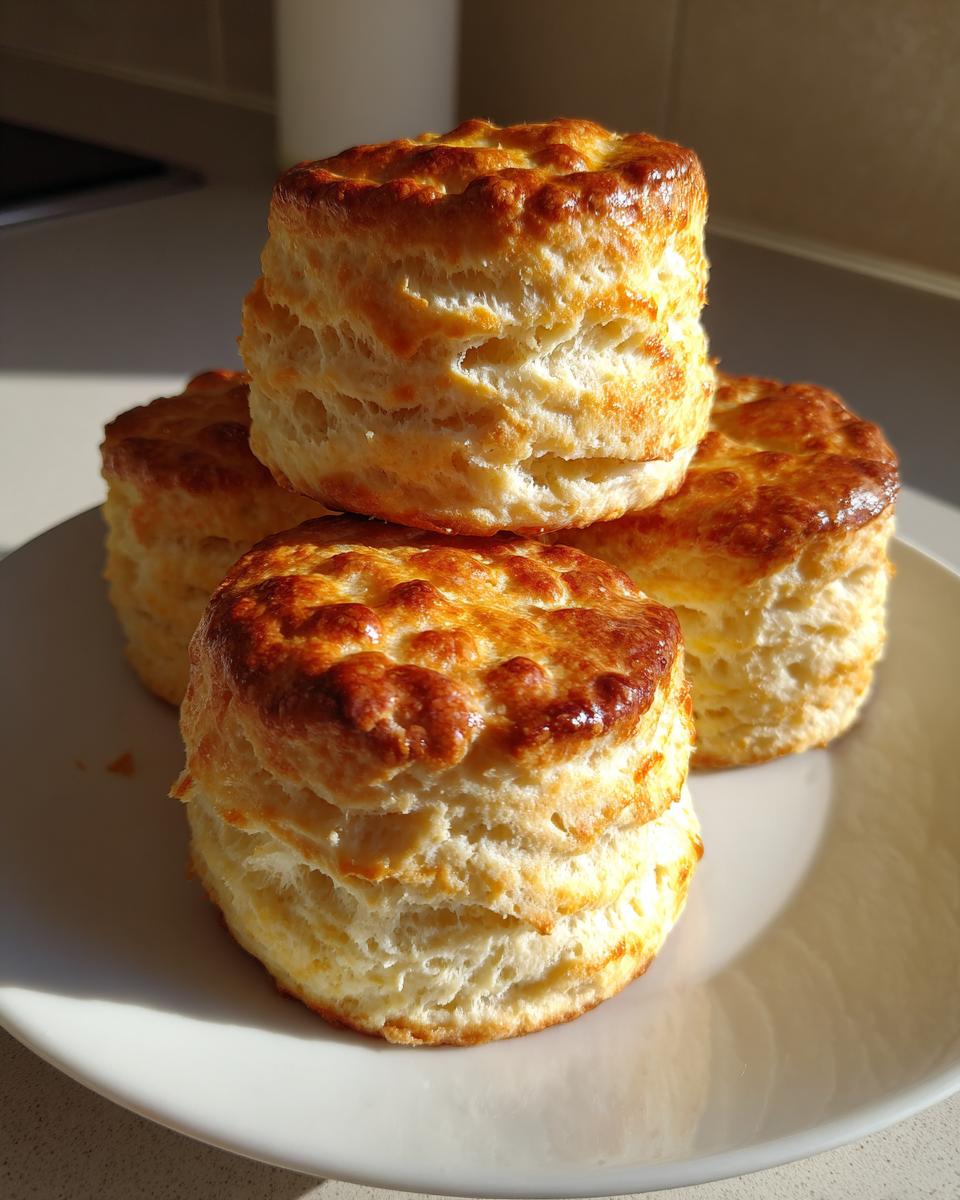
Achieving Tall Bakery Style Scones
Height is everything with scones, isn’t it? The secret here is locking in that cold butter. When those pieces of chilled butter hit the hot oven, they steam rapidly, creating little pockets of air that push the dough upward. That’s your lift! Also, make sure you press your cutter straight down—don’t twist! Twisting seals the edges shut, and you end up with squat, dense little hockey pucks instead of that beautiful, tall bakery style scone look.
The Secret to Buttery Scones
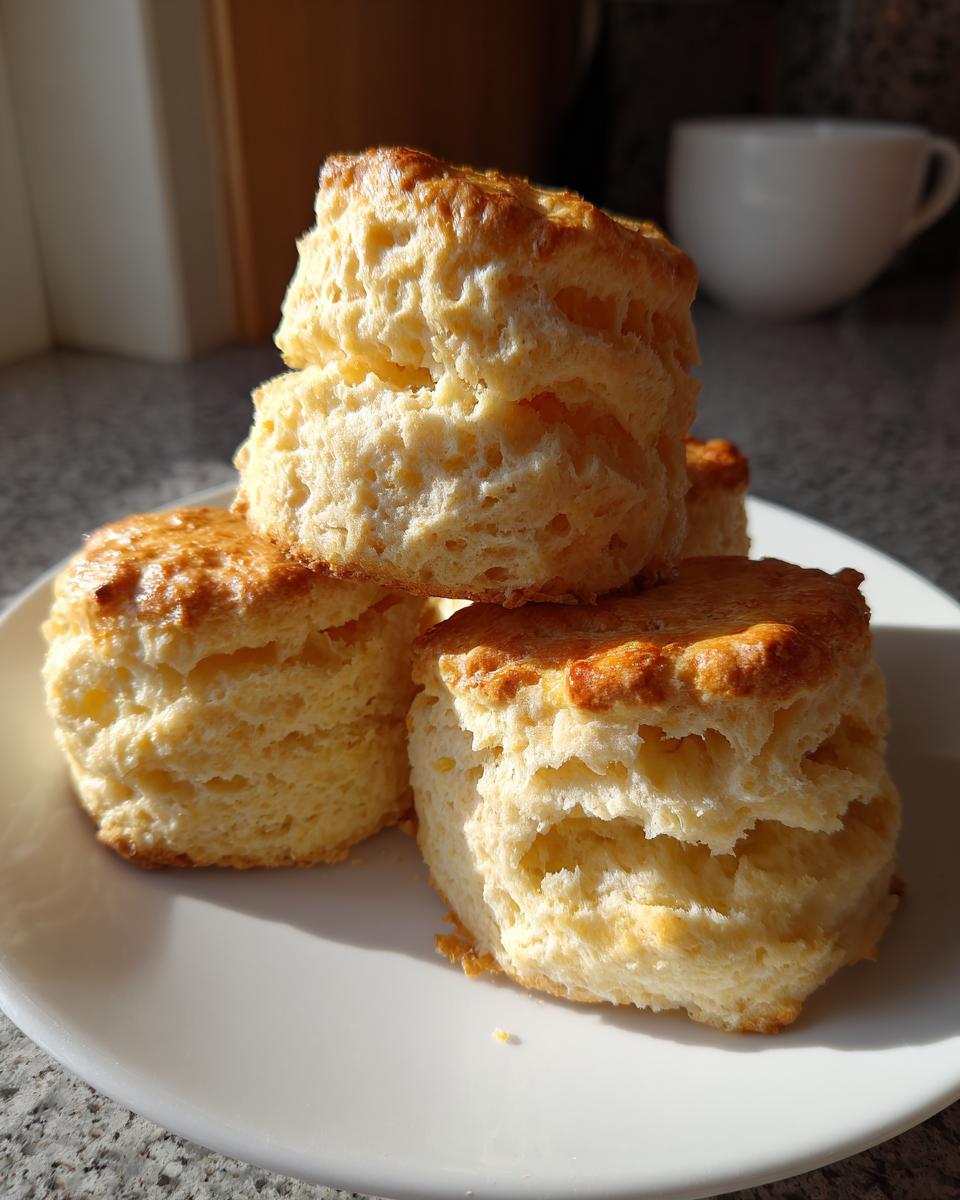
You absolutely must use good quality, very cold unsalted butter. If you feel the butter warming up between steps, just pop the bowl back in the fridge for five minutes. We only mix enough to barely bring the dough together. Overworking develops gluten, which is great for bread but terrible for scones! Minimal handling means your final product is guaranteed to be tender and spectacularly buttery scones every time, which is what we are after for afternoon tea treats.
Gathering Ingredients for Your Classic Scones
Okay, let’s talk supplies! Since this is our base recipe, you only need a few simple things to get started. Remember, the quality matters here because we aren’t masking anything with fancy frosting or heavy spices yet. Make sure that 6 tablespoons of unsalted butter are cut into cubes and seriously cold—I mean, straight from the fridge cold. The same goes for your heavy cream; cold cream means fluffy scones, trust me on this one from my time in the test kitchen!
Ingredient Notes and Substitutions for Perfect Scones
The absolute non-negotiable item here is the heavy cream. It has a higher fat content than standard milk, which gives you that lovely richness and helps structure those flaky layers. If you only have regular milk, use it, but know your rise might be slightly less magnificent. For add-ins, this is where our customizable scone base comes into play! If you skip the blueberries today, you can easily use orange zest and thyme next week for a savory twist. If you’re making the sweet version, I always throw in a teaspoon of vanilla extract because it deepens any sweetness beautifully. If you need a quick side, my creamy garlic aioli is surprisingly good spread on a hot scone!
Step-by-Step Instructions: How to Make Scones From Scratch
You’re going to feel like a professional baker watching how quickly these come together! When you learn how to make scones from scratch the right way—which is my way, that means minimal fuss!—you’ll realize it takes less time than running to the coffee shop. We start by prepping the oven to 400°F (200°C) and lining that baking sheet; getting that oven hot is crucial for lift. Then we move straight into creating the texture that makes these irresistible. Ready? Let’s get baking! Afterwards, if you need some other fast recipes to keep your morning momentum going, check out my post on quick and easy breakfasts.
Mixing the Dough: The Key to Flaky Scones
First, we tackle the dry ingredients, and then comes the butter work. Take your cold butter cubes and use a pastry blender—or just your fingertips if you’re quick!—to cut it into the flour mixture. You are aiming for coarse crumbs, honestly, stop when you see some pea-sized bits of butter still visible. That’s what creates pockets of steam! Next, make your wet mix and pour it in. Stir with a fork only until *just* combined. Stop right there! If you see streaks of dry flour, that’s perfect. We want a shaggy dough for this beginner scone recipe.
Cutting and Baking Your Scones for Height
Now, turn that shaggy mess onto a lightly floured counter. Gently pat the dough—and I mean *gently*—into a circle or rectangle about 3/4-inch thick. Remember what I said about twisting? Use a 2-inch round cutter and press straight down firmly, then lift straight up. Don’t go around and around! Place them on your preheated sheet, brush the tops with that extra heavy cream for a golden finish, and pop them in the 400°F oven for about 12 to 15 minutes. They bake fast!

Tips for Success When Baking Your Scones
Even with a great recipe, baking is science, and mastering these tiny details is what separates good baking from great baking. If you want consistent results every time you try these scone baking techniques, you need to pay attention to temperature and handling. This is where my test kitchen experience really helps demystify things for you!
First, that cold rule is sacred. If you are working in a warm kitchen, your butter is melting before it even hits the oven, and that means no lift! Keep your butter cubes, your cream, and even your bowl chilled until the absolute last second. Keep that dough moving quickly, too.
Second, remember the cutter trick. Press straight down, lift straight up. No twisting! Twisting seals the edges and prevents those beautiful, flaky layers from opening up. For extra height, when you place them on the sheet, put them close together so they rise up against each other, giving you those incredibly tall, restaurant-quality sides. If you want to practice your high-rise bread skills further, check out my recipe for homemade dinner rolls!
Customizing Your Scones: Sweet Scones Ideas and Savory Variations
This base recipe is truly wonderful because it’s like a blank canvas just waiting for your personal touch! Because we used minimal sugar in the base dough, it handles mix-ins like a dream, making it perfect for all sorts of sweet scones ideas. If you want a classic fruity flavor, fold in about a cup of fresh blueberries or dried cranberries right at the very end of mixing. I even have a specific recipe for cranberry orange scones if you want a citrus kick!
But don’t stop at sweet! These are amazing for savory scone variations too. If you want cheese scones—which are fantastic for breakfast or alongside soup—simply skip the sugar entirely in the dry ingredients and swap it for 3/4 cup of finely grated sharp cheddar or black pepper for extra zip. You can also add freshly chopped chives. It’s wild how versatile this dough is; it’s almost as helpful as my sourdough discard pizza dough! See? One simple method opens up your entire week of brunch planning!
Serving Suggestions for Perfect Scones
Now that you have these gorgeous, warm pastries, what do you serve them with? While these are perfect for a proper classic English scones experience—meaning clotted cream and strawberry jam, of course—I love seeing how you all adapt them for a modern spread! They are unbeatable fresh from the oven, split in half while still warm.
For a brunch situation, consider serving them alongside fresh fruit salad or maybe my baked French toast muffins. If you’re going for high tea vibes, you can’t beat a simple spread of good quality jam—the flavors in our base recipe pair wonderfully with raspberry or the strawberry jam you can find detailed in this guide about strawberry cream scones. Honestly, even just a slather of good salted butter is pure heaven.
Storage and Reheating Instructions for Your Scones
Nobody wants a dry scone the next day, right? Good news: because we used that high-fat heavy cream, these stay remarkably fresh! If you have leftovers, just let them cool completely and store them in an airtight container at room temperature—no need for the fridge, which can actually dry them out faster. They usually hold up wonderfully for two days this way.
When you’re ready to enjoy them again, especially if you want that fresh-baked feel, reheat them briefly. Pop them on a baking sheet in a 350°F oven for about 5 to 7 minutes. This crisps up those edges just perfectly and brings back the warm, comforting aroma of a great warm pastry recipe. If you can’t wait but need a quick carb fix, maybe try dipping a cooled scone into my creamy olive dip? Kidding! (Mostly.) Serve them warm with butter, and they taste like they just came out of the oven!
Frequently Asked Questions About Making Scones
I know you might have a few little lingering questions as you get ready to bake these, and that’s totally normal, especially when you’re tackling a new from scratch baking project. If you’re wondering about texture or timing, chances are someone else has asked the same thing! Don’t hesitate to try these out; they are truly the most forgiving recipe I’ve ever developed for brunch baked goods.
Troubleshooting Common Scone Issues
The biggest drama most people face is dense scones. This almost always comes down to two things: your ingredients weren’t cold enough, or you handled the dough way too much! For the fluffiest results, remember my rule: cut the butter quickly, mix the wet and dry until just barely combined, and press gently. Always keep that in mind if you’re looking for that perfect lift!
Why are my scones flat?
Usually, flat scones mean the butter melted prematurely, or you used baking soda instead of baking powder. Make sure your oven is fully preheated to 400°F! If you need other helpful tips for mastering quick breads, my post on creamy mango sticky rice has some great foundational temperature advice too, even though it’s dessert!
Can I make these ahead of time or freeze the dough?
Yes, the dough freezes beautifully! Cut your shapes out, place them on a parchment-lined tray, freeze until solid, and then transfer them to a freezer bag. When you’re ready to bake, brush them with cream and add about 2 to 4 minutes to the baking time. They make the most amazing, easy homemade scones for unexpected guests!
Can I use buttermilk instead of heavy cream?
You absolutely can! If you use buttermilk, you might actually get an even taller rise because of the acidity, similar to how it works for my biscuit recipe. Just know that buttermilk is thinner, so you might need to add a mere tablespoon or two of extra flour in the final mixing stage just to help the shaggy dough hold together.
Estimated Nutritional Information for Classic Scones
I always like to include a quick peek at the numbers, even though my heart is truly in the taste and the joy of baking! Since I have a background in nutrition, I want to be upfront about what you are eating. Please remember that these figures are estimates based on the standard recipe for one scone, using the ingredients listed above, without any extra glaze or additions like blueberries.
For our classic scones, here is a general breakdown:
- Serving Size: 1 scone
- Calories: 280
- Fat: 15g (with 9g saturated)
- Carbohydrates: 32g
- Sugar: 6g
- Protein: 5g
We keep the sugar fairly low in the base dough because we want those natural butter and flour flavors to shine through, especially if you are planning on serving them with jam. If you are using mix-ins like dried cranberries or making a sweet glaze, those numbers will obviously tick up! For more background on my approach to food and why simple, whole ingredients matter, you can always read more on my About Page. Happy baking!
PrintThe Ultimate Flaky & Buttery Classic Scones Recipe

Learn how to make tall, flaky, and moist scones from scratch. This easy, customizable recipe is perfect for beginners and delivers bakery-style results for breakfast or afternoon tea.
- Prep Time: 15 min
- Cook Time: 15 min
- Total Time: 30 min
- Yield: 8 servings 1x
- Category: Breakfast
- Method: Baking
- Cuisine: American
- Diet: Vegetarian
Ingredients
- 2 cups all-purpose flour
- 1/4 cup granulated sugar
- 1 tablespoon baking powder
- 1/2 teaspoon salt
- 6 tablespoons cold unsalted butter, cut into small cubes
- 1 large egg
- 1/2 cup heavy cream, plus more for brushing
- 1 teaspoon vanilla extract
- Optional add-ins: 1 cup blueberries or 1/2 cup dried cranberries
Instructions
- Preheat your oven to 400°F (200°C). Line a baking sheet with parchment paper.
- In a large bowl, whisk together the flour, sugar, baking powder, and salt.
- Add the cold, cubed butter to the flour mixture. Use a pastry blender or your fingertips to cut the butter into the flour until the mixture resembles coarse crumbs with some pea-sized pieces of butter remaining. This step is key for flaky scones.
- In a separate small bowl, whisk together the egg, heavy cream, and vanilla extract.
- Pour the wet ingredients into the dry ingredients. Mix gently with a fork until just combined. Do not overmix; the dough will look shaggy. If using add-ins, fold them in quickly now.
- Turn the dough out onto a lightly floured surface. Gently knead the dough 3 to 4 times, just enough to bring it together.
- Pat the dough into a 3/4-inch thick circle or rectangle. Use a 2-inch round biscuit cutter to cut out the scones. For taller scones, press the cutter straight down without twisting.
- Place the cut scones onto the prepared baking sheet, ensuring they are touching slightly if you want softer sides, or spaced apart for crispier edges.
- Brush the tops lightly with extra heavy cream.
- Bake for 12 to 15 minutes, or until the tops are golden brown.
- Let the scones cool slightly on a wire rack before serving warm with jam and cream.
Notes
- Keep your butter and cream very cold. Warm ingredients prevent the dough from rising properly, resulting in dense scones.
- For the tallest scones, avoid twisting the biscuit cutter when cutting the shapes; press straight down and lift up.
- If you want a glaze, mix 1/2 cup powdered sugar with 1-2 tablespoons of milk or lemon juice and drizzle over cooled scones.
Nutrition
- Serving Size: 1 scone
- Calories: 280
- Sugar: 6
- Sodium: 250
- Fat: 15
- Saturated Fat: 9
- Unsaturated Fat: 6
- Trans Fat: 0
- Carbohydrates: 32
- Fiber: 1
- Protein: 5
- Cholesterol: 65