
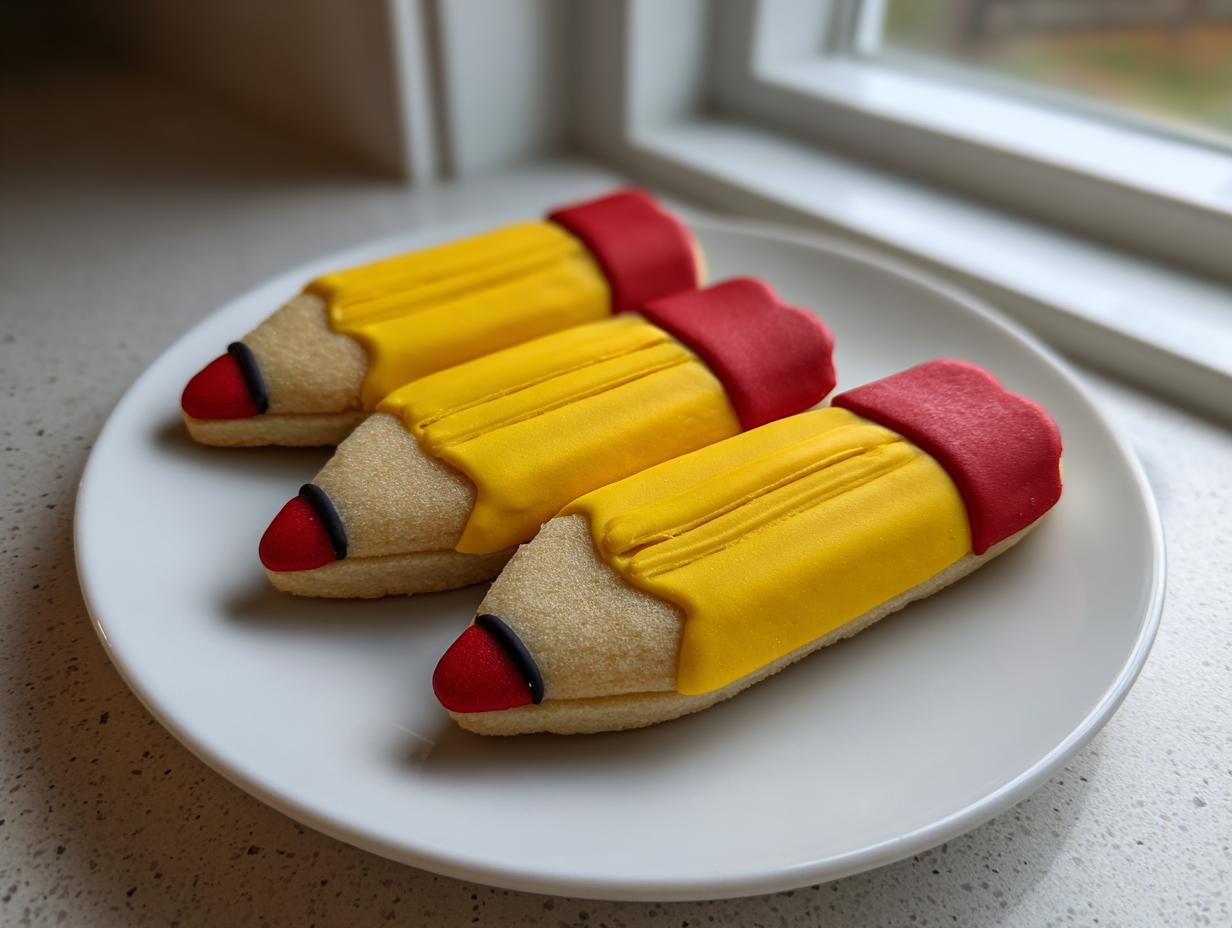
Teacher Appreciation Week sneaks up fast, doesn’t it? I know how it is—you want something thoughtful, something that shows you really care, but your week is already crammed full! That’s why I developed this recipe specifically for those busy moments when you need a big ‘wow’ without the fuss. Forget the generic store-bought stuff; these adorable, completely portable pencil sugar cookies are the perfect sweet nod to the amazing educators in our lives. They look professional, but honestly, they’re simple to master, even if your piping skills are just starting out. If you want to dive deep into making the icing look professional, check out my guide on sugar cookie icing techniques before you start decorating. Trust me, these cookies deliver connection right in the snack box.
- Why You Will Love These Pencil Sugar Cookies for Teacher Appreciation Gifts
- Gathering Ingredients for Your Decorated Sugar Cookies
- Step-by-Step Guide to Perfect Pencil Sugar Cookies
- Tips for Success with Royal Icing Tips on Pencil Sugar Cookies
- Making These Easy Teacher Treats Portable
- Storage and Shelf Life for Your Decorated Sugar Cookies
- Variations for Back to School Cookies
- Frequently Asked Questions About Pencil Sugar Cookies
- Nutritional Estimates for Your Pencil Sugar Cookies
- Share Your Teacher Appreciation Gifts
Why You Will Love These Pencil Sugar Cookies for Teacher Appreciation Gifts
I designed these treats thinking about real life—which means they need to look amazing but also survive the trip from your kitchen to the classroom! Here are a few reasons why these cookies are my go-to for Teacher Appreciation Week:
- They serve as the perfect simple, yet thoughtful, teacher appreciation gifts because they show effort without taking up your entire weekend.
- The classic pencil shape is instantly recognizable and so charming for pencil sugar cookies.
- They hold up beautifully! The royal icing dries hard, meaning they won’t smudge or get melty, making them incredibly portable for lunch bags or cubbies.
- The base cookie recipe is my tried-and-true sugar cookie—soft, buttery, and it doesn’t spread weirdly when you cut out those precise shapes.
- You can bake the dough days ahead of time, which is a lifesaver when you’re juggling schedules.
- Using these specific cutouts makes them fantastic back to school cookies too!
- They are completely customizable; you can change the ‘eraser’ color to match your teacher’s favorite color if you want to personalize them even more.
Gathering Ingredients for Your Decorated Sugar Cookies
Okay, before we dive into the fun part—the decorating—we have to make sure our foundation is solid. A perfect cookie depends entirely on having the right ingredients measured out correctly. Trust me on this: prepping your mise en place first makes the entire process smoother and way less stressful. For the royal icing, that’s what gets these beyond just a regular cookie and turns them into proper pencil sugar cookies. If you need a deep dive on measuring icing correctly, I cover all my secrets in the royal icing recipe guide.
For the Pencil Sugar Cookie Dough
These quantities will give you about two dozen cookies, depending on how large your pencil cutter is. Remember, the butter needs to be properly softened to cream nicely!
- 3 cups all-purpose flour
- 1 teaspoon baking powder
- 1/2 teaspoon salt
- 1 cup unsalted butter, softened
- 1 1/2 cups granulated sugar
- 1 large egg
- 1 teaspoon vanilla extract
- 1/4 cup milk
For the Pencil Sugar Cookie Royal Icing
This icing sets up beautifully hard, which is exactly what we need for these decorated sugar cookies to survive getting tossed into a lunchbox. Make sure your powdered sugar is sifted!
- 4 cups powdered sugar, sifted
- 3 tablespoons meringue powder
- 6 tablespoons warm water
- Food coloring (yellow for the main pencil body, a touch of red for the eraser, and brown or black for the tip)
Step-by-Step Guide to Perfect Pencil Sugar Cookies
This is where the magic happens, but listen up—timing is everything, especially with royal icing! Don’t rush the drying stages, or you’ll end up with a beautiful, colorful mess. We’re breaking this down into manageable chunks so you can tackle the baking one day and the decorating another if you need to. It keeps things relaxed! If you want to see how I treat my simpler cookies which also rely on good creaming technique, take a peek at my recipe for meltingly soft butter cookies.
Making and Chilling the Pencil Sugar Cookie Dough
First things first, whisk your dry stuff—that’s the flour, baking powder, and salt—in a bowl and set it aside. Get your butter and sugar nice and creamy until it looks pale and fluffy. Then, beat in your egg and vanilla. Now, here’s the important bit: add your dry mix alternating with the milk, only mixing on low speed until just combined. I can’t stress this enough: don’t overmix! Overmixing develops the gluten and we want soft, tender cookies, not hockey pucks, so stop as soon as you don’t see streaks of flour. Wrap up both halves of the dough tightly and let them chill in the fridge for at least one hour. This chilling is non-negotiable; it keeps those pencil shapes crisp!
Cutting and Baking the Cookies
Get that oven preheated to 375°F (190°C) and line your sheets with parchment paper. Roll out one of those chilled dough balls to about a quarter-inch thick on a lightly floured surface. Use your pencil cutter to press out shapes and pop them onto the prepared trays. Bake these beauties for 8 to 10 minutes, watching for those lightly golden edges. Let them cool on the sheet for five minutes—they’re too fragile right out of the oven!—then move them completely to a wire rack to cool down. Seriously, they need to be 100% cool before we even think about touching them with icing.
Preparing and Coloring the Royal Icing
While the cookies are cooling, let’s mix the icing. Whisk that sifted powdered sugar and the meringue powder together, then slowly add the warm water until it’s smooth. You want icing that’s thick enough to hold a shape but thin enough to level out—that perfect flooding consistency. Divide this into four bowls. Color one generous portion yellow for the main body, a tiny bit red for the eraser, and small amounts brown or black for the very tip. Keep the rest white for the metal band, the ferrule. This stage is all about preparation!
Decorating Your Pencil Sugar Cookies
Fit your piping bags with small round tips. Start by outlining the whole cookie shape with the yellow icing first. Let that outline dry for about 15 minutes so it builds a barrier. Then, flood the inside of the outline with more yellow, shaking it gently until it levels out. Now comes the hardest part: you need to let this yellow flood layer dry completely—we’re talking several hours, or better yet, overnight! Once that yellow is rock hard, pipe that thin white band for the metal casing, then the little red eraser section, and finish with the brown or black tip at the bottom point. If you want a final professional touch, grab a thin black food marker to draw a little detail on the yellow body.
Tips for Success with Royal Icing Tips on Pencil Sugar Cookies
If you’ve successfully baked your cookies, the decorating might feel a little intimidating, but honestly, it’s just physics! When working with pencil sugar cookies, getting that royal icing right is the difference between cute and a cracked disaster. Don’t you worry, I’ve got a few key royal icing tips that will build your confidence immediately and give you those sharp lines you see everywhere.
First tip: Consistency checks are your best friends. If your icing is too thin, it runs everywhere and ruins your carefully piped outlines. If it’s too thick, it will create ridges instead of smoothing out. When you lift the piping bag, the icing line should hold its shape for about 10 seconds before sinking back into the main icing mass. If it disappears instantly, add a teaspoon of powdered sugar. If it won’t flow, add a drop of water! A little patience here saves hours of fixing mistakes later. For those of you who prefer a softer icing texture overall, you might want to check out my thoughts on vanilla buttercream, though it won’t dry hard like this does.
Next, when you are flooding the yellow base, use the ‘wet-on-wet’ technique carefully. After you pipe the outline, flood the middle. Take a clean toothpick (or even the tip of a clean paintbrush) and gently drag it through the icing to push it to the edges. If you see air bubbles pop up, lightly blow across the surface—yes, seriously! The air movement pops them and helps the icing settle smoothly.
My third big tip relates to those colors. Yellow and white icing tend to pop right off the cookie, but the darker colors like black or brown can sometimes bleed into a lighter color if they touch while setting. Make absolutely sure the white ferrule section is dry before you pipe the black tip right below it, even if it means waiting an extra 30 minutes. We want distinct sections, not muddy colors!
Finally, invest in decent piping tips. You don’t need a huge set, maybe just a small round tip (like a Wilton #2 or #3) for outlining and flooding. If you try to flood with a bag that’s only cut open at the tip, you’ll end up frustrated. Small, precise tools make these detailed cookie shapes so much easier to manage.

Making These Easy Teacher Treats Portable
You’ve done the hard work—the baking is perfect and the icing is gorgeous and dry. Now comes the crucial part for any teacher appreciation gifts: getting them safely to the school desk! Because these are decorated sugar cookies, we need to handle packaging carefully so all that detail we put in doesn’t get smushed before the teacher sees them.
The key to portable cookies is ensuring they don’t touch each other or anything that can snag the edges of the icing. I always recommend individual wrapping for maximum protection. You can use simple, clear cellophane bags—the ones that seal tightly work best. Twist the top shut or use a little ribbon or heat sealer. This keeps the air out and locks in the freshness too!
If you’re making a whole batch to hand over at once, use a sturdy container—nothing flimsy! Line the bottom with a layer of clean parchment paper, and then gently place the first layer of pencil sugar cookies down. Don’t stack them edge-to-edge; leave a tiny bit of space. Then, lay another sheet of parchment paper on top before adding the next layer. This barrier prevents any accidental rubbing.
If you’re worried about movement during transport, especially if you have little helpers carrying the box, try packing them upright in a box, almost like filing folders. You can use small, decorative paper shred on the bottom of the box to cradle them lightly. Honestly, seeing these little edible gifts lined up perfectly is half the fun. Check out some of my quick and easy ideas for pairing these cookies with something quick for breakfast if you want to make a full gift basket!
Storage and Shelf Life for Your Decorated Sugar Cookies
You’ve spent time coloring, outlining, and flooding, so we want these beautiful cookies to last! When it comes to storing decorated sugar cookies, especially those detailed ones, the main enemy is humidity, which softens that glorious royal icing we worked so hard to set.
The good news? Because we used royal icing and made sure the cookie dough was crisp, these store impressively well at room temperature. You absolutely do not need to refrigerate them! In fact, the fridge can sometimes make the cookie itself go a little stale faster, so we always keep them out on the counter.
Keep them in an airtight container—a large tin or Tupperware works perfectly. Line the bottom with a fresh sheet of parchment paper before laying the cookies in a single layer, or only two layers deep with paper in between. This prevents sticking and keeps the icing protected. If you follow this method, these treats will stay wonderfully fresh for up to a week. That gives you plenty of time to bake them early for those busy Teacher Appreciation Week mornings!
If you want more tips on storing other delightful baked goods that hold up well, you should check out my recipe for fudgy chocolate crinkle cookies; their texture changes slightly but they store just as easily!
Variations for Back to School Cookies
While I absolutely adore sending my teachers off with perfectly shaped pencils, sometimes you just need to mix things up a bit! This sugar cookie dough is incredibly versatile, so the same solid recipe you used for those fruit pizza sugar cookies works like a charm for any fun theme. If you have extra dough after making your pencil sugar cookies, or if you want to make a mixed batch of back to school cookies, here are a couple of my favorite easy shape swaps!
First up, you can’t go wrong with the classic apple. Use an apple cookie cutter, flood the whole thing yellow or maybe a soft pink instead of yellow for the base color. Then, use a small green swirl for the leaf and a tiny brown dot for the stem. It’s instant classroom charm!
Another fantastic idea is transforming the shape into a stack of books. You can use a simple rectangle cutter, or even cut two rectangles separately. Ice the whole thing in a bright color—maybe red or blue—and once that base layer is dry, just pipe simple horizontal lines across it in white or yellow to look like the pages. So cute, and it screams ‘thank you for teaching me to read!’
Or, keep the pencil shape but switch the palette entirely! Instead of yellow, try making them look like fancy colored pencils. Ice the body purple, hot pink, or teal. You can still use the white ferrule and black tip, but changing the main color is a fun way to use up leftover icing colors you made for the erasers. It’s a great way to use up those small amounts of colored icing you have left over from decorating the main batch of pencil sugar cookies!
Frequently Asked Questions About Pencil Sugar Cookies
It’s totally normal to have questions when you’re tackling a multi-step project like decorating cookies! I’ve answered the few things that always pop up when folks are making these fabulous decorated sugar cookies for their favorite teachers. These should clear up any last-minute cooking confusion so you have success!
Can I skip chilling the dough for these cookies?
Please, please, please don’t skip the chilling! This is probably the most important structural step. If you roll out soft dough, those sharp pencil points and defined edges will melt right into blobby ovals in the oven. Chilling solidifies the fat in the butter, ensuring that the cookie holds that specific shape perfectly while it bakes. It’s essential if you want crisp edges for those clean lines we paint on later.
What is the best way to make these easy teacher treats ahead of time?
This is where these become the ultimate easy teacher treats! You have two options, and both are great. You can bake the cookies entirely (cooled and completely dry!) up to three days ahead of time. Store them airtight and decorate them the day before or the morning of delivery. OR, you can bake and decorate them all the way through and store those finished cookies airtight for up to a week. The key is separating the baking from the decorating if you can!
Can I use a different icing instead of royal icing for these decorated sugar cookies?
For maximum shine and that hard, chip-resistant finish that lets you stack them up, royal icing is the gold standard, especially since we need them to be portable dessert recipes. However, if you absolutely hate royal icing, you can use a very stiff powdered sugar glaze (just powdered sugar, vanilla, and a tiny bit of milk). The difference is that the glaze won’t dry hard—it stays a bit soft and sticky, so you’d need to package them with extra care so they don’t stick to each other inside the bag.
Nutritional Estimates for Your Pencil Sugar Cookies
I get asked a lot about the numbers, and while I focused on making these cookies delicious and fun, I also wanted to give you a general idea of what you’re sharing. Remember, food is fuel, and these pencil sugar cookies are certainly a treat meant for celebration!
It’s important to know that baking is an exact science, and these numbers are just estimates based on the standard measurements and ingredients listed in the recipe. If you use a different brand of butter or add extra food coloring, your final counts might shift slightly. But for a single decorated cookie, here’s the typical breakdown:
- Serving Size: 1 cookie
- Calories: 180
- Sugar: 22g
- Sodium: 110mg
- Fat: 8g
- Saturated Fat: 5g
- Unsaturated Fat: 3g
- Trans Fat: 0g
- Carbohydrates: 26g
- Fiber: 0g
- Protein: 2g
- Cholesterol: 25mg
I always say the greatest nutritional value in these easy teacher treats is the smile they bring to a deserving educator’s face! Enjoy them knowing you made something wonderful from scratch.
Share Your Teacher Appreciation Gifts
Well, friend, you made it! You’ve mixed, you’ve chilled, you’ve outlined, and you’ve flooded—I’m so incredibly proud of the beautiful pencil sugar cookies you have sitting on your counter right now. Seeing the effort you put into making something handmade for someone special? That’s the absolute core of why I love to cook and bake.
Now that you’ve got these amazing edible gifts ready, please, please come back and tell me how they turned out! Did the yellow flood dry perfectly overnight? Did your teacher actually squeal when they saw them? Drop a comment below and rate this recipe—your feedback helps me know I’m giving you the most reliable instructions possible.
And if you snapped a picture of your finished bag of goodies, I would be thrilled if you shared it on social media! Tag me so I can see your amazing decorating skills. If you have any questions at all while you’re packing them up to deliver, don’t hesitate to reach out through my contact page. Happy teaching appreciation—you are all doing amazing work!
PrintAdorable Pencil Sugar Cookies for Teacher Appreciation

Make these easy decorated sugar cookies shaped like pencils as a thoughtful, portable gift for Teacher Appreciation Week or back to school.
- Prep Time: 45 min
- Cook Time: 10 min
- Total Time: 155 min
- Yield: 2 dozen 1x
- Category: Dessert
- Method: Baking
- Cuisine: American
- Diet: Vegetarian
Ingredients
- 3 cups all-purpose flour
- 1 teaspoon baking powder
- 1/2 teaspoon salt
- 1 cup unsalted butter, softened
- 1 1/2 cups granulated sugar
- 1 large egg
- 1 teaspoon vanilla extract
- 1/4 cup milk
- Royal Icing Ingredients:
- 4 cups powdered sugar, sifted
- 3 tablespoons meringue powder
- 6 tablespoons warm water
- Food coloring (yellow, red, black, brown)
Instructions
- In a medium bowl, whisk together the flour, baking powder, and salt. Set aside.
- In a large bowl, beat the softened butter and granulated sugar with an electric mixer until light and fluffy. This is key for soft cookies.
- Beat in the egg and vanilla extract until combined.
- Gradually add the dry ingredients to the wet ingredients, alternating with the milk, mixing on low speed until just combined. Do not overmix.
- Divide the dough in half, wrap each half in plastic wrap, and chill for at least 1 hour.
- Preheat your oven to 375°F (190°C). Line baking sheets with parchment paper.
- On a lightly floured surface, roll out one portion of the chilled dough to about 1/4 inch thickness.
- Use a pencil-shaped cookie cutter to cut out shapes. Place them on the prepared baking sheets.
- Bake for 8 to 10 minutes, or until the edges are lightly golden. Let the cookies cool on the baking sheet for 5 minutes before transferring them to a wire rack to cool completely.
- Prepare the royal icing: In a bowl, whisk together the powdered sugar and meringue powder. Gradually add the warm water, mixing until smooth. The icing should be thick enough to hold a line when drizzled.
- Divide the icing into small bowls. Color one portion yellow for the pencil body, a small amount red for the eraser, and a small amount brown or black for the tip. Keep the remaining icing white for the ferrule (metal band).
- Fit piping bags with small round tips. Fill the bags with the colored icing.
- Outline the entire cookie shape with yellow icing. Let the outline dry for about 15 minutes.
- Flood the center of the cookie with the yellow icing, gently shaking the cookie to spread the icing evenly. Let this layer dry completely (several hours or overnight).
- Once the yellow is dry, pipe a thin band of white icing near the bottom for the ferrule. Let it set slightly.
- Pipe a small section of red icing above the white band for the eraser. Let it set.
- Pipe a small brown or black triangle at the bottom point for the pencil tip.
- For added detail, use a thin black food coloring marker to draw a small line or detail on the yellow body if desired.
Notes
- For easy cleanup, use a silicone baking mat instead of parchment paper.
- If your royal icing becomes too stiff while decorating, add water a few drops at a time until you reach the right consistency.
- These decorated sugar cookies store well in an airtight container at room temperature for up to one week.
Nutrition
- Serving Size: 1 cookie
- Calories: 180
- Sugar: 22g
- Sodium: 110mg
- Fat: 8g
- Saturated Fat: 5g
- Unsaturated Fat: 3g
- Trans Fat: 0g
- Carbohydrates: 26g
- Fiber: 0g
- Protein: 2g
- Cholesterol: 25mg